The Best Whole Wheat Bread
Check out this post for not one, but three, healthy, unprocessed, homemade, delicious whole wheat bread recipes. Homemade bread is worth it!
For the last several years, I’ve been making all of our family’s bread. It seemed like a daunting task at first but now it is such a part of my routine that it barely makes an impact in my day (and the bread is done start-to-finish in about 2 hours or so).
I make a bread every week or so and freeze it after it has cooled. I’ve found that slicing the bread before I put it in a freezer bag makes my life much easier because I can take out a slice at a time and avoid the dry, crumbly, homemade bread phenomenon that my kids despise when I am making their sandwiches.
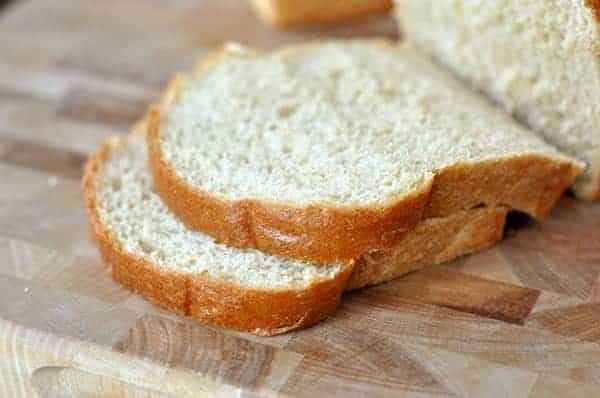
I simply pull out a slice or two of bread and microwave it for 25 seconds at 50% power. Woila! Tender, fresh bread ready for sandwich making (or for a nice slather of butter and jam).
I know that many of you have your own favorite whole wheat bread recipe. There are so many good ones out there.
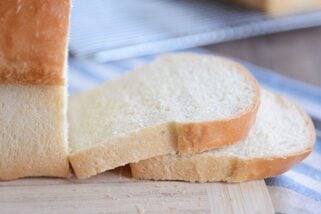
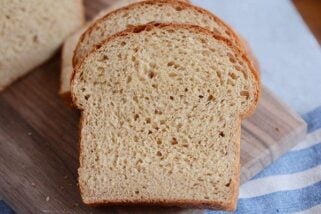
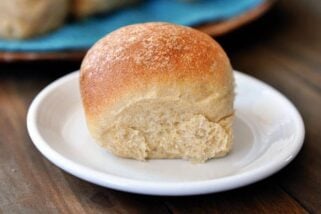
I’d like to share with you my favorites. I alternate making these and love them both equally. Both recipes produce a light but sturdy loaf, perfect for sandwiches or just for eating with dinner.
And don’t even get me started on homemade bread for toast in the mornings. Oh, divine.
The first recipe is one perfected by my friend, Mel’s, mom. Her bread has quite a legacy and lives up to it’s fame. I’ve adapted the recipe slightly to fit what I normally have on hand (as in, I never have dough enhancer so substituted gluten and powdered milk).
It is a bit lighter in texture than the second recipe, due to a couple cups of white flour.
The second recipe is one I’ve had for years and mimics the recipe from the notorious Bosch bread mixer. It has less oil than the first recipe and a few other different ingredients (like honey instead of sugar).
Here are a couple tips I’ve found to help with breadmaking:
- I follow Bosch’s recommendations and use instant yeast. Because of this, I only ever let my bread rise after shaping the dough into loaves and placing them in the pans. They rise once in the pans and then I put them in a cold oven, turn it on to 350 degrees and bake for 32 minutes exactly. It turns out beautiful, not burned, loaves. (Note: Remember each oven is different. Experiment around a little, and do what works best with your particular oven.)
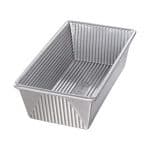
- I have a specific loaf pan that I absolutely swear by: The Chicago Metallic Commercial Bread Pan. I’ve done side-by-side baking comparisons with my other non-stick loaf pans, dark loaf pans, glass loaf pans, and hands down, every time the Chicago Metallic pans turn out a perfect loaf. The edges don’t get burned, the bread slides out perfectly without leaving crusty remnants, and they are heavy and durable. Love them. I use the standard 1-pound loaf pan (which is the equivalent to the 8 1/2-inch by 4 1/2-inch loaf pan).
- As long as we are talking brands, let me tell you another product I love for breadmaking: these perfect bread bags. I was sick and tired of trying to stuff my loaves in ziploc bags or other ill-fitting plastic bags. These bags are perfect. I freeze the bread right in them and they are the perfect size. (Incidentally, I also order my vital wheat gluten from King Arthur Flour.)
- I personally like to use white whole wheat flour. I prefer the light texture over red whole wheat but either kind will work in these recipes. I used to grind my flour with a Nutrimill wheat grinder, but now have a Wolfgang Flour Mill. Here is a post on popular wheat grinders and another on wheat/wheat grinding in general for more information.
Granted, bread making can be time consuming but the rewards are worth it when my son heartily exclaims that he doesn’t want to eat the French Toast Sticks at school and would rather have a sandwich on mom’s bread (and this is the kid who hates sandwiches). Hallelujah for the exit of French Toast Sticks in his diet.
Darcy’s Whole Wheat Bread {The Recipe I Use Most}
Ingredients
- 15-17 cups wheat flour, about 80 ounces
- 2 tablespoons instant yeast
- ½ cup vital wheat gluten
- 1000 mg Vitamin C, crushed, or 1 tablespoon lemon juice or white vinegar
- 6 ½ cups very warm water
- ⅔ cup oil
- ⅔ cup honey or sugar
- 2 tablespoons salt
Instructions
- In a large bowl (or stand mixer, like the almighty Bosch), mix together 5 cups of wheat flour, yeast, vital wheat gluten and Vitamin C (or lemon juice or vinegar). Add the warm water and mix well. Add the oil and honey (or sugar) and mix again.
- Cover the bowl and let the mixture sit for 10 minutes. Add the salt and start the mixer (or mix by hand), adding the remaining flour until the dough pulls away from the sides of the bowl to form a soft dough. You may not need to add all of the flour! Judge the dough by feel not by the amount of flour you’ve used. It might be slightly sticky but should hold it’s shape.
- Let the dough knead for 7 minutes in the stand mixer (or 15 minutes by hand). Form into 5 loaves (for the 8 1/2 X 4-inch loaf pans) and place into greased bread pans. Let rise until the bread is 2 inches above the top of the bread pan.
- Bake at 350 degrees for 25 minutes (I like to let the bread rise 1 inch above the top of the pans and then put the bread in a cold oven and turn the oven on to 350 degrees and bake the bread for 32 minutes).
Notes
Recommended Products


LuAnn’s Whole Wheat Bread {With my Adaptations}
Ingredients
- 5 ½ cups warm water
- ½ cup sugar
- ½ cup oil
- 2 tablespoons instant yeast
- 2 tablespoons salt
- 2 tablespoons vital wheat gluten
- 2 tablespoons nonfat dry milk
- 2 cups (284 g) white flour
- 8-10 cups (1136 to 1420 g) whole wheat flour
Instructions
- Lightly spray bread pans with cooking spray and set aside.
- Mix the water, sugar, oil, yeast, salt, gluten and dry milk together in the bowl of an electric mixer or by hand. Add the white flour and mix well.
- Continue adding the whole wheat flour until the dough cleans the sides of the bowl and the dough is soft but not overly sticky.
- Knead for 10 minutes until a soft, smooth dough has formed. Using oil or cooking spray to grease your hands and countertops, form the dough into 4 loaves.
- Place the loaves into the bread pans and cover with lightly greased plastic wrap. Let them rise until the dough has risen about 1 1/2 inches above the top of the bread pan.
- Place the bread pans carefully in a cold oven. Turn the oven on to 350 degrees and bake for 38 minutes.
- Remove from the oven and turn out the bread onto a wire rack. Let cool completely before placing in bags to put in the freezer.
Notes
Bosch Foolproof Whole Wheat Bread
Ingredients
- 6 cups warm water
- 2 ½ tablespoons instant yeast
- 2 tablespoons salt
- ½ cup oil
- ⅔ cup honey
- 2 tablespoons vital wheat gluten
- 12-15 cups whole wheat flour
Instructions
- Mix 8-9 cups fresh wheat flour and 2 ½ tablespoons yeast together in the bowl of an electric mixer (or in a large bowl by hand). Add 6 cups warm water and mix to paste consistency.
- Cover and let sponge 10-15 minutes.
- Add salt, honey, oil, and gluten. Mix by hand or if using an electric mixer, turn to speed 1 or 2 as motor bears down and add additional flour until dough pulls away from sides of bowl (be careful not to add too much flour). Let the mixer knead the dough for five minutes. (If using hands, knead for 10 minutes.)
- Use oil or cooking spray on your hands to form six equal loaves.
- Take dough immediately from bowl and fill lightly greased (or nonstick) loaf pans ½ to 2/3 full. Cover with lightly greased plastic wrap to keep moist. Let the bread rise until doubled, approximately 1 ½ inches above the top of the pan.
- Place the bread carefully in a cold oven. Turn the oven to 350 degrees and bake for 38 minutes. Let cool completely before placing in bags to put in the freezer.

We purchased a Nutrimill at our Bosch Kitchen center last year in October. I’ve been afraid to use it but a few weeks ago, I also bought some Hard White Wheat, also from the Bosch Kitchen center. Yesterday, I got up my nerve and just got started. I was amazed. Honestly, I had no idea how easy it was to use the Nutrimill and then to proceed with making the dough and bread with the Bosch. I used Darcy’s recipe and I live at about 4500 ft. elevation. I let the bread rise until it was about 2 inches above the pans and then put into a 350 degree oven. It took about 30 minutes to bake and came out beautifully. Thank you so much for all the whole wheat bread making tips on your site. I have read them all and really appreciate all of it. This is going to help us so very much; I have been buying whole wheat bread at Great Harvest for the past 4-5 years and that now costs over $7 a loaf. Yesterday, I made 5 loaves which saved us the same amount that 50 lbs of wheat berries cost. It’s blowing my mind. Thank you again.
Hey Mel! Love your site, literally everything i make is a hit! Just wondering what would happen if I left out the vital wheat gluten?
It should be ok as long as it kneads for a few minutes longer!
Thank you for this recipe. For several years I used this one (minus the VWG) making a batch into rolls at least once a week. Everyone love it, it was easy, moist and versatile. I sometimes made a small loaf of bread, plus some rolls, and other times made the whole batch into burger buns. However, time marches on and the recipe I thought I would never forget, I did forget–at least part of it. Now, Bosch has a completely different, more complex, recipe. No thanks. I am back to this basic, great recipe. Thanks again–and sometime try part honey and part molasses. That is good too.
When you grind your wheat berries do you sift out some of the bran and stuff before you make bread?
No, I just use all of the ground wheat.
Ok thank you!!
Sorry for all the questions. Last one I think hehe. Why put the bread in cold oven? Rather than preheated. I was under the impression the heat helps with spring. Does the slow rise in temp help with rise gradually? I would think elevation could be a factor a
Too cold vs preheated? I am at 5000 ft and baking can be a challenge. I have to reduce yeast by 20 percent. Thanks again.
The cold oven method probably just boils down to preference. It’s how I learned to make bread so I utilized the cold oven method for a long time. Having said that, I almost always preheat the oven now when I bake bread (whole wheat or other). It should be fine either way.
Forgot to ask what elevation do you bake Mel? Thanks in advance.
I’m at right around 2,500 feet elevation.
I apologize earlier post…this recipe does call for VWG. It was the recipe I used previously small batch using kitchenaid mixer that leaves out the vital wheat gluten I believe.
Hey Mel, I have made this recipe several times all with wonderful results. I grind my own flour too. However I have mainly made sourdough becoming a sourdough snob, until getting a Bosch now I make all of our sandwich bread and loving it my questions is the lemon juice used as a dough enhancer? I noticed many Bosch recipes call for vital wheat gluten. Why is it you have such great results without the addition of vital wheat gluten?Also dough enhancer helps improve shelf life; does lemon juice? I have searched this topic but still a bit unclear. If you could touch these topics I would really appreciate it.
Thanks
Robin
Hi Robin, from what I understand lemon juice (or vitamin C) helps activate the gluten, so that’s why I use it. I don’t know if it necessarily improves or prolongs shelf life.
What size loaf pans do you use? 9X5″ or 8 1/4 X 41/4″?
I use 8 1/2 by 4 1/2-inch pans.
can you use all white flour for this recipe i like that it makes 5 loafs.and i noticed after kneading you dont put in greased bowl to rise double is that right
Correct, you don’t need to let it rise after mixing. I haven’t tried it with all white flour, but you could definitely try!
I have made a white bread using your recipe and it turned out great. So I was looking for a whole wheat bread recipe but would like to use my newly purchased 9×5 loaf pan. Do you have any I can use?
I don’t have a wheat bread recipe written for that size of pan, but you could make any whole wheat bread recipe and portion out a larger amount of dough and use your pan (and then bake the rest of the dough as rolls or in a shorter loaf).
Hi Mel! I have been using this recipe for months with great success! I’m considering buying a Bosch so I don’t have to hand knead it. Does this whole recipe fit in the Bosch? Wanted to make sure before I splurge! Thanks for all your recipes. I’m a huge fan!
Yes, it definitely fits into a Bosch!
Reading through some of the comments, I saw that you use lemon juice now instead of Vitamin C in the Darcy recipe. Does powdered citric acid, (the kind you might use in canning), do the same thing? Have you ever used it in that recipe?
I haven’t tried the powdered citric acid – but it’s definitely worth a try. (And I’ve made a lot of other whole wheat recipes since this one without lemon juice at all so you can also try leaving it out).
I have tried several of these recipes and no matter what I do my bread is very delicate. It is not dry but it can’t stand up to a spreading of butter or peanut butter. It just falls apart. So I’m wondering if my problem is yeast. I have lbs and lbs of active dry yeast. It’s not instant. So if I use the stuff I have should I just allow the dough to rise once before I shape the loaf and put it in the pan to rise one more time?
Hi Amy – if you are using active dry yeast, it does definitely help to let the bread go through that first rise before shaping into loaves. You can see if that helps. Also, make sure it’s not over rising before going into the oven.
Would you be willing to make a print option for the last two recipes. I can only see a print option for Darcy’s recipe. (Or I can be a big girl and just retype it myself to print)
I am on weight watchers and would really like to find the nutritional values for these recipes so that I can calculate my Weight Waters Smartpoints. Can you provide that information?
I don’t calculate that info but there are several online nutritional calculators if you do a quick google search.
I am a lifetime WW fan. I slice thin and use 2 points. The same for any whole grain bread that is not enriched.
Hi,
I have being reading about your Bosh mixer experience making bread and the recipe here calls for 7 minutes of kneading in the machine.
I have tried now a couple of recipes very similar to your bread recipe and the Bosch machine (I have one) keeps on overkneading the dough even with 5 minutes of kneading.
So, it’s so frustrating because I keep messing the bread up and I loose lots of money and time.
How do I know if it’s over kneaded? Well, the dough breaks easily. If I give it more time it keeps breaking more and more easily. I just put my fingers in it and it breaks.
I wish someone would help me.
I’m not sure, but it sounds like your bread is overfloured, not over kneaded. With yeast breads the more you knead the better the dough becomes, not worse. So if it’s breaking it sounds like it’s maybe too dry = too much flour.
Also I have noticed more fresh wheat berries produce a dough with more stretch. If I use older wheat the dough breaks more easily. I have compensated and had look luck by adding extra vital wheat gluten.
The mix needs to be well hydrated. At first you will want to add more flour. Resist the temptation. So many factors affect the outcome. Final dough temp, humidity, elevation, flour used and how fresh it is.
Hi Mel! You have been my fav and go to recipe woman for the last decade. I just got a wheat grinder after looking through all your advice! So exciting. Fresh bread out of the oven is WAY different than homemade leftover bread the next day imo. Is there a great way I can easily pop a fresh loaf in the oven daily- like make the full batch into 3-4 loaves, let rise, and then place in the fridge for a day or two until I’m ready to put in oven?
You could definitely try that – I haven’t just because even though the fridge will slow down the rise of bread, it can still overrise and develop a yeasty taste. If I did it that way, I’d leave the dough in one big mass and pull off the part I want to bake…shape it into a loaf (may need to let the chill come off a bit), let it rise and bake. There are a lot of rustic/artisan bread recipes that do that.
Hi! I was wondering if there was any substitute for the wheat gluten?
You could try leaving it out and kneading for a few minutes longer.
When I make Darcy’s bread recipe I always have to bake it at least 35 minutes (usually closer to 40) or else the inside is still gummy. Any tips on what I’m doing wrong? I usually end up putting in the full amount of flour and I don’t feel like it’s too wet of a dough going in the pans. It’s frustrating because I can’t seem to master it. Thanks for any help!
Do you find other recipes like cookies and brownies take longer to bake in your oven? It might be that your oven bakes cooler than mine. Where do you have your oven rack? Middle, upper, lower?
Hey Joanna – I think that’s pretty normal considering there are a lot of factors that may contribute (every oven bakes differently and at slightly different temperatures – elevation and humidity can make a difference too). As long as it isn’t drying out and burning, it’s ok to bake it longer!
Cookies and other baked things don’t usually require more time. When I do the full batch of bread I fit them all on the middle rack. Maybe I’m wrong on how the texture should be at first? When you first take the loaves out and cut it, is it still fairly moist and squishy? Does it take cooling time to dry a bit?
Yes, the bread will definitely be more dense and moist if cutting the loaves hot. Once they’ve cooled, the texture will firm up and dry out a little.
Hey! Any tips on 1/2ing the Darcy recipe? I was thinking of just halving the rest of the ingredients and eye balling the flour. Thoughts? Made this today but it wasn’t my best attempt. I didn’t add enough flour so it was SUPER sticky. Tried my best to salvage but I think they may be sense.
Hey Amanda, a Mel’s Kitchen Cafe reader, Julie, sent me a revised version of Darcy’s whole wheat bread that works in a Kitchenaid and makes two loaves. Her sister perfected this smaller batch – maybe it will help?
2 3/4 cups very warm water
1 1/2 scant tablespoons yeast (or 1 heaping tablespoon)
1/4 cup vital wheat gluten
1000 mg crushed vitamin C
1/3 cup oil
1/3 cup honey or sugar
1 tablesoon salt
5-ish cups flour
The process for mixing will the be same as the recipe in the post. Good luck if you try it!
I’ve been baking whole wheat bread for almost 20 years, I have used mainly zourishi bread machine or kitchen aid for mixing and rising, however; I just bought the Bosch Universal Plus….I am having the hardest getting my bread to turn out like it did…it’s dense, doesn’t rise well. My sister uses a bosch and said it doesn’t need to rise twice. I live in a very dry, low humidity climate in California. She told me I would need to adjust my recipe to the Bosch, but it is not working. Any tips? My SAF yeast is good and I grind my own flour, hard spring white wheat (montana) HELP! 🙂 I’ve been wasting a lot of grain, and honey. I am scared to make these large batches because of waste….my usual recipe is 2 cups warm water, 2 tsp salt, 3 tsp SAF instant yeast, 1/2 honey, 1/4 cup oil, 5 1/2 cups flour.
Hi Lisa, it’s really hard for me to know exactly what’s happening since you are using a different recipe than I make, but I’d recommend using less flour and letting the dough rise twice (it’s a bit of a pain, but it might help!).
Wow. I make all of our bread and Darcy’s recipe is probably the BEST whole wheat bread I’ve ever made!!! I don’t think I will ever use another recipe. Thank you, Mel!!
I’ve made LuAnn’s weekly for almost a year now. I love it! I chose that recipe because it was easier to convert into two loaves, but I am a huge fan! I even figured out conversions to use regular milk when I don’t have dry milk. Anyways, it turns out perfect almost every time and I’ve gotten loads of compliments. Thanks, Mel! I’ll have to try Darcy’s recipe when I need a bigger batch of bread (and buy more bread pans lol)!
MCKENN: Would you share your conversion on the regular milk instead of using powdered milk? Thanks so much.
Hi Mel,
Do you have anybody tips about freezing the bread? I always slice mine before freezing and then put the loaves into sandwich bags. The problem I have is that after it freezes the slices are all stuck together and I have to microwave the whole loaf to get the slices to separate.
I used to slice before freezing but now I freeze the whole loaf, unsliced, and we slice it once it’s thawed. Not as convenient if you only want a slice or two, but I feel like the bread doesn’t dry out as fast.
I know this is very late, but I freeze with small squares of parchment between them. They are meant for separating burger patties. It works great!
I had to add lots more flour! But, it turned out good!
How would you say Darcy’s bread recipe differs from the bosch recipe? I’ve found the bosch recipe to be tried and true, but I’m always up to try new recipes!
I’ve use Darcy’s recipe for a decade, so I’m not sure how it really compares to the Bosch recipe…but if you have one you’d love already, I’d probably stick with it! 🙂
Hi Mel, I know it’s not new but thanks for this recipe. We can’t get Western-style bread where we currently live so I am gearing up to start making my own. However, I have a very tiny European-style oven and I cannot fit all the loaves in at once. Can I let some of them sit (in the fridge maybe?) until the first batch is done? Also I currently only own just two of the smaller 8.5 x 4″ pans (I have a few other 9×5). Any problem with using some of the larger ones as well until I get more of the others? And finally it looks like the Chicago Metallic pan is no longer available (says there is a newer model available). If it’s not too much trouble to update the link I would love to purchase it through your site. Many thanks!
Hi Juliet! Thanks for the comment! Yes, you can definitely keep the bread dough in the refrigerator (in the pans) while the other loaves bake and then let the refrigerated loaves proof/rise and then bake. You can also use larger pans – just keep an eye on the baking time. They’ll probably need another few minutes. I just updated the link. Thank you!
I have been making bread for a lot of years and clicked on your recipe just to see how it compared. I’m very curious about the Vitamin C. Any idea why? Is there some science behind its inclusion? Thanks for all your recipes.
It helps activate the gluten, but a lot of recipes don’t call for it or need it. Just the way I’ve always made it! 🙂
I’ve been making this recipe for 3 years now, and I love it! The bread comes out light and delicious, and it hardly takes any work. I always use fresh ground white wheat and halve the recipe for 3 smaller loaves. It freezes perfectly too.
Hey miranda!! What do you do for halving? I wished I had tonight but it was my first time making the Darcy and wanted to see how it went as written. It didn’t go well. 🙁 would rather make 1/2 the recipe next time.
Thanks!
Mel, I wanted to add sunflower seeds and flax seeds to my bread and make a more nutty bread. I know you don’t “know”, but what’s your best guess as to adding those? Just throw them in? Add less flour? More water? I have no idea! But want to try and make a copycat similar to Grandma Sycamores Sunflower and Honey bread….any help would be appreciated! 🙂
For non absorbent ingredients like that (assuming the flax seeds are whole and not ground) you really shouldn’t need to adjust the flour or water. I’d just toss them in. The question is whether to do it with the flour or wait until close to the end of kneading. Might be worth consulting another bread recipe with lots of seeds to see when they add them. I think I remember ATK recipes adding those types of ingredients toward the end of kneading.
Thank you! I made some using Darcy’s recipe halved and a cup of flax and a cup of sunflower seeds (but I think something was wrong with my yeast), so while it turned out super dense (I refused to eat it ☺️), both my husband and my next door neighbor gobbled it up! I’m chalking that up to the fact that they have been homemade bread deprived for the last year or so! Im trying it again tonight! Thanks again for always answering my questions! Using both your newest chicken recipe for dinner tonight, and your buttercream frosting for mutual tonight as well! You are the greatest!!
Keep me posted on the next batch results!
Mel would you please half this recipe for me.I want to make 2 loaves thanks , Laura
If you cut all the ingredients in half, that might work!
I should be able to divide this recipe in half, correct? I just need 2-3 loaves. 🙂
Yes!