The Definitive Guide to Making the Best Homemade Caramels of Your Life
The Definitive Guide to Making the Best Homemade Caramels of Your Life: step-by-step tutorial, high speed how-to video, candy thermometer + wrapping tips…and all the other details you need for foolproof success!
This post has been a long time in coming! I’ve wanted a one-stop, comprehensive look at making the best homemade caramels ever for years. And today’s the day.
I have a lot of caramel recipes on my site. They’re all amazing in their own right.
- Cinnamon caramels (like a cinnamon bear only 1,000X better)
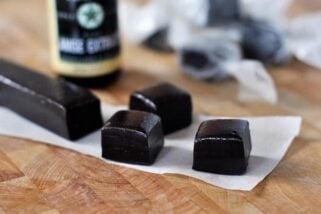
- Licorice caramels (where my black licorice lovers at??)
- Foolproof No-Stir Caramels (classic and yummy)
- Soft Chocolate Caramels (need I say more?)
- My Mom’s Famous Caramels (sweetened condensed milk recipe)
But my all-time favorite caramel recipe is this one. I posted about it three years ago and it’s really the only caramel recipe I’ve made since then. I love the rich flavor. I love the soft and chewy texture. I love how easy it is to make (I have the recipe memorized).
It has become my go-to homemade caramel recipe. I’ve changed it every so slightly over the years to use vanilla extract instead of vanilla beans among a few other minor changes.
Today we are going to go through a step-by-step definitive guide to making the best homemade caramels of your life. Everything from how to make them (obviously) to the best candy thermometer to what to wrap them in.
I even made you a 1 minute 15 second video of the whole entire caramel cooking process. It’ll take you a little longer than that in real life, but it’s time well spent.
Basic but important tools for making caramels
- heavy-bottomed 4- or 5-quart pot
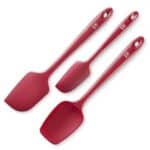
- flat-edge spatula for stirring
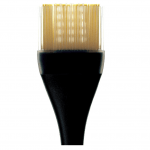
- pastry brush for washing sides of pan {aff. link}
- candy thermometer (lots of details below)
- bench scraper for cutting the cooled caramels
- wax paper or cellophane squares for wrapping (details below)
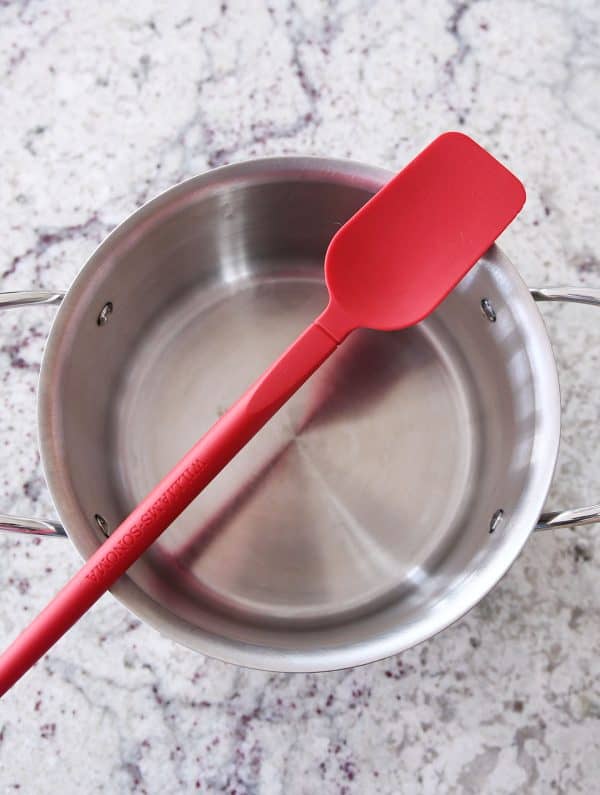
One of the most critical pieces of equipment in all homemade candy making is the pan. For these homemade caramels you want a heavy-bottomed stainless steel pan. I recommend using a pan that does NOT have a nonstick coating. Heavy-bottomed simply means the pot or pan has a thicker base. It shouldn’t be thin and tinny. This will help ensure the caramels don’t burn.
(In the pictures of this post, I’m using an All-Clad pot.) However, you don’t need a high-end pan. For years, I used a fabulous set of heavy-bottomed Farberware pans, and they worked great for caramel making.
Using a flat-edge rubber spatula for stirring is also key. It works better than a rounded spoon or spatula at scraping up the bottom of the pan thoroughly and preventing scorching and sticking.
Which candy thermometer is best?
Ah, this is a loaded question. If I had a dollar for every candy thermometer I’ve gone through over the years, I’d be a rich woman (actually not really because I’d still be in debt for all those thermometers I purchased that held all my candy hopes and dreams).
I am convinced there is no such thing as a perfect candy thermometer. The ones that sit perfectly on the side of the pan (like these flat Taylor thermometers) have hardly ever been accurate temperature-wise when I’ve used them, and the numbers have worn off of all the ones I’ve owned.
The classic glass bulb candy thermometers need to be retired (do they even make them anymore?). They aren’t known to be very accurate and they are prone to breaking.
I used to love and use this digital candy thermometer (and recommended it for years) until it, too, disappointed me enough times in later uses that I had to break up with it.
I’ve finally found a solution that works for me. It’s not perfect, but it’s come the closest to being so.
My candy thermometer solution
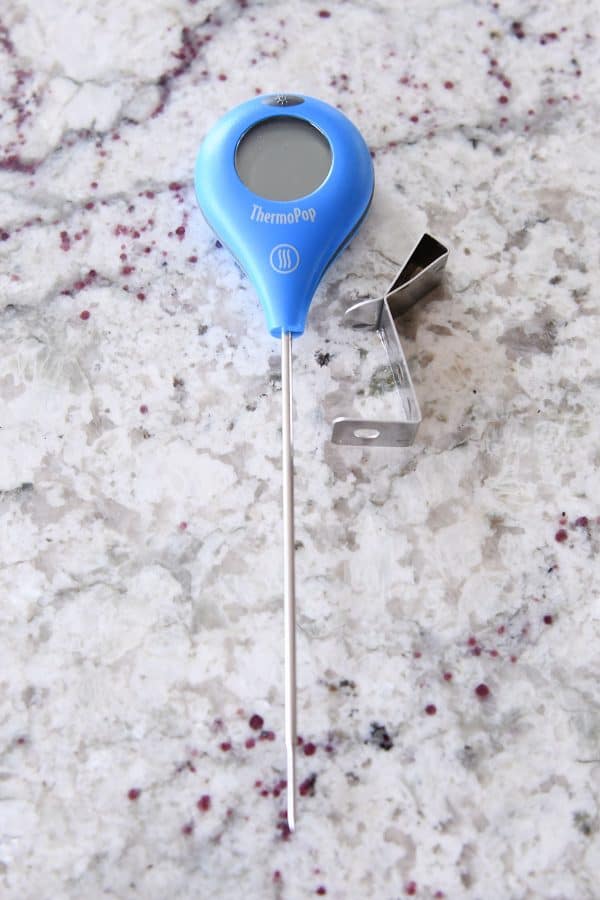
I now use a straight instant-read thermometer and use a pan clip to attach it to the side of the pot. Bonus: this thermometer can also be used for so many other things (like meat temperatures, etc).
I have this Thermopop thermometer from Thermoworks but there are a lot of inexpensive similar versions around {aff. link}. You can attach the thermometer to the pan with a pot clip, such as this silicone version or a metal pot clip.
You want to make sure that when the thermometer is clipped to the pan, there is space between the end of the probe and the bottom of the pan, otherwise the temperature reading will be inaccurate. The thermometer shouldn’t be touching the bottom of the pan.
The instant accuracy of these thermometers can’t be beat, and this feature outweighs the only two downfalls I see with this situation:
- the thermometer will turn off once or twice during cooking – all it takes is a quick press of the button (for this particular model) to turn it back on; no biggie
- I haven’t found a pan clip that nestles the thermometer right up against the edge of the pan like other candy thermometers, so it does tend to get in the way of stirring just a bit – not a huge deal breaker, but make sure if you use this setup to stir underneath and around the thermometer probe or else the caramel will scorch in those spots

How to Calibrate a Candy Thermometer
Bring a pan of water to a boil and insert the tip of the thermometer in the boiling water for a full minute. Write down the temperature your thermometer registers in the boiling water.
A few rules of thumb:
-We’re making the assumption that the candy recipe being used has been written and tested at sea level (I’ll tell you below how to make further adjustments if that is NOT the case.)
-Water boils at 212 degrees F at sea level
If your thermometer registers below 212 degrees F in the boiling water, you’ll need to subtract degrees from the cooking temperature in the recipe. If it registers above 212 degrees F you’ll ned to add degrees to the cooking temperature in the recipe. *Whatever temperature your thermometer registers is your “new” 212 degrees F mark.*
For instance, if your thermometer registers 205 degrees F in boiling water, subtract 7 degrees (212-205=7) from the cooking temperature in the recipe (for this recipe, the caramels cook to 245 degrees F so you would only cook them to 238 degrees F).
If your thermometer registers 215 degrees F in boiling water, add 3 degrees to the cooking temperature in the recipe.
Potential further adjustments:
If a recipe has been tested at an elevation other than sea level (the only way to know this is if the author notes it in the recipe or if you reach out and ask), further adjustments may be needed based on the difference between the elevation YOU live at and the elevation the RECIPE was tested at. An easy rule of thumb is to add 2 degrees F for every decrease of 1,000 feet elevation and subtract 2 degrees F for every increase of 1,000 feet elevation.
For instance, if a caramel recipe was tested at 3,000 feet elevation and indicates the caramel needs to be cooked to 238 degrees F, and you live at sea level (which is a 3,000 feet decrease in elevation from where the recipe was tested), you would add an additional 6 degrees F (2 degrees for every 1,000 feet elevation change) to the final cooking temperature bringing it to 246 degrees F. This adjustment would be in addition to the adjustments made for the boiling water test.
Another example, if a caramel recipe was tested at sea level and indicates the caramel needs to be cooked to 245 degrees F, and you live at 5,000 feet elevation (which is a 5,000 feet increase in elevation from where the recipe was tested), you would subtract 10 degrees F (2 degrees for every 1,000 feet elevation change) to the final cooking temperature bringing it to 235 degrees F. This adjustment would be in addition to the adjustments made for the boiling water test.
Remember that candy-making can take some trial and error! Even with the above adjustments, you may find that you need to add or subtract a few degrees for particular recipes to achieve the best results. Usually a 2 to 3 degree difference won’t make or break or a recipe, so do your best to make adjustments based on the information above and have fun with it!
Ok. I’m glad we had this talk. Now let’s move on past candy thermometers.
The biggest key for homemade caramel success is getting all of the cooking supplies and ingredients laid out in a very cooking show-style manner. No, but really, it’s pretty important.
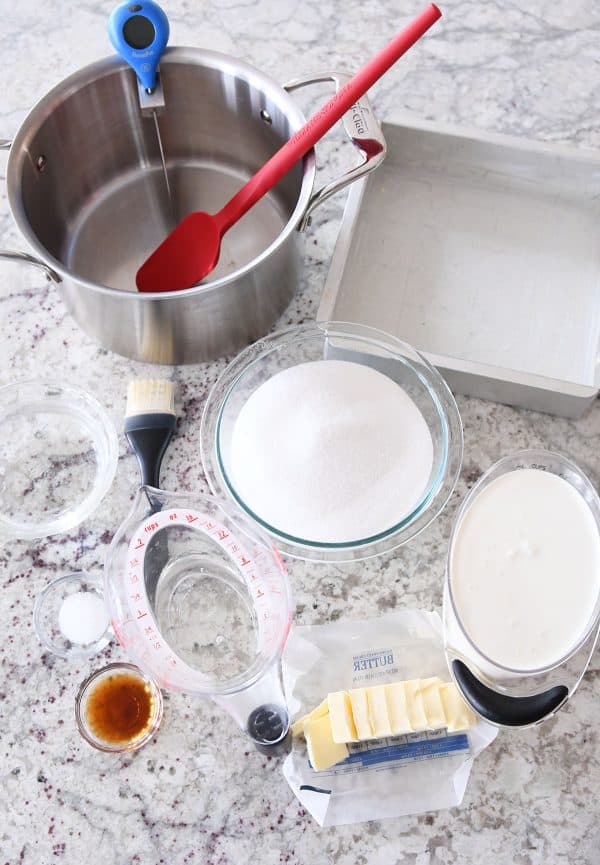
Measure out all the ingredients and have them ready to go.
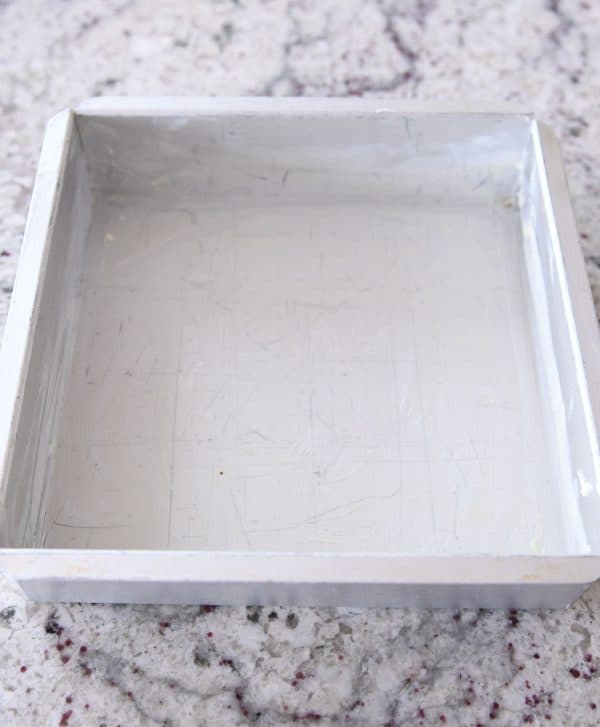
Also, get the pan ready for when the caramels are finished cooking. You don’t want to have a bubbling hot batch of caramels at the perfect temperature only to realize you don’t have your pan buttered (they’ll continue to cook, even off the heat, while you butter that pan and you’ll be sad when your beloved caramels break off someone’s prized tooth).
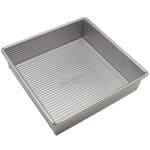
I usually just butter all the creases and corners and crevices of a straight-sided 8X8-inch pan (this recipe doubles great for a 9X13-inch pan). But you can line with parchment for easy lifting of the caramels after they’ve cooled.
How to make homemade caramels
Finally! The fun part.
In that wonderful, heavy-bottomed pan (I wish I could be complimented for being heavy-bottomed at some point in my life), combine the sugar, water and corn syrup.
Don’t go crazy here. You don’t want to splash it everywhere up the sides of the pan. Be gentle. Be careful. Those splashed sugar marks can become sugar crystals, and they can ruin a whole batch of caramel if they get stirred back into the caramel.
That sounds kind of doom and gloom, but don’t worry. I’m going to show you how to easily rid your life of sugar crystals forever and ensure you know how to make the best homemade caramels of your life.
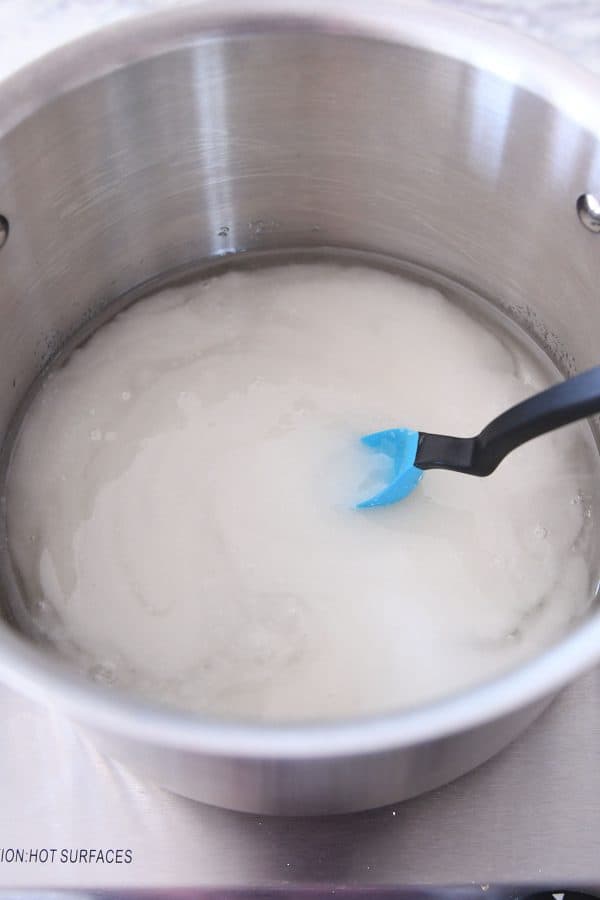
Heat this mixture over medium or slightly medium-high heat until it comes to a boil. It will foam and rise up a bit at the beginning but will quickly settle down into pretty, glassy bubbles.
Why this step? A lot of caramel recipes have you combine cream (or sweetened condensed milk), butter, sugar and corn syrup from the very beginning. But cooking the sugar and corn syrup like this first means you get a whole lot of flavor and cooking done quickly without having to stir and without any milky/creamy ingredients scorching on the bottom of the pan.
It’s brilliant.
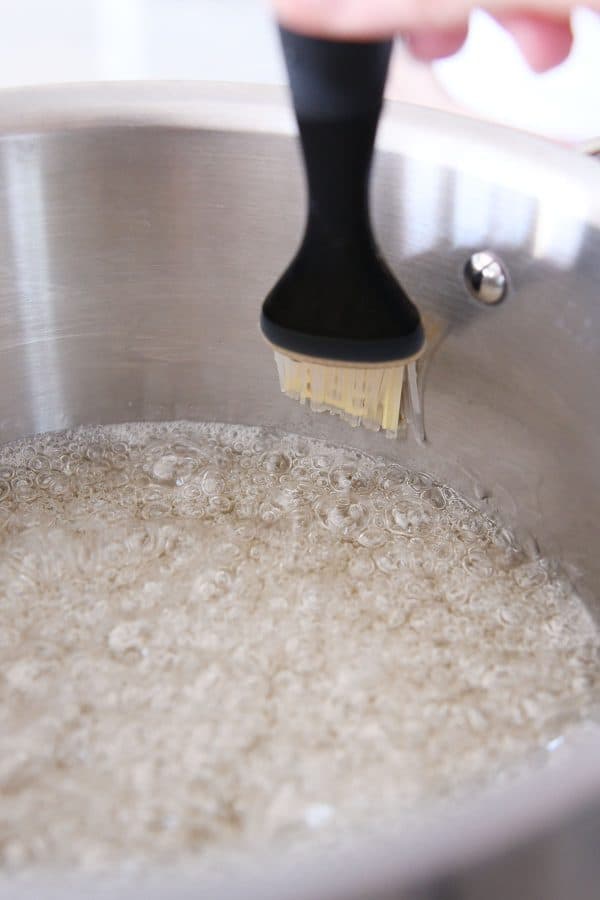
This is when you want to fill a cup with water and use the pastry brush {aff. link} to wipe down the sides of the pan above the boiling sugar/water line. Just dip the brush in the water and rub it along the sugar crystals; they’ll dissolve and run back down into the boiling mixture. This is what you want.
Once the sides of the pan are cleaned, you probably won’t need to repeat this process again.
Clip your handy dandy thermometer – instant read or candy thermometer – to the side of the pan. Without stirring, cook the mixture to between 325 and 345 degrees F. The range in temperature is fine and won’t affect the soft chewiness of the caramels. The higher the temp in this step, the darker the color of the caramels will be.
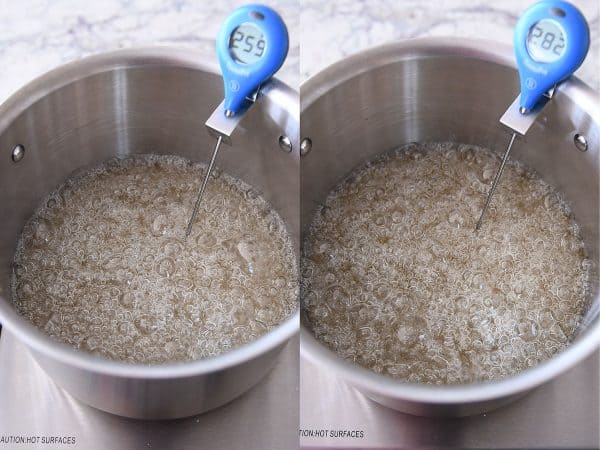
I usually cook the sugar mixture to right around 345 degrees. Over medium heat, this usually takes around 20 minutes on my stove.
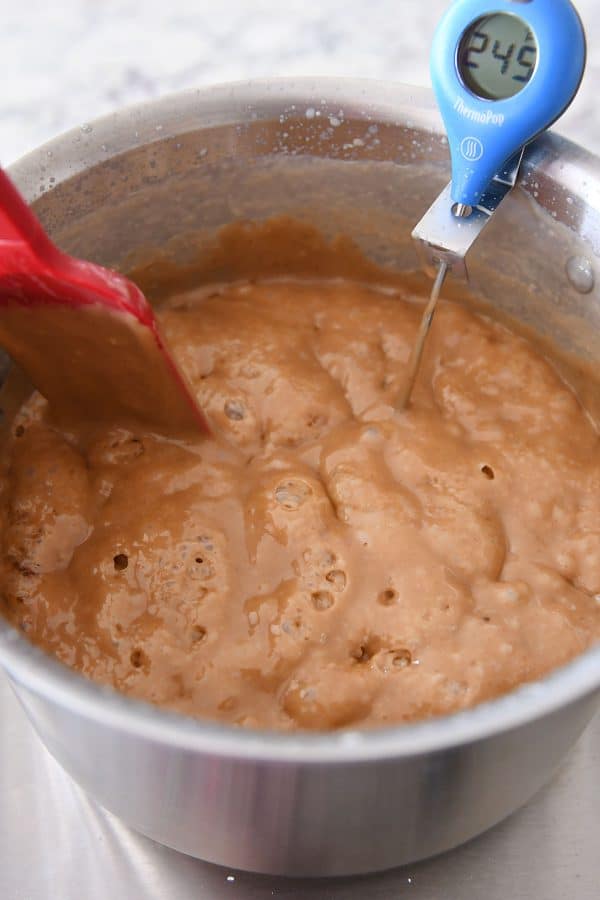
Immediately but slowly pour in the warm cream. The mixture is going to bubble and steam and completely freak out. It’s ok. Just keep your hands and fingers safe. This is also why it’s important to have a bigger-than-you-think pot. The mixture will rise quite a bit during this step.
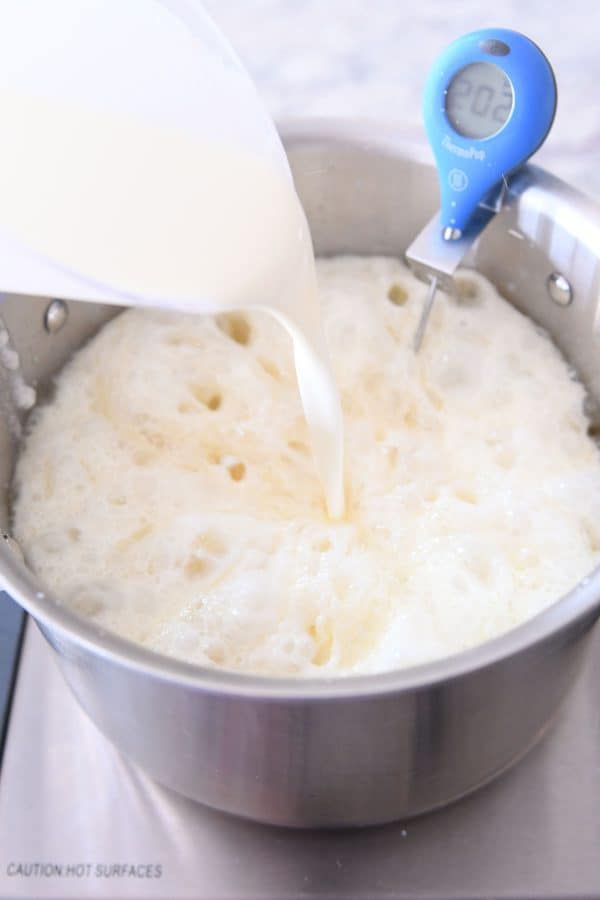
Add the butter and salt.
The temperature of the caramel mixture drops significantly with the additions.
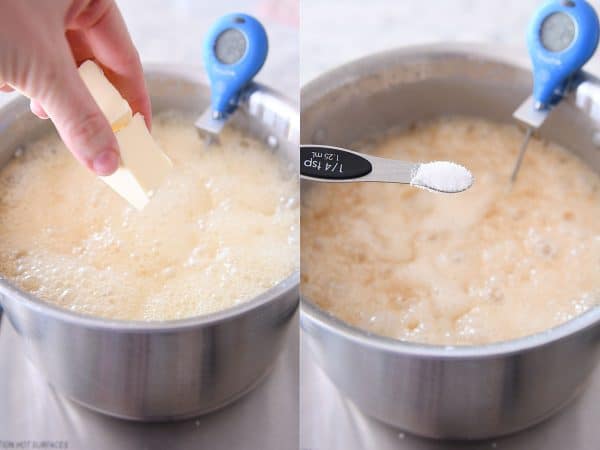
Once the cream, butter and salt have been added, it’s time to start stirring. You are going to stir constantly until the end of the caramel making process. This prevents scorching and burning. Just commit and stick with it.
You only need to focus on scraping the bottom of the pot – don’t scrape down the sides as you stir. It gets all sorts of sugary crystals and hard bits into the mix, and that’s not good. You will cook the caramel mixture back up to about 245 degrees F (depending on how soft/hard you want them).
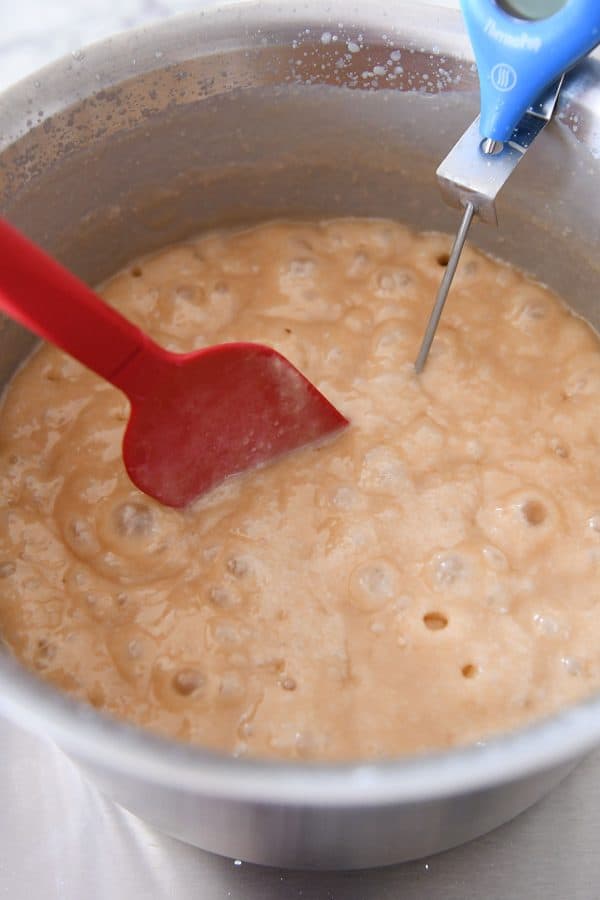
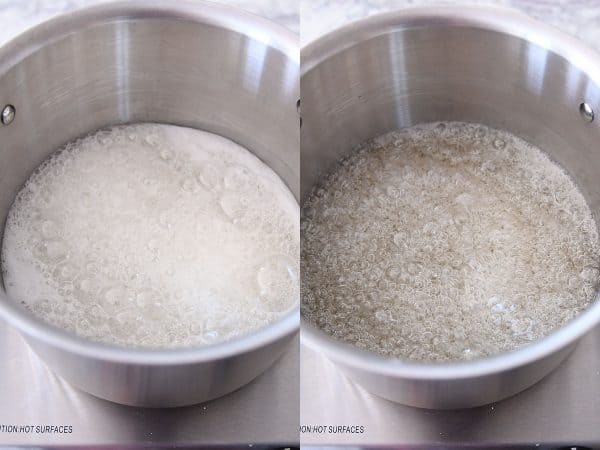
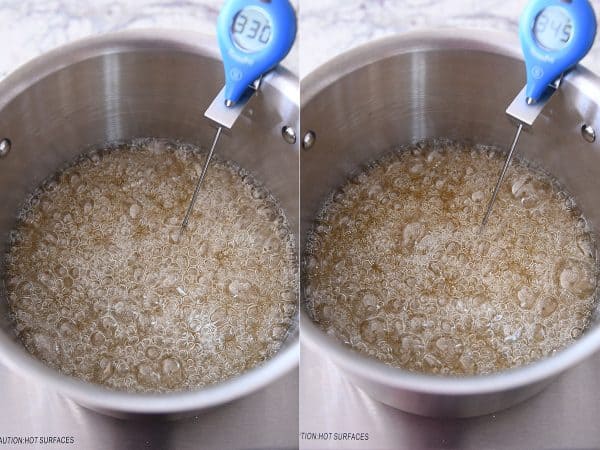
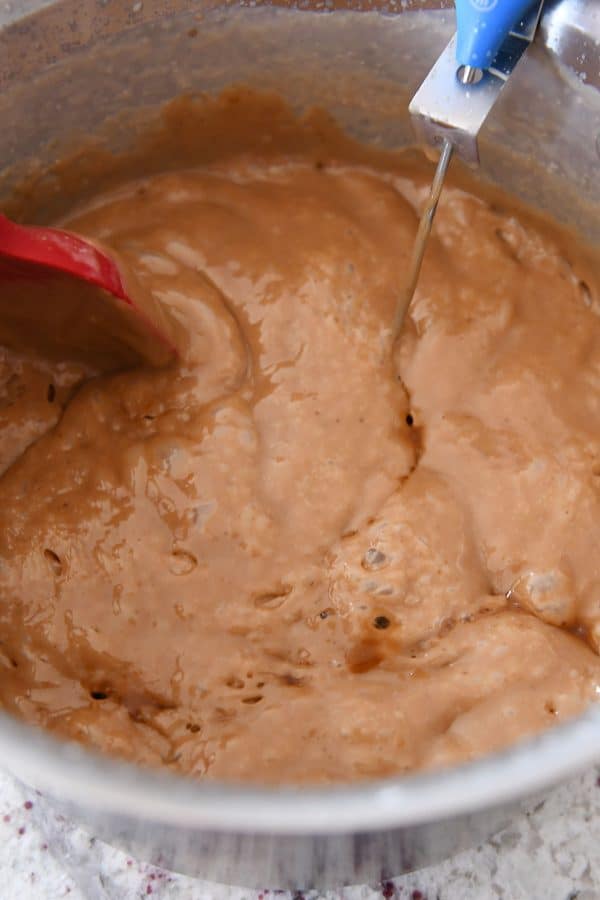
The look of the caramels changes as the temperature increases. At the beginning, the caramel mixture is light in color and the bubbles are small and closely spaced.
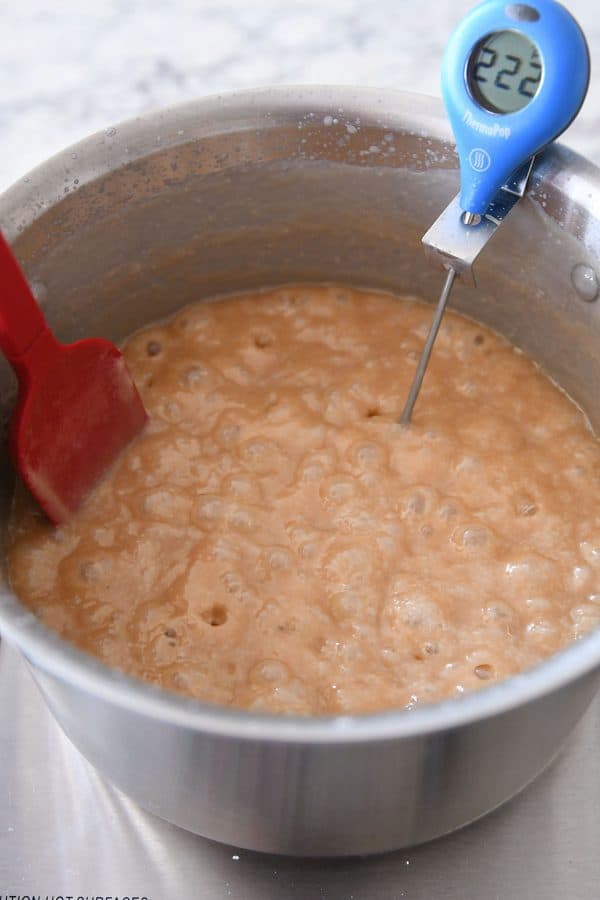
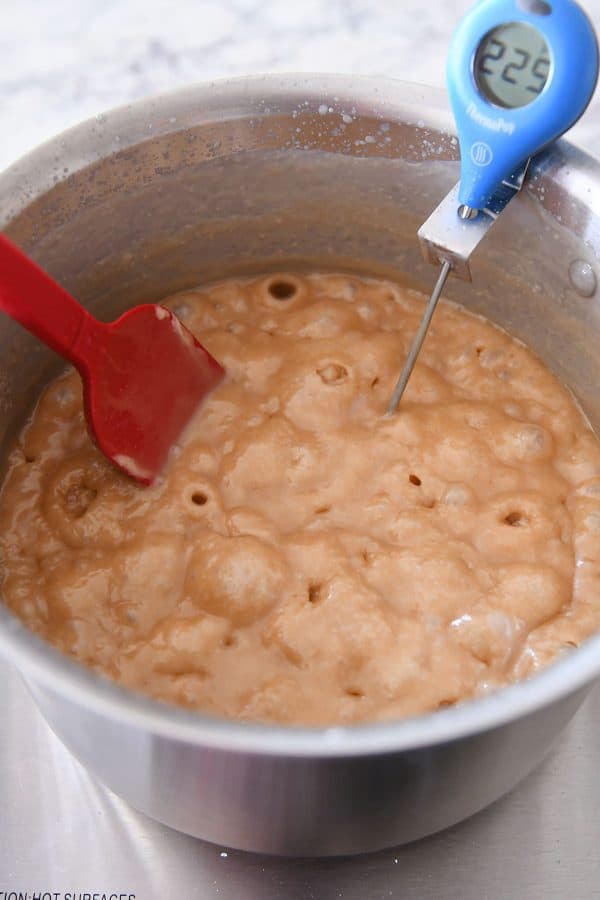
As the temperature increases, the color darkens and the bubbles get larger.

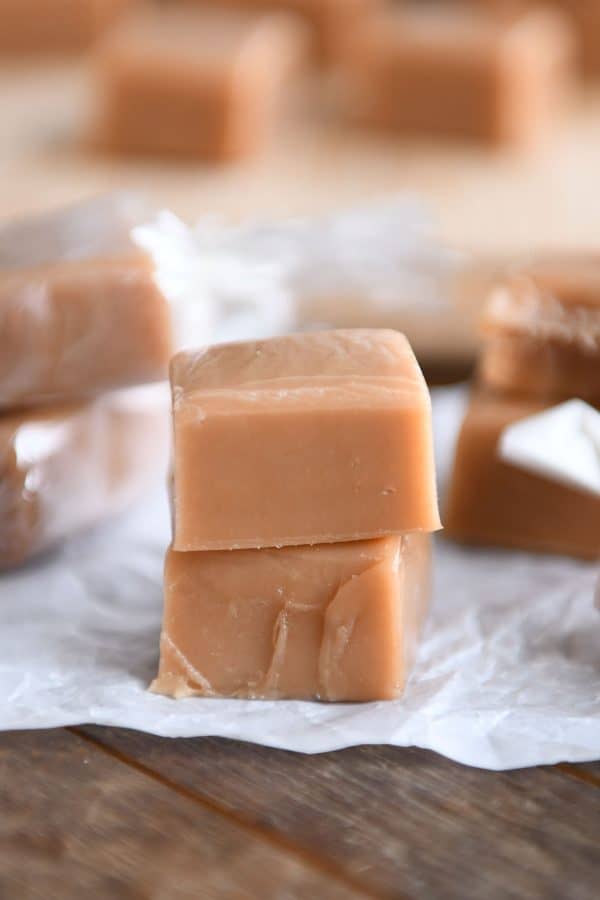
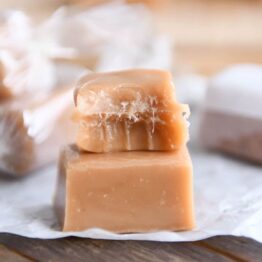
With my perfectly calibrated thermometer, I cook these perfect vanilla caramels to exactly 245 degrees. This will take about 30-45 minutes, depending on your stove and how you moderate the heat.
At this temperature, they are soft but not stick-to-the-paper soft. I’d consider them slightly softer than, say, a store bought Kraft or Brach’s wrapped caramel but firmer than the caramel inside a Twix bar.
Am I making any sense? Also, why don’t they make Twix bars in dark chocolate? And if they do, why does my grocery store not carry them? These are the things that keep me up at night.
You can cook these caramels to a lower or slightly higher temperature, too, depending on how soft or firm you like your caramels to be.
Immediately take the pan off the heat and stir in the vanilla. It will bubble a bit; that’s normal. As you stir it in, don’t scrape down the sides of the pan.
Other caramel flavors
If you want to change up the caramel flavor, now is the time! Omit the vanilla and stir in a variety of different extracts: cinnamon, anise, huckleberry or razzleberry.
The exact amount depends on the brand and flavor of the extract (and keep in mind flavored oils are much more potent than extracts so you’ll want to use less). Generally speaking I use about 1/2 to 1 teaspoon of a flavored oil and 2-3 teaspoons of a flavored extract.
You can also add food coloring at this step, too, if you want. I prefer using gel food coloring because a little goes a long way.
1-Minute How-To Caramel Video
Want to see that whole cooking process condensed into about a minute? Here you go.
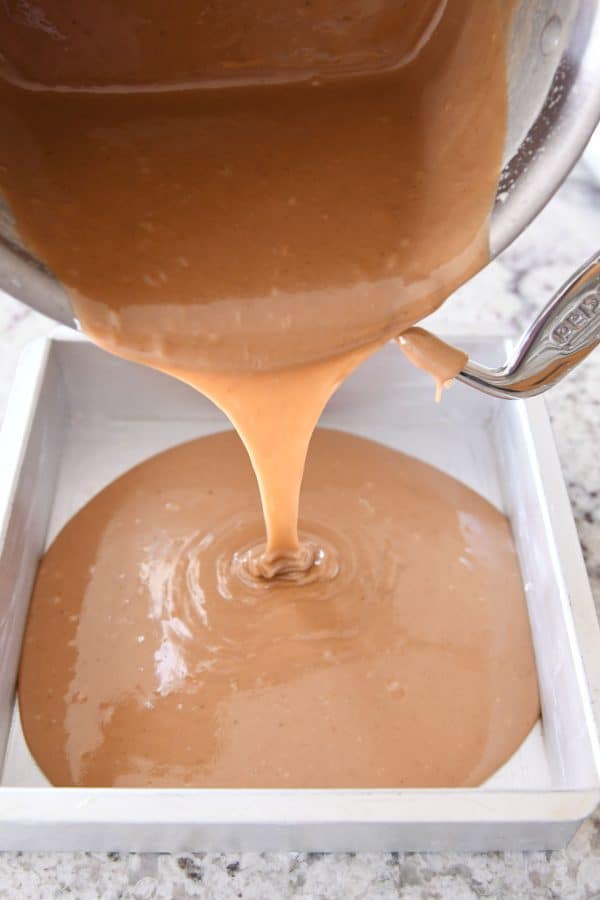
Once the vanilla has been stirred in, immediately pour the hot caramel into the prepared pan. You prepared the pan, didn’t you? I hope you prepared the pan.
Don’t scrape the sides and bottom of the pot too aggressively – a little scraping is fine, but cleaning out the pot is a bad idea; it can ruin the texture of your caramels with the super hot caramel on the bottom of the pan and sugary bits on the sides.
How to cut and wrap homemade caramels
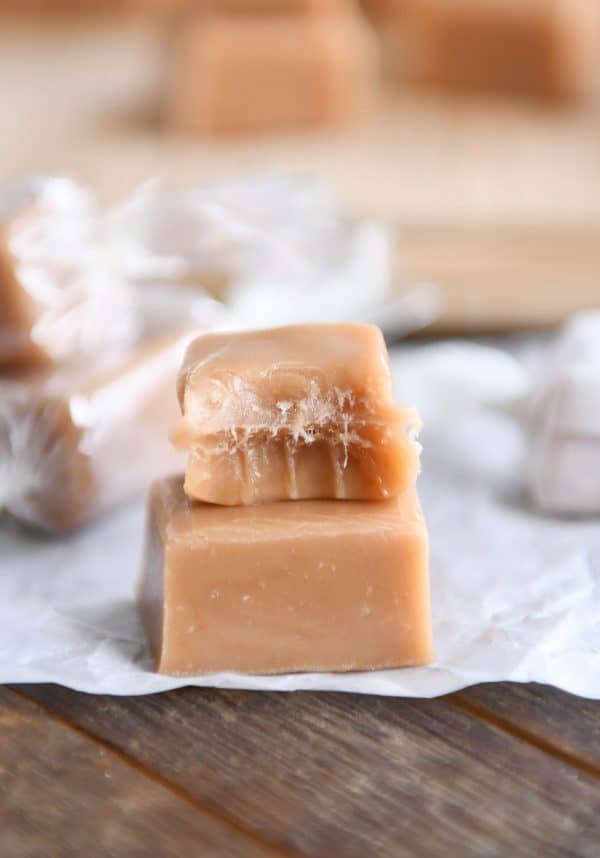
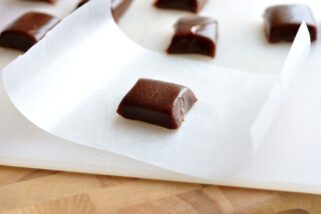
Once the caramels have completely cooled (a couple of hours), it’s time to wrap them.
First of all, it helps to use a flat spatula to dig them out of the pan (they should come right up if the pan has been well buttered) and place the whole slab on a cutting board.
I use this can’t-live-without bench knife {aff. link} to cut the caramels. One 8X8-inch pan of caramels will yield about 50-60 caramels.
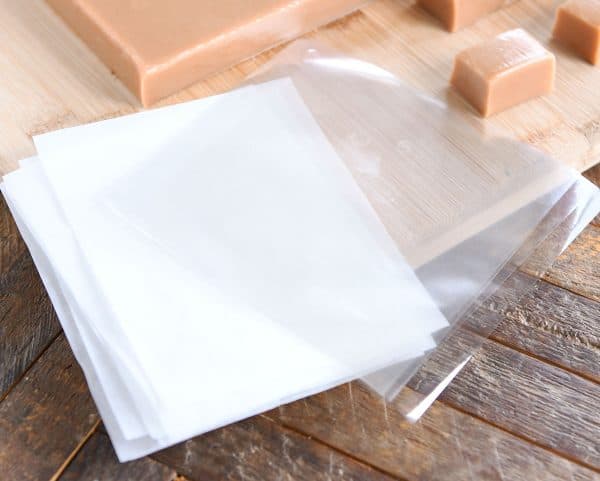
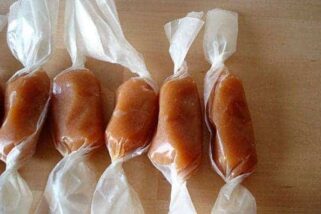
Wax paper vs cellophane
I grew up on a homemade caramel assembly line where I usually got relegated to the wax paper cutting station. With a good old-fashioned pair of scissors, I cut hundreds and hundreds of wax paper shapes (they ended up being all over the square-rectangle spectrum) for the homemade caramels my mom made every year.
Wax paper works great. But it’s a pain in the heavy-bottom to cut into pieces. As of yet, I haven’t seen precut wax paper for caramel wrapping. CORRECTION: but YOU awesome readers have. Here’s some precut wax paper squares on Amazon several of you told me about since this post went live {aff. link}.
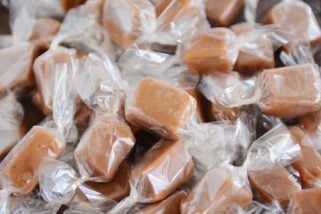
Now that I’m old and grown up with a caramel making household of my own, I go straight for the cellophane wrappers. They come in packs of 500 or 1,000 (read: they’ll last a lifetime unless you make caramels like it’s your job), and they are so super handy. Plus, I think the caramels look pretty in those clear crunchy little wrappers.
I use these cellophane wrappers {aff. link}. There are lots of brands available – they end up being between two and three cents a piece on Amazon. You can get them cheaper online elsewhere (like Orson Gygi or this site dedicated to Caramel Wrappers – shipping costs may vary).
When using the cellophane wrappers, you have to be a little aggressive as you twist the ends or else they tend to unroll a bit, but I love them and can’t imagine making and wrapping caramels without them.
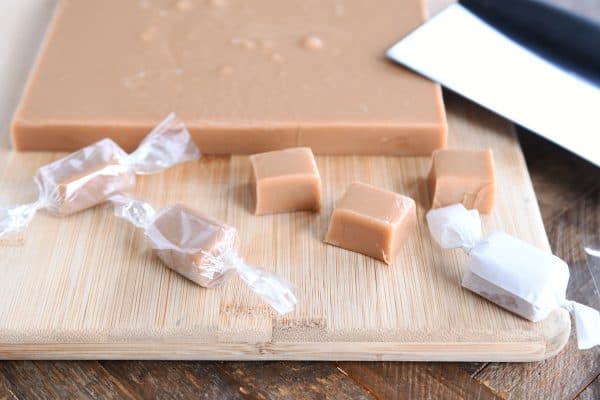
Also, don’t panic and worry about the bubbles in that there slab of caramel. It happens. Especially when your sweet tween is helping you make the caramels and accidentally scrapes too much out of the pan (that can cause the pesky bubbles). They aren’t noticeable once the caramels are cut and wrapped.
I hope this definitive guide to making the best homemade caramels of your life is helpful.
Because I honestly think everyone needs to feel like a rock star in the kitchen and make homemade caramels at least once.
There is seriously nothing like them. I’ve actually had to delegate the cutting and wrapping to my children because my self-control is nonexistent in the face of 50 little caramels staring up at me. One for the wrapper, one for me. One for the wrapper, one for me. I usually have a mild to severe stomach ache by the end. I know, I know personal problem.
What other questions do you have?
Please ask any other caramel making questions below and I’ll be happy to answer them or refer you to someone (ahem, google) who can!
Homemade caramels are my absolute favorite thing to make during the holidays. I also use this caramel recipe for homemade caramel apples and it’s become my go-to for other flavors (like cinnamon or licorice).
Seriously, I’m going to end it here because I CAN TALK ABOUT HOMEMADE CARAMELS FOREVER, and I don’t want to lose your loyalty forever by droning on and on. Brian’s giving all of you the side eye, like, “seriously, who got her started??”
Love ya. Now go make yourself or your neighbors a batch of homemade caramels, ok?

The Best Homemade Caramels
Ingredients
- 2 cups heavy cream
- 2 ½ cups (530 g) granulated sugar
- ½ cup light corn syrup
- ½ cup water
- 6 tablespoons (85 g) butter, cut into tablespoon-size pieces
- ¼ teaspoon coarse, kosher salt
- 1 tablespoon vanilla extract (see note)
Instructions
- Butter the bottoms and sides (get into the corners, too!) of a 9X9-inch square baking pan. (Alternately, you can line with parchment and butter the parchment – this may make it easier to pull the slab of caramels out of the pan after they have cooled in order to cut and wrap them.) Set aside.
- Heat the cream in a saucepan or in the microwave until steaming. Keep warm.
- For the caramels, in a large, heavy-bottomed pot (at least 5- or 6-quarts), stir together the sugar, corn syrup, and water, taking care to not splash the mixture up the sides of the pot.
Clip a candy thermometer onto the side of the pan. - Bring the mixture to a boil over medium-high heat WITHOUT STIRRING or moving the pan. As it begins to boil, fill a cup with water and use a pastry brush to wash down the sides of the pan so there are no granules of sugar sticking to the sides of the pan (you probably won’t need to repeat this after the sides have been well-cleaned). This prevents the caramel mixture from crystallizing in later steps.
- Cook until the boiling sugar mixture registers 325 degrees F on the thermometer, about 15-20 minutes (for darker but still chewy caramels, continue cooking the sugar mixture – I’ve gone as high as 345 for super intense, dark caramels; beware the next step will cause much more steaming and bubbling the higher you cook this initial sugar mixture).
- Slowly and carefully pour the warm cream into the caramel. It will bubble and produce a lot of steam! Add the butter and salt. The mixture will bubble high during this step but will go down after a few minutes.
- Begin stirring the caramel with heatproof rubber spatula with a flat top (a flat edge does better at preventing the caramel from burning than a rounded edge). Avoiding scraping the edges of the pan, and continue to cook, stirring constantly and slowly, until the mixture reaches 245 degrees F, about 10-15 minutes (you can go as high as 248 degrees F for a firmer, but still chewy, caramel, or take the caramel off the heat earlier for a softer caramel; 245 is perfect in my book).
- Off the heat, stir in the vanilla without scraping down the sides of the pan – scraping the bottom of the pan is fine (this would be the time to add other flavorings/color).
- Immediately pour the caramel mixture into the prepared pan.
Let the caramels cool completely. I use a large, metal spatula to peel the whole slab of caramel out of the pan and onto a cutting board. - Cut into squares using a sharp knife or bench scraper, wrap, and store in an airtight container at cool room temperature for up to two weeks.
Notes
Recommended Products
Recipe Source: adapted from this recipe which was originally adapted from Cuisine at Home 2016
Please clarify – temp lower than 245 for softer chewy Carmel and higher for more firm but not tooth breaking. How high? Thanks
Hi Valerie, assuming the thermometer is calibrated correctly, you could go as high as 248.
Thank you so much for your thorough details about calibrating the thermometer and adjusting for elevation and everything else. We have one of those Taylor thermometers and a wider large pot, so my first attempt the bulb wasn’t getting an accurate reading (it’s surrounded by metal to keep it from touching the bottom of the pan, but I didn’t notice the bulb itself wasn’t submerged in the sugar water so the sugar water burned and when I added the cream/butter it was already way above the final 245 temp and the final texture was very liquidy). Second time around, I made sure the bulb was submerged and I got much more accurate readings. And they turned out! Thanks so much for sharing your recipes!
Can you use this caramel recipe for caramel turtles?
Yes
Excellent! And easy! But I was confused about the temperature. At more than one place it said to heat to 335-345 degrees F. My candy thermometer shows soft ball stage at 240 and hard ball stage at 260. So I applied some common sense and used 245 instead of 345. I think I’ll knock it down even farther to 235 next time. Also I used a buttered bench cutter before they completely set so it was easy to cut. You could also use a buttered pizza cutter if you don’t have a pan with tall sides.
Hi Janet, the sugar/water mixture cooks to 325 degrees and the finishe caramel cooks to 245 (more or less depending on how firm you like the finished caramels)
I’ve been making caramels for YEARS and never knew about calibrating the candy thermometer! Thank you, thank you, thank you!!
While I didn’t make your recipe tonight, I learned several things I may try when making my (mom’s secret) recipe next time. I did use a flat ended wooden spoon tonight; that just made so much sense. I have always added the cream to the sugar and karo syrup right up front. I’m going to try just the sugar and karo syrup up front next time, along with the pastry brush tip. The temps are interesting. I’m at about 750’ and have experimented with temps from 236° (a gooey mess) to 244° (rock hard toffee) and have settled in at 240°-241°. I use the softer batches when dipping in chocolate and the firmer batches when leaving plain. I’ll have to check my thermometer’s calibration.
I made these caramels today for the first time, and they came out GREAT! I cooked them to the exact temperatures (325 / 245) you recommended. I couldn’t quit eating them! Eat one, wrap one, eat one, wrap one… (You get the idea.)
Mel, if you’re monitoring this – if I wanted to cook them to a lower temperature to make a caramel sauce for dipping apples pieces, what temperature would you use, rather than the 245F?
Hi Kathy! I usually cook caramel for caramel apples to about 234-236 degrees.
Thank you! I will try that!
Could you use this caramel for a carameled apple? We use to get them at a candy shop where I live and that place closed years ago, I still have to have my fall carameled apple fix every year and never have I found a creamy caramel covered apple like theirs. I would like to try and make some for my nephews and me of course. I’m now 70 but still enjoy that treat in the fall season.
Yes! I use this recipe for caramel apples! I cook it a few degrees less (to about 238 degrees F) and let it cool to about 180-190 degrees F before using it on the apples.
I have made this recipe 3 to 4 times and I each time it is so soft. I also find that it takes much longer time to reach the temperatures that your estimate. I think I am so afraid of burning that I may have the stove temp too low? One time I think I burned the sugar in the first step and it ruined the caramel. I love the flavor but am not happy with the texture and prefer it to be more like your picture! Please help!
Hi Denise, what thermometer are you using? Have you calibrated it? If it is off by even a few degrees that could be why the caramel is coming out soft. Are you using an electric or gas stove? What temperature/heat level do you have it on?
I actually bought the one you recommend from Thermoworks. I did not calibrate it though. I have an induction cook top and usually have it on 4 or 5 out of 9. (I must have burned the sugar in a batch I made last year and my caramels were bitter. I think because of that I am afraid to make the temperature of the stove too high.) Thank you so much!
I totally get that! I’d be nervous, too. I haven’t worked with an induction stovetop so I don’t know how the heat levels differ from the stovetop I’m using, but I would say you could probably go up just a bit on the heat so they cook a bit faster and then just keep an eye on the first step when the sugar mixture is caramelizing. I think I’ve heard before that induction cooking boils water faster – I wonder if it the caramel in the first step (with the sugar and water) also cooks faster on induction and can lead to burning? It’s likely that thermometer is fairly accurate but depending on where you live altitude-wise, you may need to add a few degrees to the cooking temperature to get the caramels just right. If they are coming out soft, try cooking them 2-3 degrees higher.
Any advice on adding in cocoa powder for a chocolate version of these? Or a chocolate caramel recipe you already have? Made your gingerbread caramels with great success and now I’m needing to do all the varieties possible! 🙂
These chocolate caramels are great!
https://www.melskitchencafe.com/soft-chocolate-caramels-sugar-rush-6/
Delicious! Had success making a double batch of these this year. Even my mother-in-law, who is an excellent cook, loved them!
Delicious! These won’t be around our house for long. We used some to drizzle on top of our marshmallow eggs before dipping in chocolate. Huge success!
I have commented on these before but have to tell you how amazing they are!!
We made 8 batches this year to take to friends and family and everyone loves them! Each batch makes about 150 so after 1,200 my kids have become pro Carmel wrappers!!
Wow!! That’s amazing!
Hi Mel! I was wondering if I could leave out the corn syrup for this recipe. I haven’t made it yet, and I was hoping there was an alternative I could use or something.
Hi Grace, the corn syrup is really imperative to the success of these caramels. I don’t know of a good substitution, but you might try googling “homemade caramel recipe without corn syrup” and see if there’s a good honey-based recipe you could try.