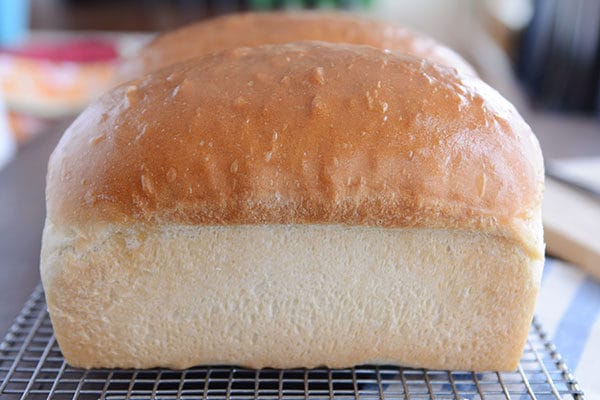
The Best White Sandwich Bread
This is the best white sandwich bread ever! It is surprisingly easy to make and is perfect for sandwiches and toast (French toast, too!)!
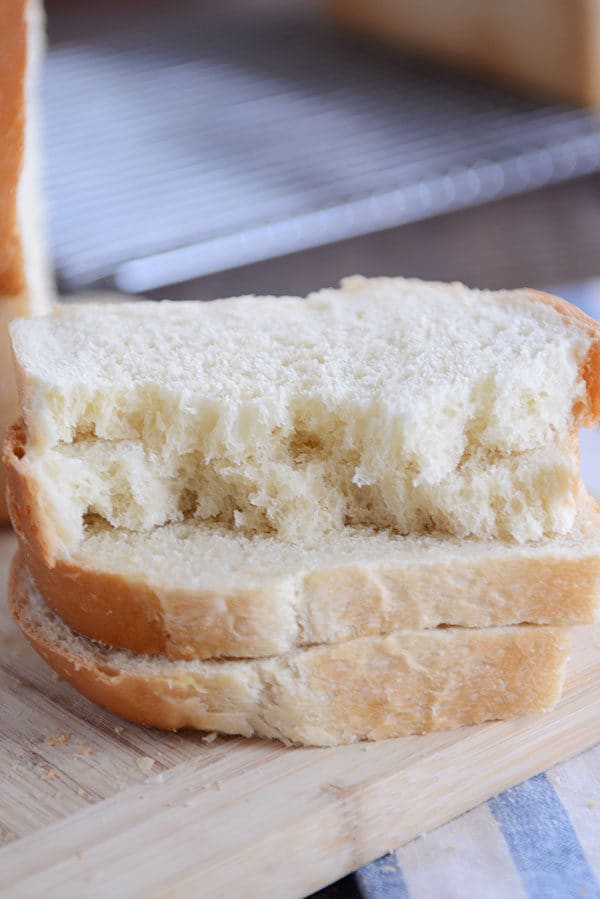
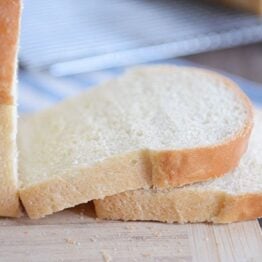
Nothing compares to this soft, fluffy, PERFECT white sandwich bread.
It is amazing! And really easy to make. No fancy ingredients. No time consuming method. It’s straightforward and simple!

My Mom’s Famous Bread Recipe
This amazing, tried-and-true recipe is my mom’s famous and spectacular white bread recipe. She made it all the time when I was growing up.
I have fond memories of her mixing the dough together in a huge blue bowl with a wooden spoon (she didn’t – and still doesn’t – own an electric stand mixer).
The dough is forgiving enough that it is the perfect bread recipe for beginning and expert bread makers alike.
How I Make It
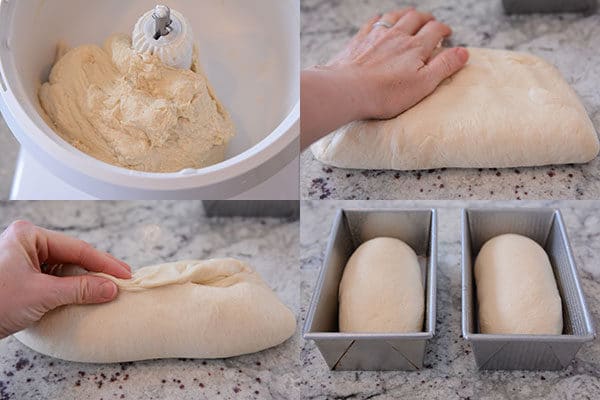
I am not as hardy and definitely more lazy than my mom, so I always opt to make this bread dough in my mixer. I have a Bosch stand mixer but the recipe should work just as well in a Kitchenaid or other type of stand mixer that has a dough hook.
The dough is soft and smooth and a dream to work with.
I divide the dough in half and then press each half into a rectangle and then roll up into a log (pinch the seam!) to place in the bread pan.
Perfect Homemade Bread
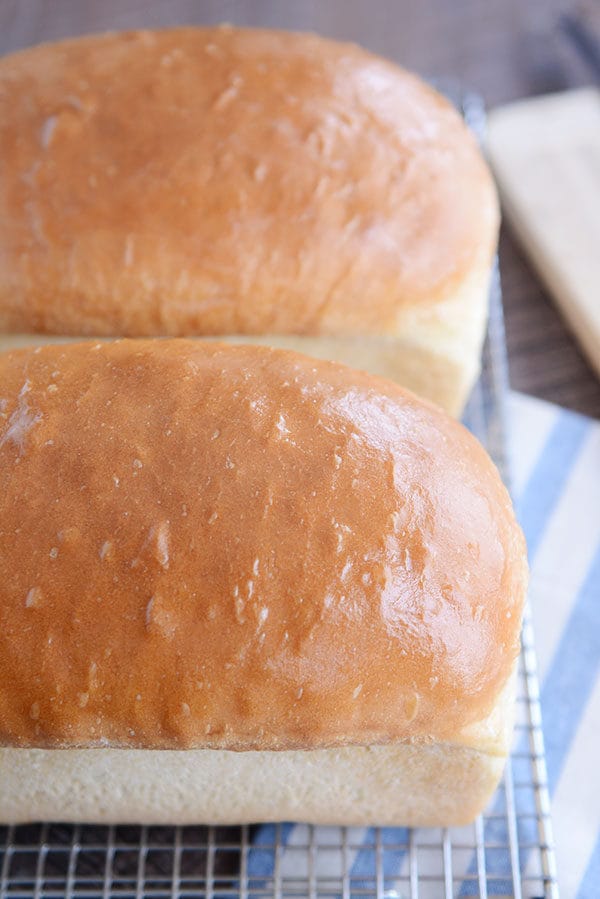
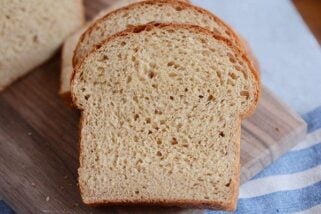
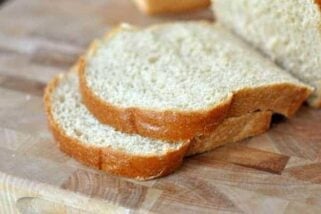
The baked loaves are tall and sturdy. The crumb is soft but tight, so it makes the perfect bread for sandwiches.
Just in case you care, the bread also makes the most fantastic grilled cheese sandwiches and French toast you’ll ever have.
Good thing this recipe doubles well! It doesn’t last long in our house. (I usually double the batch and then freeze two of the loaves for later…I like to call it freezer self-control.)

Here’s the equipment I use for homemade bread:
- Stand Mixer
I use my Bosch stand mixer for this (and all breads). I also have a KitchenAid mixer but usually say very bad words when I use it to make bread; I know many of you have better luck using your KA mixer for bread, but I’m a creature of habit, and the Bosch is unparalleled for bread making. This recipe makes two loaves which is doable in a KitchenAid; I usually double the recipe in my Bosch so I can get four loaves out of the deal. Having said all of that, you can definitely make this bread by hand, too. - Bread Pans
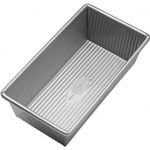
I always bake our everyday sandwich bread in 8 1/2-inch by 4 1/2-inch bread pans (vs 9X5-inch pans). I have a mix of Chicago Metallic pans and USA Bread pans. I love both brands, truly. If I had to choose, though, I’d probably opt just slightly more in favor of the USA bread pans (nothing sticks!). As a sidenote, I never wash my bread pans when making homemade sandwich bread (banana bread and other quick breads are a different matter). Sounds icky, but after a decade plus of homemade bread making and pan cleaning, I haven’t had an issue. Instead of washing and submerging in water, I get a clean dishrag and run it under very hot water. I wipe out each pan, paying particular attention to the crevices, let them air dry, and call it good. This has helped avoid rust in the edges of the pans. I’ve had a few of my bread pans for almost 10 years and they are going strong. - Scale
I use my trusty kitchen scale to weigh out the dough when dividing into loaves. You certainly don’t have to, but I like the loaves to be as similar in weight as possible so they bake evenly. - Bench Scraper
Another optional but super handy tool, this bench scraper/cutter is the perfect thing to use when dividing bread into loaves (plus, it’s one of the most-used items in my kitchen since it has a million different purposes). - Flour Sack Towels
A great alternative to using greased plastic wrap, I throw these lightweight towels over my bread while it is rising in the pans. - Unbleached All-purpose Flour
When using white flour, I always use unbleached all-purpose flour vs bleached all-purpose flour. I’m sure you could use bleached white flour in this recipe, too; I just haven’t tried it (but I’m 99.9% certain that’s what my mom used for decades when I was growing up). - Bread Bags
A few years ago, I bought a case of 1,000 bread bags. Yes, that’s right: 1,000. I’m still working through them (obviously), but it’s cemented the preference that real, live bread bags (instead of stuffing that loaf into an ill-fitting ziploc bag) is the way to go. This is the case of bread bags I have, but I bought these bread bags for a friend and she loves them (bonus: you don’t have to buy a gazillion at once). I always use plastic clips like these (I snag them at IKEA when I’m there once a year) to close the bags. - Bread Knife
This is my favorite bread knife. So inexpensive, and the long blade design makes for very even, neat slices!
If you’ve been looking for the perfect, white sandwich bread, this tried-and-true recipe should end your search! Simple, delicious, and so fluffy!
One Year Ago: Soft Baked Skillet Chocolate Chip Cookie {Egg-Free}
Two Years Ago: Fudgy Coconut Oil Brownie Bites
Three Years Ago: Incredible Chocolate Pudding {Dairy, Egg and Gluten Free}
The Best White Sandwich Bread
Ingredients
- 6 ½ to 7 ½ cups (923-1065 g) unbleached all-purpose flour
- 2 ½ teaspoons salt
- 1 ½ tablespoons instant yeast
- ¼ cup sugar or honey
- 2 ¾ cups very warm water
- ¼ cup neutral-flavored oil, like grapeseed, canola, vegetable, avocado
- Butter for top of loaves, optional
Instructions
- In the bowl of an electric stand mixer fitted with the dough hook (or in a large bowl, if making the dough by hand), combine THREE cups of the flour, salt, yeast and sugar.
- Add the water and oil and mix until combined. The mixture will be thinner than bread dough.
- Cover the bowl and let the batter rest for 10 minutes; it will be slightly bubbly at the end.
- With the mixer running (or stirring by hand), gradually add another 3 to 4 cups of flour, until the dough comes together in a cohesive ball that clears the bottom and sides of the bowl and doesn’t leave a lot of doughy residue on your fingers when touched while still being just slightly tacky (not overfloured and dense).
- Knead for about 2 minutes until the dough is smooth and supple.
- Lightly grease a large bowl. Transfer the dough to the prepared bowl, cover with greased plastic wrap or a light kitchen towel, and let rise until doubled, about an hour or so, depending on the warmth of your kitchen.
- Lightly punch down the dough and divide it into two equal pieces.
- Grease two 8 1/2-inch by 4 1/2-inch bread pans.
- Press each piece of dough into a thick rectangle about 8-inches long; roll it up, pressing on the seams, and pinching the final seam together.
- Place the dough loaves into the prepared pans.
- Cover with lightly greased plastic wrap or thin kitchen towels and let rise until doubled and the dough has risen about 1-inch above the top rim of the pan, about an hour or so, depending on the warmth of your kitchen.
- While the dough rises, preheat the oven to 350 degrees F.
- Bake the bread for 30-32 minutes until golden and baked through.
- Remove from the oven and turn the bread out onto a wire rack. Immediately brush the tops of the loaves with melted butter (or use a stick of butter, peeling the paper back and rubbing it on the top of the hot bread).
- Let the bread cool completely.
- The bread can be stored at room temperature, covered in a bread bag, for a couple days, or frozen for up to a month or so.
Notes
Recommended Products


My new favorite recipe!
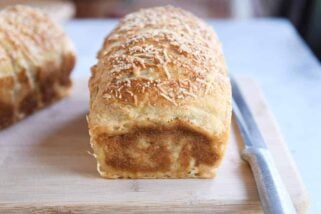
I’ve made it as cinnamon bread and it was even better as French toast! So many variations of flavor. It will give you all the love back that you put into the kneading!
Thanks for sharing this recipe!
Tanya
Question;
I’ve made this bread several times and absolutely love it, but the crumb of the final product is not as fine as pictured in your blog. (As a note, I do use honey instead of sugar and mix it with the water.) Is the knead time really only 2 minutes (with a kitchenaid). When I made another recipe by hand (also with honey) I had to knead it 15 minutes. And your cinnamon bread recipe calls for a 6 minute knead with an electric mixer and the final crumb is very fine and tender. I’m wondering what I can do to get a finer crumb for this white bread recipe. I would love your advice as this bread recipe is fantastic.
If you want a finer crumb, you can knead for more time – that should help! Try 6 to 8 minutes.
I have loved this recipe for many years, and today I turned it into a hybrid sourdough recipe, and it turned out great!! I took out 100g of flour and 100g of water, and substituted in 200g of ripe sourdough starter. Then I cut the amount of instant yeast in half. I let it rise for about 3 hours til doubled (my kitchen was kind of cold), then shaped into the loaf pans and put them in the fridge overnight. Baked the next morning according to the recipe, and they turned out perfect! Very happy 🙂