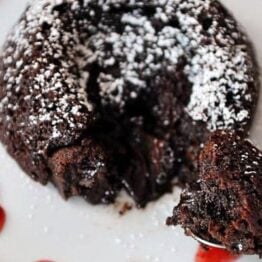
Chocolate Molten Fudge Cakes
Ingredients
Butter/Sugar Coating:
- 2 tablespoons salted butter, softened
- 2 tablespoons granulated sugar
- 1 tablespoon cocoa powder
Cakes:
- ½ cup plus 2 tablespoons all-purpose flour
- ⅔ cup (57 g) natural unsweetened cocoa powder
- 1 ½ teaspoons baking powder
- ¼ teaspoon salt
- ¼ cup (57 g) salted butter, softened
- ⅔ cup (141 g) granulated sugar
- ⅔ cup (141 g) lightly packed brown sugar
- 4 large eggs
- 1 ½ teaspoons vanilla extract
- ⅓ cup (57 g) finely chopped semisweet or bittersweet chocolate
Garnish:
- Powdered sugar for sprinkling
- Warm strawberry or raspberry jam for drizzling
- Ice cream for serving
Instructions
- In a small bowl, mash together the butter, granulated sugar and cocoa (for the butter/sugar coating) until well-combined. Using a pastry brush or your fingers (no really, it works), rub the mixture evenly into the bottom and up the sides of 10 (4-ounce) ramekins (see note for other dish options). Set aside.
- For the cakes, in a medium bowl, whisk together the flour, cocoa powder, baking powder and salt.
- In a medium bowl beat the butter (with a handheld electric mixer or in the bowl of an electric stand mixer) until light and creamy, 1-2 minutes. Add the granulated and brown sugars and beat on medium-high speed for 4-5 minutes.
- Add the eggs and vanilla and mix until pale and thick, about 4 minutes. Don't scrimp and take time off of the mixing times indicated. It might seem like too long but it helps the cakes to be airy and moist. Fold the flour mixture into the wet ingredients until there are no dry streaks. Stir in the chocolate.
- Divide the batter evenly among the ramekins (or muffin tin if using - see note). Cover lightly with plastic wrap (this is easily done with ramekins by placing them all on a sheet pan and covering them with one sheet of plastic wrap versus tearing off a bit of plastic wrap for each ramekin). Refrigerate for at least 4 hours or up to 2 days.
- Preheat the oven to 350 degrees F. Remove the cakes from the refrigerator and let them sit at room temperature while the oven preheats, about 10 minutes.
- Remove the plastic wrap from the cakes and bake them for 14-15 minutes (slightly less if using muffin tins), until the edges of the cake are puffy and slightly crusty on top.
- Serve immediately with a dusting of powdered sugar, ice cream or a drizzle of warm jam.
- If using ramekins, I serve them right out of the ramekin, however, you can turn them out of the dish onto a plate for a more fancy presentation. Of course using the muffin tin, you will want to turn them out unless you are keen on everyone swarming around the muffin tin with spoon in hand. Talk about family-style. To turn them out of the muffin tin, I place a piece of greased parchment paper onto a baking sheet or cooling rack (greased-side up) and place it on top of the muffin tin (so now the greased-side of the parchment is down on top of the cakes) - then holding on to the baking sheet and muffin tin at the same time, I flip the muffin tin over so the cakes fall right out onto the parchment paper-lined baking sheet or cooling rack (if it isn't greased, the cakes will stick). Then the cakes can be easily scooped with a spatula into a small bowl or serving plate.
Notes
Ramekins: you can use any size of ramekin, really. The recipe makes about 10 (4-ounce) ramekin-sized cakes. You could get about 8 cakes with 6-ounce ramekins and if you don't have ramekins at all, never fear! You can use a muffin tin. The key is not to overfill the muffin tin. This makes about 14 standard muffin-sized cakes.
Plan Ahead: keep in mind that the prebaked cakes need to be refrigerated for at least 4 hours (this helps the fudge center stay molten while baking). The good news is that they can be refrigerated for up to 2 days which makes them a great make-ahead dessert.
Serving: these little beauties need to be served immediately out of the oven - if left for a while, the molten center solidifies a bit and the edges of the cake aren't quite as soft.