Make-Ahead Buttermilk Dinner Rolls
Ingredients
- 3 cups buttermilk at room temperature
- 3 cups (426 g) flour
- 1 tablespoon instant yeast
- ½ cup (106 g) granulated sugar
- 3 large eggs
- 2 teaspoons salt
- ½ cup oil
- 1 teaspoon baking soda
- 6-7 cups (about 852 to 994 g) flour, more or less
Instructions
- In a large bowl or in the bowl of a stand mixer (I only ever use a Bosch, never tried this in a Kitchenaid), mix the buttermilk, 3 cups flour and yeast together. Cover and let stand at room temperature until puffy and bubbly, 2-3 hours.
- Add the sugar, eggs, salt, oil, and baking soda. Mix well and start adding the remaining flour until a soft dough is formed that clears the sides of the bowl and is smooth without being overly sticky or overflowed. Knead for about 7 minutes.
- At this point, you can roll out the dough or cover and refrigerate for up to seven days. If doing so, place the dough in a large container or bowl as it will expand a bit in the refrigerator.
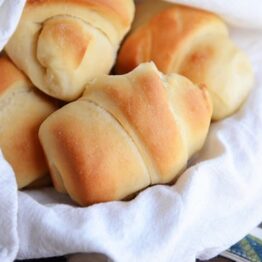
- To use immediately, shape the dough into rolls: cloverleaf (three balls each about 3/4-inch in diameter popped into a greased muffin tin), crescent (divide the dough into thirds and roll each section into a 10- or 11-inch circle, brush with butter and cut into 8 or 12 sections and roll up), classic dinner rolls (about 2-3 ounces of dough rolled into a taut ball and placed in a 9X13-inch baking dish or on a large baking sheet). Cover the rolls with greased plastic wrap and let rise until double, about an hour or so.
- Bake at 375 degrees until golden and baked through (exact time will depend on shape; for cloverleaf about 11 minutes, crescent about 15-16 and dinner rolls about 16 or so).
- For refrigerated dough, pinch off the desired amount and shape. If the dough is really cold and hard to work with, let it rest covered at room temp for 30-45 minutes before shaping.
- Once shaped, cover with greased plastic wrap and let rolls rise until double in size, 2-3 hours (dough taken from the refrigerator will take longer to rise since it's been chilled) and bake with the above instructions based on shape.
- Remove from the oven and butter the tops, if desired.
Notes
Buttermilk: I usually don't plan ahead and get the buttermilk out of the refrigerator to come to room temperature so I pour it into a liquid measure and microwave it for 45 seconds (all microwaves will vary a bit) and then give it a good stir to get rid of any warm spots. Here is a guide for making your own buttermilk.
Measuring the Flour: as with all yeast doughs, I never use the flour amount called for in the recipe as a hard fast rule (unless a weight measure is given and then I pull out my kitchen scale). Because humidity, temperature, altitude and a multitude of other factors can impact how much flour you need in your yeast doughs, I always judge when to quit adding flour by the texture and look and feel of the dough rather than how much flour I’ve added compared to the recipe.
Tutorial: this tutorial on yeast may help identify how a perfectly floured dough should be.