DIY Vanilla Extract {With a Free + Cute Printable Label}
Homemade Vanilla Extract {With a Free + Cute Printable Label} plus lots of tips on what type of beans, jars and other supplies to use!
You might be wondering what business I have posting a tutorial for homemade vanilla extract in March. But if you ask me, it’s the perfect time to start thinking about the delicious nectar that is homemade vanilla.
Plus, we are in between holidays so I’m just helping you out so you aren’t bored. Ha.
The bonus is that homemade vanilla is probably one of the easiest things you’ll ever make in your kitchen (even easier than that grilled cheese sandwich you made for lunch) – the hardest part is waiting for it to actually become vanilla.
Because you need to plan on a couple months to let that vanilla bean + alcohol mixture actually work its magic, now is definitely the best time to think about it, especially since the longer it sits the better it gets (hello, Christmas gift-giving! done and done).
Let’s get started with the details!
FYI’s
–Storebought pure vanilla extract is usually about 35% alcohol (75 proof). I don’t want to get into all the ethics of whether or not you should or should not buy alcohol or drink alcohol or bathe in alcohol.
But if you use storebought pure vanilla extract at home, you are using alcohol, plain and simple. I don’t drink alcohol (nor do I bathe in it, if you must know) but I do buy it when making this homemade vanilla extract.
And if you’ve ever seen a fish out of water, that would be me in the liquor store; thank goodness for Bill, my liquor store associate who has taken me under his wing and is very gracious in his tutelage when I ask ridiculous questions.
-Homemade vanilla extract will almost always be lighter than storebought. This may be due in part because storebought vanilla extract often has added caramel color, but it also might be because the process used to make storebought extract is completely different, in most cases, than homemade (in extremely large batches, the vanilla beans are mashed and cut and pressed to exude the vanilla paste which creates a darker color in the finished vanilla).
My point is, don’t stress about the color. If it infuses for the proper amount of time, you’ll have amazing homemade vanilla no matter if it is lighter than what you are used to.
-There are about a million tutorials online for homemade vanilla. I’m basically adding my two cents today because a) free printable! and b) I’ve been making homemade vanilla this way for a while and it works great.
If you want to explore different alcohols, types of vanilla beans, etc, feel free to research out other methods online.
Vanilla Beans
You can use many different types of vanilla beans for homemade vanilla but the general thought is you don’t need to spend money on super expensive, prime vanilla beans.
Grade A or grade B beans will work; grade B beans are drier but the alcohol will plump them up just fine, and many people swear by them since they have a lower water content than grade A beans can and won’t water down the vanilla (but don’t try and use grade B beans for recipes where you need to split and scrape the vanilla bean; you’ll be pretty angry at the whole situation).
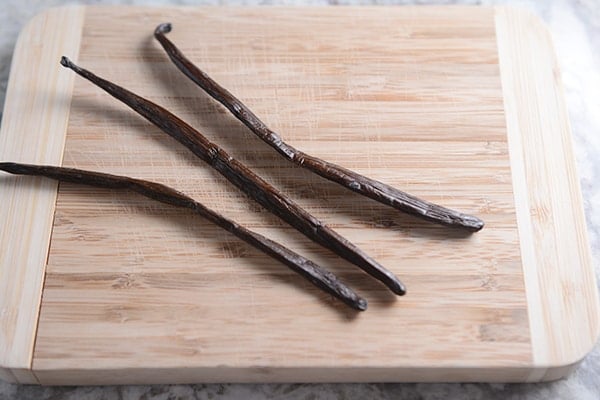
I most often use these vanilla beans from Amazon. They are actually quite plump (I use them for baking, too) but they have produced some seriously delicious vanilla extract.
Here’s an option for grade B beans which I’ve used with great results, too. If fair-trade, organic vanilla beans are what you are after, you might want to check out Beanilla, Mountain Rose Herbs or look at other similar companies online.
Alcohol
Like I mentioned above, you don’t need to buy the most expensive or highest proof alcohol out there. I’ve made homemade vanilla with both vodka and white rum. Both make wonderful extract and it really boils down to personal preference.
Vodka gives a neutral-flavored vanilla extract whereas the white rum tends to be a bit sweeter and more rum-tasting (obvs). I even got all wild and crazy once and made a batch with half vodka and half white rum. Of course I didn’t drink the stuff straight, but I kind of liked the end result in my chocolate chip cookies.
I use 80 proof vodka, whatever brand is the cheapest at the liquor store. For white rum, I usually pick up the Bacardi brand.
Jars
For Personal Use:
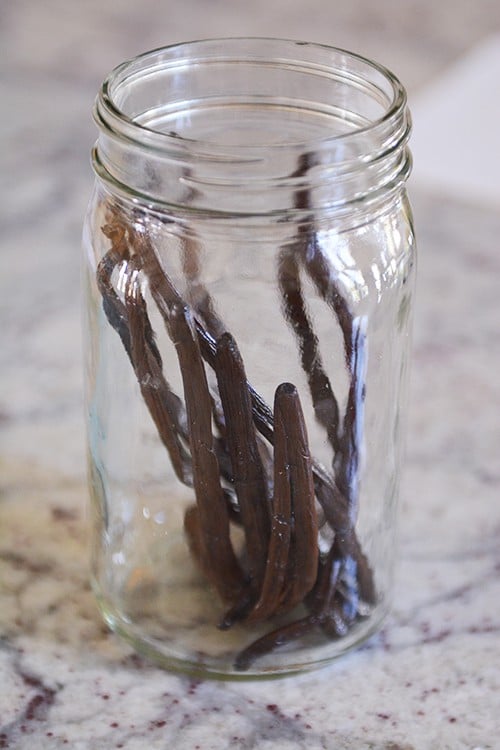
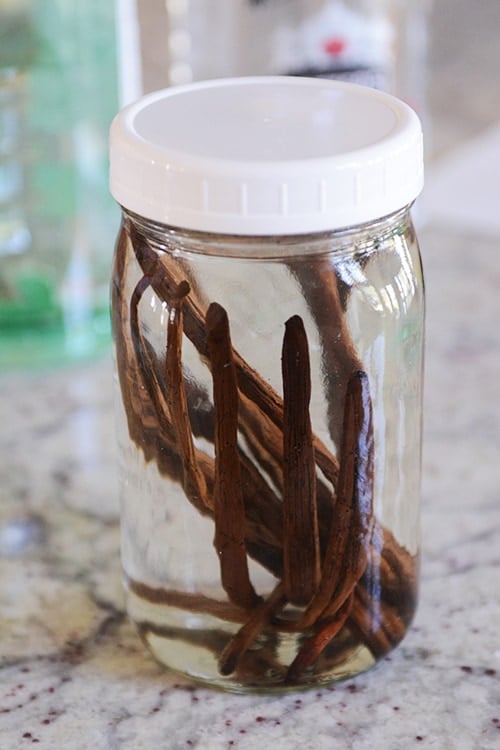
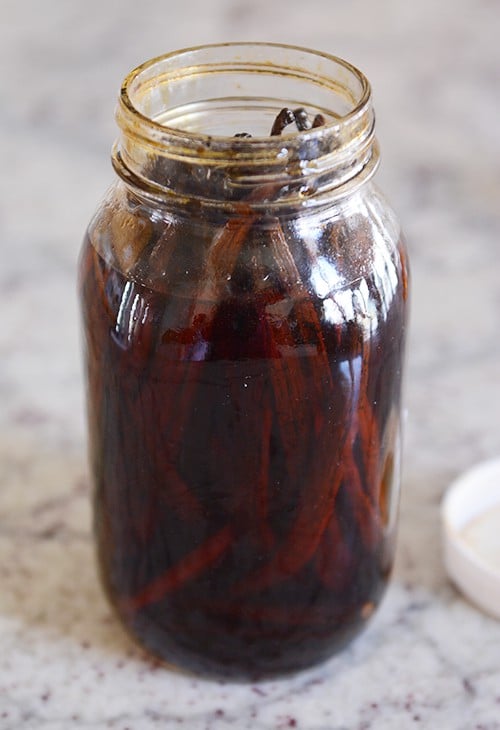
I make vanilla in wide-mouth canning quart-size jars and cap them with the handy dandy white lids. It’s much easier than pouring the alcohol or finished vanilla into tiny-mouthed jars, especially if you are using it personally and not giving it away in a cute jar.
When I use the vanilla for baking, I just dip my clean measuring spoon in the jar and get what I need (that’s the one downfall; pouring from mason jars is messy).
I keep two quart jars of vanilla in my pantry cupboard. When I finish one, I leave the vanilla beans in the jar and fill it back up with alcohol, usually adding a couple fresh vanilla beans, too, and slide it to the back of the cupboard. It has time to rest and do it’s thing (i.e. become vanilla) while I use up the other quart jar.
For Gift-Giving:
There are tons and tons of jar options online and I’m sure locally, depending on where you live.
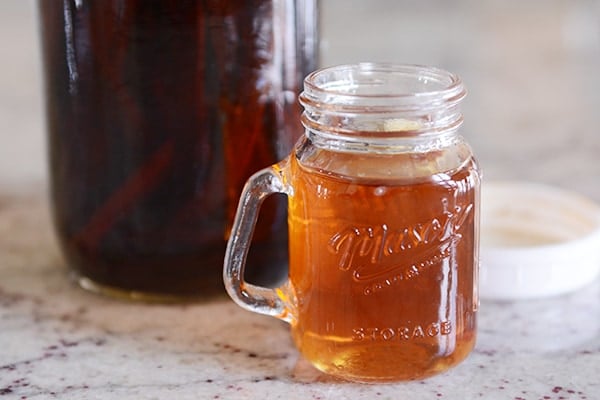
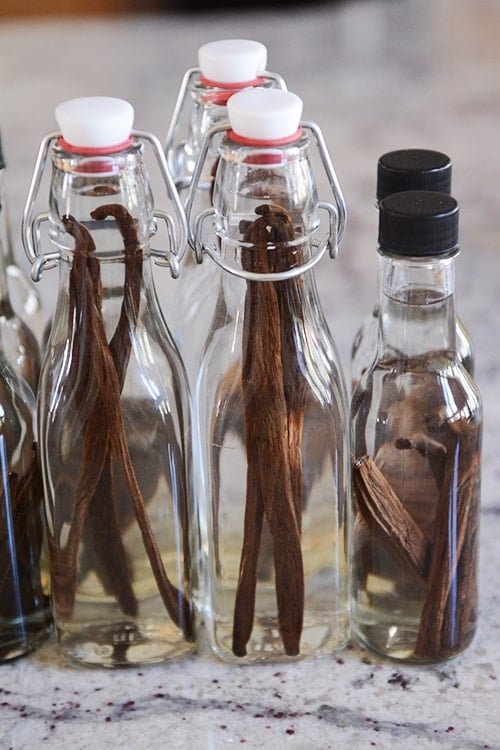
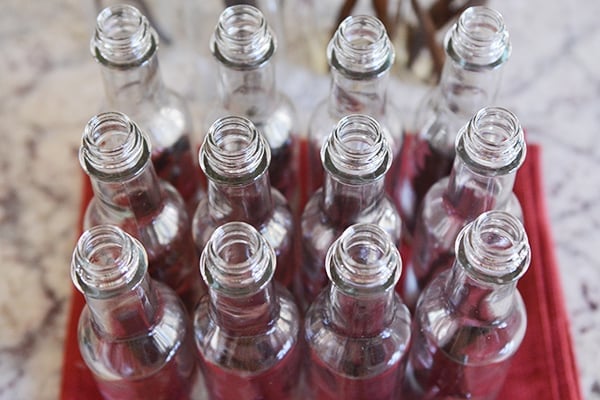
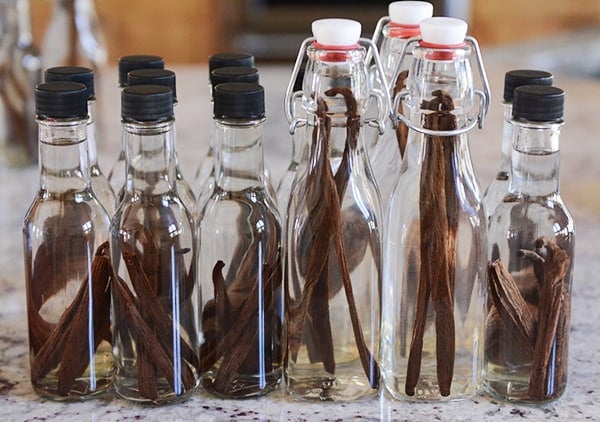
My favorite jars to use for gifting homemade vanilla are these 8.5-ounce beauties (the swing top lid adds a little something special) or the smaller 5-ounce jars (love the shrinking cap that goes on with the heat of a blow dryer; my kids think we’re a regular vanilla extract factory when we line these up and go to town shrinking caps).
The Process
Brace yourself…this is almost too easy.
First, decide how many vanilla beans you want to use per 8 ounces of alcohol. You’ll find ranges all over the internet – some claim one vanilla bean will do the trick (don’t listen to them) and others use upwards of eight vanilla beans (go ahead and sell your firstborn child to make your own extract). I’ve settled on a pretty good ratio that works for me:
4 beans for every 8 ounces alcohol
Increase or decrease the number of vanilla beans if you like to live on the edge.
For Personal Use:
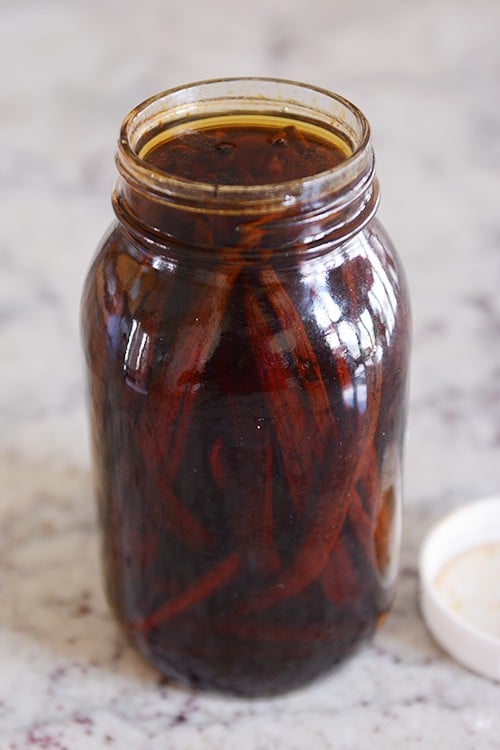
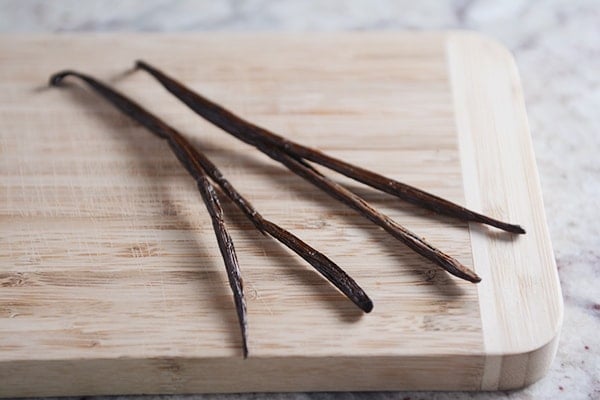
Using kitchen shears, cut up the middle of 14-16 vanilla beans about 1/2 to 2/3 of the way (you can chop them up if you want smaller pieces or have smaller jars) and put the vanilla beans in the quart jar.
Fill the jar with vodka (or whatever alcohol you are using). Try to make sure the beans are completely covered with alcohol to prevent molding/spoiling.
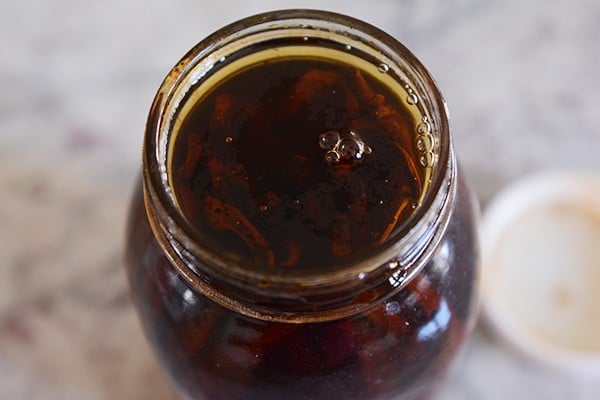
Cap the jar and put it in a cool, dark spot for at least six weeks but the longer the better (I shoot for about three months). You’ll know it’s ready when you uncap the jar and it smells, well, like vanilla.
You really can tell a difference when it turns from smelling completely like alcohol to developing a strong vanilla aroma.
For Gift Giving (two methods):
1) Follow the process above filling as many quart jars with cut vanilla beans and alcohol as needed (depending on how many gifts you’ll be giving).
Let the vanilla infuse for the allotted time (several weeks to several months) and then fill individual jars (like the ones mentioned above) with the vanilla.
If filling narrow jars, a handy dandy (super inexpensive) funnel like this will save lots of wasted vanilla running down the sides of the jars and/or bad words being directed at said vanilla.
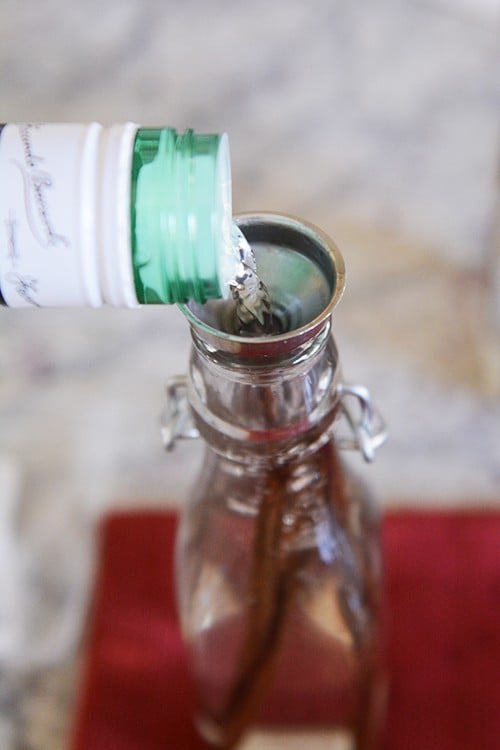
2) cut the vanilla beans as stated above (snipping about 2/3 of the way up the vanilla bean) and depending on the size of your individual jars, put the desired amount of vanilla beans in each jar (again, I use about 4 vanilla beans for every 8 ounces of alcohol).
Pour in the alcohol to fill (again, that funnel may come in handy), trying to cover the vanilla beans completely to prevent mold (if the jars are too short, I cut the vanilla beans in half), and seal the bottles.
Put the small jars in a cool, dark place and let the vanilla sit for six weeks or up to several months.
If giving the vanilla before it’s completely ready, consider adding a small note that lets your friend(s) know to let the vanilla sit for another month or two before using.
A Few Extra Notes
-I don’t know if this is really the case but after doing side-by-side vanilla experiments for the last couple years (for personal use and gift-giving), I think the mixture becomes vanilla more quickly (and has a stronger flavor?) when made in the quart jar versus assembling it in individual, small jars. I could be dreaming, but my very unscientific process has led me to this belief.
-If you want to give your homemade vanilla extract an extra dose of love, you can shake it up once or twice a day (and maybe even give it a little hug). I wish I could say I’ve done that but usually, I stick it up in a cupboard and forget about it. And you know what? It still turns into vanilla. Amazing.
-If you don’t want flecks of vanilla seeds, you can strain the vanilla through a sieve or strainer before using/giving (I think the seeds are pretty, personally).
-There are so, so many opinions, ideas, posts, forums, thoughts about making homemade vanilla. It’s easy to get lost down the rabbit hole that is The Best Way to Make Homemade Vanilla. Start somewhere and improve or change each time you make it! The fun of projects like this is finding your own perfect recipe.
-Last time I made vanilla, I tried to keep track of how much of everything I used – 50 vanilla beans made about 4 (8.75-ounce) jars, 10 (5-ounce) bottles and 1 (quart-size) mason jar.
And there you have it! Homemade vanilla!
If you are interested, here’s a cute printable you can use for gift giving. I print these labels on white sticker paper, cut them out, peel off the backing, and stick them on the jars I’m giving away (if you want to prevent smears from dribbling vanilla, you could cover the label with a large clear sticker or piece of packing tape). Click on the picture below to download the file.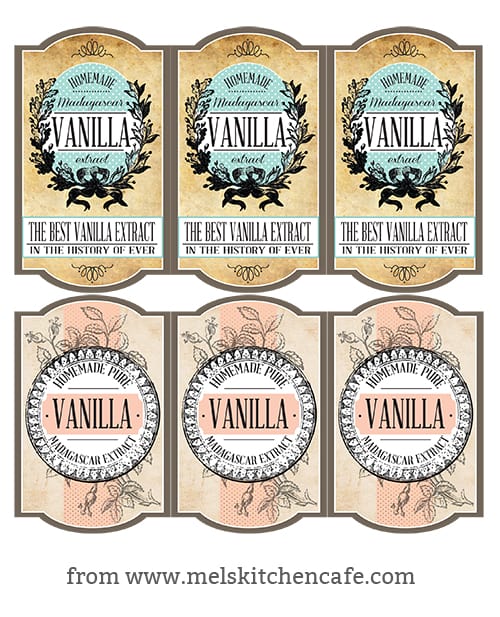
Please ask any questions below in the comments and I’ll get to them as soon as I can!
Disclaimer: this post contains affiliate links.
I have been making vanilla extract for years
now, there is much misleading information on how many beans to 8 oz of liquor. There are a couple of groups on FB, please look them up. There is a book with so much good truthful information, it’s called the art of extract making by Paul and Jill Fulton. Great book.
The correct ratio is 1 oz of beans to 8 oz of liquor. Light liquor takes about a yr and dark liquor is 12-18 or longer.
As far as “how many” beans, depends on the size of the beans. You must use a kitchen scale to weigh the beans to 1 oz. It could be 2 beans on up. I have had to use 14 beans before to reach 1 oz.
If you do not use the above ratio, you are just making colored liquor with very little vanilla flavor.
💯 % AGREE w/ Sandy!
It is irresponsible to give out bad information…U’r labeling says Extract when U’r not using correct ratios…What U R making is FLAVORED ALCOHOL….
U have no idea what beans someone is using…for example.
I had 7 Uganda Beans & they weighed @ 4.7 ounces….&
7 MadagascarBeans weighed @ .7oz ( not even 1 oz) so telling people buy what ever & use a # of beans is Bad info..
Correct Ratio is 1 ounce weighed beans to 8ounces alcohol..
Now the time line is way off also .. vodka take 12mo…
rum/ wiskey/ other booze takes 18-24mo. DON’T GO BY SMELL…
DO NOT TASTE OUT OF BOTTLE!
Always taste in sugar cube or hwc/milk w/ little sugar…It will always taste like booze cus that’s what it is…This is a journey enjoy!
If U want something Quick Look for a Good Vanilla Paste recipe!!!
Paste is now my favorite but I’v got lots of jars of vanilla extract going! The longer U let it set the happier U will B..it’s an amazing Journey down the 🐰 🕳!!!
Do you have to slice the beans lengthwise or can you roughly chop in half?
Slicing them releases more of the vanilla seeds, but yes, you can cut them in half (might take a bit longer for the vanilla to develop flavor).
if I make this in a quart jar. then put in a smaller jar for gifting, could I add a small piece of bean to the jar?
Sure
I would love to hear what recipes you prefer to use your rum-based-vanilla and which recipes you choose to use your vodka-based-vanilla!
I used your blog to make (and gift) a giant batch of vodka vanilla. This year I am planning on doing it again, but doing half my bottles with rum. I won’t have a lot of time to experiment with recipes before giving the vanillas away, so it would be so appreciated to have the expert scoop on what the differences are when it comes to taste in the final product!
I adore your writing and recipes, thanks for being a consistent presence in our kitchen 🙂
Thanks for all the comments and reviews on recipes, Jenni! As for the vanilla, to be honest, I just use the rum and vodka vanilla batches interchangeably. Yes, the flavor is different between them, but it just adds a delicious note to whatever I’m making (and I haven’t found that the rum vs vodka batches work better in certain recipes, if that makes sense). It’s been a long time since I’ve made vanilla with rum (or at all, vanilla beans were so expensive for so long!) but I should make some new batches this year!
So I made the Vanilla months ago to give out for Christmas. My jars have and orange residue on the glass at the top. Is that normal?
Hi Kim, I haven’t seen that happen before, so I’m not sure. Have you tried googling “homemade vanilla extract orange residue” to see if it’s something abnormal or not?
I love these labels. I have been making vanilla for awhile and have given some out with the promise a label will come soon. I just haven’t found what I am looking forward to. I am super excited. Is there anyway we can get an editable version? While this will work for my normal vanilla. I just finished a special vanilla for my co-workers this Christmas in memory of our founder. I wanted to personalize it to include his name.
I use cream port, ruby port, or Dubonnet (the red one) for soaking my beans and making my extract….much cheaper than vodka or rum, and there is an added smoothness and depth of flavour to the extract.