Cookie Dough Tins – A Simple How-To
What is better than a gifted tin of cookie dough – ready to be baked in an instant? Check out this post for a simple cookie dough tin how-to.
I love giving cookies as a treat/gift but at this time of year when friends and neighbors may or may not be overloaded with generous cookie plates and trays, what is better than bestowing a tin of cookie dough – ready to be baked in an instant – to them instead! This way, they can bake cookies as they want them and enjoy them even after the sugar craze of the holidays has passed.
Here are a few details to help you get started if you want to embark on this {simple} project:
First, decide what cookie dough to make.
Here is a list of cookies that I have frozen in dough form many, many times and which bake up perfectly after the cookie dough balls have been frozen. The important part is including details to bake the cookies for 2-4 minutes longer to account for the dough being frozen (more details on the labels below).
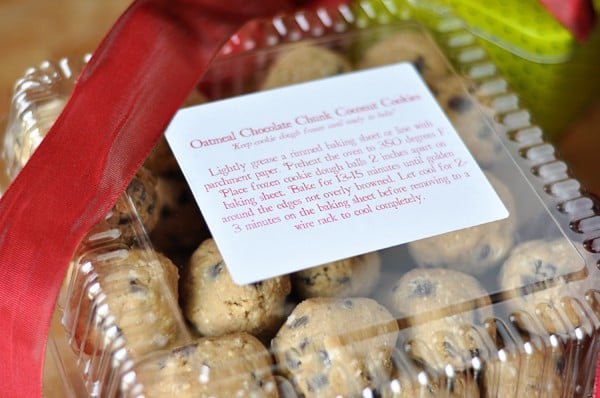
Oatmeal Chocolate Chunk Coconut Cookies
Classic Oatmeal Chocolate Chip Cookies
Oatmeal Coconut Chewies
Perfect Chocolate Chip Cookies
Peanut Butter Chocolate Chip Cookies
Decadent Double Chocolate Cookies
Whole Wheat Oatmeal Chocolate Chip Cookies
Monster Cookies
Second, make the cookie dough according to the recipe, shape it into balls and place on a parchment or wax paper lined cookie sheet, like so:
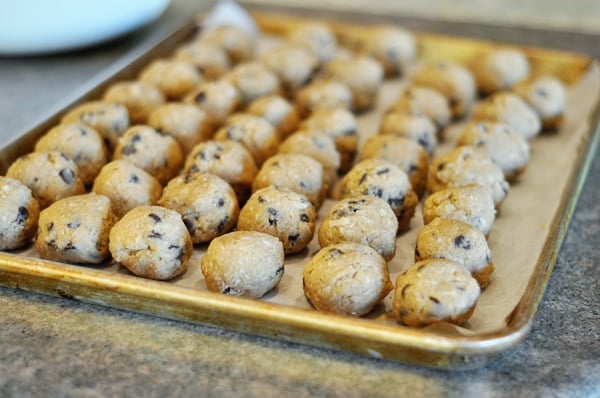
Lightly cover the tray and freeze until the cookie dough is very firm. At this point, you can either transfer to a freezer ziploc bag and place back in the freezer until ready to use or you can put the cookie dough balls into the trays/tins for your gifts.
Third, choose a container to use for gift-giving. Here’s what I found in my resesarch (refer to the picture below the details):
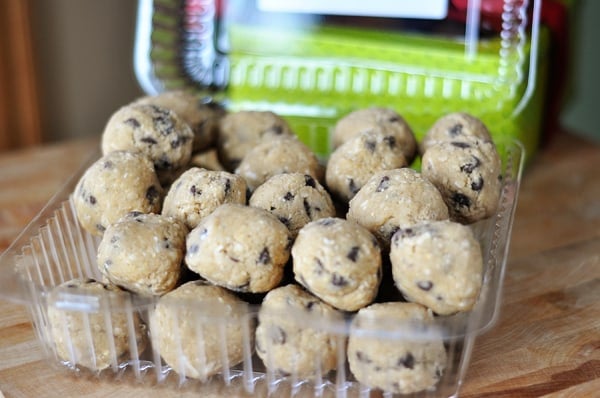
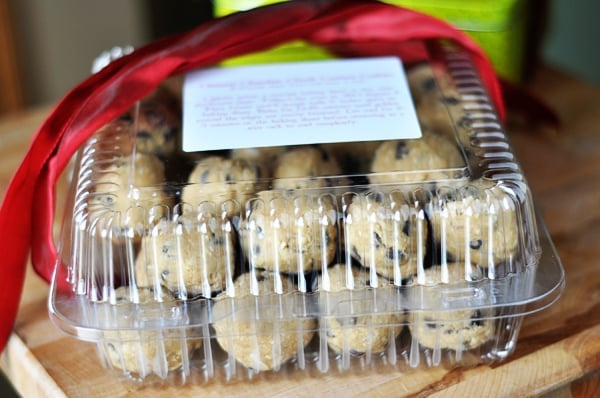
1) The simple, plastic deli containers can be had for very cheap (or free) at your local grocery store deli counter. My grocery store let me have up to 20 free, after that, I think they required 5 cents a piece. They can fit anywhere from 12 to 24 cookie dough balls. Granted, they aren’t airtight and the cookie dough probably wouldn’t fare well in the freezer packed in them for longer than a week or so, but they are economical and still dress up cute with a ribbon (plus you could always place the cookie dough balls in a freezer-safe bag first before placing in the container).
2) Simple, disposable tupperware-type containers are widely available now at most stores. These Rubbermaid containers with the black bottom and clear top also fit up to 2 dozen cookie dough balls and if I remember right, they were about $1.99 for 3 containers.
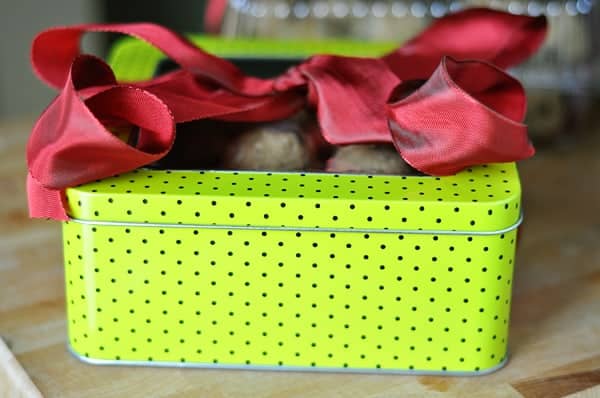
3) On the fancier end, you can pick up a variety of different tins from craft stores like Hobby Lobby or Michaels. This particular tin fit up to 2 1/2 dozen cookie dough balls (you could definitely include less, too) and ran me about $3.99, although you could buy it for much less using the widely available 40% off coupons. Cute, classy – but obviously the most expensive option on the list.

Fourth, fill up your chosen container with frozen cookie dough.
Close the lid and attach a label that gives simple instructions for storing and baking. Here is a Microsoft Word document with the labels I created, in case you want to use them (I used Avery labels 5164). There are so many adorable free fonts out there that you can customize the label to your liking. I used the St. Nicholas font, available for free here.
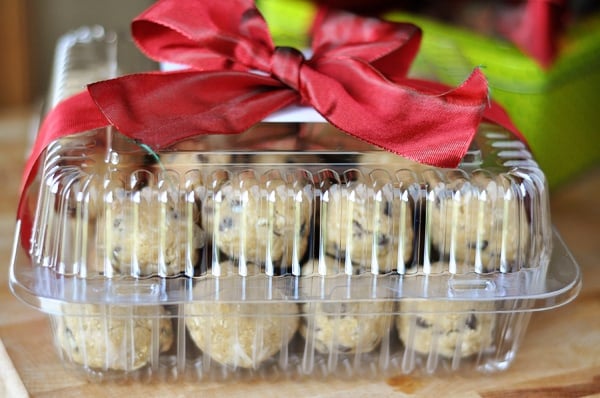
Fifth, grab some ribbon…
…tie it up precious-like and deliver!
I have just stumbled across mel’s kitchen site. Oh my gosh. I love it already. Mel you are creative witty and down to earth.
Was looking at chocolate chip cookie recipes. Can wait to make yours
Thanks, Patricia!
Have you tried the thin crispy oatmeal cookies? Do they work as well as the others?
I haven’t tried those ones for this type of project/gift, Stacy but I think they should work just fine.
What a great gift to give or receive. Thanks for the great idea!
Such a cute idea! I’m going “green” this year so I’m upcycling containers for these!
Great idea! Excellent playdate treat or hostess gift or neighbor gift – Thanks Mel!