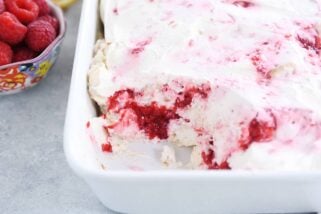
No-Bake Berry Yogurt Cheesecakes
Get this recipe for no-bake berry yogurt cheesecakes! These little cheesecakes are no-bake. They’re creamy. They’re completely luxurious. And they are lightened up.
Cheesecake is notoriously indulgent. I should know since I have made, eaten and thoroughly enjoyed it in its most decadent forms.
But today, I’m seriously happy to be giving you a cheesecake dessert that won’t make you hide the spoons in order to avoid the temptation. Not that hiding a spoon would stop me from figuring out a way to still partake, but that’s just me.
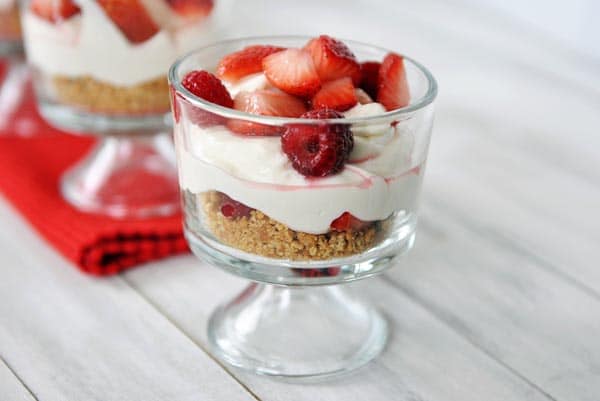
These little cheesecakes are no-bake. They’re creamy. They’re completely luxurious. And they are lightened up, both in calories and texture, by using low fat vanilla yogurt.
I was thrilled with how this dreamy concoction turned out; an experiment to use up the lowfat Greek yogurt sitting in my fridge. Not enough yogurt to split evenly but just enough for the kids to argue about meant that I needed to solve the conundrum by either eating it myself (and causing widespread tears) or use it up in a way that could satisfy everyone.
The kids are so used to homemade yogurt, poor souls, that when actual, plastic-tub yogurt enters the fridge, they completely lose their minds in excitement. Kind of like their reaction to seeing white sandwich bread. Have I mentioned we need to get out more?
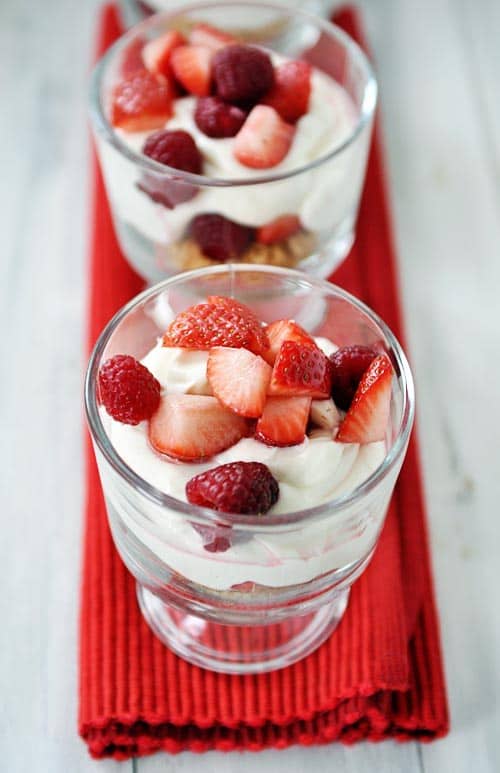
While these are perfect for the upcoming Valentine holiday (those red berries!), the last thing these cute little cheesecakes need is to be pigeon-holed into a holiday.
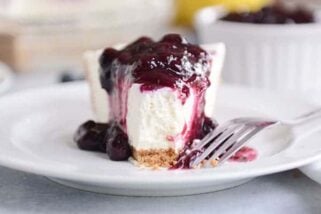
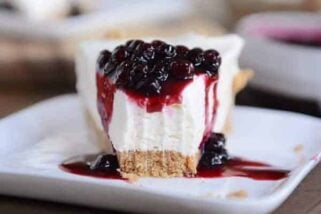
You could adapt the fruit to use blueberries, blackberries, peaches or any number of things, and eat this all year round. I love that each little spoonful holds the fabulous deliciousness of cheesecake with just a touch of restraint.
And speaking of love, I love-love that you can have this dessert ready to go in minutes.
PS: I’ve mentioned this before when I’ve pictured those mini trifle dishes, but in case you are wondering, I bought them years ago at Walmart (no haters, please) and have used them countless times for everything from rice pudding to no-bake Nutella cheesecakes. Love them.
One Year Ago: Black Bean and Sweet Potato Burritos
Two Years Ago: Homemade Fortune Cookies
Three Years Ago: Fruit Pizza
No-Bake Berry Yogurt Cheesecakes
Ingredients
Berry Topping:
- 16 ounces (454 g) fresh strawberries, washed, hulled and diced
- 6 ounces (170 g) fresh raspberries, washed and patted dry
- 1 teaspoon granulated sugar
Crust:
- 9 rectangular graham crackers, 1 sleeve of crackers, crushed into fine crumbs
- 4 tablespoons (57 g) salted butter, melted
- 1 tablespoon granulated sugar
Cheesecake:
- 16 ounces (454 g) light cream cheese, softened
- ½ cup (57 g) powdered sugar
- 1 teaspoon fresh lemon juice, just a squeeze
- ½ teaspoon vanilla extract
- 1 cup low fat Greek vanilla yogurt (see note)
Instructions
- For the berry topping, combine the strawberries, raspberries and sugar in a medium bowl. Give the mixture a good stir and let it sit for 10-15 minutes while the rest of the dessert is being made and assembled. The berries will macerate – which basically means the sugar will help the fruit become a bit syrupy while resting.
- For the crust, combine the crushed crackers with the sugar and butter; mix. Divide the mixture evenly among 8 (6- to 8-ounce) bowls, ramekins or individual trifle dishes and press lightly into the bottom of the dishes.
- For the cheesecake, in a medium bowl (or in the bowl of an electric stand mixer), beat the cream cheese and powdered sugar together until the mixture is very light and creamy, 2-3 minutes. Mix in the lemon juice and vanilla. Add the yogurt and beat until well-combined and fluffy, 30 seconds to a minute.
- Give the fruit/sugar mixture a good stir. Spoon a bit of the fruit mixture on top of each crust (keep in mind you’ll only use half for this layer; the other half will go on top of the cheesecake layer).
- Spoon an even amount of cheesecake filling on top of the fruit (about 1/3 cup or until all the filling is divided evenly among the dishes) and top with a spoonful of the remaining fruit.
- Refrigerate until ready to serve.
Notes
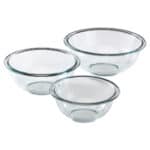
Recommended Products


Recipe Source: Mel’s Kitchen Cafe

I’ve been making these for our lake get togethers ever since Mel first posted it and it’s a favorite with young and old. They all get excited to see them coming out of the fridge. Would highly recommend.
Flipping fab, Mel!! Thank you so much! The only mod I made was to use vanilla yogurt. We all loved it!
I love lime cheesecake, do you think I could get away with adding lime juice/zest to this?
For sure! Would be delicious, I think!
Probably the best thing I’ve ever made. And it was super easy!
Do you know how many oz. your mini trifle bowls hold? I’m trying to figure out what size my individual dishes should be.
I think they are right around 6 ounces.
Hi, Mel! I’m newbie for cooking, only did one Orea Cheesecake few weeks ago. Just a question, this cheesecake is without gelatin powder, I was wondering it can keep it for how long? Cause I wish to make it on weekend and keep it until Monday for my breakie.. 🙂
Stephanielinli – This cheesecake probably won’t keep quite as well for that many days – it will taste fine but will probably end up a bit more watery than when it was fresh.
Mel these look so so good! SO good! I will be making them soon. Possibly tomorrow.
Can I cut the fruits, make the crust and cheesecake filling the day before, store all three separately in the fridge and just assemble the next day?
MJ – Sure, sounds like a great plan!
Because it’s healthier that means it would be great for my breakfast. Thanks Mel!
Loved this!!! I just put it in a pie plate and made a blueberry topping for it… my mini dessert cups were busy with the Nutella Cheesecakes 🙂 Yep ,, I made both !!! I’m so excited about this I can’t even tell you.. I Love no-bake cheese cake and these were both amazing recipes… I loved the yogurt in these berry ones.. I even used non-fat greek vanilla yogurt and… awesome !!! I need to hide more than the spoons.. !! So So yummy…Thanks Mel.
Love the pie plate idea, Helen!
Delish!
What a great dessert! Think these will make it on our Valentine’s menu! I’m making the Cuban street tacos and lemon cream pie for dinner tonight. Can you tell I love your recipes?
I never can print your recipes. Always come up Blank Page. Any suggestions? I have to copy and paste to word, and that is such a hassle.
Jenice – If you are using Internet Explorer, the recipes aren’t printing. I am working on the issue but in the meantime, a different browser should work great: Chrome, Firefox, etc. I’m sorry for any inconvenience!
This could be a sneaky and yummy way to get my cheesecake-loving husband to eat some greek yoghurt!
Oops! I meant to write tomorrow!
Mel, these look so delicious! My husband will be out of town this weekend so I think the kids and I will have a fun and yummy activity to do together! This has been such a great week of posts. Thank you and thank you for all that you do!
Hi Mel! This is my first comment ever but I just wanted to thank you for your blog. Since I discovered it several months ago I have made so many delicious recipes for my family. I am on here almost every day looking for new recipes to try! I made these berry cheesecakes for dessert tonight and they were so good! I halved the recipe but I wish I would have just gone ahead and made a full recipe – I might have to make some more tommorow! Oh, I only had plain Greek yogurt so I mixed it with some honey and vanilla extract to flavor it. I also used regular cream cheese and left out the raspberries. I just used small drinking glasses because it’s all I have and they still looked beautiful in them. And since I prepared it earlier in the day and didn’t want them soggy, I just topped the cheesecakes with the strawberries right before serving instead of layering them inside. Thank you again! I know I will be making this (and many more of your recipes) again!
Looks so good and such cute bowls! Thanks Mel!
These sound so cool, creamy, and refreshing. Love them and those trifle bowls!
I love cheesecake, and these little cups are so cute! You are right…these would be perfect for Valentine’s Day. I have seen those mini trifle dishes at Bed Bath ans Beyond, as well as Walmart. They really make a nice presentation!
I love these little dishes and love Walmart, too. They’re a good company and good to their people (regardless of the grumbling by a few unhappy ones).
Simple, yummy, and healthy! It doesn’t get much better than that.
Mmm this looks lovely!!!
A healthier way to eat cheesecake?! YES! This looks insanely delicious, Mel!