California Sushi Rolls {a How To}
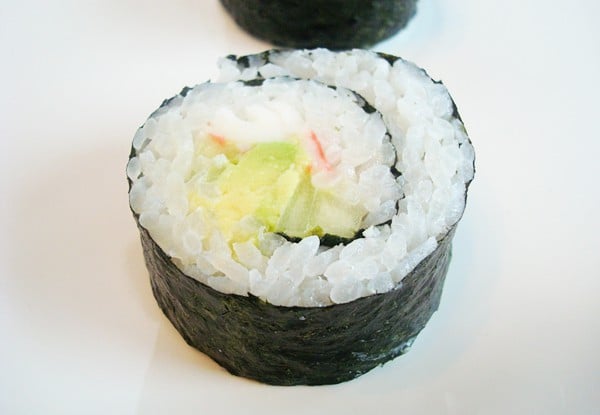
Yes, the ingredients are simple, but these California sushi rolls are awesome! Avocado, cucumber and crab rolled up in sushi rice and nori.
Disclaimer: I am not an expert on sushi or California Rolls. In fact, I probably fall in the category of unexpert. But I am an expert at eating them and happen to think they are some of the most delicious little morsels on the planet.
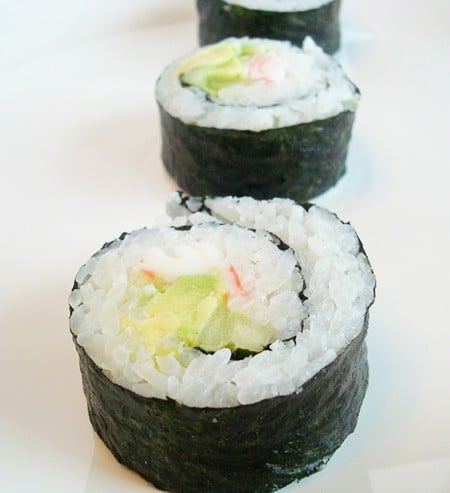
Since my friend, Melanie (who lives in Japan – essentially the sushi capital of the world, although I don’t know if this Americanized California Roll is widely ordered there), introduced me to the idea, I have made them countless times and thought I’d share my step-by-step process with you.
I keep my California Rolls extremely simple: avocado, cucumber and imitation crab rolled up in seasoned sushi rice and nori (roasted seaweed). You can get as crazy as you want (pickled ginger, anyone?) but I prefer the basics.
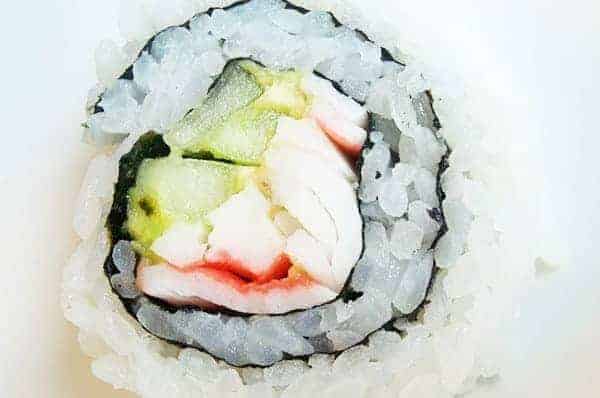
It took me some time to decide to try making these – I was skeptical I would like them since I had never even tasted one. I mean, seaweed? Really? But I’m hooked. And shockingly, so are my kids. They gobble these up like there is no tomorrow. Must be a genetic thing.
Even if you are a skeptic about making and/or eating these little beauties, I feel the need to pressure you into trying these.
Everybody’s doing it and I just know you’ll love them. Plus they are healthy and delicious, so it makes me an even better friend for sharing the how-to with you.
P.S. Did you know sushi does not mean raw fish (of which I’m not so much a fan)? Instead, it refers to the process or method of making a Japanese dish of seasoned rice topped with seafood and veggies. Sashimi is the term that officially officializes raw fish. And there’s your fact for the day (which you probably already knew).
California Sushi Rolls {a How To}
Ingredients
Filling:
- 4 cups cooked and prepared sushi rice, recipe follows
- 2 large avocados, cut into long, thin slices
- 1 large cucumber, peeled and cut into long, thin slices
- Imitation crab meat, cut into long, slender slices
Supplies:
- Bamboo mat, for rolling
- Plastic wrap, for covering the mat
- 4-5 sheets nori, large squares of roasted seaweed – should be dark, dark green, nearly black, in color
Sushi Rice:
- 2 cups sushi, short or medium grain rice (do not use long grain rice)
- 2 cups water, plus extra for rinsing rice
- 2 tablespoons rice vinegar
- 2 tablespoons sugar
- 1 tablespoon kosher salt
Instructions
- Place the rice into a mixing bowl and cover with cool water. Swirl the rice in the water, pour off and repeat 2 to 3 times or until the water is clear.
- Place the rice and 2 cups of water into a medium saucepan and place over high heat. Bring to a boil, uncovered. Once it begins to boil, reduce the heat to the lowest setting and cover. Cook for 15 minutes. Remove from the heat and let stand, covered, for 10 minutes.
- Combine the rice vinegar, sugar and salt in a small bowl and heat in the microwave on high for 30 to 45 seconds. Transfer the rice into a large wooden or glass mixing bowl and add the vinegar mixture. Fold thoroughly to combine and coat each grain of rice with the mixture. Allow to cool to room temperature before using to make sushi or sashimi.
- In order to cool the rice quickly, it can be spread out on a large rimmed baking sheet and can be alternately folded and fanned (a file folder works great for fanning!) until it is cooled to room temperature. As my friend Melanie likes to repeat while doing this process: “fan and fold, fan and fold.” It is therapeutic. When the rice is completely cooled, lay a damp towel over it to prevent it from drying out.
Notes
Recommended Products
To assemble the California Rolls:
*I’ll start by showing you how to make a California Roll with the rice on the outside – and then at the end, I’ll show a quick reverse if you like the seaweed on the outside. Easy peasy, lemon squeezy, as my five-year old would say.
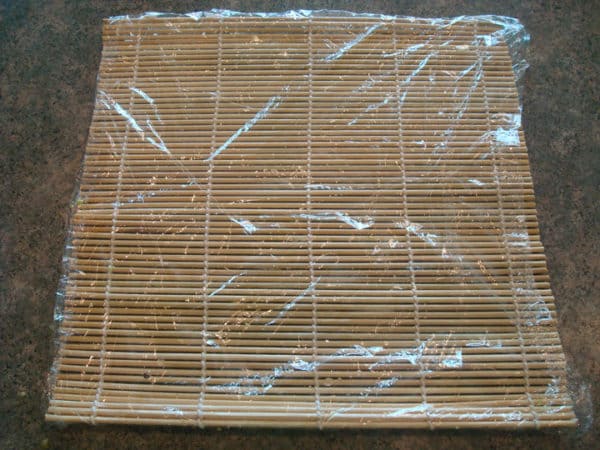
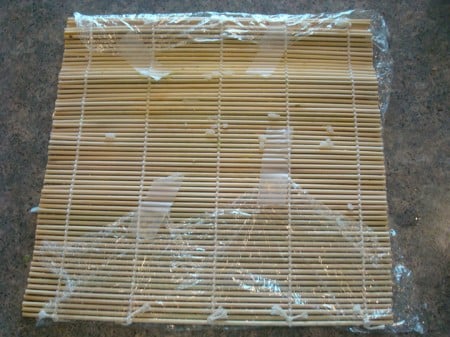
Take your mat and place a piece of plastic wrap over the top, leaving about 2 inches on each side to tuck under and tape on the back.
Like so. This will prevent rice from getting stuck in all of those tiny little openings. And trust me, you will never make these again if that happens and you have to clean it out.
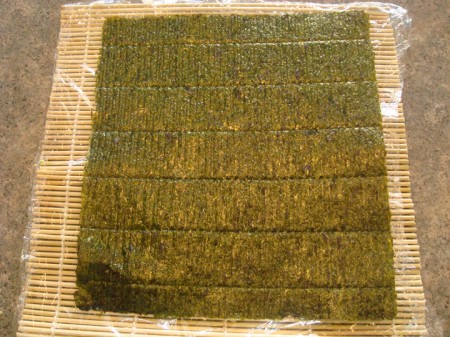
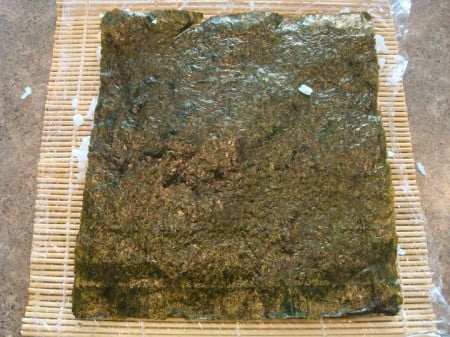
Now flip your bamboo mat back over and take a piece of that deliciously dark nori and place it on the top of the bamboo mat.
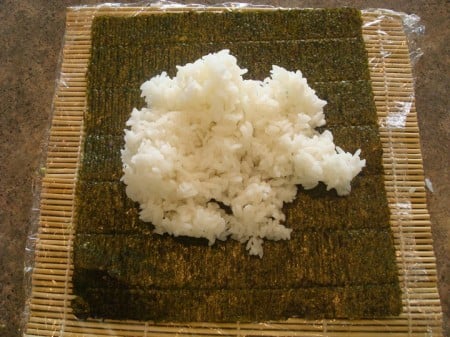
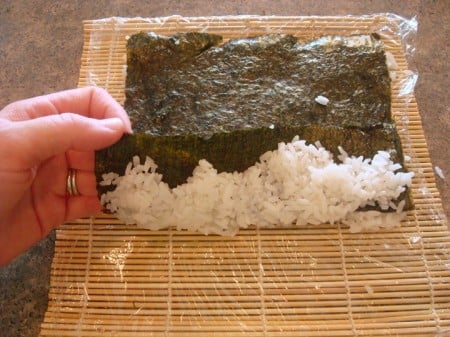
Grab a handful of the cooled sushi rice (um, maybe about 1/2 cup or so) and plop it on the center of the nori.
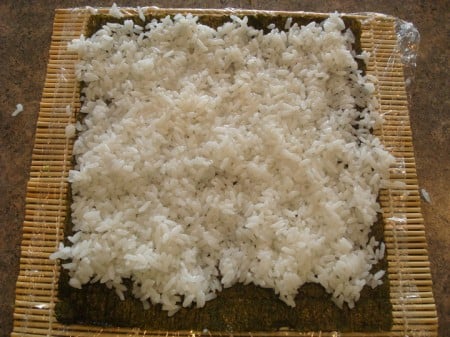
Using dampish-wet hands, spread the sticky rice to the edges of the mat, leaving a slight margin on the side closest to you, to help with sealing.
Gently grab the nori and flip it over so the rice is on the bottom.
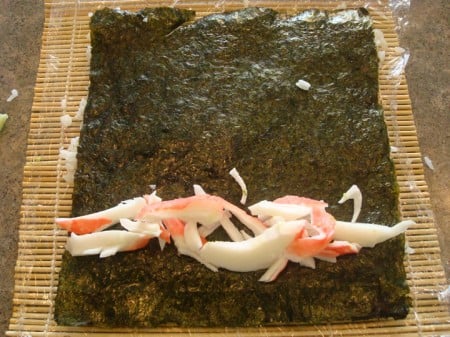
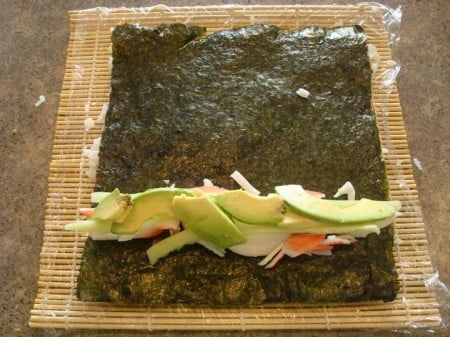
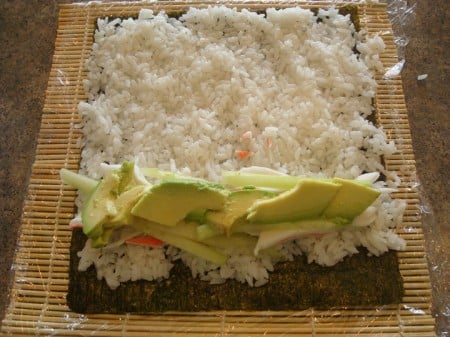
Now we get to start layering all the yummy goodness that gets rolled up inside the roll. First, the crab. Place it in somewhat of a line near the side closest to you (can’t tell if you would refer to that as the top or bottom so I will try not to be confusing), leaving about a 1-inch margin to help with the rolling.
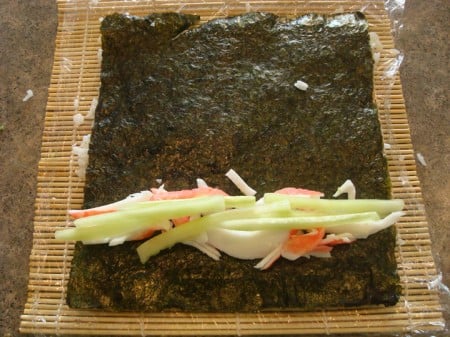
Now the cucumber. Right on top of the crab.
And finally the avocado. My personal favorite. I think I may have overdone it on the ingredients in these pictures, a bit, so make note of that. I’ve heard and read that you should exercise caution at not overloading the roll – the more filled it is, the harder it will be to roll up.
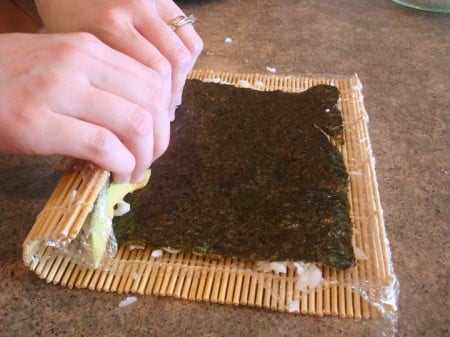
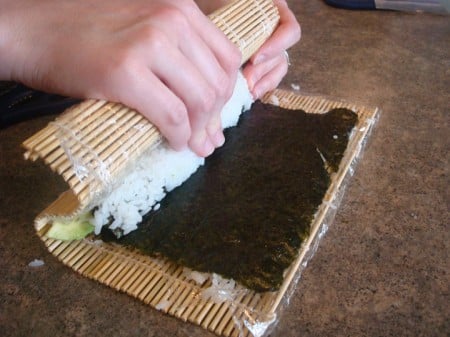
Now comes the fun part. It may require some deep breathing, but I promise, with practice, it will be easy as pie. Begin by gently lifting up the edge of the mat closest to you and folding it over the roll, like so. Gently use your fingers to press the crab, avocado and cucumbers back towards the mat so they stay compressed and don’t become loose.
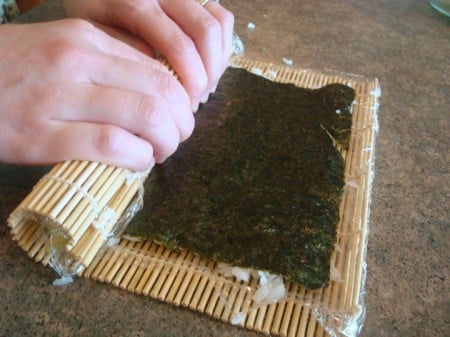
Continue folding the mat over, pressing tightly the entire time until you have tightly rolled it to the point that the bamboo mat can’t keep rolling or it will fold over on itself (and you don’t want to roll up the bamboo mat in the roll, obviously). See what I mean in the picture below?
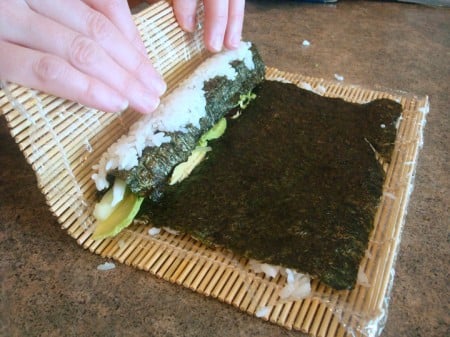
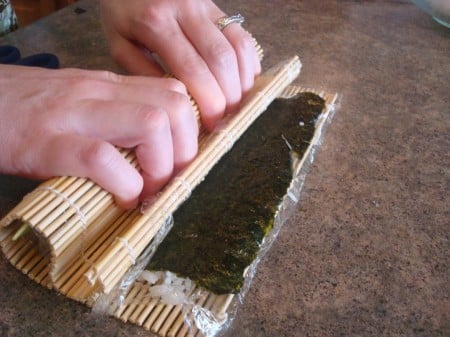
Gently unfold the mat, leaving the roll tightly tucked, and grab the bamboo mat straight up to reposition it to start rolling again.
This time, you’ll again bring the bamboo mat over the roll, rolling it further while pressing the bamboo mat tightly into the roll with your fingers.
As you do this, the bamboo mat will have some overhang in front of your fingers, but that’s the sign that your California Roll is rolling up nice and tight.
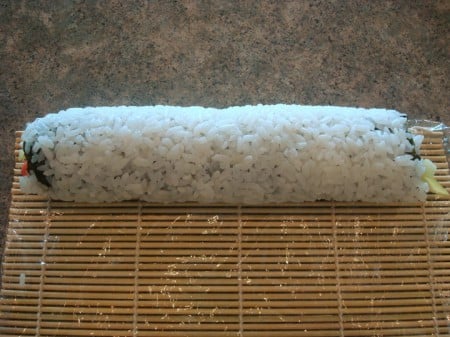
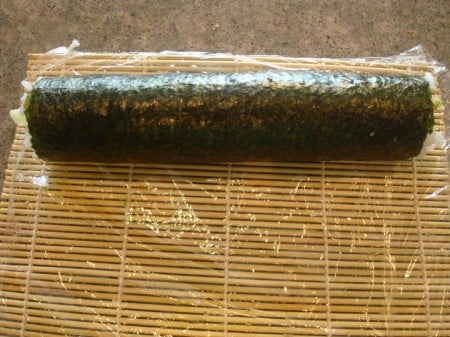
Continue this process of rolling, lifting up the bamboo mat and repositioning and rolling again, until you have reached the end of the mat and the sushi is tightly and completely rolled. At this point, wrap the bamboo mat around the roll and give it a final hug with your fingers so it is firm and evenly rolled (not too hard, though, or you’ll crush it to death). Now give a big shout of hallelujah and try not to stuff the entire roll in your face. The roll can be rolled in plastic wrap and refrigerated until ready to serve.
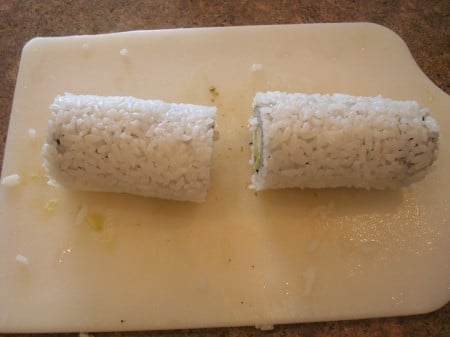
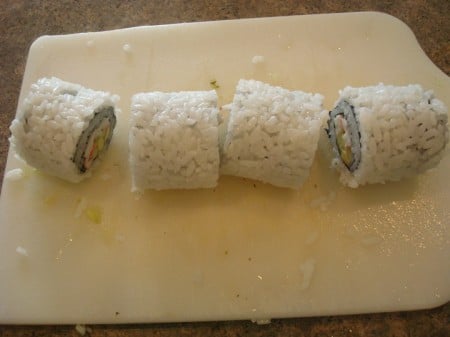
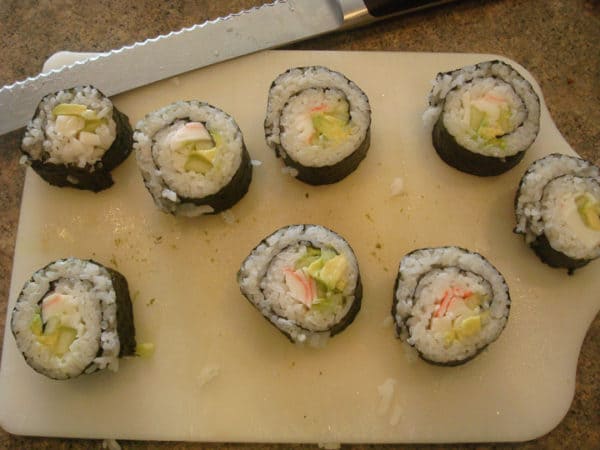
If you want to serve them right away, transfer the roll to a cutting board and cut in half.
Then eighths – you get the picture. And have I mentioned…try not to stuff your face full of the California Rolls – I still need to show you how to roll it up with the nori on the outside.
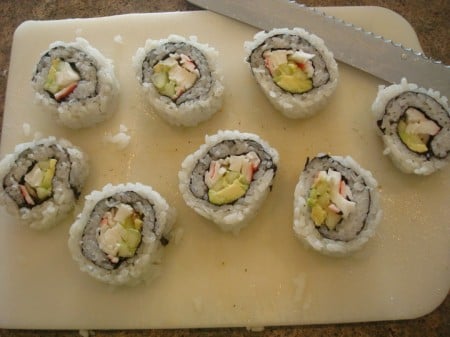
This time, after you have pressed the rice to the edges of the nori, DON’T flip it over. Instead, all the ingredients will be layered on top of the rice and rolled up.
Roll as explained above until the roll is tight and finished.
Slice and serve! Oh yeah, and try not to shove every single last piece in your mouth.

Could a silpat May work instead of a bamboo mat?
I haven’t tried that, but you could definitely experiment. I think the rice would stick to it without something in between.
Hey, Mel.
I’m missing a crunchy ingredient that I’ve noticed in some sushi restaurants.
Is it sesame seed, fish eggs…any ideas?
It could probably be a wide variety of things! Sesame seeds would be a good start!
Thanks Mel.
I don’t like imitation anything, so I used jumbo shrimp. My wife decided she would stay with me a little longer!
Thanks for the rolling tips, but I need to know… shiny side of the nori filling side or outside?
Thanks again!
I don’t know that it matters on the shiny side but I usually do shiny side out.
Made these tonight for New Years Eve 2020! It took a few rolls to master the technique but rolls 4 &5 looked professional.
This look amazing! I love sushi so much!
I’ve been making sushi for dinner almost once a week for dinner. I used ready made store bought sushi seasoning powder or sushi vinegar to season the rice. Fillings which I’ll always have are mayo tuna, cucumber, scramble eggs, avocado and imitation crabmeat sticks. I’m using the second method which is placing the rice and all my ingredients on top of the seaweed to roll my sushi.
Hi Mel, I’ve made these before and they turned out really well. I want to make them again for my Mom’s birthday. I am having about 10 people over and I’d like them to be sort of the appetizer. What should I serve as a main course? I’d like to stick with asian flavors, but it need to be soft since my mom has issues with her teeth and since the rolls have so much rice I want to avoid more rice. Thank you
What about doing a beef and broccoli dish or sweet and sour chicken? Both of those are delicious enough to stand alone (without needing more rice). You could also do some type of Asian soup?
I second the gallon sized ziplock bag usage! No need to tape the plastic wrap! Just put the entire bamboo mat inside.
Tried sushi making for 2nd time and family loved it thanks for the tips on homemade sushi
Thank you Mel for making something that seemed pretty hard to me – quite easy! My first roll was a bit dodgy – but after that I got the hang of it and it was actually pretty fun! I tried both versions – one with rice on the outside and one with the Nori on the outside and had it with Japanese spicy mayo and it was rather delish! I even took a picture of it and posted it on Facebook (which I have never done with any food I have cooked), because, well, I was so impressed with the results! Thanks so much!
That’s awesome, Melissa! I love making these because the sheer presentation makes me feel like a rock star. 🙂
Well apparently all Nori isn’t created equal. I envisioned myself snacking on these morsels all afternoon, but my first bite was my last. The nori I bought had such an overpowering “fishy” taste that I started to quiver while chewing it. I am so traumatized by the nasty nori that I am scared to try again. California rolls are my favorite: I will literally go to a Chinese buffet and only eat plate after plate of these. They obviously don’t get their nori from Cub. Well, I can say that I tried. Thanks for the great tutorial.
I spied these under the gluten free tab, but imitation crab is a hidden source of gluten. Almost every kind I have ever seen has wheat in them.
Ah, thanks for the catch, Clare!
I did use my rice cooker for the rice, works great. Loved the step by step pictures, very helpful. This is my first time making this style of roll and they turned out fab. Thanks.
I’m going to try making these soon but I was wondering if you have ever cooked the rice in a rice cooker? Also, have you made any other type of rolls that you would LOVE to share the inside fixings with us? 🙂 I’m going to try a breaded shrimp one and maybe if I get really adventurous a spicy tuna but was wondering if you have found a recipe that you really like.
Hi Keri – I’ve never made the rice in a rice cooker but I think you probably could. We haven’t gotten too crazy with fillings…we love these so much that we usually just stick with them!
You’re right. We do not have California Rolls in Japan. But when I lived in California I tried them and will make them for friends here. I love avocado and will usually splurge for one when I want to make these….since it costs about $2 USD for one avocado here!! I like to sprinkle toasted sesame seeds on the rice before flipping it over to make the inverted roll.
And for the pregnant lady…imitation crab is not crab at all. It’s made from fish.
I have been wanting to make sushi for a long time and finally did when I found this tutorial on Pinterest! I could not have been easier. I am pregnant and am not sure if I can eat the crab. So I used frozen shrimp and cooked them in a skillet. Then they got chopped up really fine in my mini food processor.
Instead of the plastic wrap, I put my bamboo mat in a gallon size plastic ziplock bag. Worked like a charm with no tape needed!
My husband loved it as much as I did. Tasted just like we get from a restaurant, and was much much cheaper!
I made this last night w/ my boyfriend. Came out great. I ate the left over this morning.
Mel,
I just discovered your website and can’t wait to start cooking some new things! We have attempted (!) sushi in the past but could never perfect the rice (seriously, it was so bad I contemplated a “sushi salad” instead). Thanks for the great recipes!!
This makes me hungry for sushi! My friend from Japan taught me how to do this too, and she uses “Press-n-seal” plastic wrap and it holds itself to the bamboo map and you don’t have to fuss with the tape. Thanks for the inspiration, I love all of your recipes!
This look amazing!! I’m going to have to try this!! I came across your website today and I have been drooling over all of the yummy food!! 🙂
Oh my gosh! This looks so good! I really want to consider giving this bad boy a try! This is so going on my ‘to make in the near future’ list.
These are exactly the way I make them 🙂 I learned at a class at Johnathan’s Cupboard in Appleton Wisconsin (now closed). My international student (from South Korea) told me to run my knife under really hot water before cutting them and it works like a charm!!!
Elizabeth – love this tip! Thank you!
I’m finally catching up on all the recipes I’ve missed during our move. Your sushi tutorial is perfect and my mouth is watering. I agree, simple is best. . . along with a slice of pickled ginger.
(And can you always refer to me as your friend from Japan so I can feel special? Friend from Seattle just doesn’t have the same ring to it!)
just made it- delish! thanks for yet another great recipe!
Thanks Katie!
So proud of you for making sushi rolls. Dan and I make it all the time but use fresh salmon or tuna! We actually just made it on Friday night…so yummy!!!
I made these last night and felt very fancy! the family loved them and the recipe made a ton! thanks so much for a recipe that I was too scared to try — but to all those who are thinking— maybe. . . go for it! it was easier than I thought and delish!
idahomichele – oh, I’ve been waiting to hear if someone tried these! Thanks for letting me know. I always look forward to your comments and I’m excited that you liked this recipe and that it wasn’t too hard!
Ok. question on sushi rice. do I need to have “sushi rice” or can I use any short or medium grain rice?
idahomichele – I usually buy short or medium grain rice (only a few times have I splurged on the real sushi rice).
Thanks a lot for showing us these step by step pictures!One can see that you take great care with your recipes because you want us to experience the same enjoyment that you and your family experienced! These look delectable!
I’m SOOOOOOOOO addicted to sushi and maybe now will attempt it at home – thanks for the tutorial! Do you have any advice for making spicy tuna? What is the secret there? [Or do you know where I can find out]?
Hey Melissa – I couldn’t even begin to help you with the spicy tuna issue but I bet if you googled it you could find some great info.
If you can’t eat avocado (allergy), is there something that could be substituted that would be equally as good? I want to try to make them, but would have to pass on the avocado…..an alternate sushi? thanks
eydie/shebrews – I think any other vegetable you like could be subbed – like green or red peppers. I’ve also heard of some people putting in a layer of cream cheese. That could sub for the creaminess of the avocados.
I definitely love sushi! Yours looks great!
By the way, I just featured My Kitchen Cafe over on my on cooking blog http://www.heatherskitchenconcoctions.com. Thanks again for the great blog and recipes!
Great ‘how to’! I just might have to take a stab at making my own sushi!
I bought them at Easter to serve as an appetizer. They are quite addicting! I definitely will be following your precise tutorial and make them on my own. Thank you for all of the wonderful recipes you share.
marvelous tutorial, mel (can i call ya mel?)! i’m in no way a sushi lover, but it’s good to know how it’s done for future reference. 🙂
Awesome! I am planning on making tempura next week so maybe I will add sushi to the menu. I think my older girls would think it was fun to help make them. Seriously, you are awesome.
Great tutorial, I’ve wanted to make sushi – I’m only afraid that no one in my family will eat it if I do!
We’ve made California rolls at home before but never with the rice on the outside. I think we’re going to try that soon, thanks to your tutorial!
I thought it was funny you kept warning not to shove every piece into your mouth because the last time I made sushi at home (about 5 years ago) I seriously could not stop eating it and made myself sick. Since then I have not wanted to make it b/c I recall that sick feeling! I like the ingredients you use here–very simple. (And I adore imitation crab!) I think I may have to break out the sushi mat again!
These look awesome! I actually just learned these techniques the other night from a Japanese friend of a friend & you are spot on (as usual) w/ your instruction etc. so thanks for sharing!
Dee – thanks for chiming in. Since I am totally not fit to be giving a sushi tutorial, I’m glad it at least lined up with what you learned!
I’m like you, only mild California rolls for me. My daughter is a little more adventurous with her seafood. Do you use any wasabi or dipping sauce, or do you just eat these little beauties straight up? I’m excited, I’ve never tried these at home. I think I’ll head out and pick up a mat!
Cammee – when I say I’m boring, I mean I’m really boring. I don’t dip mine in anything. Wasabi scares the beejeebers out of me. So if I’m feeling extravagant, I’ll mix a little soy sauce with rice vinegar and a bit of sugar and use that. But usually I just pop them in plain. It’s faster that way. 🙂
Seriously…is there anything you can’t do? I’m not a huge fan of sushi, (I know…gasp!) but these look beautiful and tasty! Love your blog 🙂
Beautiful rolls! I live in a suburb of Tokyo, the sushi capital of Edomae sushi. I always look forward to visiting your kitchen care for wonderful American home cooking, but today, I learnt how to make a roll with the rice on the outside from you step-by-step. I’m especially impressed that you rince rice. That’s the way Japanese do! Thanks Melanie.
Thanks, Akiko! So nice to hear from you.
okay i’m so excited that you finally posted something that i’m all like “oh yeah, i already know that, i already do that…yay me” about. makes me feel somewhat like less of a kitchen shmuck…since every day you show me something or tell me something i didn’t know. so yes, today i am feeling secure in my kitchenness. (just go with it, i like to make up words)
i used to make these alllll the time. but, (UN?)fortunately we have all ‘graduated’ beyond the california rolls and onto the fishy deliciousness that we have grown to love. so now we go out for sushi as opposed to eating it at home daily like we used to. {{lol}}
my 11 year old is addicted, and i do not use the term loosely…to raw fish, i swear. we used to always order a few rolls to share and now he gets his own…cuz it’s overload for me…funny huh?!! when we were in new york in march, he actually ordered sushi with a big hunk of eel all across the top of it. i *gagged* silently. hubby was a sport about it and tried a piece at my boy’s insistence. hubby then turned to me and *gagged* silently.
oh yes. we love us some sushi. thanks mel!!!!!!!!!!!!!!!!!!!!!
~xoxoxoxoxox!~
mia – for real? Your son is an animal. I can’t believe that. Truly. He’s much more brave than I am!
I’ve always been afraid to try my own, but now I’m feeling slightly more brave. Time to hit the Asian market I say.
I’m craving these now!! My problem is that I can only eat a couple, but I think that has more to do with the mayo that usually comes on them (I’ve got a problem with slimy textures).
Oh, and bring on the pickled ginger–so good!!
Fabulous tutorial, Melanie!
Great step by step! You make it looks incredibly easy!
Wow, this is incredible. I have never made rolls at home because I am so intimidated, but I guess it isn’t too hard!
WOW! What wonderful step by step photos, Melanie! Thanks for taking the time to share you passion for cooking with us! 🙂