Divine 1-Hour Homemade Breadsticks
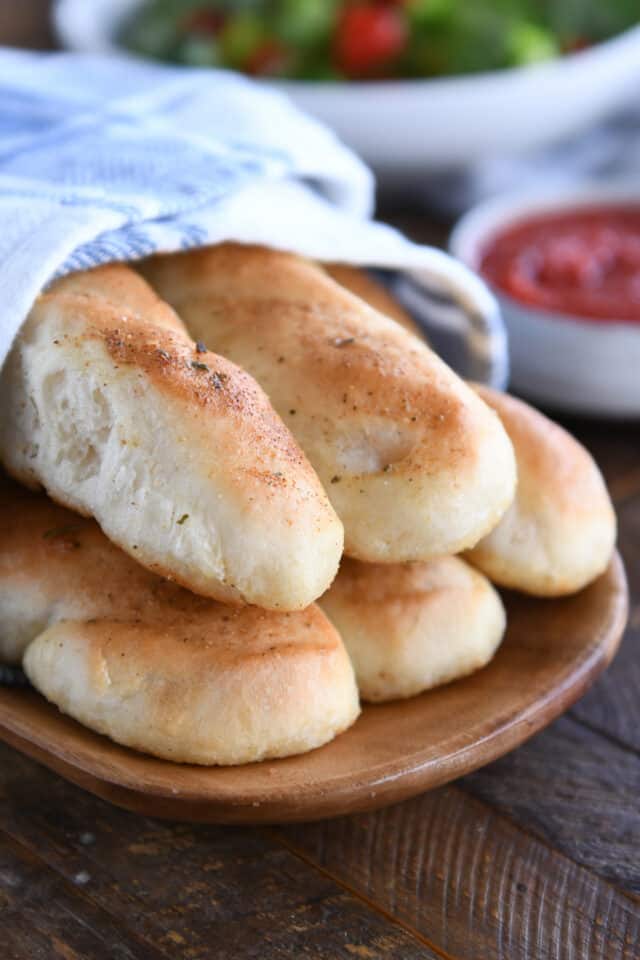
Quick to make, these divine homemade breadsticks prove that making yeast dough from scratch is easy. The result is delicious breadsticks in under an hour!
Easily one of the most oft-made bread recipes around here, these breadsticks have been a staple for nearly two decades. Easy, fast, and SO YUMMY!
Homemade Breadstick Dough
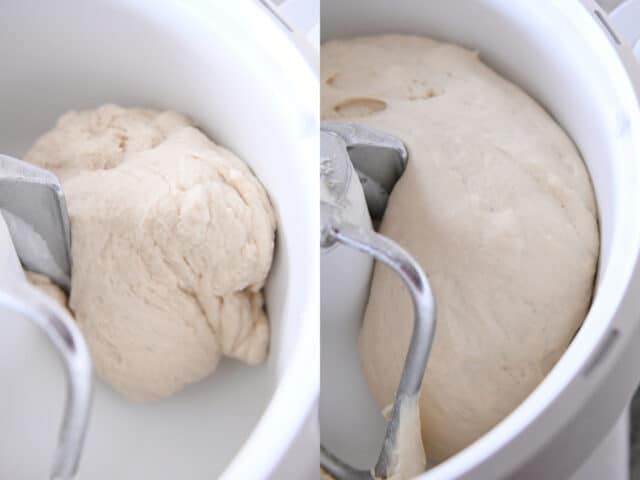
The dough for these homemade breadsticks is extremely straightforward and easy.
It can be made in a stand mixer with a dough hook or can easily be made by hand (with an old-fashioned bowl, spoon, and hand-kneading).
The breadstick dough is resilient and pretty much foolproof. Leave it to rest/rise right in the bowl it was mixed in.
Cutting and Shaping the Breadsticks
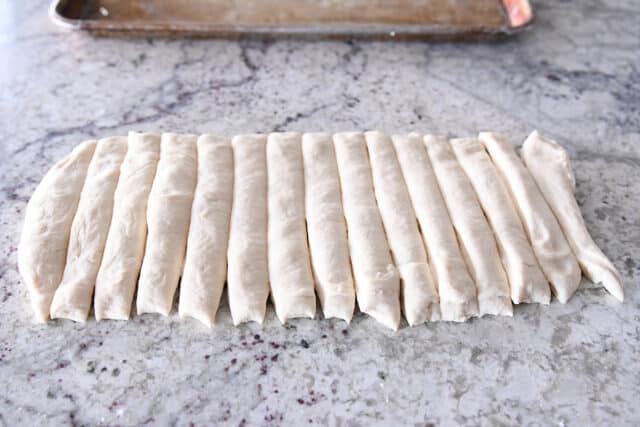
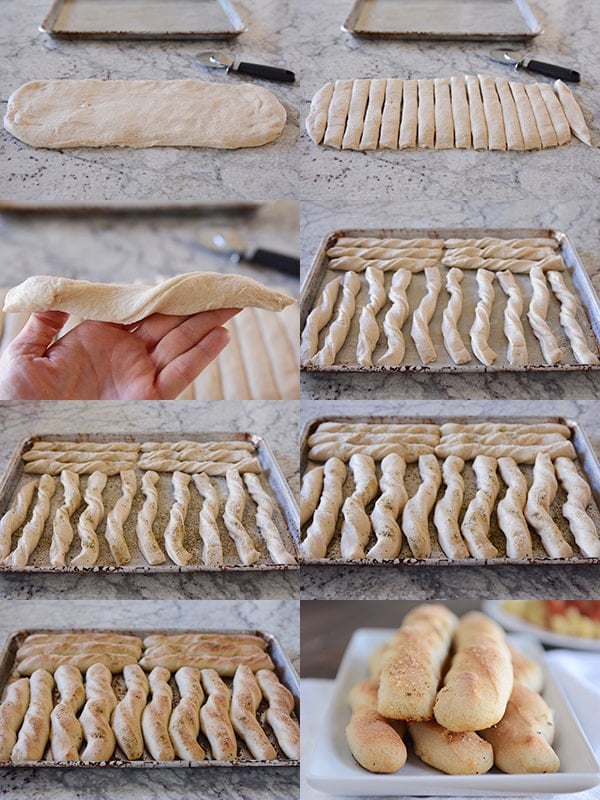
After the dough has rested for a few minutes, pat it into a thick rectangle, about 16-inches by 7-inches or so.
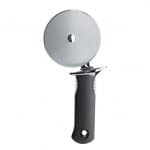
Use a pizza cutter to slice the dough into 1-inch strips.
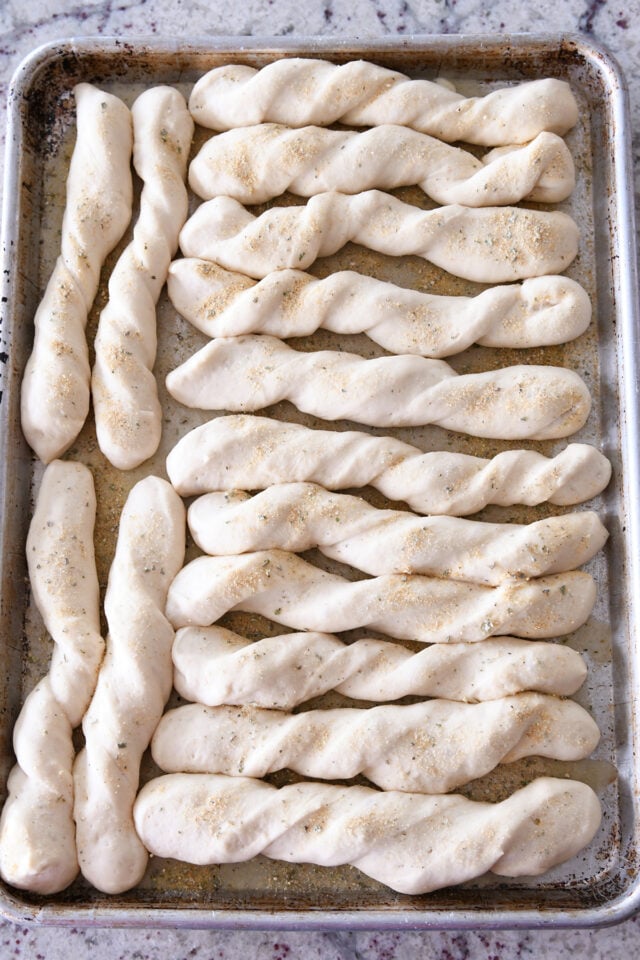
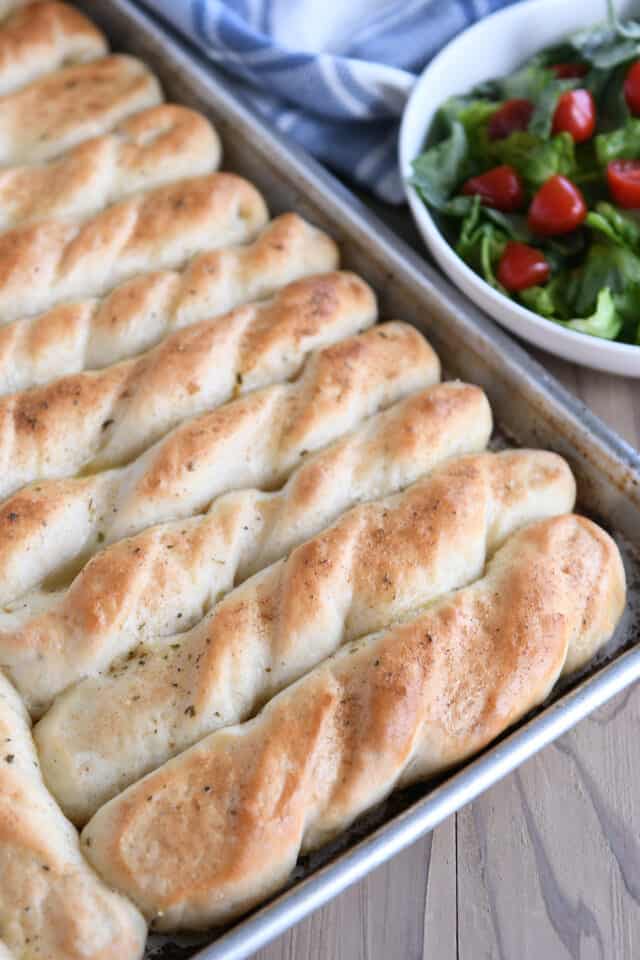
Give each breadstick a little twist (optional, but I always do it) and place on a half sheet pan that’s been slathered with butter (as noted in the recipe).
I usually get anywhere from 14-16 breadsticks out of the recipe.
Sprinkle the breadsticks with seasonings. I like to use a garlic seasoning blend (lots of options at the store for this: Johnny’s garlic spread, Spice Islands Garlic and Herb).
If you don’t have a pre-mixed blend, you can use dried oregano, dried basil, or Italian seasoning.
Let the breadsticks rest and rise until noticeably puffy and then bake until golden.
You can brush with butter right out of the oven, if desired.
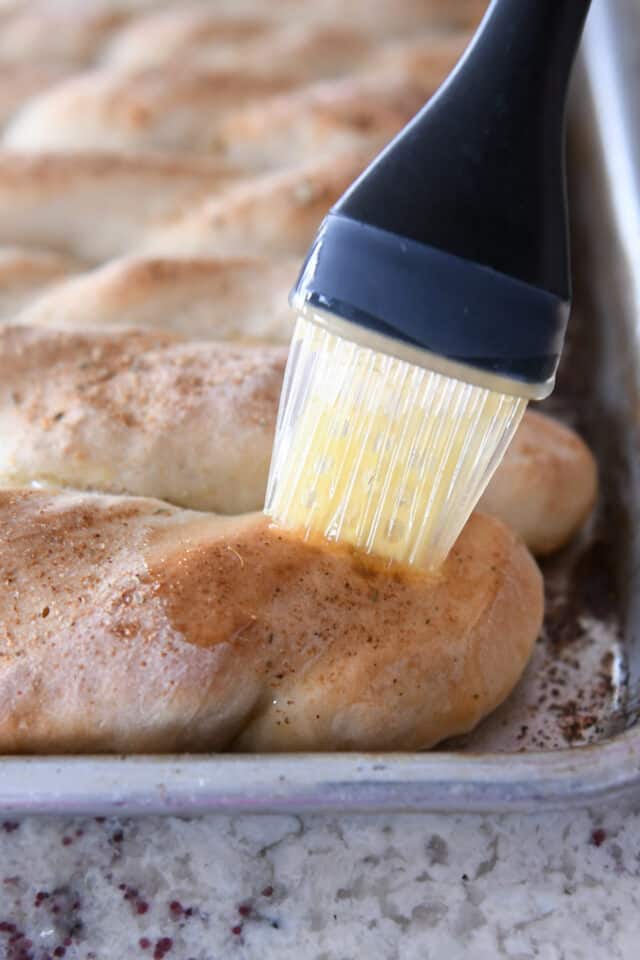
You won’t believe how easy and delicious these breadsticks are.
Most of the time, we double the recipe because it’s hardly any extra work for double the breadstick goodness (and the kids devour the leftovers for snacks and lunches).
They are our go-to side dish for everything from Instant Pot pasta to creamy soup.
They are fabulous!
A Fan Favorite
With over 500 5-star reviews, this homemade breadsticks recipe has become a beloved favorite of many!
Judy says: Love love love this recipe. So quick. So convenient. So YUMMY! ⭐️⭐️⭐️⭐️⭐️
Lauren writes: These came out amazing….I’m on my second batch my husband demanded I make another batch this week as well. Definitely a hit! ⭐️⭐️⭐️⭐️⭐️
KD writes: Just tried this recipe tonight! This will be a hit for my movie nights. So soft and fluffy and VERY easy recipe to follow! ⭐️⭐️⭐️⭐️⭐️
Maegen says: Made these last night and they turned out amazing. We doubled it and put butter, cinnamon, and sugar on half for dessert. We will be using this recipe again for sure! ⭐️⭐️⭐️⭐️⭐️
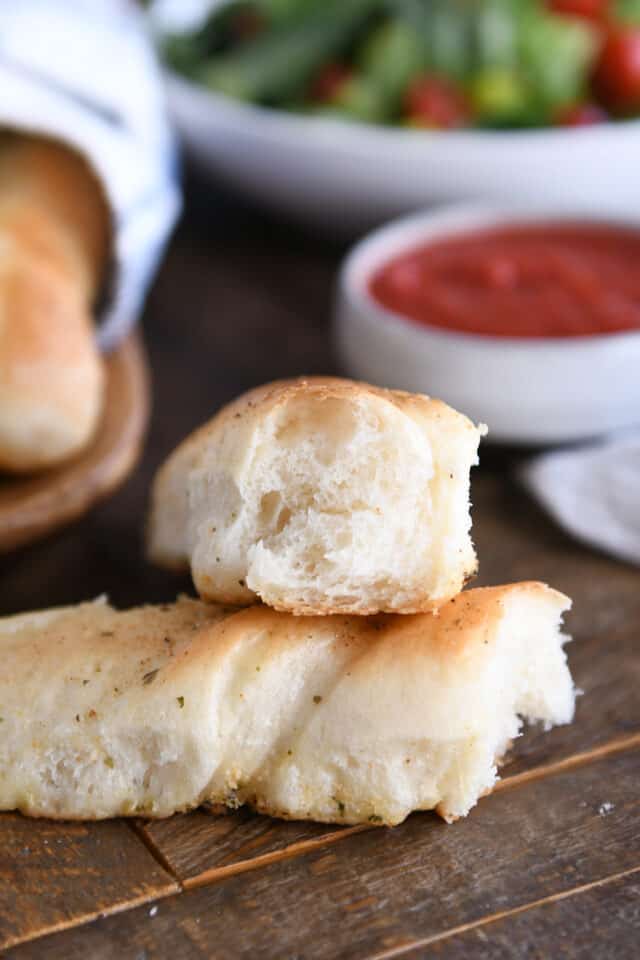
FAQs for Divine 1-hour Breadsticks
Yes, you can shape the breadsticks, place on the pan, cover and refrigerate for up to 12 hours before baking.
Yes.
I usually use a garlic/herb seasoning or Johnny’s garlic seasoning. You can also use dried basil, oregano or Italian seasoning.
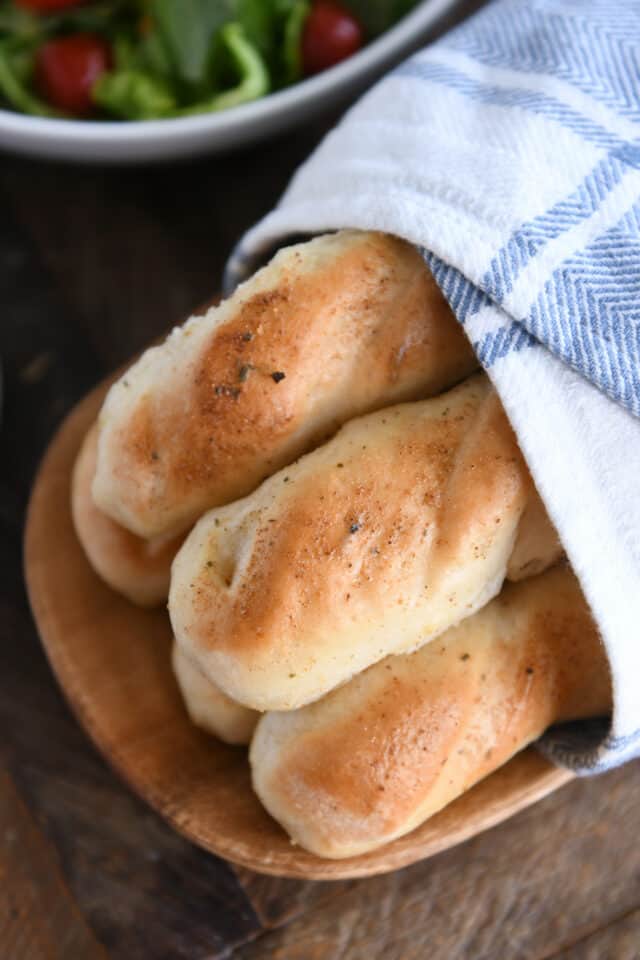
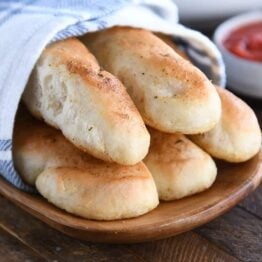
Divine 1-Hour Breadsticks
Ingredients
Dough:
- 1 ½ cups warm water
- 1 tablespoon instant yeast
- 2 tablespoons sugar
- 1 teaspoon salt
- 3 to 4 cups (426-568 g) flour (see note)
Butter and Topping:
- 3 tablespoons butter, melted (for the baking sheet)
- Dried herbs, garlic salt and grated Parmesan cheese
Instructions
- In an electric stand mixer fitted with the dough hook (or in a large bowl by hand), mix together the water, yeast, sugar, salt and one cup of the flour.
- Continue adding the flour until the dough just clears the sides of the bowl; knead for about three minutes. It should be soft and slightly sticky without leaving a lot of residue on your fingers.
- Let the dough rest in the bowl for 10 minutes.
- While the dough rests, preheat the oven to 400 degrees F. Spread the melted butter onto large, rimmed baking sheet (about 11X17-inches).
- On a lightly greased countertop, pat the dough into a long rectangle, about 16-inches by 7-inches or so. Cut the dough every 1-inch (more or less) into strips with a pizza cutter.
- Twist each strip slightly and place about 1/2-inch apart on the baking sheet. Sprinkle lightly with dried herbs of choice, garlic salt and Parmesan cheese.
- Let rise for 20 minutes (you can cover with greased plastic wrap, if desired, I usually go without). Bake for 15 minutes until golden.
Notes
Recommended Products
Recipe Source: adapted from my sister-in-law, Erin W.

Does this recipe double well?
Yep!
I’m confused where the butter comes in and the directions never mention it. Are you supposed to spread it on the baking sheet before you put the bread sticks on, or put on the top before adding the herbs? Or when you remove from the oven?
It gives instructions in step #4
Thank you! I don’t know how I missed it ♀️ My kids absolutely love these and they’ve been a dinner-saver!
Loved this recipe! I made cheese breadsticks by cutting cheese sticks in half and wrapping the dough around them. I coated with butter and sprinkled garlic salt and Italian seasoning over them. I’m thinking about try cheese and pepperoni the next time!
I made this recipe today. It turned out great and everyone loved them. My suggestion to inexperienced bakers to to pay close attention to Mel’s advice on the amount of flour. It calls for 3-4 cups of flour. I stopped adding flour at 3 cups and it was perfect. Four cups would have been far too much. Great recipe…thanks, Mel!
This was such an easy recipe and absolutely delicious! My 8-year-old daughter has made three batches of these (kneading by hand) in the past two weeks and we all love them. We might use the dough for our next pizzas that we make rather than our usual pizza dough. Thanks for the recipe!
Could you clarify if kosher salt or table salt is recommended for this recipe?
I use table salt.
The breadsticks came out delicious! The recipe was so easy to follow and they came out perfect. I did half with Italian seasoning and the other with everything bagel seasoning. Thank you for the detailed instructions and a great keeper recipe.
I never know what speed my dough hook should be set at for my Kitchen Aid mixer. And how long do you do your initial mixing before adding more flour? My first batched turned out ok, but didn’t rise much, so I don’t think I had the yeast well blended. Will try again tomorrow night! I love having such a quick bread recipe available! Thank you!
I don’t usually use a kitchenaid for this dough – I use my Bosch mixer. But the dough should come together pretty quick, you don’t need to mix it excessively between adding more flour.
I love this breadstick recipe. Its so easy and fast. So wonderfully good! They disappear as fast as I make them. I use garlic and rosemary for the topping.
What are the nutritional facts for these Divine Breadsticks?
I don’t have that info – sorry!
So quick and delicious! We’ve made them twice since I’ve discovered your recipe! We all love them!
Can I make these a day ahead or day of, refrigerate and then cook when my dinner is almost ready?
Yes, that should work great.
So easy and so so good. After I had them out of the oven a while I decided they weren’t browned enough so I put them back in for 5 more minutes and they came out perfect. Sift inside and slightly chewy. Me and hubby ate 4 before they made it to the table.
These are awesome! Thank you so much for this recipe. We needed something fast for dinner as it was getting late and these totally trumped the pizza that we paired them with. This is definitely a keeper for the wife and I!
just made them, fantastic.. thanks for sharing the recipe
renata
Mel these breadsticks were perfect and so easy! Crisp bottom, crisp top, soft inside, just what you would want!
Mel these were so excellent they sort of stole the spotlight from your Creamy Chicken Soup! I loved how the butter on the sheet gave the bottom a wonderful golden crisp, and then the higher oven heat gave a top a golden crisp, but the middles were still soft. Perfect texture!
Wow! These turned out AMAZING! Easy, quick and a HUGE hit for the family! Will be making this again! Thank you 🙂
These are awesome & so easy to make! I made them to go with chicken gnocchi soup last night for dinner. I was asked to please make them again today since there were no leftovers!!!
Thank you for sharing your recipe!
I love these! Thank you for sharing this recipe. I have been cooking for over 40 years & I’m still intimidated by yeast breads. I decided to try this when I realized I was out of frozen garlic toast to have with dinner but I did have a bit of time & some yeast. I only had instant yeast so I was very happy when I found how to use it in the comments. Thank you again! I will make these in the future.
I have probably commented before on this amazing recipe but it deserves another comment. I used this dough for pigs in a blanket for dinner tonight. Rolled dough into 2 circles, buttered, cut Ea circle into 8 pcs, Rolled up 1 hot dog per crescent, brushed with egg, sprinkled with sesame seeds for fun. Easy peasy dinner. Love you Mel!
I made these tonight for my family and OMG! Very easy and super good! Next time I think I might try to add the dried herbs into the dough just to see how flavorful that is. I paired them with The Best Homemade Spaghetti sauce recipe from this site and they were the perfect addition.
Thank you!
Very very good and come together fast
Made for first time. Had a hard time getting them from counter to pan. Had to cut in half. May have had it too wide. Hope they bake up good.
easy, fast yet so much flavor. Thank you
Easy as can be
Wow! These were delicious! I used instant yeast and bread flour, because that’s what I have. It took about 18 minutes in my oven. I made up 3 tbsp melted butter, 1/2 tsp of garlic powder, 1/2 tsp of kosher salt, and 1/2 tsp of Italian seasoning and brushed it on after they came out of the oven. It could have used more garlic, but they were really good.
I’ll try your combo of seasonings next time I make these. Sounds great.
I couldn’t figure out what all the hype was about these breadsticks and almost gave up on them completely until one day I decided to make them thicker. That was the trick! I also realized I wasn’t seasoning them enough, so I sprinkled on a generous amount of Italian seasoning, garlic salt, and parsley. Now they are our FAVORITE breadsticks!
Really great, thank you! I found this recipe when I realized I forgot to get good bread for garlic bread to go with our spaghetti supper. I didn’t twist the breadsticks, but rather fashioned them into ropes, and the ln rolled them in the melted butter to coat all the sides. Then, as I took them out of the oven, I brushed them with more melted butter mixed with salt and garlic powder. Fantastic!! Better than OG’s breadsticks! Thanks!
Hi Mel, it’s my first time trying to make any kind of yeast bread so I have no idea what I’m doing. I’m guessing tonight I’ll use my back up frozen breadsticks…But I want to try again. I followed the instructions to the letter, the yeast I used is: ‘Platinum superior Baking yeast, Premium Instant Yeast. I mixed by hand since I don’t have a real mixer and after the 3rd cup of flour I kept adding a little at time but the dough was incredibly sticky. Kept kneading o the counter top but nothing changed. I let it trust for 10 mins hoping that will change the consistency but it was still to sticky. I watched your tutorial on yeast but I don’t know what I’m doing wrong.
I’m going to keep trying, even if it’s half the recipe to minimize waste but if you have any ideas please let me know.
Hi Carol – if it was still very sticky, it sounds like just adding a bit more flour will help. Try another 1/2 cup flour and see if that works.
Third time is the charm! 3 and 3/4 cups of flour kneading by hand for 6 mins and they were perfect!
My family loves these! Can I make them up the day before and keep the dough in the fridge until the next day?
That should work!
I love this recipe and now make it “the lazy way!” 🙂 I plop the dough (after it rests) on a greased pan and use my hands to spread it out. Then, use a pizza cutter to cut into sticks. There are cut lines but the dough doesn’t really separate. Brush with melted butter and sprinkle with spices. Let the dough rise again and then bake. You can still see the cut lines after baking to separate the bread sticks. Just as delicious and easier if you are trying to cook other things at the same time!
I love this idea! I’m going to try it next time!
What size pan did you use?
I never leave comments, but just in case anyone was looking for a lazier version of this recipe, here’s what I’ve been doing for years (because I’m lazy):
Make the recipe as directed. After the first 10 mins rising, I pour the melted butter + herbs into an 11×17 baking dish. I plop the dough on top of the butter and pat it to fit the dish. Once it is formed, I flip it over, so that butter gets on both sides of the dough rectangle. I then use a pizza cutter to make vertical strips, and a final long cut down the middle Then I let them rise for another 20 mins and cook them as directed. They come as pull-apart breadsticks and are very tasty, despite requiring less work.
If you want to know if this will work with various flours or no flour or flowers, I have no idea. I only do lazier versions.
I love your outlook! Do not think of it as lazy but smart thinking with the abilities to make something easier and get the same results. It just made me laugh. Love it! Thank you.
I just posted this exact comment! Great minds think alike! 🙂
Laura, I just posted this exact comment! Great (kinda lazy) minds think alike! 🙂
Wondering if you can make by hand? I don’t have a mixer? I’ve only tried baking bread a few times.
Yes! This dough is pretty forgiving and you can definitely stir it together by hand and knead on a counter.
This was amazing! I made it exactly as written, except I used slightly more active dry yeast, instead of instant. I put parchment paper down first, and I topped half with the cinnamon and sugar/vanilla drizzle from your cinnamon breadsticks recipe. Such an amazing meal that made!
Hey Mel, my kids are really into breadsticks lately, but we are wanting to make them with cheese in the middle. Would this recipe be the best choice for wrapping around a cheese stick?
Sure, I think it would be great!
Excellent recipe. Well written and the taste is fabulous. I sprinkled some Every bagels spice on top ….On the first batch the seeds didn’t stick very well so then I put a little melted butter over the uncooked breadsticks and sprinkle again and it was perfect. This is a really easy recipe for young kids to make.
WOW!!!!! These are SO good! I am so exited to make them again!
Hi Mel! I have these in the oven right now. I was wondering if you half the receipt will it still bake for 15 minuets?
Yes, I do!
I chopped up a couple of heads of garlic, browned it in a little olive oil & added it to the dough while mixing. Wow, the garlic made this great recipe even better….P.S. I omitted the sugar
I am relatively inexperienced with bread/dough, and my first try was not a total success. Butter on the baking sheets scorched pretty badly and the bottoms of the breadsticks burnt before I got to golden brown on top. Still tasty, but not perfect. Next time, I will try a little less time and/or slightly lower temp, but I like the recipe.
Maybe your rack wasn’t in the middle. Just a thought.
It is a good quick recipe. I guess it is all about what you prefer. I think I will try it again, but make less slightly thicker sticks. Maybe just 10-12 would better if you like fluffy ones.
Oh these are DIVINE! Thanks for your video and pictures. I tend to make everything harder than it needs to be. Watching you make it made me see how easy and quick it could be. I love, love your recipes!!
Do these make 16-20 like the recipe says or 9 like the video shows?
It all depends on how thick or thin you make the breadsticks. I usually get around 12-16 out of the batch because I make them thinner (the video shows the same amount of dough – just slicing them thicker).
Thank you for the recipe! Would the same baking time of 15 min still be required if I cut the recipe in half? Also my oven temperature is a bit off so is there a way to know when they are done to make sure they don’t get burned or get too crispy?
Yes, the baking time will be the same as long as the breadsticks are the same size as when you roll out a full batch. They’re done when they are lightly golden and no longer doughy in the center.
Hi Mel. I made these tonight. It was my first attempt at making any kind of bread that didn’t come out of a canister from the grocery store.
They tasted great but are a bit heavy/dense. I used 3 1/2C.of bread flour. I also used bread machine yeast because that was all I could find in the grocery store (thanks COVID 19). Should I knead it longer in the stand mixer, let it rest longer? Any tips would be appreciated. Thanks.
Hey Stef, I think kneading longer and also adding just a tad bit less flour should help!
Really want to make these tonight, but wondering if using active dry yeast with the water that is called for in the recipe will work. Or do I need to proof it first? And if so…do I add the proofed liquid to the mix? Sorry, new to the baking world.
If subbing in active dry yeast, proof it in about 1/4 cup warm water with a pinch of sugar until it is foaming and bubbling and then use it in the recipe (decrease the rest of the water in the recipe by 1/4 cup).
Worked beautifully. Thank you. Infact I have had to make these two days in a row as my family devoured them before I got a chance to try.
These are so good! I’ve made them many times over the years and they are always delicious. I like using Penzey’s Sandwich Sprinkle or everything bagel seasoning.
Wow! These were soft, fluffy and delicious with lovely brown crispy tops and bottoms, and even the first time making them the whole process was just under an hour. I see why you make them all the time. Definitely going to as well, and now I can’t wait to try your cinnamon & sugar twists. Thanks Mel!!
These were a hit with my bookgroup. I made a change on how to apply the toppings. Prior to cutting into breadsticks, I brushed the dough with eggwash, then sprinkled on the toppings. I used a pizza cutter to divide into breadsticks before twisting and placing on two baking sheets topped with parchment paper. I covered the sticks with plastic wrap and put in the fridge overnight. They were baked the following morning.
Imagine how the breadsticks would be with raisins or chocolate chips in the dough and cinnamon sugar on top!
These were a huge hit at my house! Thank you so much for a delicious and easy bread recipe! Have you tried doubling the recipe and freezing some for later? If so, any tips?
They usually go pretty quick around here so I haven’t frozen them but I bet the baked and cooled breadsticks should freeze and reheat really well!
Why don’t you tell us what temp for the oven?
It’s in step #4: you want to preheat the oven to 400 degrees. 🙂
We have made these twice this week, so so good and so easy! Thank you!
We absolutely love this! Light and fluffy! My 7 kids increased all the “gunk” on top, I added chives on top of mine