Simple Homemade Haunted Halloween Houses
Simple Homemade Haunted Halloween Houses {Plus a Revolutionary New Way to Stick Them Together!}
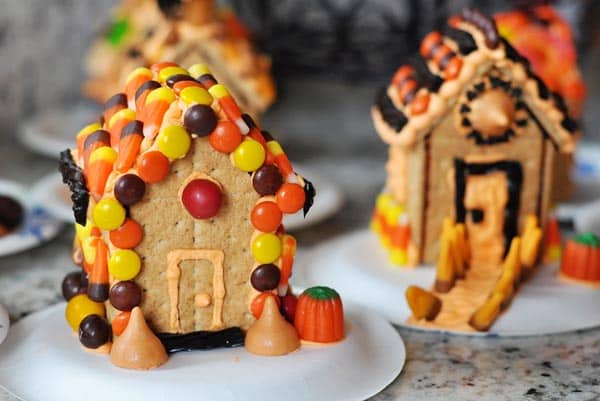
Are you in the Halloween spirit? If not, these little DIY haunted Halloween houses are sure to put you there. Plus, they are a cinch to put together and will keep the kids occupied for at least 8 minutes.
My friend, Kate (of the smothered pork burrito fame) told me that growing up her mom (who makes the best cinnamon pull-apart bread I’ve ever tasted in my entire life) always assembled their gingerbread/graham cracker houses with burnt sugar instead of icing. I was intrigued!
Do you know how many times I’ve assembled little houses like this with icing (both royal and regular) and had them falling apart before we even started decorating?
Hot glue is another popular choice for assembling these, but, um, I like a 100% edible house for my eating pleasure and I stopped eating hot glue, like, 12 years ago.
So I gave the burnt sugar method a go and let me tell you, it was amazing. Revolutionary. Life changing. I’m totally not kidding and I’m here to tell you (and show you) all about it.
You could definitely use this method with homemade gingerbread, too, which I plan to do with our annual Christmas sled tradition, but this time, I was making 15 houses for 15 wily little kids and homemade gingerbread did not even cross this momma’s mind. Graham crackers all the way, baby.
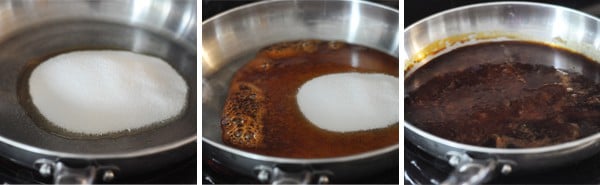
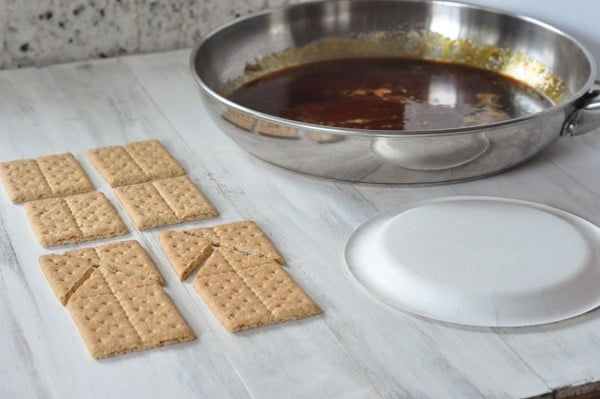
First, in a large skillet (preferably not non-stick so you can see the sugar changing color), pour in 1-2 cups sugar and set it over medium-low heat.
Don’t stir. Don’t move the pan. Nothing.
Just let the heat to do it’s magic. In about 15 or so minutes, you’ll have perfectly caramelized, melted sugar to use for “glue.” If, while the sugar is still melting, it smells like it is burning and/or it is smoking, turn the heat way down (you can see in the middle picture how it’s bubbling on the edges but there is still a fair amount to melt; I turned the heat down a bit here).
I know it’s called burnt sugar and all but it shouldn’t be setting off the smoke alarms. After it completely melts, keep the skillet over very low heat so the sugar doesn’t get too hard to work with.
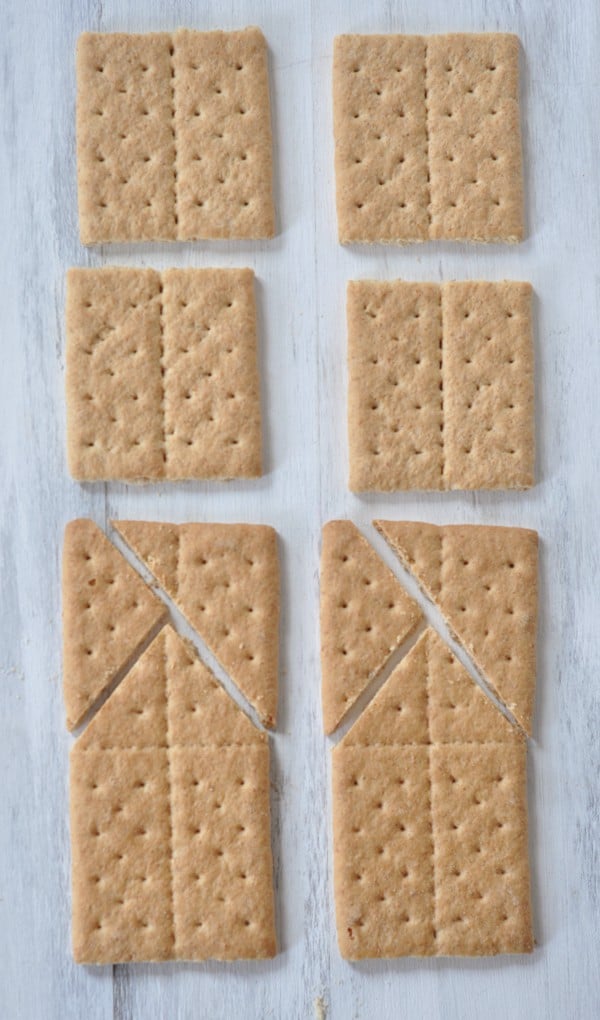
While the sugar melts, go ahead and start trimming up those graham crackers. You’ll need four rectangular graham crackers for each house. Break two of the grahams along the center seam so you have four squares. Trim the other two rectangles like you see below in the picture (read on further for some very essential and pertinent graham trimming techniques that will save you saying bad words during the process).
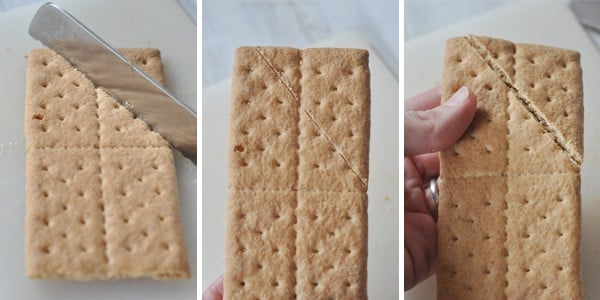
First tip: use a sharp serrated knife. Second tip: use a careful, gentle sawing motion as opposed to a horror movie hacking motion. Third tip: don’t cut all the way through the graham cracker; simply score a line about halfway through and then gently press on the cut pieces to break them apart. Perfect!
Now on to the assembly. Have all the components laid out and ready. You’ll notice my skillet is not sitting over low heat. I realized about 10 seconds after taking this picture that was a bad idea since the sugar was already starting to harden so don’t be me; keep the sugar over low heat pretty please. Also, keep in mind that this hot sugar is, well, hot. And it will burn your little fingies, so please, please be careful!
First, take one of the trimmed pieces and dip both edges in the sugar. Carefully attach a square side to each edge and press to adhere. It’s ok if the sugar sticks to the plate. It snaps off very easily.
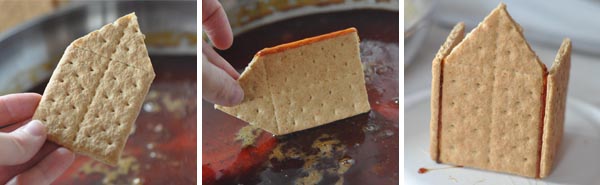
Now, take a second trimmed piece, dip both edges in sugar and working quickly set it between the open end of the house and press the square sides gently to stick everything together.
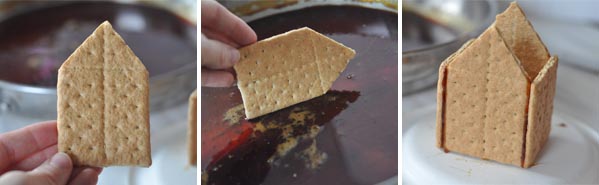
At this point, I let the house sit for 1-2 minutes (and assemble the beginnings of another house). Once it is slightly set, pick up the entire house and dip the top triangular pieces and open edges in the sugar, shown below. The sugar doesn’t need to cover every inch of open edge, just do a quick dip on each side.
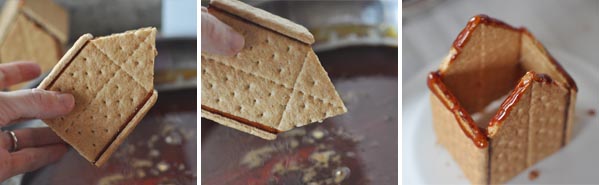
Working quickly so the sugar doesn’t harden, attach the two last squares to the top of the house, pressing lightly.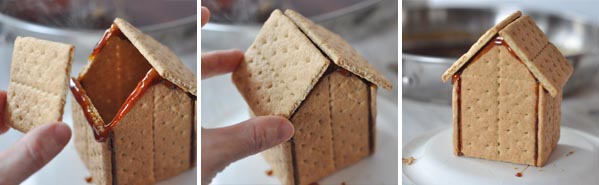
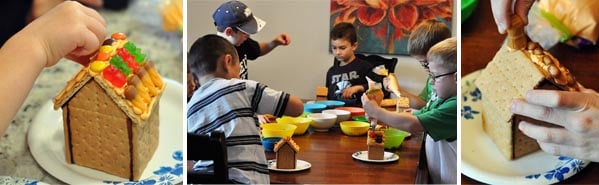
Within about 5 minutes, those houses are ready to decorate (alternately, they can be assembled days in advance). I always use royal icing (made from meringue powder and following the recipe on the can) for decorating.
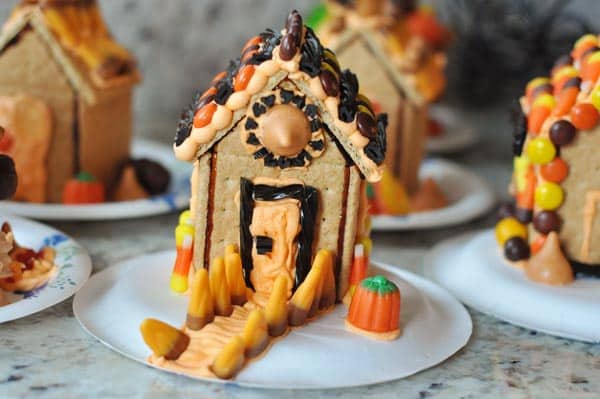
We had some friends over to decorate our scary-slash-cute houses and all eight boys (and two girls) had a blast decorating and of course eating.
It goes without saying that these would be just as cute with Christmas decorations.
All I know is that I’m pretty sure I’ll never assemble any type of gingerbread contraption using anything but burnt sugar.
It hardens almost instantly so the houses can be decorated within minutes, dries tough as cement (much more sturdy than using icing), and doesn’t require rubberbands or anything else to help keep the houses together while drying. Brilliant, really!
Looking for more Halloween Food Ideas? I added a nifty little widget right over there —> in the sidebar. Click on it to see all the cute Halloween food ideas at your disposal!
These turned out fantastic! So easy and simple.
Mel! Thank you for telling me about this amazing secret glue!! It worked perfectly to assemble Graham Cracker houses for my kids to decorate for Christmas! Even my husband was impressed!!!
Stumbled upon this and excited to try this Halloween. I’m making them the day before but any suggestions to how to store them? Just leave them out?
Hi Julianna, they are fine being left out as long as it’s not really humid (the graham crackers get soft if it’s humid). Otherwise, they’re best wrapped or covered.
First time I have ever made Graham cracker houses. Used this burnt sugar method and found it to be so easy. I just let it sit on the lowest heat setting and it worked perfect. Thanks so much Mel.
Worked perfectly for gingerbread houses made with homemade gingerbread. So much faster and stronger than any other method we’ve tried. Thanks for the great tips!
I buy small milk or OJ cartons and we glue the crackers on with frosting.
Have done this for years.
My mom always just used hot glue. After all, when do you ever eat these? It works much better than frosting!
How many houses can you make with one package of graham crackers?
About 2.
Ok, probably a dumb question, but can I get some candy recommendations? I’ve never done anything like this before and I’m not sure what candies would be the best. The houses look so cute and fun and I really want to make them with my kids. Thanks!
Hey Janette – we usually keep it pretty simple with candy corns (lots of different varieties out there), the little sugar pumpkins, M&Ms and any other festive Halloween candy I spy in the candy aisle.