Homemade Bagels {New and Improved}
Make perfect homemade bagels at home with this easy step-by-step recipe. The bagels are easily customizable with your favorite toppings!
I originally published this recipe in 2011 and have since added new photos and additional recipes notes, as well as a few recipe enhancements, to make this recipe better than ever!
One reader, Nancy, commented: Thanks so much for this absolutely delicious recipe! Followed your recipe exactly, (used sesame seeds as the topping), and they are every bit as good as any bagel shop we’ve ever been to, and oh-so-much better than any grocery store brand. ⭐️⭐️⭐️⭐️⭐️
Why You’ll Love This Bagel Recipe
- The bagels are straightforward and easy to make at home – the recipe doesn’t require any overnight starters or lengthy instructions.
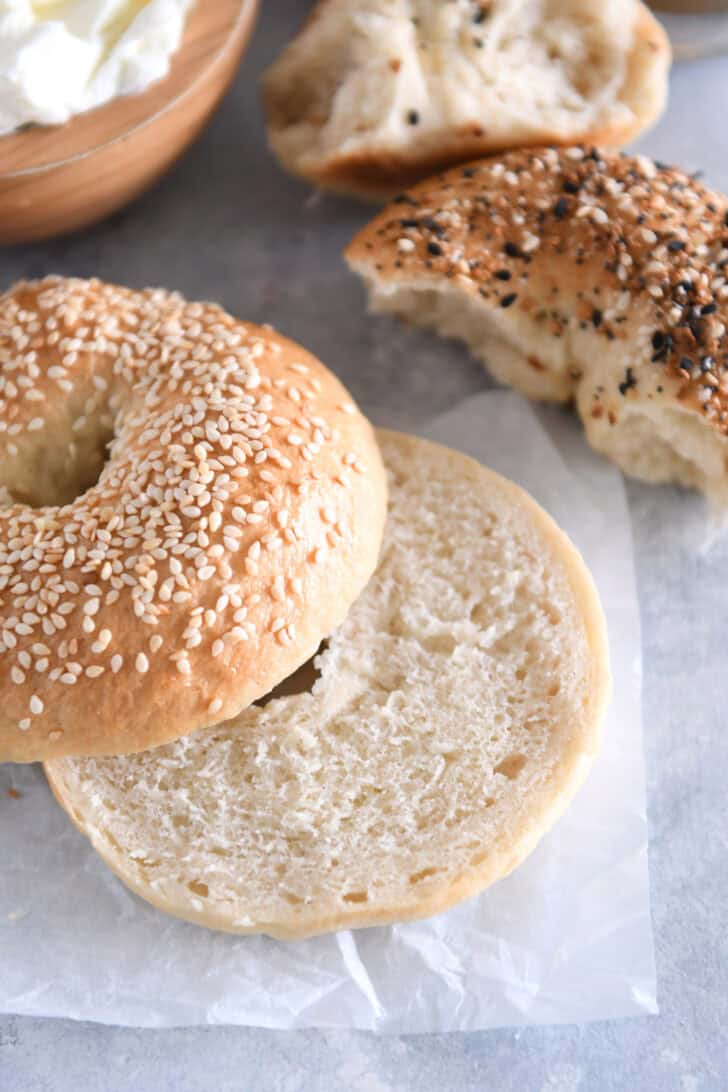
- The bagels are incredibly delicious with a perfect fluffy-chewy texture.
- It is very easy to customize the bagel toppings to your tastes.
- The baked bagels freeze extremely well, so you can make large batches and freeze for later breakfasts, snacks, or bagel cravings.
- This is the perfect recipe for beginner bread makers. SO MANY people have commented that they struggle making yeast doughs or they are brand new to breads or they are scared to make homemade bagels…but they tried this recipe and the bagels turned out amazing!
How to Shape Homemade Bagels
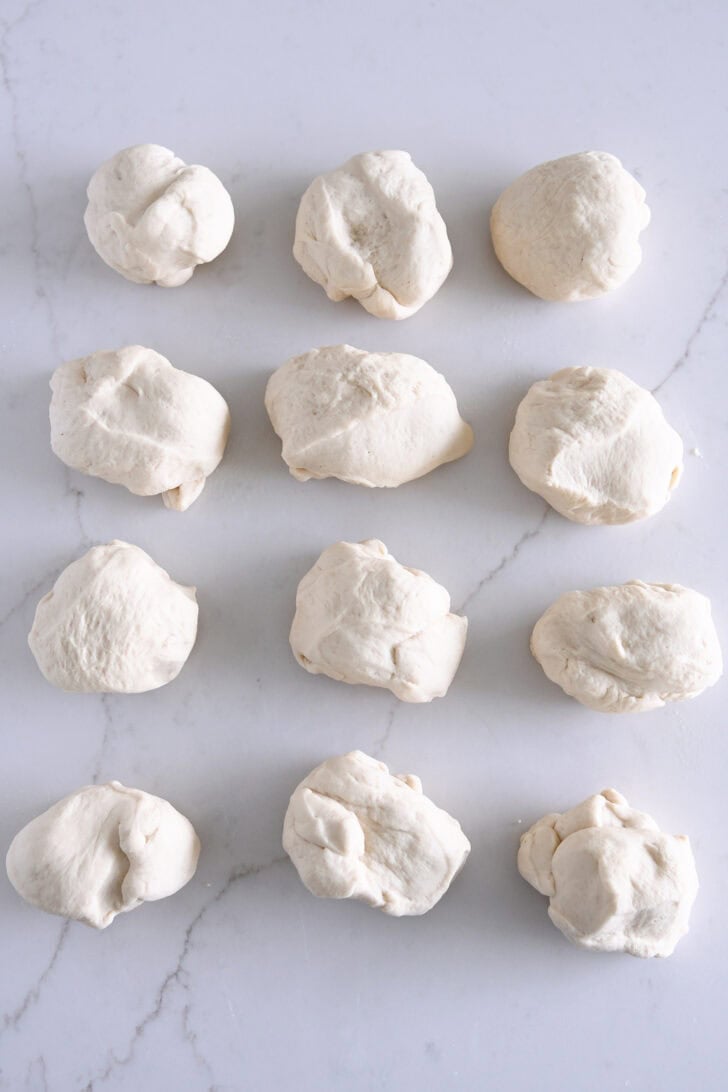
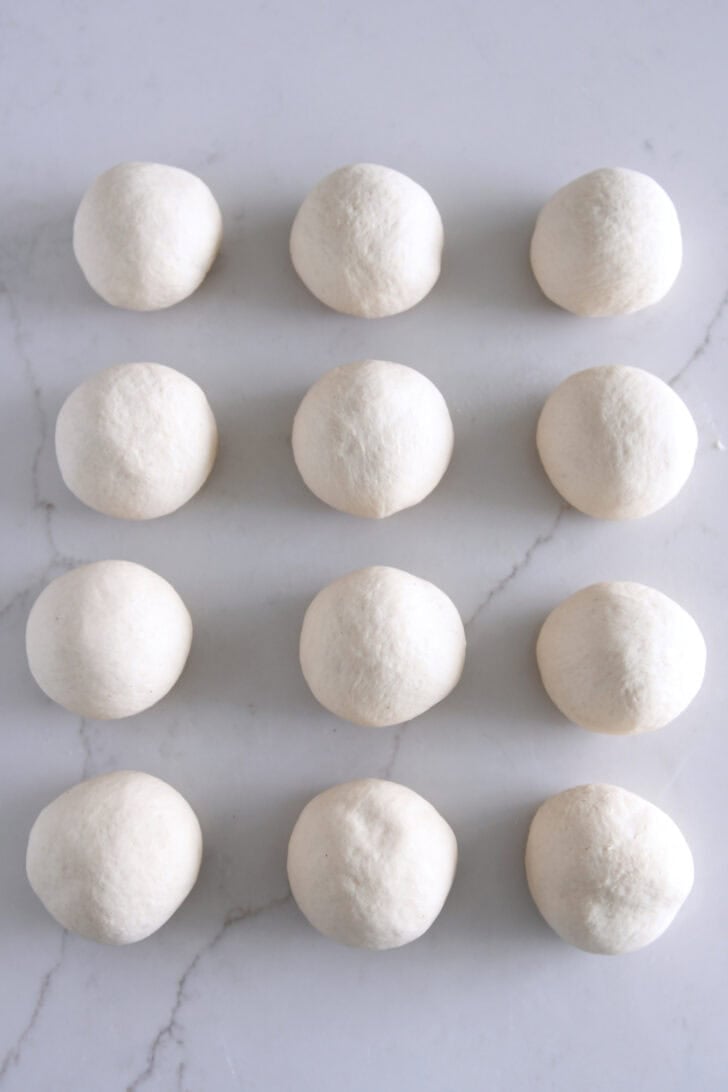
- Turn the dough out onto a lightly greased work surface and divide the dough into eight equal pieces, about 115 g/4 ounces each.
- Roll each piece of dough into a smooth, taut ball. Let the balls of dough rest for 30 minutes. This helps relax the gluten so that when they are shaped, the dough holds its shape without stubbornly springing back.
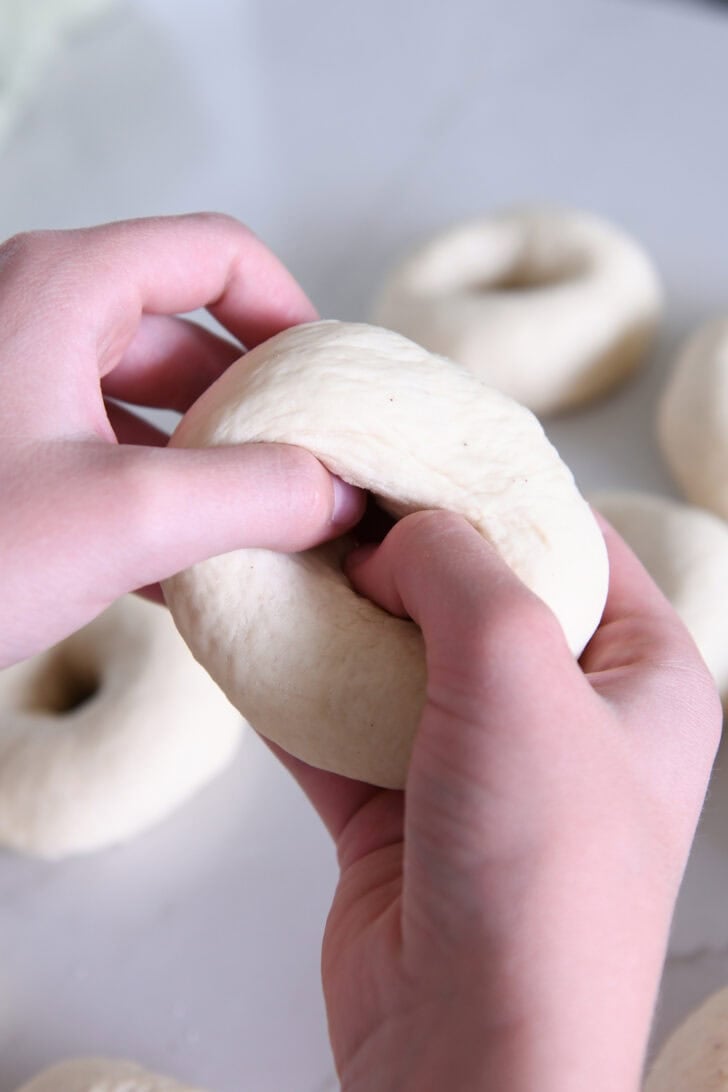
- Use your thumb to poke a hole through the very center of each ball then use both thumbs together to twirl and stretch the dough until the hole is 1 to 2 inches in diameter (the bagel will be around 4 inches across).
The most important thing you can remember when shaping homemade bagels is to let go of perfection! Not all of them will look the same, and some of them may have thin/thick spots. It’s ok! It gives the bagels personality…and they all taste delicious regardless of how they look.
Why are Bagels Boiled Before Baking?
There are several reasons why bagels need the necessary boiling step.
- Boiling the bagels helps develop the signature chewy texture. The steaming hot water cooks the very outside layer of the bagel allowing it to rise in the oven but not as much as it would without the water bath. This is what helps create the classic dense, chewy texture.
- The sweetener in the water (either sugar or honey) also helps the bagels develop a beautifully golden crust while baking.
Bagels that aren’t boiled prior to baking end up just simply posing as a quirky dinner roll with a hole in the center instead of the gloriously chewy, delicious bagel they were meant to be.
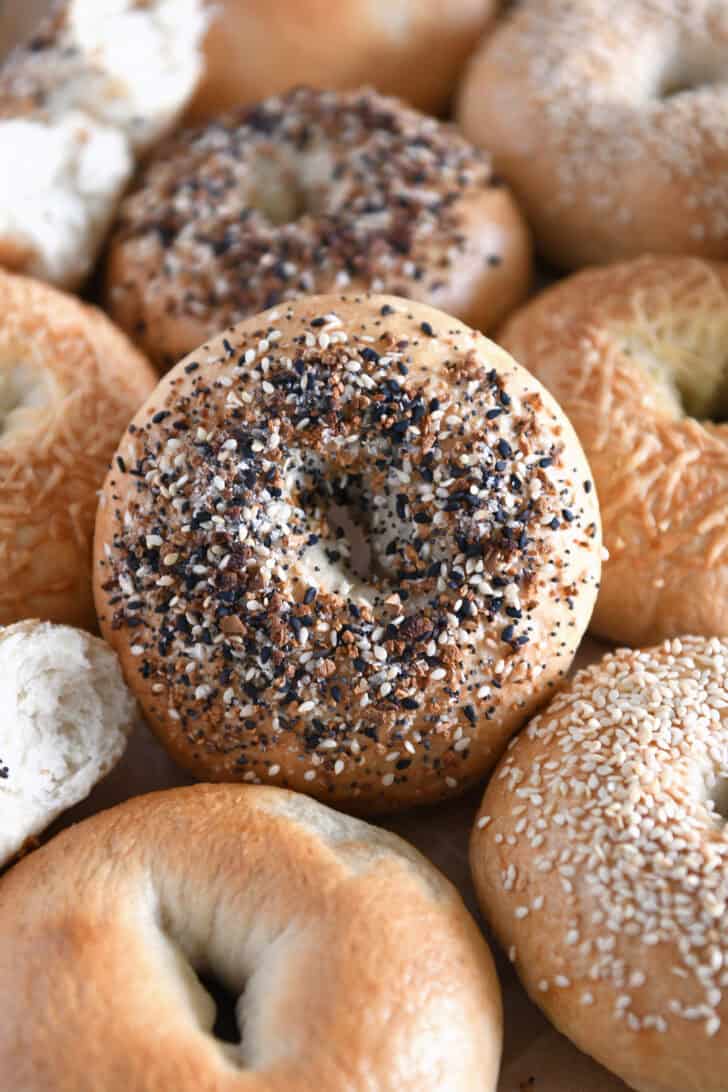
Best Bagel Toppings
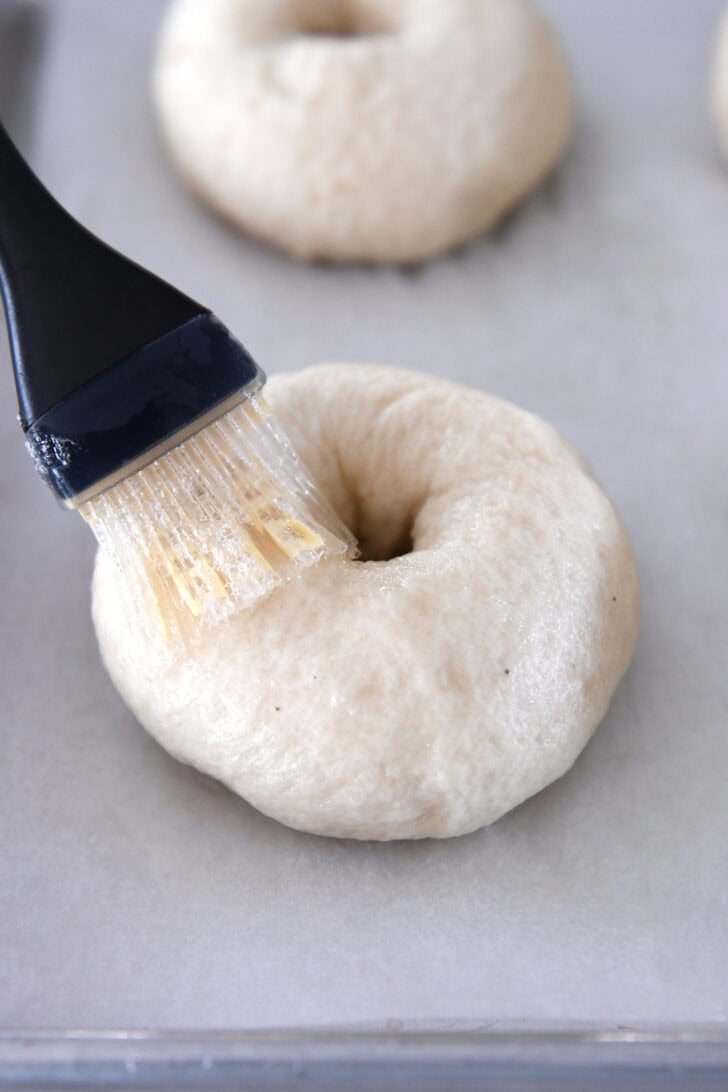
To get bagel toppings to stick, brush the tops and the sides of each bagel with a simple egg wash (1 egg white + 1 tablespoon water). For maximum coverage, place the toppings in a shallow bowl and dip the bagels, turning to coat the top and sides. Or simply sprinkle them on top.
Our favorite bagel toppings are:
- Sesame seeds
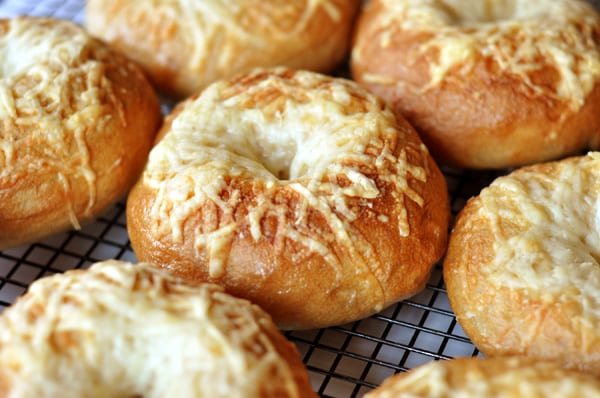
- Finely grated Asiago or Parmesan cheese
- Sesame seeds
- Coarse salt
- Cinnamon and sugar
Of course, you can also leave the bagels plain. If doing so, the egg wash is optional (but adding it will further help the golden brown crust to develop).

A Few Additional Tips
Making bagels at home is not hard, but it can be helpful to keep the following tips in mind:
- The dough for homemade bagels is stiffer than a dinner roll or sandwich bread dough. This is by intention. Because the bagels are boiled before baking, a lower hydration dough, like bagel dough, holds up to the boiling water bath without disintegrating and the result is a perfectly chewy bagel.
- I highly recommend investing in a kitchen scale {aff. link} and weighing ingredients, particularly dry ingredients like flour. If you measure your flour in cups, lightly fluff the flour, scoop in the cup and then level off.
- If you live in an excessively dry climate, you may want to start with 1/4 cup less flour and add remaining flour only if the dough is sticking to the sides and bottom of the bowl.
- Keep a timer going during the boiling step – it may seem counter intuitive, but boiling the bagels longer won’t result in a better bagel. They just need a minute or so per side, max.
Most of all, have fun with this recipe! This has been a favorite recipe of ours for over ten years. My kids love to help with shaping the bagels, choosing the toppings, and of course, devouring the bagels after they’ve baked and (barely) cooled.

Perfect Homemade Bagels
Ingredients
Dough:
- 1 tablespoon instant or rapid-rise yeast
- 4 cups (568 g) bread flour (see note)
- 2 teaspoons salt
- 1 tablespoon brown sugar
- 1 ½ cups warm water
Water Bath:
- 2 to 3 quarts water
- 2 tablespoons brown sugar
- 1 tablespoon granulated sugar (see note for honey option)
Egg Wash:
- 1 large egg white
- 1 tablespoon water
Optional Toppings:
- Sesame seeds, Everything Bagel seasoning, grated Parmesan or Asiago cheese, coarse salt, cinnamon and sugar, etc.
Instructions
- In the bowl of a stand mixer fitted with the dough hook, combine all of the dough ingredients and mix on low speed until the dough comes together. The dough will be fairly stiff (but shouldn't be dry).
- Increase the speed to medium and knead the dough for 10 minutes. This is a high-gluten dough and the long kneading time is necessary to develop the gluten.
- Place the dough in a lightly greased bowl and cover with lightly greased plastic wrap. Let the dough rise for 1 to 1 1/2 hours until noticeably puffy.
- Turn the dough out onto a lightly greased work surface and divide the dough into eight equal pieces, about 115 g/4 ounces each. Roll each piece of dough into a smooth, taut ball. Let the balls of dough rest for 30 minutes.
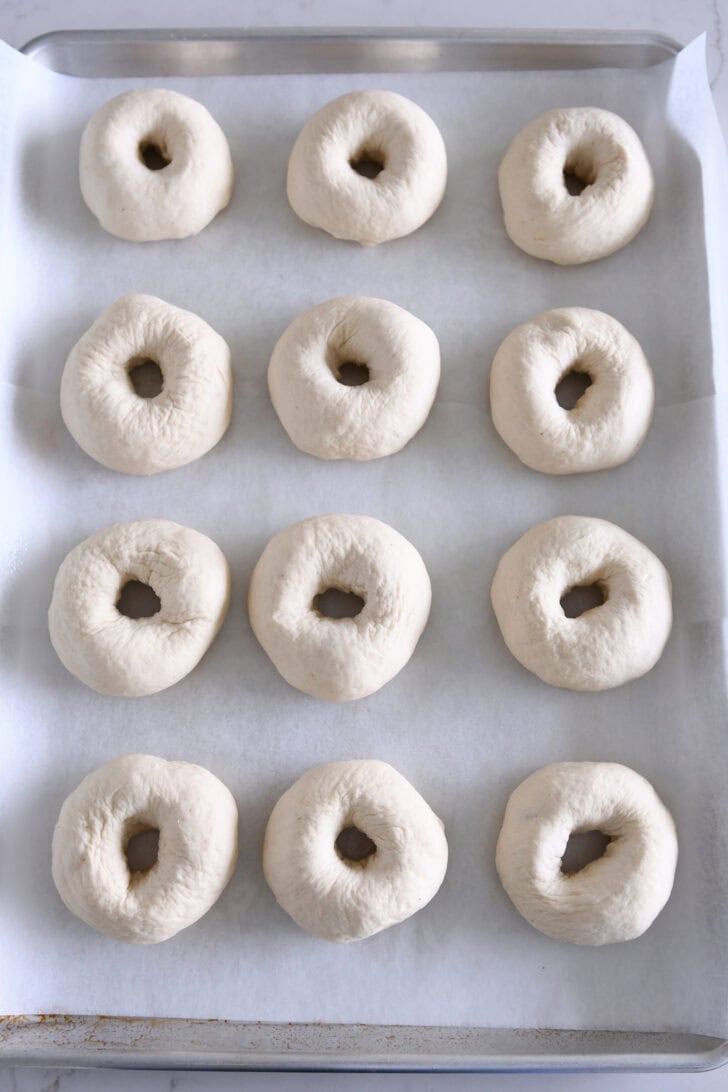
- Line two half sheet pans with parchment paper and lightly grease with cooking spray.
- Use your thumb to poke a hole through the very center of each ball then use both thumbs together to twirl and stretch the dough until the hole is 1 to 2 inches in diameter (the bagel will be around 4 inches across). Place the shaped bagels on one of the prepared baking sheets.
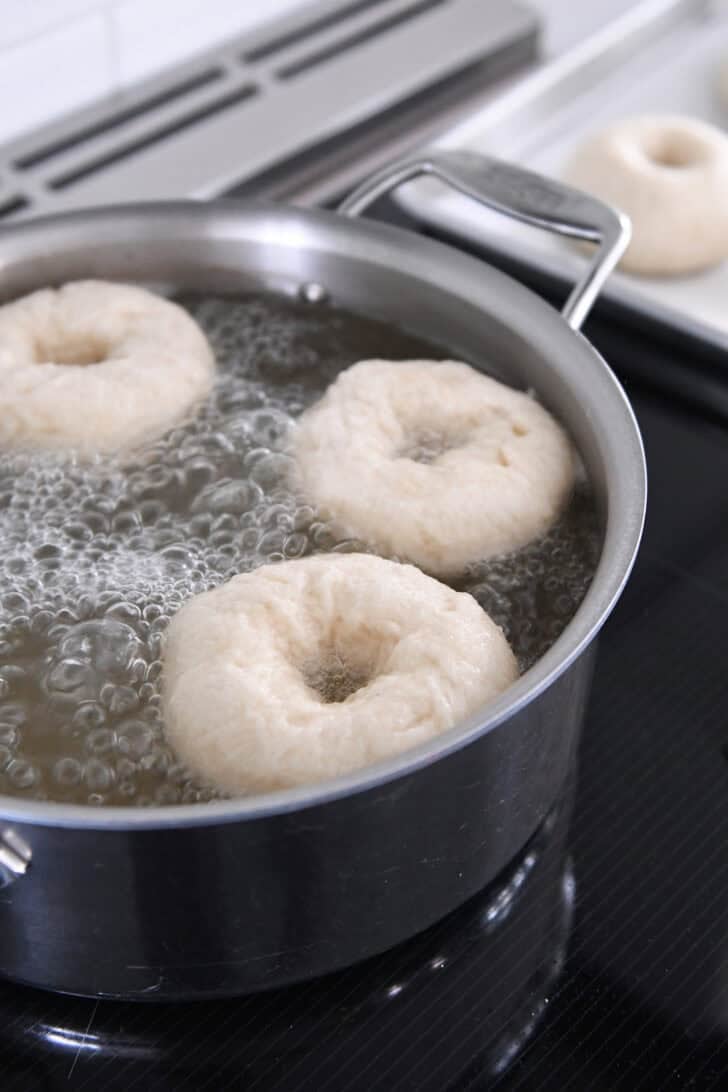
- For the water bath, add the water and sugars (or honey – see note) to a large, wide pan or pot and bring to a boil.
- Preheat oven to 425°F.
- Transfer the bagels, three or four at a time, to the simmering water. I like to gently re-stretch the center of the bagel if it has closed up while the bagels have rested. This is optional; if you do the same, make sure to stretch gently so as not to deflate and compress the bagel.
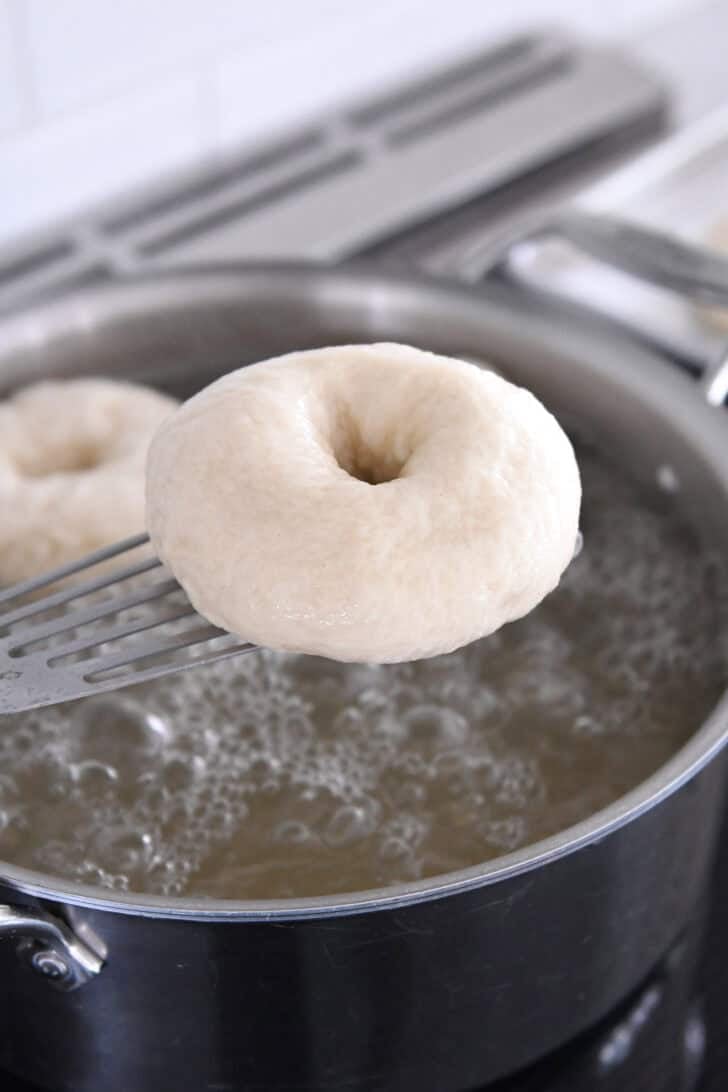
- Cook the bagels for 1 minute. Flip and cook for another minute. Use a wide spatula to lift each bagel up, letting the excess water drain back into the pot. Place the boiled bagels onto the prepared baking sheet, spacing them several inches apart. I bake six bagels per half sheet pan.
- Repeat with the remaining bagels.
- For the egg wash, whisk together the egg and water. Brush the top and sides of each bagel and then sprinkle with desired toppings: sesame seeds, everything bagel seasoning, cinnamon and sugar, coarse salt, grated Asiago or Parmesan cheese, or other toppings of choice. If leaving the bagels plain, the egg wash is optional.
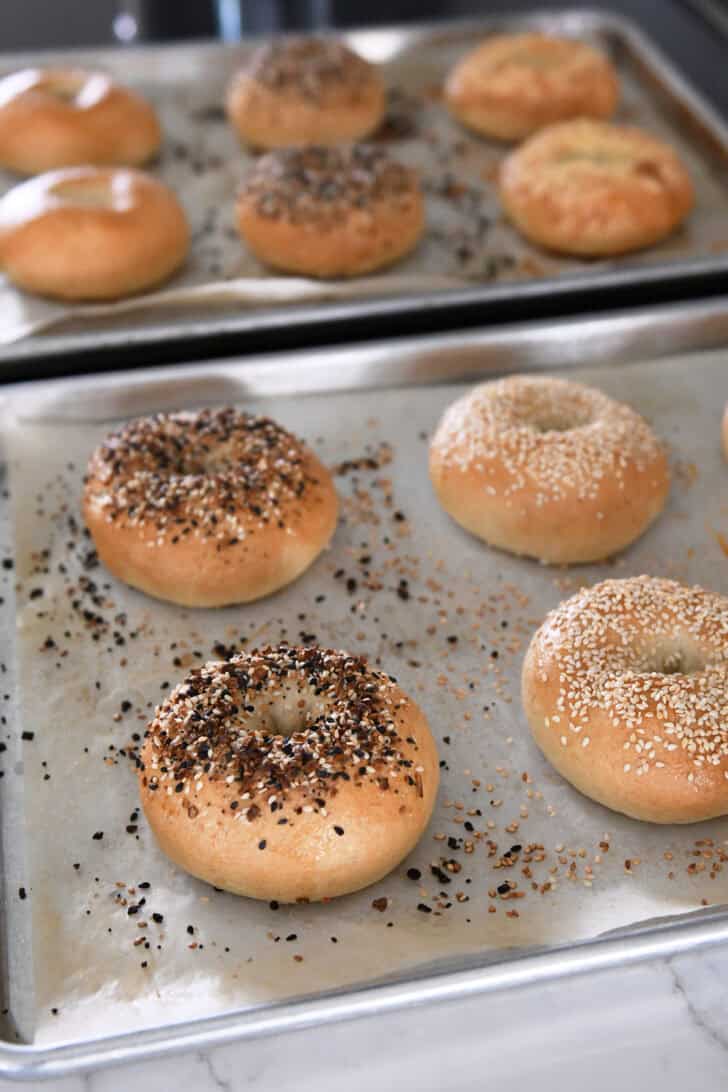
- Bake the bagels for 20 to 25 minutes until golden brown. Remove the bagels from the oven, and transfer to a cooling rack to cool completely (don't let them cool completely on the baking sheet as they have a tendency to stick due to the sugar/water bath).
Notes
6 cups bread flour
1 tablespoon salt
1 tablespoon grown sugar
2 1/4 cups warm water
Recommended Products

Recipe Source: adapted slightly and expounded upon from King Arthur Flour
Recipe originally published April 2011; updated September 2025 with new photos, recipe notes, etc

Did not work making 12. Not enough flour. May try again but not sure.
So excited to try these! Any suggestions on how to add cinnamon and raisins?
Thanks!
You can add ground cinnamon to the dough with the other dry ingredients – maybe 1 teaspoon to start? And add the raisins during the last minute or so of kneading.
I’m wrong. Sorry. KAF does have it. It must be for the color. I have the barley syrup. Thanks for detailed instructions.
Why a tablespoon of sugar in the dough? Are they sweet? The KAF recipe doesn’t have the sugar. I’m about to make them and wondering about the sugar. Thank you.
Hi Mel,
Do the bagels still have the chew you get when you boil them in water & baking soda? That is the best part of a homemade bagel . . . the chew.
Yes, they have a wonderful bagelly chewy texture.
Thanks for your quick response Mel! I really appreciate it! I will be making these soon! They look delicious!
I’ve tried bagel recipes in the past. This one tops them all. It is as close to the NY/NJ bagels as possible. Living in California, a good bagel is impossible to find. Will be making these on a regular basis. Husband even loved them.
That’s amazing, Mary! Loved reading this.
These bagels are so yummy and easy to make! I’m 15 years old and love to bake! The bagels turned out perfectly and were so delicious (even though 3 of the dough balls accidentally got baked as homemade pizza crust!) Thanks for another great recipe Mel!
You’re amazing, Brooke! Thanks for letting me know!
Have you used 1/2 fresh wheat before, or would you recommend using store bought white flour?
Yes, I’ve made these with 1/2 wheat (freshly ground white wheat flour). They are a bit more dense, but still delicious.
I know you love your Bosch – can it handle the 1.5 recipe
My KA can barely handle the recipe without me holding it down. It might be time to invest in the Bosch
Hi Betsy, yes, I very often double this recipe in my Bosch with no issues.
These bagels are so good. I make a triple batch, we have breakfast sandwiches with these for dinner, and the rest are for enjoying throughout the week. I have some on my counter right now. In fact, I make them often enough that my phone will suggest a 2 minute timer for me around dinner time on Sunday now.
I love this, Jennifer!! so happy these bagels have become a staple for you and your family!
Mel, how are your pigs and donkeys?? How is your faux farm??? I miss seeing your posts about them. Thanks for all the awesome recipes!! My family loves you! Thank you!
Hi Janette! I posted a little update about some of our animals in an older Friday Thoughts post. We actually re-homed the pigs and donkeys. It was such a hard decision, but we needed our pastures for other animals, and my kids were getting older and not as involved with the cute animals, and I wanted a better place for them. I miss them!! We still have chickens and cows…and I’m hoping some day we’ll have some other fun little animals around, but for now, we’ve simplified and it feels like the right thing.
Can this recipe be halved? And can this recipe be made by hand instead of mixer with a paddle?
Hi Sandra, yes, the recipe can definitely be halved. And the dough can be mixed by hand. If doing so, add a few minutes to the kneading time just to make sure the gluten develops fully.
My daughter loves blueberry bagels, and I love cinnamon raisin bagels. Question would air-dried blueberries be what I need to add to the dough while mixing it. I think fresh or frozen blueberries would not work. Also, about the cinnamon raisin bagels, would I add the cinnamon and raisins while mixing the dough?
Sorry for a lot of questions, but I need to know. Thank you, Mel.
Hi Claudine, for add-ins, I would add them in during the last minute or so of kneading time just so they incorporate without over mixing. I agree, I think fresh blueberries would break apart too much in the bagels, but you could try dehydrated or freeze-dried blueberries.
When I saw your recipe for bagels I knew I had to make a batch. Oh my soul!! These are so absolutely wonderful I don’t have the words to describe them. I divided the dough into 12 pieces. Before they went into the oven I sprinkled four with cinnamon sugar, four with parietal, and four with sesame seeds. I took a bite of a parietal topped one, intending just the one sample bite. Before I knew it, the bagel was gone. So was a sesame bagel. Thank you (I think!) for this great recipe.
I’m so happy you loved this recipe so much – and am thrilled you made them today! Thanks for taking the time to let me know!
I love this recipe! I’ve added jalapeños haven’t tried the cheese, but this recipe turns out awesome every time! Thank you🥰
Hi Mel. I have made these bagels often and they are indeed delicious. I recently made them and attempted to do a “slow rise in the fridge overnight” but I must have done something wrong because the bagels turned out to be very small. Can you please expand on the process of a slow rise?
Did you refrigerate the dough as one big mass or did you shape the bagels and refrigerate them that way?
Hi Mel. Can you explain more about how to proceed after leaving in the fridge overnight? Tia!
If you’ve refrigerated the dough overnight, let it rest out of the fridge for an hour or so to shape the bagels. If you’ve refrigerated the shaped bagels overnight, you can proceed with the boiling step per the recipe.
Do you let the dough rise first for an hour before it gets refrigerated or is all the rising done just in the fridge?
I usually pop the dough right in the refrigerator without letting it rise. It should rise a bit in the fridge…but if it hasn’t risen fully, it may help to take it out of the fridge and let it come to room temp and continue to rise until puffy. A lot depends on the exact temperature of your fridge and the temp of the dough when it goes into the fridge.