Buttery Pull Apart Bundt Bread
This buttery pull apart bundt bread is fabulous! So easy to make, it’ll wow everyone at the table and is sure to become a favorite. That golden buttery goodness can’t be beat!
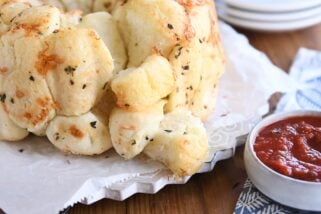
This bread. It’s amazing. Talk about taking your every day dinner roll to the next level. Not only is it a showstopper in the looks department, but that crispy, buttery goodness is other-worldly delicious.
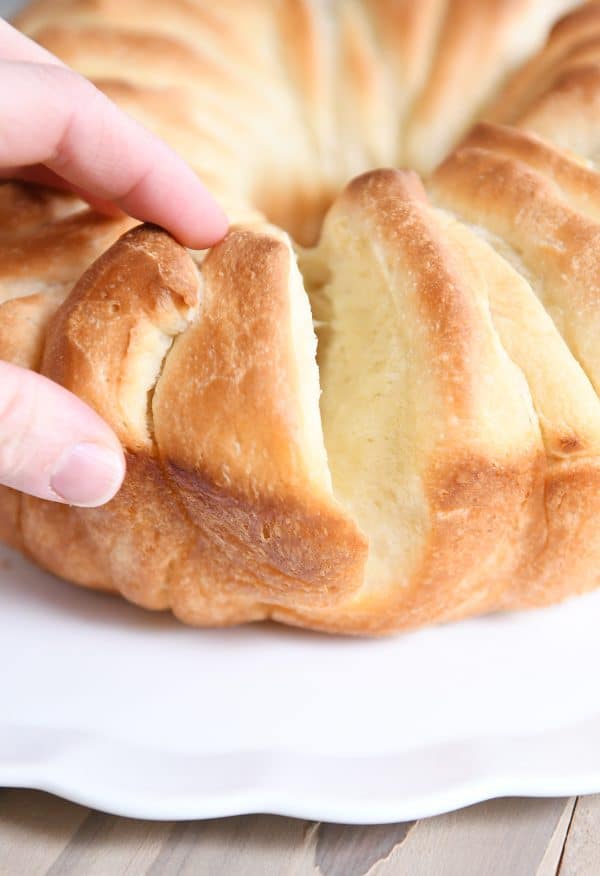
And I promise I’m not just saying this, but you guys, this bread is really easy to make. It definitely looks harder than it actually is, which will make you look like a total rock star. The dough is so easy to work with and comes together fast. Plus armed with yesterday’s baking with yeast tutorial, you’ve totally got this.
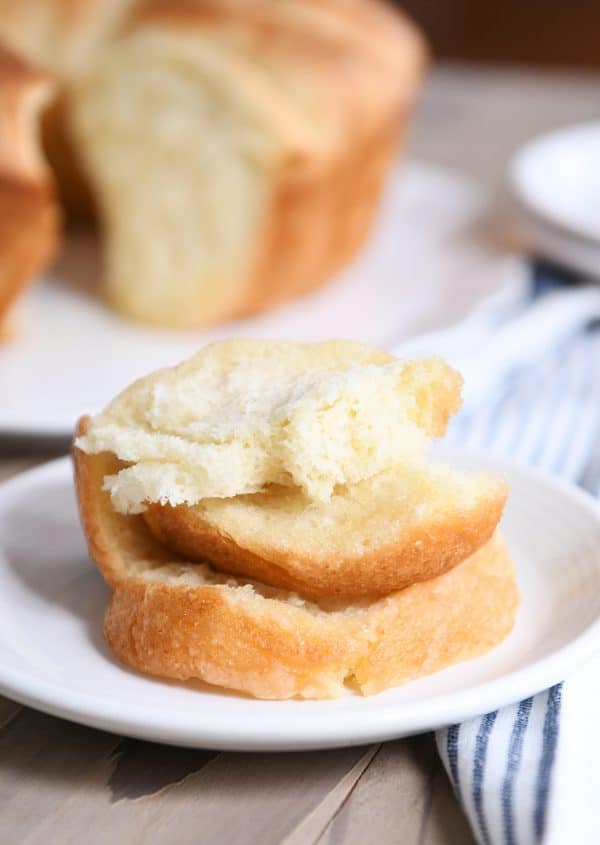
I got this recipe from a super awesome MKC reader, Madison G. (thanks, girl!) who not only shared her deep and abiding love for this easy pull apart bundt bread, but she also sent me step by step photos of her making the bread. Now if that’s not true dedication, I don’t know what is. (I’ve included her step by step photos at the end of this post!)
So Easy Your Kids Can Make It
We’ve made this bread so many times since Madison sent me the recipe. I think you can easily say we’re obsessed. Over the last few months, I’ve been delegating Sunday dinner assignments to the kids (and deliberately leaving myself out of the rotation so they can get some good hands on time executing a recipe start to finish, and also because, Sunday nap).
So, for instance, one kid will be in charge of main dish, another will tackle dessert, yet another will do a side dish, and since we usually have homemade bread of some sort on Sunday, I give at least one kid the assignment of homemade rolls. They each get to pick the recipe they want to make as long as they approve it through me first.
The kids have totally surprised me with their ability to conquer homemade bread. And this buttery pull apart bundt bread has been one of the most oft-chosen bread recipes to make on Sundays. My 12-, 13- and 15-year olds have each successfully made it all by themselves. I could cry with happiness.
Because this bread is meant to be a little rustic in appearance, it’s perfect for kids to make (and let’s be serious, for me to make, too).
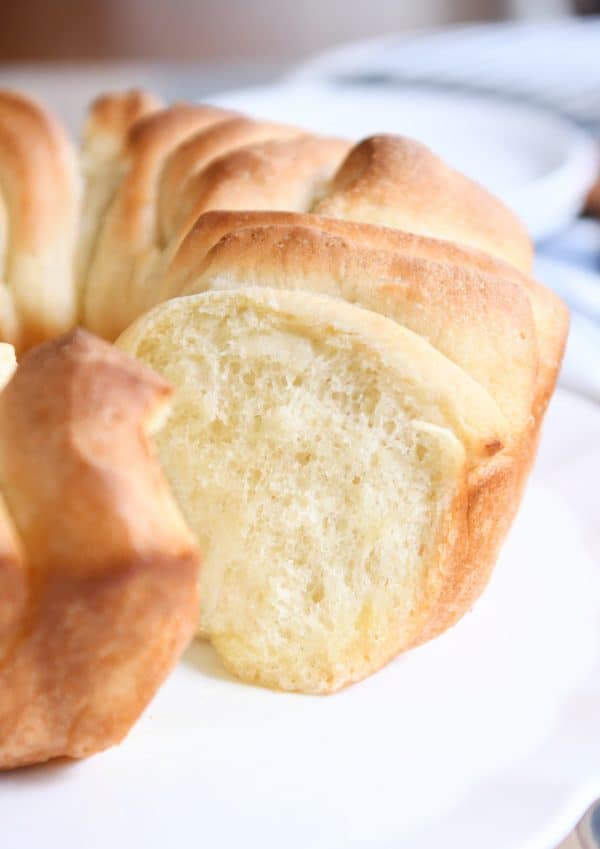
This bread is not hard to make, but I still put together a little tutorial just because sometimes visual learning is the turning point between “maybe” and “dude, totally.”
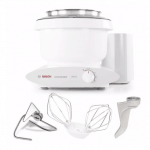
As with most bread making, I use my Bosch to mix up this dough. It’s a small amount of dough, so I think a KitchenAid can handle it just fine, as well. The dough should be soft without being overly sticky. Add flour gradually until you get there (the exact amount of flour will depend on a lot of factors so don’t stress about how much you use as long as the dough forms a ball, clearing the edges of the bowl and is still soft).
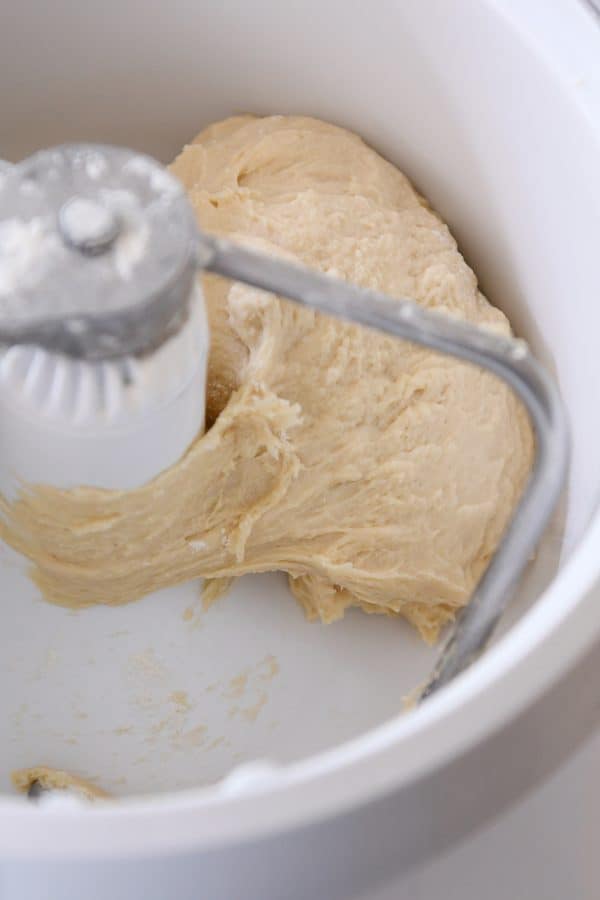
The dough will rest in the mixer for 10-15 minutes until slightly puffy. That’s right! No need to transfer it to another bowl to rise. Totally low maintenance.
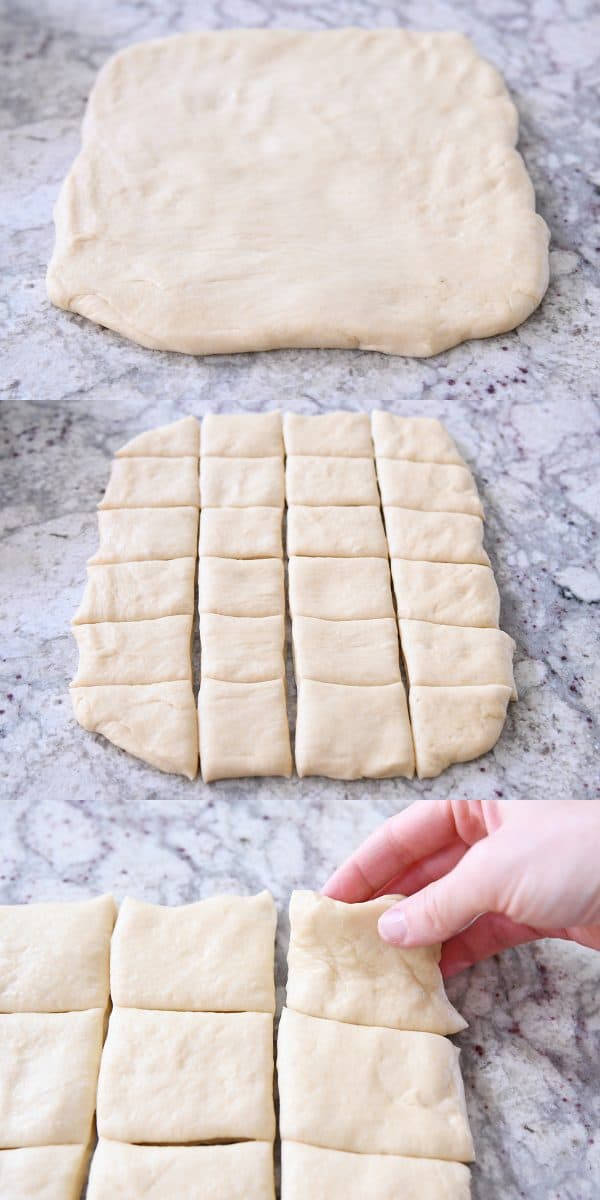
After it puffs a bit, you can press or roll it out on a lightly floured or greased countertop. Madison, who sent me the recipe, cuts out rounds with a biscuit cutter, but I’m kind of lazy, so I press the dough into a rectangle about 12X10 inches and then cut the rectangle into four strips the long way and six strips the short way which gives me 24 little squares. Following?
It’s not rocket science. Basically you want about 24-26 pieces of dough to layer into the bundt pan.
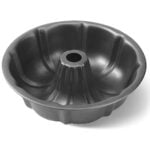
What if I don’t have a bundt pan?
Well, don’t you worry. This bread will convert really well to a couple loaf pans. You may not get quite the same wow factor as the bundt pan-effect, but hey, all that really matters is how it tastes. And I promise this bread tastes incredible no matter what it looks like.
Pour 4 tablespoons melted butter evenly in the bottom of the bundt pan. Then, one by one, take a square (or circle if that’s how you chose to cut them) and dip into the butter and then lay the piece of dough down slightly on top of the one before it. Kind of like a trail of dominoes that’s been knocked down by an annoying sibling.
Please tell me that random visual makes sense to someone else other than me.
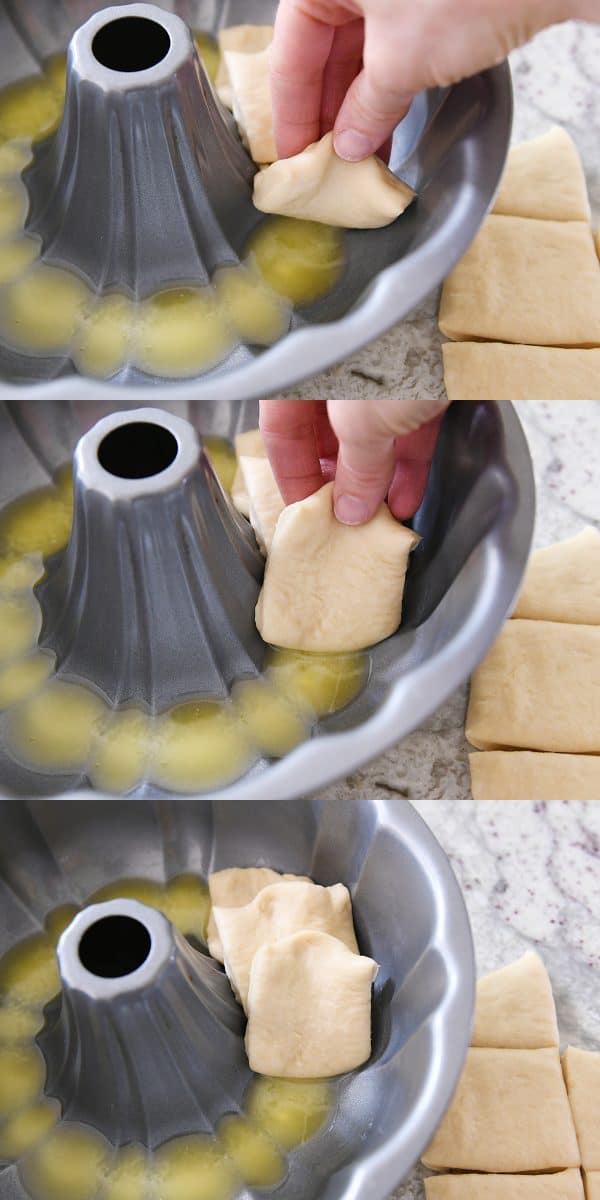
You’ll continue doing that until all the pieces of dough have been dipped in butter and laid to rest in a single layer around the bottom of the pan.
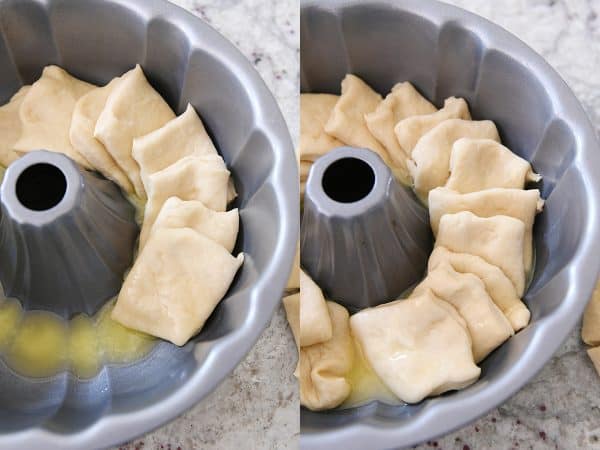
Toward the end with the last few pieces, you may need to reach in and adjust the dough squares a little bit to fit in the remaining pieces.
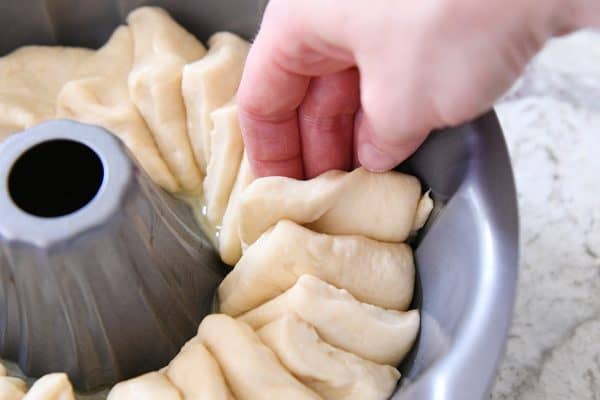
Cover the bundt pan and let the dough rise until noticeably puffy. Then, and don’t think twice about this, pour the remaining 4 tablespoons melted butter over and around the top of the bread and pop it in a 375 degree oven to bake for 20 minutes or so. You’re going for super golden. Super crispy. Super buttery.
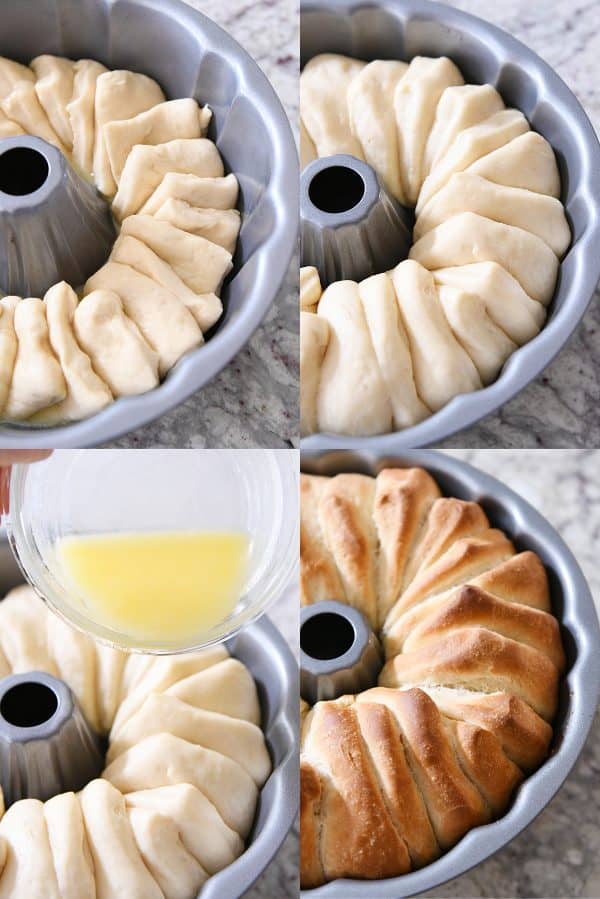
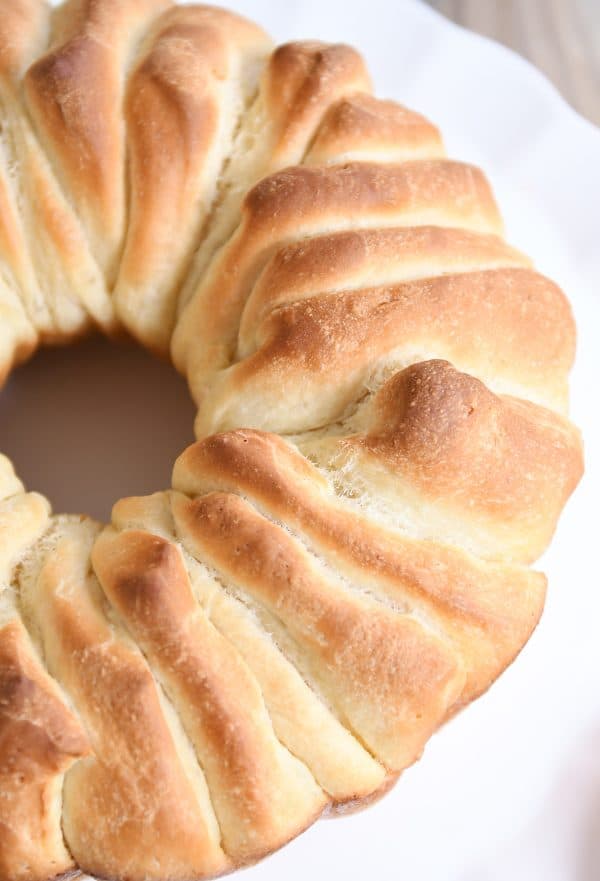
Once it comes out of the oven, let it rest for a couple minutes in the pan before turning it out onto a plate. The easiest way to do this is to turn a plate upside down over the top of the pan and then grabbing both the plate and the pan at the same time, do a quick flip so the baked bread pops out onto the plate.
You can leave it bottom side up or flip the bread one more time (with your hands) so the craggy, golden edges are facing up. It doesn’t really matter either way. The golden pieces of bread pull apart easily, and it is delicious eaten plain as can be or spread with a little jam. It makes a fantastic side dish for everything from soup to pasta.
We haven’t done much experimenting yet because we love this buttery version so much, but I have a feeling this would adapt really well to a Parmesan or Asiago pull apart bread. And adding fresh or dried herbs would be a very, very good idea!
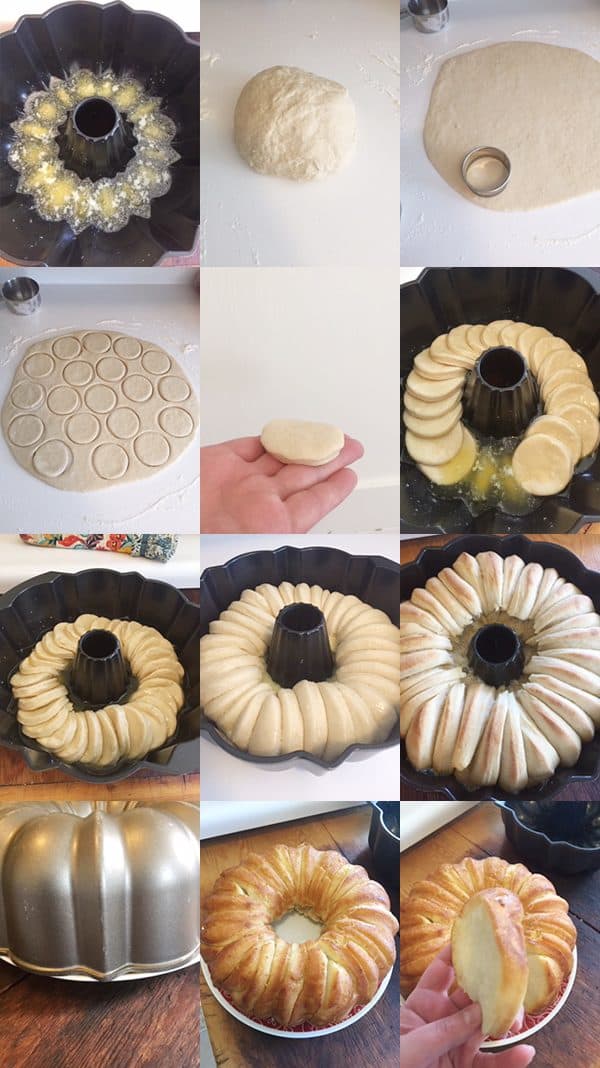
As an added layer of support, here are the step by step pictures Madison sent me when she emailed me the recipe. I threw them into a quick collage so you could see how it looks to cut the dough out into circle shapes. Also, Madison uses all the butter on the bottom of the pan (vs pouring half on top like we do).
Truly, this buttery pull apart bundt bread is special. Really, really special. It makes a fantastic “gift” for new neighbors or friends or to throw in with your next take-in meal.
Also, I think it would make a an awfully pretty centerpiece too. Thanksgiving, maybe? Although it’s doubtful anyone would be able to keep their hands off it as they sneakily try to snitch buttery piece after buttery piece. Yeah, after typing that out loud, I think this bread is meant to be freely enjoyed. Dig in!
FAQs for Buttery Pull Apart Bundt Bread
Yes!
Yes, you could make the dough with a bowl and wooden spoon. Just mix and knead the ingredients until a soft dough forms and knead by hand for 3-4 minutes.
I usually pop the leftovers in a ziploc bag and keep at room temp (and then lightly warm the bread before eating leftovers).
One Year Ago: Thin and Chewy Toffee Bits Cookies
Two Years Ago: Instant Pot Smoky Honey Cilantro Chicken {Bonus: Slow Cooker Directions}
Three Years Ago: Brownie Batter Puppy Chow {or Muddy Buddies}
Four Years Ago: Double Chocolate Greek Yogurt Cookies
Five Years Ago: Blueberry and Almond Baked Steel Cut Oats
Six Years Ago: Refried Beans {Made in the Slow Cooker and Fat-Free}
Seven Years Ago: Lemon Cupcakes
Eight Years Ago: Healthy Oatmeal Chocolate Chip Cookies
Buttery Pull Apart Bundt Bread
Ingredients
- 1 cup warm water
- ¼ cup (53 g) granulated sugar
- 1 tablespoon instant yeast (see note for active dry yeast)
- 1 large egg
- 1 tablespoon oil
- 1 teaspoon salt
- 3 ¼ to 3 ½ cups (462 to 497 g) all-purpose flour (see note for whole wheat)
- ½ cup (113 g) salted butter, melted
Instructions
- In the bowl of an electric stand mixer fitted with the dough hook (you can make this by hand, too) add the warm water, sugar, yeast, egg, oil, salt, and 2 cups of flour.
- Mix until combined – it’s ok if it is a little lumpy. With the mixer running, continue to gradually add flour until the dough clears the sides of the bowl and forms a ball that is soft but not overly sticky. Knead for 2-3 minutes. Cover the top of the bowl, and let the dough rest for 10-15 minutes. It should puff slightly.
- Pour half (4 tablespoons) of the melted butter evenly in the bottom of a bundt pan (if you don’t have a bundt pan, you can use loaf pans).
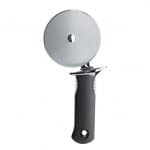
- On a lightly floured or greased countertop, press or roll the dough into a 1/2-inch thick rectangle, about 12X10 inches. Using a pizza cutter or sharp knife, cut the dough into 24 semi-equal squares.
- Grab one square at a time, dip the bottom of the square in the butter in the pan and layer the squares against each other (kind of like a trail of dominoes that has fallen over on each other). See pictures in the post for a visual. All 24 squares should fit in a layer around the bottom of the pan. Lift and rearrange the squares, if needed, to fit them all in.
- Cover the bundt pan and let the dough rise until noticeably puffy, 45-60 minutes. After the dough has risen, pour the remaining 4 tablespoons butter over and around the top of the bread.
- Preheat the oven to 375 degrees F.
- Bake the bread for 20-25 minutes until golden brown on top and baked through. Remove the pan from the oven and let rest for 5-10 minutes before turning out onto a plate or platter (lay the plate upside down over the bundt pan and holding onto both the plate and pan at the same time, flip it over so the bread falls out onto the plate).
- Serve warm or at room temperature.
Notes
Recommended Products
Recipe Source: adapted slightly from a recipe a MKC reader, Madison G. sent me



SO easy to make and SO delicious!!! My kids now request this frequently! They love that they each get a crispy edge piece! Thank you for the recipe!
My kids raved and said it was the best bread they’ve ever eaten!
My 12 year old asked me to teach him to make this so we can have it more often! He said it’s the best thing he’s ever eaten (even better than your rosemary bread which is a huge favorite around here).
I love that!!
Added garlic and Mrs.Dash herbs and delicious
Has anyone tried this without sugar? Does it still turn out good?
This is my favorite thing to throw together because I don’t need to go to the store! I’ve made it quite a few times, always adding garlic powder, dried herbs, and usually some shredded cheese. People rave! I dislike the assembly because it’s awkward, so today I just rolled out the dough and spread the butter and seasonings over it and THEN cut the squares out and layered them in. So much easier! To make sure the pan was greased, I just brushed some of the melted butter on beforehand. Worked like a charm.
I just made this bundt bread – literally. It’s still warm. It is absolutely delicious. I followed the recipe exactly. The additions of one of the cheeses sounds good, and I may add one of them the next time I bake it.
I made this adding some fresh garlic and chopped parsley to the butter I also added Parmesan cheese to the bottom of the Bundt pan with the butter, and also sprinkled some between the layers. It came out beautifully with a nice crispy. Cheesy top! This went perfectly with chicken chili for game day! I also used a regular drinking glass to cut out circles instead of doing squares and realized Super Bowl is coming up and I think they would be great for sliders! I will definitely make it again and looking forward to your monkey bread next!
This looks great! I have a question about the weight. Are you using the weight of your measured cups, as opposed to the weight of the equivalent from the package? I use All Purpose Flour that’s 30 g per 1/4 cup serving, so 3.5 cups would be 14 x 30g, or 420grams. Your recipe says 462 to 497 g. Maybe I will just try about 462g? Thanks! Can’t wait to try this!
I test all my recipes using 140-142 grams of flour per cup. Even though different brands of flour will list varying gram measurements on the package, I always recommend that home cooks and bakers use the weight measures on a given recipe since the recipe has been tested that way. Hope that helps!
Is it possible to make this without eggs?
Sorry, I did not see the question has already bern answered! I will try without the egg.
We absolutely love this recipe and have already made it a few times! However, our daughter was just diagnosed with an egg allergy. Does anyone have a suggestion on how to make this eggless? Thank you!
Hi Theresa, I think you could leave out the egg. The dough will have a slightly different texture, but it should still be delicious (might need to add a bit less flour).
This bread is amazing! And fairly quick, too. One note – I now cut the melted butter in half and use 2 tbsp. in the bottom, and pour 2 tbsp. on top. Our family prefers it this way; we found the bottom to be too ‘buttery’ after baking. Otherwise – delicious!!
Incredible! Easy to prepare. I had to stop myself from eating half the pan!
This bread is easy to make and delicious. My kids have made it many times. It’s always on the list to take to families whether with a meal and by itself. Every time they request the recipe. Thanks for creating this recipe that brings joy and happiness in good times and hard times.
Our favorite bread. We make it most Sundays in the fall and winter.
I made this bread several times and it’s a delicious easy recipe. Do you know if I could use this dough to make cinnamon rolls. To me it would work. Instead of cutting squares or circlies, I would just put butter and cinnamon and sugar and roll up like other cinnamon rolls recipes. Please let me know what you think. Thanks for this great recipe. Family and I loved it.
I haven’t tried that, but I think it’s definitely worth a try!
I want to make this bread but I have only one packet of instant yeast. Will that work? can you explain why a tablespoon of yeast and not just a packet?
thanks.
Hi Tara, I don’t keep packets of yeast on hand – I buy yeast and keep it in a quart-size jar. But you can use a packet of yeast – it should work fine.
Mel! I literally just took this bread out of the oven, let it cool for 5, took a bite, and told my husband, “I have to email Mel right away.” This is beyond delicious and so easy! I LOVE it!
Oh, this made my day! So happy you loved this bread!
Hi! I made this the other day and it was so good! Huge hit with my 5, 3, and 1 year old picky eaters!
I love that you can make this ahead of time and refrigerate the dough. Which point of the dough would you refrigerate it? After initially making it or after the cut squares?
Thank you!
I refrigerate it after assembling the squares of dough in the pan.
I’ve made this twice & it’s amazing! (I’m not a bread maker either.)
Yum, this bread is soft and so delicious! And so easy!!!! My family did think it was a little too sweet for a dinner bread, so next time I would cut down the sugar and add some herbs/cheese. But as is, it would work so well with some caramel and pecans (my mouth waters just thinking about it). I will definitely try this one again.
Made this for the first time today and WOW we loved it so much. Way easier than rolls and that caramelized, buttery, melt-in-your mouth edge is absolute heaven. Such a good one Mel! Thank you!
OMG! Was this EVER soooo good! You’re right this was easy. I thought the bread almost had a cake like texture it was so very soft. Did not need any more butter after baking either.
Thank you Mel and Madison, definite winner!
So good – my family quickly devoured this!
Making these to take to Christmas dinner at my daughter’s?
Years ago we made it then dipped the dough into butter then into cinnamon and sugar then continue on. Delicious for Christmas breakfast
Excellent! I used brown sugar to serve with BBQ and, well, molasses. Superb and EASY!
For my visit tomorrow I look forward to worm my bread it’s looking pretty good. Thank you to have share this bread.
What size Bundt pan (# cups size) thanks
10-cup or 12-cup bundt pan.
We’ve made this at least once a month for the past year. It’s super easy and looks and tastes amazing! Thank you, Mel!
It really is FABULOUS!!!
Absolutely delicious. We make this almost every Sunday!
This looks yummy, and easy I can’t wait to try it! I wonder if it would work with toppings or mix-ins. Cinnamon/sugar, cinnamon, raisins, craisins…
Made this a couple days ago, the bread cooked in butter makes such a nice crispy outside and a really soft inside. It was so good!!
This has become a family favorite – my kids cheer when I make it! It’s so much easier than I thought it would be, and it’s fast compared to other yeast bread recipes. It’s perfect when I want to make bread but don’t have much time. The cutting and arranging is very forgiving – I let my 8yo cut it the last time I made it and the sizes of the pieces varied WILDLY, but it still looked just as pretty coming out of the oven and tasted just as yummy 🙂
Do you think I could add fresh mozzarella with pesto to the middle layer between the dough? Where’s the best place to add fresh cheese?
Sure! Sounds yummy. I’d probably add it after all the bread is layered in the pan – just pull apart the layers and add the cheese.
This is the best bread ever. It’s easy to make and the taste is out of this world . My husband and kids love love it.
This is so yummy! I am a 13 year old boy and learned to make these when I was 12. SO EASY AND YUMMY!
I used half of the butter, whole wheat and bread flour half and half and it turned out great. We also made star shape instead. Kids had fun with it.
This was superb! Made it several times, and for something so easy, the results are spectacular!
Bread is my weakest kitchen skill.. but somehow this recipe always turns out really well for me! And it’s SO beautiful. I always let mine raise longer (I don’t know enough about bread to understand why- maybe where we live or something with my technique?) but it seems to be pretty perfect after raising for 90 min.
Super fabulous and easy!! I’ve made this 3 times in the past week! All the results were solid and definitely a crowd pleaser. I love the bundt pan idea; seems to go quicker. The texture was perfect and the flavor was just so great! I liked the butter in the rolls, too. There was no need to pass around a stick of butter and take your turn in line, while instructing kids how to butter things properly. I love the simplicity of just putting a hot roll on your plate and eating it right away. The only change I made was to let them rise in the bundt pan for 1-2 extra hours. It’s just the way the timing of the meals worked. I also found mine browned too much the first time, so I think I will lower the heat a tad. The 2nd and 3rd time was pretty consistent, even though I cooked them in a different oven. Mine were done before the 20 minute mark. Thank you for another amazing recipe, Mel!
When it says to knead for 2-3 minutes, is that with the dough hook or by hand? I noticed in the picture-steps it doesn’t make mention of it, but in the notes is where it gives instructions about it. Thanks!
I use the dough hook.
I needed by hand 3 min
can you make the dough and refrigerate overnight?
Yes!
Hi , stupid question, do i use the 1 tbl. Instant dry yeast, or the 1 1/4 as stated in “ notes” after adding water. Thanks . Toni
If you’re using instant yeast, use 1 tablespoon – if you are subbing in active dry yeast, use 1 1/4 tablespoons. Does that help?
Yes, thank you
I made this yesterday for the first time. My mother-in-law said it reminded her of her grandmother’s bread recipe that she loved as a kid. I was so easy and tasted great.
Super easy recipe and love the visuals. So I decided to go sweet with this light and fluffy bread. I made cinnamon rolls and they are awesome. I added just enough cinnamon/sugar mixture to get my sweet bread feels. Thank you for sharing. This is now my go-to bread recipe. Will definitely try some savory flavors.
This bread looks heavenly! Wondering if I could make the dough in my bread machine using “dough cycle”?
I don’t have a bread machine so I don’t know for sure, but it’s worth a try!
I don’t own a bread pan but I do have a Bundt cake pan so I made this once and it was a hit! now I’m trying it a second time bc I want to use it for French toast with mascarpone whipped cream and I think the thick squares would be perfect for an imperfect but highly addictive French toast! I used 00 flour, vegan butter and an extra egg yolk. This is a divine recipe!