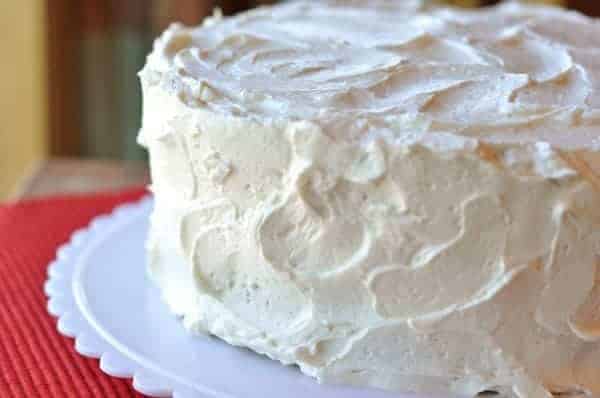
The Best Frosting {a.k.a. Magical Frosting}
This magical frosting is simply the BEST frosting ever. It requires a bit more planning than every day buttercream, but the results are worth it.
I am rarely left speechless {if you are my husband you are seriously nodding your head right about now}. I like to talk {husband still nodding}. To dissect the details of important matters, such as great toenail polish and food {husband falling asleep}.
However, after taking a taste of this frosting, I was left completely speechless. No words. None. Just absolute, incredible tastebud bliss {husband shocked into silence himself}.
The Best Frosting of My Life
It is the best frosting I have ever tasted in my life.
You might have seen the phenomenon of this type of frosting swirling around. I tried the Tasty Kitchen version (highlighted by the Pioneer Woman) twice, and both times it was a disaster. I had given up on the so-called miracle of flour-based frostings until I saw and made this latest version.
It left me weak and trembling.
And do you know what tops it all? There is a chocolate version. Oh, heaven help me.
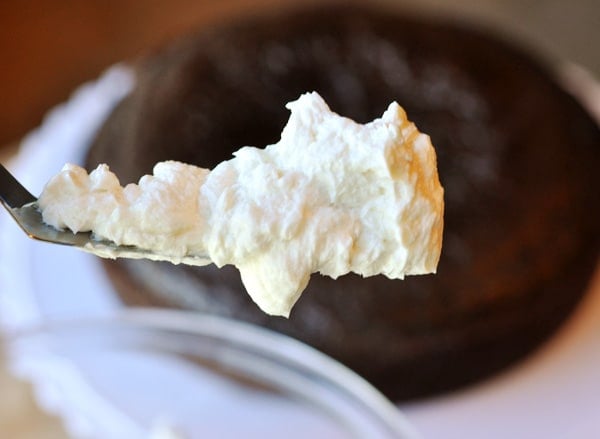
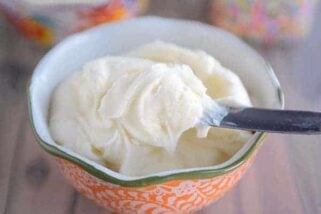
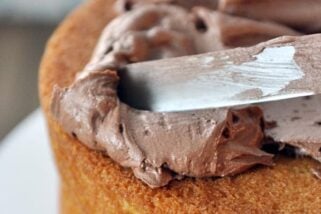
I slathered this frosting on the most decadent cake I’ve made to date (posting tomorrow!) and I can’t begin to describe the magical web of fluffy, creamy sweetness that is beholden in this frosting.
I am a self-professed frosting hater, which makes my testimonial of this frosting all the stronger. I abhor the greasy, filmy, overly-sugary taste of traditional buttercream. Even the adventurous seven-minute/marshmallow frostings of the world leave me wanting.
But this frosting…well, it belongs in The Best Recipe section no doubt about that.
My search for the best frosting is over.
I’ll be honest, it is a little more work and requires a bit more planning than throwing butter and powdered sugar together in a mixer but I’m promising you here and now that the results are worth every minute.
The real issue now becomes making sure any of this frosting actually makes it to the cake before being inhaled by my little lips.
One Year Ago: Basil Chicken in Coconut Curry Sauce
Two Years Ago: Chocolate Chip Cookie Dough Cheesecake Bars
The Best Frosting {a.k.a. Magical Frosting}
Ingredients
- 1 ½ cups (318 g) granulated sugar
- ¼ cup (36 g) all-purpose flour
- 3 tablespoons cornstarch
- ¼ teaspoon salt
- 1 ½ cups milk, I use 1% or 2%
- 2 teaspoons pure vanilla extract
- 1 ½ cups (340 g) butter, cut into 24 pieces and softened at room temperature (I use salted butter)
Instructions
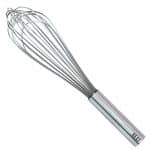
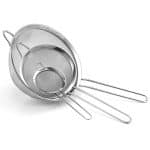
- In a medium bowl, combine the sugar, flour, cornstarch and salt. Slowly whisk in the milk until the mixture is smooth. Place a fine-mesh strainer over a medium saucepan and pour the milk mixture through the strainer into the saucepan. Cook the mixture over medium heat, whisking constantly, until the mixture boils and is thick enough that it starts to become difficult to easily whisk. This could take anywhere between 5-10 minutes, depending on your stove, heat, etc. It should bubble quite a bit at the end (be careful of the splatters) and thicken considerably.
- Transfer the mixture to a clean bowl and cool to room temperature – this is extremely important! If it is even slightly warm, the frosting won’t beat up properly. I refrigerated my initial mixture overnight. If you do this, make sure to pull it out in time to let it warm back up to room temperature. If you try to proceed with the rest of the recipe and the mixture is too cold, the butter won’t absorb into the frosting like it should.
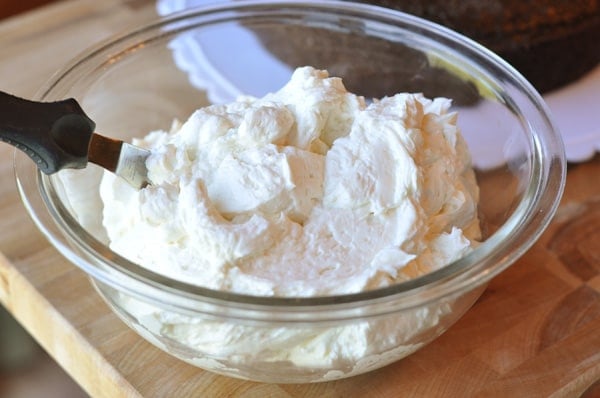
- Once the frosting is completely cooled to room temperature (it should have no hint of warmth at all!), beat the mixture with the vanilla on low speed until it is well combined, about 30 seconds (a stand mixer will work best for this). Add the butter, one piece at a time, and beat the frosting until all the butter has been incorporated fully, about 2 minutes. Increase the speed to medium-high and let the mixer work it’s magic. Beat the frosting for five minutes, until it is light and fluffy. Let the frosting sit at room temperature until it is a bit more stiff, about 1 hour. I suspect if you chill it for an hour or so, it would be stiff enough to actually pipe with instead of frosting with a rubber spatula.
Notes
Recommended Products

Recipe Source: adapted slightly from Cook’s Country Oct/Nov 2010
after seeing the version on tasty kitchen, i had my doubts–i’m a skeptical person by nature. however, i find myself believing your assessment of this frosting and am now itching to try it myself! what can i say, melanie, except that you’re worthy of my trust. 🙂
Still not great after an overnight in the fridge. I think it’s better, but my 5 year old is telling me to leave it off the cupcakes! I added some powdered sugar, and I think I will add even more. I think it can be saved. Maybe.
I just made it, and it tasted…SOAPY? I can’t figure it out because I know I used clean utensils. The prefrosting mix was tasted, and it was OK. Not soapy, not overly sweet. The only thing I can figure is my butter was off? I didn’t actually taste the butter before it went in to the mix. It was in an unopened box, but I’ve had it about a month. Do you recommend unsalted butter? Or, fresh butter?
I haven’t scrapped it yet. It’s sitting in the fridge, firming up, I’m hoping for some magic!
Tricia – well, I have to say, I never thought I’d hear this frosting described as soapy! I have no idea what might have happened. Butter shouldn’t go bad after a month, but you might check the expiration date to be sure. I always use regular, salted butter. Let me know if the taste manages to change after the sit in the refrigerator!
After posting my last comment, I read through a bunch of other’s. Linda (comment #53) helped me realize that I am probably doing it right. I think next time I will add a little more sugar for my taste. Like this recipe needs more calories, right?? 🙂
Thanks Mel! Love your website!
Morgan – I think you are doing everything right. This is definitely a recipe that is going to either WOW people or leave them wanting for more sweetness. I liked the frosting for it’s mild sweetness but you should try adding more sugar next time. I’m glad you liked the chocolate cake, though! And as for canned butter, I’ve never used it (or heard of it to be honest) so I’m not sure the effect it would have on this frosting. If you have access to regular butter that comes in 1/2 cup sticks, you might try that to see if it helps the frosting’s taste.
So I made the Tasty Kitchen version a few weeks ago and thought it was “so so.” Seriously nothing to write home about. I was sure I did it wrong because everybody raved about it. Then you posted this recipe and I made your version tonight along with your Divine Chocolate cake recipe (though I made mine into cupcakes!).
I haven’t even frosted them yet but have licked the spoon of the frosting a couple of times. I must be doing something wrong because I think it is rather boring! I hardly taste any of the sweetness. I used canned butter for both. Do you think that makes a difference? The butter smells and tastes the same but I just can’t imagine why I don’t just love it. I love all things sweet, and I usually love all things that other people totally love….so I am afraid I a missing something. Perhaps a 3rd time will be a charm and I will make sure to use freshly store bought butter????
p.s. The Divine Chocolate Cake IS MOST DEFINITELY AMAZING!! That is a recipe that I will forever hold on to! Thanks! 🙂
I made this tonight and it is great. I let it set in the fridge for about 20 minutes and then piped it on cupcakes. I had enough for 24 cupcakes with some leftover. I may or may not have piped some of the extra icing directly into my mouth…..:)
Steph – thanks for the laugh. Seriously. I’m glad I’m not the only one that sneaks a little frosting into the old gullet!
I am so excited to see this recipe and the chocolate cake recipe!! My son turns one on Friday and I wanted to make him a cake and my 3 year old demanded that K wants a choclate cake. I just pulled the cake out of the oven and the frosting is waiting to go on. Can’t wait to try it!!
this might be JUST what I have been looking for. I have a super delish moist chocolate cake recipe (which I bet rivals yours – I have not tried yours yet so I can’t truly judge – but will soon!) that my husband also loves but he does NOT like my homemade frostings (picky picky) and I cannot STAND store bought frostings. I’ll try this week!!!
I also made the Tasty Kitchen version of this and it turned out a huge flop. I always trust Cooks Country so I’m sure you’ve got it right here!
Just tried this tonight! It tastes awesome! Having tried both the tasty kitchen version and this one, I think that I still prefer the tasty kitchen version. I don’t have a problem with it tasting gritty and it doesn’t have as strong of a buttery flavor to me as this one did, but this recipe is still a keeper! I can’t wait to try the chocolate version!
Melanie – thanks for checking in on this recipe! Glad you liked it!
It will thicken more upon cooling, but it definately should not be as pourable as a glaze when you finish cooking. It needs to be brought to a full boil, while you cook and stir. The flour will not properly thicken the milk unless it is brought to a full boil, not just a few tiny bubbles around the edge of the pot, but the whole mixture should be bubbling.
Turn the heat down to medium and cook and stir a minute or two more for good measure.
You should not be able to pour it into a bowl to cool. You should have to use a rubber spatula to scrape it out. It should be soft and smooth, but thick ……more the consistancy of peanut butter.
Be sure to cover it as it cools so that it doesn’t develop a hard skin like pudding does if not covered.
My mix is currently cooling, even as we speak. What should it look like while cooling? Mine kinda reminds me of sweetened condensed milk at the moment…thick but kinda could be poured like a glaze (it IS still warm). Is this normal? Should I be panicking yet? Of course, I also used skim milk (it’s what I had), so if it’s supposed to be thicker or pastier (like the Tasty Kitchen version, which I tried and was a huge mess) that may be the trouble. Thanks for any tips!
Miss L – my mixture is the same consistency as what you have described. I’ve made this frosting three or four times now and the first boiled mixture is always thick but if I tipped up the bowl, it would slowly (very slowly) pour out – like a very thick pudding before it has set up. I wouldn’t panic if I were you since it sounds like your consistency is like mine has been. The mixture should be thick enough that it starts to get a bit difficult to wisk it toward the end of the cooking process but it shouldn’t be so thick that it clumps up and is a big mass. Hope that helps. Let me know what the result was!
I think people are having trouble w/The Tasty Kitchen version simply because they are not cooking the flour-milk mixture long enough nor beating the frosting enough.
This is an old-time, simple recipe we used to call Poor Man’s Whip Cream Frosting. It has the taste and texture of whipped cream and is definately not a sweet buttercream frosting. The original recipe called for shortening (Crisco), but I make it w/butter instead.
In a saucepan, gradually add 1 c. of milk to 5 Tbs. flour, stirring to avoid lumps. Bring to a boil, stirring constantly. Lower heat to medium and continue to cook and stir til a thick paste, about 5 min. Cool completely. This can be done ahead of time, placed in small bowl, covered and refrigerated.
When ready for frosting, remove from frig and bring to room temp.
Beat 1 c. room-temp butter til light and fluffy, about 2 min. Add 1 tsp vanilla and 1/3 c. regular sugar and beat til well-combined. Add another 1/3 c. sugar and beat, then another 1/3 c sugar (1 c. total). Scrape sides of bowl and beat 2 min.
Add half of milk/flour mixture and beat well. Add remaing milk/flour mixture and beat 2 more minutes til fluffy and you can no longer feel the sugar if you rub a bit of frosting between your thumb and finger. That’s your Poor Man’s Whipped Cream Frosting!
If a sweeter, more flavorful frosting is desired, add 1/2 – 1 c. conf. sugar and another tsp vanilla..
Linda – thanks for your comments. As a clarification, this particular recipe that I posted, after boiling the flour and milk, should not be quite as thick as peanut butter as you mentioned in your comment. The consistency of this boiled mixture will be shiny and thick, like a really thick pudding before it has set up. It will take effort to continue whisking it but it shouldn’t be so thick that it masses together in a ball. My issues with the Tasty Kitchen weren’t with the fluffy outcome. It seemed to beat up just fine and work out that way but the texture was grainy and the flavor seemed off somehow. I liked this other version a bit better because of the cornstarch addition because it seemed to take out some of the flour taste/grittiness. You’ll have to let me know if you try the version I posted. If not, it seems like you are quite the expert on your own recipe – glad you love it!
Is this frosting really, really light and buttery tasting? I made a frosting this weekend that was with egg whites and a lot of butter like yours and it was so light it almost tasted greasy. But if you’re convinced this is the best I want to try it.
Marci – yes, this frosting really is light and buttery. It is a completely different texture than egg-white frostings I’ve made before. I hope you like it if you try it!
It’s me again…just giving feedback so others know how it was. I didn’t end up putting cream cheese with it since I already used the 3 sticks of butter, though I may have tried omitting the one stick and adding the cream cheese if I’d seen that suggestion first. So, my mom tasted it and thought it was cream cheese frosting without any cream cheese. I guess I fooled her! Regardless we all loved it on the carrot cake my dad ended up making, which was moist and yummy! Once again two winning recipes.
Thanks for the feedback, Shannon! That’s funny (and wonderful!) that your mom thought it was cream cheese frosting anyway. Makes it easy on you!
I’ve made a flour based frosting before but it didn’t come out quite right. The taste was very good (Kinda like Farina) but it wasn’t frosting-ish. I’m gonna give this one a try.
I read in the comments about a cream cheese version….hope you’ll update us on that one if you give it a go.
~ingrid
I love your blog and I have tried dozens of your recipes. This frosting however seemed wrong to me. It didn’t have much taste to it. To me the frosting on a cake is supposed to make the cake pop. The consistency of the frosting was fantastic, but the flavor was lacking in a major way. Maybe I am too used to my butter cream, sugary frosting. If I make this frosting again I will definitely try adding more sugar.
Kristi – sorry that this frosting just didn’t taste right to you. I’m glad you left the comment, though, because it gives me the chance to clarify that this is definitely not an overly saccharine sweet frosting (which is probably why I like it since the sugary buttercreams aren’t my thing). This frosting is lighter/fluffier and less sweet than many traditional frostings and I love it for the reason that I can still enjoy the cake without being overwhelmed by the frosting. Although I completely understand how all of us have different feelings about our frostings! I think if you dare make it again, you could definitely try adding more sugar – although I don’t know how that would impact texture. Let me know if you try it and thanks again for your comment!
The. Best. Frosting. Ever. Nuff said. I just made it, and had to get on here and say that it is amazing. Thanks for sharing!
Adam B – thanks for your agreement that this really is the best. I was a bit nervous after posting it and issuing my claims that it is the best and has changed my life and yada yada. But I am ecstatic to read that others are loving it as well. Thanks again!
Shannon – I think there is actually a cream cheese version of this where you cut the butter down to two sticks and use an 8 ounce block of cream cheese that has been softened and add it to the frosting in pieces with the butter. Since you already made the frosting, it wouldn’t hurt to blend in the cream cheese and see what happens but I’d definitely make sure the cream cheese is very soft and I’d whip it up on it’s own before adding it to the frosting to avoid lumps. Let me know if you tried it!
Ok I hate frosting. So when this popped up I made it the same day. I tasted the mixture when cooling, Hmmmm….interesting. I tasted the frosting after whipping in the butter….hmmmm still average. However, when I let it set for an hour and then put in on a chocolate cake…..it was just as you described it. DELISH!!! I don’t know what the waiting had to do with it but everyone who ate the cake thought it was indeed MAGICAL! Thanks!
Tracy – I was reading your comment going, ok, I hope it finally tastes magical…and I’m so glad that whatever the waiting did to the frosting turned it great for you. Thanks for the review!
Here’s the chocolate frosting to knock your socks off. It was published in a complementary issue of Cuisine at Home to go with an old fashioned chocolate cake. Both recipes have been posted together on Food.com….but it’s the frosting that’s the star in my opinion. The cake? Amazing for a cake with no eggs or dairy.
http://www.food.com/recipe/old-fashioned-chocolate-cake-with-glossy-chocolate-icing-102587
My sister called me yesterday and said, “I have a favor to ask you.”
“What?” I asked.
“Mel posted a new frosting and cake recipe–I need you to try it.”
“Well, for you, I guess I will. Twist my arm….”
And so out of sisterly duty I made this amazing chocolate cake and frosting. I really don’t even like frosting (except your cream cheese frosting) and I feel sort of neutral about cake, but this frosting (and cake) is in a league of it’s own. It was so amazing. I’m so glad you’ve gone through all the legwork to find “the best”…because I will be looking no further!
Reyna – love the sisterly duty. Will you be my sister, too? I’m with you on the not loving frosting thing so I’m glad this converted you to loving some kind of icing. So glad you liked both recipes!
Wow! I am definitely bookmarking this recipe. I am not a huge frosting fan either, but this recipe sounds unique so I am going to give it a try!
This, too, is my favorite frosting recipe! It is much easier and lighter (at least I think so) than the traditional Italian buttercream. I will definitely try your recipe for accompanying chocolate cake. Congrats!
oh, i forgot to ask….should i store the frosted cupcakes in the refrigerator or covered at room temp? thanks!
Jeanette – sorry my response is late on this. I’m glad that you liked the cupcakes and frosting! If it were me, I’d store them covered in the refrigerator. Before serving, I’d let them sit at room temperature for 10-15 minutes to take the chill off.
made this tonight with the chocolate cake recipe that you posted on 9/24. i made the cake into cupcakes and it worked just fine. it was really good and i really like this frosting for a change. one one cupcake, i sprinkled a little bit of instant espresso granules on top and it was yummy!!! the frosting stiffened up once refrigerated for an hour and i was able to use a 2d wilton tip to make a big swirl on top of the cupcakes. thanks for another winner! 🙂
Jeanette – glad to know the frosting worked well enough to pipe with. I actually made it again this week and piped with it, too, and it worked great. Thanks for your review!
So I made the frosting and I keep licking my fingers – it is so light and fluffy even with so much butter. Yum! But now I’m wondering what would happen to the texture/flavor if I decided to add some cream cheese to it to go on the carrot cake. Although the flavor of this is really good, I too think cream cheese flavor is so yummy with carrot cake. If I softened the cream cheese first and blended it in room temp do you think it would be gross or would it take it to another level? Maybe I’ll just try it and let you know.
On the stand mixer did you use a paddle attachment or a wire whisk/whip attachment?
Carrie – I used the whisk attachment.
I too was wondering how it would work without a strainer. I don’t even own a strainer, so I’m wondering are there different kinds? (sorry… I have no idea) And if there was one strainer that was a must have in the kitchen- what would it be? Thanks.
Andrea – there are lots of different brands of fine mesh strainers but I got mine at Walmart or Target (can’t remember which one) several years ago. They came in a three pack of different sizes and are made of thin wire with a black plastic handle. I use them all the time – for basic pasta draining to straining puddings/custards/frostings, etc. They are very reasonably priced. If you had to just buy one, I’d get the large-ish size – mine is probably right around 8 inches.
I have had good luck with the “other” recipes for this floating around and used through the years, but this one looks better! I could not longer make the other ones, they had crisco and we have not eaten that in years. Your shared recipe is all butter, thanks.
As a fellow frosting hater, your review sounds great, I bet it is the corn starch that makes this frosting differant. Can’t wait to try.
I’ve tried ‘the best frosting’ as well, like many of these other people and was also disappointed. Anytime someone praises something so much I have to give it a try! And this does look really good! Although the picture of it in the bowl kind of looks like mashed potatoes to me hehe.
You’ve convinced me; I must try this!
I’m making my mom your carrot cake recipe this weekend for her birthday. I have only had cream cheese frosting on carrot cake. Would this magical frosting being magical even on that? I trust you…if you say yes then we are going for it! I am also not a typical frosting lover, the canned stuff is fake tasting and usually the other stuff is just not quite right.
Shannon – actually, now that you mention it, yes, this frosting would be divine on carrot cake. I think if you twisted my arm, I’d probably always prefer the classic cream cheese frosting with carrot cake, but this magical frosting is seriously so light and creamy it would taste delicious, also. Let me know if you try it!
Magical for sure! 😉
I have used the Tasty Kitchen version and we really liked it, but now I’m dying to try this one! I’ll wait for the delectable cake post tomorrow though :).
Thanks for sharing this recipe! Now you have stimulated me to make a cake today! It looks yummy in the photos.
Yum, I have been making the Tasty Kitchen version for a few months and fell in love with that frosting! I am excited to try your version. They are similar enough that I know it is going to taste divine!! I can’t wait to try the chocolate version too. Thanks!
Do you think this frosting would be good with fresh or frozen strawberries beat into it? I was given the most divine strawberry cake recipe, but the frosting doesn’t do it justice. This frosting you have sounds a bit lighter (you know, 3 sticks of butter makes it lighter) which would be good with the strawberry cake. Their frosting was only butter and powdered sugar. Thanks.
Sara – I think this frosting would be even more magical with strawberries (or strawberry puree) beaten into it. Take care that the strawberries are not overly watery or else it might thin out the frosting too much.
I thought i was the only one who had issues with that frosting recipe on tasty kitchen/pioneer woman… I look forward to trying this recipe!
Now I have to make a cake today to try this frosting. Like you, I tried the recipe on Tasty Kitchen because it claimed to be the best frosting ever. I was so disappointed! Can’t wait to try your version. Thanks.
Hmmm….. usually I like homemade desserts much better than store-bought ones. But I have never ever tasted a homemade frosting that I thought compared to Betty Crocker Creamy Deluxe French Vanilla – not the whipped stuff, not Duncan Hines, not the plain vanilla or any other flavor – specifically Betty Crocker Creamy French Vanilla. To me, that frosting is the perfect frosting for a moist chocolate cake – creamy, rich, not too sugary/gritty. I honestly have doubts that this frosting will compare. It sounds like a lot of work too – will my curiosity be enough to convince me to do all this work to try something new? I wish someone else would make it and let me try it lol. If I ever do try it, I’ll come back and let you know what I think.
(And if anyone is looking for a quick shortcut, please try the Betty Crocker Creamy French Vanilla! …. and I have my opinion about chocolate cake mixes too – if you’re going for a mix, it has to be Duncan Hines Moist Deluxe Dark Chocolate Fudge – again, this specifically – not Betty Crocker, not Devil’s Food Chocolate . Trust me, if you are looking for a quick, store-bought chocolate cake with white frosting, pair these two!)
Kelly – I guess we’ll have to agree to disagree on this issue since I have never tasted any canned frosting that compares to homemade (especially this recipe). But having said that, I think it’s great if you’ve found a version that you love because it definitely makes life easier! Thanks for sharing your thoughts!
I just made this to go on your chocolate cake I made last night and it seems to be separating. Ahh! What did I do wrong?
I make frosting almost identical to this. My only extra is the press the cooked and thickened mixture through a strainer to ensure there are no lumps from the thickener. The best ever frosting hands down!
Jenn – hopefully if the mixture is well strained prior to cooking you won’t need to strain it again – although, I guess I wouldn’t hurt, right?
Mel, what is the purpose of the strainer? I tried to make your Schoolyard cupcakes without using a strainer, and it was utter disaster. It seems like the strainer wouldn’t make that big of a difference though.
Marian – the strainer should help eliminate any lumps from the frosting. It is fairly important in this recipe, I would say. As for the Schoolyard cupcakes – I’m sorry about the disaster. That frosting has definitely gotten mixed reviews and I’ve been in the process of testing it to figure out the quirks.
yay! I love frosting! Although unlike you, I could eat buttercream frosting all day long. That doesn’t mean that I’m not looking for another recipe though – can’t wait to try this!
Ah, this is the recipe my grandmother has been using for over 50 years! It is truly magical. And having messed it up many times, the key is definitely cooking the flour mixture slowly, and letting it cool completely. I’ll have to give it a try with the chocolate!
i can’t wait to try this. i found a similar recipe on a blog that is written by a professional chef and she too said it was way over the top delicious. thanks!
Awe Mel – this recipe came 1 week too late. I was searching for a good frosting recipe for Trevor’s birthday cake last weekend. The one I found was ok, but this one sounds much much better! Guess I’ll just have to try it on Ethan’s cake in October.
This icing is not what I expected, did not like it at all, tasted much better, don’t waste your time
Thanks to you, Melanie, I am a Cook’s Country subscriber now! I saw this recipe in the latest issue and was hoping you would test it-and you did! I can’t wait to see what cake recipe you paired it with. Thanks so much for sharing! 🙂
I think my grandma used to make something like this. It was incredible!