DIY Valentine Chocolate Boxes
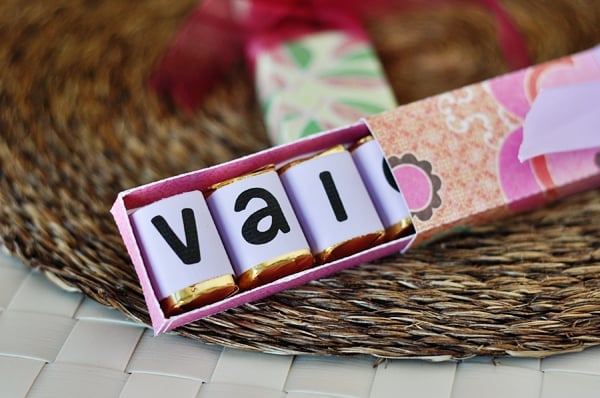
These DIY Valentine chocolate boxes are easy-peasy and make a unique and fun little Valentine gift.

So obviously, the Valentine special I’m sharing today is not a recipe. I repeat: this is not a recipe. I did not make homemade chocolates for these boxes nor will I ever. Hershey’s Nuggets do the job perfectly. But the idea is so clever and unique that I wanted to share.

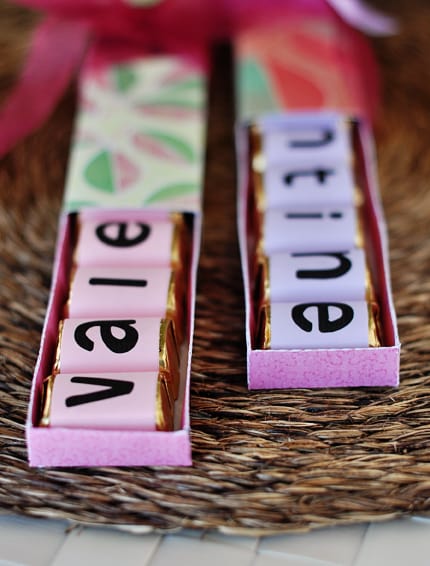
I’ve been using these chocolate boxes for a few years now for everything from tokens of gratitude (the chocolates inside are just enough to spell THANK_YOU perfectly) to simple Happy Birthday gifts for friends.
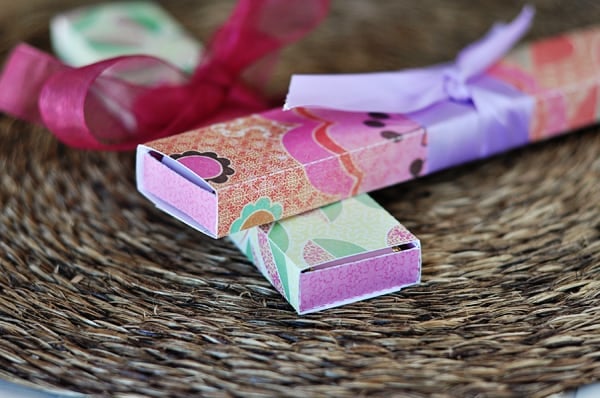
The lovely part? VALENTINE has nine letters – just like the nine chocolates that nestle so neatly inside the boxes. A perfect vehicle to wish a special teacher, friend or loved one a Happy Valentine’s Day. I adorn my boxes with a simple swash of tied ribbon but you could get as scrapbooky, creative and design-overload as you would like. I minimally spelled VALENTINE inside the box but adding a tag on the top that reads: “Be My…” would allow the recipient to slide out the chocolates and read the rest of the message.
These are going to be our teacher gifts for Valentine’s Day this year and my plan is to cut out simple white boxes for my boys to decorate on their own with stickers and markers for their teachers.
Below, you’ll find a DIY tutorial on how to create these lovely little chocolate boxes as well as the files you’ll need to download to do so. Any way you look at it, these are pretty easy-peasy and make a unique and fun little Valentine gift.
Get your craft on and go to it!
Files You’ll Need:
LETTER STRIPS
PDF Version (not editable) or Word Version (editable)
*The font I used in the Word version is Howser, a free download is available HERE*
BOX BOTTOM
**Important Note! Thanks to Kenzie, a reader, for figuring this out, but if you are printing from the .pdf files make sure that the drop-down box next to the Page Scaling option says “none” – otherwise, the box will print too short to fit the 9 chocolates. Thanks for the help, Kenzie!
PDF Version
BOX TOP WRAP-A-ROUND
**Important Note! Thanks to Kenzie, a reader, for figuring this out, but if you are printing from the .pdf files make sure that the drop-down box next to the Page Scaling option says “none” – otherwise, the box will print too short to fit the 9 chocolates. Thanks for the help, Kenzie!
PDF Version
SILHOUETTE SD FILES
Click HERE to download the Silhouette SD cut files for the chocolate boxes.
*Don’t forget the chocolates! Nine of the Hershey’s Nuggets fit perfectly in each box.*


I love this tutorial, and I’ve been making these every year since my 7th grader was in kindergarten. Thanks for a tradition that we’ll keep til my kindergartner gets to middle school!
I originally started to make these for my family for my 14 days of Valentine’s I do for them each year, but had an aha moment and thought they would make great gifts for the YW in our church. I found cute birthday paper, used my Silhouette pens to write Happy Birthday on the top and instead of Valentine I wrote We Love You. We’ve given out a few this year already and the girls think they are adorable. Thank you so much for sharing!
You actually make it appear really easy together with your presentation but I in finding this topic to be really something which I think I would never understand.
It kind of feels too complicated and extremely vast for me.
I’m taking a look forward to your next put up, I will attempt to get the dangle of it!
We have to give you a huge shout out…we bragged about you in our collection of 140 FABULOUS VALENTINE PRINTABLES ROUND-UP. We love your darling creative printable and we had to share your awesome-ness! Take a peek –> http://www.thedatingdivas.com/holidays/valentines-day/valentines-day-roundup-140-free-printables/ xox
Mel, Aunt Jeanette uses stickers for all her letters but that’s too expensive for me. I came up with my own template using just fun fonts on the computer and it’s in a word document. It’s not for valentine’s day, but you can always change the words. Let me know if you want me to send it to you.
I LOVE this! Thank you for sharing your silhouette file!! My sisters and I all call your blog, “the blog!” On the day you posted this, 3 of my sisters called me and asked me if I had seen this post and if I could cut some boxes for them with my silhouette. . . I’ve cut a lot of these boxes since you posted this. We all love this idea so much! Thank you!!!
I love these! Thank you so much for sharing (for free) your talents!! I have so many people in mind for these super cute Valentines!!
LOVE this! Will do four of these for teacher gifts. Thanks!
How adorable! Thank you for sharing! Can’t wait use these – I have so many ideas … my head is bursting! 🙂
Love your idea (and website)! I made several boxes yesterday and was thinking about how cute these would be made in Christmas-themed cardstock and used as stocking stuffers or small gifts for neighbors or the mailman. The tags could say “Merry” and as luck would have it “Christmas” is nine letters to wrap around the chocolates. Thanks for the idea and inspiration!
how cute! i LOVE this gift idea… thanks for the stepwise pictorial, gonna make these (shhh dnt tell my husband)
Thanks for helping me out Kenzie and Mel. I like the “I Love You” idea as well as “Thank You” for the shorter box. Now there are multiple options. Will be making more of these today that say “Valentine”–that is if I’m not tempted to eat too many of the chocolates beforehand.
Oh no! I’m sorry the box is too small but I’m glad you figured out the issue, Kenzie! Thanks for checking back in. I’ll make a note up above in the post so people know. Sorry I didn’t realize the issue earlier with printing but it’s good to know for future reference.
I’m looking at it again and wondering if changing some of the print settings could help??? I didn’t change anything the first time, but the box on my printed page somehow looks shorter than the picture of the box on the PDF. I think if under “Page Scaling” in the print dialog box, if I select “none,” it may print correctly. Yep… just checked and it did. Again, when you hit the print button and it pulls up the box where you click “ok,” first find where it says “Page Scaling” and make sure “none” is selected. That worked for me. And, I’m going to use my shorter box to spell “I Love You.” It fits 8 letters okay. Hope this helps somebody!
I had the same problem at Lorelei. The box was not large enough to hold 9 of the Hershey’s Nuggets. What did I do wrong??? I’m so disappointed 🙁
Hi Mel. Thanks for this fun idea. Just tried making one with my kids for my husband. Unless I am spelling valentine wrong or my hershey candies are especially large, the bottom and top of the box are missing the space for one more letter. Not a huge deal because thankfully I have a lot of paper, but just a warning for others.
I’ve have been loving your recipes, especially the main dish ones because that’s what I always need ideas and motivation for. So thank you!
Hi Mel,
I LOVE these (although I came here looking for tonight’s dinner recipe, as usual:-)
I have a wedding site (we do DIY papers for invitations with lots of DIY brides). Do you mind if I steal this idea for my blog, with full credit to you, of course? It would be such a fun favor idea! Let me know.
LOVE this idea! But now I’m torn. I’m three weeks away from baby #3 and trying to decide if I have the energy or time for this. I’ll let you know how it goes if I try it! I will definitely use it in the future.
Oh this is adorable…im always amazed at people who craft…i dont have any imagination for this kind of stuff.However im still def going to try this.Also i know this is not the correct post to comment on…i just wanted to say that i made the jello worms for halloween and i did freak out a few friends.Thanks so much.
cute! thx!!
What a cute way to personalize a box of chocolates! So fun!
I don’t mind recipe free posts to see cute food related crafts! : ) I love these and am already thinking of different holidays/events that these could be made! Thanks for sharing the downloads and step-by-step photos!
I love it. We will find someone to make them for 🙂
Hi Kate – these are definitely doable without a Silhouette. I only included the Silhouette files for the convenience of those who have a machine but I’ve made them for years without a cutting machine. The paper I used is cardstock I picked up at Hobby Lobby – you definitely don’t need a Silhouette to use that paper – it is just basic cardstock that you can trace the pattern onto (I included a link for a traceable or printable PDF pattern).
Mayme – I would definitely encourage the use of cardstock because it will hold up better to the weight of the chocolates but if you don’t have any you could always try making a test box with regular paper and seeing how it goes. Good luck!
That is so cute! I love the idea! I think it’s time to pick me up some treasures candy and get to work with my kiddos!
Very cute! Do both the top and bottom need to be cardstock? I have lots of cute paper, but none in cardstock. Wondering if the top would be okay using paper if the bottom was cardstock?
Cuuuuuuute 🙂
Gotcha… now that I looked it up, I *wish* I had one! 🙂
Thanks for the quick reply!
Awesome!!! I have got some really pretty cardstock that I’ll use! Thanks so much!!
Hi Mel- I don’t have a Silhouette cutting machine. What type of paper/cardboard would you suggest be used? Where can I find the cute printed vairety you used? Thanks~ Kate
Becky – do you have a Silhouette cutting machine? You need that program for these files. If you click on the link for the Silhouette SD files, they should download as a compressed/zipped file. My computer prompts me to choose either to Open or Save the files. When I Save the files, I can double click on the downloaded, compressed folder and it opens to show the two Silhouette SD files (which you can then open in the Silhouette program).
Love, love, love!! This is a definite winner of an idea. Thanks so much. 🙂
Very cute…and I love that it’s EASY!
I can’t open the Silhouette SD files, they must be in a program I don’t have. Is there a PDF version?
This is such a great idea!!
I love these…thank you:)
Love it!
Oh my gosh…this is crazy adorable! How do you find the time to do this sort of thing, Mel? You never cease to amaze me! 🙂