Homemade Ciabatta Bread {And The Best Garlic Bread On Earth}
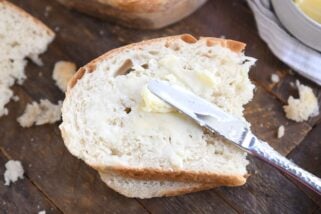
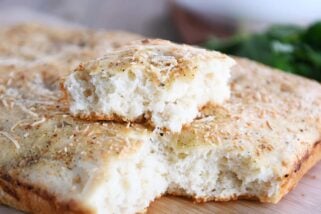
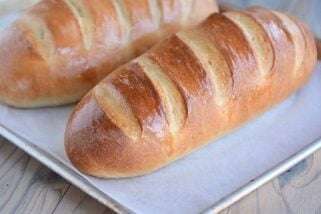
This homemade ciabatta bread is slightly crispy on the outside with a deliciously tender, airy crumb and it’s a lot cheaper to make at home.
What is ciabatta bread and why on earth should you make your own? Excellent questions…
First of all, ciabatta is an Italian bread that is long and flat-ish, somewhat in the shape of a slipper (which is what the word “ciabatta” literally translates to).
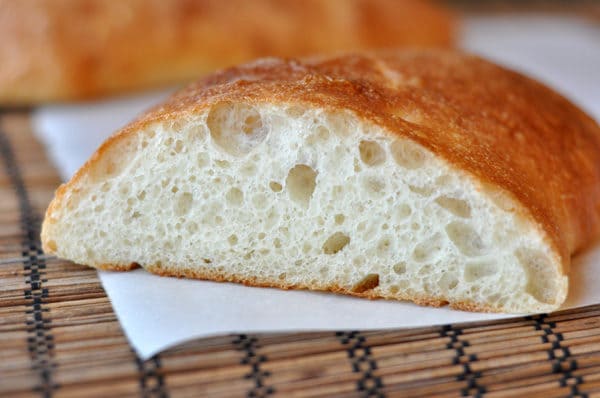
It is slightly crispy on the outside with a deliciously tender and airy crumb. I can personally eat an entire loaf myself, that’s how much I love the almighty ciabatta.
Now why should you make it yourself? It’s a heck of a lot cheaper than buying it from a bakery, first of all, if you can even find an authentic bakery to buy it from (which I cannot). And the main reason for making it? Two words:
Panini
Garlic Bread
Ok, that was officially three. But really, there is no better bread to panini out of than ciabatta, in my opinion. And for the record, this ciabatta makes the most to-die for garlic bread known on the earth (see the details below the recipe).
Seriously. I’ve done my research. I know this to be true.
If either of those options don’t get you excited, don’t worry, I usually make this when we want to tear off hunks in a non-civilized manner and dip them into the drippings of a buttery garlic shrimp scampi or something equally delightful.
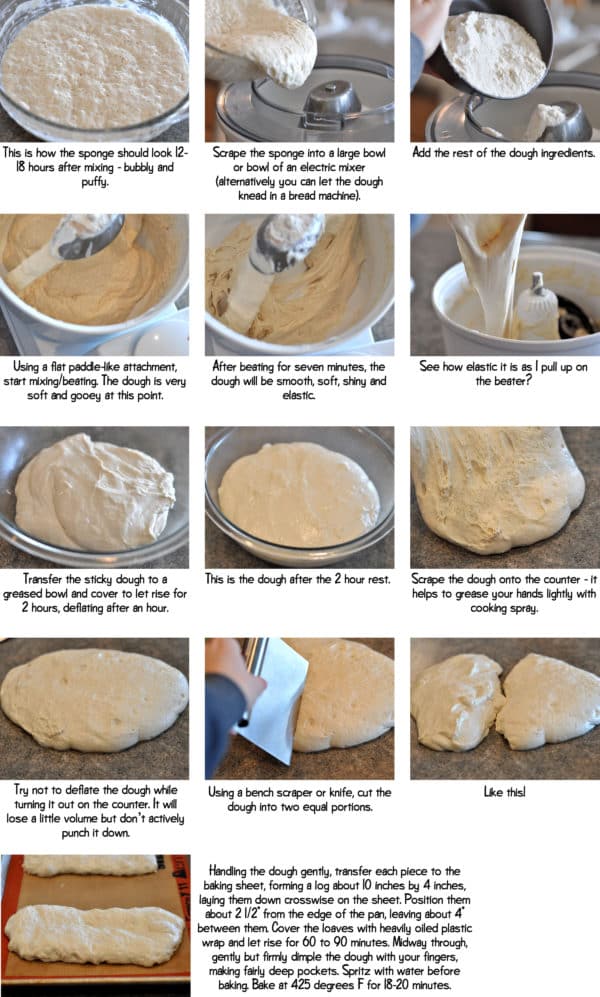
So make it already! I’ve included step-by-step photos, just like I did with the bagels, and if you can prepare yourself to forget what a normal yeast dough should feel and look like and accept the fact that you may have crazy-dough-hands-and-fingers at some point or another, well, then, you’ll do just fine making it.
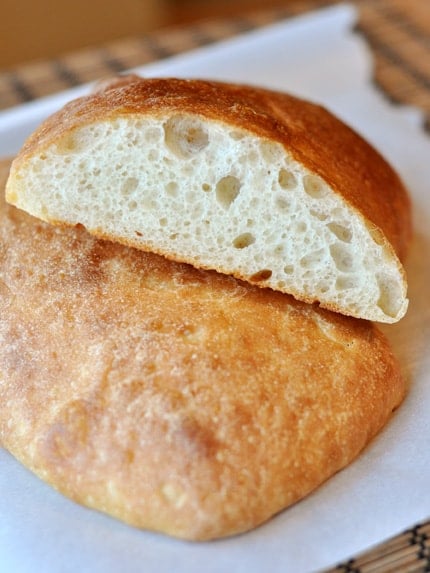
Recipe Source: from King Arthur Flour
Homemade Ciabatta Bread
Ingredients
Overnight starter:
- 1 ½ cups (213 g) unbleached or regular all-purpose flour
- 1 cup cool water
- 1/16 teaspoon instant yeast
Dough:
- All of the starter, from above
- 1 teaspoon instant yeast
- 1 ½ cups (213 g) unbleached or regular all-purpose flour
- 1 ¼ teaspoons salt
- 1 teaspoon sugar
- 1 tablespoon nonfat dry milk
- ¼ cup lukewarm water
- 2 tablespoons olive oil
Topping for Garlic Bread:
- 1 medium head of garlic, cloves separated and peeled (about 15 medium cloves) and finely minced
- ½ cup (113 g) butter, melted
- ⅓ cup olive oil
- Pinch 1/16 teaspoon of salt
- 1 cup freshly grated Parmesan cheese
- Snipped fresh parsley, for garnish (optional)
Instructions
- For the starter: Mix the starter ingredients in a small bowl until well combined. Cover the starter and let it rest at room temperature overnight, or for up to 15 hours. It will become bubbly and puffy.
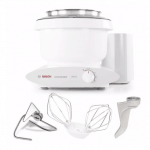
- For the bread: Place all of the dough ingredients, including the starter, into the bowl of your mixer and beat at medium speed, using the flat/paddle beater, for 7 minutes (scraping the bowl as needed). As it starts to mix, it will be very wet and sticky. After mixing for 7 minutes, the dough will be smooth, soft, shiny, and elastic. Alternatively, knead the dough ingredients in your bread machine using the dough cycle.
- Using greased or lightly oiled hands, transfer the dough to a greased bowl or other rising container, cover it, and let it rise for 2 hours, deflating it halfway through, and then recovering and letting it rise another hour. If you’re using a bread machine, allow it to rise for an additional hour after the dough cycle has ended.
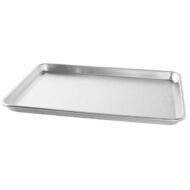
- Lightly grease your work surface/counter, and a half-sheet baking pan (18″ x 13″) or similar large baking sheet or line it with parchment or a silpat liner. Grease your hands, as well.
- Very gently turn the dough out of the bowl onto your work surface; you don’t want to deflate it. It’ll lose a bit of volume, but don’t actively punch it down. Using a bowl scraper, bench knife, or your fingers, divide the dough in half. You should have two fat logs, each about 10″ long x 4″ wide.
- Handling the dough gently, transfer each piece to the baking sheet, laying them down crosswise on the sheet. Position them about 2 1/2″ from the edge of the pan, leaving about 4″ between them. Lightly cover the dough with heavily oiled plastic wrap or a proof cover, and allow it to rise for 60 to 90 minutes. Midway through, gently but firmly dimple the dough with your fingers, making fairly deep pockets. Towards the end of the rising time, preheat the oven to 425°F.
- Spritz the risen loaves with lukewarm water. You’ll see that the dimples have filled in somewhat, but haven’t entirely disappeared. Bake the loaves until they are golden brown, about 18 to 20 minutes. Remove them from the oven, and cool on a rack.
- To make garlic bread: Prepare the topping by combining the minced garlic cloves, melted butter, olive oil and a pinch of salt in a small bowl. Cut the loaves in half lengthwise, like you’re going to make giant sandwiches. Spread the cut halves with the garlic mixture. Bake the bread in a preheated 400°F oven for about 10 minutes, or until the topping is bubbly and the edges of the bread are starting to brown. Remove the bread from the oven, and sprinkle it immediately with the grated Parmesan and parsley, if desired. Cut in crosswise slices to serve.

Hi,
I just read this recipe and it sounds delicious! I would like to try it soon. I just had a question. When you say let it rise for 2 hours, deflating it halfway through, and then recovering and letting it rise another hour. Is that 1 hour deflate and then 2 more hours?
Thanks
M – it rises for 2 hours total (you deflate it after an hour and then let it rise the final hour).
Thank you for posting this recipe. I found it yesterday and I made it right away. Took a picture too. But I used half of flour with durum wheat since I have not got enough multi purpose flour. It’s delicious.
This is the King Author recipe with the addition of olive oil. Shouldn’t you give them the credit for it?
Jeb – you are right, it is the KAF flour which is why I gave them credit for it right above the step-by-step pictures. Hope that helps!
Yes the rolls definitely have the sourdough taste which I am partial too. The first time I made your recipe I let the starter sit for about 24 hours as I got busy with other things and did not have time to make it in the 12 to 15 hour range. But it did not come out like Traders rolls, still very good though. Would it help if I or someone were to mail you TJ’s rolls and bread to see what you think of the taste?
That’s so nice, John! I’m actually going to be near a Trader Joe’s in a month or so and I’ll definitely check them out so you don’t have to worry about sending them to me. I wonder, though, if the starter needs an actual sourdough starter base to help the rolls get the unique flavor. I’m not an expert in sourdough starters but I’m guessing there is quite a bit of info online. I’ll let you know if I have any ideas after getting a real taste of the rolls.
This is the best recipe for ciabatta that I have come across, however, there seems to be a difference in taste between Trader Joe’s ciabatta bread and their ciabatta rolls. The rolls being the better of the two. I feel this recipe compares favorably with their bread but does not match their rolls which I would greatly like to duplicate. Any thoughts on this Mel or is it just that my taste buds are wacky? Thanks.
Hey John – I’ve never had either the ciabatta or ciabatta rolls from Trader Joe’s so I’m afraid I can’t really weigh in on the matter (thanks to my closest Trader Joe’s being crazy far away). My guess is that if the rolls have a different flavor, the starter might be ‘aged’ longer to create more flavor – or vice versa, perhaps it isn’t aged at all. Do you feel like the rolls have a slightly more sourdough taste?
Could you use bread flour instead of AP?
Kayla – I haven’t tried that so I can’t guarantee results. Bread flour has different properties (protein, gluten, etc) that make doughs behave a bit differently. It may be worth a try but you’ll have to really keep your eye on the look and feel of the dough to make sure you don’t over or under flour.
Thank you so much for the pictures. I was happily making my dough in my kenwood mixed using the bread hook as per instructions when smoke started to come out the back and the motor was making the most horrid noise! Left with a very sticky mess I carried on by hand until I thought it “felt right!” Now, having put it one side to prove I have discovered your instructions and don’t think I’m far off the mark. Here’s hoping!
If you want to make this by hand, a great ‘kneading’ technique to use is called “stretch and fold”.
Google and YouTube will turn up lots of good info on this technique.
Thanks for this tip, Amanda, I think I will try it.
How many stretch and folds would you do, and when? Do you also wet your hands with water while doing them?
thanks nice
This bread is great. It has a very nice flavor. The bread is light and airy. I found it to be very easy to make and extremely enjoyable to eat. Sending a loaf with my niece to bring to her father’s side for Christmas dinner. Will definitely made time and time again. If you want a fresh loaf of bread for dinner – it’s easy to time and is not as time consuming as other loafs of bread.
Thanks for sharing this wonderful recipe.
My dough is more like batter.
I also have a Bosch and am learning all the little intricacies that go with it. My biggest trouble so far is doing less than a “double batch” of any bread recipe :/ it gets stuck on the middle shaft and I add the flour slowly and a little at a time as to not over flour it. It especially does this on the French bread recipe…which we LOVE here at the Cooley Compound 🙂 Do you use the regular dough hook for that recipe or the paddle attachment as shown in this tutorial? Any advice/counsel/tips you can offer on using the Bosch would be greatly appreciated! I love love love my mixer but at times get frustrated that I’m not doing something right. I want to try out this ciabatta but am fearful since I don’t have the paddle attachment.
Thx so much for all your hard work on this blog and for sharing your recipes with us!
Andrea – to dimple the dough, press your fingertips into the dough all over to create little dimples (kind of like if you were pricking a pie crust with a fork – just use your fingers instead). Don’t pierce the dough all the way through, just create little craters with your finger tips. Make sense?
I am getting up the courage to try this, because there is no better bread than ciabatta! However, I am not sure what you meant by dimple the bread at the end of your instructions? Would you mind elaborating for a novice?
Hi Lorraine – yes, you’ll notice from my step-by-step pictures that I use my Bosch for this bread.
I would like to know if I can use my Bosh mixer to make this bread. I have used the bosh to make up to eight loafs of wheat bread at a time.
Mame – no, it isn’t an overly dense loaf – I would classify it as sturdy yet light (due to the air bubbles that form pockets in the crumb). I think you might try letting it rise longer, even if it takes going past the 2 hour mark, especially if your house is on the cool side. I don’t think they necessarily double but they should get very puffy. The rising is what will help it be less dense (that and not adding too much flour). I think you are off to a great start, though!
Ok, so I made it, and mine were much thinner AND smaller than yours. Weird right? But non the less, it was pretty good. It was a little denser than I expected, is this pretty dense? When I let it rise for the 2 hours – it didn’t double in size. It got larger, but not close to double. Should I have waited for it to double? I am so new to bread and I’ve read your yeast blog (thank you so much for that), but you said this was all different so I wasn’t sure. I want to make it again next week….
Mame – this is a really wet starter/dough so I think it is probably fine, especially if it looks like it is bubbling and the yeast is working.
So I made this starter last night, and it’s been 14+ hours later and it is bubbly on top but still pretty liquid-y underneath. Is that right?
(p.s. thanks for your helpful ideas with the flat bread!)
I saw this recipe last night, figured I’d make the bread and make the garlic butter they way I always do, I figured “best garlic bread on Earth” whatever. While the bread was baking, figured, I’ve give this version a try but add the cheese to the buter mix.
Oh my gravy, I am I glad I did, so, so, so, so delicious, had to hold myself back from eating ALL of it
Hi, this looks awesome!! I was wondering though, since I have a (non-yeast) sourdough starter that I keep feeding, would I be able to substitute that for the overnight starter? I could do the overnight starter but I am always looking for new ways to use my starter. It acts the same way as yeast mixed with flour and water would and is the consistency of a bubbly pancake batter. How much do you think the overnight starter makes? 2 cups?
Michelle – I’ve never worked with a sourdough starter before so I’m not sure how it would translate to this bread. If you try it, the overnight starter for the ciabatta recipe makes about 2 1/2 cups.
Thanks Mel! I’ve seen wet doughs, but these were spreading until they were almost flat. Mine looked a lot flatter than your picture…maybe because I didn’t have the powdered milk, so I substituted a T. of milk for the milk powder and took out a T of water. What I did was at the end, lightly pinched up both sides towards the middle and it worked. They tasted great! Do you use a convection oven at all on it? I was debating whether for bread if I should or shouldn’t use convection.
I’ve got the dough rising for the last rise but they look REALLy doughey and wet, so I am worried it won’t hold it’s shap. I used a scale to measure out the flour, and even added an extra 2 T of flour and it’s still really wet. Did you have to add any extra flour to yours?
Deanna – the dough for this bread is extremely wet, so I don’t think you should worry too much. The bread loaves themselves aren’t overly round – they bake up flatter than a normal loaf, which is traditional for ciabatta. I didn’t add any extra flour and was second guessing it, but they end up turning out every time. Let me know how they baked up!
My husband really wants me to make mini ciabatta loaves, that could be used for individual sandwiches. Do you think the dough would work if it was cut into like 6 small loaves, and just baked for a little less time?
Tracey – yes, I think you could definitely shape the dough into smaller loaves. Just keep in mind the dough is really sticky and wet so it might be a challenge to get the dough cut and shaped into mini-loaves but with a little perseverance it should work just fine.
Thanks for the tip. I agree-I think it would wind its sticky way up and down the beaters. I’m going to try hand-kneading. Forearms of steel!! 🙂
I actually have measuring spoons that include 1/16 tsp. It’s called a “pinch”. Just put together my starter to try this for tomorrow’s dinner! Can’t wait!
Wow! It was really good! I can’t wait to make it again! It was alot of rising and time involved, but not alot of work. I want to make it like a garlic bread from a restaurant nearby where they bake the garlic and cheese right on the bread.
I know this sounds dumb, but what is instant yeast? I really want to try this, I love
sandwiches made with Ciabatta bread.
Thank you for all the wonderful recipes and instructions!
Deb
Hi Deb – instant yeast is one of the types of yeast available – active dry is the other. With instant yeast you don’t need to let the yeast activate in water before adding to the recipe, whereas active dry yeast needs to be proofed in water beforehand. Check out this tutorial on yeast for a little more info!
God, I just love bread. And this looks beautiful. Thank you for sharing. Not forgetting your garlic butter.
Have a great day.
Kristy
This looks so yummy! I want to make it for dinner tomorrow night for some guests. However, I do not have dry powdered milk. Is there any way it will work with regular milk? Or without it?
Carlin – I don’t know if it will work without the powdered milk since I haven’t tried it but perhaps you could try taking 1 tablespoon out of the 1/4 cup water and using 1 tablespoon milk in its place. I’d say it’s worth a try!
I made this today and used it for dinner to make panini’s, it was awesome! My whole family loved it! Thanks for the great recipe!
1/16 teaspoon of yeast in the starter? Is this a typo or do you weigh it?
Amy – no it isn’t a typo. With most starters you need hardly any yeast to get it activated. I know it seems impossible to measure such a small amount. I just take my 1/4 teaspoon measure and approximate 1/16. It’s an eyeball estimate. A little more isn’t going to hurt the dough.
I’m. Making. This.
Thank you 🙂
this looks restaurant worthy!!
PLEASE READ!! Okay, so I hope I did not miss this somewhere in your recents posts – but did you know that you are nominated on babble for 100 Top mom food blogs 2011? You should have told us:) EVERYONE GO VOTE! Mel, put up a link for us! We want you to win!
This is such a lovely ciabatta loaf, Mel! Great job on it. If I ever have the patience or the bread maker to make it myself, I will definitely be coming back to your recipe. Thanks for sharing!
I’m so glad you showed what the dough should look like. I was afraid I was doing it wrong before I saw the pictures. Can’t wait to taste these puppies after they come out.
Thank you for doing all of the work and finding a great recipe! I have tried a few with not much success. I will be giving your recipe a try very soon (like…tomorrow!). I hope my bread turns out with as many pretty air pockets as yours. I love ciabatta–yum! Thanks again 😉
This would have paired perfectly with our dinner tonight. I guess we will try it next time 🙂 It looks delicious.
Making this tonight. I make a simple Italian bread all the time that is very similar to a ciabatta – this has more ingredients so I am definitely curious to try it!
I love this recipe! I use it to make bread for meatball sandwiches. Your pictures are beautiful!
Mel, I so wish I had great bread baking skills like you! I love fresh homemade bread but do not have the time or patience to make it.
I adore Ciabatta bread! Thank you for the great recipe!
This looks absolutely amazing. I have been buying ciabatta bread at Trader Joe’s for my garlic bread for awhile. Now I’m super excited to try it from scratch at home!
How funny! At the grocery store this morning I saw a lovely ciabatta bread that I nearly bought. Then I said to myself, I bake my other breads why not try ciabatta?! I came online to find a recipe, only I HAD to read my list of blogs first! Lo and behold there was a recipe for the exact bread I wanted. Thank you so much! And the pics are a HUGE help, I love when people post step by step. 🙂
Can’t wait to try this… and for clarification, what does it mean to dimple the dough?
-Confused in Idaho 😉
Lisa – your comment made me smile. By dimpling the dough, it means to just gently press your fingers into the dough to create…well…little dimples. Not holes, just little depressions in the dough. Does that make sense?
I’m going to be really annoying here and ask if I can do this with a hand-held mixer, as I don’t have a stand mixer. I’m only asking because I have serious intentions of making this ASAP!
Happy Monday 🙂
Christina – you aren’t annoying at all! Unfortunately, I just don’t think a hand mixer would cut it for this recipe. I hate posting recipes that are only accessible to those with a certain appliance, but on this one – I think you’d be cursing my name if you used your hand mixer. I have a feeling the ultra-sticky would wind its way up and down the beaters and create a nightmare of a mess. However, if you have a bread maker, you can use the dough setting.
This looks delicious! I love homemade bread. Thanks for the step by step tutorials. You do such a great job at this! I really enjoy reading your blog. Thanks for sharing it with us!
Oh my gosh, Melanie…how did you know that I am obsessed with ciabatta bread? I buy it at Whole Foods and keep it in my freezer for just about everything- panini, crostini, brushetta, etc. I haven’t tried garlic bread, though. Your tutorials always make every recipe look so uncomplicated. 🙂 Thanks for the recipe and step-by-step instructions…I can’t wait to try it!