Easy Homemade French Bread
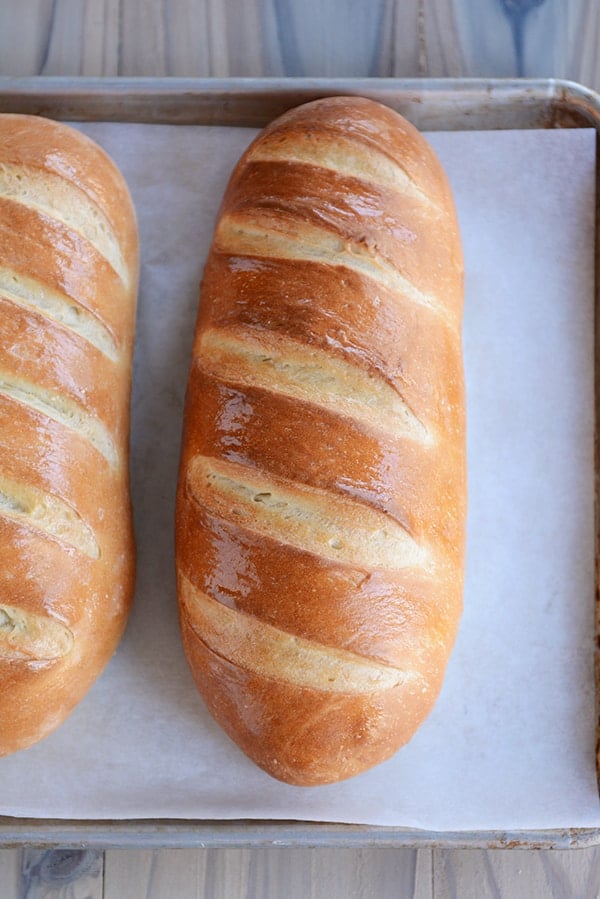
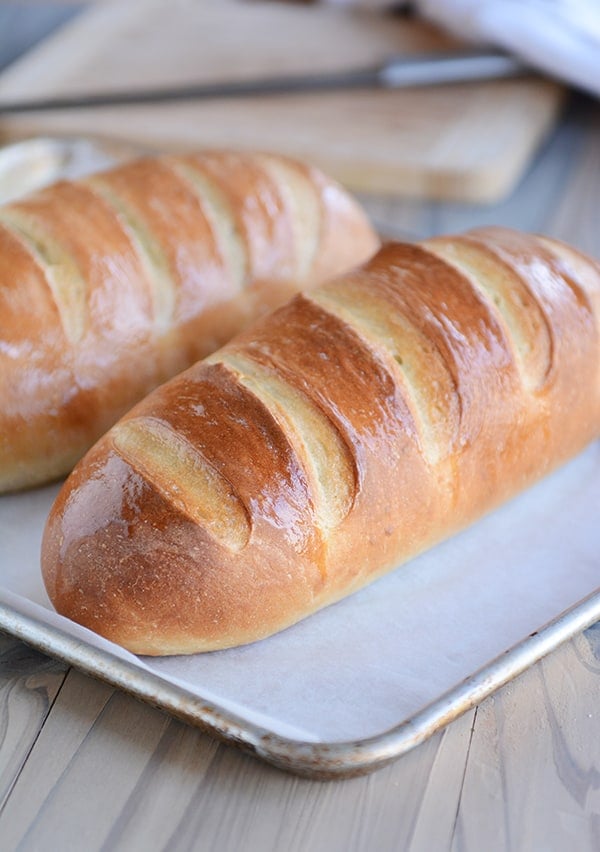
Homemade French bread has never been easier! This simple recipe produces a light and fluffy loaf of French bread that will rival any bakery!
This easy homemade French bread is so simple and perfect for a bread making beginner.
But as you can see from all the comments below, it’s just as valued by expert bread makers, too!
Making French Bread Dough
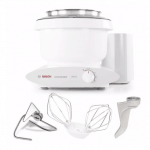
This straightforward bread dough can be made in a stand mixer or by hand.
- Warm water
- Yeast (instant or active dry yeast)
- Bit of sugar and oil
- Salt
- Flour (all-purpose or bread flour)
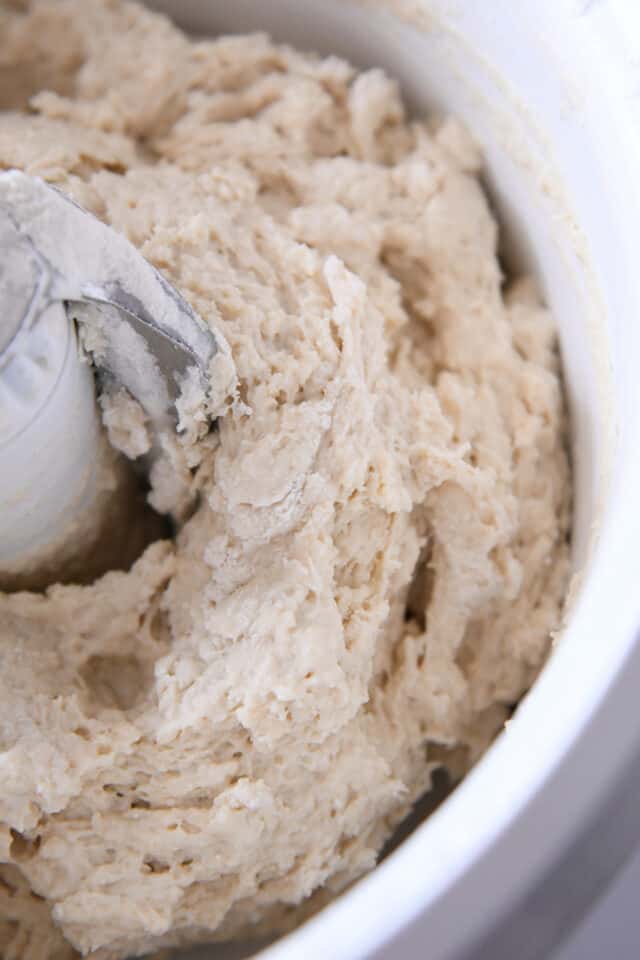
At the start, the dough will look shaggy and rough.
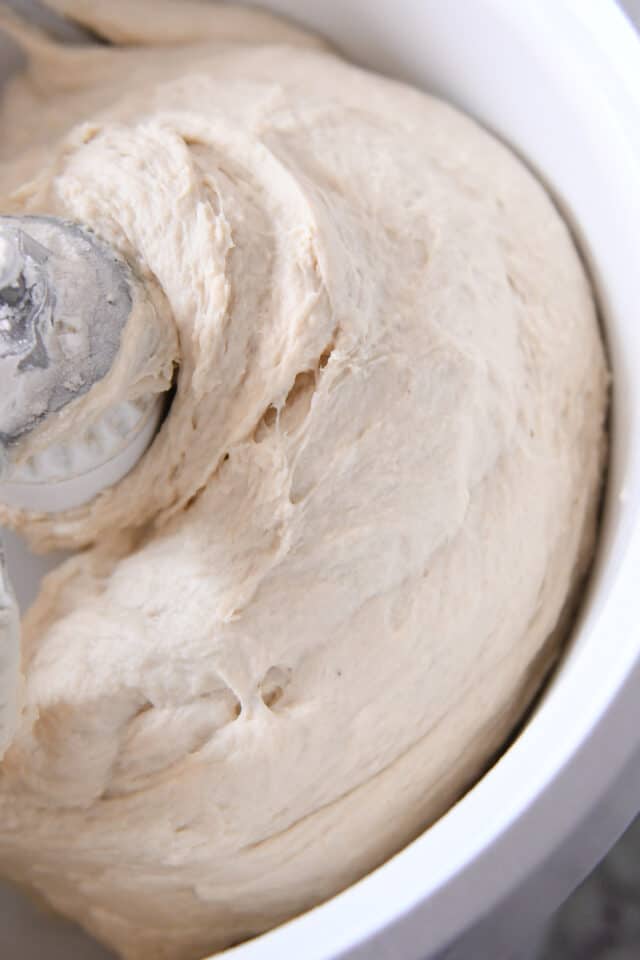
But as it kneads, it will become soft and smooth.
The most important part of this dough (and other yeast doughs) is to judge the amount of flour by the look and feel of the dough rather than the exact amount of flour called for in the recipe.
Factors such as humidity, elevation, room temperature, how we each measure flour, and more can affect the amount of flour added. So don’t stress about precise flour measurements and continuously feel the dough to achieve a soft dough that is slightly tacky but doesn’t leave a lot of residue on your fingers.
Too little flour and the dough will be a mess to handle. Additionally, the bread won’t hold its shape as it rises and bakes.
Too much flour and the dough won’t rise well and the bread will be tough and dense.
Two Methods for Dough Rising
In the recipe, there are two methods to letting the dough rise:
- Leave the dough in the mixer, cover with a lid or towel, and let the dough rest for 10 minutes. Stir it down by turning on the mixer for 10 seconds or so. Repeat the “rest and stir down” cycle five more times.
- Transfer the dough to a lightly greased bowl and cover with a towel or greased plastic wrap. Let the dough rise until doubled, about an hour or so, depending on the warmth of your kitchen.
I alternate between the two methods depending on my mood. The 10-minute increment rising method is unique to this original French bread recipe. The idea is that allowing the dough to rise this way produces a lighter crumb.
But the more traditional rising method also results in a delicious, fluffy loaf.
How to Shape French Bread Loaves
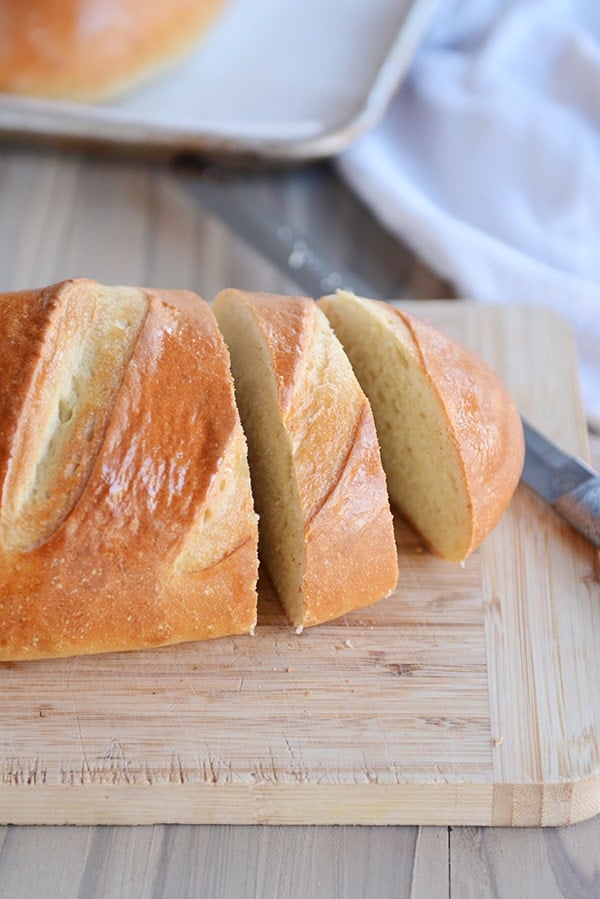
The question I get asked the most about this easy homemade French bread is how to shape the loaves.
The loaves can really be made any size or shape; I usually end up making 12-inch loaves, but if they end up being a bit thinner or chubbier, it’s no big deal!
Press each portion of dough into a flat rectangle and fold the bottom edge up and over the dough, pressing the seam flat with your hand.
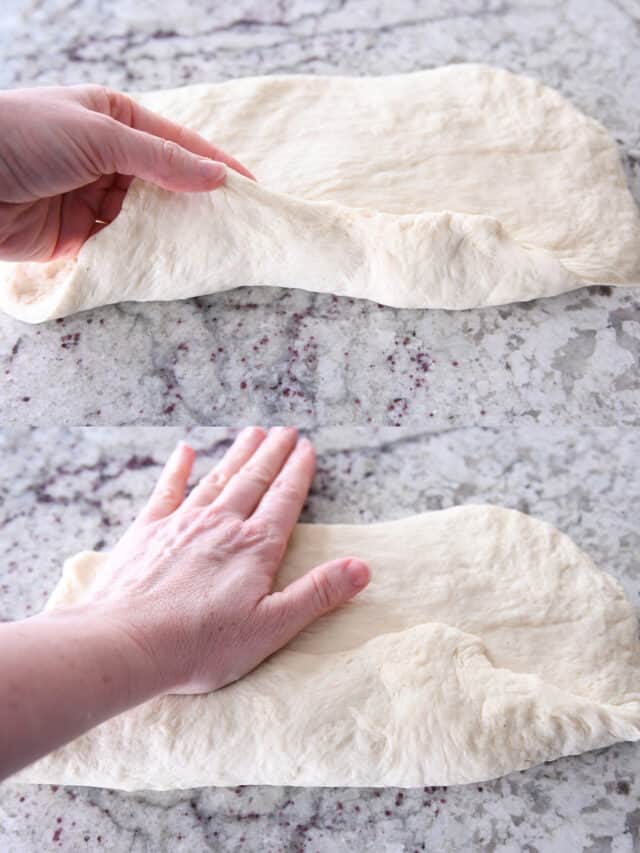
Then, roll the dough up again to meet the top edge.
Fold the top edge over and press or pinch lightly.
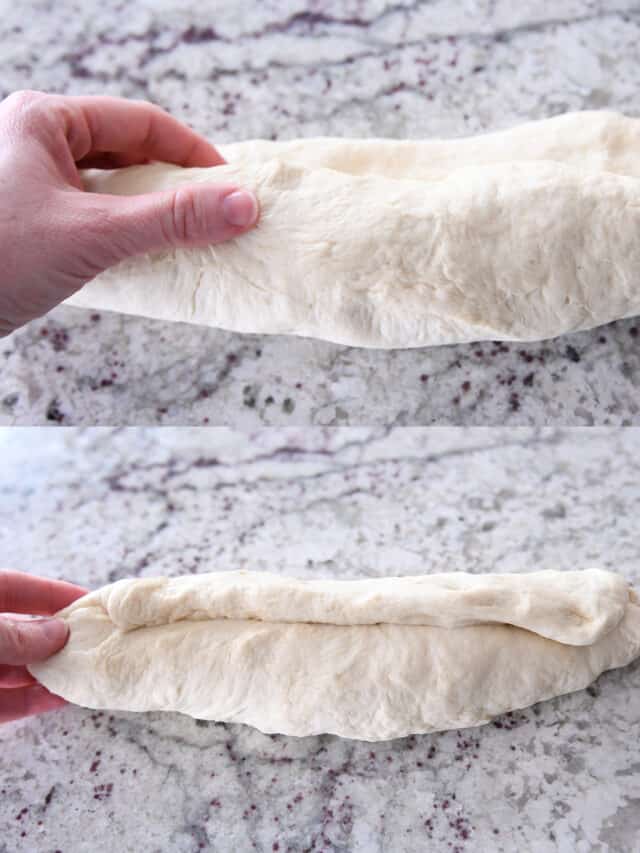
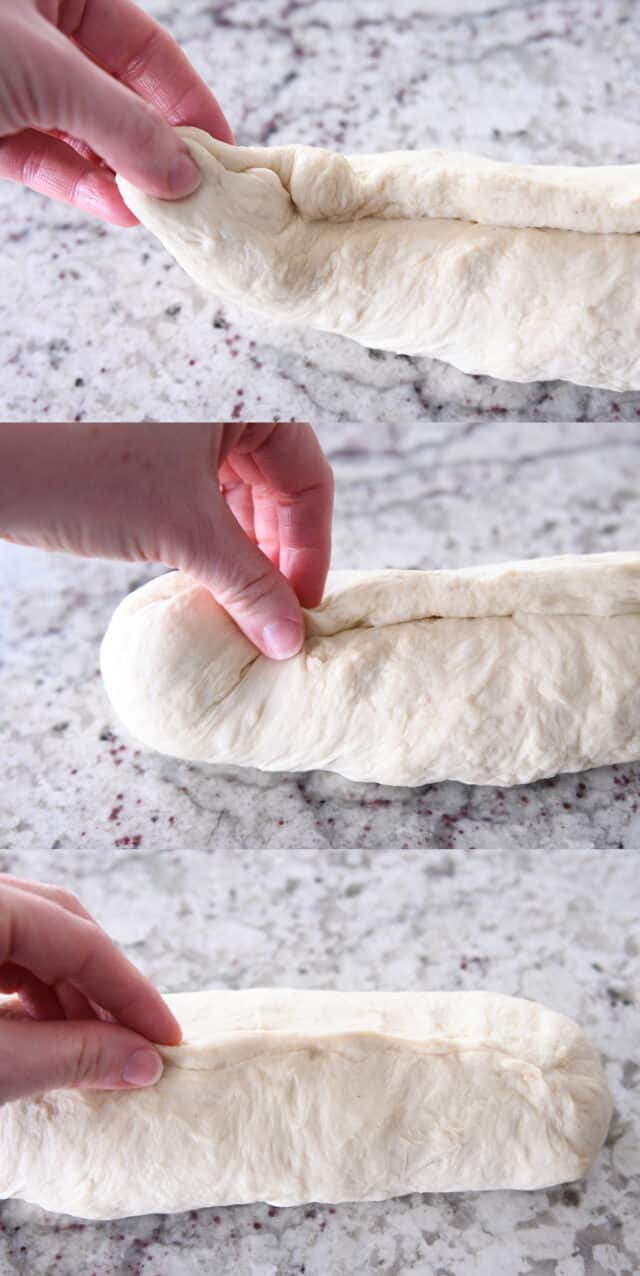
Take the end of the bread dough and fold it up and over an inch or two to give an even thickness all the way down the loaf.
Pinch to seal the end. Repeat on the other end of the dough.
Then, deliberately and thoroughly pinch and seal the entire length of the loaf.
How to Score the French Bread Dough
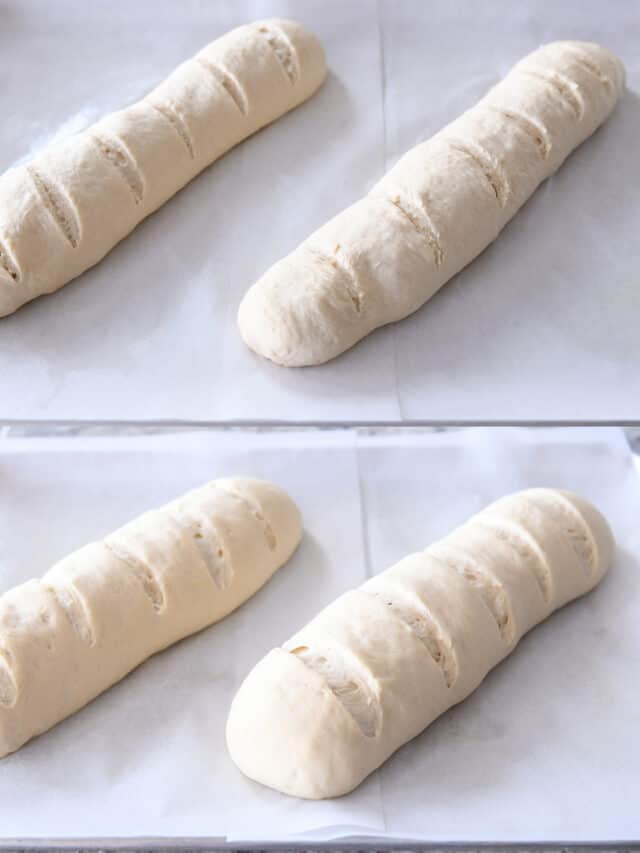
Scoring the bread dough (in my house, also called: slashing or gashing) helps the dough rise better AND prevents it from cracking in unexpected places while baking.
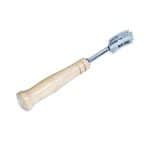
Using a bread lame for this task is extremely helpful. A bread lame is a long stick or utensil with a razor blade on the end. The razor is used to make thin cuts in the dough.
If you don’t have a bread lame, using a clean, sharp razor blade or an extremely sharp kitchen knife can work. Be aware that if the knife isn’t sharp enough, it’ll likely deflate the dough.
The bread loaves can be scored before or after the final rise. I prefer to do the slashing and gashing before they rise as I’ve had one too many loaves of risen bread deflate at the first touch of the razor, and there is nothing so soul crushing as when that happens.
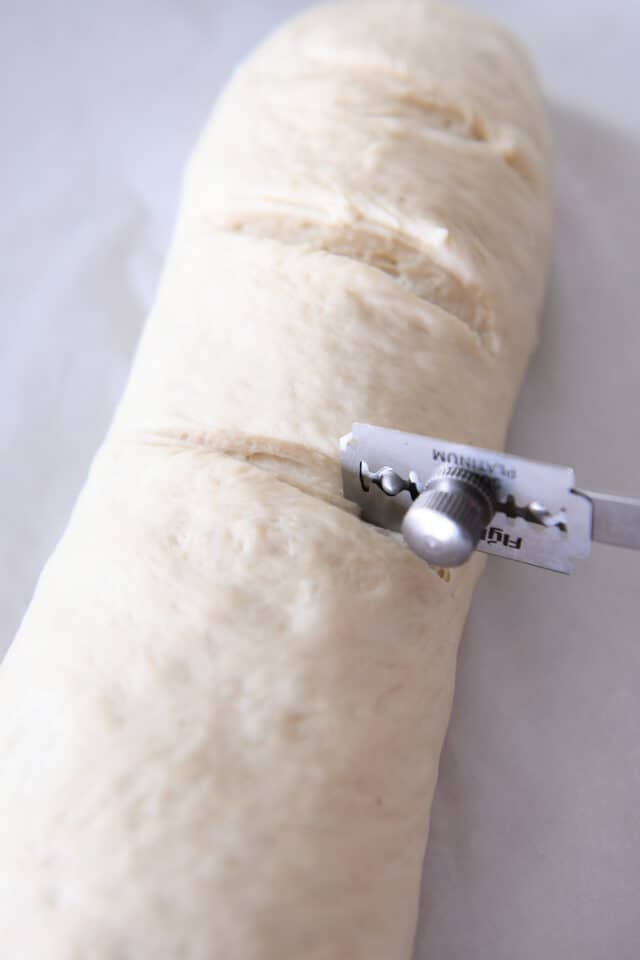
Let the bread loaves rise until noticeably puffy before baking.
Easy Hack for Crusty French Bread
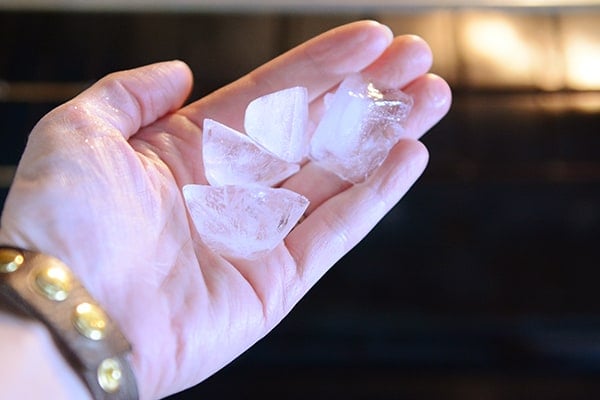
For a delicious golden crust, immediately before putting the bread in the oven, toss 3-4 ice cubes onto the bottom of the oven. Add the bread and quickly (but gently!) close the oven door.
The steam as the ice cubes hit the toasty bottom of the oven will lightly crisp up the outer crust as the bread bakes.
Important Note! Please consult your oven’s manual for details or caution on putting ice/water on the bottom of the oven floor – I’ve never had a problem, but everyone should do their own research and use their own best judgment (also take care not to toss the ice cubes on the glass oven door as it could crack).
If you are struggling to get a deeper golden crust on the French bread, try:
- Increasing the oven temperature by 25 degrees and/or
- Moving the oven rack up one position (I find my bread browns the best in the middle or upper middle area of my oven)
Whole Wheat French Bread
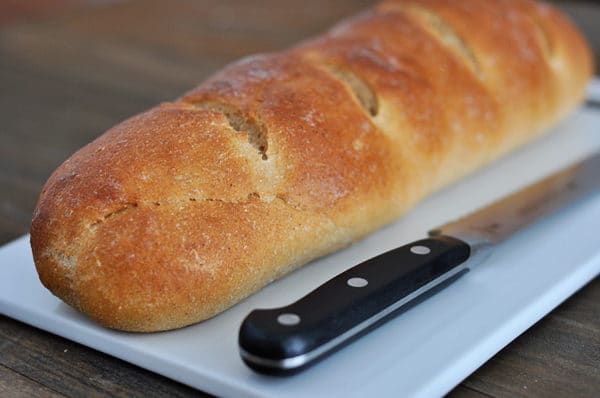
As noted in the recipe, French bread works quite well using whole wheat flour. I’ve found the best results are when using white whole wheat flour (red whole wheat flour makes a denser, heavier loaf).
I recommend subbing in half whole wheat flour to start and then adding more whole wheat flour as you continue to make subsequent batches of bread.
If using whole wheat flour, add a 2-3 minutes to the kneading time to help develop the gluten (also, adding a couple tablespoons of vital wheat gluten/gluten flour can also help the whole wheat bread bake up light and fluffy).
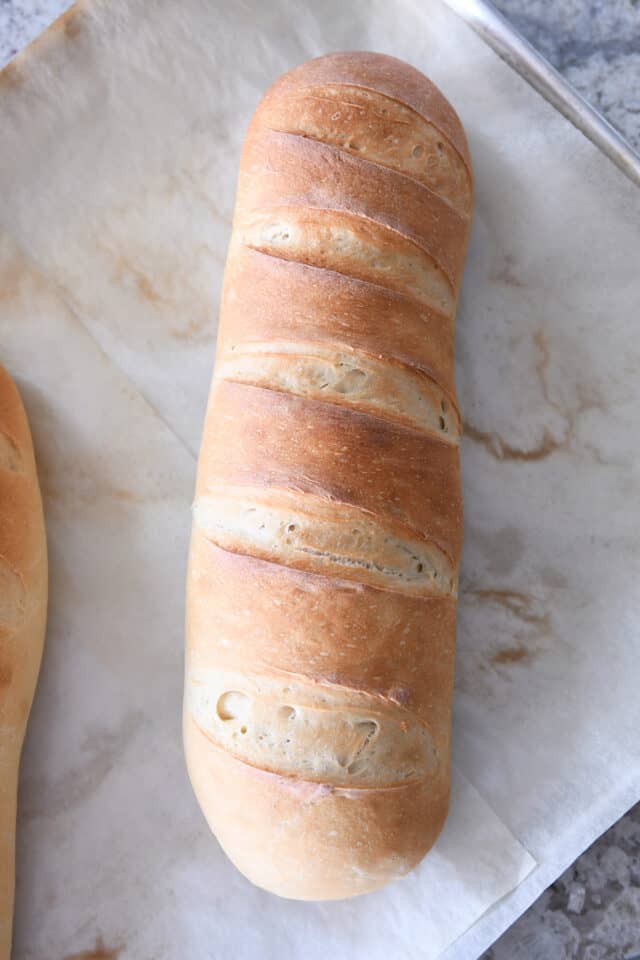
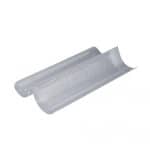
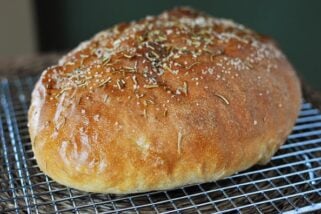
Helpful Tip: If you’ve struggled with your bread flattening out while baking instead of holding the perfect shape, you might try these French bread pans {aff. link}. I have them and LOVE them. I don’t use them every time I make this bread, but I do pull them out quite often (I also use them for this rosemary bread).
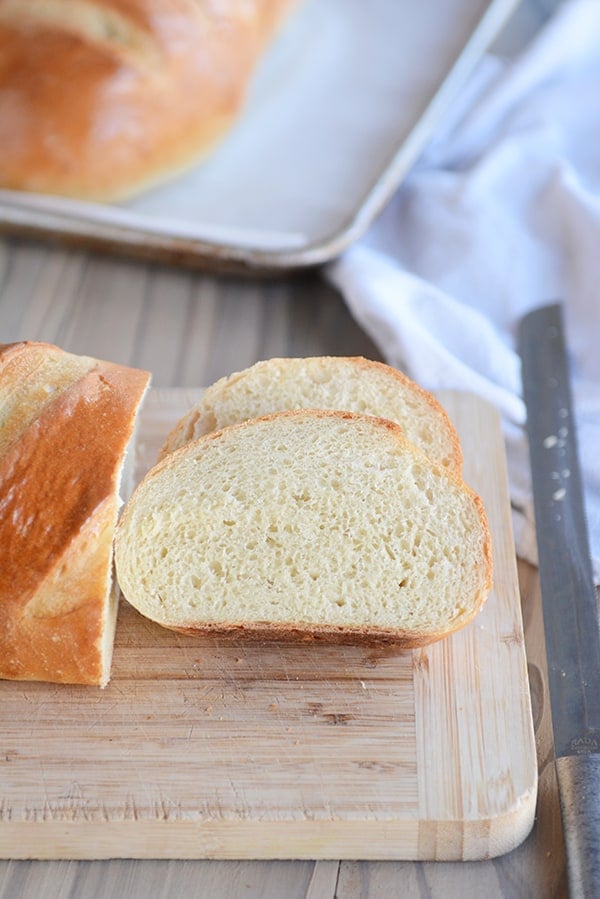
Perfect Homemade French Bread
With over 2,500 5-star reviews, this homemade French bread has become a favorite for so many of you.
Hundreds of you have let me know that you have been intimidated by homemade bread until you found this recipe! It is easy, foolproof, and will make you feel like a bread making rock star.
Helena says: Finally, after 5 failed bread attempts using other places recipes, this is THE recipe to use! Happy dance! Thank you for sharing this awesome recipe! Delicious bread!
Valerie writes: Such a fantastic, easy recipe. The “hands on” time is minimal and it comes out perfect every time. Thanks for sharing a recipe that’s become my “to do” dinner bread!
Nichole says: Followed instructions exactly! First time making any sort of bread ever. The bread turned out perfect!!!!
Pia commented: Hands down my go-to bread recipe. Today’s edition is 1/3 dark rye flour, with Italian herbs and caraway seeds mixed in and sprinkled with everything bagel topping. Yum! Best bread recipe ever, and so easily customizable!
FAQs for Homemade French Bread
Yes! Halve all the ingredients straight across – just keep an eye on the amount of flour and judge the final amount by the look and feel of the dough.
Yes, it freezes great (after baking and cooling).
Moving an oven rack up or down can help. In my oven, the bread browns best in the upper half of the oven. Also, you can try increasing the oven temp by 25 degrees.
Absolutely! You can mix the ingredients in a bowl with a spatula or spoon and knead by hand.
I always use the same amount interchangeably. Recently, I’ve heard that active dry yeast doesn’t need to be proofed in liquid first, but I always still do when using active dry yeast (no need to proof with instant yeast).
Yes, just keep an eye on baking time – smaller loaves may need less baking time.
One Year Ago: Harvest Pasta Sauce {Trader Joe’s Copycat}
Two Years Ago: Peanut Butter Cup Cheesecake with Chocolate Cookie Crust
Three Years Ago: Easy Homemade Egg Noodles {Step-by-Step Pictures Include Food Processor Method or By Hand}
Four Years Ago: Black Bean and Butternut Enchilada Skillet
Five Years Ago: Chocolate Chip Peanut Butter and Oatmeal Cookies

Easy Homemade French Bread
Ingredients
- 2 ¼ cups warm water, 110-115 degrees F
- 2 tablespoons granulated sugar
- 1 tablespoon instant or active dry yeast
- 2 ¼ teaspoons salt (see note)
- 2 tablespoons olive oil, canola oil, vegetable oil or avocado oil
- 5 ½ – 6 cups (781 – 852 g) all-purpose flour or bread flour (see note)
Instructions
- In the bowl of an electric stand mixer fitted with the dough hook, combine the water sugar and yeast. If using active dry yeast, let the mixture bubble and foam before proceeding (this can take 3-5 minutes). If using instant yeast, proceed with the recipe (no need to let the yeast activate).
- Add the salt, oil and 3 cups of flour and mix. Add in 2 1/2 to 3 more cups of flour gradually. The dough should clear the sides of the bowl and form a soft ball that doesn't leave a lot of dough residue on your fingers.
- Knead for 2-3 minutes until the dough is smooth. If the dough starts to cling to the sides of the bowl (or the center column if using a Bosch or other mixer with a center), add 1/4 cup of flour at a time until a sturdy but soft ball of dough forms.
- Rising Method 1: Leave the dough in the mixer, cover with a lid or towel, and let the dough rest for 10 minutes. Stir it down by turning on the mixer for 10 seconds or so. Repeat the "rest and stir down" cycle five more times.
- Rising Method 2: Instead of letting the dough rest for 10 minute spurts and then stirring it down, transfer the dough to a lightly greased bowl and cover with a towel or greased plastic wrap. Let the dough rise until doubled, about an hour or so, depending on the warmth of your kitchen.
- Turn the dough onto a lightly greased surface and divide in half. Pat each section into a thick rectangle, 9X13-inches or thereabouts (doesn't have to be exact). Roll the dough up starting from the long edge, pressing out any air bubbles or seams with the heel of your hand, and pinch the edge to seal. Arrange seam side down on a large baking sheet lined with parchment paper (I use separate baking sheets for each loaf).
- With a bread lame, razor blade or VERY sharp knife, cut several gashes at an angle on the top each loaf (you can wait to score the bread until after it rises, but it can easily deflate if the razor/knife isn't sharp enough).
- Cover the loaves with greased plastic wrap or a kitchen towel, and let rise until noticeably puffy and nearly doubled in size, about an hour.
- Preheat the oven to 375 degrees F and make sure an oven rack is in the center position. If you find your bread isn't browning as much as you like, preheat the oven to 400 or 425 degrees and/or move the oven rack up one position (watch carefully so the bread, especially the bottom, doesn't burn).
- Optional: for an extra golden, crisp crust, place the loaves in the preheated oven and immediately toss 3-4 ice cubes on the bottom of the oven. Close the oven door quickly but gently. (See note below!)
- Bake the loaves for 25-30 minutes until golden and baked through.
- If desired, brush melted butter over the hot loaves (this softens the crust a bit, so if you want a crispier crust, don't butter the top).
Notes
Recipe Source: adapted slightly from The Sister’s Cafe


Love this. You are my go to anytime I am looking for bread recipes
Thank you, Victoria!
“1 tablespoon instant or active dry yeast (see note)”
I don’t see a note related to yeast.
Sorry for the confusion. The “note” is included in step #1. I’ll edit the recipe for clarity.
This French bread is absolutely delicious. However , I can’t remember if I used all purpose flour or bread flour. Do you have any recommendations for the type of flour that would be best? I either used King Arthur Sir Galahad commercial all purpose flour or King Arthur bread flour.
Hi Kevin – either work really well in this recipe! Bread flour will result in a slightly chewier crumb.
Hands down this recipe makes absolutely
AMAZING bread!!! I even made it in my air fryer, I had to make them smaller loaves but they came out absolutely perfect. I’m getting ready to make another batch RIGHT NOW as a matter of fact lol
My husband and I love this bread! I have stopped bying commercial bread , much cheaper and healthier to make homemade bread.
Amazing recipe! Made a double batch for a get together and it was a huge hit!
I was wondering, you said the dough can be frozen, is that before it rises ?
Best to freeze the loaves, after baking and cooling, not the dough itself.
You can freeze the dough before it rises (but as another commenter suggested…the bread is also delicious baked and then frozen).
Hi there! I just wanted to tell you that this is by far the best bread recipe I’ve come across and as a mama of 5 bread loving kiddos, I’ve gone through quite a bit! I make this almost recipe almost weekly and it’s always devoured! My question is do you think it’s do-able to turn the recipe into dinner rolls?
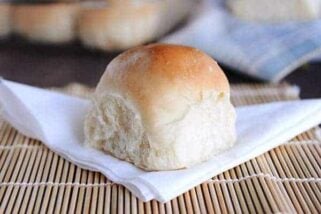
Hi Bryana! Yes, you can definitely use this dough for dinner rolls – it works great.
I followed the instructions exactly and my loaves turned out perfect! Thank you for the photo tutorial and recipe!
Our family love this recipe ♡
Been making this bread recipe for years now! Turns out amazing every time. I was wondering if you are able to freeze the dough before baking?
Hi Britt, yes, the dough can be frozen and thawed to bake later.
Loved this recipe, easy to make, just takes time because of rising the bread but worth it. I am going to try adding herbs to it next time, I made 2 loaves per recipe and froze one. We cut it into 8 inch pieces and made hoagies/subs with it. I think it would make great dipping bread for olive oil and herbs, bruschetta etc too. Thanks for the recipe!
I have tried and failed so many times. This is amazing bread. I did the stir method because hey, nothing else worked great. This worked wonderfully! Thank you so very much.
This is my go to recipe for making garlic bread, I make both loaves, let them cool and cut them in half lengthwise then add garlic butter and cheese and it’s fantastic, bread always turns out!
Does the final step of flattening the dough out and then rolling it back up to shape it into a loaf need to happen?
When I divide the dough in half, it’s easy to just shape each half into a loaf at that point. Not sure if cutting that corner would cause an issue?
You can shape the dough a different way if you’d like.
The purpose of flattening out the dough and rolling it out is to push out any air that has built up from the initial rising. This ensures, to an extent, that you won’t have large empty “buble” spaces in the finished product. Best not to omit this step.
Can I make this by hand. I don’t have a mixer with a dough mixer
Yes, it can be mixed and kneaded by hand.
I don’t write a lot of recipe reviews but for anyone on the fence about trying this bread recipe, don’t be. It’s got a great firm crumb and holds up well to toasting, eating plain and grilling. It’s becoming a go-to bread staple in our house.
This is not french bread, French bread needs to rise a total of clode to 20 hours in order to get the larger bubbles in the resulting bread.
Please use Metric measures.
You are talking about cups they come in different size’s
I made this recipe tonight to go with loaded baked potato soup tomorrow and it looked so good my husband and I split half a loaf and made sandwiches. Absolutely the best recipe and not difficult to make!
This recipe is easy and reliable. I get consistent fabulous results every time I use it.
I’ve made this very easy and reliable recipe many times. My 4 year old grandson always asks me to make him another loaf of ‘papa toast’. I usually add spices to it to give it a herb bread flavour.
Decided I was in the mood to bake after work this afternoon so decided to make this to go along with dinner. I was worried about time but it came together easily and perfectly. It was a HUGE hit with my family. My husband is going to try making it into French toast.
Hi there!
Wondering if you have a specific baguette recipe or how to modify your Best French Bread to make baguettes.
Thank you!
I don’t have a baguette recipe, but you could try using this dough and forming the loaves into thinner shapes (and/or using a baguette pan for shaping/rising).
I just made this French bread, and it was a total hit! The dough was so easy to work with, and your tip about not stressing over the exact flour measurements was super helpful. I used the ice cube trick for a crispier crust, and it turned out beautifully golden and crunchy. This will definitely be my go-to recipe for homemade bread from now on—thank you!
I have made a lot of bread over the years. Tried this for the first time today. Perfection.
After about 7 attempts at bread I finally found one that actually works! Thank you so much for this beautiful bread recipe. 🧡 My loaves came out wonderful. I’m fixing to check, but I really hope there are more where this came from.
Awesome recipe! Follow the directions and you’ll have a perfect 2 loaves of great French bread. Thank you for sharing this recipe. Saved it in my cookbook I have for special recipes.
Pretty easy and absolutely delicious!! For any first time bread makers, I’d suggest this as one of your starters! Awesome recipe! Thank you!
Can I use all white whole wheat flour? I read the note about flour but was just making sure I can use all or do I do half whole wheat and half bread flour?
Thank you!
You can definitely experiment. The bread will likely be a bit more dense with 100% whole wheat flour – if doing that, I’d increase the kneading time by several minutes.
Hi Mel, absolutely the easiest recipe and love the taste of this bread. My question is after the second rise the loaves are very large but kind of flat. When I bake them they are still on the flat side. How do I get it to be a higher skinnier loaf vs wide and flat if that makes sense.
Hi Jamie, adding a bit more flour to your dough will help the loaves retain structure while rising – try another 1/4 to 1/3 (or even a bit more flour) when mixing and kneading. Also, rolling the loaves into a taut shape can help as well.
So easy and crazy delicious! I am trying to switch over to all homemade bread and this will be on my weekly baking list.
I loved everything about this simple bread. The dough came together effortlessly and was soft, pillowy and easy to work with; the crust is thin and light and stayed crisp after cooling; the crumb is open, very soft, slightly squishy and moist. It’s perfect for a pb&j sandwich! I made a half recipe and substituted 227 grams of sourdough starter for 113 grams each of flour and water. Instead of the “rest and stir” method, I kneaded the dough in my mixer for about 8 minutes until it passed the windowpane test. I proofed the shaped loaf in a banneton and baked the bread in a clay baker. The baked loaf was nice and tall, and looked a bit artisanal because of the beautifully crackled crust.
Too much salt but otherwise good!
Easiest and yummiest French bread recipe I’ve ever used!!!
I apologize if this has already been asked. When using Rise Method 1, will the dough be doubled after the sixth stir and rest?
Not necessarily doubled but definitely noticeably puffy.
This French bread recipe is amazing! The detailed instructions and tips make it easy to follow, even for beginners. I can’t wait to try baking this at home and enjoy the fresh, warm bread. Thanks for sharing such a straightforward and delicious recipe!
Most excellent. I have been baking bread for 60+ years. The hands on time is minimal and the product perfect. It’s a keeper.
Easy to follow recipe! Came out better than expected on first try. So crispy on the outside and super soft on inside. Scrape of butter on a warm slice right out of the oven was heavenly. Highly recommend this recipe!
For the ice put a baking sheet in win pre heating and put ice on that
Great recipe! Easy to follow, rose wonderfully, crumb is gorgeous. Wish I could post a photo 😁
My go to bread. My family loves subs so when it’s camping or pool time I bake away. Clear instructions and measurements are perfect. Thank you
Hands down the easiest bread to make! I used method 1 for the rise and I’m so happy I did! I also put an oven sage casserole dish in the bottom filled with ice and it made such an awesome impact on the crust! Chewy and yummy!
Delicious! I think I measured the salt wrong, so it came out a little bland, but still wonderful. Im more used to the sweeter french bread and am wondering if I can convert this recipe somehow. Should I just raise the amount of sugar?
Thank you!!
Sure, you could add more sugar and salt to taste.