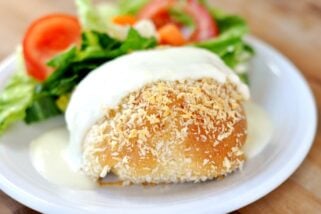
Crispy Oven-Baked Chicken
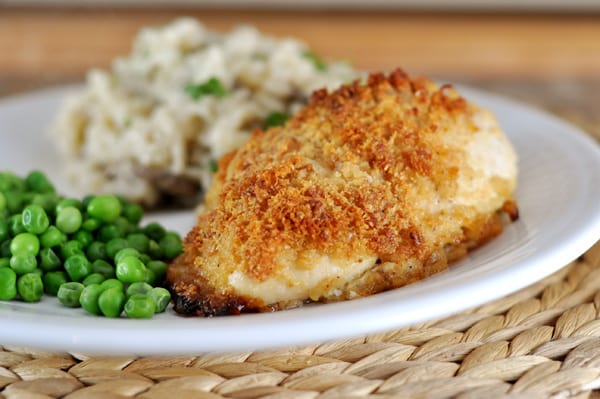
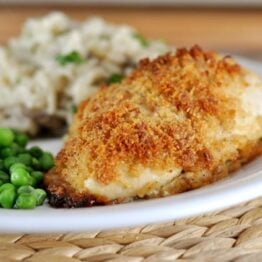
This crispy oven-baked chicken is a healthier version of fried chicken that is still tender and juicy and completely flavorful.
This meal is one of those that defies description. I mean, what could be simpler than oven-baked chicken?
And it is simple, I can promise you that. However, what amazes me each time I make it is how juicy and tender the chicken is and how utterly flavorful the crispy crust becomes.
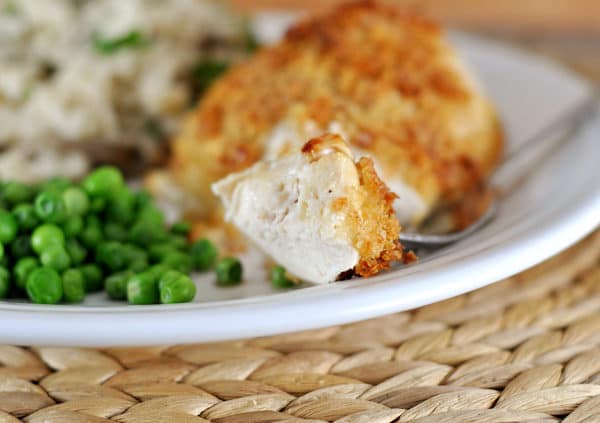
This is most definitely our favorite way to eat a healthier version of fried chicken.
One major key is using fresh breadcrumbs. I like to use two hefty slices of whole wheat bread, but if you don’t have a food processor, you can a) try using a blender to pulse the crumbs (anyone ever done this?) or b) use panko bread crumbs (found in the Asian foods section, usually).
The finished texture will probably be slightly different, but it is better than using the sawdust-y bread crumbs from a can.
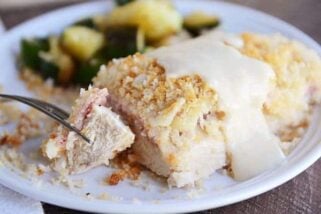
The fresh bread crumbs absorb the butter and garlic and the freshly grated Parmesan adds another layer of flavor and crunch ensuring the chicken is blasting with flavor and tenderness after baking.
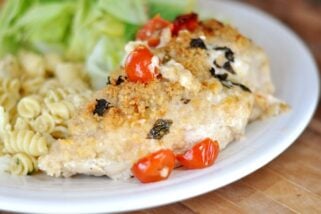
What to Serve With This
I serve it with anything from these baked mashed potatoes, cheesy broccoli and rice casserole, or these blue cheese and cheddar scalloped potatoes. Sometimes we skip the starch altogether and eat it alongside a steamed veggie and salad. The options are endless.
One Year Ago: Chocolate Cream Angel Food Cake
Two Years Ago: Sweet and Sour Meatballs
Three Years Ago: French Dip Sandwiches
Crispy Oven-Baked Chicken
Ingredients
- ½ cup butter
- 3 garlic cloves, finely minced
- 2 thick slices whole wheat bread, for about 2 cups fresh bread crumbs
- ½ cup finely grated Parmesan cheese
- 1 ½ teaspoons kosher salt
- ½ teaspoon ground black pepper
- 4 large large boneless skinless chicken breasts
Instructions
- Preheat oven to 350 degrees F. Line a rimmed baking sheet with aluminum foil and coat lightly with nonstick cooking spray. Set aside. Combine butter and garlic in an 8- or 10-inch skillet. Heat over medium heat until the butter has melted. Pour the butter/garlic mixture into a shallow pie plate or similar dish and cool to room temperature.
- In the bowl of a food processor, tear the bread into large chunks, and pulse until the bread is ground into crumbs. Pour the bread crumbs into a shallow pie plate or shallow bowl and toss with the Parmesan cheese, salt and pepper.
- Dip each chicken breast in the melted, cooled garlic butter. Transfer to the bread crumb mixture and turn until coated on all sides. Arrange the chicken in one flat layer on the prepared baking sheet. Drizzle any of the remaining melted butter over the chicken. Bake the chicken until it is lightly browned and just cooked through, 40-50 minutes. The baking time will depend on the thickness and size of the chicken you are using. Don’t overcook or the chicken will be dry.
Notes
Recommended Products

Recipe Source: adapted from Sara Moulton

This chicken is SO good! I only wish I had doubled the recipe because my family loved it and would have eaten double. One of my kids said she wanted this for her birthday dinner. We’ll make this one regularly!
This was so good! Thank you! I have actually made a recipe similar to this many times but this is so much better. That is something I love about your site. Some recipes are totally new and some are better versions of recipes. Life is better with better food.
YUM! This was soo delicious! This chicken was so easy to make, my whole family loved it. I can’t wait to make it again.
Hi,
I went to Walmart to buy Panko breadcrumbs and there were three choices: original, crispy, and Italian seasoning I think. Which of those is the one you have used or would recommend??
His recipe and reviews sound wonderful— can’t wait to try it! 🙂
I usually just buy the original kind.
Mel – I have made this chicken several times and it is a family favorite! I love that
1) I can use bone-in chicken baking it for about an hour and it is so moist
2) I can use white or wheat bread for the breadcrumbs but the wheat are superior as they create a more “browned” appearance
3) it bakes up beautifully for company and it’s so easy to put in the oven and work on other side dishes.
4) it is so flavorful and I always get tons of compliments!
Thank you a million times over for your hard work on these recipes. Your dedication has blessed my family and our tummies!
Thank you for this recipe. My family loved it. My 5 yr old actually was asking for more 2 days later! We are going to the grocery store for more ingredients today.
Hi Mel,
Your website is our family’s #1 site for delicious recipes! and we’ve referred many people to you! We really love this oven-baked chicken recipe and have made it at least 5 times over the last two months. It is flavorful and VERY tender! We finally remembered to bookmark it though since it doesn’t come up when searching “chicken” on your site. Instead, we learned to search for “baked chicken” to find it. We definitely think it belongs in your “best chicken recipes” categories! We also love the blue cheese scalloped potatoes to go with it. Yum! Thanks for all you do!
Oh yum, this + those scalloped potatoes sounds heavenly! Thanks for reminding me of this oldie but goodie!
We just had this for dinner and it was FABULOUS! Melt in your mouth chicken.. YUM!
Mel your site is the first place I go when I need a new recipe and you have NEVER failed me! We (dear hubby and I) really appreciate all the hard work you do! Hugs!
Thanks, Kelcey!
This didn’t work for me at all unfortunately. I used a brand of breadcrumbs that I usually use to when frying chicken fillets (coated with beaten egg and breadcrumbs) but thought to try this recipe because I wanted to avoid the fried part. They came out awful. The breadcrumbs didn’t crisp up at all and we were left with a soggy mess that had to be scraped off before we could eat just the chicken breast. Because I had prepared quite a lot, I left the rest until the evening and thought to fry them as normal but it still wasn’t good. The breadcrumbs just wouldn’t crisp up at all so I’m assuming that it was the butter mixture that was causing problems. I’ll stick to egg and breadcrumbs in future. A shame as I liked the sound of the recipe..
I tried your recipe tonight oh men it taste awful makes me wanna throw-up.
I made this for dinner last night and it was delicious! Your recipes are always spot on!
pulverize some cornflakes for the coating – and if you are looking for something besides butter to bind the coating – marinate the chicken in buttermilk overnite in the fridge
Just came across this recipe today. I have a few questions…
Will the chicken still be crispy if I use Panko? Or does the recipe work better if it’s fresh bread crumbs? If I use fresh bread crumbs, can I use white bread?
Every time I’ve tried to make crispy baked chicken in the past, it turns out soggy on one side. Should the chicken be turned?
Natalie – you’ll have to experiment with panko but yes, it should still be crispy (the texture of homemade bread crumbs is delicious, though). You could definitely use white bread for the bread crumbs. If you don’t want the side that is on the baking sheet to get soggy, try placing an aluminum rack (like a cooling rack) on the baking sheet and baking the chicken on the rack so that it sits up off the baking sheet.
Ok seriously!! I have not commented on this recipe yet…..but I REALLY NEED TO!! This is the BEST CHICKEN EVER!! I made it right after you posted it nearly 2 years ago. We instantly fell in love. The chicken is moist and the bread crumbs are perfect. Not to dry and not to soggy. The taste is out of this world. I have been making it bi-weekly for the last two years and have never commented. I made it again last night with rice, gravy, and corn on the cob. Seriously me and my hubbie just couldn’t stop oohing and aahing while eating. Thank you so much for the effort you put into each recipe and blog post! I always recommend you to my friends and family!!
Awesome! We are big fans of this recipe. It’s easy and delicious. I accidentally thawed chicken tenders instead of chicken breasts and was worried they wouldn’t turn out well but they were amazing! I used the panko crumbs, just because I had them. And I put them up high the last 5 minutes to crisp the top. Amazing! We will make these again for sure.
Another favorite for us! I used the Panko crumbs and the breaking didn’t brown much, but the chicken was cooked all the way. This will be a repeat recipe for us!
Made this tonight and it was amazing! This chicken will definitely be happening again at our house. Thanks for the great and easy recipe!
I know you aren’t a fan of prepackaged products, but I use Shake n Bake for PORK breading on my chicken and it always comes out crispy and perfect.