Chewy Soft Pretzels
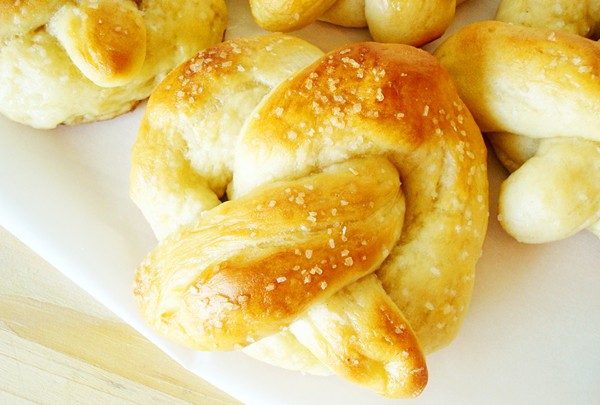
Chewy, soft and slathered in butter and salt, these homemade soft pretzels are a carb-lover’s dream. Seriously, they are absolutely heavenly.
Over the next few days, I’ll be posting three of my favorite appetizers. Appetizers and party foods are some of my favorite ways to consume calories.
Pretzels may not seem a likely option for appetizers, but they are a fantastic way to increase the spread.
These pretzels I’ve been making for years and they certainly don’t disappoint.
Chewy, soft and slathered in butter and salt, these pretzels are a carb-lover’s dream.
I make these often for after-school snacks or when the baking bug hits and I need simple ingredients. Seriously, they are absolutely heavenly.

Chewy Soft Pretzels
Ingredients
Dough:
- 2 ½ cups (355 g) all-purpose flour
- ½ teaspoon salt
- 1 teaspoon sugar
- 2 ¼ teaspoons instant yeast
- 1 cup very warm water
Topping:
- ½ cup warm water
- 2 tablespoons baking soda
- Coarse salt, optional
- 3 tablespoons (42 g) butter, melted
Instructions
- In a large bowl or the bowl of an electric mixer, place the flour, salt, sugar and yeast. Mix to just combine. Add the water and mix well, adding more flour, as needed, a bit at a time to form a soft, smooth dough that clears the sides and bottom of the bowl. Knead the dough, by hand or machine, for about 5 minutes, until it is soft, smooth and quite slack. The goal is to get a really soft dough that isn’t overly sticky. Lightly flour the dough and place it in a plastic bag; close the bag, leaving room for the dough to expand, and let it rest for 30 minutes or up to 60 minutes (see pictures below).
- Preheat your oven to 500°F. Prepare two baking sheets by lining them with parchment paper.
- Transfer the dough to a lightly greased work surface, and divide it into eight equal pieces (about 70g, or 2 1/2 ounces, each). Allow the pieces to rest, uncovered, for 5 minutes. While the dough is resting, combine the 1/2 cup warm water and the baking soda, and place it in a shallow bowl or pie plate. Make sure the baking soda is thoroughly dissolved; if it isn’t, it will make your pretzels splotchy. Sometimes I have a hard time getting the baking soda completely dissolved, so I just lightly stir up the mixture right before adding each pretzel.
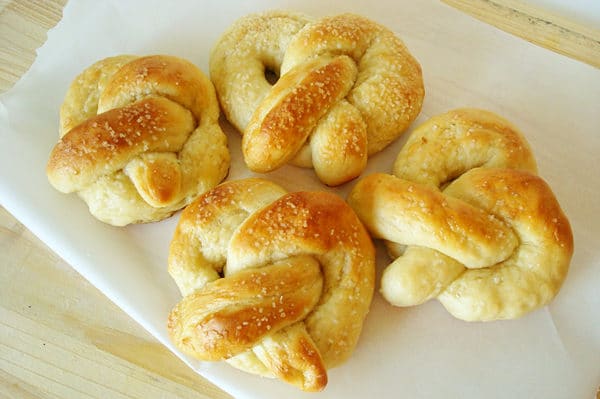
- Roll each piece of dough into a long, thin rope (anywhere from 14 to 22 inches long), and twist each rope into a pretzel. Dip each pretzel in the baking soda wash (this will give the pretzels a nice, golden-brown color), and place them on the baking sheets. Sprinkle them lightly with coarse, kosher, or pretzel salt. Allow them to rest, uncovered, for 10 minutes.
- Bake the pretzels for 7 to 9 minutes or until they’re golden brown. Bake one sheet at a time – it won’t hurt the other pretzels to chill out for a little longer.
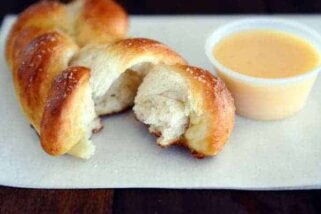
- Remove the pretzels from the oven, and brush them thoroughly with the melted butter. Keep brushing the butter on until you’ve used it all up; it may seem like a lot, but that’s what gives these pretzels their ethereal taste. Eat the pretzels warm, or reheat them in an oven or microwave.
Notes
Recommended Products


Recipe Source: adapted slightly from King Arthur Flour
In the picture below, the dough has just been placed in the bag to rise for 30 minutes. Notice how there is a lot of slack in the bag to allow for rising.
Below, the dough has risen for 30 minutes and has expanded quite a bit. 


I made these with my daughter today and they turned out amazing! The recipe is just so easy and fun, we had a ball making these pretzels!
Loved this recipe! It was so easy, and my pretzels turned out so soft and chewy I can’t wait to make them again :-)
Wish I could post a picture of my daughter and her friend making these. They were so delighted that they turned out as well as they did and they tasted absolutely amazing. Unfortunately we each have already eaten a few a piece which means that even though we made a double batch we will need to make some more again soon.
Easy to make and delicious. Definitely a keeper recipe I’ll make every year.
I love making these. They’re super easy and yummy! Since I was in a mood to experiment, I tried using half whole wheat flour, and I couldn’t taste a difference. They were still really good!
I made these for the super bowl yesterday. The recipe is very straightforward and the pretzels turned out really yummy. One thing I don’t understand is doing the rise in a plastic bag. I would have preferred a bowl, as the other commenter noted. I found it challenging to get the dough out of the bag after it rose. I might try a loose wrap in saran wrap next time.
I unfortunately underbaked some of them (less than 10 minutes in my oven), and they came out more soft like rolls and not as chewy. The ones that I baked for 10-11 minutes were chewy and had that ballpark texture.
This recipe is quite a project and I had flour all over my kitchen, but still worth it!
Thankyou so much Mel, they turned out perfectly. I did decide to change shape and cooked a couple in the airfryer as experiment.
This recipe was great! Although it took a long time to roll out each pretzel, my family loved them and so did I. But still, before you get started, please know what you’re getting yourself into! It took me 2+ hours to make these soft pretzels. Despite that, I’m sure I’ll be making them again soon because they’re simply that good!
In step 4, instead of shaping the dough rope into a pretzel FIRST and then placing into the baking soda water and then placing onto the parchment papered tray, could I dip the dough rope into the baking soda water FIRST and then arrange into a pretzel on the parchment papered tray? I’m thinking about how to best manage a good pretzel shape.
Sure, you could try that.
I would love to make pretzel buns to have for burgers or pulled pork. Could you turn these into rolls/buns? Any recommendations for how to do so?
I use this recipe for pretzel buns: https://www.melskitchencafe.com/amazing-soft-pretzel-rolls/
I only have “live yeast” how can I make these. No instant can be found these days!
Like, fresh yeast? I have literally hardly any experience using fresh yeast. You might try googling a fresh yeast vs instant yeast conversion!
These are so easy and delicious! I have made them several times, but my favorite is to wrap the dough around full size hotdogs and make pretzel dogs! I tried small ones at first, but they are time consuming and I am lazy. So full size hotdogs, in my oven takes about 12-15 min. Have also made with sausages and works the same. Thanks for such a simple recipe!!
I make these in my ninga with the dough attachment in it n they come out perfect everytime no mess no fuss
Making my third batch of these in two days they are so simple and easy thank you!!
I’ve been obsessed with your website over the past 2 months as I’ve started to learn how to bake with yeast! These are delicious and I love telling people I know how to make pretzels…they’re always impressed!
One question I have-I’ve made your pretzel twists before and loved them too-have you ever tried the egg wash from the twists on this recipe? I love the color it gave but don’t want to mess something up that’s already so good!
Thanks, Ashley! You could definitely use the egg wash for these pretzels!
So I have made these twice now, first time my husband was craving soft pretzels. So I found this recipe and an hour later we were enjoying pretzels. They didn’t last as long as it took to make! 2nd time I rolled them more in circle was only difference and did as pretzel rolls. These are super easy to make, endless ideas to use them next time I am wrapping little smokies! Thanks for an amazing and awesome recipe! If I could give it more stars I would!
They taste amazing! Ive already been asked for the recipe. Its not as difficult to make as it seems, just some waiting involved. I also made a cinnamon sugar batch with the same recipe. Love it!
Speechless . Absolutely awesome.
These were AMAZING! Super quick and easy, and they tasted A-MAZ-ING! I made them for my family and they loved them, too. 10/10 recommend.
Has anyone tried these with a gluten free flour ?
I used wheat flour and they were great! Didn’t taste anything like the white flour but they tasted great still!
Hey Mel!! I would like to make a bunch of these to have on hand. Can I freeze and reheat in the microwave or oven???
Thanks,
Melissa
Hey Melissa, these reheat really well after being frozen. I usually just reheat what we want in the microwave (on low power so they don’t get crunchy, hard spots from uneven microwave cooking) but you could probably reheat a whole batch in the oven on low heat, too.
awesome! thanks!
These are so delicious!!! My mouth has never been as happy and they’re super simple to make!
These are a go to in our house and what my mom requests as “payment” for watching my kids. My husband recently asked for a stuffed pretzel (cheese being his preference), though, and I’m stumped. Do you think these would translate well to be stuffed and, if so, how would you go about it? Thanks!
If it were me, I’d take the easy route and shape them like a small ball and squeeze a cube of sharp cheddar cheese in the middle, pinching the bottom to seal. Then follow the rest of the recipe. Good luck!
Made these today with my son. They are delicious! So soft and chewy. I made them into cinnamon sugar pretzels instead.
Made these yesterday with my kids…AMAZING! They were gone in minutes. My only question: is it necessary to let the dough rise in a sealed ziploc? Just thinking for next time, it might be easier for me to let it rise in the mixing bowl.
Nina – I think the ziploc bag helps keep a bit of humidity with the rising. I’ve let them rise in a mixing bowl before and maybe it’s just my mind playing tricks, but they didn’t seem quite as chewy as when left to rise in the bag. Worth experimenting, though. Good luck!
I love your site and I use it often! I was going to try these pretzels today with my boys (I have 3 boys and today is a snowday) and I was wondering if this recipe does ok doubled? We might have some friends come over to help us and I want to make sure there’s enough for all the kiddos to play with.
Andrea – yes, this recipe works great doubled (or even tripled!). Have fun!
We made these for a snack today and they were downright delicious…a definite family favorite!
LOVED these. Omitted salt in both dough and sprinkling (the butter gave it plenty of saltiness).
These are amazing. I’m not really a bread lover, but thought my boyfriend would like them. I’m not so sure there will be any left by the time i see him!
Lauren – sure, you can make these smaller. Just bake them a minute or so less, perhaps.
How big are these and can I make them
Smaller in order to make more? Im going to try and make
These for a Halloween party.
I added about a Tbsp of garlic powder to the dry mix, then while it was rising i finely shredded fresh parmesan. After the warm water/baking soda bath I COATED each (top and bottom) with the cheese. Baked them like normal and basted with garlic butter, topped with more cheese, then back in the warm oven for about a min just to melt the topping cheese a little. SO GOOD!!!
I forgot to add, it may also help that I add brown sugar to my cinnamon sugar to give it a more molasses taste.
I made these last night and they were so good I am making some more right now;
I also made another batch that instead of using sugar I added 2 tablespoons (to bring out the flavor) of cinnamon sugar and a 1/4 tsp. of salt instead of a half. They were delish!! Thank you for this recipie!!
Just made these with my two little girls who are homebound with mono. These were by far the BEST pretzels we’ve ever made, and we’ve tried many recipes! Living in Europe it’s impossible to find this type of pretzel, THANK YOU for this wonderful recipe and blog which has kept us occupied and happy even when sick!
Thanks for the recipe! But how do I store these? In the fridge? I’m afraid to keep them outside because the weather here is really humid and kind of getting warmer and warmer as the days past. By the way I have the first batch in the oven and they’re smelling heavenly!!
Crysatl – to be honest, I hardly ever have leftovers of these to keep but when I have, I’ve just kept them in a ziploc bag (once they have cooled completely) on the counter. If you are worried about the temperature, pop them in the fridge and give them a quick warm-through in the microwave before eating.
Hi Mel
do you need to use active yeast and do you have to place in bag for the dough to raise and many recipe add bread flour is this necessary.
thanks for reading
Vanisha – the recipe calls for instant yeast and I’d recommend using it as well as using the bag to help the dough rise. All of that contributes to the chewiness of the pretzels.
This are amazing! I made 2 batches (since yesterday!) and soooo delicious! Thanks!
You are so right about these being absolutely heavenly! After slathering them in butter, the crispy outer layer reminded me of a croissant, and I felt like I was eating a decadent pastry. When they were ready to go into the oven I feared I was going to end up with dense hockey pucks, but they rose beautifully and perfectly met my expectations.
These have become our Sunday snack of choice. I made 2 batches today, one cinnamon and sugar and one whole wheat. Both were delicious!
One word:A.MAZ.ING! Soft, yummy, buttery goodness! These may become a weekly treat!
Oh. My. These are fabulous! I’ve been wanting to make pretzels forever, and finally did it today. My husband- who doesn’t really care for pretzels- LOVED them! I laid 3 out for pictures, and when we were done, he ate all of them! They have fabulous flavor. Thanks Mel!
My first attempt at baking with yeast and it was awesome! I only got to eat 1 1/2 (the 1/2 stolen from my little guy) cause my girls and husband gobbled them up. Will make again….OFTEN!
These turned out delicious. I made it on my silpat and there was this funny taste at the bottom of the pretzel. Any idea why? It was like a chemically burnt taste? I baked at 480 which is the max recommendation for siplat and I suspect mine might be at the end of it’s life because i use it to roast veggies
May – I’m guessing it must be too high of heat for your silpat – and perhaps a residue of anything else you’ve baked on it. Even though the manufacturer says the silpat can be used at temps of 480 degrees, I never use mine above 425 for the same after-taste reason. Parchment is probably your best bet.