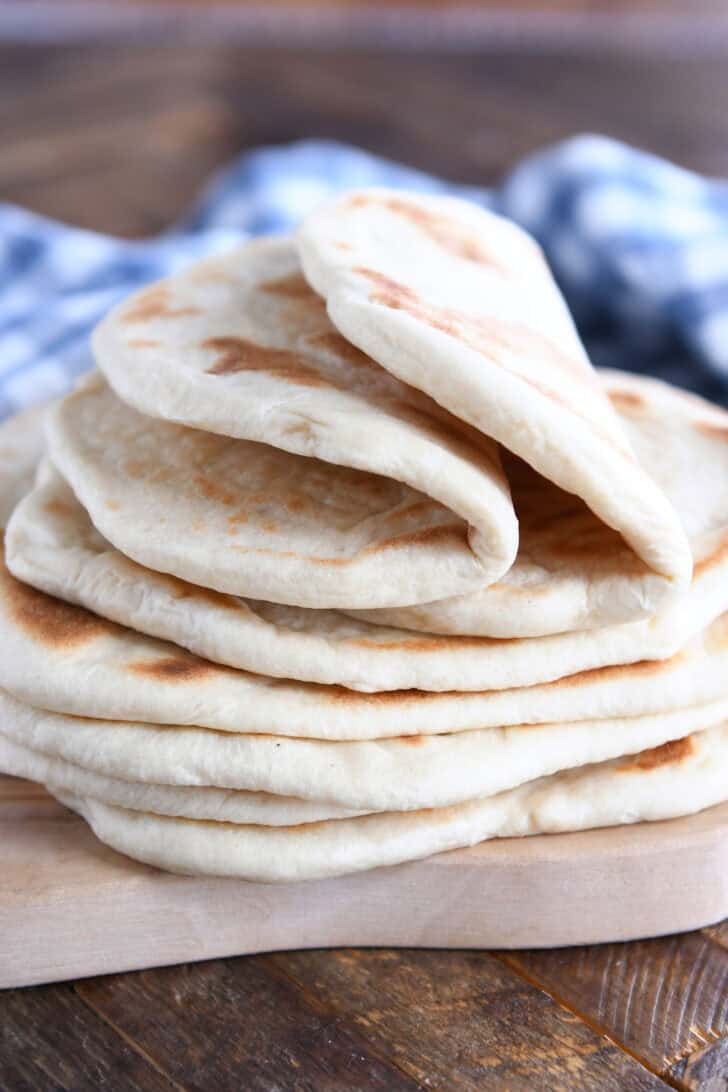
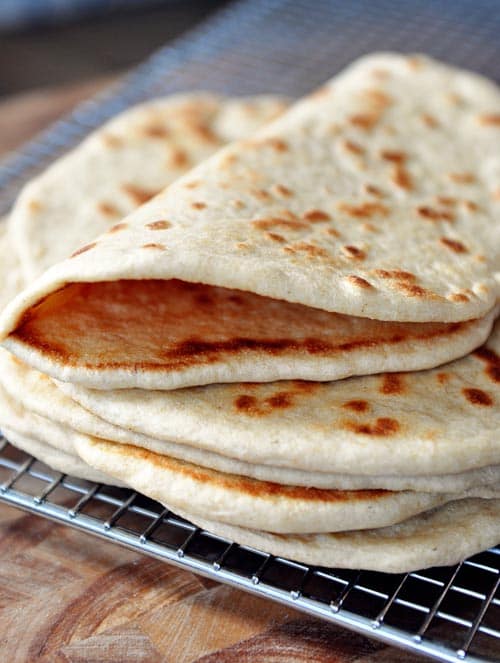
Homemade Flatbread
This homemade flatbread recipe is so easy! The flatbreads are soft, foldable, and can be cooked on a skillet or griddle.
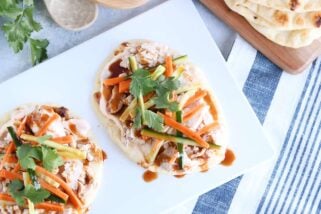
Who knew it could be so easy to make flatbread at home! These flatbreads can be used for wrap-style sandwiches, as well as serving alongside a multitude of meals (like curry!).
Soft Flatbread Dough
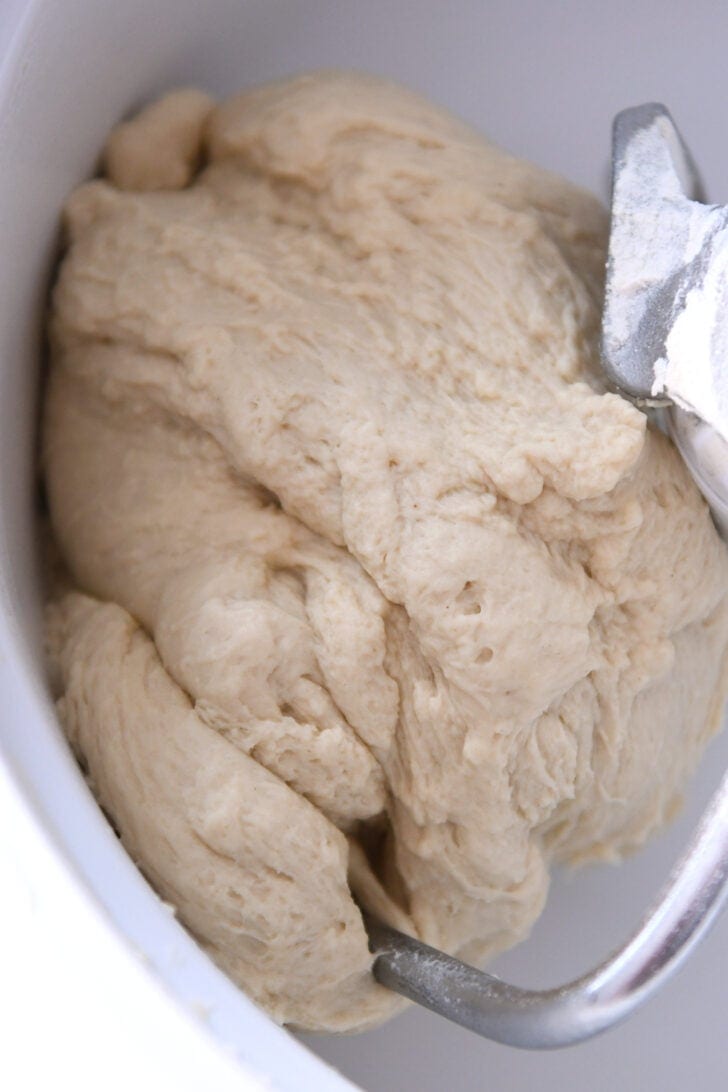
The dough for these homemade flatbreads is very simple. It can be made by hand, but a stand mixer fitted with a dough hook makes it even easier.
Flatbread dough ingredients:
- yeast
- sugar
- water
- milk
- olive oil
- bread flour
Instead of relying on the flour measurement as an exact rule, judge the amount of flour needed by the look and feel of the dough. It should be soft and slightly sticky without leaving a lot of residue on your fingers.
Separate the dough into eight pieces and let the balls of dough rest until puffy. This helps relax the gluten so the flatbreads are easier to roll out.


How to Cook Flatbread
Roll each piece of dough into circle that is about 1/8-inch thick. The flatbreads will puff as they cook, so roll the dough as thinly as possible.
You can lightly stretch the dough with your fingers (but take care not to stretch too much, or the flatbreads can shrink back to a smaller circle while cooking).
The flatbreads can be cooked on a griddle or in a skillet set over medium heat on the stovetop. It helps to use a nonstick surface so the flatbread doesn’t stick. There’s no need to add oil for cooking if using a nonstick griddle or skillet.
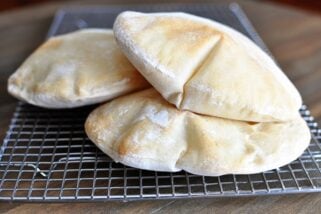
Cook the flatbread for 2 to 3 minutes until the dough bubbles and puffs. Flip and cook until golden and spotty on the other side.


What Recipes to Use Flatbread With
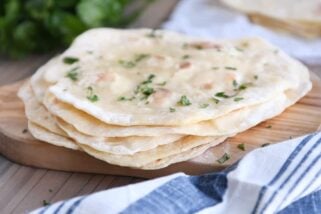
This flatbread, hot off the griddle, is mind-bendingly delicious with a little butter and honey.
If you happen to have any leftover after trying that, here are a few recipes perfect for the soft, foldable flatbread:
- Avocado Veggie Flatbread
- Chicken Banh Mi Flatbread
- Easy Chicken Gyros
- Sheet Pan Chicken Tzatziki Wraps
- Tender Greek Pork
- Big Fat Greek Tacos
This flatbread also makes a delectable side dish/dipper for any number of recipes like the ones below:
- Chicken Curry in a Hurry
- Coconut Shrimp Curry
- Indian Butter Chicken
- Korean Beef Bowls
- Egg Roll in a Skillet
- Thai-Style Green Beans and Turkey

5-Star Flatbread Feedback
With hundreds of 5-star reviews, you can bet that this homemade flatbread recipe is a tried-and-true favorite for many (not just me!).
⭐️⭐️⭐️⭐️⭐️ This recipe was simple, the instructions were clear and informative. The dough was soft and well balanced in taste, and created a nice pita pocket. We filled ours with chicken, cucumber, pickled onion, tomatoes, and tzatziki sauce. So good! -Mariah
⭐️⭐️⭐️⭐️⭐️ So easy and so delicious!! I’ll never do store bought flatbread again now that I have this recipe in my arsenal. Made pita pizzas with the leftover bread using muhammara and leftover grilled chicken – fantastic!! Thank you for sharing this! -Lauri
⭐️⭐️⭐️⭐️⭐️ Made this last night and I was impressed. The dough is a dream to work with and the finished product was exactly what I wanted for the grilled kenbabs I made. -Mari
⭐️⭐️⭐️⭐️⭐️ Yes! I’ve been looking for a flat bread recipe like the ones I’ve had Greek gyros in and this is it! Perfect!! Thank you! -Kathy


Homemade Flatbread
Ingredients
- 2 teaspoons instant yeast
- 1 teaspoon granulated sugar
- ⅔ cup warm water, 100 to 105 degrees F
- ½ cup warm milk, 100 to 105 degrees F
- 1 tablespoon extra-virgin olive oil
- 1 teaspoon salt
- 3 cups (426 g) bread flour, more or less (see note)
Instructions
- In the bowl of an electric stand mixer fitted with the dough hook, mix the water, milk, oil, yeast, sugar, salt and 1 cup of the flour until well combined.
- Add the remaining flour a little at a time until a soft dough is formed. Don't over flour the dough. It should pull away from the sides of the bowl to form a ball and feel soft to the touch without leaving a lot of dough on your fingers.
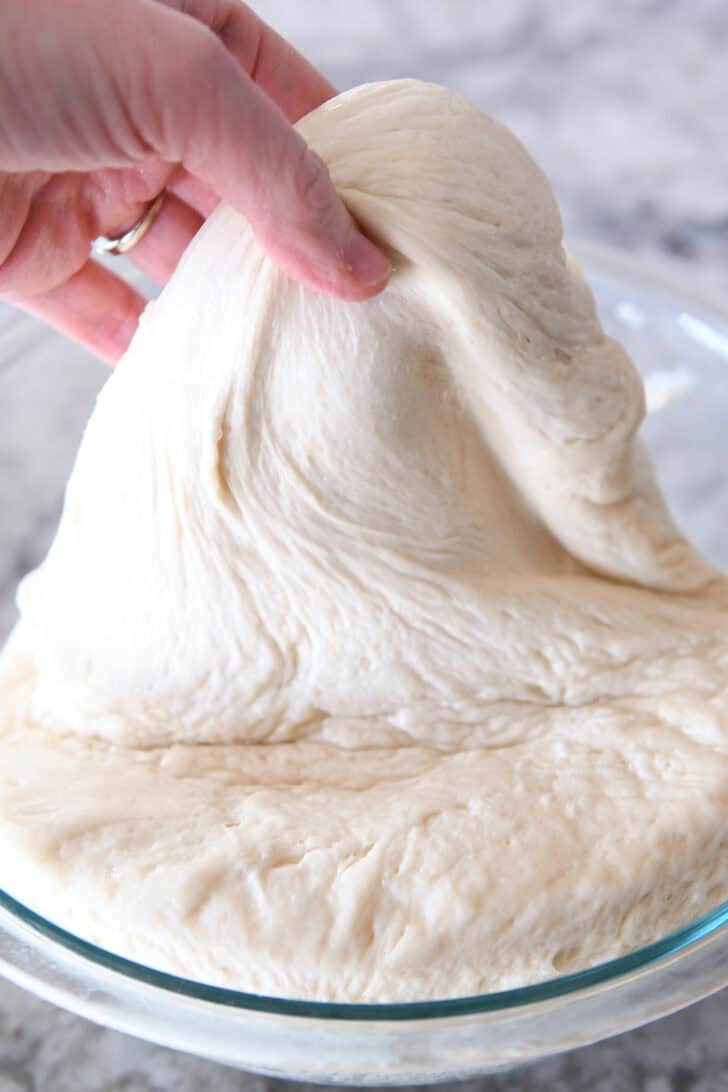
- Knead the dough for 4-5 minutes.
- Place the dough in a lightly greased bowl and cover with greased plastic wrap. Let rise until doubled, about an hour or so.
- Divide the dough into 8 equal pieces. Cover with a cloth or plastic wrap and let the dough pieces rest for 10-15 minutes (this helps relax the gluten so they are easier to roll out).
- Working with one piece at a time on a lightly greased or floured counter, roll the dough into a circle 7 to 8 inches in diameter and about 1/8-inch thick.
- Heat a griddle to medium (about 350 degrees F) or place a skillet on the stove over medium heat. When the griddle or skillet is hot, cook the flatbread for 2 to 3 minutes until they bubble and puff. Flip and cook on the second side until golden and spotty.
- Transfer the flatbread to a plate and cover with a clean kitchen towel. Repeat with the remaining dough, stacking the warm flatbreads as they come off the griddle or skillet.
- Serve warm or at room temperature
Notes
Recommended Products

Recipe Source: adapted from Jaclyn at Cooking Classy (reduced sugar, oil and salt, used instant yeast and adapted bread flour amounts, as well as adapting the method a bit)
Recipe originally published March 2014; updated February 2025 with new photos, recipe notes, etc.

Love these!! Have been making them every Sunday afternoon as part of my meal prep for the week. I use them for chicken salad sandwiches, buffalo chicken meatballs or just along with a big salad! I let them cool. Pop in the freezer and take one out in the am when I pack my lunch. LOVE!!!!!!
That’s amazing, Catherine!
Can you use a tortilla press to flatten out the dough?
You can try, although this dough is a bit thicker and less easy to press out like that than a tortilla which has a bit of a softer/looser consistency to the dough.
These are perfect. Soft and chewy and quick and easy.
These are so delicious, everyone love them! Thank you for your great recipe!
Does doubling the recipe work well?
Yes, this recipe doubles great!
Can you use all purpose flour instead of bread flour?
Yes. The bread will be slightly less chewy and fluffy, but it will work fine.
Best flatbread ever. Turns out perfect every time. The best part of any meal.
Easy and delicious! Came together quickly and was perfect with our shrimp curry. Will make again for sure.
If I could give this a higher rating I would, I love how good it tastes without toppings, and it tastes even better topped with sweet and savory toppings. I kinda wish we tripped the flatbread. also my little toddler sister loves to be able to flatten her own out while we make all the other flatbread.
Turned out great! I oiled the skillet with a bit of olive oil. Great taste and awesome when it’s fresh
Hi Mel!
My family really likes this flatbread! I made them with your Big Fat Greek Tacos. I do need some advice though. I let the dough rest and they rolled out quite well, but when I transferred them to the gridle , they shrunk in size. Do you have any tips on how I can prevent this from happening?
Hi Becky, it’s normal for the dough to shrink a bit when baking, so I think it’s probably fine! You can mitigate that by rolling the dough bigger anticipating they’ll shrink. Also, letting them rest a bit longer before cooking can help relax the gluten and shrink less.
Just made these to eat with Corn Chowder. They are delicious! Followed recipe exactly. Thanks for this.
Mel never disappoints! I wanted to attempt pitas for the first time and after looking thru some tiktoks and other googled recipes, decided to see if she had a recipe- sure enough, she did! This recipe was simple, the instructions were clear and informative (I appreciate the explanation about resting the gluten to allow for easier rolling- I wonder if that’s where I’ve been going wrong with my tortilla attempts).
The dough was soft and well balanced in taste, and created a nice pita pocket. We filled ours with chicken, cucumber, pickled onion, tomatoes, and tzatziki sauce. So good!
I had been looking for a recipe to make flour tortillas and this recipe works great and has a great flavor. I used half the recipe to make smaller tortilla for tacos and this recipe is a keeper. It will also be great for burritos and flatbreads. Thank you for sharing the recipe.
great and easy recipe!
We love this recipe!
I also want to say that I always freeze the bread in a freezer ziploc bag the same day to keep them fresh. I take out what I’m using and cook in the microwave for a few seconds to thaw them or I thaw them on the counter.
I love this bread recipe. I have been making this recipe for about 10 years! Everyone seems to enjoy this bread. I’ve given out your recipe. Thank you!
YUM! These are so good! Mine wouldn’t brown like the picture, and they kept shrinking after I rolled them out when I peeled them up to cook them….but they were delicious!
The flatbread pitas are something I simply got tempted with at the very first bite. I tied out this one with meat curry and the combination was a match made in heaven.
So easy and so delicious!! I’ll never do store bought flatbread again now that I have this recipe in my arsenal. Made pita pizzas with the leftover bread using muhammara and leftover grilled chicken – fantastic!! Thank you for sharing this!
I was worried these might be tough because my dough wasn’t sticky and I only used some of the projected amount of flour. Nope. They were perfect. I will probably make them smaller next time, because I can’t eat a dinner plate sized sandwich. But the flavor and texture were lovely and I’m grateful for the recipe. Btw, I used all purpose and had no issues.
I was worried these might be tough because my dough wasn’t sticky and I only used some of the projected amount of flour. Nope. They were perfect. I will probably make them smaller next time, because I can’t eat a dinner plate sized sandwich. But the flavor and texture were lovely and I’m grateful for the recipe. Btw, I used all purpose and had no issues.
These are amazing! My 5-year old helped to shape them and roll them out. With the extra fuss I worried they might be tough, but they were soft and perfect! I used your chicken gyros recipe for the chicken, too. They were every bit as good as what we used to get from the gyro places in Boise! Thank you!
Another great recipe! Thank you! Always get compliments whenever I make these wonderful flat bread.
You mentioned that you like to make a bunch so you can freeze some and have it on hand whenever you want it. Does it freeze well and do you just toast or microwave it after thawing?
Thank you!
Yes it freezes great!
Delicious. Plan plenty of extra time for rolling and cooking.
Hi Mel! Have you ever cooked these on the grill? Just wondering because one of our favorite dinners EVER is a salad pizza with a grilled crust.
I haven’t, but I’ve grilled pizza dough and it works great…so I bet these would cook up well on a grill, too!
Made this last night and I was impressed. The dough is a dream to work with and the finished product was exactly what I wanted for the grilled kenbabs I made.
The only difference I had was I used the Breville countertop pizza oven so I had to dock the shaped dough so it wouldn’t puff up.
Thank you fo a wonderful recipe.
I made this, and the naan bread to go with it, completely dairy and egg free and it was amazing! I subbed vegan mayo and oat milk for milk in the bread. My entire family gobbled it up! Thanks Mel!
Fabulous flatbread recipe! After trying other pretty good ones, this is the best!
I’ve never used bread flour per se, but I did have 00 Flour, which is technically a bread flour. Results were fantastic.
I love your Flour Rule for yeast breads. After making breads that require kneading a few times (I’ve only picked up bread making again in the last year), I have learned that a slightly sticky mix that JUST forms a dough ball is ready for kneading. I required another 1/2 cup flour to get it soft, smooth and ready for rise, and I now live in the Deep South………So, everyone is going to have a different experience. Don’t despair. Bread making for me has changed drastically over the years having lived in 3 vastly different climates.
Anyway, the flatbreads were perfectly crispy on the grill spots, and wonderfully pliable, soft and chewy otherwise.
very good
This flat bread is THE SHIT!!!
AMAZING RECIPE!!
I’m from Germany and used to live down the street from a small Greek restaurant. I ate a pita gyro sandwich at least twice a week. When I came to the U.S. and had a gyro sandwich here, the pita bread just wasn’t the same. Even at “authentic” Greek restaurants. So when I tried your recipe, I wasn’t expecting much. Just wanted to see how they would turn out. Well, they turned out AMAZING. Just like the ones I used to eat back in Germany. I found a recipe for authentic gyro spice mix and tzatziki sauce, and made gyro sandwiches for dinner tonight. They were a hit.
Thank you so much for posting this recipe. I immediately bookmarked it and will do pita bread again before too long. Probably gonna make enough to fill up my freezer
Thanks again!!
Great recipe! I followed it exactly, and the flatbread was amazing. Definitely adding to my list of go-to recipes.
Hi.
Just a little confused.
The recipe says to knead for 4-5minutes, but the information on yeast says to knead the dough for eight minutes.
Can you help me please?
Lori
Hi Lori, 4-5 minutes is enough kneading time for this recipe.
Hi Mel,
I can’t wait to give these a try! I love pitas, but I’m trying to stay away from processed food. These will be perfect for at-home lunches. Thanks so much for sharing!
I wonder if this flatbread would be good for making pita chips?