Homemade Thin Mint Cookies
Homemade thin mint cookies are as delicious as they sound! A delicious spin off of the Girl Scout Thin Mint Cookies, they’re amazing!
Hi, my name is Mel and I love Girl Scout Thin Mint cookies more than I should probably confess.
In fact, I have to make myself not buy them during the glorious cookie selling season (sorry Girl Scouts; it’s not you, it’s me) because devouring an entire cellophane wrapped roll is just a tad bit too easy, if you know what I mean.
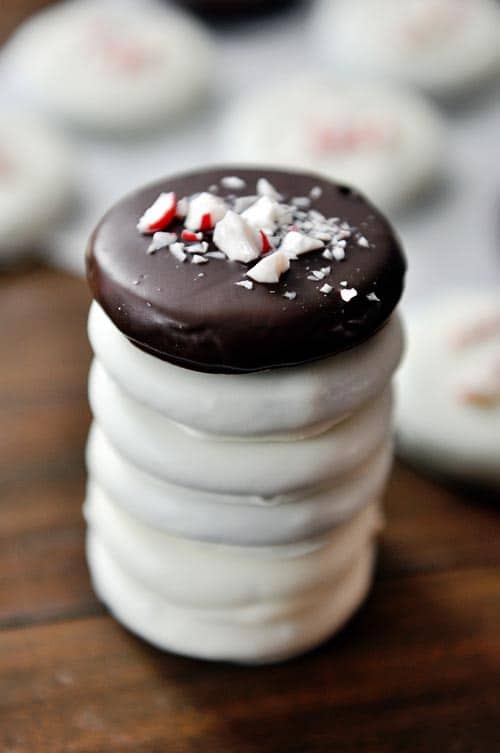
Since I rarely enjoy the real thing, the holidays are when I break out my go-to knockoff recipe and make them myself.
I know, I’m supposed to be gifting these babies but I have to be honest, when I make these delectable thin mint cookies, not many of them make it out the door.
I clearly passed on the Thin Mint loving gene to my kids because we gobble these up like nobodies business (and they freeze great, even after being dipped, which prolongs their goodness).

A simple minty chocolate cookie dough is rolled into circles, chilled quickly in the freezer and then baked until crispy. Yum. I’m lucky any of the rich cookie centers even make it to the dipping station.
When I originally posted this recipe years ago, the process was a bit more involved – since then, after making them every holiday season and usually a couple other times during the year when I just have to have them – I’ve simplified the method a bit and added dark chocolate for dipping in addition to the white.
Have I mentioned they really are one of my very favorite cookies? They are.
Even though I don’t have a new packaging idea for you today, I hope you’ll still love me.
Several of the packaging ideas already mentioned in the series will work beautifully and all of them are simple.
You could even throw these divine cookies onto a paper plate and cover them with plastic wrap because the fabulous taste and looks will be quite enough to win anyone over.
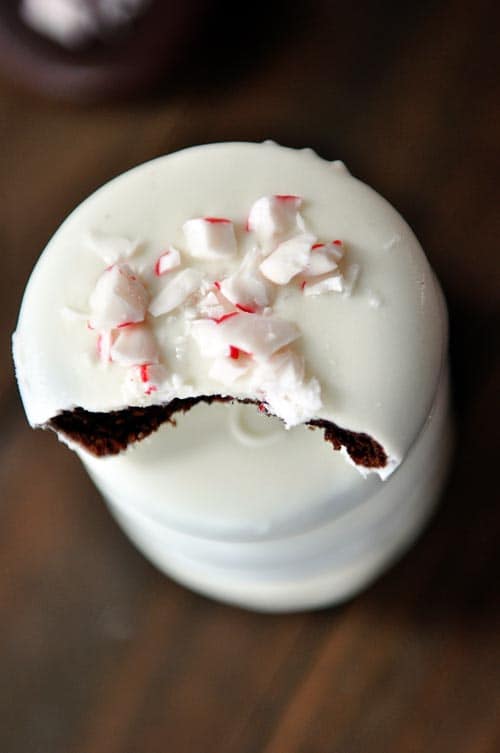

Homemade Thin Mint Cookies
Ingredients
- 1 cup (142 g) all-purpose flour, plus more for surface
- ½ cup (43 g) unsweetened Dutch-process cocoa powder or natural cocoa powder (see note)
- ½ teaspoon baking soda
- ½ teaspoon baking powder
- ½ teaspoon salt
- 5 tablespoons salted butter, softened
- ¾ cup (159 g) granulated sugar
- 1 large egg
- 1 large egg yolk
- ¾ teaspoon pure peppermint extract
- Peppermint candies, crushed (optional)
- 2 pounds white or dark chocolate, coarsely chopped (or a combination if you want to dip some in white chocolate and the rest in dark)
Instructions
- Preheat the oven to 325 degrees.
- In a small bowl, whisk together the flour, cocoa powder, baking soda, baking powder, and salt.
- In a medium bowl (or the bowl of an electric stand mixer), beat the butter and sugar with a mixer on medium-high speed for 1 minute. Reduce the speed to medium-low and add the egg and egg yolk. Mix well. Beat in the peppermint extract.
- Slowly add the flour mixture, and beat until just incorporated. Shape the dough into 2 disks, wrap each in plastic, and refrigerate until firm, at least 1 hour (or up to 2 days).
- Roll out 1 disk of dough on a lightly floured surface to 1/8-inch thickness, more or less. Using a 2-inch round cutter, cut out circles and place 1-inch apart on parchment-lined baking sheets. Roll and cut the scraps once or twice (the cookies will be a bit more dry with each rerolling). Freeze the tray of cookies until firm, about 15 minutes. Repeat with the remaining disk of dough and freeze also.
- Bake the frozen cookie rounds until they are dry to the touch, about 12-14 minutes. It’s really important to bake them all the way through so they are crisp and not soft.
- Transfer the baked cookies to a wire rack to cool completely. The undipped cookies will keep well , covered, for up to 3 days.
- Melt the chocolate in a heatproof bowl in the microwave or in a double boiler on the stove. I like to melt it in the microwave at 1-minute intervals at 50% power, stirring in between. Melt the white and dark chocolate separately, if using both.
- Dunk the cooled cookies into the melted chocolate, one at a time. Using a fork, press lightly on the cookie until completely submerged in the chocolate. Pick up the cookie with the fork, let the excess chocolate drip off, and gently scrape bottom against edge of bowl. Using the flat edge of a knife or another fork, gently push the cookies onto parchment or wax paper. Sprinkle with crushed candy if using. Let the cookies sit until the chocolate has hardened, an hour or so (you can refrigerate to speed up this process).
- The dipped cookies will keep covered in the refrigerator for up to a week or in the freezer for up to a month.
Notes
Recommended Products
Recipe Source: updated and adapted from the post way back when, originally from Martha Stewart Living






I already commented, but don’t know if it “went through”! This cookie is FABULOUS!! Delicious and beautiful!! Love coming to your blog for recipes, Mel!! Thank you for posting them!! Love your white chocolate raspberry truffle cheesecake!! Mel, I’d like to freeze these cookies for an upcoming cookie exchange. Would the crushed peppermint candies on top “bleed”? Would the chocolate crack?
Thanks, Stephanie! 🙂 I haven’t tried freezing these, so I’m not honestly sure how they would fare. Sorry I’m not more help! I think the peppermints might be soft after freezing and thawing.
This recipe is SO DELICIOUS and pretty! I made them for a cookie exchange years ago and plan on making them for another one this year. When I made them last time, I put buttercream that I had tinted a beautiful green sherbet color on top of some of them on my display plate! It was fun to decorate them different ways! You could even sprinkle the crushed peppermint on top of the buttercream using the candy canes that have red and green stripes on them! Mel, this year I want to make them in advance and freeze them. It sounds like they freeze well, but I want to make sure the crushed peppermint candies won’t “bleed”. What do you think? (Btw, I love coming to your blog for recipes! That white chocolate raspberry truffle cheesecake is SO GOOD!!!!)
Would there be a way to make this without cocoa? (Yes I know that sounds sacrilege but my husband is allergic to cocoa but he LOVES mint! Even the smell of Thin Mints is heavenly to him) Any ideas that might work? I would be happy to try and report back to you how they turn out.
Oh boy, I honestly don’t know! You could try subbing flour for the cocoa but I’m kind of worried they might be dense. Good luck if you try!
I made these today and they were awesome! They are a labor of love for sure! They were wonderful and I delivered some to a friend who enjoyed them as well. However, as much as I love my family – they are happy with easier recipes. They were fabulous, but I’ll probably never make again.
This is the 2nd year I have made these! They were so good last year I decided to make them for a cookie exchange I have this week. They freeze so good…I actually prefer them straight from the freezer 😉
I took another tip from below to freeze & roll into logs & slice. I am not a good roller out & cutter for cookies so this is easier for me. They do get a little bent but I squish into shape as best I can & the ones that don’t look as good I just save for my family instead of sharing 🙂
Thank you Mel!
Such a good reminder I need to make these again, Erika! Thanks for the extra tips!
Have you ever made “Faux Thin Mints?” Ritz crackers dipped in melted Andes Mints. So quick, easy, and delicious!
Hi! Thank you for this great recipe! I’m going to make a batch for my boyfriend this Valentine’s Day and I think he’ll really lik them :).
At what temperature do I put the oven when I put the cookies in for 12-14 minutes?
Thank you!
325 degrees.
Hi Mel – thanks for posting this recipe. We made them last night and they came out fantastic!
I have one tip for better work flow: DO NOT ROLL THE DOUGH OUT and use cookie cutters. Just shape the dough into logs that have the desired diameter (about 1 to 1 1/2 inch), and put them into the freezer until they’re frozen solid.
Then, take each log out one-by-one, and give it a 5-10 second hit in the microwave. It will still be frozen but now you can cut 1/8-inch slices with a very sharp knife. That way, you have frozen cookie rounds going straight into the oven … not a crumb of leftover dough, and no additional flour used during the rolling and re-rolling. It is so much faster, and you can make the logs ahead of time and bake when you need them.
If your logs didn’t freeze perfectly round due to gravity, you can gently nudge the oval cookies into round shapes before they’re baking, but you will have to wait a couple minutes for them to defrost enough to get soft again. The baking seems to even out little irregularities though, so it’s a very forgiving process.
I just tried this trick and it worked perfectly! I’m horrible at rolling out cookies most of the time, and this was so easy! I didn’t need to thaw mine in the microwave at all. I just rolled them into two rolls, wrapped them in plastic wrap and froze them (I put them in a loaf pan so they wouldn’t get beat up). I sliced one ole log at a time, and then just put the remaining slices in the freezer while the others baked, which worked well. It was so simple, and the cookies taste amazing! I’m kind of wishing it hadn’t worked out so simply, because they will probably be made more frequently than they should be. 🙂
Hi Mel, I love your site! And I was excited about making these Thin Mints, but something didn’t work out … I got to step 5. After refrigerating the dough for 24 hours, I rolled it out, but it was so sticky I wasn’t able to cut it into cookies … it just became a big, gooey mess. It was more frosting that dough. Having checked and re-checked the recipe, I know that I followed it to the letter. Any advice? Should I just add more flour during the mixing stage? If so, how much?
Shany – I am not really sure what could have caused that. Usually this dough is on the stiff side for me. Perhaps its the way of measuring flour? You could check out THIS kitchen tip on how I measure flour. You probably need to add a bit more flour – start with 1/4 cup and see how it goes. Good luck. Sorry it didn’t work out!
Lots of work, but turned out yummy!
I rolled the dough into a 2 in log before refrigerating, then sliced.
So addicting!! I made a batch of these over Christmas and could not stop eating them! I left a tin of them on my kitchen table and honestly I felt like I had to pop one of these minty chocolate delights into my mouth every time I entered the kitchen. While baking, I left each batch in the oven a little bit longer than the 14 minutes because the cookies were still soft and I was afraid to under bake them (I really wanted crispy cookies!), but they ended up a little overdone. So, the takeaway is that after the 12-14 minutes cookies will still be soft but will crisp up as they cool!
These look delicious! I want to make these for Christmas, but I’m having a hard time finding peppermint extract. I think I’ll be using either crème de menthe flavoring, or peppermint oil (if I can find it). Thanks for the recipe, and Happy Holidays! 🙂
Update: dipped them in Ghirardelli’s semi-sweet chips. They tasted like Mystic Mint cookies (if anyone here remembers them), which are also yummy. I’m going to go darker for the next batch to get the dark choc thin mint taste.
Just baked off the cookies, and I’ll be dipping them tonight after the little one is in bed. And of course had to taste test–cookie is awesome, crisp minty, chocolate … ah bliss. Cannot wait to dip them for they will only get better covered in the dark goodness. I don’t have any circle cutters, so I improvised and used the top of the salt shaker (after a really good washing!). Perfect size, perfectly baked cookies. Thanks again for another winner Mel!!!
I have a friend who is absolutely nuts for Thin Mints. Every year when our kids sold their Girl Scout Cookies, I would try to send her a box or two. I’m definitely going to have to try your recipe and see what she thinks, they sound fabulous!
Is it a Ghirardelli’s baking chocolate or a candy bar type chocolate that you would just eat? Our Target has both!
Betsy – I’ve never used the candy bar that you would eat although I’m sure you could try – I use the Ghirardelli’s baking bars or baking chips.
Question: if you have to refrigerate the dough for at least an hour, shouldn’t you hold off on preheating the oven? 🙂
Thank you for posting this recipe. I will be making these for my husband as a gift. We have all we need in life so I like to gift him things he loves. He loves thin mints, but refuses to eat them for political reasons. So, this is perfect. Thank you again.
Mel I am curious. What chocolate specifically did you use for this recipe?
Melanie – I almost always try to use Ghirardelli’s chocolate for dipping (when I can find it!).
Oh my! I will have to make these over Christmas break. Such a fan of chocolate and mint!
Yum! I love Thin Mints, and I love your addition of crushed pepper mints, Mel!
These look and sound amazing!! I too am a thin mint lover, and as much as I hated that we didn’t get that wonderful Girl Scout knocking at our door this year, I was kind of glad. Now I feel compelled to make these! We love them frozen too! And for the chocolate, I bet almond bark and candy melts would work too, if anyone has those readily available, they don’t scorch as easily when microwaved at 40% or 50% power. Love this recipe and will def make them soon! Oh! And I too would roll it into a log and slice with a super sharp knife, sounds easier with a toddler pulling at my leg 😉
Have you ever used peppermint essential oil instead of extract?
Jenny – I’ve used peppermint essential oil with the homemade peppermint patties but not with these (although I think it would work great if you experiment!).
Hello Mel! Your sugar rush series is the best although I have a “gag” reflex just smelling licorice. 🙁 Your pictures are so beautiful that I was almost convinced to read the licorice recipe. Like so many comments I read on here, the final product you produce is “a piece of artwork”. I always put my husband on the spot by showing him the end result of my making one of your recipes and showing him your food picture. Then asking innocently, “Doesn’t mine look just like Mels?” 🙂 I’m amazed that thin mint cookies are so simple to make. I can’t wait to try these if only I can get the white chocolate to melt. I’m making the sugar rush popcorn with the melted white chocolate tomorrow night for a Christmas party on Friday night. Thank you so much for all the time and hard work you have put into developing this sugar rush series!
What brand of chocolate did you use to dip? These look great! Thanks.
Hi Sara – I use Ghirardellis almost always (either their candy melts or their bittersweet chocolate pieces).
my FAVORITE thing to do with thin mints is to take a tiny bite off opposite sides and then slurp hot chocolate through the thin mint cookies. You have to hurry and eat the cookie before it melts but it is SO good. My boys LOVE it and we go through tons of these cookies. I am totally going to try making my own. Thanks
Oh those look so wonderful! I too love thin mint cookies, but won’t buy them either since I would eat the whole package. I tried to print your recipe, but it only opens into a blank window. It is just me? Please help as I *need* to print this out. 🙂
Hi Melissa – are you using internet explorer? Unfortunately, IE doesn’t play nice with many parts of my website (this is a trend all over the internet). I’m working to get the functionality back to print in IE but it might take a while. In the meantime, I’m encouraging readers to switch to another browser like Safari, Firefox or Chrome. Any of those have less bugs than IE. Sorry for any inconvenience!
I am sure our version is not as good as yours but….. A REALLY quick and easy knockoff thin mint cookie is to melt a bag of the Ande’s mint candy pieces, dip in Ritz crackers and let them dry on wax or parchment paper. We love them here!!
Great idea! will try it soon!
So excited to try these cookies as Thin Mints are my vice during Girl Scout season! Thanks for sharing! Gorgeous photos too, by the way!
is there a benefit to using bar chocolate over chocolate chips?
Lee – yes, mostly because bar chocolate melts much easier (and has less tendency to seize) than chocolate chips. Of course that doesn’t mean you absolutely shouldn’t use chocolate chips, I just recommend the bar chocolate because it works better when I use it to dip cookies/candy.
I love thin mints, can’t wait to try these! Just curious, would it work to refrigerate the dough in a log and then just slice the cookies instead of rolling and cutting out circles? I just don’t have a circle cookie cutter, and it sounds easier to me to slice and bake!
Stacey – that’s a great thought! I’m not sure because I haven’t tried it but I think it’s definitely worth a try.
Seriously, HOW do you get the things you dip in chocolate to look so nice!! They are perfect looking. Mine always look crazy! Nice job.
Yummy! Can’t wait to try these!!
Thin mints are my weakness as well. Can’t wait to try these!
These are my husband’s favorite kind of cookie. He would love if I made a batch of these for him this week! Thanks for the recipe!