Amazing Bagel Bread {Step-by-Step}
This amazing bagel bread holds all the delight of perfect, chewy bagels…just in loaf form. The step-by-step guide makes it so easy to make at home!
⭐️⭐️⭐️⭐️⭐️ I’ve made this recipe many times since I first saw it! I’m a novice baker and the detail you put into this post makes me look like a pro! Thank you for sharing! It’s come out perfect every time! -Victoria
How to Make This Bagel Bread
This bread might look intimidating, but I promise, it is so easy to make at home, and it is likely to be one of the most amazing baked goods to ever come out of your kitchen. You are going to feel like a total rock star. Here’s how to make it:
- Make the dough and let it rise for 15 minute (or up to an hour).
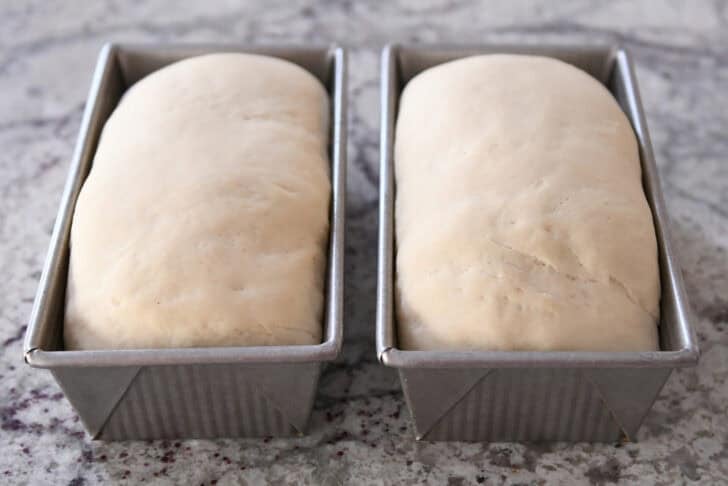
- Shape the dough into two loaves and let rise in loaf pans until they look perfectly ready to pop in the oven (except we aren’t going to pop them in the oven quite yet).
- Prepare a water bath with honey and baking soda and bring to a boil in a wide pot.
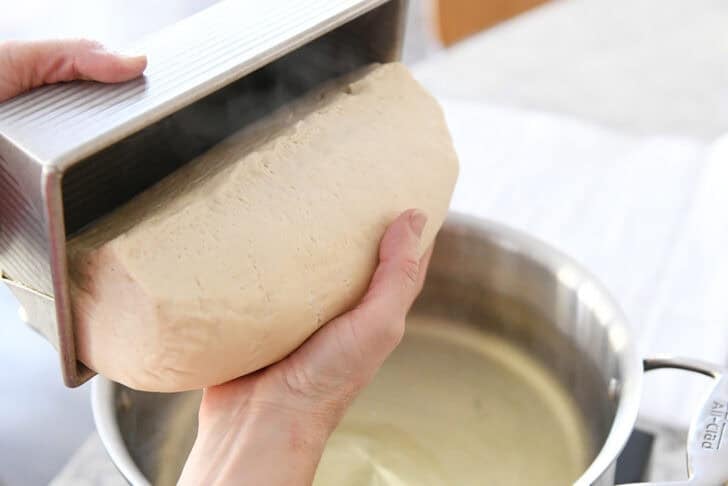
- One at a time, turn each loaf out into your hand and gently lower the loaf into the boiling water.
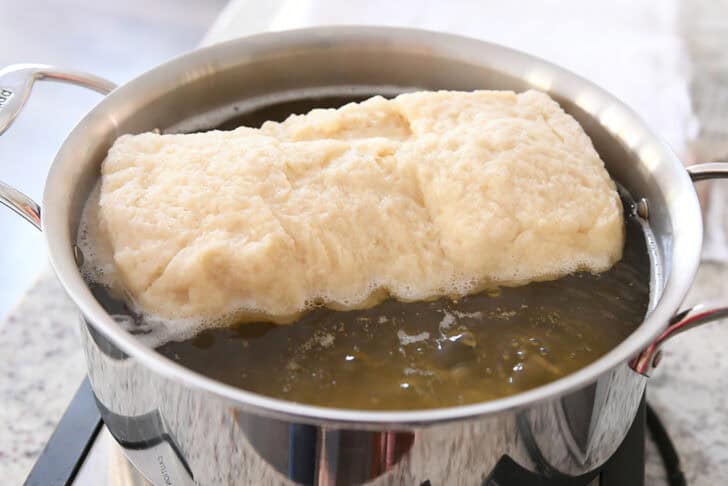
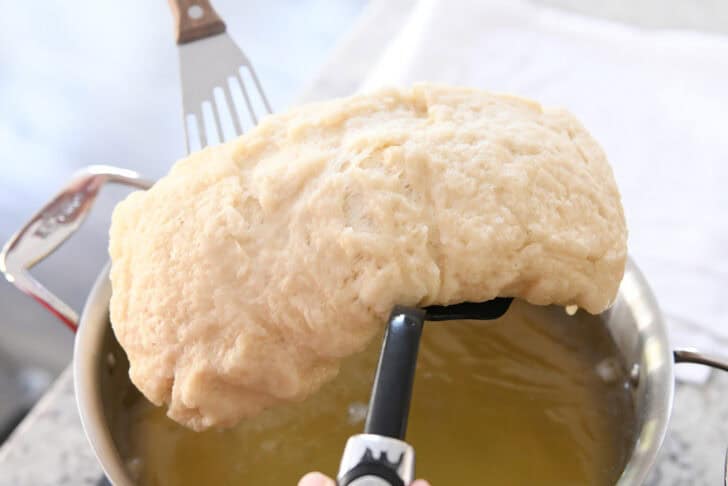
- Boil for about a minute on each side.
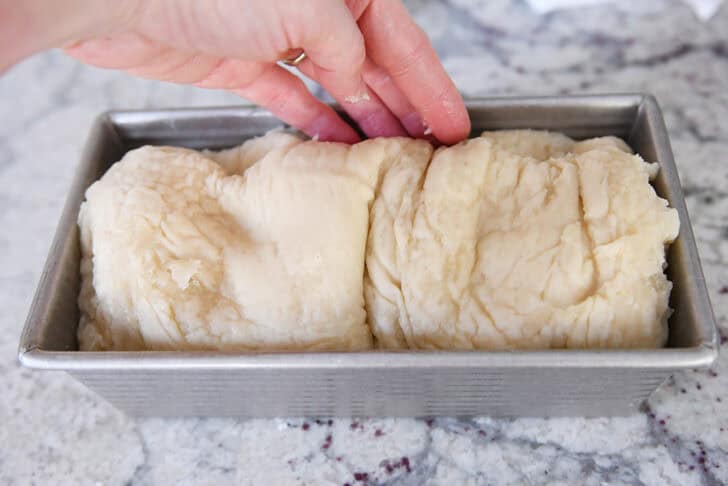
- Remove the loaf from the boiling water and place on a thin, non-textured towel (like this one – aff. link) and pat dry.
- Place the shaggy loaf of boiled bread into a loaf pan sprinkled with a bit of cheese (if desired).
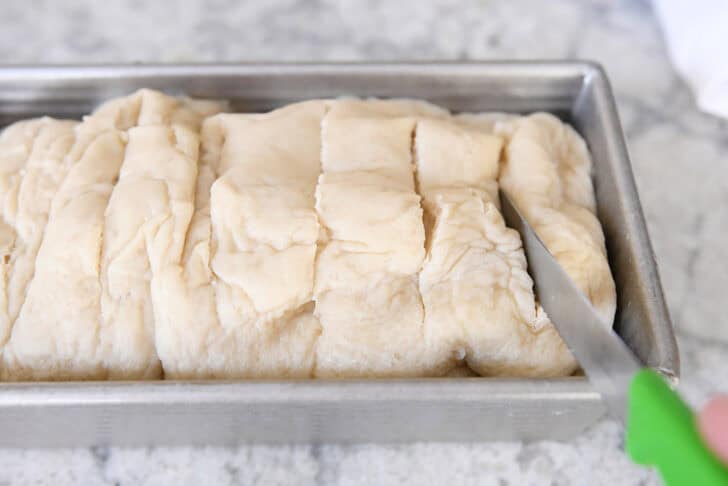
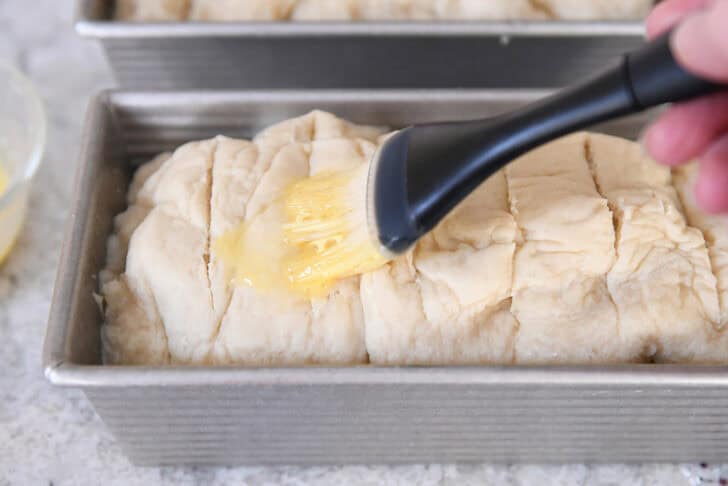
- Slash the top of the bread several times and brush with an egg wash.
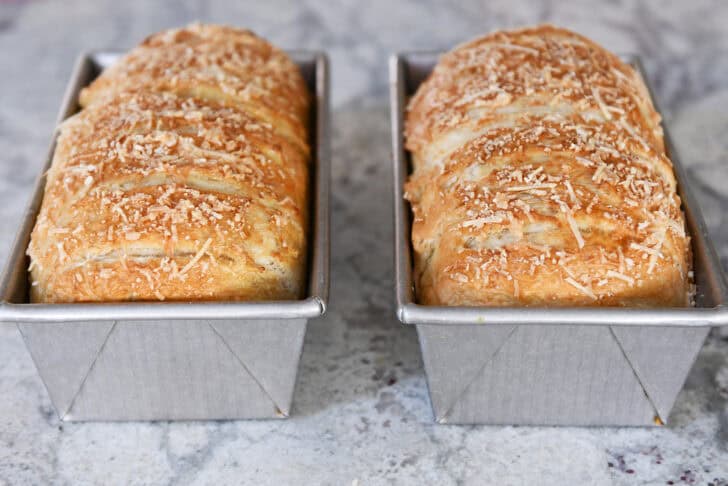
- Bake until golden.
If you want to see a quick video visual of how to make this bread, here’s an Instagram reel I put together for it (and dedicated to Jennifer Garner since she made this bread once and called me “ballsy” for it 😜).
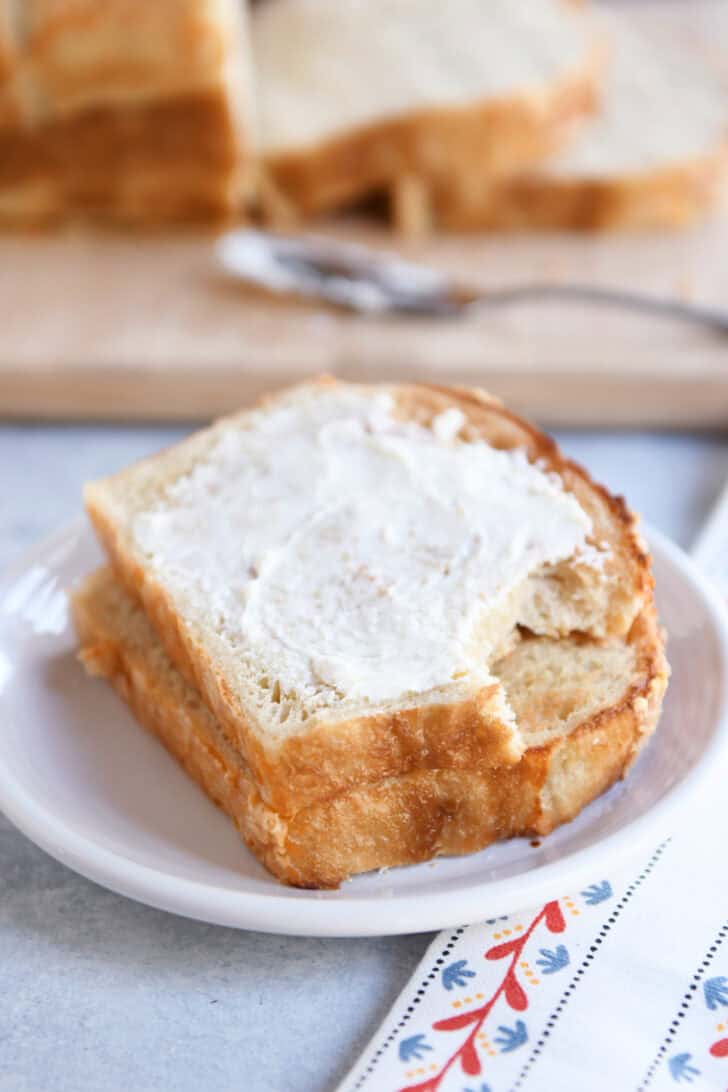
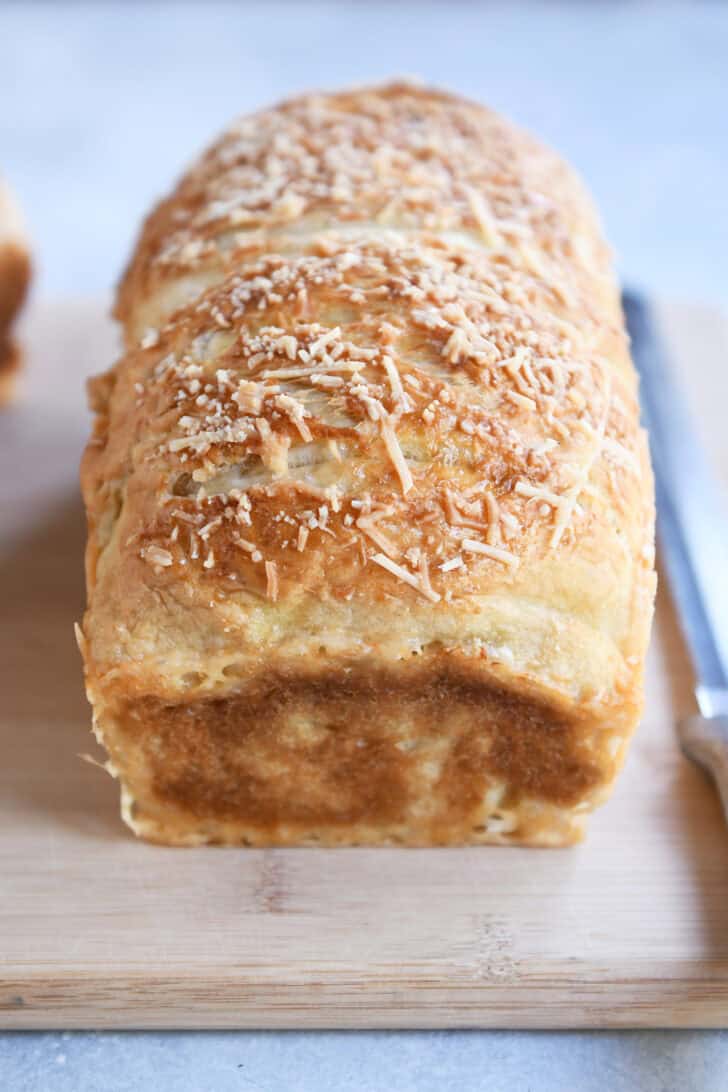
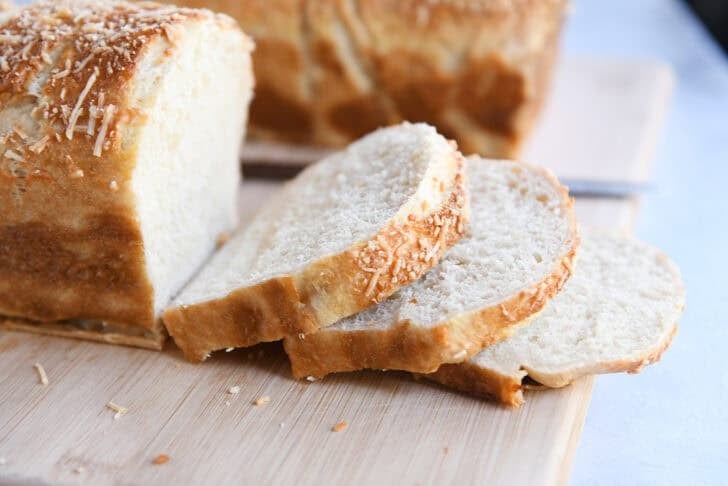
The crumb of the bread is ultra-soft and just a bit chewy. And that golden, cheesy crust. Oh my. It is to-die for delicious.
A Few Very Important Notes
- Do not under flour the dough. This bread dough relies on being just slightly stiffer than a regular, soft, dinner roll-type dough in order to keep it’s shape and not fall apart while being boiled and baked. Add flour until a soft dough is formed that doesn’t leave hardly any residue on your fingers.
- Pat the bread dry before baking. It’s important to use a towel to pat the bread dry before placing in the bread pan. I roll the bread up in the towel and let it sit while I spray the pan and prep it with cheese.
- Bake the bread for longer than you think. In order to avoid soggy spots on the bottom and corners of the bread, it needs to be baked until hot and sizzling.
- TRUST THE PROCESS. The first time making this bread, you might panic at the thought of tossing that perfectly good loaf of bread into a vat of boiling water. Don’t be alarmed when the bread looks lumpy and weird after it is boiled. Nestle it into the bread pan and just know that it will turn into the most deliciously golden loaf of bagel bread as it bakes.
Flavor Variations
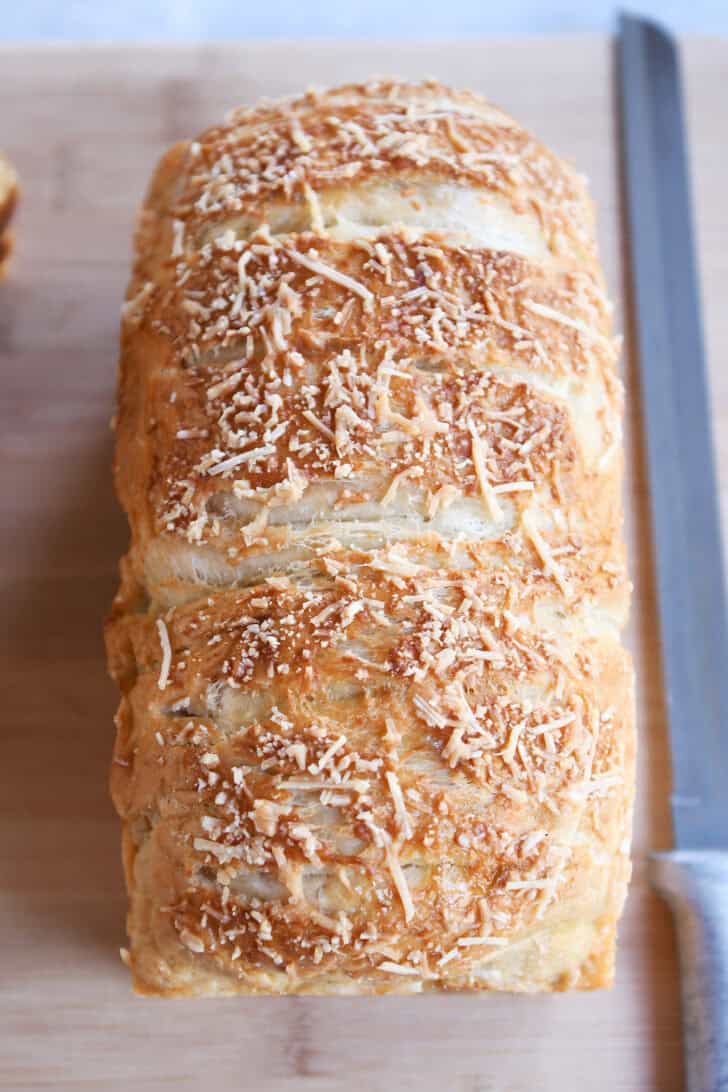
Our favorite way to make this bread is as an Asiago or Parmesan loaf. I sprinkle freshly grated Parmesan cheese on the bottom of the pan and then on top of the bread before baking. I think my kids would riot if I made it any other way. However, just like flavored bagels, you could experiment with other variations:
- Cinnamon or Cinnamon Raisin: Add 1 teaspoon cinnamon to the dough or use cinnamon chips (like this cinnamon burst bread). If adding raisins, add 1/2 to 1 cup during the last minute or so of kneading.
- Everything Bagel: Sprinkle an “Everything Bagel” seasoning blend on top of the loaf before baking.
- Sesame or Poppy Seed: Sprinkle sesame seeds or poppy seeds on top of the loaf before baking.
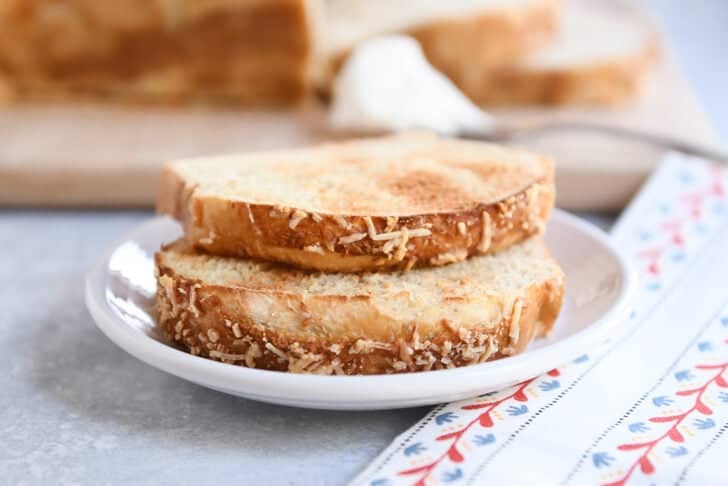
This bread is easily one of my family’s favorite bread recipes of all time. We love it toasted (and untoasted!) with cream cheese or butter, and we can devour a loaf of this in a shockingly short period of time.
It is also exceptional used for sandwiches – like BLT’s. YUM. The bread is soft, chewy, and absolutely divine.
Amazing Bagel Bread
Ingredients
Bread:
- 2 ½ cups warm water
- 4 tablespoons honey
- 1 ½ tablespoons instant or rapid-rise yeast (see note for active dry yeast)
- 1 ½ tablespoons coarse kosher salt (use half for table salt)
- 5 to 5 ½ cups (709 to 780 g) bread flour (see note for substitutions and notes about exact flour amount)
Topping:
- 1 egg, lightly beaten
- ½ cup (57 g) freshly grated Parmesan or Asiago cheese, or other toppings of choice, like sesame seeds, poppy seeds, Trader Joe's everything but the bagel seasoning, etc
Water Bath:
- 4 quarts water
- ¼ cup (85 g) honey
- 1 tablespoon baking soda
Instructions
- For the bread, in the bowl of a stand mixer fitted with the dough hook, combine the water, honey, yeast, salt and 2 cups of the flour. Mix until combined.
- With the mixer on low speed, continue adding flour until the dough comes together and clears the sides of the bowl. The exact amount of flour doesn't matter as much as the texture and feel of the dough. It should form a soft ball that doesn't leave a lot of dough residue on your fingers – this dough does better if it is properly floured. It shouldn't be overly sticky.
- Knead the dough for 5 minutes.
- Cover the mixing bowl and let the dough rest for 10-15 minutes (or up to an hour).
- Turn the dough out onto a lightly greased or floured counter and separate into two pieces.
- Shape each piece into a loaf by pressing into a thick rectangle, folding the bottom edge up to the middle and then grabbing the top edge and folding it down over the dough and pinching the seam to seal.
- Turn the loaf seam side down and pat and roll lightly to form an even 8-inch loaf. It's important for the bread to be in a very sturdy, well-formed, and well-sealed loaf shape so it doesn't unravel in the water bath.
- Grease two 8 1/2-X-4 1/2-inch loaf pans. Place the loaves seam side down in the prepared pans.
- Cover with a clean kitchen towel or greased plastic wrap and let rise in a warm, draft-free spot until the dough rises just over the edge of the pan, about 45 minutes to an hour.
- For the water bath, toward the end of rising, prepare the water bath by bringing the water, honey and baking soda to a boil in a pot (that is at least 10 inches wide).
- Fold a clean non-textured kitchen towel (I use a flour sack towel) in half and place next to the stove.
- Preheat the oven to 350 degrees F.
- One at a time, carefully turn each loaf of risen dough out into your hand and place the loaf into the boiling water. It's ok if the bread loaf deflates and looks a bit wonky. It will all work out! Trust the process.
- Cook for 1 minute. Use a wide flat spatula or other tool/spoon to flip the dough and cook for another 45 seconds to 1 minute.
- Using two wide spatulas, carefully transfer the loaf onto the folded towel, using extra towel length to pat any water off the top and sides of the dough. I usually roll the loaf completely up in the towel and pat it on all sides to dry it as thoroughly as possible.
- Spray the same loaf pan with cooking spray and sprinkle a couple tablespoons of cheese evenly across the bottom of the pan.
- Unroll the dough from the towel and transfer to the pan (use the towel to help transfer the hot loaf, if needed). Tuck the dough down into the edges of the pan in a mostly even shape. It will likely look fairly bumpy and rustic – that's normal.
- With a baker's lame or sharp serrated knife, cut five or six slashes about 1/4-inch deep crosswise on the top of each loaf of dough.
- Brush the top of with the beaten egg and sprinkle each loaf with a couple more tablespoons of cheese.
- Bake the bread in the preheated oven for 40 to 45 minutes until golden on top (an instant-read thermometer should read 200 degrees at the center of the loaf). This bread needs to bake longer than a typical loaf of bread so it isn't soggy on the bottom.
- Let the bread cool for a few minutes in the pan before turning onto a cooling rack to cool completely.
- Slice, toast, slather with cream cheese, devour!
Notes
Recommended Products
Recipe Source: inspired by a recipe in Oct/Nov Cook’s Country (I adapted and changed recipe for two loaves, used honey instead of corn syrup, changed the topping from seeds to cheese, etc)
Recipe originally posted October 2018; updated August 2026 with more recipe notes, visuals, etc.




Question- what does the honey do in the water bath? Can you sub another sweetener?
Hi Veronica, it adds a bit of sweetness but also helps the bread develop that golden crust while baking. Yes, you could probably use another sweetener as a substitute.
Just made this and it’s a hit! I was worried about the boiling/towel part, but it wasn’t that bad at all. Once the dough is wrapped in the towel, I made sure to really dry the corners and the bottom. I let it hang out in the towel while I quickly sprayed the pan and aded the cheese. The bread turned out perfect. If you’ve seen Jennifer Garner’s reel of her making this recipe she “shhhes” the bread and rocks it gently in the towel. I think that is key. 😉
Hahaha, you might be right about shushing the bread! Glad this turned out well, LeAnne – thanks for taking the time to let me know!
Can this be made with a frozen bread dough, like Rhodes.
Hi Carol, I haven’t tried that, but you could definitely experiment!
Oh my goodness! I’m SO making this! I loved reading your post, actually I love reading all of your posts!
Thanks, Kim!
That was fun! My teenagers were very intrigued/impressed with the process and the hard parts actually turned out pretty well. Next time I will more aggressively pat dry the loaf after boiling it as the bottom was a bit soggy when it came out of the pan, but it was absolutely delicious and I will be making it again for sure. (I didn’t have coarse kosher salt so I subbed out 1 T table salt and that was perfect)
Thanks for the review, Katie! I also find I have to bake this bread a bit longer so the bottom cooks thoroughly…
Why not update the recipe if that’s the case? Just curious as someone who is wanting to try this..
Hi Lindz, the recipe has been updated since that comment to make it more helpful.
I made this for the first time a year or two ago and it was a stressful experience. The bread turned out good, but didn’t look good and had wet spots inside due to unpretty folds after baking. We ate it and my husband really enjoyed it, but I thought that I won’t make it again. Well, yesterday I wanted to make some sort of bread, but didn’t feel like a simple sandwich loaf. Scrolled through my saved recipes and thought I should give this bagel bread another chance 🙂 I was glad I made some notes last time I baked it so I could avoid some mistakes – my dough was too soft, that’s why it was so hard to handle when boiling and transfering into the loaf pans, and that’s why it looked so horrible even after baking. So I made it more stiff this time (maybe little softer than as for bagels), using about 850 grams AP flour and gluten combined. I also decreased the amount of the instant yeast to 1 Tbsp so the dough doesn’t rise too fast. And it worked like a charm! My loafs looked beautiful with no wet spots inside. They did come out of the loaf pans wet on the bottom and sides 🙁 I just put them on the baking sheet upside down and baked for 10 more minutes till the bottom and sides have browned. I am very happy I gave it another chance!
I’m so happy you gave it a go and perfected it. You are amazing! So glad it worked out.
I made this bagel bread for the first time today and it blew my wife and I away. It is so good! I had made an everything bagel bread because I thought it would taste like a bagel. It tasted like good bread with the seasoning sprinkled on top. My wife said well it’s just okay. But this one she said is fantastic and a keeper for recipes we want to do again. So glad I found this recipe.
Very happy to hear that! Thanks for taking the time to let me know, Jeffery!
Do you have any experience with using diastatic malt in this type of bread? If I wanted to experiment, what ratio of diastatic malt to flour would you recommend as a good start point?
Hi there, unfortunately, I haven’t used diastatic malt in this recipe. Sorry I’m not more help!
Great bread. Love the unique texture. Instructions were so detailed and helpful. Transferring the loaf from the pan to the boiling water was not that hard. Just use two big spatulas.
I just made this delicious bread for the first time today after reading about it on your website yesterday!
I wanted to offer what might be helpful to someone else. I have an Instant Pot silicone steamer basket. After the pot of water was boiling I dropped the steamer basket which has handles down into the pot. Then I dropped the bread in. I was able to turn the bread over with a spatula and then lift it out onto the towel with the handles on the basket. The basket itself cradled the loaf just fine. I found it easier than trying to maneuver two spatulas and thought I would pass this along.
Thank you Mel for your wonderful recipes. I always have great success and have shared often with family and friends.
Whoa. This is incredible. Another fan favorite in this household. Next, I’m going to try the cheddar/jalepeno version that someone kindly suggested. Thanks again, Mel.
Also, I used one glass pan and one dark metal pan and both loaves turned out great. I used the thermometer like you suggested and, not surprisingly, the loaf baked in the dark metal pan was done first.
So – I LOVE this bread! I have made it and gifted it to EVERYone in the last couple of weeks since I found it. It’s so easy. Last week I made a cinnamon/brown sugar swirl in it. One of the loaves split apart – and was very hard to get out of the boiling water…. but I went with it and said a little prayer. It came out fine! YUM! Just a pain! Thanks for the recipe Mel! LOVE IT! Gonna try the sourdough loaf in the comments this weekend! That would make it a step better – but LONGER. Hope I can wait! xoxox
I hope the sourdough version worked out well for you, Pam! I have been wanting to try it that way, too! Also, made me smile that you “said a little prayer” – glad I’m not the only one who prays over the outcome of my baked goods! 🙂
So delicious! The first time I made it, flipping the bread in the water was a disaster. But I have made it 4 times since then and it has become a lot easier! Totally worth it!
I use Everything Bagel seasoning and grated Parmesan.
Simply amazing! I was so nervous to make it but first attempt turned out great! Will make it again and again.
This is super yummy and cheesy! Totally try it out!
I made this tonight with the creamy tomato pasta soup and wow. I used all purpose flour and did not add gluten because I don’t keep that on hand either. Aside from that I used my ceramic loaf pans and these loaves cooked up absolutely perfect at 45 min. The water bath was glorious, that’s one step I’ve never done. The bread was an absolute hit among all my kids big and small. Delicious!! I’m guessing bread flour would have densed it up more like bagels but I don’t buy it and all purpose alone was perfect. I did use 7 cups though. I don’t pack my flour though. Just skim off the top so maybe that’s what I needed more. Loved this so much! And it paired amazingly with Mel’s creamy tomato pasta soup! Wow!
This is amazing!! Thank you!!! I’m even going to make some for friends!!!
May I ask the point of the folding? Could you not just shape it to fit in loaf pan?
As long as the loaf is tightly formed, it’s fine however you shape it.
I made four mini loaves out of this recipe (pan size is 5.25 x 3 x 2.25). Worked out great! It took about 10 minutes less time to rise and to cook than the recipe called for. Also, I would suggest double the cheese amount noted.
I love this bread❤️ How long can you keep in a bread container since it has cheese on it. Does it have to be refrigerated since it has cheese. I want to make it again but I’m concerned how to keep it and how long. Please let me know
Hi Jane, I store it at cool room temperature for 1-2 days (sealed in a bag). You can refrigerate, as well, if you are concerned about the cheese.
I am single – can I make these into mini loaves?
I bet you could! Should work out just fine.
Have you run into anyone yet who has baked these in glass or ceramic loaf pans? I have both of those but no metal. I don’t want to waste the ingredients and time to experiment but I also don’t want to make the investment in more loaf pans if they’re not necessary. I’m anxious to try this – I haven’t been brave enough to try making bagels yet!
Hi Avra, two people just tagged me on Instagram and both made them in glass pans with beautiful results!
Thank you!
can I use the dough cycle of my bread maker?
Could definitely try! I don’t have a bread maker so I’m not sure how the quantity would fit – so make sure to double check the size of your bread maker to make sure the amount of dough will fit.
With the water bath, how many recipes of dough do you think I can use in it? I want to make 4-6 loaves for a meeting but I only want to make one water bath. Think I would be good to reuse it through-out the day?
Also, have you ever tried mixing in other ingredients? I want to try maybe a blueberry loaf and a cinnamon chip loaf and was just curious if you had any updates on that process.
I’ve made up to four loaves in the same water bath. The water gets noticeably darker/filmier with each loaf but it doesn’t seem to affect the taste. Any more loaves and you may need to top off the water and let it heat up again. I haven’t tried mixing in other ingredients but I think it should work great!
I did four loaves and you are correct, the water did get darker.
I mixed in a cup of dried blueberries. After the initial kneading, but before resting it for 10 minutes, I folded the dried blueberries and kneaded the dough for just another minute by hand. I let the loaf rest and proceeded as normal. I was worried about dry blueberries robbing moisture, but it worked out beautifully. People asked me if I had used fresh blueberries.
I also did a loaf of cinnamon chip, but I didn’t add the full cup of chips. At about half a cup, the loaf had plenty. My chips were on the miniature side though.
My third loaf was a cheddar jalapeno. I like chunks of cheese (probably 1/4inch cubes), versus a shredded, so it was just under a cup of cheddar.
Thank you for your help and giving me confidence to experiment. Over all your years blogging, just know you’ve given people a ton of confidence.
I love the variation in the loaves you made!! Thanks for including your variations.
My family looooooved this!!!! We loved it best with plain cream cheese spread on it.
So good!!! Definitely adding this to our must make a lot list!!!!!
My bread didn’t rise. Should I have proofed the yeast in the water and honey first? I obviously killed it. Not sure I’ll try again.
Hi Teresa, did you use instant yeast per the recipe or another kind of yeast? Active dry yeast may need to be proofed in water until it bubbles. Also, if your yeast was expired or the water too hot it can contribute to the dough not rising.
Mel, talk to me about your granite countertops. What’s the name of the granite? Has it held up well to stains and scratches?
Hey Emily, the name of our granite is Bianco Romano (or something like that…I can’t remember exactly!). We’ve had it for almost ten years and it’s held up like a dream!
YUM! Absolutely delicious – hot buttered bagel bread on a cold winter afternoon. What a great recipe – thank you!
I made this wonderful bread a while back, and wanted to come and check out your posting again for a refresher lesson before I make it again tomorrow. Thank you so much for all the great photos, they help a lot with this recipe!
What purpose does the honey serve in the boiling water? I only ask because it felt like a bit of a waste of honey. I’m wondering if sugar could be used (less expensive and easier to part with).
You could try sugar – I believe the honey helps the bread brown in the oven.
I would Like to make this for breakfast. Is there a good overnight Option?
I haven’t ever made this overnight – sorry I’m not more help!
I made this yesterday and will definitely make it again. One loaf came out a bit gummy but the other was good. Not sure why.
I needed to add quite bit more flour so maybe I added too much?
Mine too sort of fell apart in the water. I read the other comments and will seal it better next time.
Tasted great though!
This recipe is AMAZING! We tried it last week and have made it several more times since then! Thank you, Mel!
This bread is AMAZING and a lot easier to make than it seems! It’s great with rosemary on the top as well. My roommates and I made a few loaves of this and it was gone pretty fast because it’s just sooo good. I legitimately got my roommate a husband because he claims he wasn’t sure she was interested until we brought his apartment a loaf and they started dating the next week haha!
Mel have you tried using whole wheat flour + vital wheat gluten to make these (or even just part whole wheat flour)?
I haven’t tried 100% whole wheat flour, but I have tried half whole wheat flour and it works great! (I didn’t add any vital wheat gluten).
I just made a giant batch of rosemary focaccia yesterday and yet I find myself wondering if I have any raisins stashed away to make a cinnamon raisin bagel loaf. This seems way easier than making homemade bagels!
Is it possible to use gluten free flour with this bread?
I don’t think so (at least, I haven’t tried it; gluten-free flour behaves very different in bread/gluten recipes like this).
I’ve made this several times with sourdough starter and wanted to share my measurements with others wanting to use their starter. I’ve only done one loaf, so it’s about half of the recipe ingredients in grams. 250g water, 42g honey, 70g fed starter, 10g salt, 365g bread flour ( I use King Arthur). I mix by hand to a shaggy ball, rest for 20-30 min. Then stretch and fold til smooth. Rest 30 min and stretch/ fold one more time. Continue with recipe at step 4. It takes about 5-6 hours to rise to edge of pan ( or almost) depending on how warm your room is. Right now we are about 78-80. I usually refrigerate overnight and boil/ bake the next morning. It really is delicious! Use your best sourdough bread making instincts if things don’t feel right as you’re going along. Hope this works for you.
This is amazing! Thanks for sharing, Kathy!
Hi! I was wondering if the dough was able to be frozen after the shaping, then thawed out, proofed and baked later?
Have you tried this? I wanted to know before I try to make a large amount for an upcoming gathering?
I haven’t tried that, but usually bread doughs like this freeze well. Sounds like it is worth experimenting!
Yup! It freezes great!
Thank you for the recipe. It tastes delicious. I did wonder if anyone else had the same problem I did in that the dough was really wet. What am I doing wrong?
I hope somewhere in the last four years you’ve gotten his help already, but in case anyone else is scrolling comments like I am:
I haven’t made the recipe to I can’t comment to your *specific* problem, but generally if a bread dough is too wet, your solution would be to add more flour until it becomes the texture/moisture level you’re looking for.
I am surprised I haven’t left a review until now! We found this recipe during COVID. I am an avid bread baker. I make 4-8 and sometimes 12 loaves a week. This is our FAVORITE loaf of bread. Seriously the best. I double this recipe every time. Everyone who tries it says it is the BEST bread. It always looks amazing. The texture is light yet dense and chewy. Absolutely delicious.
I love it toasted with butter or cream cheese. It makes an awesome avocado toast. Or my favorite way is with an egg, smashed avocado, tomato and cheese toasted sandwich!
When I double it, I only use 2 1/2 T of yeast. It works great. I have also found that after I boil the loaves and put them back in their pans and season them on top, then I turn on the oven to 350. That gives the loaves just an extra lift. I have also found that cooking the 4 loaves at 43 minutes is perfect for my oven and my 6,000 ft elevation.
This was so good and relatively easy! I did one loaf with the asiago and another with cinnamon/brown sugar, which I folded in when forming the loaf. Next time I’m going to fold in the asiago too! Awesome toast!
I’ve made this recipe twice and we loved it both times. I definitely added at least an extra cup of flour if not more. Otherwise, we follow the rest of the recipe. So delicious! Thank you for the detailed instructions! It was really helpful!
I made this today and was amazed at how good it is!
I will definitely make it again.
We love this bread in my house! And I use regular APF and about 20% wheat flour and it still turns out great! Thanks for the amazing recipe!
I have made this over a dozen times including baking loaves for Xmas gifts and always a winner. Have made everything bagel bread mostly but also cheese and a raisin pecan bfast loaf. Don’t be afraid to add flour. Every batch I make I use different quantities of flour. Also full minute each side in water bath for chewier crust, more dense bread. A bit less time each side for softer bread.
This is a winner Mel.
Only problems are 1. My husband only eats bagel bread now and 2. Everyone complains no directions for how to stop eating this amazing bread:) thanx
Yes I’m in the process of making bagel bread. Its abit too sticky so I dusted my counter pretty good. Got them in my 2 pans but look really loose, waiting for the rise before water bath what happens if they fall between my fingers before they go in? What did I do wrong?
I couldn’t find my favorite cheese bagels at the grocery store last week so I made this bread yesterday and it turned out perfect! I was skeptical as to whether it was cooked through when I started slicing it but it was just right. Had a toasted, buttered slice with dinner last night, and I enjoyed it for breakfast this morning topped with avocado. Instructions were very help and easy to follow. Thanks for sharing this wonderful recipe! I’ll be making it again!
I’m an experienced baker, especially of yeast breads ( hundreds of loaves of challah, italian, french, pizzaand this was a huge fail for me. I followed the instructions to the letter, with one exception, I did not use the cheese topping. I usually make my own bagels, which are good, but I’ve not, yet, been able to replicate the heft and chewiness of a true bagel, I saw Jennifer Garner make this on her FB live and was intrigued and I was hoping to get something close to a real bagel. The bread was visbly uncooked in spots along the bottom and though the upper portion appeared to be cooked, it was not.I used two instant read thermometers…180 degrees @ 40 minutes, 200 degrees @ 45 minutes. I had been very hopeful as my dough rose very nicely when it first went into the pans. Thanks for the intriguing idea, but I’ll stick to my regular bagel recipe for now.
Sorry to hear this recipe didn’t work out for you!
I just made this (thanks for the recommendation Jennifer Garner!) for my bagel loving kids. It was a HUGE hit with chive cream cheese. It was so good I tried your instapot creamy baked ziti for dinner and my mildly picky eaters loved it so much. Super glad I found your blog!!
Thanks, Olivia! Glad you found your way here!