Easy No-Knead Cheesy Peasant Bread
This no-knead cheesy peasant bread is INCREDIBLE and so easy to make! Baked in a pie plate, it is soft and chewy with the perfect crust.
Clear your schedule. Make this bread. I promise it’ll be the best decision you’ve made all year.
Mixing Cheesy Bread Dough
The dough for this no-knead cheesy peasant bread is mixed by hand in one bowl. No stand mixer or kneading required.
- Mix together flour, salt, sugar, yeast and warm water.
- Once it forms a shaggy mass, add the cheeses.
- Mix until the cheese is fairly evenly combined throughout the dough.
The dough is going to be sticky! That’s the purpose; that’s the plan. So don’t panic.
If it is absolutely too sticky to work with (some of this will depend on where you live exactly – humidity, temp, elevation, etc), you can add another 1/4 cup flour to the dough. But don’t add too much flour! A soft, more-wet-than-normal dough is essential for the bread to bake up soft and fluffy with delightful squishy air bubbles throughout.


The Best Cheese for this Peasant Bread
Cheese matters. Always. But especially for this bread.
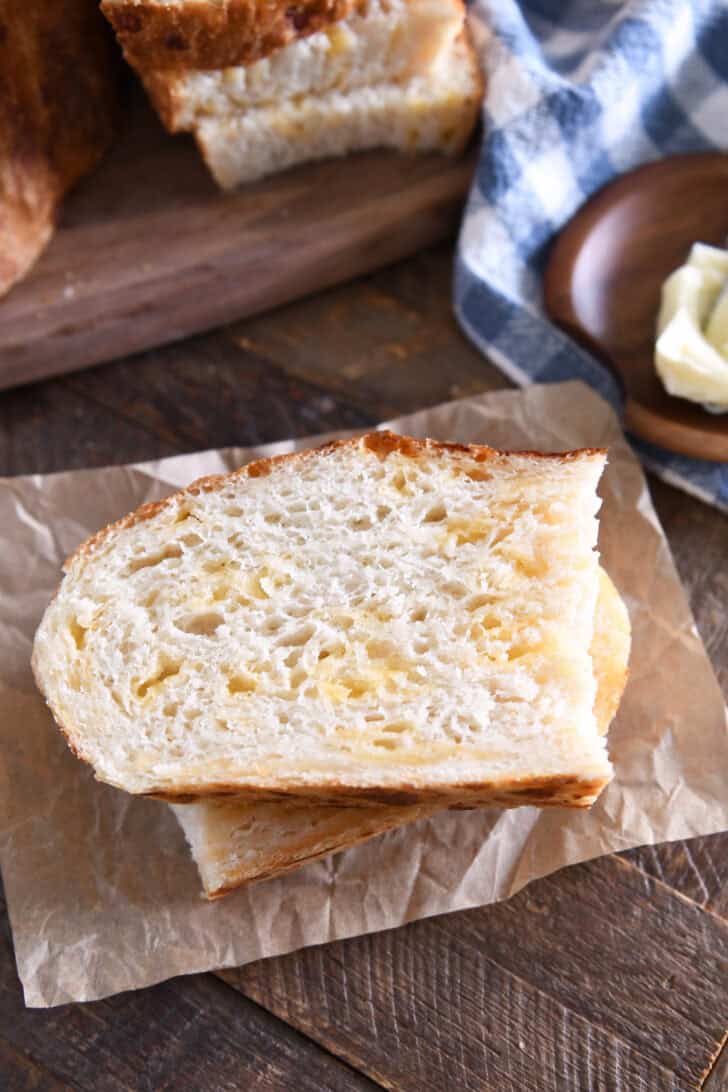
The punchy cheese flavor is dotted throughout the interior of the soft bread and also in crunchy pockets bursting through the golden crust.
So…make sure to use cheese with a lot of flavor. The recipe calls for sharp cheddar cheese and aged Parmesan. Substitute wisely.
And…grate that block of cheese yourself. Freshly grated cheese will not only provide maximum flavor, but it will also meld into the bread dough better than pre-shredded cheese, and you’ll see the benefit of that in the deliciously delightful crumb.


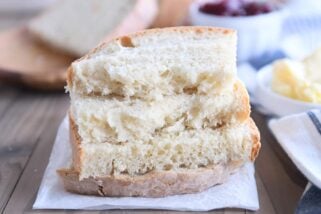
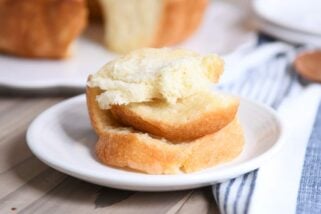
While nothing really beats the soft, squishy middle of this other-worldly cheesy peasant bread (YES, WE’RE EMBRACING SOFT, SQUISHY MIDDLES HERE 🙌🏼 🎉), that golden crust is something else.
Sourdough Version of Cheesy Peasant Bread
For an easy sourdough version, decrease the water and flour each by 3/4 cup and add 1 1/2 cups fed or discard sourdough starter (I use a sourdough starter fed at a 1:1:1 ratio – it is thick but still pourable). Add the sourdough discard with the warm water. Decrease the yeast to 1 teaspoon if using fed starter and 2 teaspoons for sourdough discard.

This easy cheesy peasant bread is a dream to make. So easy and fast!
It is always assumed that I will (at least) double the recipe. One loaf gets devoured pretty much immediately. The other loaf gets devoured right after. I’m not kidding when I say this cheesy bread is a HUGE family favorite.
It goes well with everything. Pasta? ✅ Soup? ✅ Snack? ✅ And it stays fresh-tasting for days! (Day old cheesy peasant bread is unbelievably delicious toasted and buttered.)
Built on the following and popularity of this original peasant bread recipe, this cheesy version is wildly delicious. I can’t wait for you to make it!
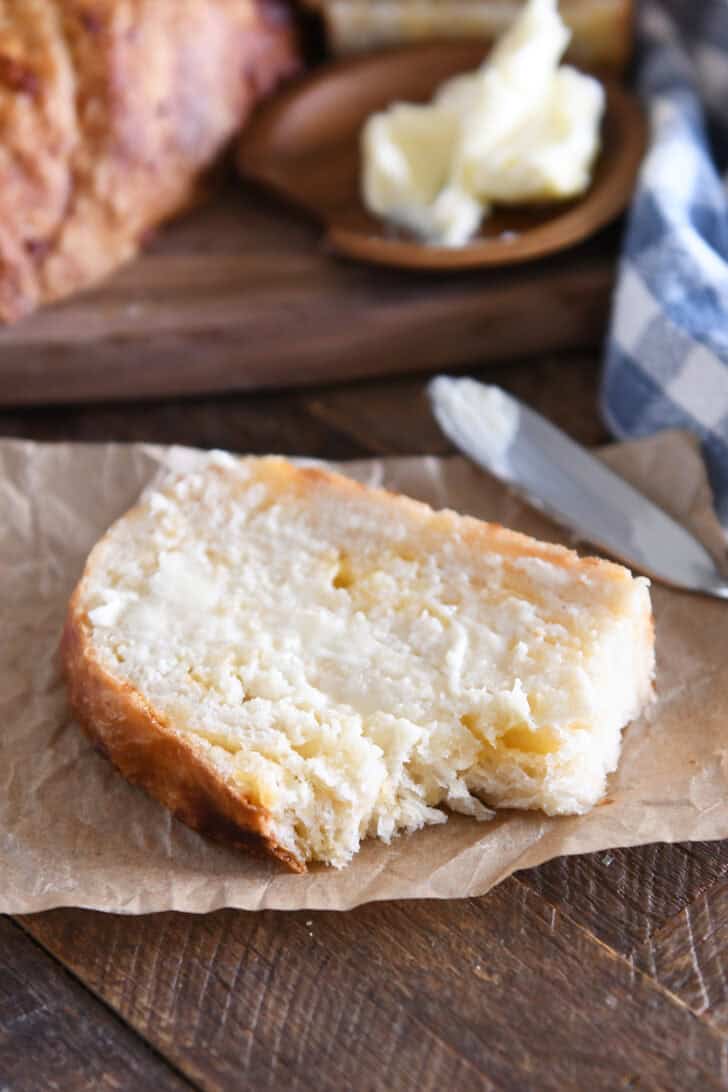
One Year Ago: Apple Cider Caramels
Two Years Ago: Pumpkin Chocolate Chip Bread
Three Years Ago: Sourdough Pumpkin Muffins {a.k.a. The Best Muffins On The Planet}
Four Years Ago: Perfect Pumpkin Chocolate Chip Muffins
Five Years Ago: Chicken Cordon Bleu Panini {My New Favorite Sandwich}
Six Years Ago: Amazing Bagel Bread {Step-by-Step}
Seven Years Ago: Pumpkin Applesauce Muffins with {Optional} Maple Cream Glaze
Eight Years Ago: Perfect Pot Roast and Gravy
Nine Years Ago: 15-Minute Homemade Root Beer
Ten Years Ago: Step-by-Step Homemade Tortillas {White & Whole Wheat Versions!}
Easy No-Knead Cheesy Peasant Bread
Ingredients
- 4 cups (568 g) all-purpose or bread flour
- 1 tablespoon instant yeast (or rapid-rise/bread machine yeast)
- 2 teaspoons granulated sugar
- 1 ½ teaspoons table salt
- 2 cups (484 g) warm water (110 to 115 degrees F)
- 1 ½ cups (170 g) freshly grated sharp cheddar cheese (large holes of box grater)
- ½ cup (45 g) freshly grated Parmesan cheese (small holes of box grater)
Instructions
- In a large bowl, add the flour, salt, sugar, and yeast. Whisk to combine. Add the water and mix with a rubber spatula or wooden spoon until the ingredients form a shaggy, sticky ball and no dry streaks remain.
- Add the cheddar and Parmesan cheeses and mix into the dough with your hands (lifting and turning) until the cheese is evenly combined throughout the dough. Pat the dough into a ball shape.
- Cover the bowl and let the dough rise until very puffy and nearly doubled, about 1 to 1 1/2 hours.
- Place an oven rack in the center position. Preheat the oven to 425 degrees F.
- Generously grease a 9-inch pie plate or 8 1/2-by-4 1/2-inch loaf pan with cooking spray.
- Scrape the dough away from the sides of the bowl with a rubber spatula, forming a rough ball in the center of the bowl. Lightly grease your hands with cooking spray or oil and shape the dough into a circle loaf shape (or a rectangle loaf shape if using a loaf pan), tucking edges under. Place in the prepared pan. The loaf will not be completely smooth and may look a bit rough in shape, that's ok!
- Let the dough rest, uncovered, for 15-20 minutes until puffy.
- Bake for 15 minutes. Reduce the heat to 375 degrees F and continue to bake for 15-20 minutes until golden. Tent the top of the loaf with foil if the crust is browning too quickly while baking.
Notes
Recommended Products
Recipe Source: from Mel’s Kitchen Cafe




This bread is magic.
I made this recipe in my Oster bread machine, including the cheese, last night to serve with my bean soup. Turned out a perfect loaf, using a light crust and the Basic (#1) setting. I downsized to 3/4 of the ingredients (3 cups flour, etc) Only other alteration was 1 1/4 cup water and 1 tsp gran sugar and 1 tsp. Inulin instead of the recommended ones. Next time I’ll try adding some herbs also.
So delicious! We loved this so much!! Silly question though…do you refrigerate the leftovers because of the cheese? Or is it fine at room temp since it’s cooked?
We usually keep in the fridge (which is usually against how I store bread leftovers!). The one time we kept it at room temp, it had mold growing in a short amount of time because of the cheese and extra moisture, I think.
I have made this twice now and both times I chopped up a couple jalapenos and throw them in the dough at the same time as adding the cheese. Oh my goondness. SO GOOD!!!!!!
This was so yummy! But when she said “generously” grease your pan, she means it! 😂 use more than you think you should
Everybody ate and ate and ate this! Nothing but rave reviews around here. Thanks for another great and easy recipe!
Thanks, Tara!
Amazing as always! First, may I tell you how much I LOVE your recipes and sweet and humorous demeanor! My daughter and I have followed you for years and when we need a recipe, you are our go to for sure!
With respect to this recipe, would it be possible to add the grated cheese to the flour mixture to coat before adding in the liquid? It is pretty messy stirring with your hands to combine and I never felt like I got all of the cheese separated; there were still clumps that I felt would have been separated if added to the flour first. Would this disturb the reaction with the yeast for rising? Also, would make in a 2 quart casserole dish instead of a rectangular bread pan as it was not done inside (as you warned!) and had to put it back in the oven. The result was a loss of about a third of the loaf but once baked properly, was excellent. I buttered the top and lightly salted with Kosher salt and wow! Will be interested in hearing your thoughts about the order in which the ingredients are combined.
Ah, thanks, Gretchen! Interesting question – you could definitely try adding the cheese and flour together first and then adding to the yeast. I tried that during one of my recipe tests and the rise on the bread wasn’t as pronounced (which made it more dense), but maybe it wasn’t due to that mixing method and was caused by something else? Thanks for your notes and insight!
I made the sourdough version and ate four pieces one right after another before I realized what happened. FOUR, my friends! It’s SO delicious. And toasted the next day with garlic butter? ohmygoooooodness
Quick note…I doubled the recipe, and as I loaded my two 8.5×4.5 loaf pans I thought they looked too full. I was right; they majorly overflowed in the oven (luckily I had them on a sheet pan). I carved off all the overflow and fed them to my family anyway and all were happy! Next time I will use three loaf pans instead of two when I double the recipe. ☺️
Thanks for the note on the pan size, Lynne! If baking in loaf pans, because of the extra cheese, this bread might be better in a 9X5-inch pan…I’ll make a note on the recipe.
All of your peasant breads–sourdough and regular–are my go to. This one was also perfect! I made it with your no cap chili, and they were perfect together! These peasant bread recipes are seriously the best!
Yay! Thanks for all the comments you leave on recipes, Jen! It is so helpful!
This recipe is so easy and delicious! It was very simple to put together, I only needed one bowl which is great. Then the flavor and softness of the bread really knocks this recipe out of the park. I will definitely make this again!! Thank you!!!
What is a fed?
A fed starter is one that has recently been fed with flour and water and left to sit until it is bubbly and active and doubled in size.
Can I sub some of the white flour for brown?
By brown flour, do you mean whole wheat flour? I believe that should work ok – the bread may be slightly more dense if using whole wheat flour.
Yes, lol, that’s what I meant. Thank you for making sense of that. 🙂
Honestly, I just made it as is and it was so easy and came out perfect — I’m still stunned. I don’t consider myself a fancy bread baker — and this had crunchy crust and a soft interior — really perfect.
I’ll wait for you to do the testing and post a whole wheat version. 🙂
I was already a big fan of the plain version, but this is next level delicious! The crusty, crunchy cheese on the crust is amazing and I could almost just eat the crust alone if I didn’t know the inside was so soft and tasty as well. Now I kind of can’t wait to toast it for breakfast. This one is a winner for sure.
Yay, Misti! So glad you love this bread! Toasted, it is unbelievable!
The instant I saw this recipe I knew I had to try it, and I sure did!
Followed recipe pretty much exactly, but I zested the Parmesan instead of just going with the fiber shreds option, and grated the cheddar as usual.
The zested Parmesan melted completely into the dough and became a part of the whole loaf, and there were bursts of cheddary goodness adding to that.
The crumb was unbelievably tender and fluffy and even though this is a decidedly sticky dough, it’s well worth just dealing with the drama queen that is sticky dough because of the results you get.
This will be on heavy rotation in my house from now on!
One word to the wise: To my dismay, it got some spots of mold just as I was finishing up the loaf on the third day, so take care how you store it because of all the extra yumminess that makes it go off a little more quickly than other breads.
Still totally worth it. I’ll just have to eat more bread 😁
Thanks so much for this recipe! Next loaf (after the one I’m about to bake right now) I’m going to try gruyere and brie.
Loved your review; thank you!! I think a gruyere and brie version sounds fantastic!
SUPER easy!! For reference, I think the breadsticks are difficult and they never turn out for me. SO delicious! I just lightly toasted a leftover slice and fried up an egg – delicious breakfast sandwich! I will definitely make this again.
Perfect breakfast sandwich!!
Just had this for dinner tonight with fettuccine Alfredo! Oh my goodness!! This is amazing! I’ve made the original peasant bread recipe and that is delicious as well… but this cheesy peasant bread is on another level!! Thanks Mel! We have a new favorite!
Yay, yay! Glad you loved this bread so much, Sandy!
My family LOVES this bread! So delicious, and very easy to make!
Thanks for letting me know, Leslie!
Love it! Threw in a handful of pickled sliced jalapeño peppers. So fire! 🔥
I cannot wait to try it with jalapenos!! I especially love the idea of using pickled jalapenos. Thanks for the review with those details!
Oh my!!! This is AMAZING!!! (Said in a singing voice)!!! 🙂 My family melted in happiness eating this bread! This is truly an easy recipe (I was worried it really wouldn’t be for me because I rarely make bread) and turned out great my first time making it! This will be on repeat especially now during soup season! Thanks Mel!!!
Yay, Kristine! It made me so happy to read this, especially because YOU DID IT! You are a rock star!
Made the sourdough discard version – excellent! Did have to bake longer.
Thanks for the note and review, Kelly!
Was delicious and so easy to make!!!
This was super delicious! Added some sourdough discard since I had a bunch. I didn’t realize it needs shredded parmesan so I had to use the powdered kind, but it worked great. I’ll definitely be making it again.
Thanks for the review, Jen!
This was SO easy and SO yummy!!
Yay, thanks, Karin!!
This bread looks absolutely delicious! I will definitely be trying this myself at the weekend! xxx
I made this as directed with the sourdough instructions and it turned out great! Will make again for sure!
So happy the sourdough version worked out well, Lexi! Thank you for letting me know!
So simple. So delicious! Will be on repeat.
Is it OK for this to have a longer, initial rise – like 5+ hours?
If so, I would pop in the fridge – at room temperature, it may over rise.
This bread is absolutely amazing! We love the regular peasant bread, but this bread is not only incredibly delicious, but it is truly beautiful! Thank you, Mel! The majority of the foods I make are recipes from you!:)
Thank you so much, Laurie!
Oh my gosh! Do not sleep on this recipe. This bread is SO delicious! I make the plain sourdough peasant recipe on a weekly basis and I can’t believe it never occurred to me to add cheese. Such a good idea. I made the sourdough version of this recipe tonight and it exceeded my high expectations. I used Parmesan from the green can, measured by weight, and, even with that “low brow” sub, was delighted with the result. Easy and so gorgeous, with a crunchy cheesy crust. I did bake it for longer than called for, maybe an extra 15 minutes. With dough this wet, I bake until 195-205 F on an instant read thermometer, to avoid a gummy final product. 10 degrees is a lot, so I also use crust color to help guide me- I pulled this loaf right at 200 and the texture is perfect. Thanks for another winner, Mel! I will bake this version often!
Your review is so helpful, Rebecca (as always). Thank you! So glad you loved this one!
I am not sure why this one worked out so well, but it did! I made the sourdough and converted the water/flour measurements to weight before I started BUT I did not have enough active starter! Then I misread my own notes when adding the water! I had to do some rough math in my head and fish out some of the water to make it “approximately” right and then I crossed my fingers…
But the result was fantastic! Eating a piece warm with a bit of jam on it right now it and it is over the moon yummy.
Oh yay! I was nervous reading your comment, but I’m thrilled it worked out!
Oh yeah, this is a great recipe! I will take more care next time to see that I have sufficient starter available. Even with less starter and only 1 tsp of yeast I still got a great loaf (a tribute mostly to my very hardy starter I think).
It is Thanksgiving in Canada this weekend and I will be making it again AFTER the turkey, for leftover turkey sandwiches…. mmm…. a bit of cranberry sauce, turkey, mayo and this bread and I will be in heaven.
Oh wow, Doug, this bread used for leftover turkey sandwiches sounds AMAZING. Happy Thanksgiving!
I made this today using Mel’s sourdough version suggestions and also added 2 diced jalepenos. I made a regular cheddar jalepeno sourdough loaf last week that took 2 days with all the waiting in between and my husband didn’t realize they were different. He actually said this one was more cheesy! Definitely making this one more often! So easy and quick to pull together! Very fluffy and delicious flavor!
(Also for those who want to try using sourdough starter, I weighed the 1 1/2 cups of starter she suggested using and mine weighed about 344 grams – it was fed 1:1:1 12 hours before and I added 1 tsp yeast).
I love this, Ali! Thanks for all the details you included. The jalapeno version sounds to-die for. I’ll definitely be trying that!
I want to try this “so bad” but I’ve made the traditional peasant bread numerous times and it always turns out moist or gummy in the middle. When I lift up a slice and squeeze it, sounds “wet.” I always weigh the ingredients. The last time I even baked it about 15 min. longer and it was still like this. Anyone got any suggestions? I’m so envious that it turns out well for so many. Thanks!
Hi Tamara, what type of pan are you baking the bread in? Try adding 1/4 cup additional flour and watch the rising times to make sure it puffs enough to be fluffy.
Delicious! Made as written and added a few grams more cheese. I made it too late in the day to try it so I had slices for breakfast. Seriously addictive and perfect for a side dish.
So happy you loved it, Sam! Thanks for taking the time to let me know!
Excited to try this. How do you think this would do, adding jalapeño slices along with the cheese?
Yes! Fantastic idea! Will likely be trying that myself. Yum.
I added 2 diced jalepenos and it turned out fantastic!
When Mel tells us to make a recipe right away, we would all be wise to listen. This bread is fabulous! I made it exactly as written and the flavor is everything she promised it would be. I probably skimped on the oil in the pie dish. So the entire bottom of the loaf stuck. That’s on me. Next time I will use parchment paper. My oven cooks hot, so when baking I did the first 15 min as directed, dropped the temp for 10 min, then put foil over the loaf to prevent burning during the last 10 minutes of baking. It was baked to perfection. I can hardly believe how fast it came together. Thanks, Mel!
Thanks for making this recipe so quickly, Rachael! And thanks for your additional notes about temp and dough sticking. You are awesome!
This was easy and so delicious! I knew I had to make it right away.
You are a rock star for making this so quickly, Brina! Yay!