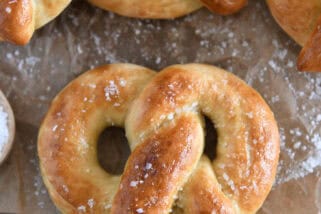
Soft Pretzel Rolls
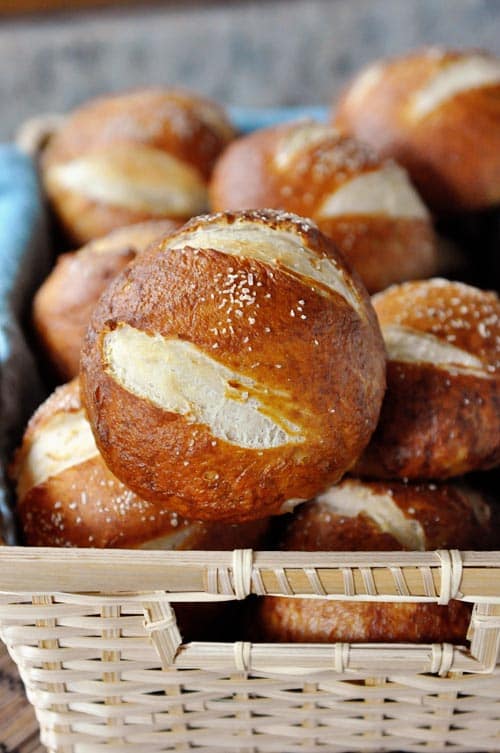
Out of the oven these soft pretzel rolls are perfectly puffy and wonderfully salty and chewy. They look like they come from a gourmet bakery!
So I know I tend to be a bit dramatic about food, but I kid you not, these soft pretzel rolls are one of the best breads to ever come out of my kitchen.
And I’ve made a lot of bread over the years.
Brian didn’t even believe I actually made these (rude!) because they look like something that would come from a gourmet bakery or fancy restaurant, neither of which happen to be in big supply in my cute little town.
In his defense, I do have to admit that even I let out a real, live squeal of joy when I first made these and they came out of the oven looking like, well, pretzel rolls!
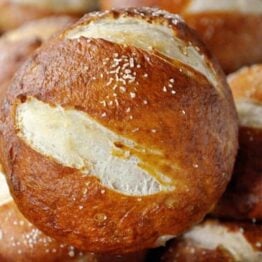
Rich, dark brown color, perfectly puffed and wonderfully salty and chewy. I promise that not only are these absolutely makeable (not nearly as hard as you think, I promise!), they will solidify instant rockstar status. I’m not kidding…just look at them.
I just looked and now I want to eat 50 right this minute.
I’ve included a step-by-step below for anyone a little hesitant about delving into the world of pretzel rolls (don’t be hesitant!).
Boiling the dough in a baking soda water bath prior to baking gives the pretzel rolls a delightfully chewy texture and helps crisp up the outside of the roll while baking.
And can I just emphasize again for the sake of emphasizing that: oh my heavens, these rolls are amazing.
Through the many revisions of this recipe, we’ve enjoyed these babies with everything from soup to spaghetti to buns for sandwiches and grilled hamburgers.
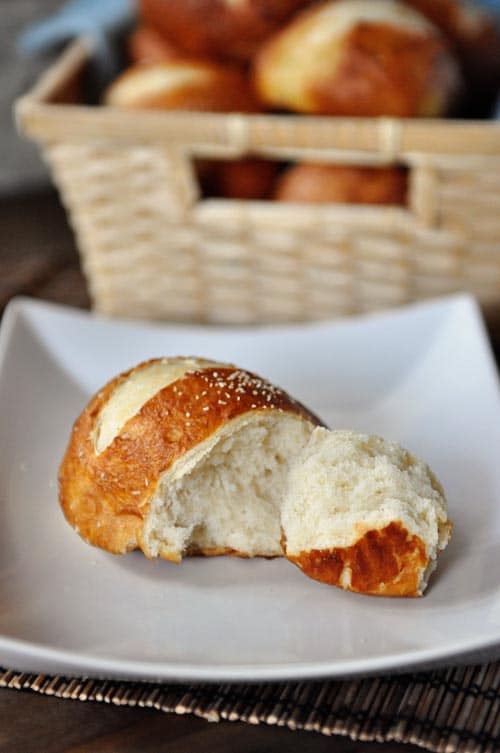
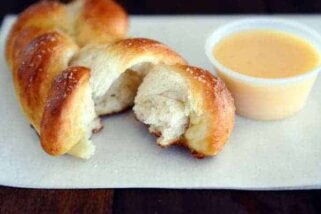
Well, that’s when any of the rolls actually make it to mealtime. Most often, we gobble these perfectly perfect pretzel rolls up after they exit the oven and our favorite way to enjoy them is slightly warm with a thick wedge of sharp cheddar cheese.
Rockstar status, baby, rockstar status.
One Year Ago: Glazed Chocolate Chip Scones
Two Years Ago: Hearty Turkey and Bean Chili
Three Years Ago: Autumn Minestrone Soup
Amazing Soft Pretzel Rolls
Ingredients
Dough:
- 1 tablespoon instant yeast
- 2 tablespoons canola or vegetable oil
- 2 cups warm milk, about 100-110 degrees F
- 1 ½ cups warm water, about 100-110 degrees F
- 2 teaspoons salt
- 6 ½ – 8 cups unbleached all-purpose flour
Water Bath and Extras:
- 3 quarts water
- 1 tablespoon sugar
- ¼ cup baking soda
- Coarse salt for sprinkling
Instructions
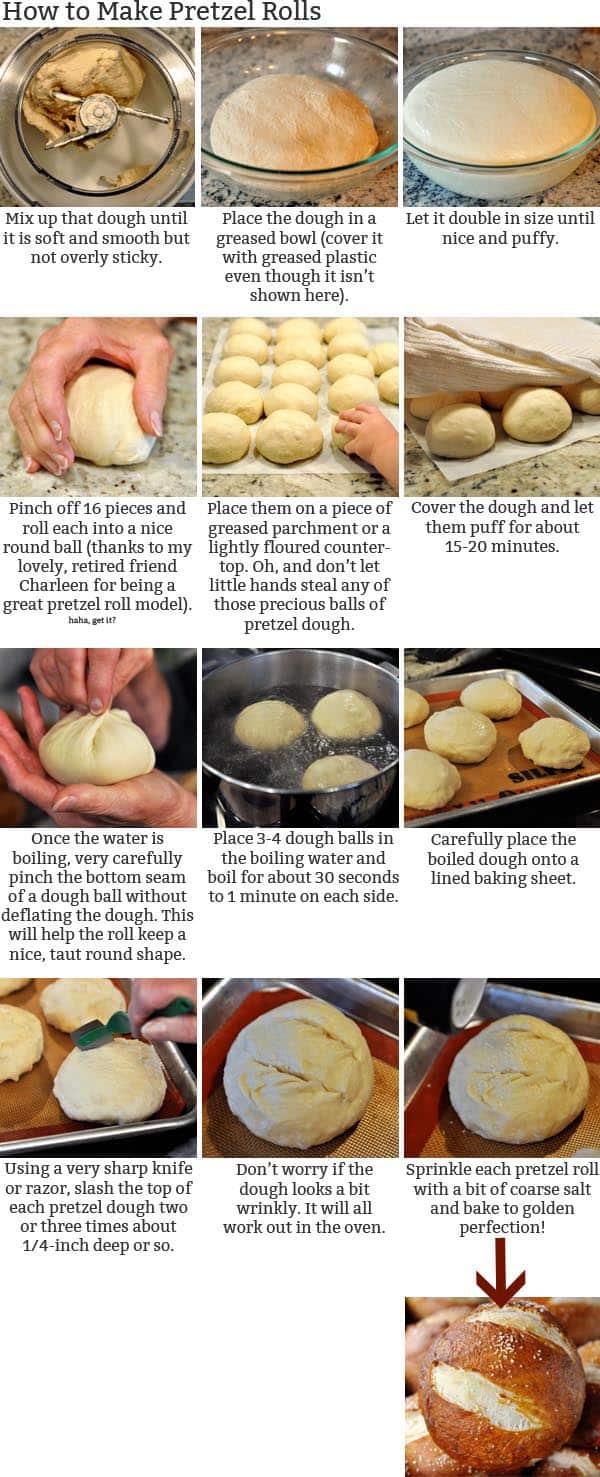
- In the bowl of an electric mixer (or you can do this by hand in a large bowl), stir together the yeast, oil, milk and water. Add the salt and two cups of the flour. Add the rest of the flour gradually until a soft dough is formed and knead for 3-4 minutes. You may not need to use all the flour depending on many different factors (see the note) – add the flour until a soft dough is formed that clears the sides of the bowl. It is similar in texture to bagel dough and should be slightly more stiff and less sticky than, say, roll dough, but definitely still soft and not overfloured.
- Transfer the dough to a lightly greased bowl, cover it with greased plastic wrap and let it rise until doubled in size (1-2 hours).
- Portion the dough into 16 pieces and roll each piece of dough into a lovely little round ball. Here’s a great tutorial on how to do that quickly and efficiently.
- Lay out the rolls on lightly greased parchment or a lightly floured counter. Make sure the dough balls won’t stick! Let them rest for 15-20 minutes.
- While the dough rests, bring the water, sugar and baking soda to a boil in a large 5-6 quart saucepan.
- Working with one piece of dough at a time, carefully take it off the parchment or counter, flip it over in your hand and pinch the bottom to form a little pucker and help the dough form a nice, taut ball. Take care not to deflate the dough; you should pinch just the very edge of the dough.
- Place 3-4 dough balls in the boiling water and boil for 30 seconds to 1 minute on each side (the longer you boil, the chewier the baked pretzel roll will be).
- With a spatula, remove the dough from the boiling water and let the excess water drip off into the pan. Place the boiled dough balls onto lined baking sheets (lined with lightly greased parchment or a silpat liner).
- Preheat the oven to 425 degrees F.
- Using a very sharp knife or razor, slice 2-3 cuts into the top of each unbaked roll about 1/4-inch deep or so. It’s important to use a very sharp blade so that it cuts the dough without deflating it. It’s ok if the dough looks wrinkly and kind of funny. It will work itself out during baking. Lightly sprinkle each dough ball with coarse salt.
- Bake for 20-22 minutes until the rolls are deep golden brown. These rolls definitely taste best the same day they are made; however, lightly warmed in the microwave for a few seconds will do wonders for pretzel rolls 1-2 days old.
Notes
Recommended Products


Recipe Source: Mel’s Kitchen Cafe (originally inspired by many versions online that made me decide to create my own variation; I wanted more milk in the dough than water, different amount of salt and instant yeast, simpler method for mixing the dough, among many other factors)

The rolls came out looking just like your picture, and they are very soft, but to me they don’t taste like a soft pretzel. They taste like a salted roll.
Just made the pretzel rolls ! Oh my gosh they are amazing! I made the dough in my bread maker, they are picture perfect and taste incredible ! I will be making these frequently!
I’m looking forward to making these today, and I just wondered your thoughts about using a bread machine to prepare the dough or is it better to do it by hand or mixer?
I don’t have a bread machine, so I haven’t tried it that way, but definitely worth a try as long as your bread machine has the capacity to fit the dough.
Easy, no fail recipe! Family loved these!
I just made this recipe and it is delish! I added 2 tablespoons of brown sugar and also made big sandwich rolls/bread bowls about 7.5 oz. each give or take and it made about 9 rolls and a taste tester:)
Thank you for such a wonderful recipe!:)
Just checked the comments to see if anyone had made these into bread bowls and if so, what size, how many, etc. Your reply was perfect. Thanks!
I never have instant yeast, just regular. Will that still work?
Yes, just let it proof in the warm water and milk until bubbly first.
This recipe is so easy to do and the rolls are absolutely delicious. Will definitely make again.
So, so good and picture perfect!!! I ended up using more flour than what was called for in the recipe, but I followed the guide rather than the measurement.
I will def be making these a LOT more!
WHOA, THESE WERE AMAZING!!! Definitely keeping this recipe and making again and again.
So easy and so good! These get devoured every time I make them. Another wonderful recipe from this amazing site! Thanks Mel!
I made these today. They are delicious! I’m not great in the kitchen, but I’ve decided to cook and bake more at home. As far the recipe goes, I didn’t have instant yeast so I used active yeast, and I used bread flour. And I don’t think I left the buns in the oven long enough to brown more. I was scared I’d burn them. Haha. Good news is EVERYONE in my large family devoured the pretzel rolls. Great recipe which I will make again for sure!
The dough turned out perfectly but the end result wasn’t as good as I was hoping. It wasn’t chewy like a traditional pretzel and it wasn’t as light and fluffy as a roll. I don’t think I’ll make them again but it was fun to try!
Of all the pretzel bun/roll recipes I’ve tried this one is hands down the best. Always super soft with a great flavor. I’ve made these for friends, family, pot lucks with beer cheese. Mini sliders. So many ways to enjoy them.
First time ever making break, cut the mix in half but could have left the same for extras, Was super easy and shocked myself when they came out almost perfect.
Thanks
This is my 1st ever review & u must say, this is a terrific recipe!!
I haven’t made these yet planning in doing so very soon.. However I have a question I want to make sandwich size rolls, how many will I get from the recipe
It’s hard to say since I don’t know exactly how big you want the sandwich rolls to be? If you make each roll out of 3-4 ounces of dough you might get about 10 or so?
I make soft pretzels from a Lancaster County recipe and can freeze dough after it’s formed into pretzels, before boiling and baking. These rolls look great. Am going to try for a get together. Probably better though freezing after boiling and baking. Has anyone tried? Can I take them out of freezer and put in a low oven to thaw and warm?
I have only ever frozen these after they’ve been baked and cooled – it works great!
Can I use all purpose flour instead of bead flour
Yes. They’ll be a bit less chewy, but it should still work fine
the recipe I’m looking at calls for AP flour. Would I use the same amount of bread flour? I’m new to using different types of flour – just want to be sure I’m doing it properly
Yes, you can usually sub in the same amount of bread flour for all-purpose flour in certain types of bread recipes.
I like to sub a tablespoon of vital wheat gluten per cup of flour when I don’t have bread flour on hand
Didn’t pinch them perfectly, and I need a better system for boiling them for the same amount of time, but they tasted like giant soft pretzels. Gonna make these again
Tasted good, but did not get the golden brown color on the outside, needed eggwash?
My dough was really sticky after I let it rise for two hours and the balls didn’t hold their shape 🙁 I used 7 cups of flour. Should I increase to 7.5 or 8 cups of flour next time? Did anyone else have this issue. Hoping to retry. Thank you!
Definitely judge the finished dough by texture and feel and not by the amount of flour added (so many factors can impact this like elevation, humidity, how we each measure flour, etc). Sounds like you can definitely get away with adding more flour and still be ok. Good luck if you try them again!
Can you freeze these and do they still taste as fresh and delicious?
Yes, they freeze great.
These were the BEST! I flattened some them a bit for burger buns.
Also, I am at high altitude,7200 feet, so only use 2 teaspoons of yeast and made a firm dough.
‘
I just started baking and I was wondering. How many packets of yeast is a tablespoon?
One packet of yeast is 2 1/4 teaspoons. So one packet is a bit less than a tablespoon.
Absolutely perfect! Thank you.
Made these tonight to have as hamburger buns–turned out fantastic! Formed the buns a little larger based on your other videos, and still got 9 buns after I cut the recipe in half. I was nervous about over-salting the top but I’m glad I put on a good amount. The salty taste was amazing.
I made these tonight, just a half recipe. They were fantastic. We all just ate it plain, it’s perfect by itself. Thanks for posting this recipe
Can you freeze these and if you have they still taste fresh?
I froze half of mine. I thawed all of them on the counter for a few hours before I was ready to use them, then heated individually in the microwave for ~10 seconds. They were delicious.
Great rolls! They are so good! We were short on time, but the bake and rise time were perfect! Thank you so much! Also, I need to try that dairy free alternative 🙂
I made them with my sourdough starter the other day and it came out fantastic! I still added a little yeast but I cut back on the milk a little and added 1/2 cup of my starter. I also added a little sugar to my dough as I had in the past with another pretzel recipe. You might need extra four when you knead the dough to get the right consistency. I should note that I cut the recipe in half because 16 rolls were just too many for us. We served them with homemade soup and they were fantastic.
I can’t wait to Make these- I have my own sourdough starter I would like to use instead of dry yeast. Do you know if I can substitute and how much?
I haven’t tried it and I’m sorry I can’t give a good answer (I don’t want to lead you astray!)
Inspired by your English Muffin bread and Bagel Bread do you think this can be cooked in a loaf pan? If so, would you keep the oven temp the same?
Hi Tasha, sure, I think it’s definitely worth a try! The rolls do get a bit of chew from the boiling water bath – are you planning to boil the loaf before putting it in a pan? I’d probably bake at 375 degrees in a loaf pan.
Hello! Is there a point in the recipe where I can make ahead to finish the actual cooking the following day?
You can make the dough the night before and probably even form them into rolls and refrigerate to boil and bake the next day. I wouldn’t boil them one day and bake the next.
I used sourdough starter without yeast. If you’re sourdough is a 1:1 ratio, then if using 1c of starter reduce flour by 1/2c and water by 1/2c. Your rise time will be longer – at least 4 hrs, maybe longer. Mine was longer. Happy baking!
They turned out lovely. I just should have thought to also do an egg wash so that they were shiny and pretty. I think that is the only thing missing!
So excited to make these! I’m dairy free though, have you tried them with non-dairy milk? If so, which kind would you recommend? I was going to try almond milk as I’ve had good luck cooking with it, but wonder if oat milk would be better since it’s creamier? Would love any thoughts. Thanks so much!
Hi Lara, I haven’t tried these dairy free – I’m sorry! I think if you’ve had good success using almond milk in other recipes, I’d stick with that!
Lara, let us know if you tried almond milk – I’m also curious!
I’ve just made these with oatmilk, and they worked well! I’ve baked with other alternative milks in the past and haven’t had issues, so imagine almond would be fine!
I used almond milk and YUM!
Hi Lara, I’m vegan and cook and bake with oat milk. I found I like it best out of all the alternatives. It seems to have less bitterness and flavor than almond or soy milk. I do the same amount that any recipe has for regular milk.
Made these and although good, they were very dense/heavy. When eaten as a roll just with butter and warm, awesome. But as a sandwich…not so much. What could I have done wrong?
Sometimes rolls and bread are dense if they haven’t been kneaded long enough or the dough has been overfloured. What was the consistency of the dough?
I don’t eat grains; however, hubby says the recipe is a keeper.
They looked like yours and smelled fantastic. Thank you for the recipe! Very easy and not too time consuming for a yeast risen roll.