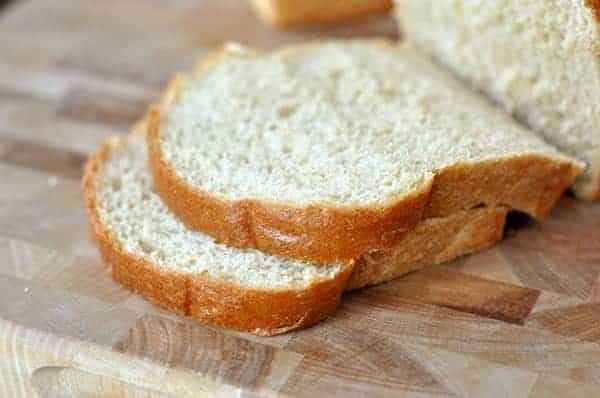
Whole Wheat Bread {Step-by-Step}
Check out this step-by-step picture tutorial on simple whole wheat bread making to become a master bread maker in your own home.
I get a lot of questions regarding yeast and baking bread. A lot. It can be tricky to know when to stop adding flour, how long to knead, what yeast to use, etc, especially when you are just starting down the bread making road.
A few years ago, I wrote up a tutorial on yeast which answers many of those questions. However, I have yet to do a step-by-step picture tutorial on simple bread making. Enter today’s post!
Several years ago I transitioned to making all of our bread. Not only has it saved us money but we have come to far prefer the taste of homemade bread to storebought.
Even if you aren’t up to making all of your bread, conquering a loaf of bread for special occasions or an occasional indulgence is surely worth it! And I promise, it isn’t hard. In my carb-centered world, there is nothing more divine than a piece of warm, homemade bread fresh out of the oven slathered with butter.
A few notes:
1) For the purposes of the step-by-step instructions below, I am using Darcy’s Whole Wheat Bread recipe from this whole wheat bread post. That post has several recipes but I almost exclusively use Darcy’s recipe.
2) I have a Bosch mixer which is pictured in the instructions below and which I use to make all of my breads/rolls. You might need to tailor each bread recipe you try to the size of your stand mixer (or the size of the motor in the mixer) or to what you can accomplish by hand. The pictures below are a simple guideline to follow – adapt according to your equipment or lack of.
3) I grind my own wheat flour (with the Wolfgang Grain Mill) when I make bread although you can definitely use storebought wheat flour. I prefer hard white wheat over hard red wheat for it’s delicate texture and flavor but either can be used. Here are a few informative posts I did on wheat (varieties, where to buy) and wheat grinding (different wheat grinders on the market with lots of reviews). When using freshly ground wheat flour, you will need to add more cups of flour than if using flour that has settled in a bag, since the flour is more aerated and fluffy from being freshly ground. That is a minor issue since I harp on the fact that when making yeast doughs the flour amount given in the recipe should be a guideline only – the real test is the look and feel of the dough.
4) Just to restate from an earlier post, I use these bread pans and once the bread is cooled, I package it in these lovely bread bags with the plastic bag clips from IKEA and freeze until we are ready to eat.
5) As always, please let me know if you have any questions! I hope this tutorial is helpful for those of you wanting to conquer the art of bread making.
Click here for a printable PDF version of the picture tutorial.
Update 4/2015: If you have issues with your bread rising pretty well in the pans but deflating a bit in the oven, you might consider changing the way you shape your dough. I’ve included a video below with a quick 2-minute tutorial on how I shape my bread dough these days. I used to do it as pictured in the post above (and I know it works for many of you so I’m leaving the pictures as is) but over the last several months, my bread hasn’t risen well in the oven and I’ve realized it needs a tighter loaf. So I simplified how I shape it by pressing it in my hands into a much tighter loaf. I’ve indicated this in the comments but many of you wanted a visual so here you go. I literally grabbed the video camera in the middle of making bread when I remembered you asked for this – and so please don’t mind the quirky editing and my little sidekick.
LuAnn’s Whole Wheat Bread {With my Adaptations}
Ingredients
- 5 ½ cups warm water
- ½ cup sugar
- ½ cup oil
- 2 tablespoons instant yeast
- 2 tablespoons salt
- 2 tablespoons vital wheat gluten
- 2 tablespoons nonfat dry milk
- 2 cups (284 g) white flour
- 8-10 cups (1136 to 1420 g) whole wheat flour
Instructions
- Lightly spray bread pans with cooking spray and set aside.
- Mix the water, sugar, oil, yeast, salt, gluten and dry milk together in the bowl of an electric mixer or by hand. Add the white flour and mix well.
- Continue adding the whole wheat flour until the dough cleans the sides of the bowl and the dough is soft but not overly sticky.
- Knead for 10 minutes until a soft, smooth dough has formed. Using oil or cooking spray to grease your hands and countertops, form the dough into 4 loaves.
- Place the loaves into the bread pans and cover with lightly greased plastic wrap. Let them rise until the dough has risen about 1 1/2 inches above the top of the bread pan.
- Place the bread pans carefully in a cold oven. Turn the oven on to 350 degrees and bake for 38 minutes.
- Remove from the oven and turn out the bread onto a wire rack. Let cool completely before placing in bags to put in the freezer.
Thank you for giving me the confidence to make my own bread! I started with baby steps and my kitchen aid mixer one loaf at a time. Then came the rolls, pizza dough, bagels, cookies, brownies. I then saved enough money to purchase the bosch universal mixer and my life changed! I can never eat a store bought item again, thanks to all your fabulous recipes. Saved enough money to buy a KoMo grinder and a 40lb. bag of hard white wheat berries.
I just made 5 loaves with my freshly milled flour:) Taste great, looks different than yours. (yours looks like a white loaf, mine looks like whole wheat)
Thank you Mel, for creating this fabulous blog, it truely is my go to site, when I need a recipe.
I love to hear this, Angie! My Bosch mixer and KoMo grain mills are some of my most treasured kitchen tools and I’m so thrilled that you are enjoying them as well and that it’s allowed you to make bread from scratch. Yay!
How would I alter this to use a food processor?
I don’t really know; I haven’t tried whole wheat bread with the food processor. Good luck experimenting if you decide to try it!
Mel we have been cooking loads of your recipes. They are delicious. When making Darcy’s bread we end up with a nice large loaves that come out nice and golden brown. However, most times the middle of the bread is still doughy. I feel like it is done, because the outside looks nice and delicious, but like stated, it can get slightly doughy towards the middle. Do we just need to cook the loaves longer?
Hi Colten, yep, it sounds like you might need to tack on a few minutes to the baking time – that could be due to how ovens vary in individual temperature. 3-4 extra minutes should help!
It didn’t seem too sticky but I’m gonna add more flour and see what happens. I can’t wait for that post! How exciting!
I’m having a new problem with this bread. I’m making the 4 loaves with 3 T of yeast and while I’m getting a much better rise, my bread is coming out very airy on the top half and more dense on the bottom half. My 4 loaves have only ever weighed 27-28 oz. could I just not be putting enough flour? The dough seems to meet your description but definitely isn’t the 32 oz you said you were getting.
Hi Marci – is your dough overly sticky? Do you think it needs more flour based on how it feels? If so try adding a half cup or so to see if that helps. I’m working on a new and improved bread recipe that hopefully will be virtually foolproof – to be posted soon I hope!
When’s this new bread post coming? I’m dying with anticipation!
Just made three batches today, Marci – tweaking it a bit more but sometime in January for sure.
Can I still ask a question several years later? I use active dry yeast, because that’s what I have a scrap load of. Switching to instant as soon as it’s gone. Anyway, with Darcy’s recipe, do I need to do two rises with ADY? Or can I stick with the one rise? Thanks for you website, by the way. I love making my MIL jealous with what she thinks are my mad cooking skills. Nope. It’s just Mel!
Ha! Thanks for the smile, Sarah! As for your question, yes, if you use active dry yeast, you want to have the dough rise once (in a large greased bowl or something like that) and then again in the pans. Also, you might consider upping the amount of yeast. Usually it’s about 2 1/4 teaspoons instant yeast to 3 teaspoons active dry yeast.
Have you ever tried making the bread with applesauce instead of oil?
Kellie – I haven’t tried that. Sorry!
Ugh…failure again. After 20 cups of flour I stopped counting and it was still sticking to my counter top and giving me monster fingers. I can rock all your roll recipes but those darn loaves remain elusive.
Is the dough supposed to be about as sticky as your French roll recipe or more sticky? That might help me out. Also do you think it would work if I turned your French roll recipe into loaves or is that just nonsense? Thanks Mel!
Karen – I’m sorry the bread isn’t working out for you! Are you making it all by hand (even the mixing)? You might want to try this French Bread Recipe (different than the french bread roll recipe).
Oh goodness, don’t be sorry! I’ll get it figured out someday. Thank you for the response.
Hello Mel , it’s me again with another bread question!! 🙂 i ve been Attempting this whole wheat bread for a few months now and have have varied results.. Initially I let the dough Proof once before forming the loaf and then let it rise again.. And the bread came out pretty good.. Today I did as you suggest, only let the dough rise once.. The bread was a lot denser than the twice proofed ones.. Now, I must say that I knead by hand.. In this case do you think I’m not kneading enough, or that a second rise might prove benifiacial in developing the gluten and a softer loaf??
Hi Anne – I definitely think the kneading by hand could be an issue. It’s a bit harder to develop the natural gluten by hand (but definitely not impossible, you just have to knead it for about double the time you would in a mixer). If you are having better luck letting it double rise, I would definitely continue with that method as long as you are hand kneading the bread (and maybe try kneading a few minutes longer to see if that helps, too). Good luck!
Will try that and check back in!! Thanks you:)
Thank you so much, Mel! We devoured the first batch these past few days…onto the second. I will try freezing the whole loaves, getting out one at a time (like you suggested). I do have one more question! I just now realized that the vital wheat gluten I bought says Vital Wheat Gluten with Vitamin C. Would you think I should then omit the additional Vitamin C from the recipe, or throw that in as well? I put it in last time and it was great, just wondering if it was unnecessary.
Sara – Whenever I use that type of wheat gluten, I still add the vitamin c tablet – seems to work just fine. I’m so glad the bread is working out for you!
OK, I have had your recommended bread pans, King Arthur Freezer bags and all the ingredients for this bread for months, and I finally gave it a whirl. I tried the Darcy’s bread recipe (using your modified amounts/directions that you had given in your last comment) and it turned out FABULOUS. I am so excited…have been wanting to switch to homemade sandwich bread for a long time. I do have a question about freezing, though. (I apologize if you have already clarified this somewhere else and I just missed it.) Do you freeze the whole loaf intact, or do you cut it into slices first? If I freeze the loaves and just get one loaf out at a time, will the bread stay fresh enough that way (we probably eat a loaf in 2 to 3 days) or do you prefer getting each slice right from the freezer? I baked the bread yesterday, sliced, then froze in the bags. This morning when I went to get a slice out, they were so stuck together and really difficult to break/cut apart. Thoughts??
Sara – I’m so happy the bread turned out so well. Yay! About freezing, I used to slice the loaves and then put them in the freezer but I haven’t done that in years. Instead I bake them and let them cool, then put them in bread bags (trying to get out as much air as possible) and close with a clip. I just take the loaf out of the freezer when we want bread. If it sits on the counter for a few hours it’s good to go but if I need it right away, I microwave it for about 2 minutes on 50% power. It makes it cuttable without defrosting the entire loaf. We eat a loaf of bread within 2-3 days also. By the third day, it’s definitely on the drier side, but when that happens, I just put the slices of bread in the microwave for 5 seconds or so and they soften right up. Hope that helps!
Hi Mel! I’ve made this recipe 4 or 5 times now, but I am having such a HARD time getting my dough to rise over the bread pans. I half the recipe because I don’t think my tiny mixer could handle all that dough, but I’ve only been successful once at getting the dough to rise up and over the pan. Any suggestions? Is it because I’m halting the recipe? I weigh the dough and it seems like I’m adding enough dough, but not too much. The taste is there and the bread is moist and fluffy once cooked; it’s just a flat loaf of bread. 🙂 Any help would be much appreciated!!!
Hi Laura – when you halve the recipe how many loaves are you making? My guess is that your dough isn’t rising enough because a) it’s overfloured (what’s the texture like – soft and slightly sticky or a bit tough)? or b) you need to use more dough in the pans. I’ve been helping another reader (Marci) troubleshoot her bread also on the other whole wheat bread post I have. When I was experimenting with the recipe I found the magic combo when making just four loaves. Here’s what I wrote to Marci – see if it helps (and be sure to let me know if you have any other questions):
——————————————————–
Hey Marci – I hope you check back here because I had a breakthrough that I think might help you. This morning my friend came over to get a hands-on bread making tutorial. She’s been having some of the very same problems you have described in your comments so I was especially interested to make the bread today. Because my friend has a KitchenAid (a 325 watt motor) and not a Bosch, I altered Darcy’s whole wheat bread recipe. Basically, I halved the recipe except for the water, I brought it down to 3 cups. She made this altered batch in her KitchenAid while I made the same altered batch in my Bosch. The dough was perfectly floured, pulled away from the sides of the bowl – slightly sticky but could easily be rolled into a ball in the palm of my hands without leaving a sticky residue. When we split the dough into loaves (4 total, 2 loaves for each altered batch), we put 32 ounces in each bread pan. That’s more than I usually put in the pan (I usually put about 26 ounces or so). We let the bread rise to 3 inches above the edge of the pan and baked it for 28 minutes in a preheated 350 oven. It was perfection. The most glorious, beautiful bread ever. It’s by far the best bread to come out of my kitchen. In fact, it rose SO high during baking that next time, I think I’ll put it into the oven with slightly less rise on top (the bread was huge). So I think what that lady told you might be true about more bread in the pan. I’m going to be using this altered recipe from now on:
6 cups very warm water
2 tablespoons yeast
1/2 cup vital wheat gluten
1000 mg crushed vitamin C
2/3 cup oil
2/3 cup honey
2 tablespoons salt
10-ish cups flour
Follow the directions for Darcy’s whole wheat bread recipe, except split the dough into 4 loaves instead of 5-6, let the bread rise in the pans about 2 inches or slightly more above the edge of the pan and baking in a preheated 350 degree oven for 25-28 minutes.
Good luck!
Thanks so much for your reply, Mel. I usually split the dough into 2 loaves and have left-over dough which I then roll into dinner rolls.
I broke my collarbone recently so I haven’t been able to try your suggestions. I am feeling good today, so it’s bread-making day! I will let you know how the altered recipe goes for me. Thanks again!!!
Oh no, Laura – I hope you have a speedy recovery from your injury!
I have a probably stupid question, but I am new to bread making and wanted to make sure I am doing things right. I use the 8.5X4.5 inch glass pans (which are 1 pound pans). Does this mean that my loaves/dough should weight 1 pound? And if I was using the 1 1/2 pound loaves I should make sure my loaves/dough is 1 1/2 pounds? My loaves were ending up 2 pounds each, when I was using the 1 pound pans and I think that might be why my bread is ending up dry after a couple days. Tastes great, but wondering if that was a big mistake!
McKenna – to be honest, I don’t know the official answer to that question but for my bread (whcih I make every week), I put about 26 ounces of dough in each 1-pound pan. I’ve tried less and it makes for flatter, smaller loaves. Perhaps it really should be just a pound of dough for each pound loaf pan, but I do more than that. You might try cutting it back from the 2 pounds (in the 1 pound pans)…and you could certainly try doing just a pound of dough but like I said, that never worked for me. Good luck!
Thanks for sharing your amazing recipes. I just found your website and have loved everything I have made so far. Forgive me if this has been asked and answered but what is wheat gluten and where can I purchase it? And do I need it if I buy my flour instead of grinding it?
Cortney – Yes, you need gluten whether you are using freshly ground flour or not. It is widely available in most grocery stores (usually on the top shelf above the flour). It helps develop elasticity and tenderness in the bread since the gluten in the wheat flour can be hard to develop on its own. It is a natural product harvested from the wheat. I hope that helps.
Stupid question . . what would be the amounts for 2 loaves. i.e. how much to decrease yeast, salt, etc. I would really appreciate it because I would LOVE to try your recipe !! Thanks !!
Hi Farzana – I’m not sure, to be honest, since I’ve never cut down the recipe. I think someone in the comment thread did do that, though, so you might try reading through to see. Good luck!
would you be able to use this in a bread machine (obviously you would have to cut down the size of the recipe)
lindsey hall – definitely worth a try although I don’t have a bread machine so I can’t tell you how to adjust the quantities. Good luck if you try it!
I did it! I did it! I did it! It was the pans! My loaf pans are the traditional 9×6 and I was w a i t i n g… forever for it to rise “1-2 inches above the pan” (which it NEVER would have done because the pan is so much bigger) and that’s why it fell in the oven. I ordered your pans and they worked perfectly! The texture is so great and I’m hooked! Also, for the initial rise in the bowl, I reduced the flour to only 1 cup and let it rise a full 15 plus minutes. I really got a nicer rise with less flour. Then I added another cup and a half during the kneading step (so 2 1/2 total for the recipe) and it’s perfect! This is magnificent! I feel like shouting from the mountaintops! You are a genius! Thanks for sharing all the great tips, pictures and this recipe!
I am curious of one thing though. I keep my flour in the freezer and the yeast in the fridge. Would you let it warm up to room temp before you start or just go with it?
Thank you!
Hi Brenda, I’m so happy the bread worked out. Thanks for checking back in to let me know. As for your question, I never bother letting the ingredients come to room temp. I use yeast from the freezer. Although my flour is usually freshly ground so you may want to take the chill off your flour if its coming from the freezer.
🙁 I’m so sad I can’t make this recipe work! I’m using a KitchenAid, but I really don’t think that’s the issue. I cut the recipe down to make one loaf but I’m certain all my measurements are correct.
2-3 cups flour
1 1/4 tsp. instant yeast
5 tsp. vital wheat gluten
200mg. Vitamin C
1 1/3 warm water
7 tsp. oil
7 tsp. honey
1 1/4 tsp. salt
Initially, I use 2 cups of the flour for the rise in the mixer bowl and then add the third cup while kneading. That first rise in the mixer is unimpressive. Not as poofy as yours but I’m only doing one loaf also. The dough is sticky but not as sticky as yours in the bowl and when I get it out onto the counter, it’s still sticking to my hands a bit. I’m using a 50/50 mixture of freshly milled hard red and hard white. When it goes into the pan, it won’t really rise. I’ve tried a warmer kitchen and in the 100 degree oven. It’s a pathetic rise really. But then, crazy as it is, it rises in the baking process and falls! Ugh! The texture is divine and I REALLY want to get this right! I’ve researched and “they” say when your bread falls it means there isn’t enough flour/structure to hold the rise but I’m thinking that I really do have enough in there. I’ve played with the ratio of flour to water a bit and I only lose the light texture with more flour. My yeast is brand new and it’s Fleischmann’s Active Dry Yeast. I’m going to try using less flour for the initial rise in the mixer to see if I can get better results that way.
Any amount of energy you want to send my way is GREATLY appreciated!
Persistant but weary in MN.
Hi Brenda – I’m sorry you are frustrated with the bread! I’m sure we can get things right. I’ve never cut the recipe down for one loaf but I know that even in the full recipe, many commenters have indicated they have to add much more flour than what is called for in the recipe. If your dough is overly sticky you might need a bit more flour. It’s surprising that it doesn’t rise initially but it does in the oven. I can attest that not enough flour has caused my bread to fall in the oven, too, so even though I always caution against overflouring, I think you probably need more like 3 1/2 cups to 4 cups flour for this recipe (and I’d increase the gluten to a full 2 tablespoons).
My bread doesn’t seem to rise as high as your bread does after putting it in the oven, I’m not sure why. Mine also never seem to have that nice round dome top. What could I be doing wrong? I mean the bread tastes good, I feel like it just never rises as high as I want it to and that the end product doesn’t look like the pictures you post. I’ve been making it by hand as well, I don’t know if that makes a difference.
Hi Melissa – are you starting it out in a cold oven or putting it in a preheated oven? I would suggest letting it rise a bit higher before putting it in the oven so that it bakes up a bit taller. It’s pretty easy to overflour dough when making it by hand and that will affect how high the bread rises so take care to still leave it a bit tacky and not overflour.
Ok, so silly question. The bread in the top photo, sliced, is that this bread recipe?! It looks so much lighter/fluffier than my bread last time. I did for sure under flour though, so I am going to try, try again!!
p.s. TOTALLY congrats on the 15 acres. May I suggest a mini-horse? they are AMAZING.
Hi Mame – yep, the bread in the photo is the Darcy’s whole wheat bread recipe.
Thanks to you I have been inspired to make all of our bread. I have been at it for a month or so and love it! I have outgrown my kitchenaide and am upgrading to a Bosch :). Very excited. Tired of only being able to make 2 loaves at a time. My family and myself thank you for the inspiration and making it so simple!
I have baked a lot of homemade bread, but I’ve always felt a little unsure of when to stop adding flour. This post has upped my confidence in bread making SO much. I even taught a few friends how to make bread about a week ago!
Thank you for taking the time to document this process for others. Bread making truly is the gift that keeps in giving, huh? ;^)
Thank you SO much for this tutorial and recipe! I have had so many failed attempts at bread until now. Thank you for taking the time to give us all of the steps. My bread turned out fantastic and that is a miracle for me!
Thank you for another great article. Where else could anybody get
that kind of information in such a perfect method of writing?
I have a presentation subsequent week, and I am at the look for such info.
Rachel- I’m sure it would work fine. Just keep an eye on flour amounts to make sure the dough doesn’t get over floured.
Would this work with all purpose white flour? I ran out of wheat.
Thank you very much for the tutorial! I want to try this very badly, and when I do this will be a very big help! =)
Mel, I just finished making “Darcy’s whole wheat recipe” and it turned out perfectly. I cut the recipe in half and it made 3 loaves but next time I think I will make 2 loaves and use the remainder dough for a pizza crust. The only change I made to the recipe is that I didn’t add a vitamin C pill but instead added one and a half Tablespoons of dough enhancer. The bread rose well, baked at 325 for 31 minutes, browned just right and tastes wonderful. I did use my Nutrimill and ground my own flour and my Bosch Mixer which makes the job so much easier. Your step by step tutorial was the key to helping me to add just the right amount of flour and helping me to determine when the dough was the right consistency. Thank you for your helpful advice. I feel like a success!!!!
Just found one of your recipes on pinterest and I’m totally hooked!!! I subscribed to your email and facebook and now have printed 7 recipes for the week. Can’t wait to make these loaves of bread. Thank you, thank you, thank you!!!!
I know this is an old post but I just wanted to thank you for this recipe! I’ve made several different types of whole wheat bread and this has been my favorite! Finally a light and fluffy whole wheat recipe. Thanks again and congrats on your baby girl.
Last night I made bread following your tutorial. (I only have 2 pans so I divided the recipe by thirds.) It was my third attempt at bread making, but the first time using the tutorial (after I found it last week). Oh my goodness … it worked! It didn’t rise as high as it should have, but I think that I started it too late in the day. I noticed that once it got dark outside, the kitchen seemed to cool down fast. Your recipe was the first recipe that I came across to use vital wheat gluten. That’s the only difference between the recipe I had tried before and yours. I’m sold on it now. I will be making bread again in a couple of days. I’ll start earlier in the day. LOL. We’ve tried several recipes from your site and love them all. In fact, we just had the frozen lasagna last week.
Hi Anissa – sorry this was a frustrating process! I know a lot of professional bakers (definitely not me!) use an instant read thermometer to test the doneness of their bread. I don’t know the exact temperature but a quick google search might be able to shed light on that. My method has always been trial and error – really professional, I know! When we’ve moved and I’ve had to adjust to a new oven (which means slightly different heat control), I just tweak the baking time by a few minutes, more or less, each time I make it until it is just right. Good luck!
Just made this bread today. I should have read through all the comments before starting and I think I would have saved myself some frustration. I thought I was on track with the amount of flour and stickiness test, but once I dumped it all out and had a huge sticky mess I knew I should have done more. I tried to kneed a little more flour by hand, but in the end I did my best to form the globs into logs and get them peeled off my counter and into the pans.
They rose beautifully though, so I baked them as outlined. The first loaf we cut into tonight was underbaked. Not to the point where we can’t eat it (I admit I love me some slightly underdone doughy bread), but probably not ideal for sandwich making. Do you know of any way to test the breads doneness while still in the oven? They were plenty brown on top… wish there was a simple toothpick test like with cakes.
I’m going to make this recipe again with more flour and longer bake time because the flavor of the bread is terrific.
Thanks for a great tute! 🙂
Mel, thank you for this fabulous tutorial. Your website is beautiful and your recipes are delicious – you have good taste! You have turned me on to making all of our whole wheat bread and I have outgrown my kitchen aid mixer. Bosch has a good reputation as a heavy duty bread mixer, but it seems big. Do you use your bosch for other things such as cookies and cake?
Hi Mel,
I just made your bread last night, ground my own white wheat and was hoping the bread would turn out white like your picture but it didn’t. How do you get your bread so light? Do you use 100% whole wheat?
Hi Carmen – yes, I do use all whole wheat. I use hard white wheat in case that might make a difference. What kind of wheat are you using?
Marie – I use it for all my breads rolls and cookies!
I just got a bosch mixer for Christmas. I can’t wait to try and make some bread in it! What else do you use it for?
I just made this bread today (after inheriting an old wheat grinder) and it is wonderful! I used all red wheat (that’s what I had on hand) and we loved the taste. I’m so grateful for your tutorial–I would have WAY overfloured my dough without it. I couldn’t believe how sticky it still was, but I trusted you and my bread was light, fluffy, and amazingly delicious. Thanks for the great recipe and tutorial!
Hi Anna – I use hard white wheat almost exclusively, although I have a ton of hard red wheat in my food storage I’m trying to use up so lately I grind half white wheat and half red wheat. When I lived out West, I would buy the big white buckets of white wheat at the Macey’s grocery store when they would have their caselot sales. Oddly, I’ve found huge 25 pound bags of the white wheat berries at Walmart out here (in Wisconsin) and so I’ll pick it up there, too. I also use the LDS Bishop’s Storehouse when I am close (but currently my closest location is 3 hours away).
Mel-where did you get your stash of wheat? What kind do you use?
Thank you for the pictures. Based on what I see here, I have definitely been adding too much flour to my breads, and this would explain their dense texture and crumbly crumbs. Can’t wait to try again!
OK. For the first time ever, I dipped into my food storage, borrowed my sister-in-law’s Whisper Mill, and ground hard white wheat. The wheat is canned and has been in the garage (in hot AZ) for 5 years. When I ground the wheat, there was a smell to it. Not the same smell as the quality whole wheat flour you’d buy in the store. The only way I can describe how it smells is that it reminds me of powdered milk or baby formula?????? I did notice the flour was warm when I was done grinding it. I read somewhere that if the wheat gets to warm during grinding, it can develop a rancid smell/taste? I just don’t want to go through the effort of making bread with this flour, only to have it taste bad. Any thoughts?
Angie – my flour gets warm, too, when I grind it but it isn’t hot, by any means. I’m not familiar with the tidbit about wheat developing a rancid flavor/taste if it gets too warm while grinding. Most grinders heat the flour up a bit while grinding the wheat berries so I think it is pretty normal to have warm wheat flour after grinding. I know that most food storage products should be stored in a cool room temperature location so it may be that the hot AZ weather hasn’t been good for the wheat for five years. Unfortunately, I don’t really know a test to determine if the wheat is still good. The only real way to know is to probably make bread/rolls with the flour and see how they turn out. Good luck!
I don’t know if the original person will ever read this, but it may help someone else reading through the comments. You can sprout wheat to see if it is still good. Wheat that is “dead” produces a very poor loaf. Google it and you will find a lot of help.
Yes, the loaves did rise well, so will try to knead a little longer next time. I’ll let know how it goes. Thanks so much Mel!!
Hi Mel. Love the bread tutorial! I use a recipe very similar to Darcy’s that does not use vital wheat gluten. I just made it yesterday, and my loaves turned out dense on the bottom and light & airy on the top? Any idea where I went wrong?
Angie – hmmm, I can’t be completely sure, but the dough might have needed to be kneaded more for a lighter loaf (kneading also develops the gluten in the bread). Rising could also be a factor – did it rise well in the pan?
Ahhh! My mom always made homemade bread in her Bosch. Her recipe wasn’t the best, but it was better than store bought stuff, so I would love to make my own bread too, using a recipe like this. I can’t at all afford a Bosch right now….and just thinking about making it completely by hand tires me out. (Have you ever done it? Is it hard?)
…but when the fateful day comes, I will be sure to try this recipe!
Oh I am not a great bread maker. I have tried this twice and don’t know what I am doing wrong but it is just a sticky gob even though the first time I added in 4 extra cups and the 2nd time I added in 7 extra cups…I did use honey and replaced the Vitamin E with 2T vinegar (which I have heard you can add vinegar as a replacement and you just use as much as the yeast you used). It barely pulled away from the bowl but kept sticking to the sides and then made a huge cloud at the top of the mixer but was still super sticky. What is the range you use for Darcy’s bread in the amount of cups of flour you use. I am terrified of over-flouring and yet it is just sticky for me and I live in super-dry Utah so I am perplexed. Any help would be great, I have made 15 of your other recipes and they turned out perfect so I know that I am the only thing standing in the way of making this bread recipe. Thanks, Jenny
Jenny – I’m sorry you are having trouble with this recipe. I hate to admit it but I don’t measure my flour (other than the five cups that sponges in the first step). I go completely based on the look and feel of the dough, which is why I constantly tell others that have questions on yeast doughs that the flour amount in my yeast dough recipes are just guidelines. If your recipe is still as sticky as you described, don’t be afraid of adding more flour in order to achieve a dough that will be easier to handle. It seems that you probably have a ways to go before you are at risk of over flouring. I’ll try to keep track next time when I’m making this bread, since I make it weekly, but I’m guessing I probably end up adding 12-14 cups total. If you have to add even more than that, it’s not a big deal, just try to get the dough to clear the sides of the bowl and still be soft. Feel free to ask me any other questions. With practice, you’ll get this down!
Beautiful tutorial! Gorgeous blog! Such talent! Keep it up! Question: have you ever used White Whole Wheat? Is that what you meant by hard white wheat in the comment above? We just can’t get used to regular whole wheat and I just discovered White Whole Wheat. Apparently it is also a whole grain, not as bitter and as high in nutritional value. Just wondering if you have used it. I will most likely make bread with it first and add vital wheat gluten. I know King Aurthur sells it, but I did find it in my local store.
Thanks, Vieve! Yes, I use white wheat flour (I grind it from hard white wheat berries). We much prefer it over hard red wheat but I have a lot of hard red wheat I need to use so sometimes I’ll use half and half.
I have a question about the vital wheat gluten. Do you, by chance, know the protein content of the wheat you are using? Is this why you add the extra gluten? I use a really high protein-content wheat and am wondering if it’s necessary to add the extra ingredient/step/expense if I’m already using a high quality wheat. For example, wheat from the LDS cannery only has about 7% protein in it, it’s really low quality. But, the wheat I buy has a minimum of 12%, so I’m wondering if that’s why you add the gluten and what difference the gluten would make with the wheat I use vs the wheat you use. Thanks!
Hi Nicole – I use gluten because I like the result of it in my bread, no matter the protein in my wheat. It gives my bread a softer, lighter texture and I use it no matter what the protein amount in the wheat. However, you could achieve the same results without the gluten, I believe, if you knead the bread for even longer. Kneading is what develops the natural gluten (as you probably already know). I use the LDS cannery wheat a lot but I also buy wheat at a local granary here and the protein content is upwards of 14%. (Also, the wheat I got at the LDS cannery recently has 12% protein – the hard white wheat). You’d have to experiment to really see the difference in your bread using gluten vs. not using it. Like I mentioned, I really think if you knead long enough you should get a delicious result without the gluten. Hope that helps a little!
Does it matter what number setting you use on your bosh when you’re mixing (2,3,4)? I tried Darcy’s recipe a few weeks ago and looked at your tutorial and had success! This has been the best tasting and lasting WW bread I’ve done. I think with all the other recipes I’ve tried, I over floured. I really needed to be patient and let the flour mix and knead. Thank you!
Hi Kailee – I’m glad this bread worked out well for you! I usually use the 1 setting on my Bosch until it starts to wear down the motor and seem sluggish – then for the longer, heavier kneading, I move it to a 2.
I love your site and your recipes. I’m 26 and I love baking and cooking for my family, thank you so much for the wonderful advice, photos and recipes!!! =)