Small Batch Soft and Fluffy Whole Wheat Bread {Perfect for KitchenAid Mixers}
Making fluffy, delicious whole wheat bread at home is easier than you think! This small batch whole wheat bread recipe is the ticket. It can be made in a KitchenAid or Bosch mixer or by hand!
If you are new to making whole wheat bread at home or you want a recipe that doesn’t yield 13 loaves, today’s your day.
I’m walking you through how to make a smaller batch of whole wheat bread. It’s so easy. And it yields fluffy, soft, and delicious bread (yep, even with 100% whole wheat flour!).
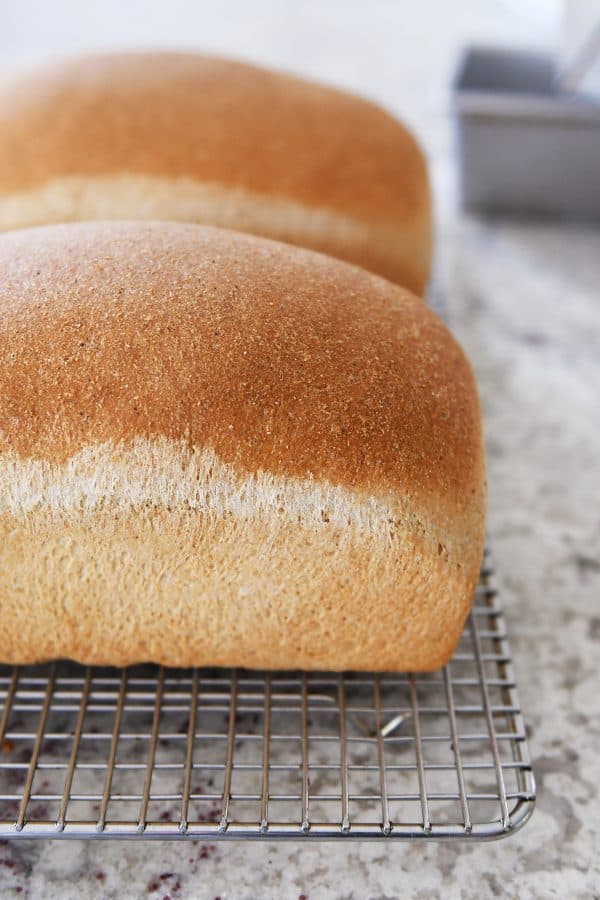
I’ll be honest, my phase of life (with five hungry kids) isn’t conducive to small batch anything. Large batches are where its at with me and mine, especially with bread because the extra loaves freeze beautifully to be pulled out at a moment’s notice.
BUT, I also recognize not everyone’s life mirrors the chaos of my own. Many of you want to bake fewer loaves of bread at a time…either because of household numbers OR because you are mixing the dough by hand or with a KitchenAid mixer.
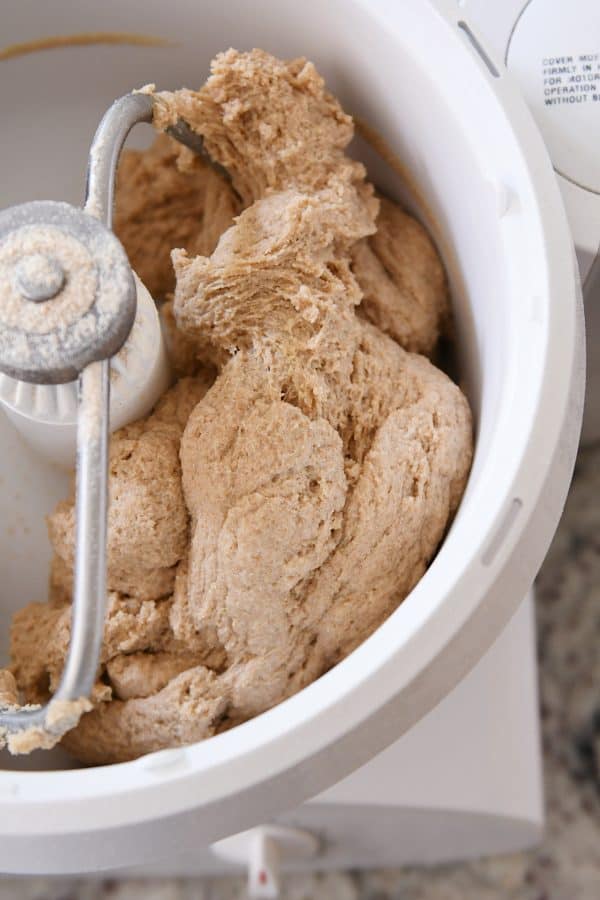
I almost always use my Bosch Universal stand mixer {aff. link} to make bread. It’s huge. It’s powerful. And it’s perfect for large batches of bread.
But many of you over the years have written/commented to me that you want a recipe for a smaller batch of bread that works great in a KitchenAid mixer.
“Small batch” may mean different things to different people, but the recipe I’m sharing today is small batch in my book. It produces two perfect loaves of whole wheat bread.
I’m showing you the step-by-step of this small batch whole wheat bread recipe below.
But first, here’s a look at some past posts that might be helpful before we start:
The Best Whole Wheat Bread Recipe (this post has the original whole wheat bread recipe that I make most and what this small batch recipe is modified from; the full recipe yields 5-6 loaves and is best made in a heavy-duty mixer like a Bosch Universal – it’s too much dough for a standard KitchenAid)
Step-by-Step Tutorial for Whole Wheat Bread (a quick-glance picture tutorial for making the bread recipe linked above)
Bosch vs. KitchenAid (an in-depth look at these two stand mixers with some insight into why I use the Bosch for bread recipes; the comments on that post are helpful, too)
Wheat 101: Where to Buy, Different Types of Wheat, Etc. (quick overview – I almost always use hard white wheat berries and I grind them at home; if you are using storebought wheat flour, look for white wheat flour for a lighter color/textured loaf, otherwise hard red wheat flour can be used…the loaf will be darker in color and possibly a bit more dense)
Wheat Grinding 101: All About Wheat Grinders (I have a KoMo Wolfgang grain mill that I keep on my counter 24/7 and use for grinding wheat; these Harvest mills are a less expensive/great starter option)
For the purposes of this tutorial, I am using my KitchenAid mixer, but this recipe can also be easily made in a Bosch stand mixer or by hand. {I have the Costco version of this KitchenAid mixer; I haven’t tested this recipe with other KitchenAid models.}
To start, add three cups whole wheat flour, 1 1/2 tablespoons yeast, and 1/4 cup vital wheat gluten* to the bowl of the mixer fitted with the dough hook.
*Quick note about the vital wheat gluten – this ingredient helps develop the gluten in bread and will also help yield a nice, fluffy loaf (fyi: gluten can also be subbed for a tablespoon or so of each cup of all-purpose flour in white bread as a sub to using bread flour). Vital wheat gluten is often found in the baking aisle at the grocery store (near the flour). Many brands of vital wheat gluten have Vitamin C added which is just fine to use in this recipe or other bread recipes. I usually buy my gluten from Amazon – the Bob’s Red Mill brand or the Honeyville brand {aff. links}.
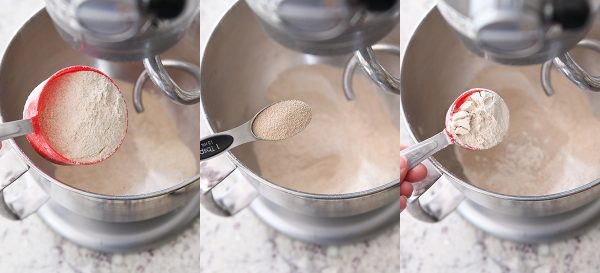
Mix the dry ingredients together and add 2 3/4 cups warm water.
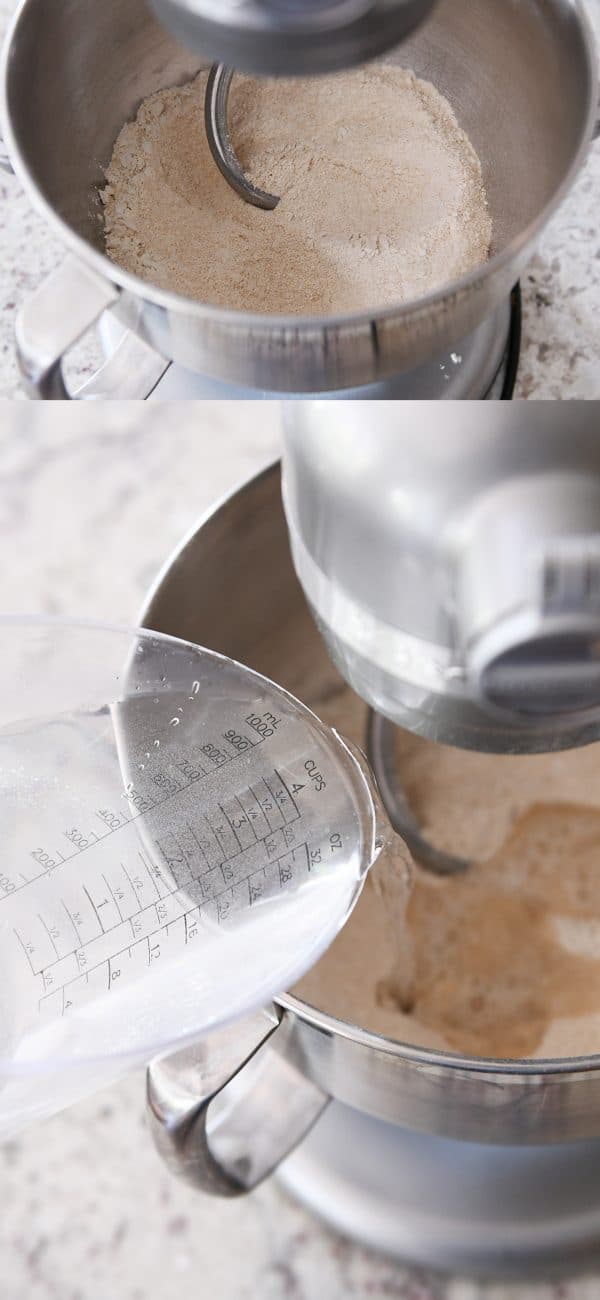
Start mixing on low speed. I find with the KitchenAid that I need to use a rubber spatula to scrape the sides and bottom at this point in the recipe when the mixture is very wet.
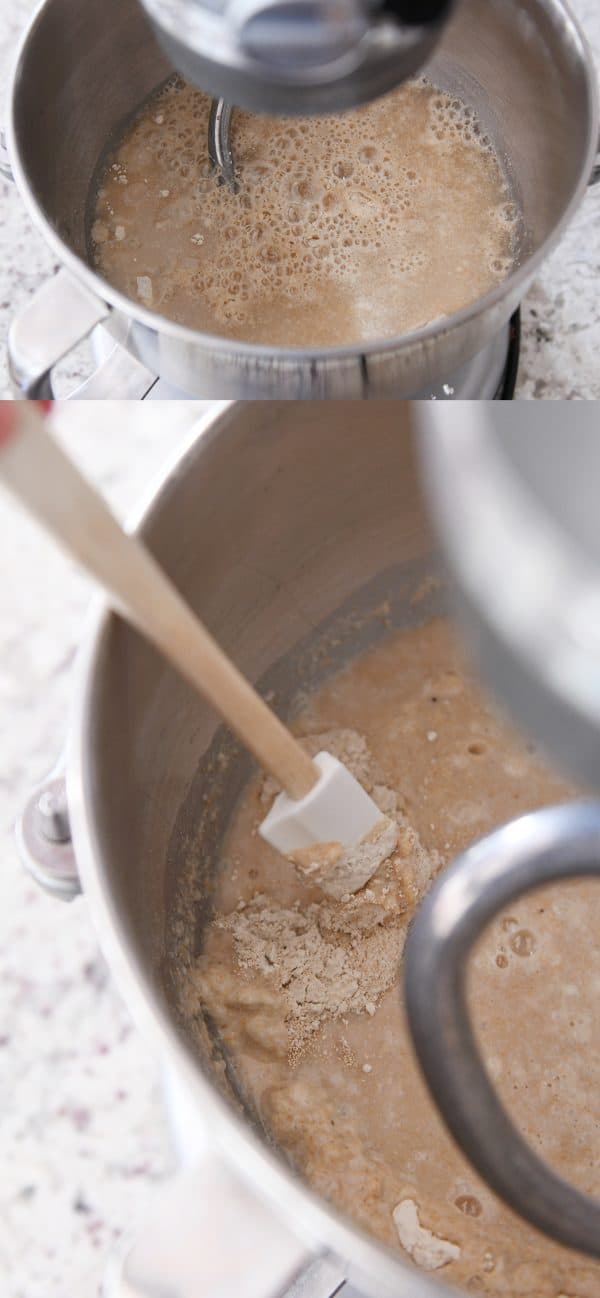
Let this “sponge” mixture rest for 10-12 minutes until it is slightly puffy – some little bubbles may form at the surface.
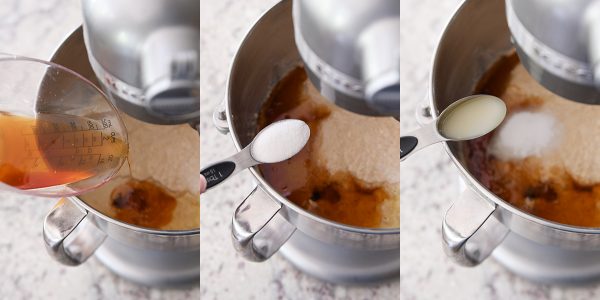
Add 1/3 cup oil, 1/3 cup honey, 1 tablespoon salt and 1 tablespoon lemon juice, bottled or fresh (you can sub in a finely crushed 1000mg tablet of vitamin c instead of the lemon juice; one or the other is needed to help activate the gluten).
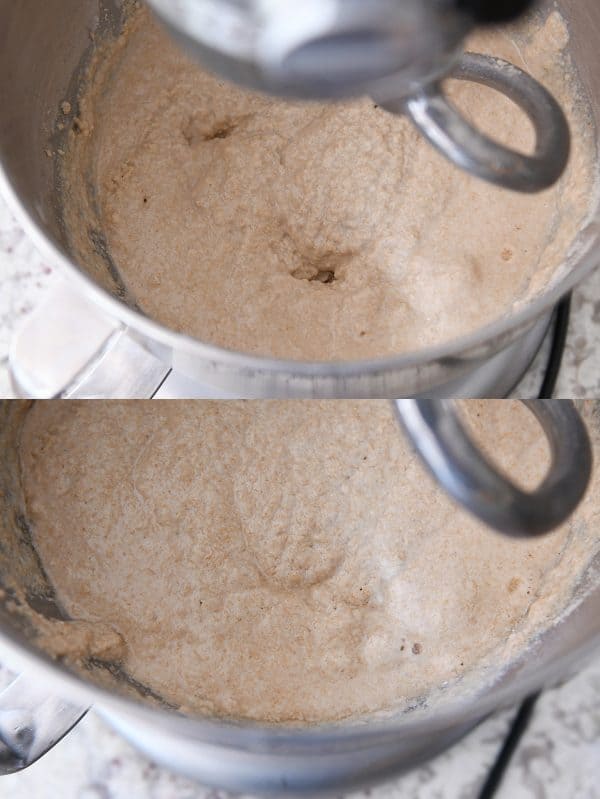
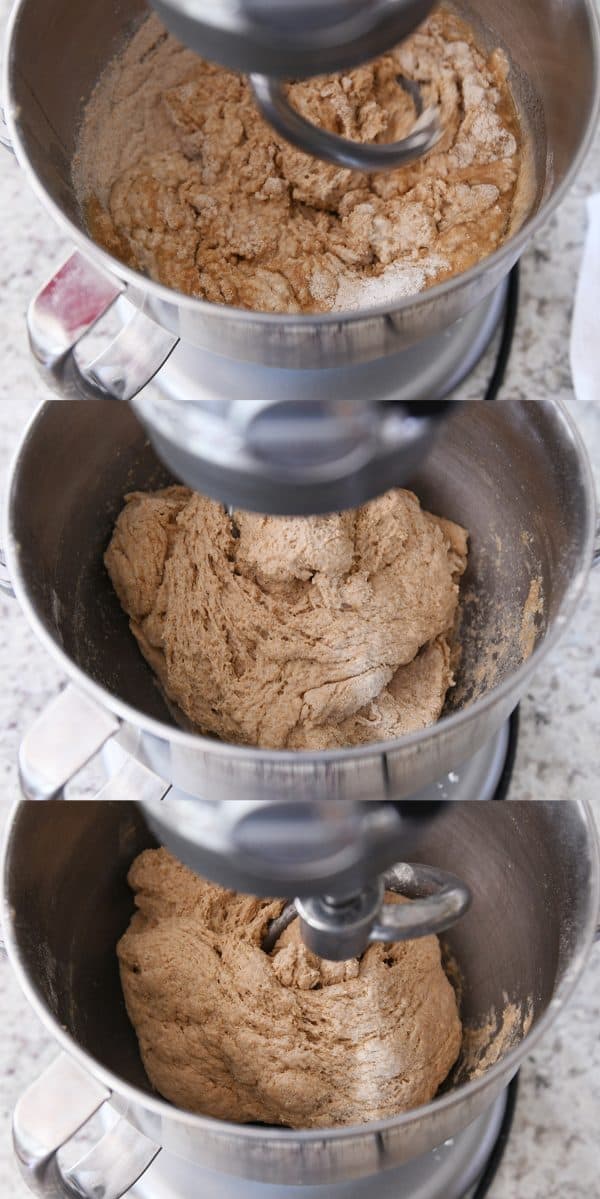
Mix on low speed with the dough hook and then with the mixer continuing to run, begin adding flour gradually to the mixer.
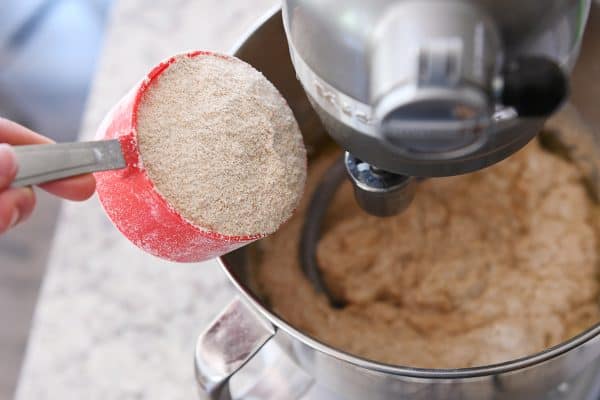
It’s going to be a shaggy mess for a while, but eventually it will start coming together. Continue adding flour until the dough pulls away from the sides of the bowl without leaving a lot of sticky residue. Be careful not to add too much flour at first; as the dough kneads the moisture in the dough will continue absorbing more flour.
If there continues to be a lot of stickiness, it’s ok to keep adding flour (even if you are several minutes into what you thought was the final kneading process).
I add about 2-3 cups. Don’t get hung up on the exact amount of flour needed; it will vary from person to person based on a lot of bread making factors like humidity, elevation, how we each measure flour, etc.
Let the dough knead on speed 1 or 2 for 6-7 minutes until it is soft and smooth.
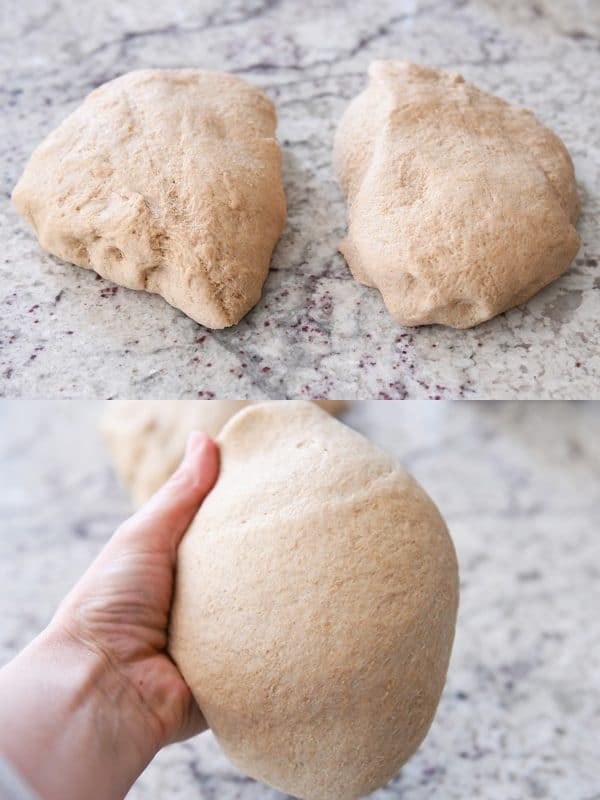
Turn the dough onto a lightly greased counter and split into two even pieces. Form into an even, taught loaf shape and place in lightly greased 8 1/2-X 4 1/2-inch bread pans.Here’s a video I posted several years ago to demonstrate how I shape loaves of bread before baking. Skip to :52 if you don’t want to hear me blabbing at the beginning.
FYI: my favorite bread pans after all these years are still these Chicago Metallic pans and also these USA bread pans{aff. links} (love the USA ones maybe even more than the Chicago ones; although keep an eye on baking as the bread bakes a little faster…but more evenly…in them).
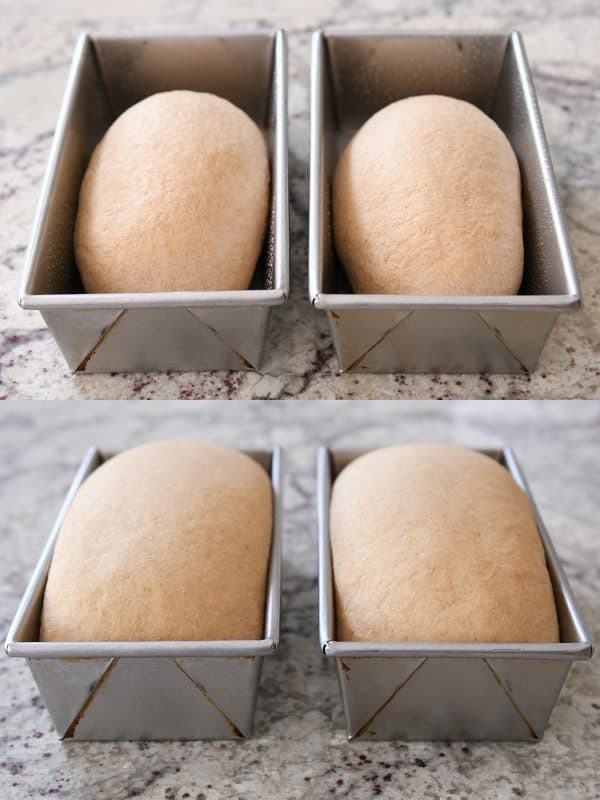
Let the dough rise, covered, in a warm, draft-free spot until it is 1-2 inches above the edge of the bread pan. I use these large, white, tea towels {aff. link} for covering the dough (I use them when making rolls and all other breads, too).
Bake in a 350 degree F preheated oven for 28-32 minutes until golden and baked through (an instant-read thermometer should register about 180-190 degrees if you are into taking the bread’s temp).
Turn the bread out onto a wire rack.
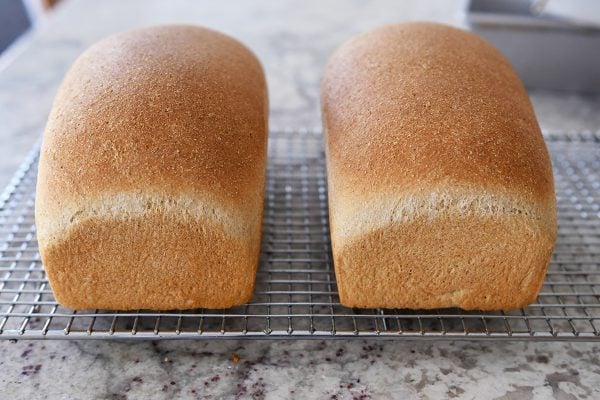
Don’t forget to slather the top with butter at this point while the bread is still warm, if so desired, and let the bread cool.
This bread freezes great! I pop the cooled loaves into one of these bread bags {aff. link} and freeze until we want to eat it all up.
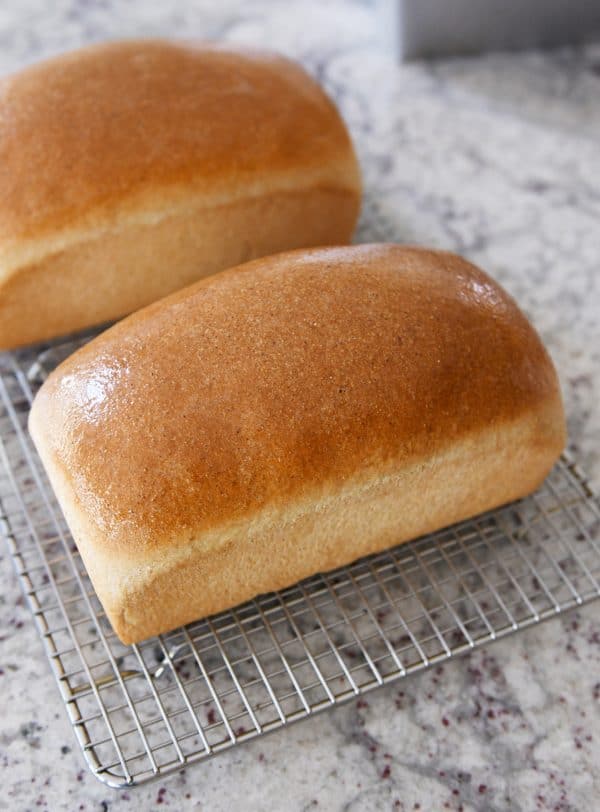
There you go! Making two loaves of whole wheat bread is doable and dare I say, quite easy!I hope this recipe fits the bill for those of you that don’t need 5+ loaves of bread hanging around at a given time and/or you have a smaller capacity mixer (like a KitchenAid) and therefore need the perfect small batch whole wheat bread recipe for it.
Happy bread making!
One Year Ago: Pumpkin Cream Cheese Muffins
Two Years Ago: Double Chocolate Chunk Muffins
Three Years Ago: White Bean Chicken Chili
Four Years Ago: Classic Slow Cooker Chili
Five Years Ago: White Texas Sheet Cake
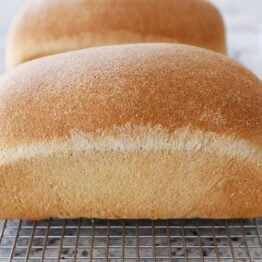
Perfect Whole Wheat Bread {Small Batch; Two Loaves}
Ingredients
- 5-6 cups (710 to 852 g) whole wheat flour, I prefer white whole wheat vs red whole wheat
- 1 ½ tablespoons instant yeast
- ¼ cup vital wheat gluten (see note)
- 2 ¾ cups warm water
- 1 tablespoon lemon juice, bottled or fresh
- ⅓ cup oil
- ⅓ cup (113 g) honey
- 1 tablespoon salt
Instructions
- In the bowl of a stand mixer fitted with the dough hook, mix together 3 cups of the whole wheat flour, yeast, and gluten. Add the warm water and mix well. Cover the bowl and let the mixture rest for 10-12 minutes.
- Add the lemon juice, oil, honey, and salt. Mix on low speed.
- With the mixer running on low speed, continue adding flour 1/2 cup at a time until the dough pulls away from the sides of the bowl (don’t overflour! A little stickiness is ok as long as the dough forms a ball and doesn’t leave a lot of residue on your fingers).
- Let the mixer knead the dough for 5-6 minutes until the dough is soft and smooth.
- Turn the dough onto a lightly greased counter and divide in half. Shape each half into a taut loaf and place in a lightly greased loaf pan (8 1/2- X 4 1/2-inches).
- Cover the loaf pans and let the loaves rise until they are 1-2 inches above the edge of the loaf pan.
- Preheat the oven to 350 degrees F. Make sure an oven rack is in the middle/center position. Bake the loaves for 28-32 minutes until golden and baked through (an instant-read thermometer should register 180-190 degrees in the center of the loaf).
- Turn the bread onto a wire rack. Brush the tops with butter, if desired. Let cool completely.
Notes
Recommended Products
Recipe Source: adapted from my favorite whole wheat bread recipe (thanks to Julie, a MKC reader, and her sister-in-law, Becky, who were the first to tell me they’d trimmed down this recipe)


Love this recipe. I live at a higher altitude and my dough rose right out of my pans and climbed down the sides! But the taste and crumb were exactly what I was hoping for. I cut the recipe in half and made single loaves taking notes and I am pleased to say, I too have perfect 100% wheat bread! I did not have to change the amounts of any ingredients but I changed the way I mixed them together. I used small pullman pans and the loaves rise very high but stay inside the pan. The taste and crumb is amazing for a loaf of 100% whole wheat bread. I used your “how to” pictures and worked until my dough looked exactly like the pictures. Thanks for those pictures!
This bread is delicious! Best I’ve ever had! However, even after baking it for longer than the recommended time, it always comes out super dense and moist in the middle. Any ideas on how to achieve the soft, fluffy, bread?
This can happen if the dough is over floured and hasn’t risen properly. Keep an eye on the amount of flour you are using – maybe back off on that a bit if the dough if you can and let the dough rise properly/enough before baking.
I used this recipe for my university food science class conducting an experiment with kneading dough time/method, and it worked perfect!! Everyone who tested the bread LOVED the bread and asked for the recipe!! Super easy with the one rising time, and dairy free too! Huge hit!! Thanks for posting this!
I LOVE all your recipes, Mel! Thank you for posting such amazing things.
I made this bread today and I am hoping you can tell me what I am doing wrong. The bread rose and then fell a little before I put it in the oven. The consistency once it baked is dense and more like quick bread or cake consistency instead of a yeast bread. Any ideas?
Hi Halee, what type of wheat flour did you use? If it rose and fell before going in the oven, it sounds like it needs less rising time in that step. If bread rises too long, it will fall and then never recover that same spring while baking.
I am using hard white wheat that I grind myself. I tried the recipe again today and have the same problem.
After reading online, I am thinking my gluten is not developing properly. My dough breaks apart instead of being stretchy and elastic. I kneaded slowly and probably a little longer than the recipe asks. I added 3.5 cups flour after the initial three. Any suggestions?
Hi Halee, try adding 5 to 6 minutes of kneading time. If the gluten isn’t developing properly, it’s usually kneading time that will help that (and not overflouring the dough!)
I’ve been making this bread for over a year now. Initially, I was not getting a good rise on it, so I started letting it rise in the mixing bowl before putting it in the bread pans. That’s what made the difference for me. It is a basic, tasty and versatile recipe. Lately, I’ve been adding 1 Tbsp. ground flax seeds and it has turned out fine.
Hi! Just curious if there is a substitute for the oil, or a specific kind of oil you use? I try to avoid oils, I’ve heard they’re not that great for you.
Grapeseed or avocado oil work great.
This recipe is amazing! Thank you so much for sharing.
Just saw the link to your big batch of this wheat bread and I discovered the problem. When I take the 80 ounces that you’ve asked for and divided by two, I get 40 ounces. 40 ounces times 28.3495, which is the amount of times in an ounce comes to 1140 g. Not 800 some thing. And 1140 is just about what I need.
I have been baking bread for over 50 years so I’m not a beginner. I have made this twice and both times, I had to use almost 300 g more wheat flour then the recipe calls for. At the maximum amount of flour in the recipe recommended, my dough still was not pulling away from the sides at all. So I continued adding flour, and weighing it, to see how much more I needed. I did end up with a gorgeous, fluffy loaf of wheat bread. This time, I started with the amount of flour that I knew from experience I needed, and they do came out perfectly, and so did the final bread.
I’ve tried this twice and I was never able to yield any good loafs. Specifically the bread never rises. In most cases, you would proof your yeast first to ensure it is good. Also the temperature for the yeast is not given.
Second, why is it necessary to add honey, salt, oil separately? I generally combine them together in a separate bowl so it’s easy to combine with the mixture.
If you have any suggestions, I’m all ears.
Hi Dawn, there’s generally not a need to proof yeast if using instant yeast – but if your yeast is expired, it will definitely impact the dough rising. I add the honey, salt and oil separately because there is enough mixing/kneading in this recipe that it easily incorporates and eliminates an extra mixing bowl, but you can definitely mix those ingredients together separately. If your bread isn’t rising, I would check the expiration date on the yeast you are using (I always store mine in the freezer to give it a longer shelf life) and also keep an eye on the consistency and texture of the dough. It should be quite soft without being overly sticky. Many times over floured dough won’t rise well.
I made this recipe today and it’s great. It’s our new favorite. Thank you sharing it! I have a Bosch and used that. First time I feel like the bread is perfect,
THANK YOU SO MUCH FOR THIS RECIPE!!!! And the step by step pictures!!! THANK YOU!
Been baking for many years. Bread for a few years. Fresh milled for 1.5 years. The last 6 months or so my fresh milled bread has declined. The more I learn about different methods, and all the slight variations to methods that produce this or that result, the worse my bread became today, I had a terrible bread failure and wanted to scream. Somewhere in my fb bread group, someone commented this recipe so I looked at it and wanted to try because for all my attempts I’d never tried the sponge method. I did it. It is PERFECTION. Felt so easy and basic and I stopped thinking so much about all the possible things to do for possible textures etc and I am in love. For this busy mom expecting #4 in a few weeks, this gives me confidence that I can still do this through the newborn phase! Excited! Thank you!
This recipe makes the best bread. It is very soft. I have made cinnamon rolls, bagels and hamburger buns with it.
I make your whole wheat rolls every week without fail and many other breads and cakes. I was excited to make these loaves and they looked excellent- all of the way until I sliced the 3rd piece and there was a ginormous hole throughout the loaf (like the middle was gone) and the second loaf was worse. And it was very soft- maybe undercooked? I did need extra flour as it was not manageable at all for a while but that happens and I know what to look for… I just didn’t expect this. I did notice there really was no proofing with the sponge being made first. I made brioche this way recently and it was perfect.
When I make the rolls which are the exact ingredients, except the lemon, and taste, I proof for up to 2 hours then cut into pieces and roll the “balls” and then proof for 45 minutes. Can this same method be applied for the loaves? Could it be the lemon? I don’t use this for the rolls.
It seems lots of people had this issue and it seems like a step is missing. I’m just confused as to why this happened with zero signs of it happening. I want to try again but would prefer not doing the sponge.
Thank you;)
Hi Jennifer, there isn’t a step missing – using instant yeast allows the bulk rise to be skipped. However, you can definitely add a rising period before shaping the loaves and then punch down the dough, shape, let rise in the pans and bake. The lemon juice helps strengthen the gluten, but you can try leaving it out and adding a couple minutes to the kneading time. Sometimes holes develop in the bread based on how it is shaped (and often, I’ve found I get a result like that if the dough has been over floured – when shaping, it seems like the stiffer dough doesn’t form as uniform/soft of a loaf shape). If you’ve had good luck with the rolls, try adding the bulk rising step and see if that helps.
Thank you Mel! I will definitely try again. Definitely not over-floured because I really listen you you lol.
I did use a loaf to make whole wheat bread crumbs and 1/2 of the other loaf to the wildlife (they loved it!!). They love the einkorn whole wheat. Haha.
I appreciate your responses and guidance.
Just made this recipe this evening and I am now having warm buttered bread for supper. I love it, I will be making this repeatedly. Thank you for the recipe. Finally found a recipe that doesn’t take most of the day to make and it is still fantastic.
Shirley
I love the flavor of this recipe and I will only each fresh milled wheat. But my loaves always fall during baking. No matter what I do! Help!
Is it possible the bread is rising too long before going in the oven? That can cause bread to fall while baking.
I am following to the letter. The first time the doughy was pretty wet. It rose perfectly but the center fell during baking. The second time, I added more flour, still stickier than normal, but better. Rose beautifully again but 15 into baking, the sunk in the center again. What am I doing wrong?
There are a couple things that might be happening – if the dough is really sticky, it’s possible you need more flour. Also, make sure the dough in the pan isn’t rising too much before going in the oven or it can deflate while baking.
Can dry active yeast be used instead of instant?
Yes!
I usually do a 100% whole wheat sourdough that has a 95% hydration level. It involves folding the dough several times every 30 minutes over a couple hours so that the bran doesn’t cut through the gluten strands. It is a really good bread but it’s not for beginners. I have been looking for a good simple whole wheat bread recipe that doesn’t use white flour for family members who are not master bakers. I also didn’t want to spend time experimenting and tweaking until I got one. I was pleasantly surprised! The bread has a soft interior like you’d expect if you had mixed white with the wheat. I have to cook until the internal temperature is it least 207°F or else it’s kind of wet inside. Other than using about 150 g extra of whole wheat flour, I followed exactly as written, and it came out beautifully. Not sure why that surprises me since I’ve tried many recipes from your website, and all of them have been well received.
I made this bread exactly as recommended. My bread appeared to be well browned on top at 28 minutes, however, I added another 2 minutes to be sure. They looked wonderful, rose as expected and were a beautiful brown color. As they cooled, the top appeared to bubble up, even though I tried to shape dough as directed. Apparently I didn’t get all the air out of the dough when shaping loaves. Also, the bottom of the loaves didn’t appear to be quite done and the bottoms were tough to cut through. I used glass corningware bread pans as I don’t have metal pans. The bread tastes great but the top layer was airy and as I cut down, it was dense and then gummy. Is it because of the glass pans?
It likely is due to the glass pans. Glass doesn’t bake as effectively/consistently as metal/aluminum pans. It tends to bake the outside of baked goods quickly leaving the inner crumb of breads and cakes under done. I usually suggest lowering the baking temp by 25 degrees if using glass pans and then adding on baking time, but I haven’t baked this bread in glass pans to know exactly how to get foolproof bread baked in glass pans.
How would you change this recipe to make whole wheat cinnamon rolls? Swap the water for milk and add an egg or two?
I haven’t used this dough for cinnamon rolls. I think your best bet would be to use this recipe for small batch cinnamon rolls and sub in whole wheat flour for the white flour:
https://www.melskitchencafe.com/perfect-small-batch-cinnamon-rolls/
I have been trying for years to make my own bread from freshly milled wheat flour with no luck. Everything fell, or didn’t rise at all. I eventually gave up and just about sold my wheat mill until I found this recipe last night. I vowed that I would try just one last recipe, and if it didn’t work, I would stick to all purpose flour recipes.
I am so happy to say that it turned out amazing, and everyone in my family loves it! My kids didn’t even wait until it fully cooled to dig into it. Thank you thank you!
This is my go-to bread recipe. I made it enough times during the worst of the pandemic to easily get through a 50 lb. bag of wheat flour (the only thing I could find at the time!). I would also like to point out that my 11 year old son just asked for this bread when I asked what he would like me to bake for his birthday. I figured I couldn’t not leave a review after that!
I’ve made this several times now and we absolutely love it. This week I forgot the 10-12 min resting period for it to rise a bit in the bowl. Realized my mistake when I put them in their pans to rise. They rose as normal so I baked them and you couldn’t tell a difference! Taste and texture was the same! This bread is foolproof!
This is my favorite bread recipe. Always my go to
Finally, the perfect whole wheat loaf, not heavy but still hearty with a nice chew and flavor. I have baked bread for 60 years (yes I am still doing it) and a whole wheat loaf that we really like has eluded me. But this is it!!! Made it twice now so the first perfect loaves were no fluke. The lemon juice threw me but I followed the instructions. Just wish I had your mixed–using a decades old Kitchen Aid. Diane
My KitchenAid is 35 years old and still going strong. But I have the KitchenAid pro which has a larger bowl and larger dough hook then the regular bowls. Also, it was a game changer when I saw one of the new KitchenAid’s in Costco and saw the spiral dough hook. The C-shaped hook that came with my mixer has been a dud. I went on Amazon and found a spiral for my model mixer and oh my gosh. Best $25 I ever spent.
This is a great recipe. My family loves it and I’ve been making it, just as written, nearly every week for years. Typically, I freeze one of the loaves and pull it out of the freezer for later in the week. Thank you!
I see that many of these older comments talk about the dough being sticky. Whole wheat bread needs to be a little sticky when you turn it out of the pan. Not sloppy, but definitely sticky. As you work and shape it that fixes itself. Whole wheat flour continues to absorb the liquid, even after it is baked. I mostly make ww rolls from this recipe and they turn out very well, but need to be frozen immediately if they aren’t all used the first time. If I do that I can take the amount I need out of the freezer and pop them into a microwave (haven’t tried the air fryer) for a very short time and they come out like just baked. I haven’t tried another recipe in years because this one works so well.
THANK YOU!!! I have made this bread many times in the past few months and it has turned out wonderful every time. I grind my own flour and have used many different ingredients (red wheat, white wheat, oat groats, almond flour, hemp hearts, quinoa, mixed grain cereals, potato flakes, etc.) I always start with 3 cups of just wheat flour and then after the first resting period I usually use about 2 more cups of mixed wheat and 1 cup of whatever else I’ve chosen to mix up for approximately 3 more cups of added dry ingredients. I then shape the bread and place it in loaf pans lined with parchment paper and set them on a warm heating pad while they rise. I can’t see myself ever needing another recipe.
This is my second try because the first try I didn’t get much of a rise and the bread was dense. I then tried a couple of things. The first three cups of wheat flour was sifted. After the wet ingredients I then added flour. I proceeded with the recipe as instructed. The bread baked up nice and fluffy.
Just made this after making a loaf in my bread maker. Between the two this was hands down the winner! After eating a slice my son told me, ‘this is why we have moms.’ Thank you for this recipe!
I have not made this recipe yet but I am looking forward to a new fluffier whole wheat bread that is not so dense and not flat. Does the salt help the bread get fluffier or is it just for flavoring. My husband is on a low/no salt diet.
Yes, the salt is necessary for flavor but also for the fluffy texture (I’ve accidentally left salt out of a bread recipe before and the bread was dense and heavy).
Just hopped on here with this exact question. So grateful for you Mel!! This my families favorite bread. I am blaming Lack of sleep for me forgetting the salt!
Best bread I ever made!
Hi, I attempted making this bread twice and it has failed ! It won’t rise! Could it be the flour I’m using? I used king arthur whole wheat white and added bobs red mill gluten along with the instant yeast! I carefully followed all your steps in making your beautifully pictured bread!
If anyone can give me tips on exactly which brand of flour to use will be helpful! Also your video is not working, can you possibly post a new video of you making the breadThanks
Hi Sila, what is the texture of your bread dough? Is there a chance your dough is over floured?
Hi, I attempted making this bread twice and it has failed ! It won’t rise! Could it be the flour I’m using? I used king arthur whole wheat white and added bobs red mill gluten along with the instant yeast! I carefully followed all your steps in making your beautifully pictured bread!
If anyone can give me tips on exactly which brand of flour to use will be helpful! Also your video is not working Thanks
I love this recipe. I’ve been using rye and whole wheat flour and caraway seeds and the results are perfect rye loaf.
Love this recipe. I have found for me it works best to actually make 3 smaller loaves then two large loafs. This is my go-to wheat bread recipe – use it almost every week!
Thanks for the tutorial and recipe. I really have had great luck with the shaping method. So much easier. I do have a question that I can’t seem to find an answer. I grind my own wheat not sure if it makes a difference in what is happening. But all my loaves seem to stretch so much the crown almost separates. I live at 4000 fr and decrease the yeast by 20 percent. I don’t over proof but happens every time. Sourdough is my thing and working with bread using yeast seems more challenging. I wondered if I need to use higher hydration or if scoring would help. They are beautiful loaves and it is more cosmetic. But still. Any suggestions. Wish I could post a pic. Thanks.
Hi Robin, if I’m understanding correctly, you could try scoring and see if that helps. Also, making sure the loaf isn’t rolled or shaped too tightly. That can cause it to separate while baking.
Can’t wait to try this. I read through many of the comments and didn’t see this question; I am wondering if I can sub white vinegar for the lemon juice or if it is just better to leave it out? Thank you!!
Yes, you can try white vinegar.
Thank you so much. How do you like to grease your pans? Rub a little oil around? Butter? I noticed USA Pans said not to use cooking spray so was just curious. Thank you!
Hi Susan, I actually do use a light spray of cooking spray.
I never spray mine and release perfect
Would this recipe do well if added some seeds to it pumpkin, linseed etc?
I haven’t tried adding seeds, but it’s worth experimenting. I think it would work just fine.
I made this today, about to bake it. Wondering why the bread rises so quickly?? It was only half hour to get to the desired size. I followed your recipe exactly except I proofed it in my oven.
Perfect – thanks for the tip to check the temperature- I’ve always struggled with having bread turn out doughy in the middle – I checked the internal temp and it turned out perfectly. Thanks!