Outrageous Eskimo Bars
Imagine brownie, ice cream, and chocolate bliss dipped into luscious warm caramel sauce and you have these outrageous eskimo bars. Delicious!
If words could adequately describe the deliciousness you see before you, it would be summed up in the words I’ve translated from my eloquent husband while ice cream and caramel dribbled down his chin: “Uh, seriously, Mel, these are unreal.” And then he proceeded to steal my firstborn’s caramel sauce and eat five more.
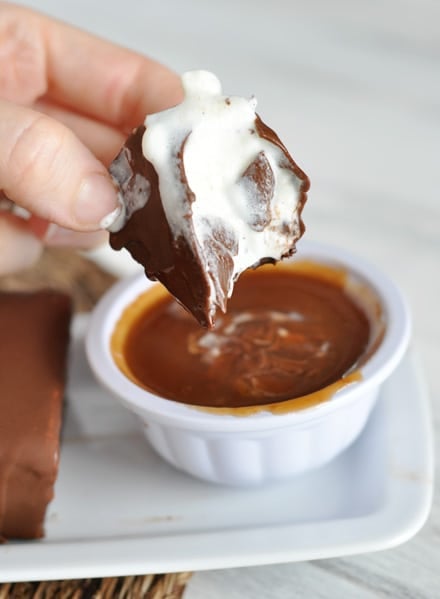
After the excitement had died down (and Brian gave Jackson his caramel back), he confessed that Eskimo bars would easily make it into his top five desserts of all time, which might possibly be the most epic statement to ever leave his dessert-loving lips.
My kids? Well, they were wildly joyful at being able to dip the crackly-coated, ice cream-topped brownie into their very own special pot of warm caramel sauce. Their little lives were complete.
Have you heard of Eskimo Bars? Apparently a while ago on the Food Network show “Best Thing I Ever Ate” (do they even air that anymore??), Giada De Laurentiis expounded prolifically on her love for these crazy delicious bars she had in Jackson Hole, Wyoming.
I never saw the show, but my friend, Lisa, sent me her version of the recipe years ago (years, people!) and I just recently tried them. All I can say is, I am kicking myself for not trying them sooner. They really are unreal, just like Brian said.
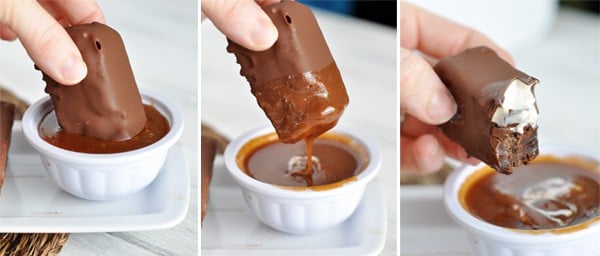
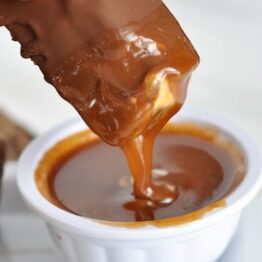
Basically, you take a decadent baked brownie layer. Top it with a thick, creamy layer of good quality vanilla ice cream. Cut into rectangles and dip in a homemade magic shell mixture that hardens immediately and leaves a crisp, thin chocolate coating on the bars. Now here’s the kicker: you take the culmination of brownie, ice cream, chocolate bliss between your little fingers and dip it into luscious warm caramel sauce.
It is messy. Very messy.
But the absolute explosion of rich, decadent brownie sundae happening in your mouth will alleviate any worries about cleanup. Can you even stand it?
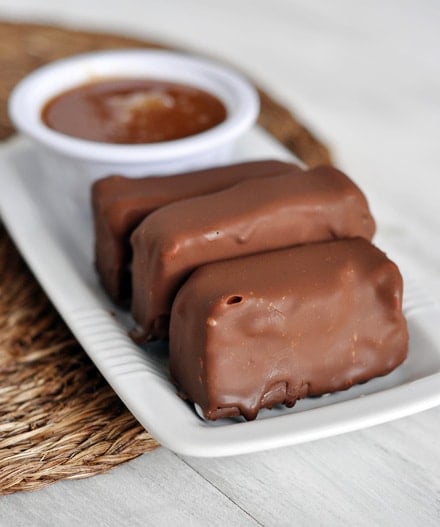
Now, listen. I know some of you (like me) hate the thought of dipping desserts. I get it. But I promise that the anxiety you are feeling is unwarranted!
The chocolate shell mixture is so easy to work with that the dipping part is perhaps the easiest part of the recipe (but not the cleanest, not the cleanest at all).
Don’t be like me and let years go by before you make these. Think of the rock star status you will earn when you serve these to your family and/or friends. And it will be well deserved.
Keep in mind that you can make these start-to-finish several days or even weeks in advance and the process can be spread over several days.
While you contemplate those awesome facts, I will leave you alone as I go delve into the depths of my terribly narrow freezer and dig out the last three of these I hid away from humanity.
Dark corner away from children, here I come. Oh my gosh. They are so good.
FAQ for Eskimo Bars
You could try butter or another neutral flavored oil (like avocado or canola).
If they are stored in an airtight container, they should stay fresh for 1-2 months.
Outrageous Eskimo Bars
Ingredients
Brownie Layer:
- 10 tablespoons (140 g) butter
- 1 ¼ cups (265 g) sugar
- ¾ cup plus 2 tablespoons unsweetened cocoa powder, natural or Dutch-process
- ½ teaspoon salt
- ½ teaspoon pure vanilla extract
- 2 large eggs
- ½ cup (71 g) all-purpose flour
Ice Cream Layer:
- 1 quart good-quality vanilla ice cream, storebought or homemade (see note)
Magic Shell Layer:
- ¾ cup coconut oil
- 2 cups (340 g) semisweet chocolate chips
Caramel Sauce:
- 1-2 cups good-quality storebought or homemade caramel sauce (see note)
Instructions
- For the brownies, position a rack in the lower third of the oven and preheat the oven to 325°F. Line the bottom and sides of an 8×8-inch square baking pan with aluminum foil, leaving an overhang on two opposite sides. Lightly grease with cooking spray and set aside.
- Combine the butter, sugar, cocoa, and salt in a medium microwave-safe bowl. Microwave for one minute intervals, stirring in between, until the butter is melted and the mixture is smooth. Set the mixture aside until it cools slightly (is warm to the touch not hot). It will look gritty but it will become smooth once the other ingredients are added. Stir in the vanilla with a wooden spoon or rubber spatula. Add the eggs one at a time, stirring vigorously after each one. When the batter looks thick, shiny, and well blended, add the flour and stir until you cannot see it any longer, then beat vigorously for 40 strokes with the wooden spoon or a rubber spatula. Spread evenly in the lined pan.
- Bake until a toothpick inserted into the center emerges slightly moist with batter, 20 to 25 minutes. Let cool completely on a rack and then chill in the refrigerator or freezer until thoroughly cold – this will help the brownies hold up well to the ice cream layer that’s coming.
- For the ice cream layer, soften the ice cream to spreading consistency (leaving at room temperature for 15-20 minutes should do the trick), then spread an even layer across the chilled brownies. The ice cream layer should be about an inch thick. Put the pan in the freezer until very firm (1-2 hours).
- For the magic shell, in a microwave-safe bowl, combine the coconut oil and chocolate chips. It helps if the bowl is more tall than wide so that when you dip the bars, the chocolate mixture is deep and not super shallow. Microwave for one minute intervals at 50% power until the chocolate is melted. Stir the mixture until it is smooth. It will be fairly runny.
- Remove the pan of brownies from the freezer. Gently lift the foil handles and remove the ice cream layered brownies from the pan. Cut the browines in half. Then, working with one half at a time (you might want to return the other half to the freezer if your kitchen is overly warm), cut rectangle into long, thin bars, about 1-inch by 4-inches. You should end up with 8 or so bars per half. Repeat with the remaining half. It is best to put all the cut bars onto a tray or plate and keep them in the refrigerator while dipping so they stay as cold as possible.
- Place a baking rack over a sheet of parchment paper or waxed paper or even aluminum foil (to help with cleanup). Working one-by-one, gently hold the ice cream bar at the base of the brownie and dip it quickly into the chocolate shell mixture (tilt the bowl to help deepen the chocolate for easier dipping) until completely coated and place on the baking rack. Your hands will get messy but I promise it’s worth it! Repeat the dipping process with each bar. After I dipped about 5-7 bars and the chocolate shell had hardened (it sets up very quickly, especially if your ice cream and brownie is very cold), I gently removed them from the cooling rack and put them in the freezer so the ice cream didn’t melt and kept dipping the other bars that were waiting in the freezer.
- Make note that the chocolate shell mixture will want to stick to the baking rack so pry the eskimo bars carefully off the baking rack so the chocolate shell doesn’t crack as you separate them from where the chocolate has hardened to the rack.
- When ready to serve, remove the eskimo bars from the freezer and let them sit at room temperature for 5-7 minutes. Warm the caramel sauce until it is runny and slightly warm but not overly hot (you don’t want any burned fingers).
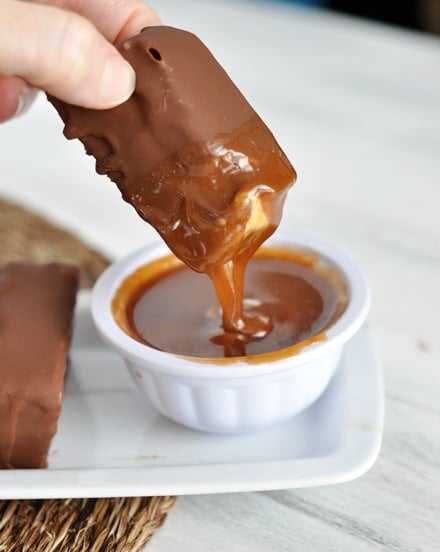
- Dip the eskimo bars in the caramel and enjoy!

My son first picked this recipe to make 5 years ago and we’ve made it every summer since then. It’s amazing and well worth the messy dipping for the end product. Such a delicious and decadent summer treat!
This gets 10 stars!!! Holy cow Mel, these are insanely delicious! I’ve had to declare them a once a summer dessert or I’d be in trouble. Seriously so yummy and also really fun to eat as a family!
Is there a substitute for the coconut oil for the magic shell? Would butter work? We have coconut allergies in the family!
You could try butter or shortening.
We made these tonight. I cut them small, and had to make extra magic shell, maybe we dipped too thick. Laid them out on waxed paper on baking sheets and it was so easy to peel off. But the dipping was such a mess. Thinking next time we may just pour the shell over the top of the bars set on a rack. But yummy for sure!
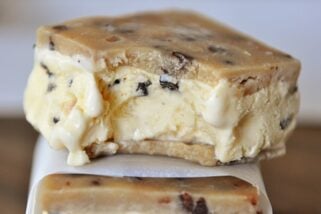
I’ve made these several times for family dinners, and everyone RAVES about them! I love to mix up the ice cream flavors with cookie dough or mint, so delicious!!
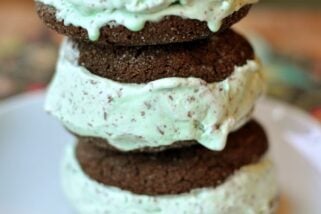
I made these (for the 4th or 5th time) last week for Valentine’s Day– only this time used mint-n-chip ice cream. Delish!! My kids thank you from the bottom of their little happy bellies!! 🙂 Thank you for all your wonderful recipes!!
I should have mentioned in my previous comment that I did have a lot of chocolate let over but I can see why you need the amount called for – you do need to have a “depth” of chocolate in your deep bowl so that you can dip the bar in it. Mel, I wanted to ask you if you can keep the leftover chocolate! I also wanted to let you know that I absolutely love your recipes. I have used many recipes from different websites, and my dear, you have the most tried and true recipes. Thank you so much Mel!
Thanks for your comment! Yes, you can definitely keep the “magic shell” leftover chocolate. I store it in the refrigerator and slightly warm it when I want to use it. It creates a fabulous hard shell over a bowl of ice cream.
I had absolutely no problem with my bars sticking. With my “frozen” brownie and ice cream cake, I cut them into the portions as stated in the recipe. The chocolate shell I let cool completely. I then put a skewer, about a 1/2 inch into the brownie portion, dipped same in the chocolate and turned the skewer a few times to a semi-hard state. I then put the bars on a rack, with a layer of lightly sprayed parchment paper. Worked fantastic!
Ok- I messed up with my US measurements and thought a pint of vanilla ice cream was a quart (silly Canadians. ..arg) but could not go back to the store at 10 at night before Christmas Eve as would lose all sanity- so swapped the vanilla out for some chocolate peanut butter ice cream I had on hand.. and then swapped the caramel for chocolate sauce to try to match ice cream flavor.. .and HOME RUN!! So so so so fab! Will be dessert of champions if I can drive them across town tonight to our dinner before they melt! I put parchment on top of the cooling rack for drying instead of under and no problems at all with sticking- also lined the plates with parchment holding the completed and waiting-to-be-dipped ones and no sticking- AMAZING!!! Double dipped any that didn’t look perfect after the first re-freeze. We also cut them smaller for kid-sized consumers who will be already flying high from Santa chocolate by then. THANK YOU MEL!!!!!!!!!!!! Now v. excited to try them properly with vanilla and caramel now that I have mastered the ‘pint’ vs. ‘quart’ debacle. Merry Christmas!!
I just finish doing this recipe and I can assure it´s one of the best desserts I´ve ever tried in my life! Thank you so much for the recipe! It is amazing !!!
Dijana – it needs to be melted.
Mel,
When measuring the coconut oil, should it be melted or in it’s “hard” state? The coconut oil I have is solid but melts when heated up.
Thanks!
Hello- I am in the process of making these…brownie and ice cream are in the freezer awaiting the hard shell….I am wondering how long do you believe these can keep in the freezer after applying the shell? I am thinking for some time but didn’t know if you had a more specific time frame…thanks for the recipe!
Hi Caitlyn – I kept a few leftovers of these for at least 6 weeks and they were still great (as long as they are kept well-sealed so they don’t get freezer burn).
I do not even understand how I finished up right here, but I thought this put up used to be great.
I don’t recognize who you might be but certainly you are going to a well-known blogger in case you aren’t already.
Cheers!
I wish I had your recipe (or your friend’s recipe) when I first attempted this back in 2010. My version is a little less fancy – brownie mix and store-bought Magic Shell – but yes, they turned out delicious!!
http://aliceinthekitchen.com/2010/06/12/eskimo-bars-best-thing-i-ever-ate/
Okay, just finished these and Mel isn’t lying. These are DAMN good. I DID use the baking rack and found that if I put the bars on diagonally while they were “hardening”, hardly any magic shell peeled off.
Also, DO follow Mel’s tip of making the brownies under-done. The toothpick should come out with wet crumbs. I lost track of time a bit after I stuck them back in the oven and they got done. Done as in I’d serve them and they’d be a nice, moist, delicious brownie. But for this recipe, keep in mind that you’re eating them frozen, so the doughier they can be coming out of the oven, the better Eskimo bar it’ll make!!!
My brownies ended up a little hard because of baking them too long, but even despite that, I will SURELY make these again.
Heaven.
We love these, Mel. I make them every year for my family reunion. I want them every day, because brownies and ice cream and chocolate are everything.
Kate – yes, parchment paper worked great for me.
I actually wanted my caramel in the brownies, so I made the deep, dark, chocolate brownies, then added a layer of salted cashews, then a layer of buttermilk caramel sauce on top, froze it, then a thick layer of ice cream on top of that. I had a hard time cutting through the frozen brownie layer with my cake lifter spatula. The nuts and caramel in the middle made the brownie and ice cream layers separate too much, so I used short wooden skewers (for kabobs) in each one to hold them together. After dipping I just left the skewers in to make them easier to grab and inhale. Yum.
If you use kabob skewers, this also makes them easier to dip. My strategy is to dip them, then suspend them in the air for a few seconds to let the chocolate shell harden before laying them down on your parchment or cooling rack or silicone mat, etc. This makes the chocolate less likely to come apart when you pick them up again.
Next time I will cook nuts and caramel into the brownies themselves, and increase the coconut oil to 1 cup, making a 2 to 1 ratio chocolate to coconut oil. I doubled the recipe for the brownie portion and still had about twice the chocolate coating I needed, even doing a single batch of magic shell. As other commenters have said, the key is having enough depth in the magic shell mix to actually dip your bars.
Later, after running out, the double caramel magnum bars were on coupon at Costco, and every time I ate one, I kept wishing I just had an awesome eskimo bar instead. This is a fabulous recipe, and well worth the extra effort, especially if you double or triple how many you make and stash them in the freezer. We had extras in the freezer for 2 weeks and they never got freezer burn or anything, even though I didn’t get the magic shell to cover the whole bars.
Sorry for the epistle.
I am actually in the process of making these right now and came across the comments regarding the magic shell sticking to the baking rack and now I’m nervous! I’m making these for my husband and in-laws for Father’s Day.
Would setting them on Parchment paper work instead?
I am drooling.
I made these yesterday, following the recipe exactly, and they were divine! The chocolate to ice cream to caramel to brownie ratio is just right, and we loved the dense chocolate fudgy brownies included in this recipe. We considered skipping the layering and dipping steps next time and just putting a scoop of ice cream on top of a brownie in a bowl with the magic shell and caramel on top. The taste would be the same but less messy and easier to assemble, but I was sharing with 7 kids and 3 adults this time, so anything would probably be less messy! Still, I’m dreaming about them again this morning! What a treat!
Thank you for another amazing recipe! My husband took one bite and said “wow!” That pretty much sums it up. Our company was so impressed and asked for the recipe. This one is a keeper!