Buttery, Flaky Make-Ahead Overnight Crescent Dinner Rolls {No Kneading/No Stand Mixer}
These make-ahead overnight dinner rolls are just might be the crescent roll to end all crescent rolls. Butter, flaky, and SO delicious, they are easy as can be – no kneading or stand mixer required!
I know I sound a little redundant lately.
But seriously, you guys, I am so ridiculously excited about this recipe today!

I guess it’s safe to give the disclaimer, better late than never, that I’m probably going to be annoyingly excited about every recipe I post on this blog.
Because as you know by now, I don’t post filler recipes, and I most definitely don’t post just for the sake of cranking out content to please the search engine and imaginary food blogger gods.
Ain’t nobody got time for that.
But what I DO have time for is finally sharing with you this incredible, and yes, life-changing, roll recipe.
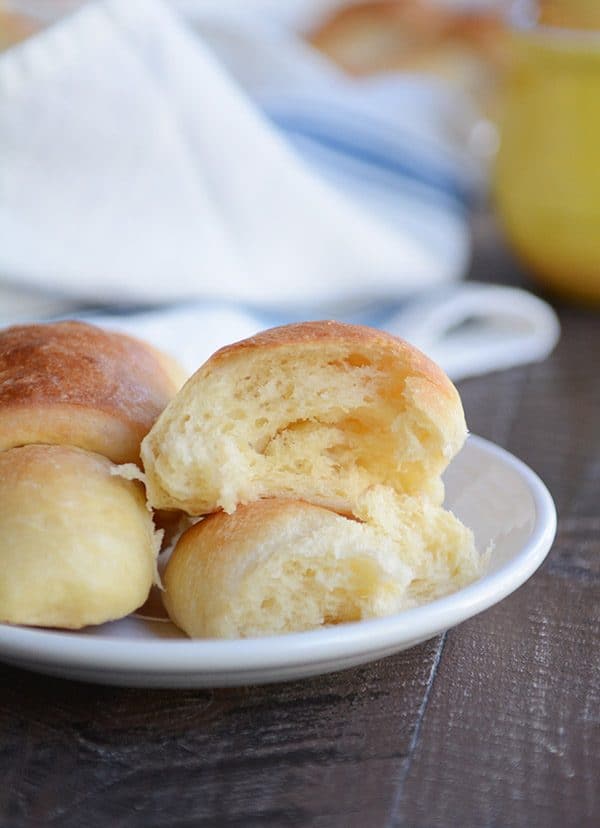
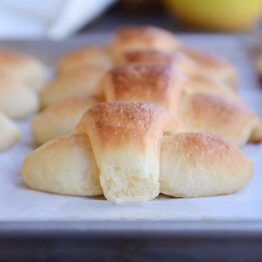
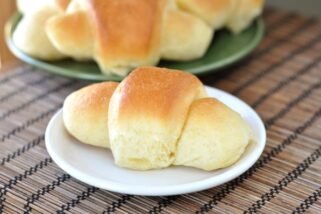
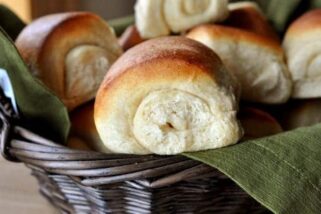
It is make-aheadable. It is easy (no stand mixer or kneading required). And the cute, little crescent rolls are buttery, flaky, tender and PERFECT.
Yes, perfect.
My sweet (made via blogging) friend, Jolie, sent me this recipe months ago. It’s her mom’s crescent roll recipe.
And I was intrigued from the start!
The dough is definitely not your traditional yeast dinner roll dough.
First and foremost, as I already mentioned, you don’t need a stand mixer or dough hook or special kneading equipment for this recipe.
Just a good, old-fashioned bowl and fork. Or maybe a spatula or spoon if you want to get all crazy.
It reminds me a little of the dough in these overnight cinnamon and sugar twists. The ingredients are different, but the method is a lot the same.
You mix up a rather unusual (ok, let’s call it what it is: lumpy) dough and refrigerate it for at least four hours, but up to four days (believe it)!
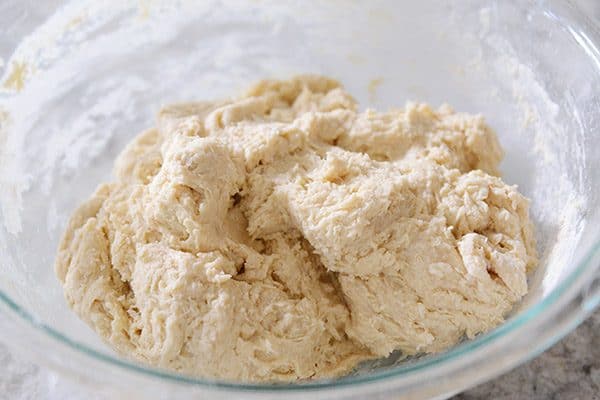
Magic happens while that dough rests. Lovely, lovely crescent roll magic.
The chilled dough rolls out like a dream.
And before you know it, you’ll have buttery crescent rolls rising on a baking sheet just biding their time until they are baked to flaky, golden perfection.
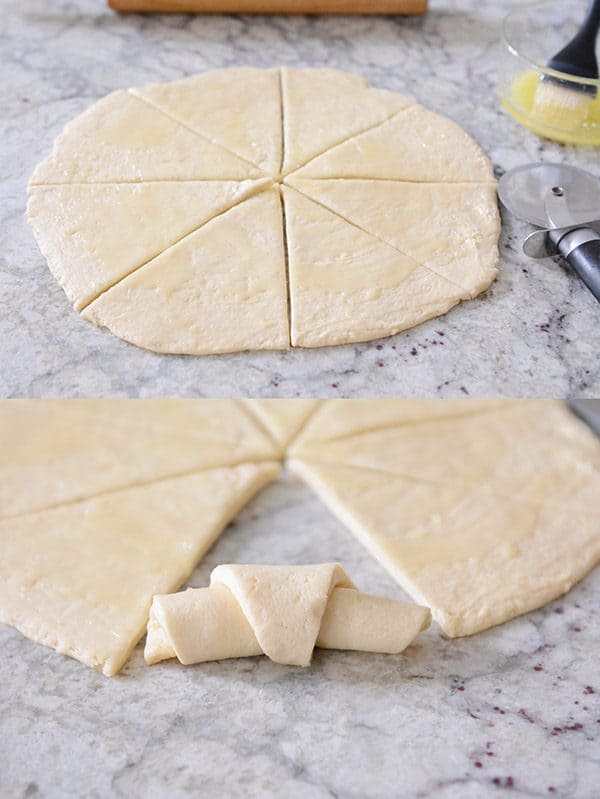
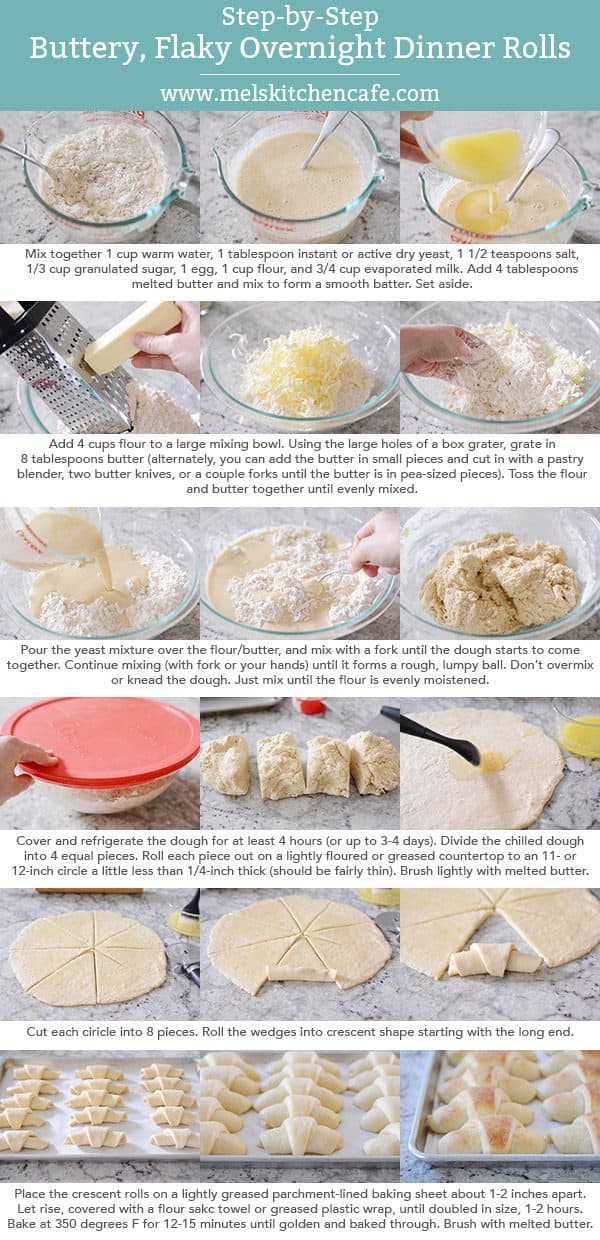
Even though the recipe is simple as can be, I’ve included a quick-glance picture tutorial below.
Just to take some of the guesswork out of the dough mixing, in particular, since it doesn’t exactly follow textbook yeast dough rules.
Honestly, these are one of my family’s favorite, new roll recipes.
And even though I am right there with them (snagging one or five straight off the baking sheet), I can’t help but love them because they are so simple.
The overnight factor is huge when you need a delicious, warm dinner roll without going to hardly any work the day of (details in the recipe and notes section how to make this happen).
Looking for the perfect roll recipe for Thanksgiving?
Or maybe another upcoming holiday menu?
Or just because you need overnight dinner rolls in your life? A very valid reason, in my book.
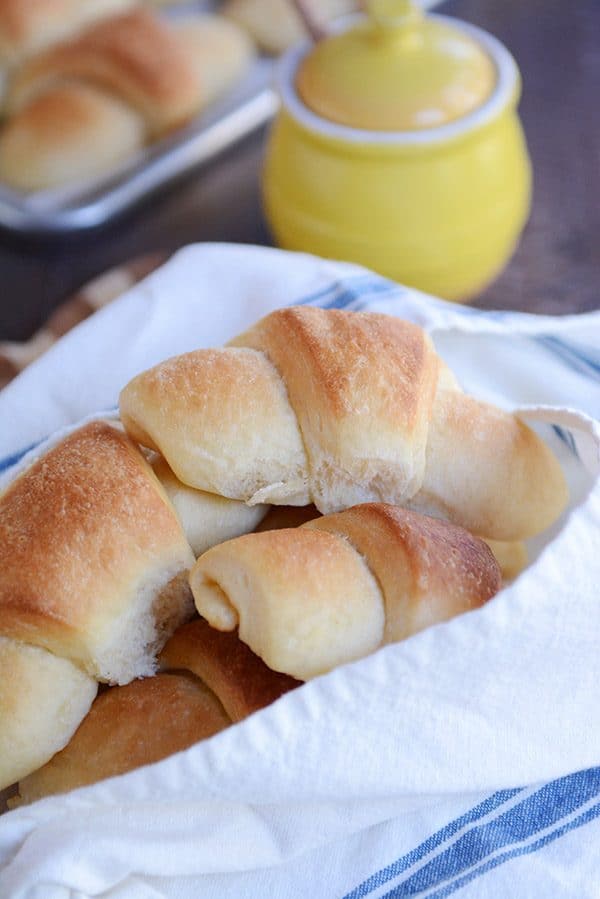
I hope these buttery, flaky, crescent numbers make the cut.
One Year Ago: Skillet Honey Garlic Chicken {20-Minute Meal}
Two Years Ago: Chocolate Cream Pudding Pie with Graham Cracker Crust
Three Years Ago: Warm Russian Tea
Four Years Ago: Healthy Applesauce Carrot Muffins {a.k.a. Carrot Cake Muffins}
Five Years Ago: Whole Wheat Blender Pancakes
Make-Ahead Buttery, Flaky Overnight Crescent Dinner Rolls
Ingredients
- 1 cup warm water
- ¾ cup evaporated milk
- ⅓ cup (71 g) granulated sugar
- 1 tablespoon instant or active dry yeast
- 1 ½ teaspoons salt
- 1 large egg
- 1 cup + 4 cups all-purpose flour
- ¼ cup (57 g) salted butter, melted
- ½ cup (113 g) salted butter, chilled
- Melted butter for brushing dough and baked rolls
Instructions
- In a medium bowl or 4-cup liquid measuring cup, whisk together the water, evaporated milk, sugar, yeast, salt, egg, and 1 cup of the flour. Add the melted butter and mix until a smooth batter forms. Set aside.
- In a large bowl, add the remaining 4 cups flour. Using the large holes of a box grater, grate the 1/2 cup chilled butter into the flour. Toss the flour and butter together until evenly combined. Alternately, you can cut the butter into cubes and cut it into the flour using a pastry blender or two butter knives (or forks) until the butter is in pea-sized pieces.
- Pour the yeast mixture over the flour/butter and use a fork or spatula to mix until the dough starts to come together. Mix just until the dough forms a rough, lumpy ball and the flour is evenly moistened (see tutorial above).
- Cover the bowl and refrigerate the dough for at least 4 hours and up to 3-4 days.
- When ready to make rolls, divide the chilled dough into 4 equal pieces. Roll each piece (or one at a time, depending on how many rolls you want to make – the remaining dough can go back in the fridge) into an 11- or 12-inch circle about 1/4-inch thick or slightly less than. It should be fairly thin. Brush the dough circle with a tablespoon or two of melted butter.
- Cut the circle into 8 equal pieces. Roll each wedge into a crescent shape starting at the wide end. Place the rolls on a parchment-lined baking sheet a few inches apart. Cover lightly with a towel or greased plastic wrap and let rise until doubled in size, about 2 hours.
- Preheat the oven to 350 degrees F. Bake the rolls for 12-15 minutes until golden and baked through. Out of the oven, brush the tops with melted butter, if desired.
Notes
Recommended Products
Recipe Source: from Mel’s Kitchen Cafe (adapted slightly from Jolie, a cute MKC reader, who sent me her mom’s crescent roll recipe – I reduced the butter in the dough by half, grated butter into the flour, rolled them slightly different)



These were great but I didn’t bake them all. Can I freeze the unused balls of dough that have been refrigerated already for 4 days?
If it were me, I’d bake them and then freeze them.
These are AMAZING. I made them first when I needed an overnight recipe for a funeral on a busy Saturday. But I’m making them for Thanksgiving and I can’t wait for others to experience the buttery goodness. So good. Thanks, Mel!!
Do you think you could replace the sugar with honey?
I haven’t tried doing that with this recipe – worth a try!
OK… I’m sold that these need to be on my Thanksgiving menu… but I’m an avid advance prep kinda girl. Have you tried prepping through the shaping step and then freezing? Imagine I’d need to thaw the morning of… and then bake when the oven is available? Tips? Thanks so much!
I haven’t tried freezing this shaped roll dough, sorry! Definitely worth a try though since yeast doughs usually freeze quite well.
I will be shaping and refrigerating the rolls overnight. Can you clarify approximately how long you mean by letting them sit out for several hours before baking?
Thank you,
Susan
Let them sit out long enough for them to come to room temperature and rise fully before baking.
I made the dough on Sunday and refrigerated it. I plan to roll it out and shape it on Wednesday. I plan to bake them on Thursday morning and need them to be ready by 10:00 AM. How much time do I need to allow for them to come to room temperature and rise?
No need to worry Guinea pigging a new roll recipe for Easter when it comes from Mel! First time making these yesterday. Made the dough Saturday and finished them off yesterday! Used bread flour instead of ap.
Bread goodness for sure!!
Love reading that, Kelly! Glad you loved these rolls!
Have you ever used this recipe to make resurrection rolls?
I haven’t, but I bet it would work great!
I just came to the comments with the same question!
Do you have a preference- instant yeast or active yeast?
I always use instant yeast.
Buttery fluffy goodness in every bite. Made these for thanksgiving today and will make them AGAIN and AGAIN and AGAIN!
Made these for Thanksgiving this year! Best rolls I’ve ever made and I’ve made a lot of rolls! Thanks for you amazing recipes…as always
My kids favorite- they demand I make them for thanksgiving and Easter- and now the whole extended family clamors for them also!
Make ahead:”make the dough several days in advance. After rolling and placing the shaped rolls on the baking sheet, cover the tray with greased plastic wrap and place in the refrigerator for up to 18 hours.” Does this mean I can skip the minimum 4 hours in refrigerator before shaping? Or I still need to let dough sit in fridge 4 hours, then shape, then back in fridge to bake tomorrow? Thanks!
The dough still needs that 4 hours in the refrigerator but after that you can shape and place on trays and refrigerate for up to 18 hours.
Whoa, these were fantastic. My family is asking if I can make them weekly and it’s a must for Thanksgiving! I didn’t think we needed another roll recipe but these are special!
Can you freeze the baked crescent rolls? As if there will be leftovers…pfft!
Yes, you can definitely freeze the baked rolls! 🙂
I want to make these and bake them the day before our Thanksgiving dinner. Do they still taste fresh the next day? Should I still brush them with butter or no since they won’t be eaten immediately? Thanks
They taste best served the same day, but I think if you make them a day ahead, lightly warming them before serving could freshen them up. I would brush them with butter right out of the oven.
Using a cheese grater for the butter is genius! The rolls were delicious and the dough was perfect! I was so surprised at how well the dough rolled out! Thank you for a roll I can make ahead of time but still be fresh the day of! You are amazing Mel!
These are hands down THE best and easiest rolls I’ve ever made! Everyone raved about them at our thanksgiving dinner! I even had one of the guests ask me to show them how to make them
Thank you for sharing this fantastic recipe Mel!