Pie Making Boot Camp {Week #1: Everything You Need to Know About Essential Pie Making Supplies}
Everything you need to know about making a pie, this pie boot camp is a comprehensive look at how easy and doable making homemade pie can be! Today, we are taking a look at the essential pie making equipment (hint: you don’t need as much equipment as you might think!).
Weeks ago I promised you that I’d be starting a pie making boot camp.
And today’s the day!
Week #1.
Every Friday in October, I’m going to be posting another segment of this pie making bootcamp, and I’m so excited I can barely stand it.
The goal?
To help you feel comfortable and excited about making homemade pie and to help make the process easy and doable!
There’s nothing quite like the satisfaction that comes when pulling a picturesque, golden pie from the oven.
I am far from a pie making expert, but I’ve made a lot of pie and pie crusts over the years and have learned a ton along the way.
During the next few weeks, we’ll be talking about everything from why your pie crust shrinks while baking (among other frequently asked troubleshooting questions) to the no-fail pie crust recipe you need in your life (hint: it’s a new one) to equipment basics, plus, I have some killer new pie recipes to share with you.
A quick disclaimer: because we are talking supplies today, there are affiliate links below for the items I’ve purchased from Amazon (nothing here is sponsored); feel free to shop around for the best deal!
Today, it’s all about essential pie making equipment.
There are a million different methods and opinions and lifestyle choices when it comes to making pie.
Recognizing and respecting that, over the next few weeks, I’m going to be sharing what works for me.
I know this may not be the way other people make pie or with the same equipment they use, but over the years, I’ve tried to strike the balance between necessary equipment and technique without getting overly fussy and having to sell a firstborn child to afford the latest pie making tool.
It’s basically a down to earth approach to making pie.
I truly believe anyone can make pie like a completely rock star!
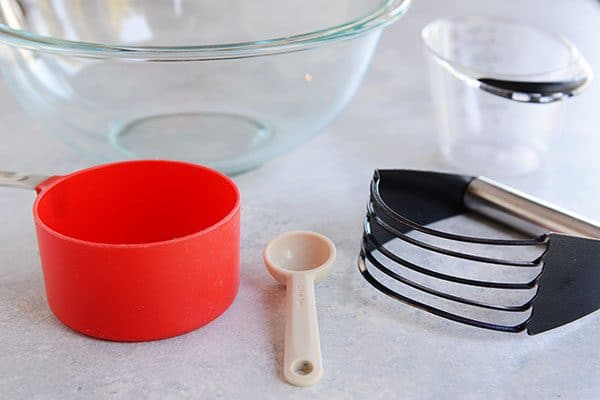
Here’s a quick glance at the basic equipment I use to make pie crusts:
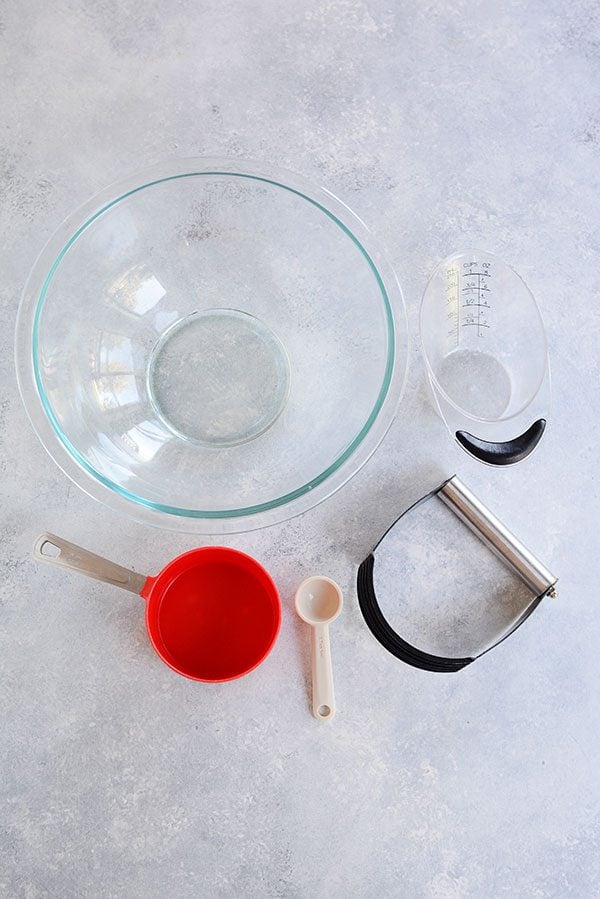
–Glass bowl. I use the inexpensive pyrex bowls (for pie and a million other things). The alternate method for mixing pie crust is to use a food processor – I use mine frequently to make pie crust but you absolutely, positively, do NOT need one to make pie crust. Not at all.
–Measuring cups and spoons. Brand does not matter here. Just use what you have! (The red measuring cup in the picture is from IKEA and the measuring spoon is from Zeal/Kitchen Innovations).
–Pastry blender. I consider this a fairly essential tool for pie making UNLESS you are making an all butter pie crust and grate the butter on the holes of a box grater instead (a visual of this can be found in a video at the bottom of this pie making tutorial).
Even still, I keep a pastry blender in my kitchen drawers, because it is inexpensive and really does come in handy. In a pinch, you can use two butter knives or a couple forks to cut in butter/fat to dry ingredients. (The one I linked to is different than the one pictured since I’ve had mine for about a bazillion years and it isn’t available anymore.)
–Liquid measuring cup. Perfect and essential for the liquid you are using in the pie crust (most common: ice water). I’m partial to the easy view liquid measuring cups from Pampered Chef (I have two sets, I love them so much), but this is a similar option.
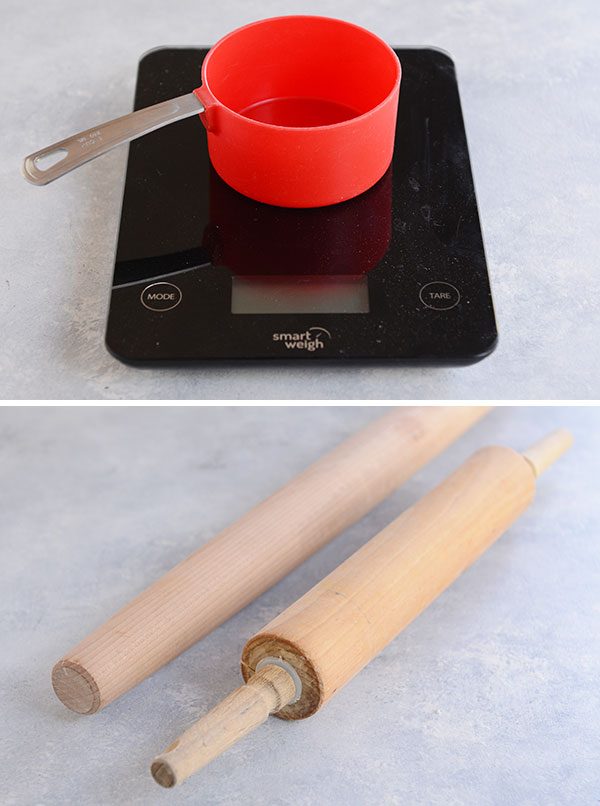
I wouldn’t be Mel if I didn’t give a quick nod to my kitchen scale.
If you are using a pie crust recipe with weights given for the dry ingredients, oh gosh, I implore you to please, please use a scale.
Using a kitchen scale changed my life many years ago, and now I don’t think I can live without it.
Recipes (that list weights in the ingredients) turn out a million times better (hello, accuracy) if you have a scale.
And if you notice, over the last couple years, all of my baking recipes include weights because of this.
Is a kitchen scale essential for pie making? No. Even I don’t have weights listed (yet) on my favorite pie crust recipe.
But it can be a HUGE help if the recipe you are using DOES have weight measures (and the new recipe I’ll be sharing next week will have them).
A quick note about rolling pins.
I have both a French rolling pin and a classic (ahem, old-school) rolling pin.
My kids might as well use the French rolling pin as a baseball bat, because I never use it. Never, ever.
I’m all about the classic rolling pin all the way.
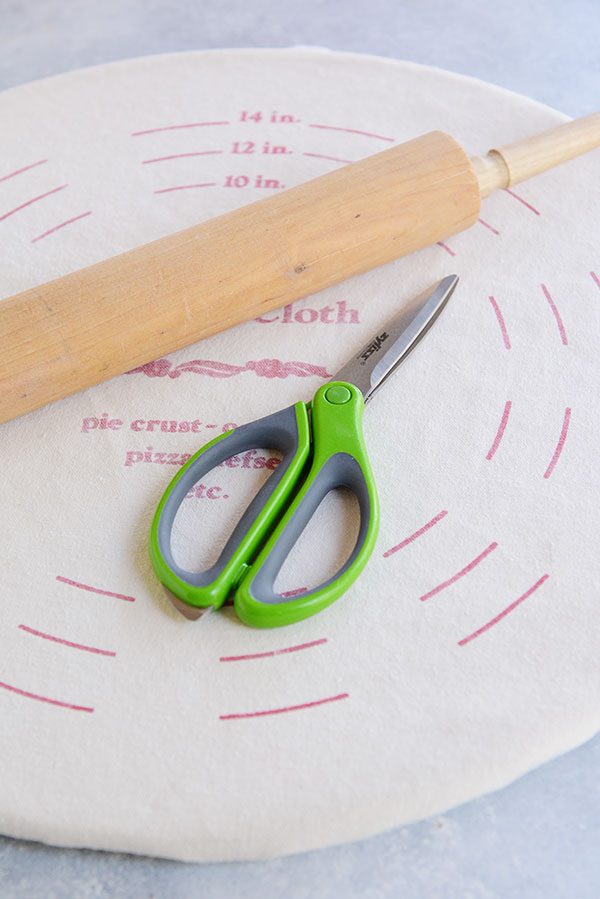
While the two items I’m about to discuss could definitely fall on the list of optional equipment, I use them every time I make a pie, so they deserve a spot here (but you don’t necessarily need them).
Those purty little kitchen shears you see up there are my go-to for trimming the edges of pie crust.
(The Zyliss ones pictured aren’t available but I also have these Kitchen Aid ones, and they are awesome. One can never have too many pairs of kitchen shears, or so I like to say.)
I keep them under lock and key in the kitchen so they don’t end up being used for gluey, messy craft projects or to dissect small insects outside.
And that canvas covered board you see up there?
It’s my favorite pie making ninja secret. It’s what makes rolling out pie crusts so easy, I want to cry.
This Bethany board found it’s way into my Amazon cart years ago when I was living in Minnesota and everyone and their dog made lefse for Christmas.
It’s the best $20 I’ve ever spent (even if I still haven’t made lefse at home).
Honestly, this thing is a dream and a total lifesaver.
I was worried about cleaning it, but it turns out, it’s as easy as pie (haha, you knew I had to throw that in at least once in this post, right?).
I shake out the cloth like crazy outside, let it hang dry from the moisture of the pie crust, and that’s it.
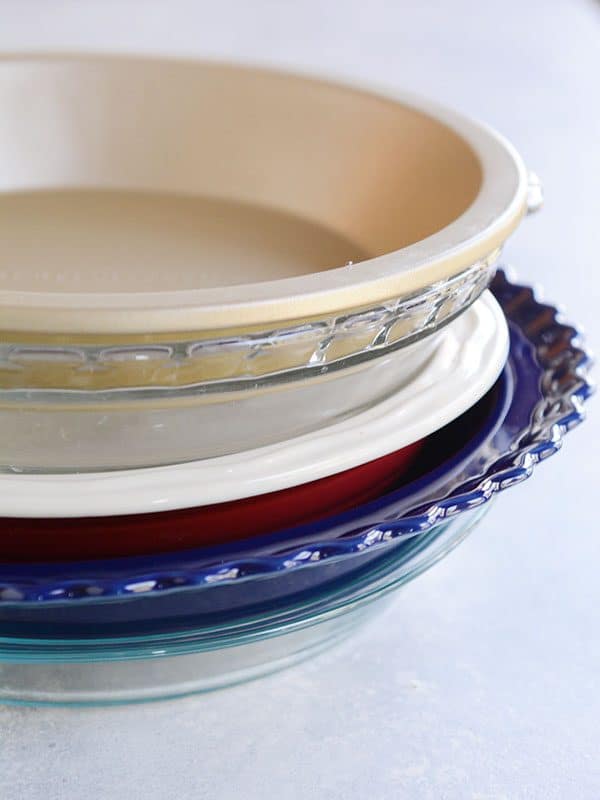
A burning question with pie making is which type of pan is the best to use when making pie?
Oh, friend. Do I have opinions about this or what? (If you read here, you should not be surprised – I have opinions about everything.)
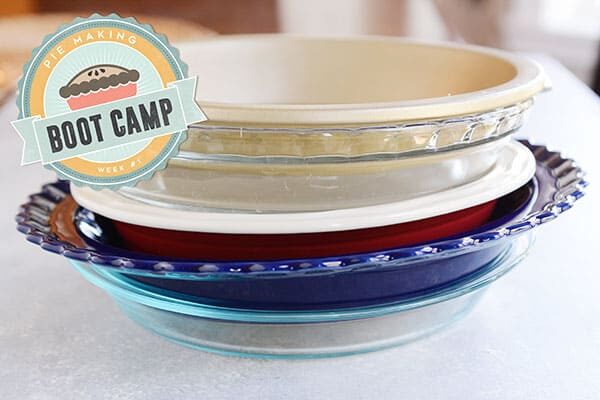
There are three basic types of non-disposable pie plates: glass, ceramic and metal.
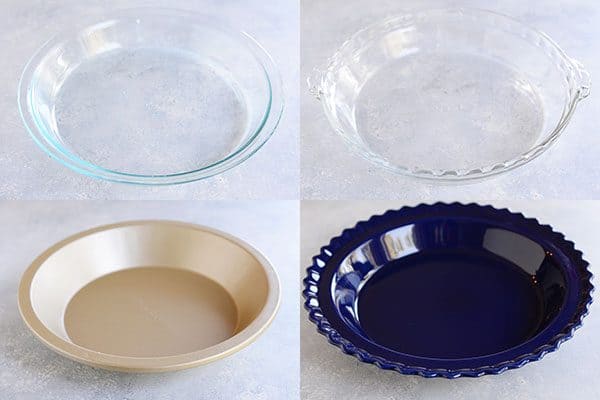
Pictured above in the top row are the glass pans I have. A pyrex 9-inch pie plate and a pyrex deep 9.5-inch pie plate.
Both are exceptional, but I highly recommend NOT using one in place of the other. They each have their purpose.
Baking ingredients for a pie in a smaller or larger dish than called for in the recipe can mess up the result.
I only use the 9.5-inch pie plate when a pie recipe calls for it (like this chocolate mousse cheesecake pie recipe).
Glass Pie Plate
Advantages: browns the crust better than any of the other options, in my opinion; inexpensive; widely available; conducts heat really well; just a great all-purpose pie plate – basically, if you only own ONE pie plate, a glass pie pan is the perfect option
Disadvantages: can break or crack if dropped; depending on the brand, doesn’t have as wide a ledge for fluting a decorative crust; not super pretty if that’s your thing (all function here)
Metal Pie Plate
Advantages: also conducts heat well (like the glass pie pan), doesn’t break or crack if dropped (am I the only one who drops everything?)
Disadvantages: many brands (including the one I have and really like, which is the Williams-Sonoma Gold Touch pie plate), scratches fairly easily when the pie is cut and served, not decorative or pretty
Ceramic Pie Plate
Advantages: often prettier and available in lovely designs, sometimes has a wider lip to help with fluting the crust.
Disadvantages: in my experience, ceramic pie plates conduct heat less well than metal or glass leaving pie crust raw on the bottom but overcooked on the top, can break or crack if dropped, sizes vary widely (many brands have poor reviews about a 9-inch plate not really being 9-inches)
I generally use my ceramic pie plates for no-bake pies, pies with graham cracker crusts, etc (like this Magnolia Lemon Pie). And I use metal or glass for traditional pie crust pies.
Next week we’ll be diving into the ins and outs (with a complete tutorial) on making pie crust. Because of that, let me give a quick shout out to a few other supplies that come in handy.
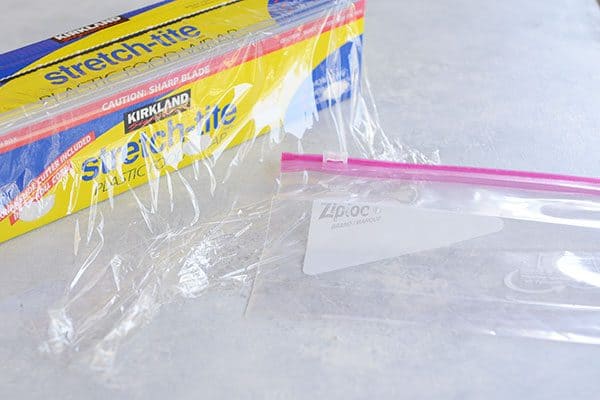
I usually wrap my pie crusts in plastic wrap, but you can also use a quart-size ziploc bag.
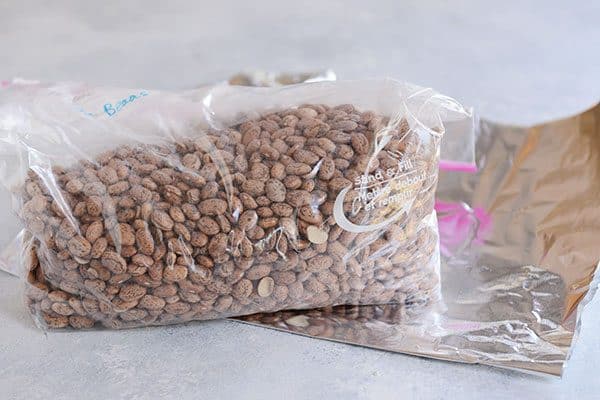
If blind baking a pie crust (we’ll get into the how-to-do-this in the following weeks!), I always line with aluminum foil (not heavy duty) and use dried beans as my filler.
Once the beans have cooled after baking, I store them in the same gallon-size ziploc bag and reuse them again and again and again.
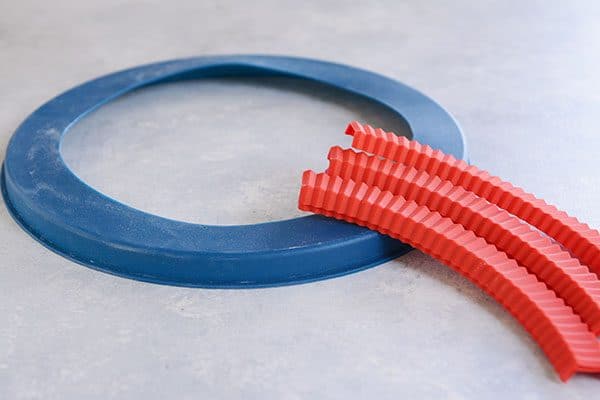
While I have several pie shields in my drawers (this blue one and red ones I picked up at Orson Gygi, I believe), they aren’t absolutely necessary, in my opinion.
Especially if you are a beginning pie maker. You can tent the pie with foil or wrap the outer crust gently with foil.
But there’s no denying that a pie shield does make that process a little bit easier.
So there you go!
That’s an in-depth look at almost all the equipment I use to make pies!
I welcome any and all of your comments and questions, so please leave them in the comment thread below!
Next week, we are going down the exciting and fun road (no, seriously, it is!) of making pie crust from scratch!
The tutorial will be in-depth and perfect for beginners and experts alike – I’ll be addressing common pitfalls when making pie crust, and I promise, it’ll make homemade pie crust seem easier than it has ever been before.
I’m excited for the next few weeks of pie making boot camp!
Just in time to knock out some rock star status pies for the holidays.
If you have any question about today’s equipment rundown, leave them below!

Where did you get your ceramic blue pie plate? I’m in love.
I am so excited about this! I became a pie crust rock star when I started using your sour cream pie crust. Is there really a recipe that is better and easier than that? Can’t wait!
That recipe will always be my favorite! But I am sharing a new one that’s really great for beginners.
I was never able to make decent rolls, and I followed your tutorial for tolls with exactness and guess what? SUCCESS!!! I can hardly wait for the rest of the pie making boot camp!! I know my pies stand a chance now 🙂
Exciting! I love these detailed tutorials! You leave no detail unattended. Thanks for all the effort you out into this Mel!
I know I shouldn’t wish my life away but….hurry up Next Week! I can’t wait!
Pie plate, the pampered chef stone pie plate is the bomb. They don’t make them anymore but if your lucky enough to have or find one. THE BOMB,
Mel, Love your site- I’m inspired every post. I’m considering an instant pot and noticed there is a mini duo instant pot- 3 quart. We are a family of two and travel back and forth between North East and South East US, chasing the perfect weather. So ease and packability are key. Any comments on if the smaller one would be a good choice?
Thank you for your insight.
Brookie
I’ve heard great things about the mini duo IP! I think it would be a great choice for a family of two – one thing to keep in mind is that most recipes online probably won’t fit in it, so you’ll have to cut in half or even more, but if you are comfortable doing that, I’d say it’s probably a great choice.
I too am a seasoned pie maker at 76 yrs. I have found a couple of tricks some years ago that improved my enjoyment of making pies! I use have always used the 4 cup no fail pie crust recipe with 1 Tbs. vinegar & 1 beaten egg! I use a hand pastry blender and pastry fork for making the dough! I also will not use my crust dough until it has been frozen overnight first! It makes a great difference in how nice it handles when rolling out and lining your pie plate! After making my dough, I weigh out 9 1/4 oz. of dough for each crust, put in quart ziplock bag, pat dough out into a flat disc and zip bag shut. Place in freezer. Take your frozen pie crust out and place in refrigerator while you are preparing your filling and it will have thawed enough to use. I roll it out on a canvas covered board which has been floured! I use a French rolling pin with tapered ends and also a plastic scraper to help lift or loosen dough that has stuck to cloth in spots! After lining bottom of pie plate, I sometimes refrigerate it to stiffen up the dough before putting in the filling! I use stoneware pie plates almost 100% of the time! I learned to bake my stoneware pie plates in the lower third of oven when baking them and you will find that the bottom crust always browns! I do use clear pyrex pie dishes for all Cream pies!
Thanks for all the tips. Louise!
I love your tips! I’ve been baking pie crusts for 25+ years, using my grandmother’s never fail pie crust recipe that includes vinegar and egg – just like yours! Friends are always shocked when they hear about the vinegar and egg. So good to hear someone else’s testimony. I also use a stoneware pie pan and haven’t had problems with doughy crust, as long as I put it in the correct spot in the oven. I never have thought to freeze the dough like you mentioned. As I read your entry, I could picture every step and envision how it would improve the process. Looking forward to trying!!
Mel – thank you for this series! I teach a Lost Art of Baking class at our local homeschool co-op and always spend a day on pie crust. Can’t wait to incorporate some of your tips and comments. You do such a great job of breaking everything down to the tiniest detail without being tedious!!
Oh, you’re the best, Mel! I like to make pies but have had trouble with shrinking crust. So I’m excited to hear how to solve that one. Thanks for the timely boot camp!
Yay! I hope it helps (we’ll be talking about that specifically because so many people have questions!)
Bless you Mel! I have been looking into a pie making class because no matter how great of a baking ninja I am, my pies never turn out looking great. The crust shrinks every dang time and they never brown properly. (Thankfully this doesn’t affect the taste!) I’m looking forward to reading your tips and tricks!
We’ll be talking about both of those things, Julie!
48 years of marriage and I’ve always been terrified of making pie crusts. Pillsbury has always been there but the pie fluting…uh..looks like a kindergarten play dough experiment. *sigh* Eagerly looking forward to the upcoming weeks.
We’ll be talking all about the pie fluting next week!!
I cut the centre out of an old aluminum pie plate and use the remaining rim as a shield. Cheap, reusable, and easily replaceable if necessary — but it’s surprisingly durable and works like a charm.
Great idea!
Wow! What a great idea! Never thought of this. Weirdly, coving my pie crust to keep it from burning has been one of the hardest and most annoying tasks of pie making. I am very brand new at this pie making thing so, this advice was very helpful!
I’m really excited for this! Thanks Mel!
Thanks, Erin!
I hope people make pie after this boot camp! So many are intimidated and so if you do make a good pie, you WILL be a hero. I say from experience as I am famous in my ‘hood for my pie and I laugh to myself because compared to cake, it is so easy. I know you will lead the way, Mel!
My rolling out cloth with measurements is this one: https://www.amazon.com/Mrs-Andersons-Baking-Collapsible-Measurement/dp/B0000CFV2O/ref=sr_1_4?s=kitchen&ie=UTF8&qid=1507322453&sr=1-4&keywords=pastry+cloth+and+rolling+pin+cover+set My mom used this kind of thing and it was years before I found one. I love the rolling pin covers also. I use the cloth for rolling out most doughs and like you scrape and shake. Every once in awhile I toss it in the washer with the pin cover(s) when I’m washing flour sack towels.
I am also in the old fashioned traditional rolling pin camp but I’ve never tried anything else.
I am a glass pie pan girl and have pyrex in several sizes including some mini 5.5 inch which are fun for small pies.
Also recently bought a pie shield like your blue one. Foil works and that’s what I did for years but the silicone is just easier for me.
Love all your tips, Liz. Thank you! I wish I could adequately convey my passion about wanting everyone to rock their world with homemade pie making! It’s so fun, so rewarding, and honestly, easier than it’s poor reputation. 🙂
I may have dropped a glass mixing bowl on my glass stovetop. Oops. I lucked out and it didn’t appear to do any damage! I like making pies, can’t wait to see the other posts in this series though!
Oh yikes! Thank goodness no damage was done. I drop things ALL the time. Ugh.
Mel, of ALL the possible things that can be produced in a kitchen, I have to say that homemade pie has been the ABSOLUTE thing I have dreaded and shied away from the most!! It’s so intimidating to me when so many people have such high expectations of pie! Especially around the holidays! I have never ever ever volunteered to make pie for any family or social event, and I swore to myself I never would… until you annouced you were doing this series on making pies. I think I just might be brave enough to try it sometime with you holding my hand along my pie-making journey. I have been so excited to learn! A million thank yous!! (And I think my husband won’t mind at all if I learn how to make homemade pie… )
You can do it, Amy! Honestly, I wish we were all neighbors and I could invite you into my kitchen to do this in person!
I am ready to learn your secrets. It seems like every time I attempt to make a pie crust it tastes good, but it always falls apart as I am rolling it out so it never actually makes it into a circle shape to transfer to a pie pan so it turns into a puzzle to get it to fit. Sigh. This is especially embarrassing because I am a Home Ec teacher, don’t tell my students!!!
Haha, I won’t say a word! And don’t be embarrassed. That happens to the best of us! We’ll be addressing the rolling out issues next week!
How is the pie crust board any different than using your kitchen counter for rolling up your pie crust? ———- Do you add flour to the fabric covered board, or put the crust directly on the fabric?————
Yes, you add flour to the canvas board. I’ll be showing it in more detail next week…but again, I don’t advocate buying a bunch of special equipment if using a floured counter works just as well for you!
I’m so excited for this series! My husband has decided that his 2018 New Years resolution will be learning how to make a killer chicken pot pie. Are any savory pies in the lineup?
That’s hilarious since I’ve, no joke, made chicken pot pie THREE times this week to perfect it. I’ll be posting it soon!
Ok here’s my beef with the pies I’ve been making….
The crust recipes only tend to make enough for a small glass pie dish but the filling recipes are always overflowing and only seem to fit in my deep dish stoneware pie dish. This has happened for apple pie (ourbestbites filling recipe), blueberry pie (bhg filling recipe), and pumpkin pies (who knows where I got this recipe). I’ve tried this with crusts from bhg, ourbestbites, and your sour cream pie crust. The crusts all make about the same amount of crust (never enough for a deep dish), but the fillings (even though calling for a regular pie) overflow. HELP A GIRL OUT!!!
Well, that’s annoying! Are the filling recipes for deep dish pies? If so, I’d probably 1 1/2 the pie crust you are using.
If my pie crust is getting too brown around the edge, I make a quick shield by tearing a piece of foil the size of the pie pan. Fold the foil into quarters., then use scissors to cut out the middle of the foil. (You want to cut out enough middle so just the crust edge of the pie will be covered) Unfold the foil and gently lay it atop the pie.
You need not worry is you have the right size shield to fit your pan. The foil doesn’t stick to the crust as a pie shield often does. The crust edge is protected from browning further, and the middle of the pie doesn’t steam, as it would if covered by a full sheet of foil.
Great idea!
Ooh! I like that idea. I love making pies, but do not enjoy trying to make the crust brown evenly. This idea should help!
Linda – fabulous tip!
That’s what I do too Linda! I taught it to my daughter who is becoming a pie baker. She was inspired to bake pies when she moved into her grad school apartment and found it had apple trees. Free food! I am going to be sure she sees this Boot Camp too!
First let me say that I love all the recipes I have made so far from your site. I think you are amazing to be able to do all that you do while raising 5 children. I thought you might like to know how a 70 yr old has been making pies for the last 50 yrs. I am also not one for fancy do0-dads but I am considered an excellent pie baker. I have used the same bowl to make the pie dough in for the past 30yrs. I am not even sure what kind of bowl it is. I think it is a serving bowl, definitely not a mixing bowl but it has worked for me and was my mothers and I love it. It also has a slight crack in it but that just gives it character, doesn’t make any difference in how the pie dough turns out. I only use one fork to blend the ingredients. I’m sure it is more time consuming my way and I may try the tool you use. I also use an old fashioned rolling pin like yours…they are the best. And canvas to roll the pie dough on. I also cover the edges with foil. So it is true, you do not need a bunch of fancy tools to be successful at making pie dough. When I first started I was determined to make pie dough equal to my mother’s if not better. I practiced and practiced making a lot of pie dough with cinnamon and sugar on top until I got it perfect. I don’t even measure any of the ingredients, which I don’t recommend. I’m sorry to say that my two daughters have no interest in pie baking but I do have a daughter-in-law who makes very good apple pie. I love cooking anything from scratch and I think it is a healthier lifestyle. And not hard to accomplish. You are doing an excellent job at promoting this. I’m looking forward to the rest of this pie making series. I’m not one to change what has worked for years but I do like to accomplish things a bit easier if possible.
Thanks so much for your comment, Janice! I loved every bit of it. I totally agree with you on doing what works and trying to eliminate unnecessary equipment AND that cooking from scratch is so rewarding. I love the visual of you using that cracked, wonderful bowl!
I have that exact Bethany board and cloth but have never taken it out of the package because I didn’t know how to clean it. Who knew it was that simple?!
We make lefse once a year at my Mom’s house. I have a recipe I’d be willing to share. Super yummy!
I am curious as to your favorite fats you like to use in your pie crust. I learned with Lard, and Shortening. I have also seen them done with all Butter. What do you think makes the flakiest crust?
Hi Claudia – I’ll be talking about it next week – but I mostly prefer an all butter crust OR a crust with about 90% butter and just a little shortening to help flakiness.
I’d love to take a peek at your lefse recipe!
I don’t have a food processor or pastry blender but that wasn’t necessary when I made the recipe you posted as the only pie crust recipe you’ll ever need. The pie crust was so easy and quick to make! I’ve made your blue ribbon Apple pie and the recently posted peach pie to rave reviews. For the first time ever I tried the lattice pie top and it was the most beautiful thing to come out of my oven! Thank you so much for all the tips you give which saves me a lot of money in not needing to buy extra equipment!
Good point, Stephanie! If you grate in the butter for that foolproof sour cream crust, you don’t need a food processor OR a pastry blender. I’m so happy you’ve had such great success!
This is just the BEST!! Thanks for sharing your skills and talents…I can’t think of a better teacher in the kitchen!!
Thanks so much, Jennifer!
I’m already looking forward to the next post! I’d love to make homemade pies, but I’m not sure which is the biggest problem for me: lack of time (making the whole thing from scratch seems daunting) or being intimidated by all the ways to mess up the crust. I hope this will change that! Thanks Mel!
Those are valid concerns, Jo! We’ll be talking about timing next week, among other things. I think it will be valuable, helpful info!
Does your recipes work in elevations over 5000 feet? I love to bake but since I just moved to Colorado my baking has suffered tremendously. I have even tried high altitude recipes for cake and they still come our dry, but at least they hadn’t fallen.
I love making pies as well but after the cake fiasco I’m afraid to try.
Hi Kayan – that’s a great question. My understanding is that pie isn’t nearly as finicky at higher elevations like cake and cookies are. I hope that’s the case! I live at about 2,500 feet elevation and that’s where I test my recipes.
If I can learn to flute the edges, my pie life will be complete. I make yummy but ugly crust. Boot camp to the rescue!
Haha, you aren’t alone, Sheila! We’ll be talking about this next week!
My 10 year old and I are going to do this boot camp together. We made homemade pumpkin pie filling last year, but used the Pillsbury crust. This year we are going to do the whole thing from scratch. Can’t wait!!!
Yahoo! You two are rock stars!
Love your recipes, Mel! Any chance of getting a gluten free pie making book camp? I was diagnosed with celiac disease a couple of years ago and have tried making GF pie crust a couple of times with little success. I sure miss a good piece of pie once in a while . . .
From my experience, Bob’s Red Mill and King Arthur have great flour mixes or blends that are gluten free. I find that you can use those in recipes in place of wheat as a 1:1.
That’s a great question, Laurel! I won’t be delving into gluten-free pie crusts during this pie boot camp, but as a resource, Nicole at Gluten Free on a Shoestring is my resource every time I need a no-fail gluten-free recipe (she’s like a scientist in the kitchen). I took a quick look and she has a gluten free pie crust recipe here: https://glutenfreeonashoestring.com/extra-flaky-gluten-free-sour-cream-pie-crust/
Laurel, America’s Test Kitchen has two great gluten free cookbooks that have a ton of pies in them. My son has celiac so they have been a great resource! Adding a touch of xanthan gum to the flour REALLY helps with the structure. Gluten free crusts can be super crumbly but that helps it stay together better. Other than that it’s pretty similar to a regular crust. Ours turned out great last year at Thanksgiving and no one could tell the difference!
I’ve been looking forward to this series! One thing I like is a little crimped rolling wheel thingy when I cut strips for a lattice pie.
Oooh yes, that’s a cute touch for that lattice top.
Oh man. I need this Bootcamp. My crusts always slide down the sides. I’m all ears/eyes!
We’ll be talking about that exact problem, Natalie!
Can’t wait! I’ve been dragging my feet in the pie making department this Fall. Pie Making Bootcamp may be just the inspiration I need to get going on my family’s beloved favorites! Thx, Mel.
You can do it, Lauren!
I’m so excited for this! Goodbye Pillsbury crust! I just love that you encourage us along the way, you’re a wonderful teacher and giver. Thank you so much!
Thanks, Melanie – that means so much to me and is EXACTLY why I love doing these kinds of posts.
I’m so excited!! 🙂
Thanks, Kristen – so am I!