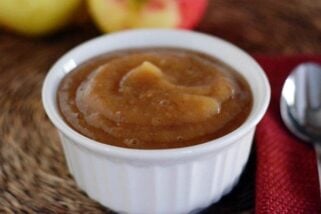
Quick and Easy Pressure Cooker Applesauce
Want applesauce in just minutes? This pressure cooker version is so simple and delicious, you can make homemade applesauce every day of the week!
Applesauce is one of our very, very favorite things to make in the pressure cooker which is a little funny-slash-ironic considering Brian works for an applesauce company and we get a lot of applesauce packet rejects for snacking which means applesauce-making at home should maybe take a backseat to other priorities (skillet cookies, for instance).
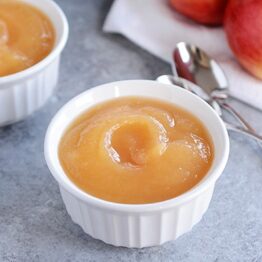
However, nothing quite beats slightly warm, homemade applesauce.

And since I’ve been able to outsource nearly 100% of the applesauce making to my kids, that homemade applesauce is even more dreamy (for me at least).
It must be the excitement/intrigue of using the apple corer slicer thingy, because we had to finally make an applesauce assignment chart so that no one ended up in tears thinking it was their turn when it wasn’t (and no, it doesn’t often work well to do it two at a time – too many chefs in the kitchen, so to speak).
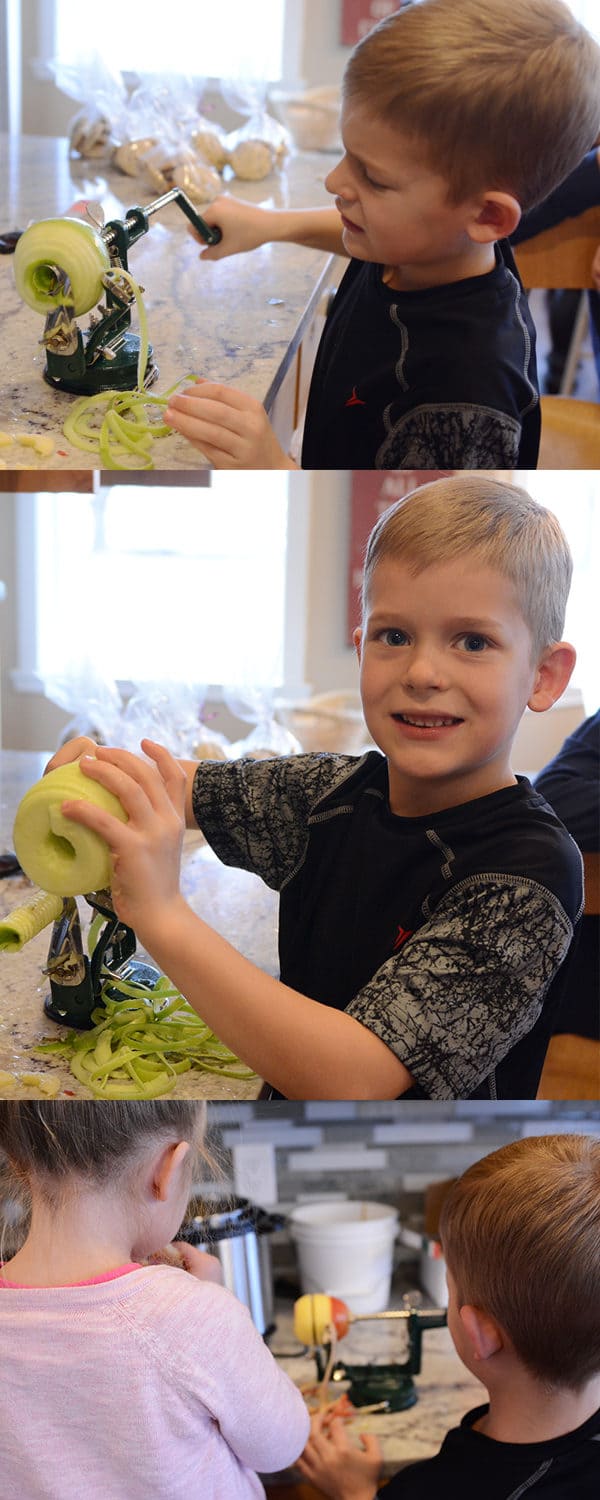
Because the pressure cooker makes such quick, hands-off work of the applesauce (once the apples are peeled, cored and sliced, of course; the pressure cooker isn’t quite that awesome yet), this applesauce is the perfect afternoon snack, and let me mention again that if you’ve never had applesauce slightly warm, you are totally missing out.
Completely adaptable to a million different varieties of apples, the recipe below is more of a starting point.
Play around with the types and amounts of apples as well as adding other fruits or different flavors like cinnamon.
If you are new to pressure cooking, applesauce is a great place to start because you actually want the apples to turn into a delightful mush (as opposed to meat or potatoes which probably shouldn’t turn into glorious, applesauce-like slop) and the cooking time doesn’t have to be precise.
A few extra minutes isn’t going to hurt anything.
FYI: this is the immersion blender I have and love (that’s what we use for this applesauce among many other things) and I’ve had my apple peeler contraption so long, I can’t remember where I got it but it’s very similar to this one.
One Year Ago: Classic Strawberry Shortcake {With a Decadent Chocolate Version}
Two Years Ago: Death by Chocolate 7-Layer Bars
Three Years Ago: Six {More} Recipes the World Forgot
Quick and Easy Pressure Cooker Applesauce
Ingredients
- 8-12 apples, peeled, cored and sliced (see note)
- ¼ cup water
- 1 tablespoon lemon juice
- Sugar or sweetener to taste
Instructions
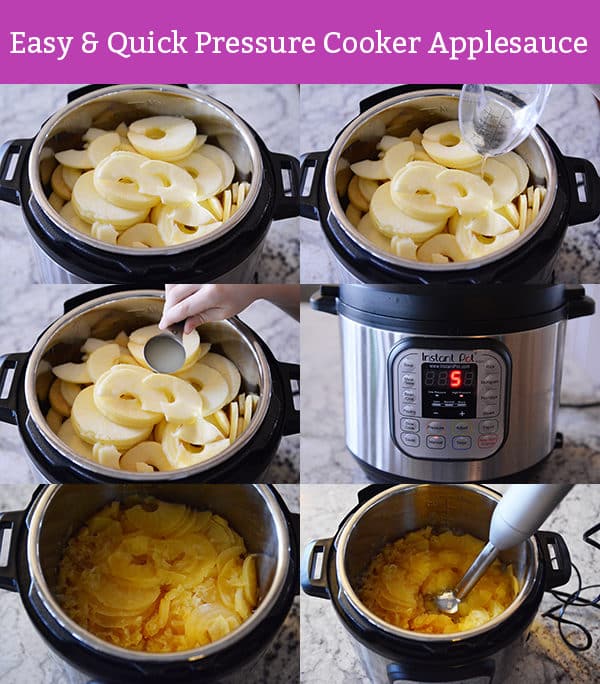
- Place the sliced apples in the pressure cooker, filling only to the max level (don’t overfill). Add the water and lemon juice (and any sweetener, if using).
- Lock the lid in place and bring to high pressure. Cook at high pressure for 5 minutes. Let the pressure cooker naturally release for 10-15 minutes and then quick release the remaining pressure. If liquid starts spitting through the vent, release the pressure in quick bursts or wait a few more minutes before venting pressure. For stovetop models, you can quickly cool the pressure cooker by running cool water around the sides and base of the pressure cooker if you want to release pressure faster.
- Carefully remove the lid and using an immersion blender (or transferring the applesauce to a blender, in batches if needed), puree the applesauce to the desired texture. If using a blender, take care not to overfill as hot ingredients can expand while blending. If you like a chunkier texture, you can simply stir the applesauce instead of blending.
- Let cool and refrigerate until ready to serve (or eat warm; yum!).
Notes
Recommended Products
Recipe Source: Mel’s Kitchen Cafe

This was the first recipe we tried with our new IP – it was a hit!
We used a mixture of gala and braeburn.
Thank you, Mel!
Missed the part about peeling them. It blended nicely and was delicious anyway! I also had cut it in large chunks and threw everything in my blender. Super easy wish I did this before!
wow! Hubby and I had at lest 2 dozen red delicious. Made a batch of apple sauce! Yummy! This recipe was soooooo easy, too! Don’t have to worry about freezing anything. It won’t last that long!
When my Cub Scout den was working on their cooking, we made Applesauce in the instant pot to go with the pancakes they made. We talked about how a scout is thrifty: I keep castoff apples in the freezer (too wrinkly, my toddler Took 2 bites and abandoned it, had a few bruises) and make a pot when I’ve saved enough. I just made a batch with frozen cranberries added – tastes just like the cranberry apple crisp I make for holidays. . I also leave peels on, they don’t bug me.
This is awesome, Sarah! Thanks for sharing!
Made this apple sauce put loads in the fridge and and freza my family and friends loved it
I recently bought an instant pot. Looked up sites for applesauce and picked yours. Just finished my first pot and we are having trouble staying out of it. My daughter wants to can some so she is going to have to make more. I have made applesauce before for years and this is the best bar none.
Thanks, Louise!
Absolutely delish! So quick and we like chunky applesauce so even quicker. Serving it with pan cooked pork chops tonight.
I make an old fashioned pie where you cook apples down like applesauce, but no lemon juice. Would it be ok to leave the lemon out?
You can definitely experiment! The lemon helps preserve a fresher apple flavor.
This is sooo good! I love homemade applesauce, and making it in a pressure cooker is about the easiest thing there is. My husband’s employer gives everyone a case of apples every year for Christmas. I just made 4 batches of this recipe to can (I pressure canned it so no worries about the acidity level), and it took barely any time at all! So much easier than standing at the stove babysitting it or waiting on the slow cooker!
Made this several months ago in my Instant Pot – kids inhaled it, the whole batch, within minutes! It was SO easy and SO good!!! Just found a bunch of holiday bags of apples on clearance at my local grocery store so I’m going to make a bunch of this today!
why does EVERYONE think granny smith are the best apple?? I think they are sour and gross. There are many more pleasing varieties. Granny smiths are NOT the best for pie or anything else.
going to make this as we love apple sauce with roast pork
But can you freeze it?
Yes, it freezes pretty well!
Do you know how if adapt this to a slow cooker?
Here’s a slow cooker version: https://www.melskitchencafe.com/slow-cooker-applesauce-no-sugar-added/
Just a tip. I was looking for pressure cooker applesauce recipes and came across the idea to cut a circle of parchment paper the size of the pressure cooker pot, with a very small hole in the center. Place on top of the apples before you cook. This 100% prevents the spitting when you release pressure! I’ve done it twice now and it works like a charm!
This is brilliant!
How long will it keep in the refrigerator? Have you done a hot water bath to can?
I haven’t canned this applesauce but you probably could try (I would just double check it has enough lemon juice/acidity per food safety regulations). It can keep in the fridge easily for a week.
Have you ever bottled this? I have a ton of apples and would love to stock up on applesauce. I assume I could just process the applesauce in a water bath. Suggestions?
Yes, you can definitely process this in a water bath but you might need to add some lemon juice for food safety…
Look at you being featured in a pressure cooker recipe roundup on msn.com! Yay! http://www.msn.com/en-us/foodanddrink/quickandeasy/13-delicious-pressure-cooker-recipes-that-save-money-and-time/ss-AAid4IS?fullscreen=true&li=BBnb7Kz#image=10
Warm applesauce straight out of the pressure cooker has become one of my favorite things. Also cold applesauce served with vanilla yogurt. We usually use a few granny smith and throw in some cinnamon and nutmeg. yummy, yummy, yummy!
Just made. Used Zestlar apples (never heard of them before). Very sweet and juicy. Added the water and a little cinnamon but no sugar. Delicious. Also left some of the a kind on so it has a pinkier look.
Made this today. Added the cinnamon and a little bit of nutmeg. So yummy!
This was great! My first time cooking applesauce in a PC. Cook’s Illustrated says in their recipe for Simple Applesauce that the peel adds a lot of flavor, so I just piled the long peelings on top of the apples in the pressure cooker and then removed them before stirring to smooth it out. So easy.
I love this idea! I’ve made applesauce in the fall for bottling in a big pressure cooker, but the thought hadn’t even crossed my mind to make some in my normal pressure cooker, just to eat for snacking. I’m excited to try it warm, like everyone has raved about.
Warm applesauce is delicious over a scoop of vanilla ice cream!
I don’t have a pressure cooker, so I’m sticking with your slow cooker recipe (which I love!). I’d never had warm applesauce before trying it but now that’s the only way I like it! And canned applesauce is so bland to me after trying homemade. Just a tip: drizzle some heavy cream over a serving of warm applesauce and it tastes just like apple pie a la mode.
At our house, we usually just eat poached apples. I peel and quarter them and cook them up in a very light syrup that is mostly water with just a bit of sugar. If you haven’t tried it you should. Probably not going to make this one, because my husband and I don’t really eat applesauce. But it is a great reminder that fruit cooks quickly in a pressure cooker. I especially like hot fruit compotes, or combinations of fruits.
Nope, not gonna do it. I’m sticking with your slow cooker applesauce recipe. Apples cooking all afternoon makes the house smell so good!
We have tons of costco apples that we need to use up right now! I’ll have to make this applesauce to go with dinner tonight!
Paige
http://thehappyflammily.com
Store bought can’t homemade applesauce. Cinnamon just makes it too. YUM!! It doesn’t take that long to make it just on the stove either.
This is genius. I’ve been a regular pressure cooker user for more than 10 years and never has it dawned on me to do apple sauce in one. Leave it to you to introduce me to all sorts of new ways to use my beloved pressure cookers! Thank you!!
You forgot the cinnamon. Yummier and healthier than sugar!
Yep! I included notes in the recipe to add cinnamon if you’d like. We never add any sweetener to our applesauce; a lot of times apples are sweet enough as is especially if you mix and match varieties. 🙂
Been looking for easy stuff to try in my new pressure cooker, do you think you could can this recipe?
Hi Stephanie – you might want to compare it against some official applesauce canning recipes only because the amount of lemon juice might need to be increased. But otherwise, yes, I think you could can it (in a water bath canner or pressure canner).