Small Batch Canning 101
Whether you are new to canning or are already a canning expert, this detailed look at small batch canning (with tons of general canning tips and info) has everything you need to know to make home canning and preserving a breeze!
Please do not read any further until you answer this question (either mentally or down in the comments):
Where do you fall on the home canning spectrum?

My “number” has changed significantly over the years, moving up and down on a wild path of highs and lows depending on the phase of life I am in.
Ten years ago when I had four children ages four and under, if you would have said “Mel, you should think about canning peaches this year,” I probably would have throat punched you and then lumped myself into a fetal position for the rest of the day (with kids piled on top of me, I’m sure).
As I’ve moved through stages of life with less newborns and less bums needing to be wiped (sorry, but that’s the reality of how I’ve judged the passage of time), I’ve renewed my serious love of canning.
I consider myself a definite NERD on the scale of how much one could love canning.
I love it so much (and seriously, in heaven, I know the air will be filled with the bright pinging sound of jars sealing, I just know it).

But…even though canning has been a huge part of my home food storage routine for many years, I’m going to be honest and tell you that spending a whole day (or several days) with my kitchen blown up with jars and sticky floors and fruit and vegetables everywhere in various states of decapitation is not as enticing as it used to be.
The reason? I can mostly by myself now.
Back when I could get a few friends or family members together to can whatever fruit we just picked up in bulk, I didn’t mind the multi-day chaos so much.
You might as well go big or go home, right?
But these days, I don’t have the time to commit hours and hours and hours of canning in one long stretch in order to produce 1,782 quarts of applesauce.
Not only that, but I also don’t have many friends that can anymore…and I’ve found after years of canning large-batch style, that my family wasn’t eating through everything I had canned (particularly jams and jellies).
And so my love of small batch canning was born.
And I haven’t looked back.
There are still times when I somehow find myself in possession of 12 bushels of peaches and after asking the question: who am I and how did I get here, I buckle down and can the living daylights out of the peaches in order to get ’em on the shelf and out of my kitchen.
And then force my children to eat a quart or two of peaches at every meal so they don’t stay on the shelf for a generation.
But usually, I find that during the summer and fall months, I tend to make use of small batch canning.
This means different things to different people, but for me, a small batch of canning is any recipe that gives me about 10 jars or less and that I can finish in just a few hours.
It works so much better for my life.
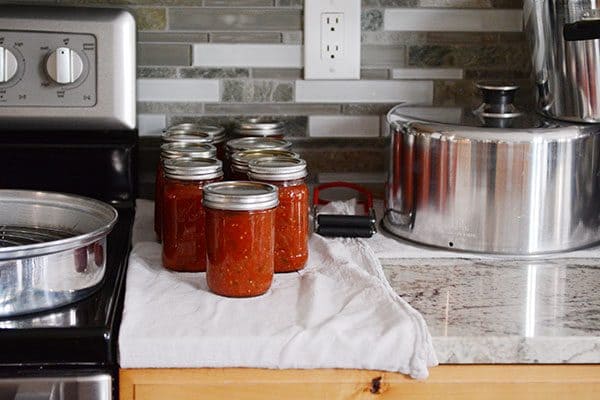
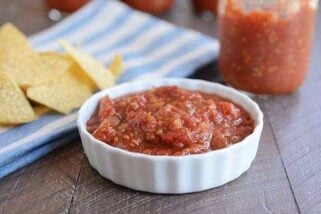
I can whip out a batch of homemade salsa (8-9 pints) in an afternoon and still have the kitchen cleaned up in time for dinner (which will most likely be chips and salsa anyway).
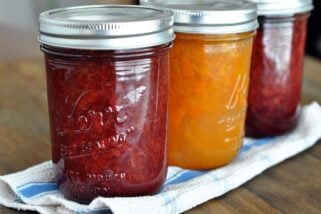
During the last couple weeks, I’ve canned two batches of homemade salsa (on different days because my tomatoes weren’t ready at the same time), two small batches (about 10 jars each) of pickled beets, a small batch of bottled peaches (8 quarts – because a friend dropped off half a box of peaches to me), 8 pints of grape jelly (this included juicing the grapes in my Nutri-steamer/juicer), and two batches of jalapeno jelly, about 12 jars total of that.
The miracle? I’ve canned all that, I don’t hate life AND I actually showered every day (which hasn’t always been the case when I’ve done the long haul huge batches of canning…keeping it real here).
That’s saying something about the benefits of small batch canning.
In a Nutshell, Here are a Few Benefits of Small Batch Canning
-Great for canning newbies who are intimidated by canning many, many jars or huge recipes at a time
-Only takes a few hours rather than all day long and late into the night
-I’ve found small batch canning has been a perfect way to test out a new recipe – and we’ve been grateful, a few times, I only canned, say, five jars of weirdly flavored green salsa instead of 32 like I was tempted to do (you definitely don’t want to get stuck with jars and jars and jars of food you’ll never eat because of the flavor)
-Good for those canning food for just themselves or for smaller families – or for families who won’t eat through huge batches of canned food
I still have some plans for lingering garden produce – and chances are, I’ll have to do some larger batches in there (because, you know, someone thought it would be awesome to start over 15 tomato plants this year), but overall, small batch canning is awesome.
Today’s post isn’t necessarily a look at HOW TO can. It’s more a look at WHY small batch canning is still very productive and WHAT tools make small batch canning effective and, dare I say, fun.
But first, a few disclaimers.
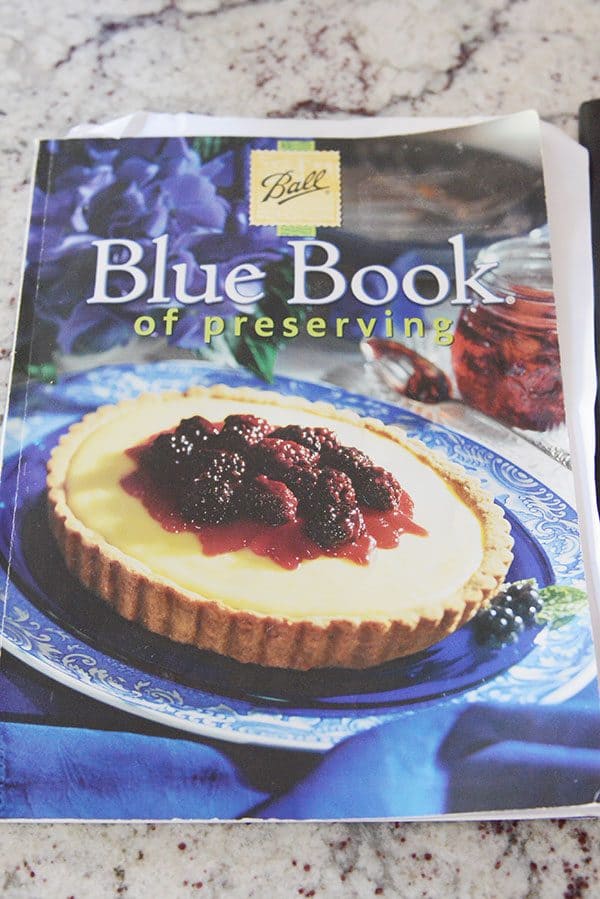
1) When canning food for home storage, always, always use a research-tested recipe that has been developed for that particular type of canning (water bath, steam, pressure). Making up your own recipes for canning food is generally not encouraged since food safety plays a huge role in home canning and without prolonged testing, it’s difficult to know the pH levels in that experimental batch of spaghetti sauce, for instance.
I have Ball’s Blue Book of Preserving, and it is my first stop when I want to see if there’s a recipe “out there” for canning A, B, or C (there’s also this newer, intriguing-looking Ball book of canning and preserving – not sure if there are the same recipes in each or not).
2) Because your grandma/great grandma/aunt marge did it a certain way, doesn’t mean it’s the best/safest way to do it. Sorry. I know that may be hard to hear. My sweet grandma would many times, fill the jars (with fruit in them already) with boiling water, add the lid and ring, and then tip them upside down and let them seal that way without processing them in a canner. That’s not really such a good idea anymore (I found that out first hand when a jar of cherries she gave me exploded in my pantry from what I can only guess was a botulism revolt).
3) When in doubt about canning in general, consult a trusted home canning resource. There are many county extension resources available throughout the country; my go-to resource for food safety questions in regards to canning is the National Center for Home Preservation.
Now, let’s talk canning!
*FYI: there are Amazon affiliate links included below for the products I’ve purchased there.
As a quick reminder, low-acid foods (like green beans and meat) must be processed in a pressure canner so that the temperature gets above boiling.
High-acid foods (like salsa, most fruits, jams, jellies, etc) can be processed in water bath or steam bath canners (here’s a quick link about a recent change to the recommendations on steam canning).
The majority of canning I do is high-acid foods. Every couple years, I’ll pressure can chicken and green beans or spaghetti sauce with meat in it, but mostly, I’m canning fruits, jams, jellies, salsa, etc.
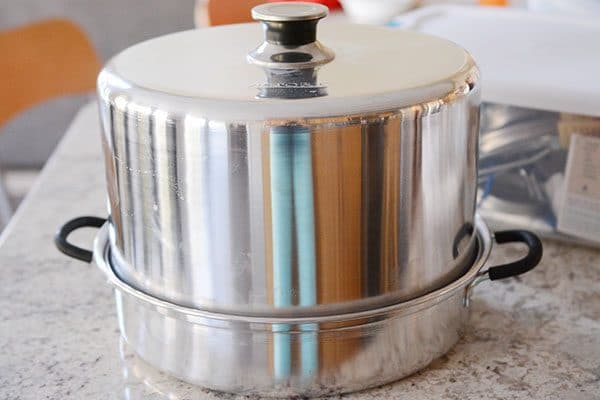
And I only use a steam bath canner these days.
–>This is the steam bath canner I have, use, and love.
I used to pull out my enormous, bulky water bath canner for processing, but because I’ve always had an electric flat top stove in every house we’ve ever lived in, the water bath canner didn’t fit well on top (and was too heavy, anyway).
So I’d also drag out my outdoor portable propane stove and lug the water bath canner out there and then cart out buckets and buckets of water until the hunormous (Cam’s word for extra big) thing was filled.
You can probably tell I hated the process.
The minute my Aunt Marilyn clued me into the joys and benefits of a steam canner, I was hooked.
I haven’t used my water bath canner in years (although if you’re curious about the process, you can see it in action in this post about canning jalapeno jelly).
This is obviously a personal decision; steam canning is how I choose to live my canning life.
Using a steam canner is a huge part of why small batch canning works for me.
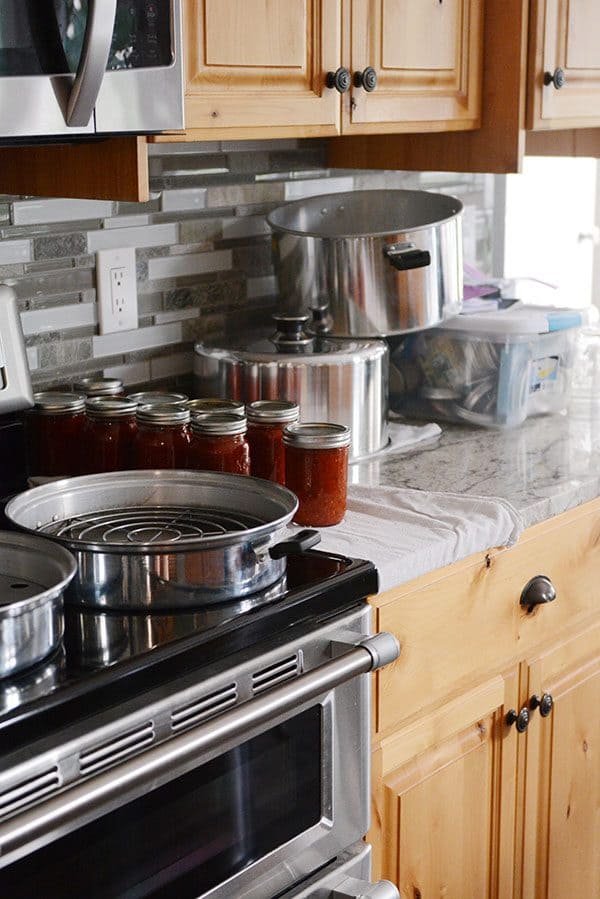
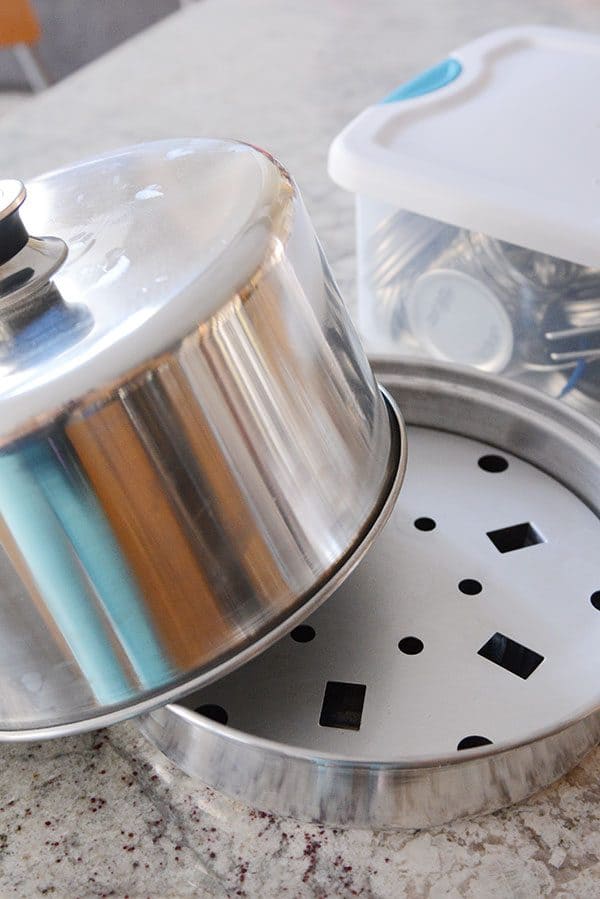
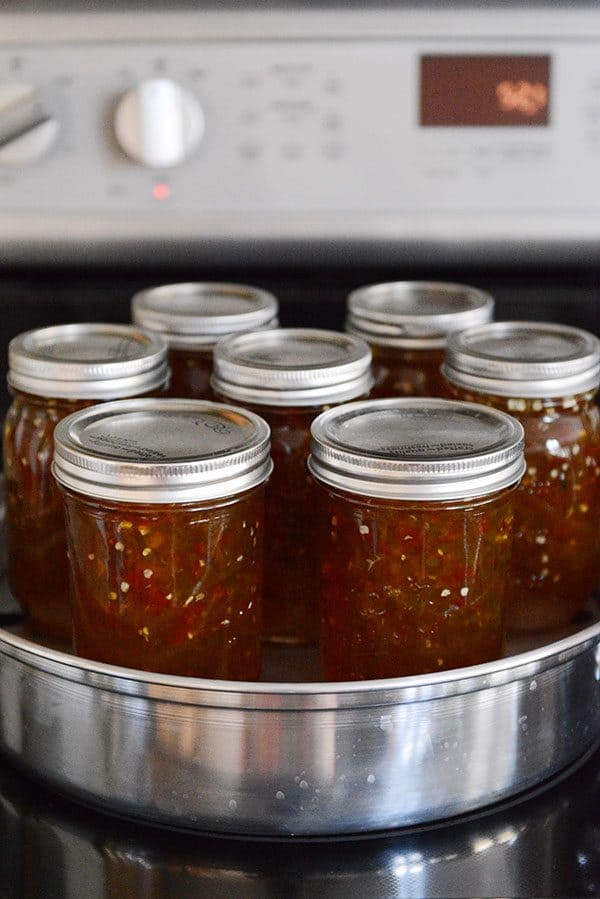
Instead of filling up a one million gallon pot of water, a steam canner relies on a few inches of water in the base, a rack for the jars, and then a domed lid.
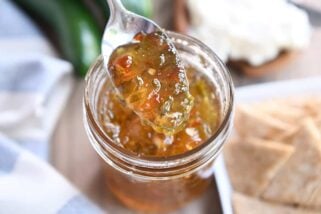
These jars of jalapeno jelly in the picture below just finished processing (I took the lid off the steam canner).
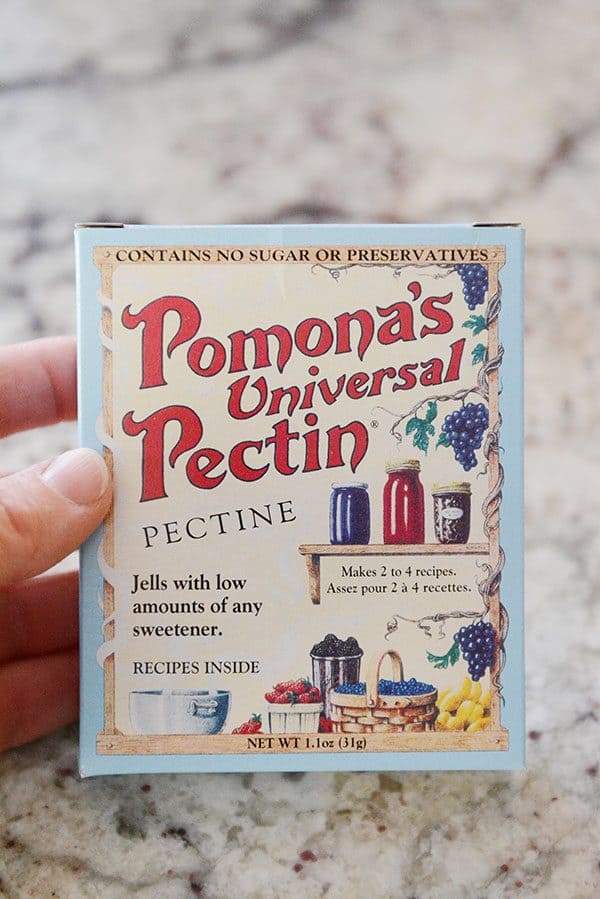
On another note, I’ve mentioned this a few times before (slight understatement, I guess), but when canning jams and jellies, the only pectin I use anymore is Pomona’s Pectin.
–>My Favorite Pectin: Pomona’s<–
It is amazing stuff and makes low-sugar jams and jellies without any preservatives or fillers.
If you are interested, I demonstrate how to use Pomona’s pectin for low-sugar strawberry jam in this post.
It’s a little different than other pectins – you mix up a calcium water solution (that activates the pectin) and this calcium water is added to the fruit and simmered before adding the pectin (which is mixed with the sweetener – even honey works!).
Anyway, I love it, and highly recommend it (totally not sponsored).
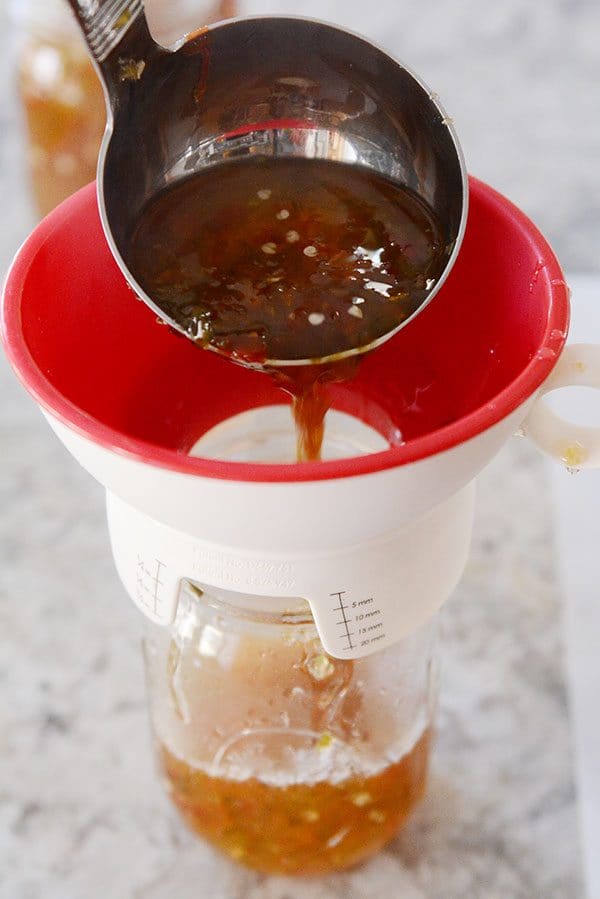
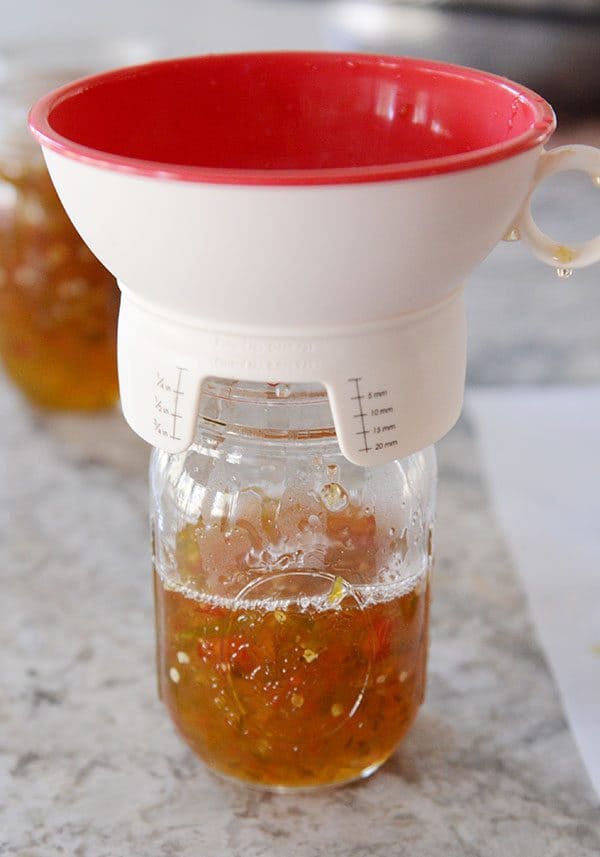
One little tool that I’ve come to rely on over the last year (recommended to me by Liz, who comments regularly here) is this:
–>Canning Funnel with Headspace Measurements <–
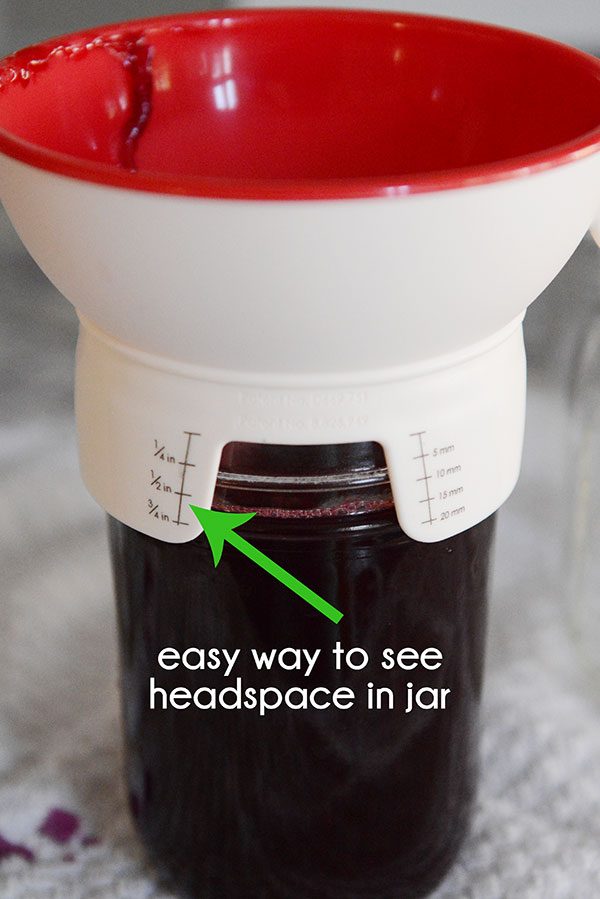
You see those handy dandy marks on the outside? It allows you to easily see how full you are filling the canning jars without taking the funnel off every couple pours to peer inside.
It’s been lifechanging, really. Now I can easily see when I’ve filled adequately to leave enough headspace in the jar.
I actually use it every morning to strain my homemade kefir, too, so it’s getting a lot of use in my kitchen (pretty awesome for a $5 or under tool).
As for jars, I don’t have a preference on brand, but if I’m buying new jars these days (not very often since I have such an enormous stockpile from canning over the years), I always go for wide-mouth. It’s worth the extra couple of bucks.
And as a sidenote, I’m completely obsessed with these adorable, tiny 2-ounce canning jars.
Granted, I have only used them for canning once or twice (such great, mini gifts for jams or jellies!), but they come in very handy around the house.
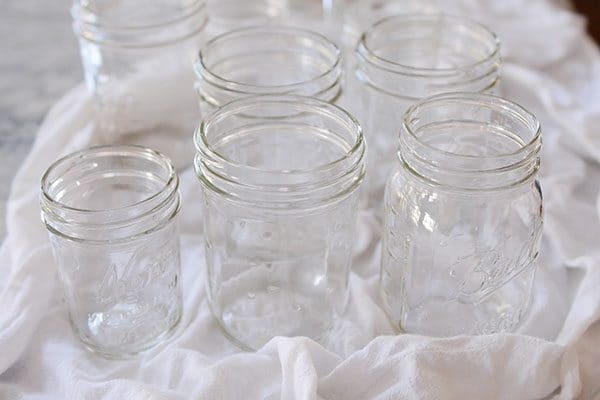
I run my jars through a dishwashing cycle before canning to sterilize and heat (and I leave them in there to stay warm prior to filling).
Also, you home canners out there probably know this already, but canning lids made by Jarden, who produces all the lids for Ball (these things), don’t need to be heated anymore prior to using.
There’s a little timesaver for you.
Also, I use these white flour sack towels like crazy when I can.
I set the empty jars on a half-folded towel when filling (to minimize sticky messes on my counter) and set the processed jars on a clean towel to cool.
I also frequently use one to wipe down the top of the jar before adding a lid.
A Few Other Organizational Tips
Please meet my canning journal.
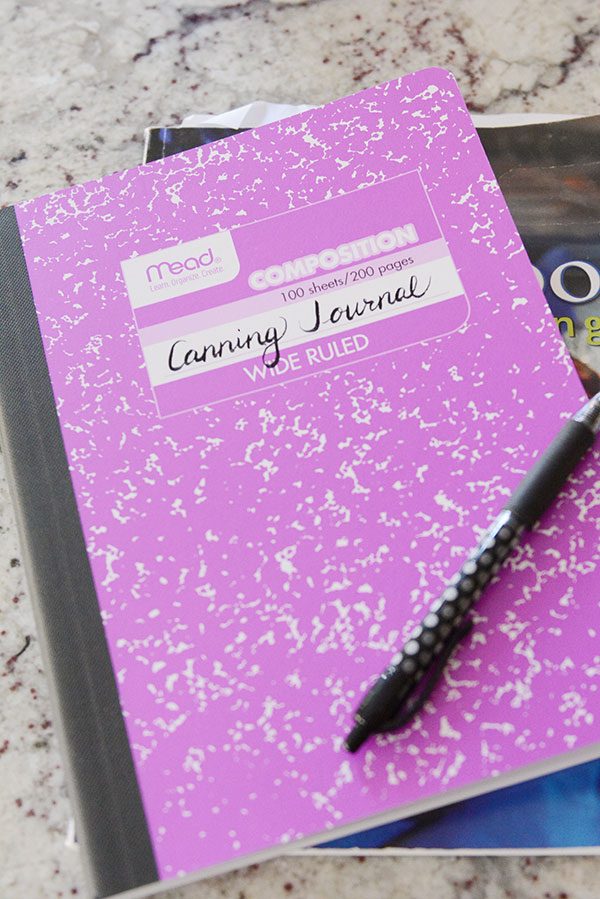
It’s so high tech and fancy, I know (we’re talking a 39 cent composition notebook).
But this journal is indispensable to my canning happiness and health.
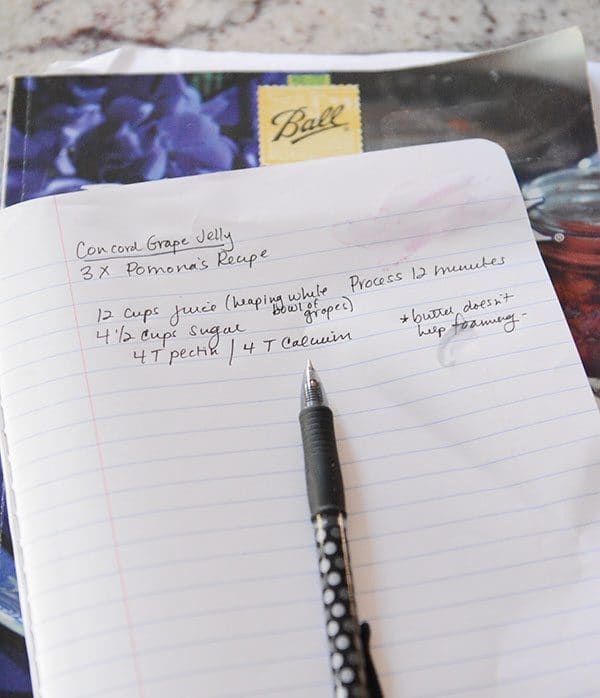
Even amid all the instant access to recipes and canning info online, this journal is my bible for all things canning.
I keep updated (albeit messy) notes in here year after year about different recipes – like, how many quarts of grape juice I can get from so many pounds of concord grapes.
That kind of thing.
The notes inside probably only make sense to me. And many pages are at risk of being completely wiped out by beet juice or strawberry jam remnants, but hey, it’s still a working system that works for me.
The other thing that contains the chaos (although it may not look like it) is this trusty catch-all bin.
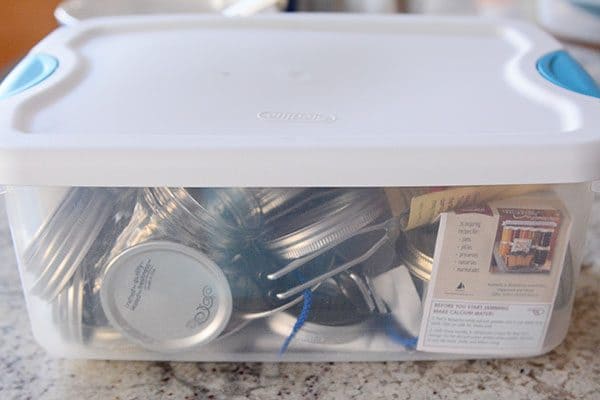
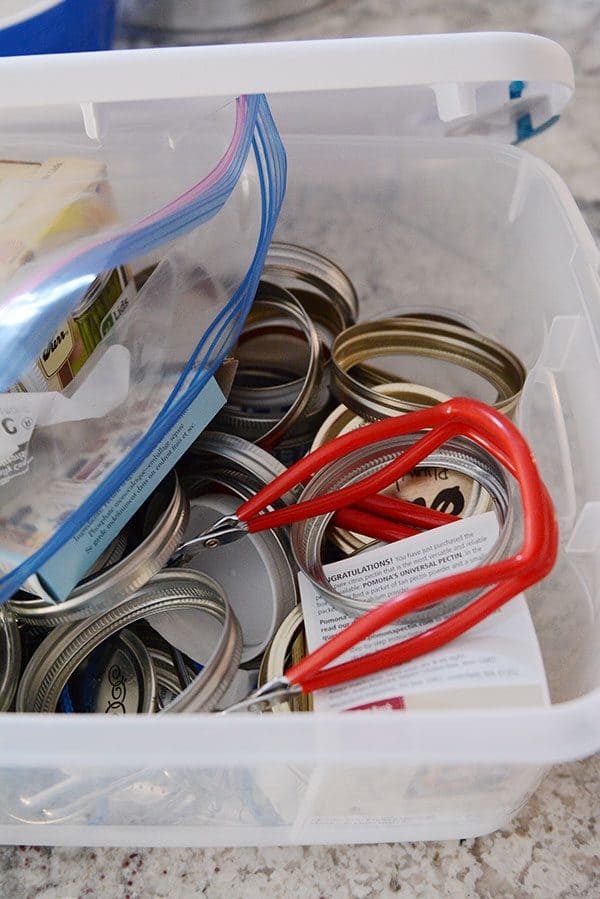
As we eat through the jars on the shelves, I toss the lids and rings into this tub. I also store leftover, unopened boxes of pectin and the simple canning tools I need.
And as for those used and washed lids I store in this bin? Please don’t ask me if I reuse them. Just don’t ask me that, ok?
Because I think I’ll have to plead the fifth on this one. I don’t want anyone to get upset over the issue of reusing canning lids or not. It’s a very personal thing.
So whatever you do, do not ask me if I reuse my lids. K, thanks.
Overall, I hope this {ahem, lengthy} post gives you a good look at why small batch canning is approachable and the various tools that make it super easy!
If you have any questions or comments, as always, check in below on the comment thread! I learn so much from you, so don’t hesitate to share OR ask questions.
Here’s a Recap of All the Small Batch Canning Essentials:
-Simple Canning Toolset
-Prepworks Canning Funnel (comes in a set with other canning tools here)
Happy Canning!

hey mel, i am looking for stainless steel canning tools. funnels specifically that are authentic stainless steel, food grade quality and made in the united states of america. 🇺🇸 a complete ss set is good too!
i came across your fabulous website and i am hoping you may know of such a u.s. of a. manufacturer. amazon and google have been a failed experience. thank you and blessings.🕊️
I (Hhmm, might have reused lids during Covid when I couldn’t get any). I also put my jars in a flat dish drainer on my counter next to the sink. Then I can rinse anything that might have spilled on the bottom of the jar while filling.
I’m in a tiny studio apartment with a two burner setup. I don’t have an oven or dishwasher. But I find free fruit all the time and want to take advantage of that. I do have a 4qt instant pot as well. Any tips for how to get started with that tiny of a setup?
A steam canner will likely work on your two burner stove (unfortunately, Instant pots are not suggested for safe canning).
How do you know forsure that your jars have sealed? This is always my fear!
If the top of the lid is flat and doesn’t pop up and down when you press on it, it means the jars have sealed.
Hi Mel. Do you have a recipe for pickled beets in the steam canner? I got one last year after reading your blog and will never go back to my water bath canner! Thanks for all the great recipes!
I have tried a few pickled beet recipes over the years and they’ve been good…but not winners. I think I’m going to play around with the recipe in the Ball Blue book for canning and reduce some of the cinnamon/cloves.
Just had fun reading all your small batch tips,I too have canned for many years. Have been using my steam canner (Vitirio )for 6 years, love it. New to me was not having to heat lids–love that. Comment on using dishwasher for jars, to conserve water(as we all should), I hand wash and place in an oven at 250 degrees while prepping ingredients. This is OK’s by both Minnesota and Wisconsin food science. Love not having drippy jars. Just finished canning salsa verde, and your recipe for tomato salsa.
Hi Mel!
I love so many of your recipes. My friend and I share recipes and we usually say, “It’s Mel’s!” and we know exactly what the other is talking about. Always delish! Thank you!
So your link for the Victorio Steam Canner goes to a different brand canner. Just wondering which one you do use? Roots & Branches FruitSaver Aluminum Steam Canner with Temperature Indicator, 7 Quart Jar capacity, Silver.
Also, I only have a flat top range and just wanting to make sure this works for that OK. I had thought you can’t can on flat tops. But your post gives me hope. :0) Thanks!
Hi Bonnie, it looks like the manufacturer changed the name of the steam canner from Victorio to Roots and Branches, but it’s the same thing! As for canning on a flat top, it’d be best to contact your stovetop manufacturer to be sure…I’ve used the steam canner on my flat top for years and it’s fine (but I would hate for something to go wrong). My understanding is that the big water bath canners weren’t safe for a flat top stove because they were too heavy, but because the steam canners use less water, they aren’t heavy enough to crack the glass top stoves.
Your explanation of canning tomatoes was great. I do have a question. I live at 2000 feet so I am assuming I need a water bath canner. But your site did not give the time needed other than 45 minutes for your steam method.. Is 45 minutes enough time for a water bath canner with your tomato recipe?
The processing time is the same for steam or water bath (just make sure to add necessary time for elevation, if needed)
alright mel. I feel comfortable doing water bath canning (haven’t gotten the steam canner yet, some day). but now I need a tutorial on pressure canning! I have green beans coming on like crazy, and I want to can them, not just freeze them. until you post something, I’ll just have to check on the ol’ google. can you just come be my neighbor? k? thanks.
Haha, I’d love to be canning neighbors! I need to get a pressure canning tutorial up. I’ve said I would for years!
Can you use the mini 2 Oz jars in a water bath? Do the lids seal?
I’m not sure, sorry!
I was wondering if you reuse your lids?
It’s not recommended to do so, but I have done it a time or two when I’ve been in the middle of canning and been out of lids completely. Usually I try to use new lids.
I’ve gotten some great recipes from your blog and enjoy reading it. I used to can but haven’t for years. I’m now retired and wanting to get back into it. I’m intrigued with the steam canner. I’ve only used the water bath canner. I have a question about it. Can you use it to can only 4 or 5 jars of do you have to always use 7 jars? Thanks.
Hi Cathy! Yes, you can up to 7 jars, so canning 4-5 jars at a time works great.
I haven’t canned in years but since I retired I have time again. I’m intrigued by the steam canner. Do you have to cab 7 jars at a time in the steam canner or could you do a smaller number. Will they sit ok if it isn’t full? I also gave a gas range. Will the steam canner work ok on that? Thanks in advance. I get so many great recipes from your blog. I really enjoy it.
I have read and cooked from your blog for years with great success. Thanks so much for all you do. I’ve canned for even more years, first with the monster canner on the traditional burner and now the tiny canner (2 quarts or 4 pints at a time) on my smooth-top range. I am intrigued by the steam canner on the smooth top range, but Victorio doesn’t recommend your canner for that purpose. I read through the comments here, and would still like to give it a try, using your ideas to keep it from warping. My question is, what is the diameter of the burner you use? My biggest one is 9 1/2″ across and may be too small and the reason I forgo the steam canner, but I really want to try it. Thanks!
Hi Nancy, I actually didn’t realize the steam canner shouldn’t be used on a flat top electric stove. I don’t want to give misinformation and have anyone ruin their canner or stovetop. The burner I use mine on is 11 inches across so there is no overhang on the burner or the canner, it fits almost perfectly.
Mel,
Thanks for the reply. I think the burner size is key. I know my 15-year-old range will stop working some day and a larger burner will be a priority. Until then, I’ll stick with my tiny canner. I still enjoy the process and rewards of home canning, and love making your recipes!
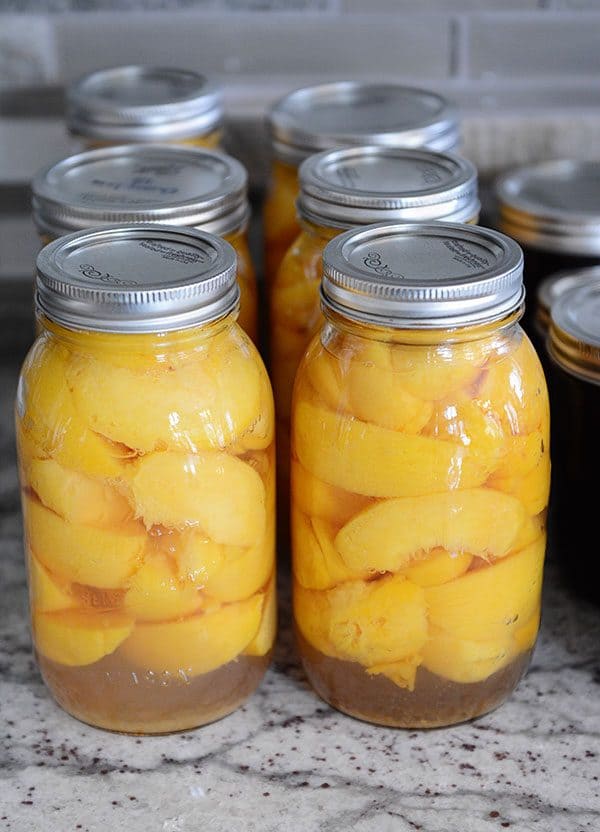
What recipe do you use for canned peaches?
I use the method in the Ball Blue Book (it’s pretty simple, pack jars full of peeled, sliced peaches, add a light syrup, close with lid and ring and process in a steam bath canner).
Mel! I love small batches of canning… we once ate apricots every morning for a year along with apricot jam and syrup… no one in my family can look at an apricot since then… hahaha! I also have a flat stove top and because of you… when I cooked a hole in my water bath canner I bought the steamer… then I was scared… but I used it last year and I love it so so much! Looking forward to canning half a box of peaches on Sat! I have a box with wall my canning stuff including hot pads and towels do add not too ruin my good ones…I had no idea you didn’t have to heat the lids in boiling water anymore! I’ll have to think about that one! Thanks for all your help… you make my life better!
Maybe someday I’ll get a steam canner, but for now I need to stick with the water bath method. I am wondering how to use the Ball Blue canning book for small batches? All of the recipes in there are for very large amounts of produce. I have a bowl full of cherry tomatoes that I need to do something with. It’s been many years since I’ve canned anything.
Tonight as I was scrolling Facebook, a page I followed mentioned doing a canning challenge. I want to can. But I knew most recipes called for a lot of produce. Which I cant always get and I don’t have a garden in my small two bedroom apartment. Ive canned jelly before but it was a long time ago and I was with my grandpa. All my grandparents are gone now. Save two but I havent heard from them in a while. I want to can and be able to say i know how. Also someday I hope to have a garden and not grocery shop as much. No one ever answered if I can do small batches. Then tonight I find your blog. And you made me feel so happy. Now. Can I can packaged frozen fruit? I have a lot and need space in my freezer.
Hi Ashley, glad you found your way here! I’m not sure what you mean by packaging frozen fruit?
I canned your homemade spaghetti sauce today. It tasted great. Where can I get other canning recipes that you have tried?
Here you go: https://www.melskitchencafe.com/?s=canning
I read you use the Ball canning book do the times used also convert to a steam canner?
Yes, I use my steam canner for all the recipes I’ve made in the Ball book.
I imagine you are busy with your lovely family, so I hate to ask questions! I wondered if you had a recommendation for water bath, steam canner, and pressure canner for an induction stove? (Available in Canada for bonus points )
Thanks so much for your blog and humor 🙂 My kids and I just canned for the first time this week – made your best homemade salsa recipe. It was a hit! Xo
Aw man, Rachel, I’m not going to be any help here because I am not familiar with canners that work on induction stoves. I’m so sorry!
I’m definitely a 9. My conversation only lasts 40 minutes.
😀
I would love your two cents on how your steam canner works on electric stove. I am seriously considering getting one, however many of the reviews on Amazon state that the bottoms tend to warp while being heated up, therefore, the base does not stay flat on the electric cooktop. Do you have this problem?
Hi Jenny – I’ve used a steam canner for years on my flat top stove without any issues. Neither of my steam canners have warped. However, I don’t crank the heat all the way to high. I usually heat on medium – maybe that makes a difference?
Me again! I was thinking… I have a steam juicer for when I make grape juice. Couldn’t I just use that to get my juice for the grape jelly?
Yes! Absolutely. I just did that last weekend!
Hi Mel! I am making grape jelly for the first time. I’ve been looking at cheesecloths, jelly bags etc. What is your favorite tool for straining the juice when making grape jelly? There are so many options online. I would love advice from someone who’s been there done that. 🙂
I really appreciated this post Mel! I have been canning for many years, but mostly jams and jellies and not all that frequently. I have never had a water canner, I have just fumbled through with a large stock pot. I was really happy to read about the steam canner, and I have gone and purchased one today, on a great sale price at Farm and Fleet. I will be making Apple Scrap Jelly next week. I came here with a couple of questions but in reading through the posts most were answered. Yay! One I didn’t see though was do you know if Pomona’s pectin is vegan? I have been using one type of pectin because one of my darling daughters is vegan. When my three young adult kids come home to visit they always go back with a jar or two of jelly. Thanks for the info and inspiration.
Yes, it is vegan!
Thanks for this post! I was really nervous about steam canning, but I have a glass top stove and use a large stock pot with a canning basket that will hold 3 pints at a time, and I always wish I could do more. I picked up the steamer you recommend at Macey’s for $25 (yay! Any Utah peeps, look at Macey’s or CAL Ranch stores) and I’ve used it twice and it’s worked so well! Thanks for the tips! Not sure how much more I’ll get done this year, I’ve got a lot of littles, but I’m glad to have more flexibility!
Yay, Becca! That’s awesome you found the canner locally and for $25!
I’d love to try canning, it intrigues me–but also scares the heck out of me! And one giant thing that has kept me from trying it–it seems like canning is only really worth it if you have a garden or are somehow able to get huge amounts of produce for REALLY cheap. I don’t have either so it seems like a waste of money.
Yeah, that’s not a bad point, Heidi. Canning doesn’t ALWAYS save money, especially if you factor in the time aspect. I think you really have to love it to keep doing it, especially if you don’t have garden produce.
I totally get where you are coming from, and I typically only can things that are better homemade (jams, salsas) I have a small garden, but I always have to purchase produce to can (I might have tomatillos from the garden but need to buy the onions, jalapenos, etc). I haven’t found a storebought green salsa that I like, and my husband LOVES the tomatillo salsa I can (the recipe from the Ball Guide). Try a small batch and see what you think! 🙂
My Mother In Law got me canning, but something about canning while pregnant with extreme morning sickness meant I couldn’t do it for a while. I still will do a few small batches of things, though. I love the The Complete Book of Small-Batch Preserving, Food in Jars: Preserving in Small Batches Year-Round, Preserving by the Pint, and Southern Living Little Jars, Big Flavors: Small-batch jams, jellies, pickles, and preserves from the South’s most trusted kitchen. One other thing that I can’t live without? Kevlar gloves. I’m a short (4’11”) person and I kept burning my arms on the pots while I was making Jelly. My husband bought me these mechanic sleeves and they are amazing. https://www.amazon.com/BSX-Gear-Industries-BX-KK-18T-Resistant/dp/B0035X8L96/ref=pd_bxgy_469_2?_encoding=UTF8&psc=1&refRID=39GAP720TE736KZFRTN3
Also have you ever had concord grape butter? It’s way more amazing than straight concord jelly, but it takes way more effort. We only make it about every four years or so. Usually when the memory of how awful it was fades away. Canning is kind of like childbirth that way…
Haha, so true about childbirth. Thanks for the link on the gloves AND the books! I bought a few based on others’ recommendations in the comment thread and the Food in Jars book is one of them. You guys have gotten me EVEN MORE excited about small batch canning if that is even possible. I’m making the mango lime jam from one of the books this afternoon, in fact! I haven’t ever made concord grape butter. I’m excited and nervous about the idea based on your comment…:)
Loved this post! I’ve really only ever done small batch canning. I’m curious if the steam canner processing time is the same as water bath? It sounds amazing!
Yes, it’s the same! Just remember to adjust for elevation if needed!
I love small batch canning too! My small yard produces just enough at a time to do a few batches of different things: Apple butter, grape jelly, tomatoes, blackberry jelly. If I wasn’t willing to do 6-8 jars at a time we wouldn’t put up anything at all.
I love that last line, Amanda! Small batch canning really is a great canning philosophy.
Hi Mel, I love this post and that it has gotten more people interested in canning. I have been canning on my own for about 40 years. Before that I canned with my mom. It’s been a generational thing for our family. My daughters are now canning! I used the steam canner about 20 years ago, and then the extension agency sent out warnings that it wasn’t safe because the heat didn’t evenly distribute in the process. Have they changed their mind on this? I would love to go back to the steamer! Thanks for the great post!
Hi Becky! Yes, the National Center for Food Preservation issued a report (I believe done by the Wisconsin extension office) saying steam canning is safe if following appropriate guidelines. You can see the article here: http://nchfp.uga.edu/publications/nchfp/factsheets/steam_canners.html