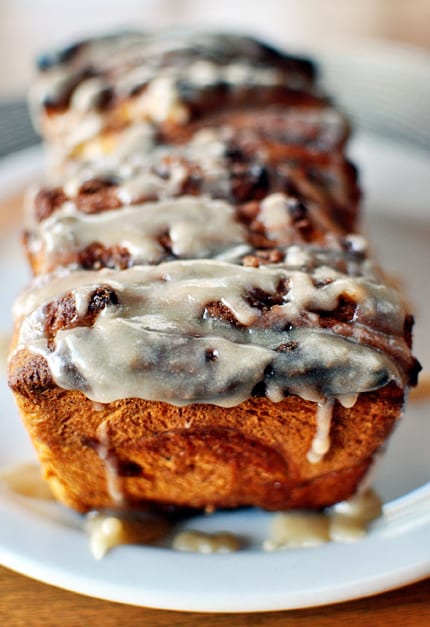
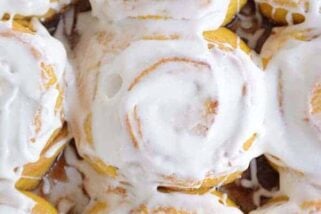
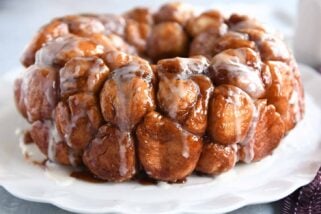
Pumpkin Cinnamon Pull-Apart Bread with Vanilla Glaze
This pumpkin cinnamon pull-apart bread with vanilla glaze is a clever way to get a cinnamon-roll-like taste and texture in a pull apart bread.
Move over, cinnamon rolls, cause you’ve got some new competition in town and it just happens to be this pumpkin pull-apart bread.
The pull-apart bread phenomenon has been circulating the food blog world for months, if not years, now, and when I finally got caught up with the trend, I had a flashback when I used to visit my old roommate, Kate, in Mesa, Arizona, and her mom would make us cinnamon bread assembled this way. Of course that was over 12 years ago and we girls just sat there idly while Kate’s mom did all the work, but still, I’m thinking this method for pull-apart bread has been around a while.
Shame on me for forgetting about it until now!
It really is a clever way to get a cinnamon-roll-like taste and texture in bread form that pulls apart in fluffy, tender layers of cinnamon/sugar bliss.
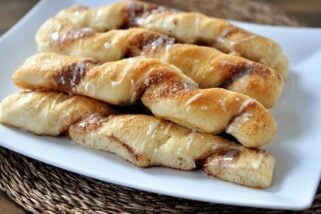
If you aren’t familiar with the method, I included a few step-by-step pictures below.
The yeasted pumpkin dough is smothered with a sweet cinnamon spiced filling and then cut into strips, then stacked, then cut again to be pressed together in a bread pan. It works, I promise.

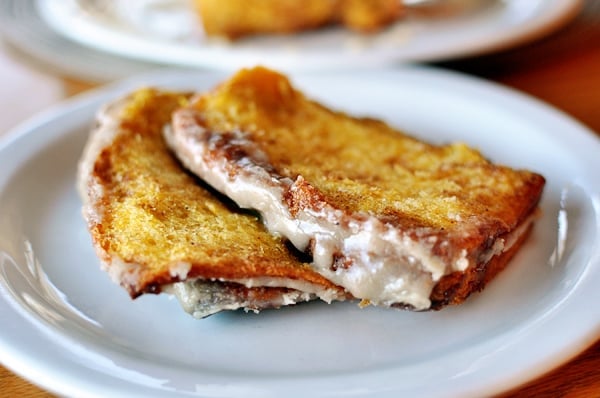
Perfect for this time of year, this bread is absolutely irresistible, especially when we discovered it heated up beautifully and tasted fresh as the day it was made.
I’m so glad this bread (pumpkin or not!) is back in my life again. It’s about time!
Pumpkin Cinnamon Pull-Apart Bread with Vanilla Glaze
Ingredients
Bread:
- 1 ½ teaspoons salt
- 1 ½ tablespoons instant yeast
- ½ cup (106 g) granulated sugar
- 5-6 cups (710 to 852 g) all-purpose flour, I’ve added half ground white wheat flour before with great results, too
- 1 cup milk
- 4 tablespoons (57 g) butter
- 1 (15-ounce) can (425 g) pumpkin puree (about 1 1/2 cups)
Filling:
- ⅔ cup (141 g) packed light brown sugar
- ⅔ cup (141 g) granulated sugar
- 1 tablespoon ground cinnamon
- ¾ teaspoon fresh ground nutmeg
- 4 tablespoons (57 g) butter, melted
Vanilla Glaze:
- 2 tablespoons (28 g) butter
- ⅛ cup (26 g) packed light brown sugar
- 1 ½ tablespoons milk
- ½ cup (57 g) powdered sugar
- ½ teaspoon pure vanilla extract
Instructions
- In the bowl of a stand mixer fitted with the dough hook (or just a large bowl if you are going to power through and make this by hand, which I’ve done, and it really isn’t so bad), combine the salt, yeast, sugar and 4 cups of the flour. In a small saucepan, warm the milk and butter until the butter is just melted and the mixture is warm to the touch. If it feels too hot, let it cool until it is at warm room temperature. With the mixer running (again, just adapt by hand by pouring it into the dry ingredients), add the warm milk/butter mixture and the pureed pumpkin. Continue mixing, adding additional flour as necessary, until the dough pulls away from the sides of the bowl, and knead the dough (by mixer or by hand) until it is smooth, elastic and just slightly sticky (don’t overflour – see the note above the recipe).
- Lightly grease a large bowl and place the dough in the bowl. Cover the bowl with lightly greased plastic wrap and let it rise until doubled, about an hour, depending on the warmth of your kitchen.
- While the dough is rising, make the filling by combining the brown sugar, white sugar, cinnamon and nutmeg in a bowl. Set aside.
- When the dough has doubled in size, lightly punch down and divide into two pieces. Roll out one of the pieces on a lightly floured countertop to about 20-inches by 12-inches. If it has trouble rolling out without shrinking back in, lightly cover the dough and let it rest 10-15 minutes before proceeding. Once rolled out, brush the dough with 2 tablespoons of the melted butter and spread half of the filling mixture evenly over the top, lightly pressing it into the buttered dough.
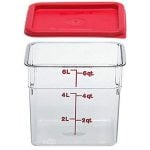
- Lightly coat two 8 1/2-inch by 4 1/2-inch bread pans with cooking spray. With the long edge of the rectangle toward you, cut the dough into 6 strips (see pictures below for a visual). Stack the strips on top of each other and cut the stack into 6 even portions (again, pictures are below). Grab the cut stacks, one at a time, placing them in the bread pan and pressing them up against each other so they all fit into the pan. Repeat with the remaining half of dough and filling ingredients.
- Cover the pans with lightly greased plastic wrap and let the bread double in size until it looks really puffy, about an hour.
- Bake the dough in a 350 degree F oven for 30-40 minutes, until the bread is browned and bubbly and cooked through. Remove the pans from the oven. While the bread cools slightly in the pans, make the glaze by bringing the butter, brown sugar and milk to a boil. Remove it from the heat and stir in the powdered sugar and vanilla until it is smooth.
- After the bread has cooled for about 5 minutes in the pan, loosen the edges with a butter knife and turn the bread out onto a cooling rack set over a piece of parchment or wax paper. Drizzle the warm bread with the glaze. Pull off pieces of the glazed bread and eat warm (the bread reheats well, microwaving several pieces on low power for 15-20 seconds).
Notes
Recommended Products

Recipe Source: adapted from Willow Bird Baking and Sunnyside Up

A neighbor shared a loaf of this with me several years ago. It was so yummy I had to have the recipe. It was this that turned me on to site and my cooking life has never been the same. Thanks for all you do, Mel.
Oh… and this bread is a fall staple we love it so much!!
I love knowing that – thank you, Toni! So happy you are here.
Highly addictive! I’ve made another one of your yeast bread recipes and loved it so no surprise we loved this one too. I halved the recipe ad used the majority of the maximum APF called for, but not all. Dough was sticky, but your tutorial on yeast page is helpful. I also added a pinch of cloves to the sugar-spice filling and topped the loaf with a maple cream cheese glaze.
So excited too try this recipe n i don’t like to use commercial yeast do in gonna use my sourdough starter instead. I just know it’ll be scrumptious! Thank you!
How do you get the recipe? Would love to try it with sweet potatoes.
Can I ask you a question on this super old recipe? Or for anyone who might know.
When is says flour until dough pulls away from sides? I’ll do that – but then as the KA keeps kneading it eventually sticks to the bowl again. So then do I add more flour u til it stops sticking to the bowl? I get nervous so I never take it that far. But I am always so unsure
Hi Mame – I don’t have a KitchenAid so maybe someone that does can chip in, but when you have that happen with your dough and don’t add more flour, does it turn out? If so, I wouldn’t worry about the specifics of adding more until it pulls away from the bowl. However, if your bread/rolls seem overly sticky or don’t rise well, you might need to add a bit more flour until it really does pull away without sticking.
I have a Kitchen Aid, and this is very normal. What I do is get it to initially pull away from the sides of the bowl, then set a timer for 10 minutes of kneading on speed 2. While it’s kneading, if it sticks again, I VERY gradually add a bit more flour until it pulls away again. I repeat this process until the 5 minute mark is reached on the timer. After that, I add no more flour, regardless any nominal sticking. Turns our excellent every time! 🙂
Could I use non dairy milk, in place of cows milk? Or does the recipe need the milk, say almond milk may not provide. any feedback would be great!
I’m afraid I don’t really know, Samantha. It’s definitely worth experimenting!
I just found your amazing looking pumpkin cinnamon pull-apart bread when I was searching for Christmas breakfasts. I will have to use dry yeast as did one of the previous responders. My main concern is I’m all about homemade but I don’t want to miss out Christmas morning or keep the kiddos waiting, so can I make this ahead of time and keep it in the refrigerator overnight to just pop in the oven the next morning?
Yes! That should work great. I’d probably put it in the oven as it preheats to give it time to puff a bit before baking.
Made this today and it was great! I thought I had ruined one loaf because I put in the oven before letting it rise a second time but it was delicious. It didn’t look any different from the one that did rise a second time. I didn’t taste the pumpkin but loved the cinnamon, vanilla, and butter flavors.
I have been craving cinnamon rolls AND something with pumpkin in it. I think I’ve found the perfect recipe to try. Can’t wait to try it.
Seriously this was so fabulous! Couldn’t stop eating it. Thanks!
I was just wondering… would it be possible to freeze this? Do you have any idea how long it would last? Thanks in advance!
Hi Hannah – I haven’t frozen this but I’m sure you could. I’d probably keep it up to 1-2 months in the freezer.
My glaze is brown and runny too…..
I am also having a problem (after 8 loaves) still getting a few doughy spots in the middle…worried about cooking it longer b/c the outside and top is getting plenty done?
Melanie – try tenting each loaf pan with foil about halfway through baking. You can bake it longer without the top getting over done.
My glaze did not turn out all white and thick like in your pictures, more brown and runny-ish, but I just drizzled it on the hot bread and it kind of soaked in and made it sweeter. This bread is amazing. I took one loaf to a friend and kept one home and I’m afraid my two year old and I may polish it off. We love it! I’ve never made the pull apart bread like this before, but I will be making it again and again now. Thank you!
…and why is my glaze brown? Weird looking but super yummy! Thank you for sharing!
I only had a large can of pumpkin. I went to 2 grocery stores asking about 18 oz cans and no one sells them. I doubled the recipe to use a full can. I wasn’t sure if I needed to double the yeast so I just did 2 TB. It’s on the first rise now. I hope it does okay. Now I’m worried I should have double the yeast.
This was not only amazing but looks impressive! Everyone loved it! My four year old had so much fun rolling and helping me cut and stack it. She was just asking when we can make it again. Now I want to try it with applesauce chunks of apples, or maybe a monkey bread theme… I love it! I like that it is easier than monkey bread and you still get the same kind of thing.
So so so yummy!!! I’ve had this recipe on my brain ever since you posted it but we (also . . . gag!) were in the middle of moving. Anyhoo, it just came out of the oven and it’s too die for delicious! One note: I’m a total dry active yeast kinda girl. Nothing against instant, I just want to know that my bread is going to rise. Anyway, I tried adding some of my 1/2 c sugar to my milk/butter mixture to proof my yeast. To my delight (and a little astonishment) it proofed just fine. I thought the butter might make it do something weird. Not so. Thanks for posting this!
This was yummy! Note the past tense – the bread didn’t last long! I was impressed with how it came together and the moist texture. Thanks for the pictures and instructions. I switched it to maple glaze and would highly recommend trying that.
I’ve made this twice this week, it’s SO goooood!
Tracey – yes, I think you could definitely mix the pumpkin in with the milk mixture – this dough is pretty forgiving.
I have this in the oven right now and it smells awesome! I used a medium size bread pan and I think it might have been better in a large size, because the “end” pieces are flopped right over the edge of the pan…like everything was squished a little too tightly! Either that or I let it rise too much! Hopefully it will still cook properly! Also, I found it to be pretty messy adding the pumpkin separately from the milk mixture. Do you think it would would work to mix the pumpkin and the milk mixture together and then add that mixture to the flour mixture?
Anyway, if it tastes at all as good as it smells, then I can’t wait to taste it when it comes out of the oven! 🙂
Yes, Mel…that makes sense!! just couldn’t tell exactly from the pics. planning on making this today! 🙂
I made this tonight and, like all recipes from MKC, my family loved it and devoured it! I wanted to omit the pumpkin, but after I added the milk/butter to the 4 cups of flour, it was way over-floured- dry and crumbling, even after a few minutes of mixing. I ended up adding the pumpkin just to get the dough moist enough again. The dough rose up fine the first time, didn’t rise much the second time (in the pan), and now I have barely half of one loaf left- my family loved it that much! It tasted great- more cinnamon-y than pumpkin-y- and so nice that it makes 2 loaves. I’m not sure what I did differently than Mel, but I can’t imagine needing 5-6 cups of flour, even with the addition of the pumpkin. Another great recipe, nonetheless! You just can’t go wrong with the recipes posted here.
Melanie – I take the stacks and flip them so they are on their sides (so they are put in the pan like little file folders – does that make sense?).
while this could never take the place of my beloved cinnamon rolls, i do appreciate the ingenuity. 🙂
Mel- when you stack the stacks back into the bread pans, do you lay them on their sides, or stack them upright just how you had them stacked on the counter top??
A pull-apart bread like this has been on my list to make forever. Looks like I need to get on that!
Has anyone tried making the dough in a bread machine? I’m definitely going to make this, and if I use the machine, I’ll let you know.
Oh my gosh…I can almost smell how delicious this is! This will make a wonderful Thanksgiving morning treat if I make it the night before and put it in the fridge. Thanks for your comment on what you think would work to make it ahead, Mel!
Just the recipe I need to use up some of the pumpkin puree I made this past weekend. I’ve made the pull apart bread before but not this pumpkin version. Can’t wait to try it.
Linda (and Laura) – I haven’t tried making it ahead of time but I think you could make the dough the day before (letting it go through the first rise and putting it in the bread pans). Refrigerate overnight and then pull it out to rise 1-3 hours before you bake it (letting it double in size). Then bake and glaze. Good luck!
I definitely need this in my life! ASAP!
Sounds scrumptious! I can’t wait to make it this weekend! Thanks, Mel. I always look forward to your emails!
Do you think I could prepare the dough, freeze it, and bake it later? I don’t have much experience with baking bread…
The chocolate chip oatmeal cookies you posted a few days ago are wonderful. I’m making another batch this weekend. I do love pumpkin, so I’ll be trying this recipe soon. Thanks so much for these recipes! I’m not kidding when I tell you that you have made my life much easier. I cook for my parents and they have loved all the recipes I’ve made from your blog.
Yum! Love pumpkin anything. We have made your pumpkin brondies with c/c several times already, and I made your pumpkin chocolate chip bread Monday. This looks so good. I have never made anything with this method, so it will be fun to try something new! Thanks Mel!
Gigi – just leave out the pumpkin and add extra flour to compensate (I can’t tell you exactly how much – just enough to make a soft, tender dough).
Megan – to substitute active dry yeast, use 2 tablespoons active dry yeast and proof it in the warm milk/butter mixture (let it sit for 5-10 minutes until it is foaming and bubbly) before adding to the dry ingredients. Take care the milk mixture isn’t too hot or it can kill the yeast.
FYI – I made this without the pumpkin and nutmeg for a cinnamon pull-apart bread. I increased the cinnamon by about 1/2 tsp to replace the nutmeg, and substituted about 1 cup flour and 1 cup milk for the pumpkin. Came out great!
Do you think this would work in a bundt pan?
Yes, that sounds like a fun idea!
Yummy yummy!!! What if I don’t have instant yeast? How much normal yeast could I use? Thanks!!!
I haven’t made “pull apart bread” yet, but I think this pumpkin version is totally the way to go!
Looks like a lot of work but totally worth it! I’m literally drooling over here….
This looks amazing but I would like to make this the night before and bake in the morning. Leaving it in the bread pans in the fridge and then taking it out and letting rise in the am (I usually place on warm heating pad to fascilitate the rising)Any downside to doing this?
Ummm, I screwed this holiday season. Stop cooking so I don’t have to double my work outs. Por favor.
I think I will be using some of my remaining honeycrisps to toss into this! Soooo excited to bake this.
I just made an apple fritter pull apart bread. It was kind of a pain and still dough-y inside after baking it. I just pray this one turns out better because it looks WONDERFUL! I think this recipe just moved to the top of my ‘pumpkin recipes to make in the next month’. 😉
I adore pull apart bread. I’ve only made a cheesy, bacon-y, ranch version. Must try this sweet Fall version of yours!
Some things will be around forever, and this bread is no exception! On my bucket list forever!
Mel, I make something similar to this and it’s wonderful. The recipe I use adds a Maple Glaze at the end and it’s divine. Basically it’s your same glaze with maple flavoring – Mapleine – instead of vanilla. It really adds to the fall flavor, you should try it.
I must presume you are now in a house??? If you posted that I missed it some how. I know this would be impossible in a motel room. Haha!!!
Looks yummy!!!
That looks fantastic!!! Thanks for sharing and posting during your chaotic life. We are moving 1000 miles away in a few weeks and I just can’t seem to have time to post anything!! Hope all is well!!
Holy moly! Looks amazin’!
This looks awesome.. please don’t judge me but I can’t take the fall pumpkin overload.If I omit the pumpkin what can I use to keep the consistency.