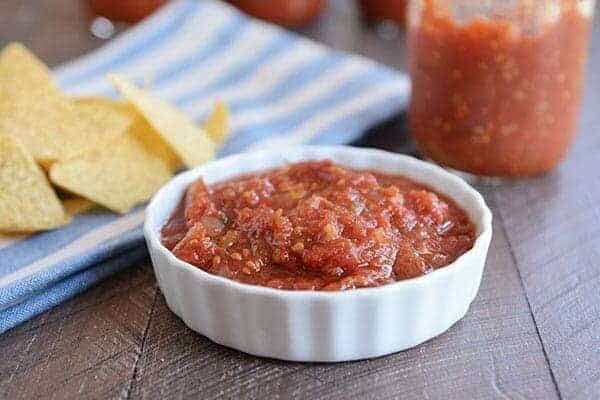
The Best Homemade Salsa
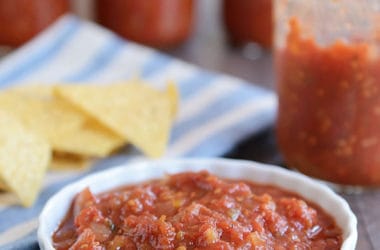
With over 2,000 5-star reviews you can trust that this is the best salsa recipe ever. It can be served fresh or canned to be shelf stable.
Included in the post is a step-by-step canning guide with tons of tips for proper home canning safety so you can store up jars upon jars of this salsa to last you all year.
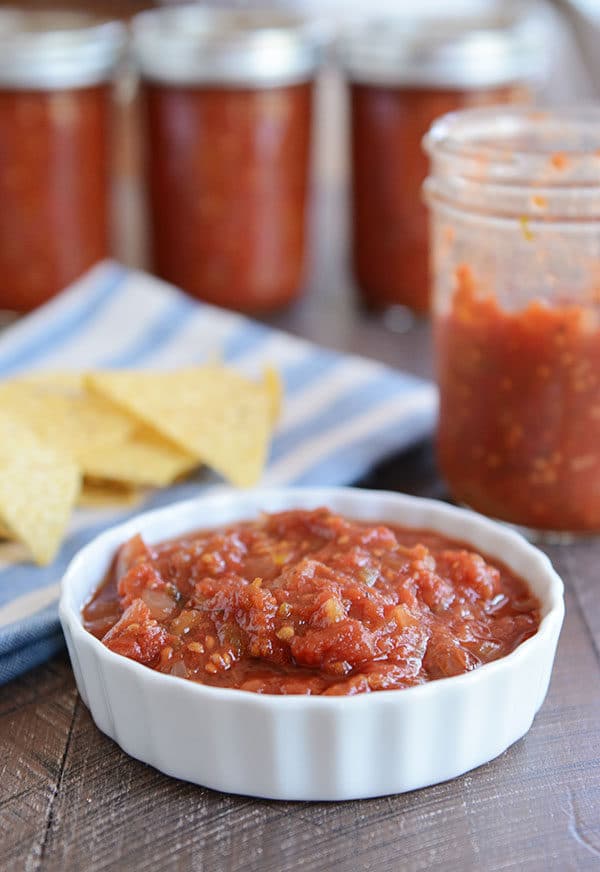
Homemade Tomato Salsa Ingredients
For proper canning safety, this list of ingredients needs to be strictly adhered to. If there are variation options, I have listed them below.
- 10 cups peeled, chopped and drained tomatoes: any variety of tomato can be used; it’s important to let the tomatoes drain after chopping and then measure the tomatoes after draining.
- 3 cups chopped onion: white or yellow onions can be used.
- 1 ¾ cups chopped green bell pepper: any variety of bell pepper can be used. Do not increase the amount of bell peppers in the recipe as it can reduce the pH levels and affect canning safety.
- 1 to 1 1/4 cups finely diced jalapeños: leave the seeds and membranes in for more heat. The amount of jalapeños can be decreased (but not increased above the 1 1/4 cup amount).
- 7 cloves garlic, finely minced: the amount of garlic can be reduced, as desired.
- 2 ½ teaspoons ground cumin
- 2 ½ teaspoons coarsely ground black pepper
- 2 ½ tablespoons canning or pickling salt: if you don’t have canning or pickling salt and would prefer not to buy it, you can use coarse, kosher salt (or experiment with table salt) but make sure it doesn’t have added iodine or any other additives.
- ⅓ cup chopped fresh cilantro: do not increase the amount of cilantro; alternatively, it can be omitted or reduced.
- ⅓ cup sugar: the sugar is optional in this recipe and the amount needed will largely be dependent on the sweetness of the tomatoes and your personal taste preference.
- 1 ¼ cups apple cider vinegar: Don’t alter the amount of acidity (vinegar). You CAN substitute some of the vinegar for bottled lemon or lime juice (keep in mind this will affect the overall flavor; I’ve had good luck subbing in half bottled lime juice for half of the vinegar). DO NOT USE FRESH LEMON OR LIME JUICE.
- 16 ounces tomato sauce: this ingredient is necessary for safe canning/proper pH and is NOT optional (despite what other recipe reviewers have said).
- 12 ounces tomato paste: this ingredient helps thicken the salsa; however, it is OPTIONAL. You can add a reduced amount of tomato paste or omit it completely.
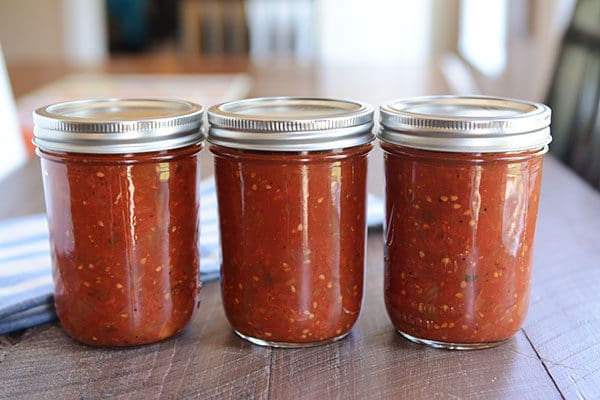
Reminders for Homemade Salsa:
- Use a tested recipe. Canning is a great way to preserve food and keep it on your shelves, but there are many food safety concerns related to canning and it’s important to use a recipe that’s been tested to ensure the pH levels are safe over time. This recipe has been tested for home canning safety in a proper lab.
- The variety of tomatoes doesn’t necessarily matter for this recipe, but the method does. This recipe calls for draining the peeled, chopped tomatoes and you’ll definitely want to follow this step otherwise your salsa will be watery.
- Peeling tomatoes is essential for this recipe (both from a texture and bacteria standpoint). See my easy method for peeling tomatoes below.
- Canning the salsa can be done with a water bath or steam bath canner. This recipe has not been tested (and is not recommended) for pressure canning.
The Easiest Way to Remove Tomato Peels
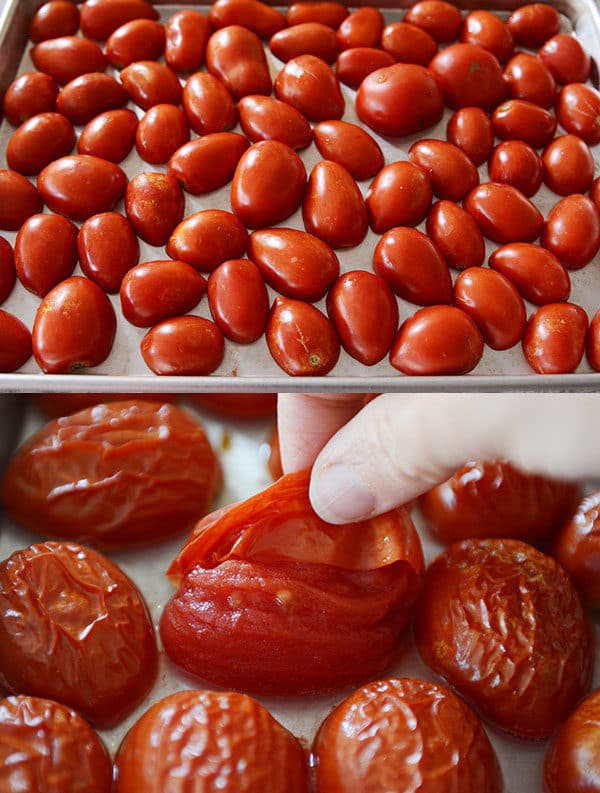
The easiest way to remove the peel/skin from tomatoes is as follows:
- Cut the tomatoes in half and place them cut-side down on a baking sheet
- Preheat oven to broil and place an oven rack 8- to 10-inches away from the broiler element.
- Place the pan of tomatoes in the oven and BROIL for 3-4 minutes (watch closely!). You’ll know the tomatoes are ready when they swell and look taut and begin to bubble just a bit.
- When the pan is removed and as they cool, the tomato skins will wrinkle and peel off very easily.
The oven broiling method to remove tomato skins is so much easier and less messy than plunging the tomatoes into a water bath.
Notes About Salsa Flavors
As written, this salsa is not overly spicy. You can increase the heat level by leaving the seeds and membranes in the jalapenos or use peppers with more heat, like serrano or habanero peppers.
IMPORTANT: the flavors of this salsa get better and balance more evenly with time. So if it has an overly strong vinegar taste after canning, let it rest on the shelf for a week or so.
The best batch of this salsa I’ve ever made used half apple cider vinegar and half bottled lime juice. I will make it like that from now on!
For a step-by-step visual on making this salsa, scroll below the recipe for a tutorial. ⬇️⬇️⬇️
Made this this morning. It is by far the best homemade salsa I have ever had. Perfect!
—Diane
Canning Tools For Homemade Salsa:
*several products below are affiliate links to Amazon
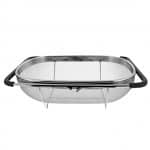
- this over-the-sink colander is perfect for draining the tomatoes
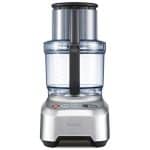
- food processor – I’ve had this machine for over 10 years
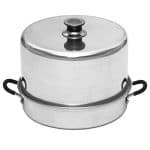
- steam canner – this is the only way I can at home (approved by the National Center for Home Food Preservation)
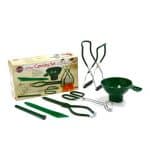
- this simple canning toolset has just about everything needed for filling and handling the jars
The Best Homemade Salsa
Ingredients
- 10 cups peeled, chopped and drained tomatoes (see note)
- 3 cups chopped onion
- 1 ¾ cups chopped green bell pepper
- 5 medium jalapeños, finely chopped, membranes and seeds removed (leave in for extra spice) – about 1 to 1 1/4 cups
- 7 cloves garlic, finely minced
- 2 ½ teaspoons ground cumin
- 2 ½ teaspoons coarsely ground black pepper
- 2 ½ tablespoons canning or pickling salt (see note)
- ⅓ cup chopped fresh cilantro
- ⅓ cup sugar, optional, depending on sweetness of tomatoes
- 1 ¼ cups apple cider vinegar (see note)
- 16 ounces tomato sauce, NOT optional – necessary for safe canning/proper pH
- 12 ounces tomato paste, optional if you want a thicker salsa
Instructions
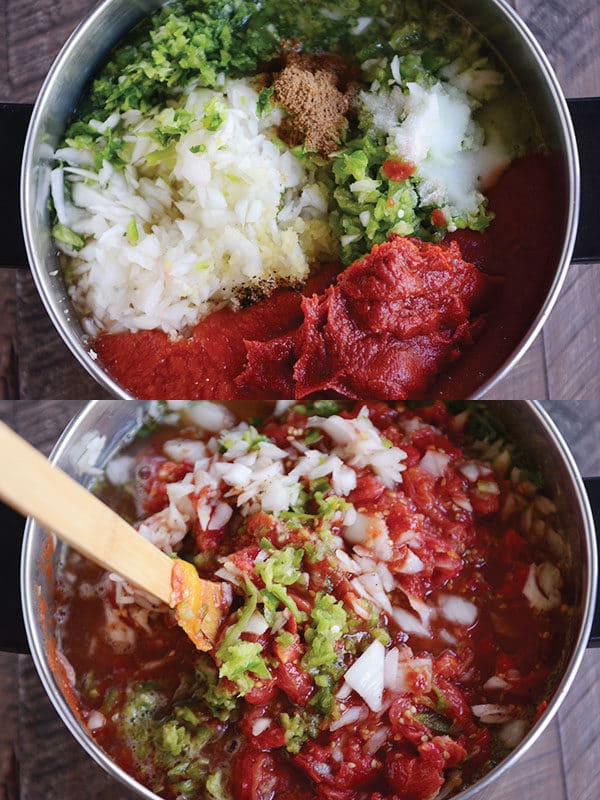
- Combine all the ingredients in a large pot and bring to a boil. Reduce the heat and simmer for 10 minutes, stirring often.
- Fill sterilized pint-size canning jars within 1/2-inch of the top. Wipe the rim of the jar clean and seal with a lid and ring.
- Process in a water or steam bath canner for 15 minutes (add 5 minutes if you live at 1,001 to 3,000 feet; add 10 minutes for 3,001 to 6,000 feet; add 15 minutes for 6,001 feet to 8,000 feet).
- Remove the jars carefully from the water or steam bath and let cool to room temperature. Check to make sure the jars have sealed correctly (lightly press the top of the lid; it should be firm – if the center bubbles up and down when you press on it, it hasn’t sealed correctly and will need to be refrigerated or re-processed).
Notes
Recipe Source: adapted slightly (increased all the quantities appropriate for canning safety) from this recipe I found on the awesome GardenWeb site


Can you use lime juice in place of lemon ?
I’m not 100% positive, but I think so. Basically the recipe needs enough acidity to can properly and be food safe. You might google and see if you can sub lime juice in canning recipes for the lemon juice.
You can use lime juice or lemon juice but it absolutely has to be the bottled type, not fresh and I would only replace half of the vinegar with it. As Mel said, the PH level is critical to safe consumption of canned foods. Fresh citrus fruits tend to vary in their acidity levels.
I just made this wonderful salsa a couple of days ago with roma tomatoes. I 4X the recipe and ended up with 32 pints of salsa. We liked it so very much I am thinking of doing more with the 1 1/2 bushels of regular tomatoes that I have. Do you think that the regular tomatoes would have too much liquid in them or would the draining take care of that problem? I didn’t add the paste last time so I would probably add it for sure to make it thicker.
I think by draining them and using the tomato paste, you’ll be fine!
Maybe this is a silly question, but what kind of onions do you use? I’m so excited to try this recipe, I want to get it just right…
Also, do you put in the tomato paste? (It says it’s optional.)
Yep, I add it. 🙂
I just use yellow onions.
After not having made salsa for 10 years, this recipe was a very delicious success. Slam dunk! It is the best Salsa recipe I’ve ever tried!
Can you use canned sauce and paste with the fresh tomatoes in it?
Hi Mary Beth – I’m afraid I don’t know what you are asking…the tomato paste and tomato sauce in the recipe is referring to canned. Does that help?
If you are going to eat this fresh, do you still cook it first?
No, you don’t necessarily need to cook it, although I do think it helps develop the flavors to do so.
I made the salsa today and it is by far the best I’ve ever had!
Yay!
Will it be okay if I omit the green pepper, in terms of acidity?
I’m pretty sure it’s fine – usually the issues come when you add too many peppers/veggies and that makes it unsafe to water bath can.
Hi! Would it be possible to can this using the boiling-water canning method with an InstantPot?
Hi Caitlin – I’m not sure – the method is entirely different with an InstantPot (it uses high pressure to can). I’ve read that the pressure doesn’t get high enough in an InstantPot to safely can foods so you might want to check into that before trying.
Even when I have a recipe I love, I feel compelled to try Mel’s. ☺️
This was too spicy for me (not mild!) and very vinegar-y! I know the acidity is important, but tomatoes seem pretty acidic on their own, right? I’ll stick to my old recipe (which is time tested from my mother in law, but I’m not sure if it’s officially approved by a lab) but I do like your skin slip method. Took longer than 3 min for mine. And the less ripe store-bought Romas didn’t really slip off. Garden ones did, but they weren’t Romas.
I agree about the vinegar- my husband tasted it and said he can’t eat it because of how strong the vinegar is. So I’m kind of sad because it took me a really long time to make this. I am sure it will get eaten, but I’d be interested in a recipe without the vinegar if that’s possible. I loved this method of peeling the tomatoes, much less painful.
The vinegar is needed for food safety but you could try subbing in bottled lemon juice (I don’t love the flavor which is why I stick with vinegar) or search for a recipe with a different lineup of ingredients. Sorry you didn’t love it; if I were your neighbor, I’d come take it off your hands. My husband would be thrilled! 🙂
I substituted some of the vinegar with lemon juice and it tasted wonderful! I also used sweet onions and red onions. I used half green and half yellow peppers. Do not use the insides of the jalapeños if you want it more on the mild side. I used store bought Roma tomatoes and it took more like 5 minutes but the skins did pull off pretty easy. I made a double batch and got 16 jars. It was a HIT with my family and they are asking for more plus my friends all want the recipe!
Could you post yours? I’m not crazy about the vinegar. I prefer lime juice
Kami, could you e-mail me your mother-in-laws salsa receipi, I’m concerened about have a salsa to vinegary. Thanks, Nancy nstienmetz@yahoo.com
Made this last week, and loved it! I didn’t can it, because I wanted to make sure everyone liked it first, but now it’s time to can. Thank you so much for the awesome recipe! Should I adjust the canning time for quart jars? We go through salsa extremely fast.
Hey Andrea – I remember reading somewhere that salsa shouldn’t be canned in quarts because of the density (it doesn’t get hot enough, I believe, when processing) but you could definitely try googling to see if you come up with information that will help you. Good luck!
Mel! You never disappoint. The legend continues! I’ve long wanted to make my own salsa but never had the courage to try it until your recipe. I knew you wouldn’t let me down. This turned out so delicious. I usually like mild salsa and I think this is closer to medium but it is perfect! Thank you for yet another amazing recipe.
Hi Mel, I’m trying to find where the original tested recipe came from. Can you help me? I went to the link you mentioned and still can’t find it. I am super careful on my canning recipes to only use those that are absolutely tested scientifically. TIA!
Hi Heather – from all the reading I did on that recipe, the lady who created the recipe, Annie, developed it and had it tested at her local extension office years ago. There are a lot of threads on the Garden web forum – I looked for a few minutes and couldn’t find the original thread I had read but here’s a couple that might help (there’s LOTS of discussion on there about the proper way to make the salsa without messing up the pH levels and making it unsafe):
http://faq.gardenweb.com/discussions/2766092/annies-salsa-recipe
http://forums.gardenweb.com/discussions/3337509/annies-salsa-the-approved-tested-recipe
Do you think the tomato peeling method would work with peaches too?
Reporting back that it DOES work! The skin didn’t pucker up though, so you do need to really watch it and check them after about 3 minutes
Yay! That’s good to know!
I have a beloved salsa recipe I have used for years. I canned a ton of it last year and thought I would try your recipe for some this year. I have a daughter who does not love cumin. Is the cumin flavor really strong in this salsa? I think the rest of my family would love it! Also do you have a good spaghetti sauce recipe for canning? Thanks for all you do! I have followed your blog almost from the beginning, my family always jokes when I give them a new recipe to try and say “is it from Mels?”
Hi Jennifer – you could definitely leave out the cumin (although the flavor isn’t really strong). I’m working on a spaghetti sauce recipe! 🙂
Great! Thanks.
Can I freeze this salsa instead of canning it? Thanks!
Absolutely!
What does it matter if I leave the skins on? It would be one less thing to mess with. I made fresh salsa with the skins on and I did not cook anything. All fresh and delicious! Is there a reasons to cook the salsa for 15 minutes besides softening the veggies?
love salsa
I have the same question about leaving skins on. My Roma tomatoes are all puny, and I’d rather blend them all up than peel them. Also what about using cherry tomatoes if I have a bazillion of them? Just blend? Thanks!
Hey Jan – the recommendation for not using the skins is mostly because the bacteria increases when using the skins but I know there are a lot of people that still use them. I haven’t tried this salsa with cherry tomatoes but it would obviously be a pain to take the skins off of those babies. 🙂
Thanks! I did some skins and some not, but mixed it all together. It turned out pretty good, but a little sweet….I didn’t add any sugar. Could it be the apple cider vinegar or possibly the cherry tomatoes? Thanks again!
Hi Jan – sounds like your tomatoes are extra sweet!
Judy – it’s really up to you but it’s not recommended to can salsa or tomato products with skins on due to the increase in bacteria. I make fresh salsa with the skins on, too (I agree, delicious!) but when canning, I always remove the skins. Yes, the cooking time softens the vegetables and increases the flavor a bit.
I’ve been searching for a good salsa recipe for years and have always been disappointed with the end product. I made the recipe today and it is fabulous! Thank you, my search is at an end!
How would fine sea salt work in this?
As long as it doesn’t have additives or iodine, it should work great!
I bought 25 pounds of scratch and dent canning tomatoes at the farmer’s market today and I’m making this salsa now. (The extra tomatoes will become frozen tomato puree.) I’m very excited to see how this salsa turns out!
Just updating my own comment to say that the salsa turned out great! I left one jar unprocessed to eat right away and it’s delicious. I did add the optional sugar and the taste is an interesting combination of sweet and tart with a good kick from the jalapenos.
Mel! This was so great! My neighbors and I just finished 4 batches! Hurray! We love your recipes so much- were a little fan-girlie over you!
Now we’re wondering if you have a canning recipe for spaghetti sauce because we’ve got tomatoes coming out of our eyeballs!!! Save us!!!
I have one in the works, Krista – been perfecting it the last couple weeks. I hope to get it posted next week!
Yay!!! You are amazing!
How crucial is the cilantro? Could I sub basil or oregano or a mix therof? I have a few cilantro-haters in the house. But tons of fresh basil & oregano available!
Not crucial at all – just a personal preference because I love it. You could leave it out or definitely sub in a different herb.
Can you cut this recipe in half? I don’t have enough tomatoes!
Yes! You can definitely halve the recipe.
I make a very similar salsa recipe and am very intrigued by your method of removing skins. To tell you the truth, I always leave the skins on (gasp!) because I hate peeling tomatoes, and can’t say I notice a difference in taste/texture, although maybe it makes the salsa more acidic? Salsa making/canning is the plan for today, and I’m going to try your oven method for the skins. Thanks, Mel!
I have never bough store salsa, my mom and I have always made lots of salsa every fall with our produce from our garden! I’m willing to give a few toes to bet it’s the best. salsa. ever. EVER! 🙂 However, it requires a lot more time and more romas than your recipe, so I stayed up last night after putting the kids to bed and made yours. I loved your trick of putting the romas in the oven – life changing! The salsa is delicious, thank you! I will definitely continue to make my mom’s recipe, but this recipe comes close and will stay in my recipe binder. 🙂 Thanks!
I’m glad you liked it, Jessica! If your family recipe isn’t secret and you don’t mind sharing, I’d love to hear more about it!
Very similar to the recipe I have used for 30 years but I don’t use the tomato sauce, paste, sugar OR vinegar. All fresh. I also love to use Roma tomatoes but have used lots of different kinds, depending on the garden. LOVE your recipes!
My favorite “fresh” salsa is The Pioneer Woman’s Restaurant Salsa. My husband would like me to make it three times a month so we never run out. I just make sure I buy Muir Glen whole tomatoes so it tastes good every time.
My mom canned salsa when I was growing up, but I’ve never tried it. Maybe soon! Thanks for such a thorough tutorial!
P.S. somehow I just discovered your blog and my kids actually ate the two skillet recipes I made! We’re putting them on our rotation along with the broiled fish tacos. They didn’t like those, but my husband raved about them so the kids are out of luck. 🙂
Can I bring a chip over and taste it before I make it? LOL!! I’m sure it’s amazing!! Everything you cook is amazing!!
Haha. How about I exchange you a jar of salsa for my pressure canner? 🙂
If I’m going to eat it right away and not can it, do I still need to cook it for the 10 minutes?
Not necessarily…although I think that simmering time helps develop the flavors a bit (and soften some of the vegetables). Totally up to you!
Yesterday I told myself I was going to make some salsa to can, but I didn’t have a good recipe for it. Then I checked your post and you delivered once again! Thanks for your psychic skills. 🙂 I can’t wait to try this.
Haha – glad the timing was spot on!
I’m a total salsa snob. So hard to find a good store bought salsa. I’d love to try this to see if I approve but I hate cilantro. So I’m scared to make a batch if I end up not liking it. And scared it won’t be a winner without it.
Oh, I think you could leave it out and be just fine (having said that, it isn’t very noticeable either – definitely not a predominant flavor).
Can I use red, orange, or yellow peppers in place of the green ones? I love your recipes! Thank you!
Yes! It will change the flavor but will be fine. Just make sure the total number of peppers doesn’t exceed the amount called for (for pH levels).
I just made and canned homemade salsa for the first time last week. I used this recipe: http://www.theyummylife.com/roasted_salsa … it is amazing. I was surprised how easy and delicious it was. Thanks for sharing your recipe. I’ll have to compare the two and see what the differences are. If yours looks milder I may give it a try.
Lime juice concentrate has the same acidity as lemon juice. I wonder if a lime juice /vinegar combo would handle the acidity issue? I would think it’d taste better.
Your Divine One Minute Salsa has been my go to salsa for years, & my whole family loves it! I cannot imagine liking anything better than that, but am interested in giving this new recipe a try. Thx, Mel 🙂
Oh, I love that one, too, but I never can it so this one is my canning winner. 🙂
This looks delicious, Mel! We must be on the same wave-length because I am canning salsa today already! We have a recipe we love and when I branch out my family rebels, but yours looks worth trying for sure! There is nothing like seeing all those pretty jars all lined up when they are finished!
You’ll have to share your recipe, Kelsey! Unless it’s a secret. 🙂
I have 2 Victorio brand steam canners that I love hard. They both have temperature gauges on top and show when you are in the correct temperature range to start timing. It’s been life changing! I had two other steam canners without the gauges that I got rid of and replaced with these. I have also found by watching the temp gauges that I can turn the heat down to med-low and still keep the temp in the correct range. Yay! It saves propane! (I can outside on my camp stove.)
Cool, Angie!
Can’t wait to try this! On another note, do you know how I can get your recipes to print without the ad in the middle? The ad used to show up but wouldn’t print. Now it’s printing and I can’t get rid of it. I’ve tried going to “ad options” but I believe that just changes the types of ads I see, not taking the ads away. It’s just annoying that a lot of the recipes are printing in 2 pages now because of it. Any direction you can give would be great. Thanks!
Oh, the ads should NOT be printing, Stacy! Clear your browser history/cache. That should do the trick. I tried it on my computer (Safari and Chrome) and the ads aren’t printing. I agree, that’s annoying. If you can’t get it to work, let me know and I’ll troubleshoot on my end.
Oh this looks delicious Mel! Your recipe is so, so similar to mine! We go through it like it’s water. I made sure I canned plenty last summer to get us through the winter. I have tomatoes coming out of my ears again this year. Looks like I need to get busy! I kind of cheat though and don’t put mine in a steam bath. I just let my salsa come to a boil and keep my jars in a warm oven and the lids in simmering water. I pour the boiling salsa into the warm bottles, then put the lid on and screw the ring on and tip the bottles upside down and let them sit overnight. The lids seal every time. Don’t call the canning police on me !
I do this with my jam! 🙂
Awesome! I just tried your method last night, Jodie, and the jars were all sealed this morning! This is so much easier. How warm do you keep your oven for the jars? Thank you!
Thanks, Mell, for this recipe! I love your method of removing the skins from the tomatoes. How close to the broiler do you put the tomatoes? I think I had them too far away. Still had to work at getting the skin off. Thank you!
Hey Terry – just keep in mind that it isn’t recommend from a food safety standpoint to keep the jars at room temperature (on a shelf) without properly processing in a water bath, steam bath or pressure canner. Simply letting them seal from the heat of the salsa doesn’t preserve them properly. You can google some of the reputable canning guides for more information but I want to make sure I give that disclaimer so no one gets sick and comes back to blame me. 🙂
I usually put my oven rack a few inches away from the broiler – maybe 3-4? Hope that helps!
My recipe is very similar but with my overload of garden tomatoes I omit the tomato sauce/ paste, use 18 cups tomatoes, and cook the salsa on the stove for 2 hours to evaporate more water.
Thanks for all your great cooking tips! I’ve used so many of your recipes over the years.
Thanks for including your adaptations, LaRene!
Can this be processed using the water bath method? If not, I’ll pick up a steam canner but I do have a traditional pot that I could use if it is possible. Thanks!
Absolutely! The instructions in the recipe and step-by-step photos include a steam canner or a water bath canner. 🙂
Ha! Sorry, I just saw that you put steam or water in the photo section. I guess I’ll save myself some money!
Could I make this with store bought canned diced tomatoes? I seriously hate processing fresh tomatoes.
I haven’t tried it so I’m not sure. Of course he flavor will be different but the real key is to check to see about the pH level and food safety. You might try googling to find out. Do you hate the peeling part? I used to hate processing tomatoes, too, until I started broiling them to remove the skins. So much easier than boiling.
Canning salsa is on my list to do today. I will have to try this recipe!
Looks delicious! I think you are putting them in half-pint jars here, though? But maybe your pint jars just look skinny on the computer screen 😀 if so, disregard. I’m going to add this to my list of things I want to can!
OH! And your peeling method??? Wow wow wow THANK YOU! When I can tomato sauce, I freeze the whole tomatoes first. Then as they thaw the skins slip off, and the mushy tomatoes are perfect for cooking down into sauce. But I am so excited to do this instead of the blanching method!
It seriously made me fall in love with processing fresh tomatoes again. I hope you like the method of you try it!
Oh I’m glad you posted this! My friend said she freezes her garden tomatoes as they become ripe and turns them into salsa and what not so I’ve been throwing them in my freezer and was scared it would ruin it! Yay!!
Nope, they are real, live pint jars. 🙂
How many pint jars did this recipe make?
8-9 pints.
Yum! i’ve never made homemade salsa before, but this looks amazing!
Paige
http://thehappyflammily.com
HI Mel. I have a hard time getting *good* fresh tomatoes – but I LOVE making salsa. I’m embarrassed to ask, but what do you think about using canned tomatoes? (gasp – hide my eyes)
Haha, always worth the question! I just don’t know about pH levels and food safety of using canned so you might try googling to see if any of the main canning experts (Ball, NCFHP, etc) have anything to say about it.
Hi Mel ,
I know this recipe like the back of my hand . It is a well posted on the internet “Annie’s Salsa” , as you have said . You are so right, its the best . I say phenomenal ! Awe …. gee whiz, I don’t like to point out a typo but for the tomato paste addition, it should be to add if one wants a thicker salsa . For canning I use an ” All American ” pressure canner ” , I can fit 19 pints for one processing time . Time is everything for me . I love my “All American” pressure canner ! I can year round, making soups, canning potatoes, pinto beans, northern beans , meats , broth and the list goes on . I too, love canning .
Thanks for the heads up on that, I’ll fix it! And yes, this is a popular recipe around the internet for good reason. So, for some reason, I didn’t think it was recommended to can salsa in a pressure canner (or perhaps it’s just that it’s not well publicized on the timing). How long do you process your pints of salsa in a pressure canner?
One can indeed use a pressure canner for canning salsa . I always use Roma tomatoes and never use the tomatoe paste (optional) in the recipe . It never turns out to liquidity or mushy ,not ever . Very certain the reason for that is the Roma’s are a meaty tomato. I have tried the water bath method as well with this recipe , both have the same consistency. I pressure can at 10 lbs. of pressure for 15 min. Adjust lbs. of pressure for your elevation .
Thank you so much! I have a beloved pressure canner and can process a lot of pint jars at one time so you’ve convinced me to try it!
Hi Mel
I like your method for skinning the tomatoes, I just do not know if it will work for pressure canning salsa ? Cooling them quick keeps them from cooking any further after blanching . Also if pressure canning you can add more cilantro and chilies ( chipotles in adobo ) are a excellent addition . Cheers !
Hi Mel. I just made your recipe for the first time and I’d have to say it’s probably my last first time! It’s delicious. I started with about 11-12 lbs of tomatoes, mostly roma (we’re raising the small ones and the giant ones, which are fabulous for this). That yielded about eight cups of cooked, peeled, crushed, and drained pulp. (I tried your oven method for peeling and that worked great.) So I went back out to the garden to collect anything that was red, which included about three cups of cherry tomatoes, and did the recipe as written with 9 1/2 cups of tomato pulp. The salsa was beautiful and canned up perfectly (water bath). I have nine pints of salsa plus four pints of tomato juice collected while draining. Thanks for sharing such a delicious recipe!
This salsa looks amazing!!!!!
I’m dying for an update on the success of your eBook and efforts to raise money for Mentors? Can we get an update? Can we? Can we? Can we? 🙂
Hi Danielle – thanks for being interested! I’ve been posting a few updates to Facebook and Instagram but the latest total was over $32,000! It’s been incredible. Additionally the eBook has raised almost $15,000!
That’s amazing! You must be so happy 🙂 I am not on fb or Instagram. I have to avoid those time traps to devote more time to my one true past time….food blogs 🙂 (PS, I follow 26, but yours is number one…hands down the best in my book)
thanks for the recipe – is it one of the new ball recipes? Anyways… the use of steam canners was approved for use last year by one of the university extension offices, and is on the NCHFP website – with a disclaimer they have been approved for anything under 45 minutes. They added a statement they will be updating their pages to reflect that.
I just got my steam canner about 2 weeks ago and wow – i love it compared to having to boil 5 gallons of water in the traditional pot.
Oh, that’s great info, Janet! I agree, I love my steam canner and the lesser amount of water. I’ll try to find the link to that article on NCHFP and link to it in my post.
awesome! your recipe will be on the list for next year, already have 50-60 pints of salsa done for the year.
Wow, Janet! That’s a lot of salsa – totally amazing!
So if you typically use romas, how many pounds (approximately) do you need to end up with 10 cups of chopped/peeled/drained tomotoes? I have a (fresh) salsa recipe I love, but your post has me intrigued…
Hi Alicia – I use about 10 pounds of tomatoes, give or take, which often yields 10 cups of tomatoes (after they’ve been peeled, chopped and drained). I hate throwing out that exact pound amount because so much depends on the variety of tomato and how long they drain, etc, but it’s a good starting place.