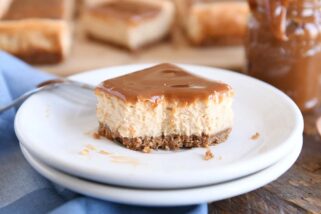
Homemade Dulce de Leche Twix Bars {Shortbread + Caramel + Chocolate}
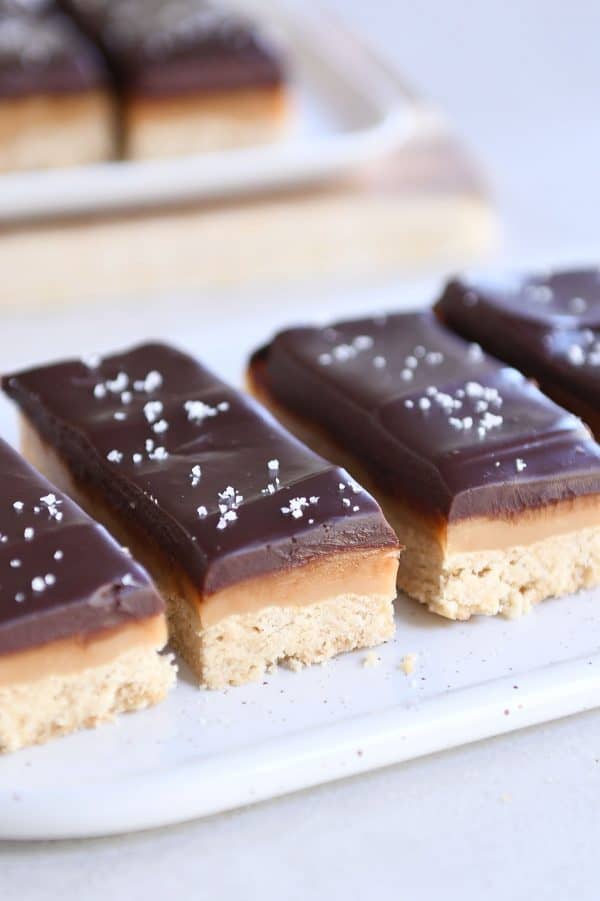
These homemade dulce de leche twix bars are the ultimate combination of shortbread crust, easy homemade caramel, and chocolate topping.
Just a few days away from the end of holiday baking season and I’m posting this recipe. What on earth am I thinking?
I mean, most of you probably already have your holiday baking spreadsheets typed up, double checked, and mostly executed. Go you.
I’m proud of you. Very proud.
But I wouldn’t feel good about myself as your virtual friend and best-recipe giver if I didn’t share this homemade dulce de leche Twix bars recipe. Even this late in the baking season. I’ve definitely saved the best for last, because I think this probably qualifies as the best thing I’ve made all year (lots and lots of close seconds, but if I had to choose…).
The perfect combo
I might be a little biased. After all, the classic Twix combination: shortbread + caramel + chocolate is one of my favorites ever. Ever ever.
Do you remember four years ago when I did the same thing I’m doing today and posted these Twixster shortbread cookies declaring them one of my favorite cookies of all time? You faithful followers shouldn’t be too surprised, right? My opinion of this stellar combo still hasn’t changed. I love those cookies and make them EVERY December (and May, and probably July, too).
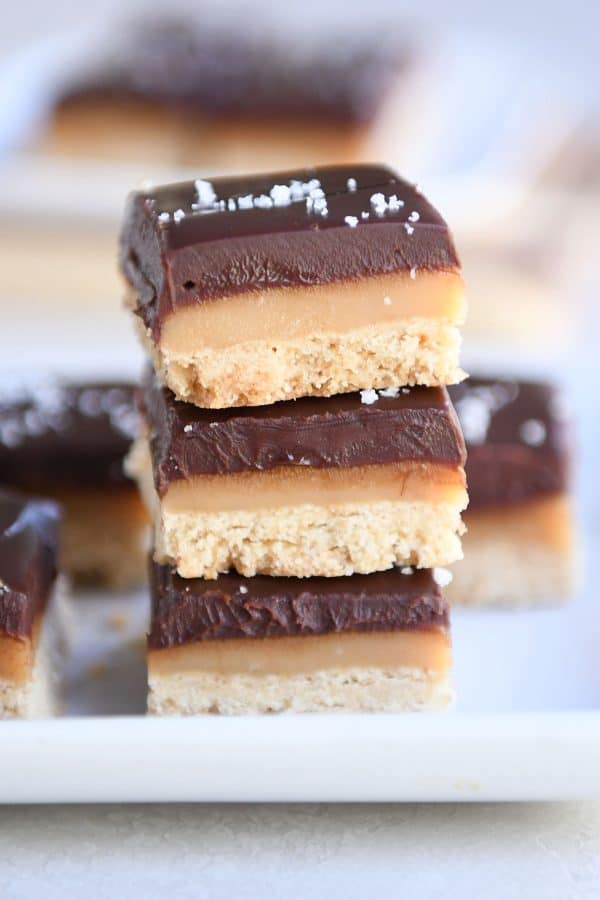
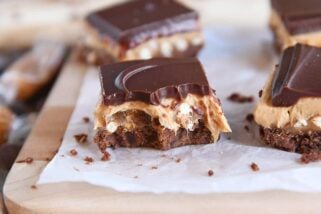
These divine dulce de leche bars are like those cookies – just in bar form. With a few little tweaks here and there.
And oh my goodness, they are insane and amazing and life changing and all the other superlatives you want to throw in there even though people will roll their eyes at you and me. It’s the truth. And I always stand by the truth. (Especially when it comes to shortbread and caramel.)
The bars start with a simple but very important shortbread crust.
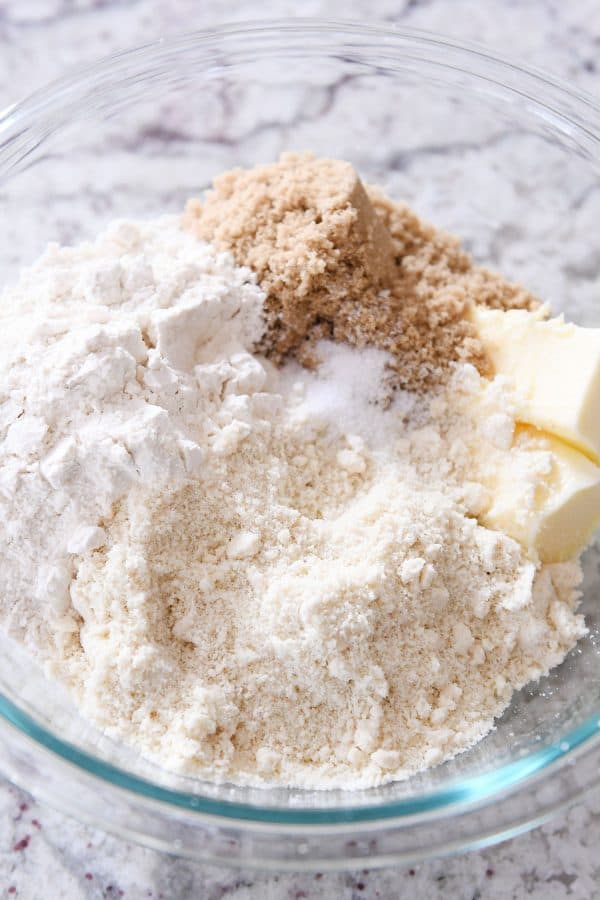
Shortbread Crust + Flour Options
And when I say simple, I mean simple.
- butter (I use salted, always)
- brown sugar
- almond flour
- all-purpose flour
The almond flour adds a fantastic depth of flavor that all-purpose flour just can’t reach. AND, it definitely adds to the perfect crumbly, but not too crumbly, texture.
I don’t think I’ll ever make a shortbread crust without a little bit of almond flour thrown into the mix. It’s delightful.
My try at using 100% almond flour wasn’t as yummy as using a combo of almond flour and all-purpose. But if you are wanting to make a gluten-free option, I think the almond flour is definitely passable!
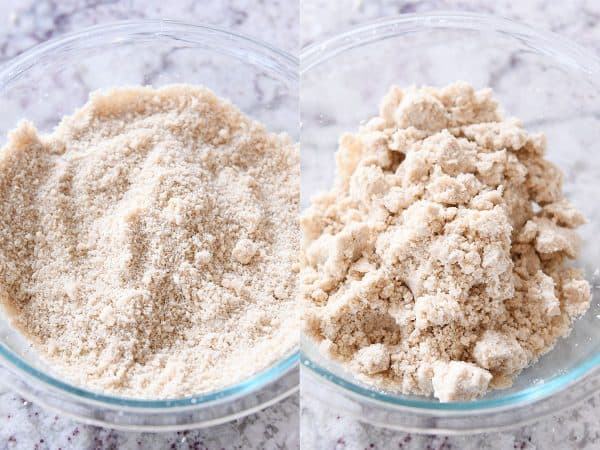
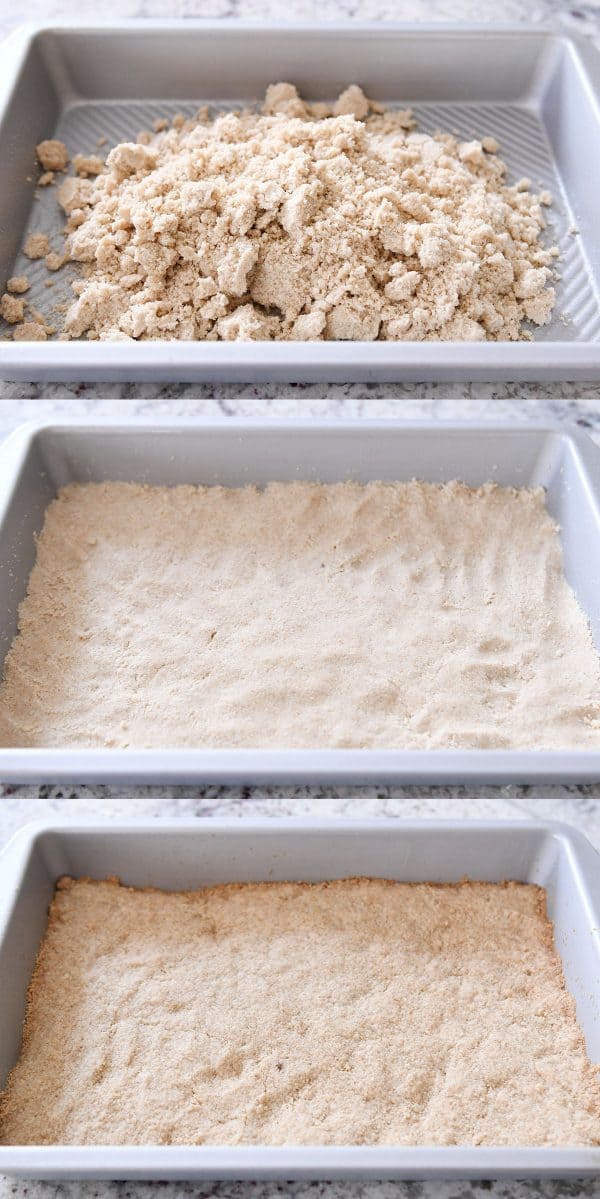
The crust is going to be very crumbly after being mixed. Don’t panic! It’ll look much more crumbly if using a handheld mixer vs a stand mixer.
Although it looks sandy, if you grab a handful, it should clump together.
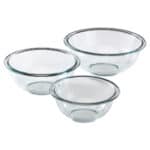
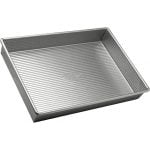
Press that delightfully wonderful buttery shortbready mixture into the bottom of a 9×13-inch pan. I use metal pans for baking. I like the straight sides and even baking potential. If you use a glass pan, you’ll probably want to decrease the oven temp by 25 degrees.
Bake the shortbread crust until set and the edges are lightly golden. Don’t overbake. Don’t underbake. Haha. Good luck. (Just kidding, it’s not hard, 13-15 minutes and you’ll be good to go.)
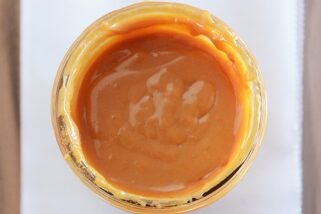
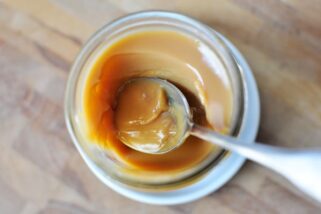
Homemade Dulce de leche
Or, caramel. You can call it what you like; I’m sure I’ll get corrected in the comments (wink, wink), but it really is a beautiful combination of both.
Because the mixture uses a can of sweetened condensed milk, it definitely has a dulce de leche vibe and flavor, although the texture is more chewy and caramel-like than normally soft and creamy dulce de leche.
While the crust cools, you get the lucky job of making this super easy homemade dulce de leche/caramel! You don’t even need a candy thermometer.
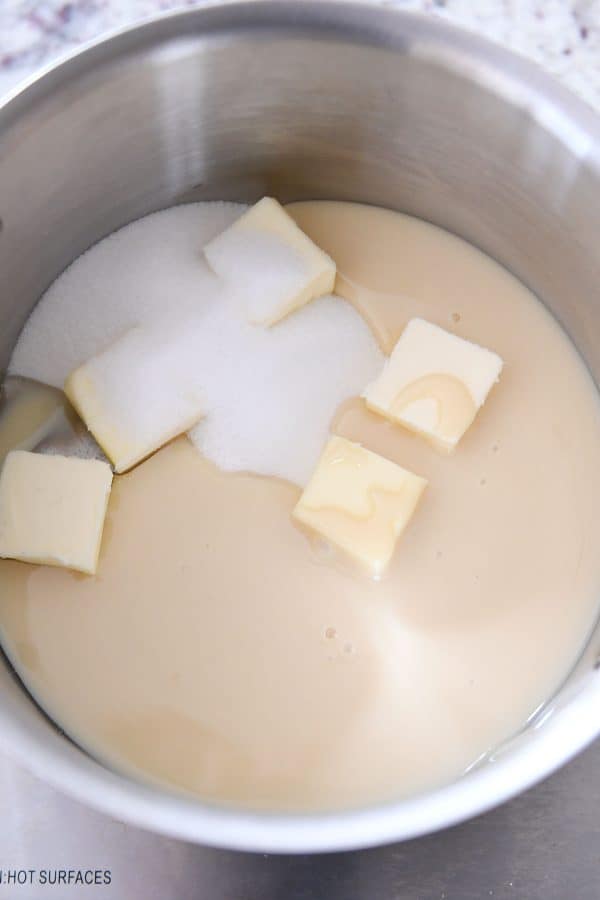
The only trick is to stir constantly over moderate heat.
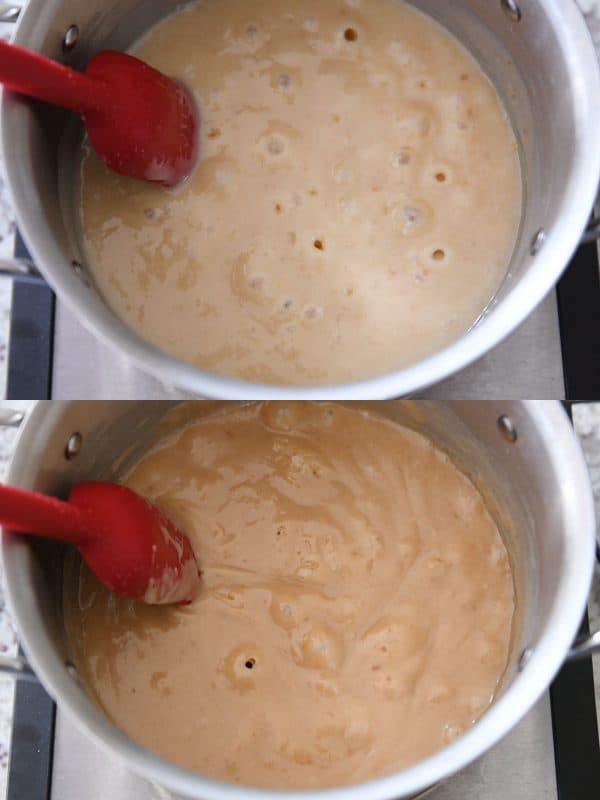
Once you see bubbles pop on the surface and the mixture comes to a gentle boil, set the timer for 10 minutes. In that time, the color will darken into a lovely golden brown but it stays pretty light overall. If you want more chewiness, cook it a few minutes longer.
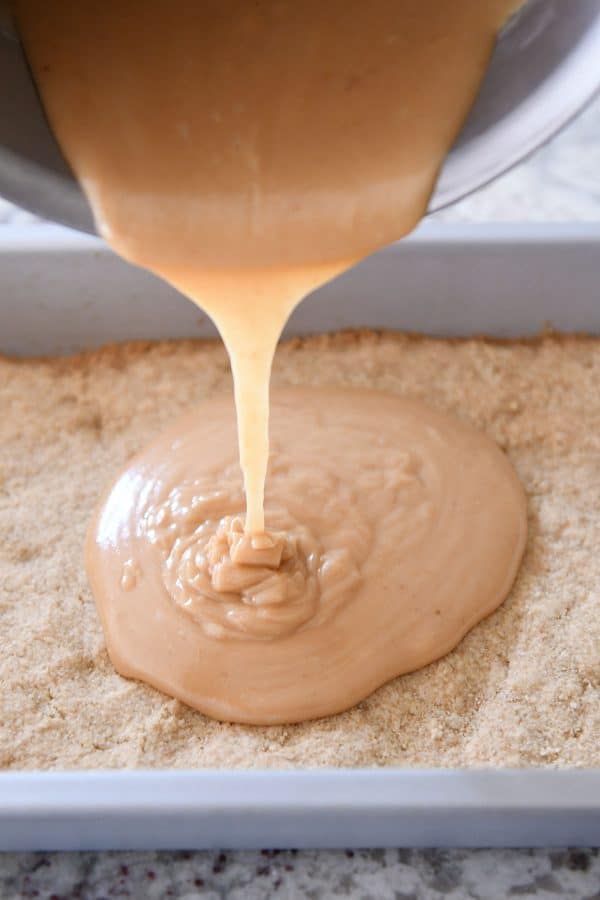
Off the heat, stir in the vanilla.
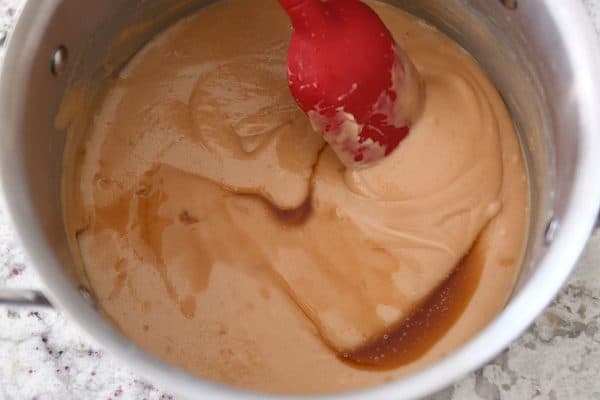
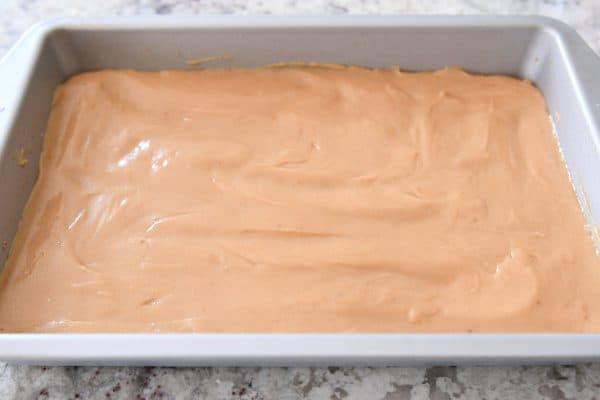
And then immediately pour the warm caramel over the cooled shortbread crust and spread into an even layer.
Refrigerate the crust until the caramel is cooled and set, about 30 minutes. What you choose to do with the caramel remnants left in the pan is up to you. #nojudging
Chocolate Ganache: A 2-Ingredient Wonder
While the caramel is cooling, it’s time for the ganache. Or in other words: one of the most divine things on the planet.
I love ganache so much. I love saying it. I love making it. I love digging in with a spoon.
For this recipe, we’re using 1 1/2 cups chocolate chips or chopped chocolate (bittersweet, semisweet, or a combo – or play around with using milk chocolate) and 1 cup heavy cream.
Place the chocolate in a bowl, heat the cream to just below a simmer and then pour over the chocolate and let sit. As you start mixing the ganache, it’ll look grainy and weird. And if it’s your first time making ganache, you might panic and think: it’s ruined!
It’s not ruined, I promise. As long as the cream is warm enough and the chocolate fully melted, it will come together. Just keep mixing!
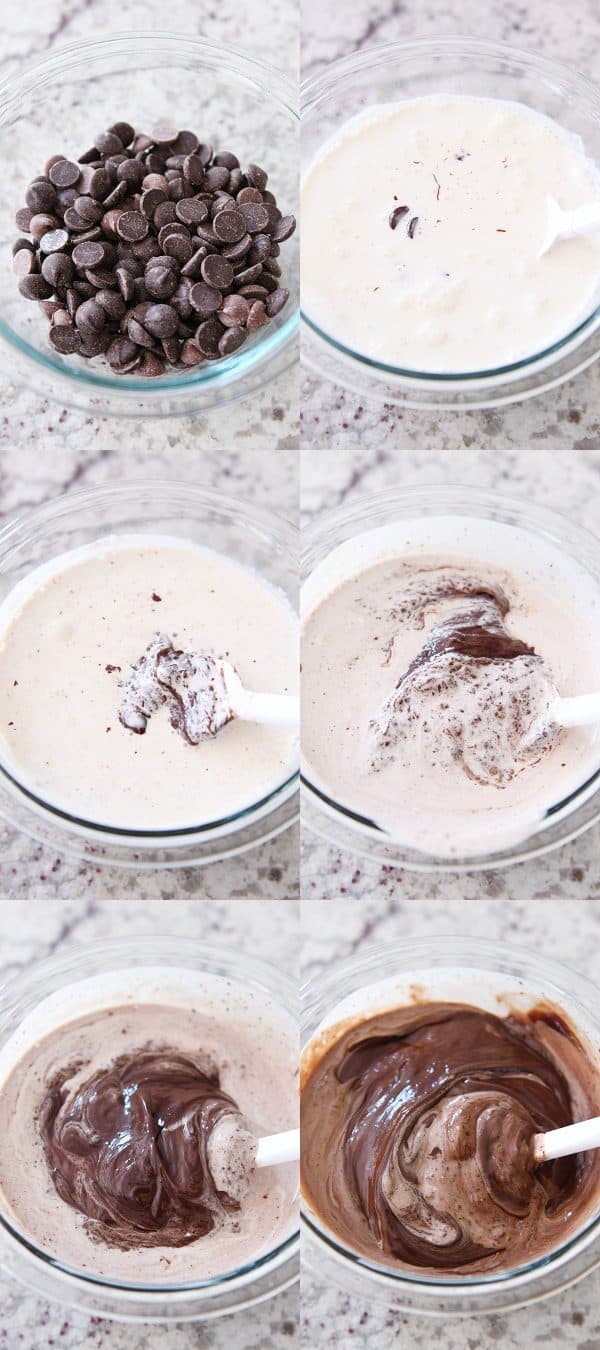
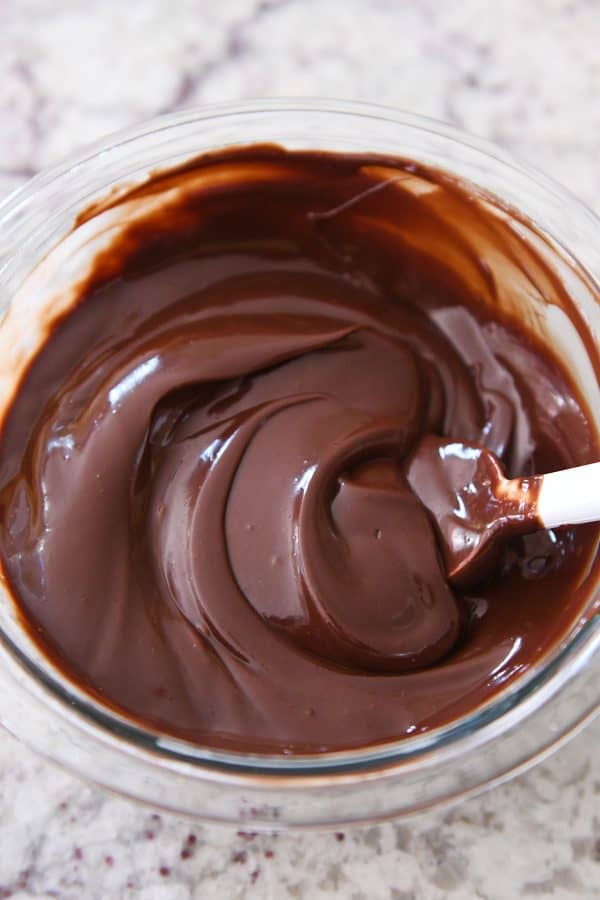
Before you know it, the ganache will be glossy and silky and glorious.
This makes a pretty substantial layer of chocolate on top of the shortbread and caramel. It’s perfect, in my opinion. But you could definitely decrease the quantities a little if you want a less hefty amount of chocolate. I mean, I think we can still be friends if you do that.
What type of chocolate is best for melting?
I always use Guittard or Ghirardelli brands when melting chocolate chips. The flavor and texture are spot on.
You can also use chopped chocolate (any brand that you really love the taste of if you take a nibble) or your favorite brand of chocolate chips. No need to be fussy, just keep in mind that some brands of chocolate chips don’t melt well and may have added ingredients that affect flavor or taste.
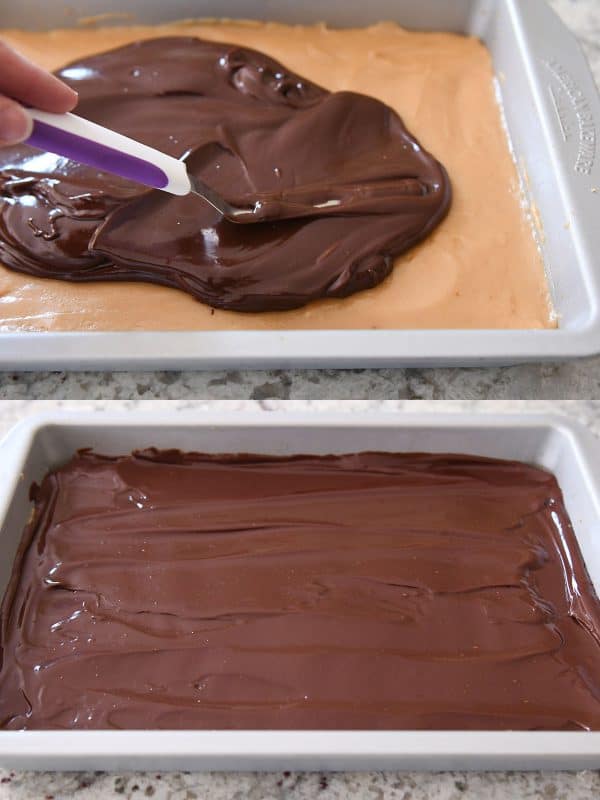
Before all is lost and the chocolate ganache is smothered in between graham crackers or eaten straight from the bowl, pour the magical mixture on top of the set caramel.

Spread the ganache into an even layer and refrigerate until set.
If you want to sprinkle a small amount of fine sea salt on top, you can do it now or wait until the chocolate has firmed up a little bit.
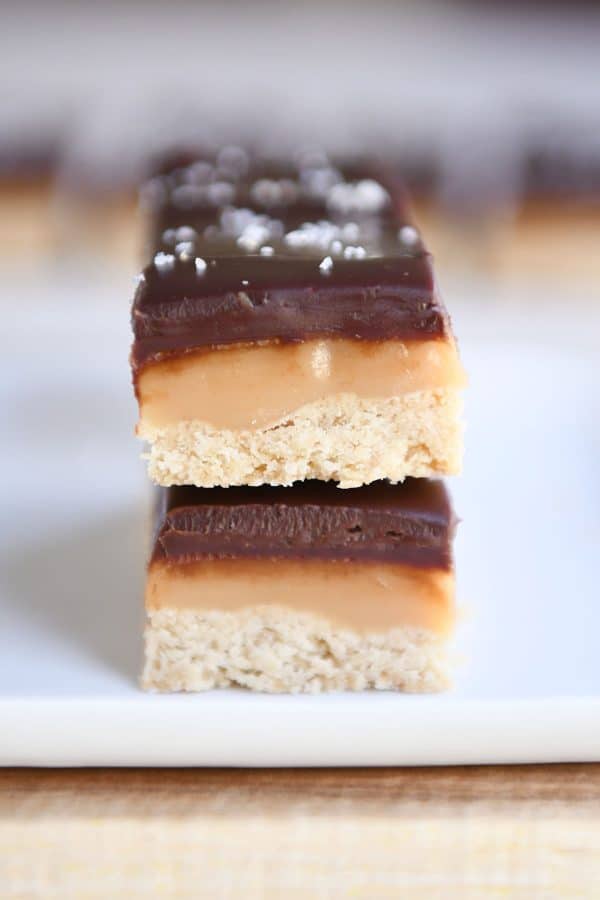
How to cut clean slices
To cut neat, even slices, first, let the bars sit at room temperature for 15 minutes or so in order for the caramel to soften a bit. Then, run a sharp knife under hot water and wipe dry. Slice the bars, repeating the hot water step as needed.
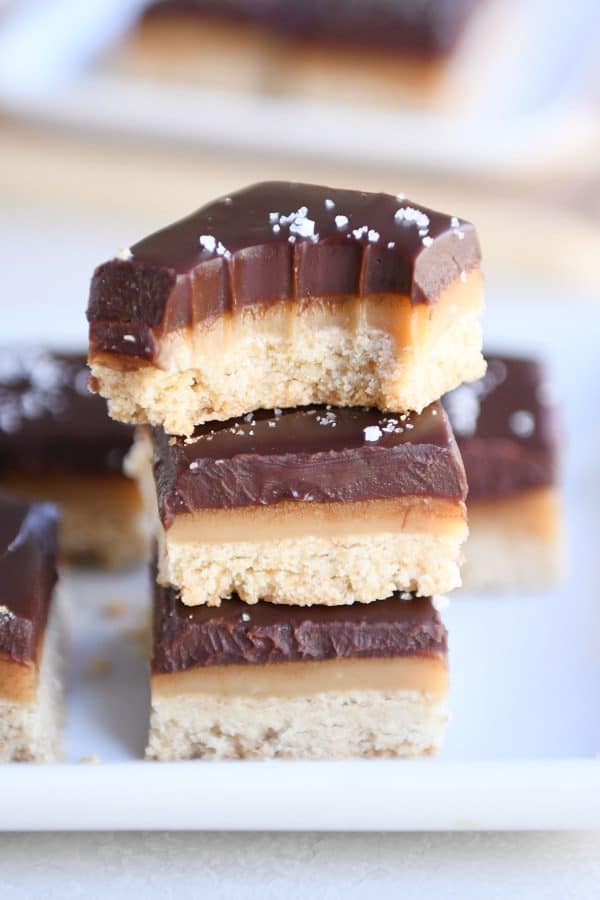
You can cut the bars into thin rectangles or squares. Even triangles or hexagons would be acceptable. It honestly doesn’t matter because they will be inhaled within minutes.
While the bars do need to be stored in the refrigerator if not served within an hour or so, I like them best one step above room temperature. Not chilly. But not warm. Because the topping is just chocolate ganache, it will soften as the bars sit out of the refrigerator. That’s ok.
They still can be served off a tray to be picked up and eaten. There might be some chocolate lingering on the ol’ fingers, but that never hurt anyone. You can also serve them plated with a fork if you want to go that route, but a small serving goes a long way.
They are unapologetically rich and decadent.
If you are looking for a showstopper dessert for a holiday meal or to add to a lineup of finger foods and desserts, these homemade dulce de leche Twix bars should be top of the list.
My brother introduced me to the recipe months ago (and to the amazing Dandelion chocolate cookbook {aff. link} they originate from); he and I have both made them numerous times. And although we are both prone to hyperbolic exclamations at times (runs in the family), he and I both sincerely and solemnly agree they are definitely one of the best desserts of all time.
I can’t wait for you to experience the deliciousness of these surprisingly simple little caramel shortbread bars. I can now rest easy and enjoy the holidays. My work here is done.
One Year Ago: Gingerbread Cookie Butter Oatmeal Cookies
Two Years Ago: Cheesy Hash Brown + Egg Breakfast Casserole {Make-Aheadable}
Three Years Ago: Flaky Buttermilk Biscuit Cinnamon Rolls {No Yeast, No Rising}
Four Years Ago: Soft Eggnog Sugar Cookies with Whipped Eggnog Frosting
Five Years Ago: Amazing Scottish Shortbread
Six Years Ago: Orange Zested Cranberry White Chocolate Bliss Bars {A Slightly Lighter Version}
Seven Years Ago: Rock Salt Roast Chicken {Basically The Best Roast Chicken Ever}
Eight Years Ago: Buffalo Chicken Bites

Homemade Dulce de Leche Twix Bars
Ingredients
Shortbread Crust:
- 10 tablespoons (142 g) room temperature salted butter
- ⅔ cup (141 g) packed light brown sugar
- 1 cup (114 g) almond flour
- 1 ½ cups (213 g) all-purpose flour
- ½ teaspoon salt, I use coarse, kosher salt
Dulce de Leche/Caramel Layer:
- 10 tablespoons (142 g) salted butter
- ½ cup (106 g) granulated sugar
- ⅓ cup light corn syrup
- 1 (14-ounce) can sweetened condensed milk
- ¼ teaspoon salt, I user coarse, kosher salt
- 1 teaspoon vanilla extract
Chocolate Ganache:
- 1 ½ cups (255 g) good-quality chocolate chips or chopped chocolate (see note)
- 1 cup heavy cream
- Fine sea salt for the top, optional
Instructions
- Preheat the oven to 350 degrees F. Lightly grease a 9X13-inch metal baking pan with cooking spray (or line with parchment). I haven’t tried making these in a glass pan – if doing so, decrease the oven temp to 325 degrees. Set the pan aside.
- For the crust, combine all the crust ingredients in a bowl and mix with a handheld or electric stand mixer until evenly combined and no streaks of flour or butter remain, 1-2 minutes. Press the dough evenly in the bottom of the prepared pan. Bake for 13-15 minutes until lightly golden around the edges. Let cool while making the caramel.
- For the dulce de leche layer, in a medium pot, combine the all of the caramel ingredients except the vanilla and heat over medium or medium-low heat, stirring constantly with a rubber spatula. Bring the mixture to a gentle boil, scraping the bottom of the pot continuously, and cook for 10 minutes until it changes to a light golden brown color (don’t overcook! if the color is changing quickly, don’t cook for the full 10 minutes – I keep my heat moderated pretty low, if your heat is higher, the caramel may cook faster). Moderate the heat, especially if it begins to burn on the bottom. Off the heat, stir in the vanilla and immediately pour the caramel over the shortbread crust and spread evenly.
- Refrigerate the bars until the caramel is cooled and set, about 30-45 minutes.
- For the chocolate ganache, place the chocolate chips or chopped chocolate in a medium bowl. Heat the cream to just below a simmer and pour over the chocolate. Let sit for 1-2 minutes. Stir or whisk until the chocolate chips melt and become smooth. The mixture will go from looking grainy to smooth and glossy. Spread the ganache over the set caramel layer. Sprinkle with sea salt, if desired. Refrigerate until the chocolate layer is set, about an hour.
- Cut into slices or squares. To cut neatly, run a sharp knife or bench knife under hot water, wipe dry and slice (repeating as necessary and wiping the knife clean, if needed). If the bars have been refrigerated for a while, let them sit at room temperature for 15 minutes or so to make cutting easier. Refrigerate bars if not serving them within a couple of hours.
Notes
Recommended Products
Recipe Source: adapted from the Dandelion Chocolate Cookbook {aff. link}
I have made these many times (before I remembered to leave a review) and they are consistently amazing! A family favorite for sure!
These were absolutely amazing! Everyone at the party I brought them to was raving about them. I made them without any adjustment other than using a mix of half milk/half semi-sweet chocolate, which I thought worked out really well. I followed the recipe to a tee and had no issues. Thanks for such a fantastic recipe!
Happy you loved these, Deirdre!
Are these ok made a day in advance? I want to make them for a baby shower that’s tomorrow but wanted to make them today in case I screw them up and have to make something else.
Yes, they can be made a day in advance.
Would these be similar to Samoas if I added coconut to the caramel layer? My kids already enhailed all the girl scout cookies…
Oh, that sounds yummy! They would definitely have a samoa cookie vibe.
My husband says “these taste like Twix on crack! The sea salt makes them so much better than Twix!” He also calls them the center Twix, the best in the left/right debate.
Ooooo – this sounds yummy! I make dulce de leche in my instant pot – very easy, right in the cans of s.c. milk (lids off, foil covering). What approx is the quantity of dulce de leche your pour on crust, if you already have some made? (I’m guessing maybe 1 1/2 – 2 cups?) Can’t wait to try these.
A-mazing!! Such a perfect Christmas treat, (but really anytime!) These quickly became a must make at Christmas time for me. Follow the directions and you’ll be so happy!
I love, love, loved the shortbread and chocolate portions of these bars, but was super disappointed with the caramel/dulce de leche layer…despite boiling for 10 minutes, and getting to the right texture, it didn’t darken at all, and I found it to just taste like sweetened condensed milk. I’d love to make these again with a different caramel- or if I’ve done something wrong, I’d love to fix that!
The caramel separated while it was boiling – the oil from the butter came out. I was able to mostly whisk it back together, but still some separation. Any ideas why?
Sometimes caramel will separate if the temperature adjusts too quickly one direction or another (or if the caramel is stirred too quickly) – but sometimes I have caramel separate and I don’t know why. It can be puzzling!
Do you think you can freeze these and let them over the counter thaw before a party?
As long as the caramel layer has time to fully soften, they should freeze/thaw ok (although I haven’t tried it myself so I don’t have firsthand experience) -worth a try though!
Whoa, these are totally delicious. Make them! I made a few changes. I was out of almond flour, so I weighed 4 oz of pecans in my food processor and ground them into meal. Then, since my processor was out (and dirty!) I whirled the rest of crust together- cold butter, no problem. I toasted some pecans in the oven while the crust was baking, which I chopped up and sprinkled on top of the ganache. I got this idea from someone else in the comments, and though it might make them less gooey to eat by hand.
I added about 1/2 tsp of baking soda to the caramel ingredients (helps browning due to Maillard reaction, etc), cooked for 10 mins at a simmer on medium low, it was a gorgeous color, checked with thermometer- 235 (soft ball). I was paranoid to cook too long because of all the comments about hard caramel.
The caramel is soft and luscious, but I think maybe I should have gone a minute or two longer, maybe 238?, because I have bars that are drooling a day later. When I cut them yesterday, they cut beautifully into little fingers, which I then layered in a bin with parchment in the fridge. No doubt aided by the fact that they aren’t perfectly level in my storage container, today the caramel has oozed off the sides of the cookies, taking the ganache with it. Not all the way, just enough to ruin their good looks. And making them quite gooey to eat- so much for my pecan experiment. They will not go to waste, regardless of their lopsided looks, because the flavor is out of this world. I sprinkled some salt across the top before the pecans- love that sweet, salty caramelly goodness. So, yeah. These are among the tastiest things I’ve ever made, but I’ll let the Dulce cook a little longer next time. Or plan to cut them and eat them ALL while they are still perfectly stacked…. 🙂
Love this detailed review, Rebecca! Thanks for all your tips and changes! Glad they worked out pretty well – hopefully that extra minute of browning will be the trick for perfection next time. I love the idea of pecans on top (AND in the crust!)
Well, I made this recipe again, with even worse results. This time I let my caramel go a little longer, to 242. Big mistake. Cold, the caramel is unpleasantly hard, and these do need to be refrigerated because of the ganache. Also, my ganache slid off my caramel again! I now think that maybe what is going on is that the moisture from the ganache is causing the very top part of the caramel to melt. I really love the components of these bars, but cannot get them to work for me. In fairness- I want a treat I can stack in a bin (with parchment), and perhaps I would have less issue if I was storing them as a single layer. It’s easy to make the components, and all of the flavors are delicious, but I can’t get them to work together… onward!
Mel these are OUT of this world good! Each layer of mine turned out just as you described with no problems. This one of those recipes I will make over and over again. And, I love that it makes a 9×13 pan size. I will say making the middle layer is a bit stressful as the pressure is there not to let the caramel mixture cook to fast at too high a temperature . I succeeded but it was tricky for a couple of minutes. Thanks for this gloriously delicious recipe!
Thanks for taking the time to let me know what you thought about these bars, Amy!
Just made these today. Oh my goodness…..they are wonderful.
Yay! Thanks, Deb!
Made this and loved it, I would note the caramel didn’t really darken much at all, and so I cooked it a little longer and thus it was a little chewier, still delicious! But I will cook the caramel for the 10min only next time.
Thanks for adding your review, Jessica!
HOLY…MOLY….I. AM. IN. HEAVEN! These were glorious, wonderful, amazing, etc. They were a breeze to make. And they were gobbled up without a trace that I had even made them. This is an amazing recipe for a decadent treat. My kids told me we didnt need to buy the icky store twix anymore…haha…and they are grown! This will be a holiday or everyday tradition! Love it! Thanks Mel! This is a ROCKSTAR recipe!
Haha, I loved this! Yay!
So so yummy! I didn’t have a problem with the caramel layer, but my ganache didn’t get as firm as I expected. Maybe because I used milk chocolate? Still tasted amazing! Thank you for another delightful and easy recipe!
Thanks, Nadene – I haven’t used milk chocolate but it might be softer (or you can try less cream next time). Appreciate you taking the time to comment and let me know!
I had the same experience with the caramel turning out hard, more like toffee, where it had a crunch almost to it. I am sure it is because I overcooked the caramel, watching for the color to darken and not watching the clock. Tastes amazing though! I cut (almost more like “broke” them into bite sized pieces and when the bottom separated from the caramel, I stuck it on top so the chocolate was sandwiched between. This was one of my favorite things I’ve made all year, even with the caramel mishap! I was so excited to try it because I have been meaning to make the Twix cookies for a long time and never got to it and this was so much more doable for me for some reason. Also, I didn’t have almond flour so I threw some almonds in the food processor and got them as fine as I could (still pretty coarse) and it worked great! I wonder if a temperature would be helpful with the recipe for how hot to get the caramel? I have to admit though, one reason I went for this was because it didn’t require a candy thermometer. I always feel like it’s complicated to use mine, needing to calibrate it and look stuff up and adjust for altitude etc… candy making is more intimidating than baking 🙂 anyway, I loved this recipe and will make it again and again!
Thanks for the review, Brittany. Next time I make them, I’ll throw a candy thermometer in there just to have a second gauge of when the caramel is done. (I’ll also add a note to the recipe since several of you are reporting the caramel has cooked up harder than you would like)
These are yummy! My caramel layer, though, turned out reallllly hard, so it’s hard to get the full experience when eating them because the textures are so wildly different (crumbly crust, soft chocolate but really hard/chewy caramel). I think the flavors work really well together, but I’m not sure why my caramel is too hard. I had to cook it for about 15 minutes over medium low heat in order for any color to develop at all, so I’m not sure if it’s overcooked, or not.
I think the 15 minute cook time is the problem. What heat level did you have it at? Was it boiling/simmering rapidly or on the gentle side? The 10 minutes stated in the recipe is the max it will need to cook…any longer and it will be too hard, darn it.
I used 3-4 out of 9 on my convection cooktop. It was it was boiling/simmering on the more rapid side. I was seriously getting cramps in my hands from stirring for so long but I just couldn’t get it to develop any color past maybe a shade from where I started. It definitely was not that golden-y, caramel color that yours was but I finally took it off because it was getting really thick.. I had to throw out the whole batch this morning 🙁 since I’m afraid someone will break a tooth on Christmas Eve, haha! Maybe I’ll try again some other time. Merry Christmas, Mel!!
I have a corn allergy so I substituted maple syrup for the corn syrup. I followed all other directions and it turned out great! SO delicious! Thanks for sharing!
So happy to hear this, Marie!
Ok, I made these for my Christmas goodie containers and O.M.G! These turned out so yummy and they were relatively easy to make. I really liked them!
Thanks, Bethany!
These are yummy and easy
I did them gluten free with subbing GF (cup for cup flour) for the all purpose and then using almond flour for the rest (agree! Love the almond flour taste in these! Next time will use a bit more
Great recipe
Prayers for your family Mel, have a blessed Christmas and praying health and life over you!
Thanks for your amazing site, always my fav go to
Thanks for the review, Robin – so glad to know gluten free flour worked out well for the all-purpose. Merry Christmas!
I made these today and they didn’t turn out that great and I’m pretty sure I messed something up along the way. The caramel turned out very hard, I had a bad feeling about it when I was cleaning the pot and it was sticking to the sides like cement but it tasted so good I rolled with it. When it was time to cut, my knife slid easily thru the chocolate but the caramel was very difficult to cut even with a hot knife. Then my caramel layer separated from the short bread, which was super crumbly. All the different component tasted awesome so I definitely want to try this again. I’m not much of a baker, does anyone have any suggestions? I’m wondering if I messed up the caramel because I had to turn it down a few times when I was cooking it (multitasking). Any ideas? I love this site and almost exclusively use Mel’s recipes so I’m sure whatever went wrong was my fault! Thanks everyone in advance.
What was the color of the caramel when it was done cooking? It sounds like the caramel mixture overcooked. I keep my heat pretty moderate but if the heat is higher, the caramel can cook faster, and that’s probably the issue. If you had to turn it down a few times, it sounds like next time (if you make them), keeping the heat lower consistently will work out better.
Mel, thanks so much for your reply. I took your advice and made them again. The second time I patted down the shortbread a bit firmer and baked it a bit longer (I had to use a glass pan). For the dulce de Leche, I kept it on a steady medium heat on my less powerful burner. It took about 14 minutes, and it still wasn’t “caramel” color but the texture seemed to be changing, so I just took it off the heat. The end result was much much softer. The bars ended up cutting up like a dream and my family destroyed them. Someone in the family had made salted roasted pecans, so we were pushing the pecans onto the chocolate layer when we ate them. Oh my god. Nirvana. Thanks again!!
Made these last night, though there are three parts to this recipe they came together quickly. I made the twixter cookies a few months ago and whilst those are good, these are far superior IMHO. The ratio of Carmel to chocolate to shortbread is better in this bar recipe than the cookies. While I liked the cookies, they seemed to be a bit on the dry side and I think that’s because there isn’t enough Carmel and chocolate to shortbread ratio. These bars however are everything you could ask for. The almond flour is amazing-don’t skip this step, the nutty flavor is delicious. I ground some blanched almonds since I ran out of my almond flour. I used Guittard semi sweet chocolate for the ganache- which was divine-not too sweet allowing the caramel to shine as the sweet element. So amazing! I don’t think I need another Twix-like dessert in my life after this, it was spot on! Word to the wise, I used my regular pot to make the caramel which started to burn so I switched pots and was fine, I kept the heat at a 4 (out of 8) on my stove (medium low) which was a good heat and ended up not needing to cook it the full 10 minutes. Watch for the color to turn golden brown not the clock. The Carmel turned out perfect! Thanks Mel, I keep going back to the pan for 5ths and 6ths! So good!
Such a detailed, helpful review, Alicia. THANK YOU! Glad you loved these!
Can I use canned dulce de leche in this recipe?
I experimented with milk chocolate and while the caramel and crust were fantastic, the chocolate layer was too soft and never set. I think I will cut way back on the cream next time.
Are these supposed to be super hard to cut? The caramel layer is really hard on the batch I made. They taste good, but the middle layer is really tough until it has been in my mouth for a bit. Did I over cook it?
Hey Bri – they shouldn’t be that hard to cut. I think maybe the caramel overcooked a little. I keep my heat pretty moderate – if your caramel is bubbling at a vigorous boil instead of more gently, the caramel could cook faster. What was the color of the caramel when you took it off the heat?
I made these today and they were delicious! I thought the chocolate was a little overpowering (I used half bittersweet and half semi sweet chocolate chips). Next time I’d do 1 cup chocolate and 2/3 cup cream because I’d like more of the dulce de Leche flavor to come through, but my husband thought they were perfect as is. That shortbread layer with the almond flour was utter perfection! Thanks for another great recipe, Mel!
Thanks for the review, Aubrie!
Are you familiar with peters caramel loafs? I was wondering ignore I could use that for the caramel layer? I have a lot of caramel I’d love to use up.
Yes, I’m familiar with Peter’s caramel – it’s much chewier and a bit harder than the soft caramel that cooks up for this recipe, but you could experiment using it if you have it on hand.
Made these today, and I can’t wait to try them! All the parts were delicious when tested. Did you use fine sea salt on yours? I can hardly see the salt – not like your beautiful pictures. I’m wondering if coarse might work better. They’ll be delicious either way, I’m sure!
I have a fine sea salt I use that clumps together – that’s what I used which is why it’s probably more noticeable. Also, sprinkling on the salt after the ganache has set will help, too.
Well Santa brought my present early! We really are of one heart Mel. One big chocolate & caramel heart… dark chocolate, of course.
🙂
Question: I’m allergic to almonds. sigh. Can I substitute hazelnut flour or should I just use more all purpose flour??
If you can find hazelnut flour, I’d suggest subbing that for the almond flour.
Hi Mel!
How long do these keep?
4-5 days in the fridge!
Oh this is right up my alley and I’ll be making them soon! Any reason you think lining the pan with parchment for easier lift-out and cutting wouldn’t work? I agree that the straight sides of metal pans is preferable but I always have some goners when I try cutting and lifting out the first few (not that this is a terrible thing…;-)
Yes, you can definitely line the pan with parchment!
Sadly Im allergic to almonds, would all all purpose flour work? Or what flour could i use instead?
The original recipe I adapted this from used hazelnut flour but that probably doesn’t help since it’s a tree nut also. You could try 100% all-purpose flour (the texture of the shortbread probably won’t be as light and tender…so if you do, measure with a light hand or use 1/4 cup less flour overall).
I just made my third batch of the Twixster cookies last night (love them so much!) for Christmas gifts. But now you have me thinking I really need to make these too!
Those cookies are something else!!
It tasted amazing!! Although, the chocolate was a bit runny, not as thick, and didn’t set up. What did I do wrong?
Hi Megan, what kind of heavy cream did you use (brand and/or fat percentage)? That might make a difference. In the future, you can use less heavy cream for a thicker chocolate ganache.
If these are anything close to your Twixster cookies I’m in! Those cookies are a neighborhood legend thanks to you! Now I just need time……
Haha. MORE TIME! I just told my husband last night: if I only had more time, I’d never be grumpy. 🙂
I’m wanting to make these for book club tonight and have all the ingredients but the almond flour. How necessary is it? 😉
That’s my question too. Would 100% AP flour be okay?
Mine too!
Jaci, Jen, and Katie, I think the almond flour is what makes this shortbread base better than any other I’ve ever tried. It adds a textural element to the shortbread that made the bars irresistible. Having said that, I’m never going to tell you not to experiment, haha. 100% all-purpose flour won’t produce the same perfect shortbread crust, but if you try it, my suggestion is to measure with a very light hand (don’t over flour!) and consider cutting the flour down by 1/4 cup.
Thanks!!!! I actually ended up not going to book club because my husband worked late. So I bought the almond flour and made them on Friday. These were INCREDIBLE!!! Twix is my favorite candy bar so these are going to become a regular around here!
Thanks for letting me know, Jaci!
You should try cornstarch. That’s what I have use before
Good idea! Maybe subbing in 1/4 cup cornstarch for the all-purpose flour – that will help lighten up the texture.
Have you made these with cornstarch? My daughter has a severe allergy to ALL tree nuts. But she loves Twix like it’s nobody’s business. I really want to make these, but I also don’t really want to kill my child. 🙂
I haven’t, but someone else said they would use cornstarch + flour for a crumbly texture. I’d go for it!
Oh my these look wonderful! Definitely on my baking list for tomorrow.