Peanut Butter Chocolate Mousse Brownie Cake
Get this show-stopper of a recipe for peanut butter chocolate mousse brownie cake. Rich, decadent, and totally amazing, plus it can be made ahead of time!
We’re not messing around today.
This cake is a little crazy. It’s slightly over-the-top. And yes, it’s absolutely one of the yummiest desserts I’ve ever tasted.
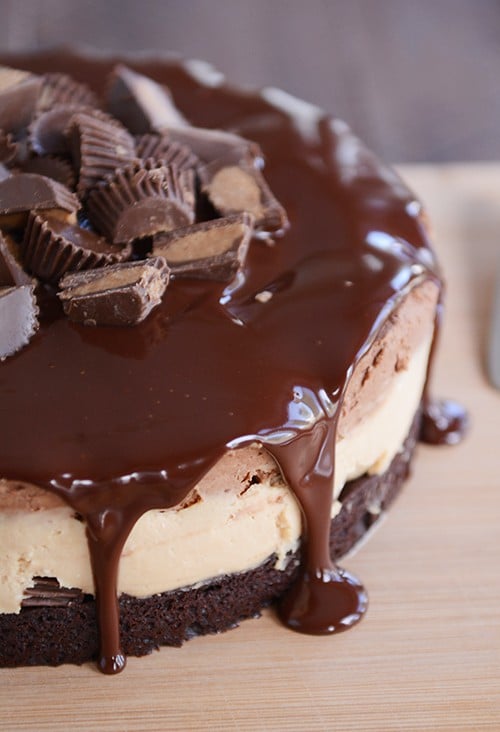
While this peanut butter chocolate mousse brownie cake does involve a few steps to get each of those luscious layers deliciously perfect, each step of the recipe is simple as can be.
Considering the whole peanut butter, chocolate, brownie thing is waaaaay high up on Brian’s list of favorite flavors, this is a no-brainer of a Father’s Day dessert for him. Athough I can see myself finding a million excuses to make this cake.
It’s hard to describe the happiness those light and fluffy layers of peanut butter and chocolate mousse piled on top of the rich, fudgy brownie bring to my life.
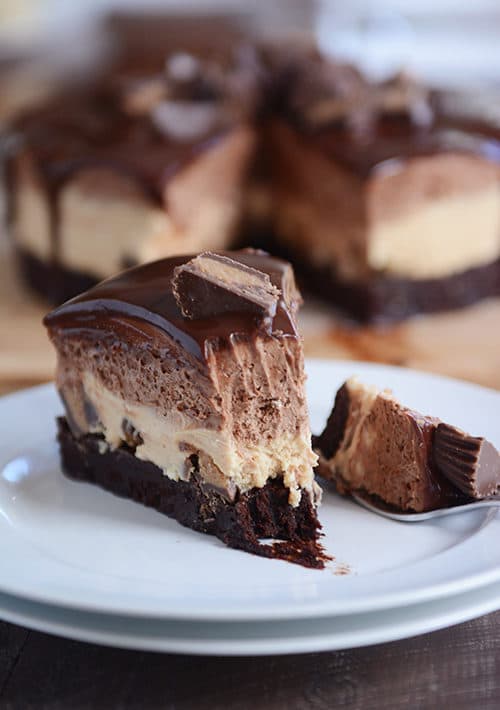
Of course on top and in between all that gloriousness is dreamy chocolate ganache and enough mini Reese’s peanut butter cups to feed a small army.
Speaking of an army, this peanut butter chocolate mousse brownie cake will serve about that. Don’t make the mistake of thinking your guests will need a huge honkin’ slice to be satisfied.
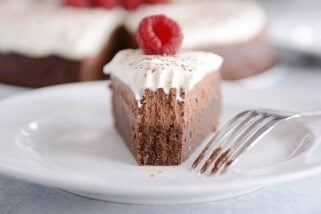
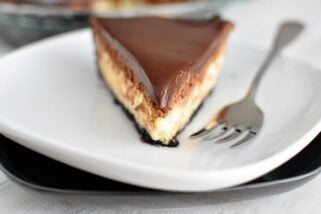
Even the slice I show in the picture above could probably have been cut a little thinner. Although I had no problem devouring it completely, just for the record.
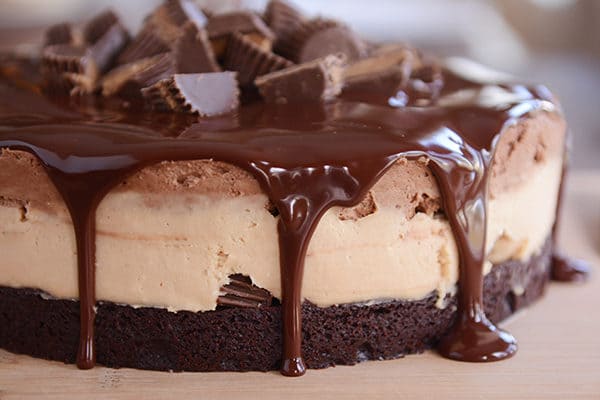
Read through the recipe to get a grip on the steps involved. The cake can easily be made ahead of time but it requires a few chilling periods and probably a little self-control to make sure the mousse actually makes it onto the cake.
And I certainly don’t need to state this out loud (but of course I will), if you’re looking to stockpile some rock star points in the kitchen, this cake will most certainly do the trick.
One Year Ago: Banana Bars with Browned Butter Frosting
Two Years Ago: Brown Sugar Rhubarb Muffins with A Little Bit of Streusel On Top
Three Years Ago: Thin and Crispy Oatmeal Cookies
Peanut Butter Chocolate Mousse Brownie Cake
Ingredients
Brownie Base:
- 10 tablespoons 1 1/4 sticks of salted butter
- 1 ¼ cups (265 g) sugar
- ¾ cup plus 2 tablespoons unsweetened cocoa powder (natural or Dutch-process)
- ½ teaspoon salt
- ½ teaspoon pure vanilla extract
- 2 large eggs
- ½ cup (71 g) all-purpose flour
- 12 ounce (340 g) bag mini Reese’s peanut butter cups, unwrapped and cut in half
Peanut Butter Mousse:
- ¼ cup (57 g) cream cheese, softened
- ⅓ cup (38 g) powdered sugar
- ¾ cup (191 g) peanut butter
- ½ teaspoon vanilla extract
- 2 cups cold heavy whipping cream
Chocolate Mousse:
- 9 ounces (255 g) semisweet chocolate, cut into chunks (or use good-melting chocolate chips)
- ¼ cup (57 g) cream cheese, softened
- 3 tablespoons powdered sugar
- ½ teaspoon vanilla extract
- 2 cups cold heavy whipping cream
Chocolate Ganache:
- ½ cup (85 g) semisweet chocolate chips
- ½ cup heavy cream
Instructions
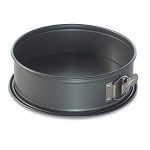
- Preheat the oven to 325 degrees F. Line the bottom of a 9-inch springform pan with parchment paper and lightly grease the bottom and sides with nonstick cooking spray.
- For the brownies, in a medium microwave-safe bowl (or in a pan on the stovetop), melt the butter, sugar and cocoa powder at 1-minute intervals, stirring in between, until the butter is completely melted and the mixture is well-combined.
- Let the mixture cool to warm room temperature. Stir in the salt and vanilla. Add the eggs and mix until the batter is thick and smooth. Stir in the flour until combined. Spread the batter evenly in the prepared pan and bake for 30-40 minutes until the brownie is set around the edges and only moist crumbs come out when a toothpick is inserted in the center (not wet batter). Remove the pan from the oven and let the brownies cool completely (in the pan).
- Top the cooled brownie layer with about 20-22 of the mini Reese’s peanut butter cups that have been cut in half (so about 40 halves total on top of the brownie layer).
- For the peanut butter mousse, in a large bowl with an electric handheld mixer (or in an electric stand mixer fitted with the whisk attachment), whip the cream cheese and powdered sugar together until smooth and lump-free. Add the peanut butter and vanilla and mix until lightly and creamy, 1-2 minutes. Add 1 cup of the heavy cream and mix, starting on low speed so it doesn’t splatter everywhere, mix until well-combined. Add the remaining cup of cream and mix until the mixture is very thick, 4-5 minutes (UPDATE: according to many of your comments and depending on the type of mixer you are using, this may be too long! Stop mixing after it gets thick, even if it’s only after a minute or so). Dollop large spoonfuls of the peanut butter mousse over the mini peanut butter cups and brownie layer. Spread into an even layer. Refrigerate while making the chocolate mousse.
- For the chocolate mousse, melt the chocolate in a microwave-safe bowl at 1-minute intervals, 50% power, until melted and smooth. Set aside to cool completely.
- In a large bowl (I use the same one as the peanut butter mousse after I’ve quickly wiped it clean) with an electric handheld mixer (or in the bowl of an electric stand mixer fitted with the whisk attachment), whip together the cream cheese and sugar until smooth and lump-free. Add the vanilla extract and 1 cup of the heavy cream and mix, starting on slow speed so it doesn’t splatter, until smooth, 1 minute or so. Add the rest of the heavy cream and mix until thick and fluffy, 4-5 minutes.
- When the chocolate is completely cool (this is critical! If it’s warm at all, it will make the mixture soupy – it should still be melted but cool to the touch), fold it into the whipped cream mixture using a large spoon or rubber spatula to gently stir the mixture up and over until it is well-combined. Whisking too quickly might deflate the whipped cream mixture.
- Spread the chocolate mousse evenly over the peanut butter mousse. Cover the pan with plastic wrap or foil and refrigerate the cake for at least 2 hours (or up to overnight).
- Run a long thin knife under hot water and wipe clean. Run the knife around the edge of the brownies to loosen from the sides of the pan. Undo the springform pan and lift off the sides. You can serve the cake on the base of the springform pan or use a wide spatula in between the parchment and pan bottom to lift off the cake and place on a serving platter.
- For the ganache, combine the chocolate and cream in a microwave-safe bowl (you can do this in a pan on the stovetop) and microwave at 1-minute intervals, stirring in between, until the mixture is glossy and smooth (it should only take a minute or so in the microwave). Let the mixture cool slightly so it isn’t super hot but is still pourable – slightly warm room temperature is fine. Pour the ganache over the top of the cake; it doesn’t need to cover the entire top and it’s ok if it drizzles down the side. It should look a bit rustic.
- Pile any extra peanut butter cups in the middle of the ganache. Refrigerate for an hour or so (or serve right away, the ganache will be a little soft and messy, but that’s ok). Use a long thin knife to cut into thin slices (running it under hot water and wiping clean can help with neat slices) for serving.
Notes
Recommended Products
Recipe Source: inspired by this recipe at Life, Love and Sugar (used an easy homemade brownie recipe, made my own peanut butter and mousse layers and used ganache instead of frosting)

Can the whole cake, without ganache, be frozen for about 3 days?
Yes, that should work fine!
This dessert is absolutely amazing. I’d like to make it for Thanksgiving…wondering how it would work to make ahead of time. Thoughts?
I think it would do very well made ahead of time! I’d make it start to finish, cover and refrigerate (probably do fine up to several days).
I had the same issue with the soupy/grainy peanut butter mousse layer. I tried using these directions twice following the instructions exactly with the same results. My mousse layer never thickened and eventually started looking grainy. I decided to give it one more shot but first I researched other mousse recipes and noticed that most have you whip the whipping cream first and then you fold the rest of the mixed ingredients into the whipped cream. I used the same ingredients as this recipe but changed the process by whipping the cream on its own first, then folding the other ingredients in and had great results. I used this same process for both mousse layers and they turned out delicious. This cake is delicious, but super rich so a little goes a long way!
I must have gotten lucky because the only issue I had was that my chocolate mousse ended up like vanilla mousse with chocolate chips. I tried to make it twice, the second time was better when I mixed in slightly warm chocolate instead of cool chocolate.
I also did a risky thing and halved everything in this recipe and made it in a small 6″-ish pan. (There’s only two of us, and this is a very rich treat!)
It was delicious! I would just recommend not to make this for a time-sensitive event, because it may not turn out how you want.
It was fun to make! Thanks, Mel.
Perfect again ! This is our second time making this cake and turned out amazing again. We don’t have 40 percent heavy cream in Canada so we use 33 percent whipping cream and still fabulous. We do whip the cream in a cold metal bowl separately for each mousse layer until stiff peaks and then whip just to combine (less than 20 seconds) with the peanut butter and the chocolate. For the chocolate mousse we use still warm and get some little speckles of hardened chocolate but less than when we let it cool completely – and is dreamy perfect ! This cake is my husband and 18 year old daughter’s fav recipe on this site and we have been cooking exclusively from Mel since my daughter was about 3- thanks Mel!❤️
You MUST whip your heavy cream separately for both the peanut butter and chocolate mousse and then fold in the cream cheese mixtures!!
I’ve made this recipe several times now, and I wish I could post pictures because it’s been gorgeous and smooth sailing each time! The chocolate does separate a bit when I incorporate it into the cream, but our family sees it as a positive more than anything. I’ve never had trouble with the peanut butter going in, and it turns out every single time. I guess I would say I’ve just gone with my gut. This recipe is so good, and incredibly rich… you want to eat a ton, but a tiny slice will see you through. We’ve fed at least 16 people with leftovers. Lol
Terrible recipe! I should have read the reviews, which I normally do. The peanut butter layer separates, even after I did a second batch and watched it carefully. The chocolate seized up when added to the hwc mixture, even tho it was completely cool. The portions have to be incorrect. I made this for my dil’s birthday tonight and have no time to make a new cake. Disappointed is an understatement!
Horrible! READ THE REVIEWS! I made this recipe just as written and had the EXACT same issues as everyone else! I watched the bowl like a hawk to make sure the peanut butter mousse did not get over whipped and yet it still turned out awful. I made sure the chocolate was perfectly cooled before adding it to the whipped cream and it still did not incorporate correctly! Infuriating! There is NO way this recipe truly has the 4.34 stars like the top of the page says it does – there are sooo many negative reviews! I only wish I had read the reviews before I started baking 🙁
I want to make this for my son’s birthday, but I’m pretty nervous after reading the reviews. Hmm…
Wow, you aren’t kidding that it’s rich! But totally worth it. 🙂 I did NOT use any of the peanut butter cups – would have been way too sweet for us. I didn’t have any issues with the peanut butter mousse – and it was delicious! Chocolate mousse was easy and yummy – but the chocolate did sieze up when folded in. Everyone actually like it that way, though. I did my brownie sugar free, and added espresso powder to the brownie, the chocolate mousse layer and the ganache – and some extra salt, which helped to cut the sweet and give an additional layer of flavor. Beautiful cake!
This is really delicious!
Thoughts:
Five stars on taste 3 stars on difficulty that peanut butter mousse can be a nightmare.
Next time I make it I will only use one and a half cups of cream and stop as soon as that last 1/2 cup mixes in. The chocolate mousse was perfect the peanut butter separated after adding that last cup. however we still ate it and enjoyed it as a family. Giving it a whole night in the fridge really made it better I think.
Lots of good comments on the mouss the chocolate mousse instructions are perfect the peanut butter is tricky in the future I will only be adding one and a half cups of the cream.
If I can’t get the peanut butter mousse to turn out successfully I will probably scrap the peanut butter and make a mint mousse and add Andy’s mints and turn it into a mint chocolate brownie delight.
Further notes:
Going into making this recipe I had the full expectation it might not turn out and when it didn’t it definitely helped me not feel like it was a complete disaster! The first day the peanut butter mousse was pretty soft and questionable but throughout the week as we munched on it the dessert got better and better and it set fine and it wasn’t a problem to us. We could eat it and enjoy it as a family and if I never figure it out I’ll still make this dessert at least for my family!
This IS a showstopper! Oh my goodness people, I have made this for my peanut butter loving husband for this birthday, and for my sis in law for hers, and everyone raves about it! SO yummy! I hadn’t made mousse before and I did have to start over after my first try, but I think it’s just getting familiar with new things, my second try it was amazing and now its a special occasion favorite!
I was so nervous about making this dessert because of the reviews but mine turned out great! So here is what I did:
I could not find any cream with milk fat of 40% (I live in Canada) so I had to make due with 33% and mine turned out fine!
Peanut butter mousse: admittedly the first time I made this it turned out absolute trash so I had to throw it out and start over. What I learned? Because the peanut butter should already be mixed and fluffy before you add in the cream it is very easy to over mix it! Once I added the 1st cup of cream I only mixed it for approx 15 seconds, and the same for the second cup and it came out perfect. The first batch became grainy and runny because of over mixing it.
Chocolate mousse: the cream part took a bit longer to whip for this one. I say I only mixed it for about a maximum of 1 minute. It came out great and I made sure to only fold in the chocolate once it was room temperature.
Can’t wait to serve this later!
Show stopper dessert. Thanks, Mel!
I had the absolute worst time with this recipe to the point of tears. I am an experienced baker and had very similar issues as others with grainy peanut butter mouse and a chunky chocolate mousse. Followed the recipe to a tee, bought really high end ingredients and wasted my afternoon and money putting this together. I do not recommend this at all and Mel, I love your recipes. This one is a miss.
My peanut butter mousse was really lumpy and didn’t mix well. It also came out very oily. Do you know where I went wrong? The peanut butter I used was Dutch calve without added sugar and with very tiny pieces of nuts. I also hand mixed it. (The chocolate mousse came out great though!)
I think it might be the peanut butter you used. I’ve only ever used traditional peanut butter (like Jif or Skippy) – the texture of the peanut butter can make a difference. Is the PB you used grainy at all? Do you have to mix in a layer of oil before using?
I normally love all the recipes I make from MKC, and I’m a fairly experienced baker, but this recipe was just frustrating. I ended up making the peanut butter mousse layer twice, because the first time it didn’t turn out at all. The chocolate mousse layer also didn’t turn out, but I don’t have enough heavy cream to try again. Like another person who commented, the chocolate was cool when I tried to incorporate it into the whipped cream, but it didn’t incorporate and just created a chocolate chip whipped cream type of consistency.
I made the mistake of letting my daughter look at your website with me to pick her birthday dessert and she picked this! After reading reviews I was quite nervous. The peanut butter mousse turned out well but my chocolate mousse is more like a white moose with chocolate chips in it. Does that just mean my chocolate portion was not cool enough when I combined it? Because it’s like the chocolate hardened. I just used semi sweet chocolate chips so was it the type of chocolate I used that caused that to happen? It’s totally fine and I’m still using it just wondering what I did wrong.
Hey Jane, it seems like maybe the chocolate hardened when it hit the cream mixture for the chocolate mousse layer. Semisweet chocolate chips should be fine – what brand did you use?
Thanks for the response! I used toll house. Yeah it totally hardened. It tastes like chocolate chip mousse. Ha! It felt pretty cool to me before I combined it. Not cold but not very warm at all.
Can you use milk chocolate for the chocolate mousse layer, instead of semisweet?
I haven’t tried that but you could experiment!
Absolutely delicious!! Enormous success on Christmas Day and Boxing Day, thanks so much for all your wonderful recipes, I brag about your work to every foodie I meet :))
I’ve made this amazing cake for my husband’s birthday 2 years in a row and now going into our third.
The flavor and different textures are amazing. Everybody loves it.
Thanks for a great recipe! You’ve made a lot of people in Paraguay happy.
This was absolutely delicious! I made it for my husband’s birthday and now every time someone else has a birthday, they request this cake! I found your directions easy to follow and everything turned out great the first time. I added swirls of peanut butter frosting in between peanut butter cups on the top of the ganache. Thanks for sharing!
I live in North Carolina and cannot find 40% milk fat cream! Can I use devin double cream?
I don’t know what that is, Celia – sorry! If there’s another brand of heavy whipping cream that has whipped up thick for you in the past – that should work!
I made this and it was fantastic. Everyone raved about it! I used full fat cream cheese. I whipped until thick, about 1 minute. I’ve over whipped heavy cream before so I knew to stop before it separated. I also made extra peanut butter mouse and put another layer on top of the chocolate mousse. The brownie recipe part was delicious and good enough to stand alone, so I’ll use that as my go to for brownies now too. I will definitely make this again!! Thanks Mel.
I tried making this dessert and every time I would try and add the heavy whipping cream to the peanut butter mixture it would start to seaparte and get liquidy. I used a stand mixer with the whisk attachment. I was upset because I followed this recipe to the T. Just was wondering what could’ve made it separate.
This recipe was pretty easy for an experienced baker. I decided to add melted bittersweet chocolate to the brownie mixture so make it more rich.
The chocolate mousse was super easy and I have no issues and it turned out beautifully.
However the peanut butter mousse was difficult. I made the first batch as directed even reading the update portion and the first batch was horrible!! I had to toss it and start again. However the second outcome was slightly soupy. I decided to adjust the ingredients because the first batch had too much peanut butter and made it grainy.
I really hope it hardens in the refrigerator overnight. I’m afraid to take it out of the spring foam pan or cut it. With me luck!