Pie Making Boot Camp {Week #2: How to Make Pie Crust Like a Pro + Video AND Picture Tutorial + Brand New Pie Crust Recipe}
It’s Pie Making Boot Camp Week #2! Today’s detailed picture AND video tutorial will show you how to make perfect homemade pie crust! Bonus: I’m sharing a brand, new, no-fail pie crust recipe!
This might possibly be the most important week of our 4-week Pie Boot Camp series!
The crust!!
Does the thought of making homemade pie crust give you a nervous twitch?
Or are you a homemade pie dough rock star?
Well, no matter where you fall on the spectrum, today, my goal is to take all the mystery and stress and angst out of making homemade pie dough.
Armed with last week’s list of pie making equipment essentials, we can dive right in to learn how to make perfect homemade pie crust.
In today’s post, I’m giving a super in-depth look at every step of homemade pie crust, PLUS, we’ll be talking about common pitfalls and how to troubleshoot if things go wrong.
Included is both a picture tutorial with lots of description and tips as well as a quick 2-minute video tutorial for an extra level of visual help.
What Recipe Should I Use?
The pie crust recipe you use is almost as important as what you choose to fill that pie with!
Most of you probably know that I am insanely in love with this amazing pie crust recipe I posted a couple years ago. It is the pie crust recipe I make 90% of the time.
However, in the interest of keeping things open-minded and giving you options, today, I’m sharing my other standby pie crust recipe (printable version is at the bottom of this post).
It is super simple to make, very easy to work with, and produces a flaky, tender crust that is downright enviable in the world of pie making.
(The reason I slightly prefer the sour cream pie crust is because the flavor is better, in my opinion, and the crust is just slightly more tender.)
I’ll be using this “new” pie crust recipe today in both the picture and video tutorial, but the sour cream pie crust recipe could easily be substituted when going through the tutorial as it is very similar.
I took one for the team and ripped up a baked pie crust so I could show you JUST how flaky this pie crust is. Look at those layers!
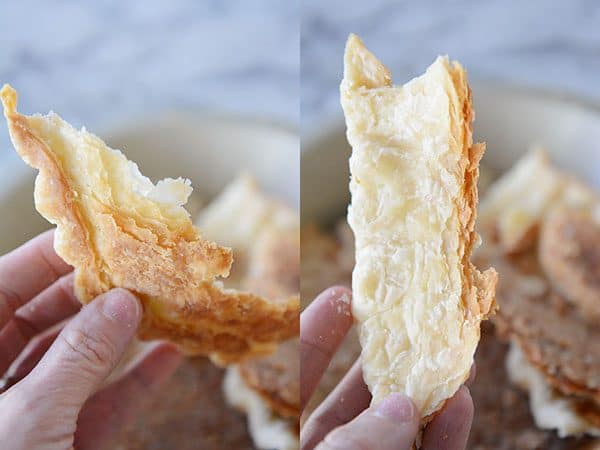
That right there is pretty much pie crust amazingness. And you can make it, too!
Even though many people make pie crust in the food processor (I do as well, at times), I’m demonstrating in both the picture AND the video tutorial how to make the pie crust by hand (it’s actually so super easy) since I know not everyone has a food processor.
{For an additional boost of help, here’s the video I already have in the archives dedicated to that favorite sour cream pie crust above. Plus, it has a cameo appearance by my favorite sous chef, and she’s downright hilarious.}
Ok, let’s get to it!
On a starting note, one of the best tips I can give you for pie crust success is using cold ingredients and keeping the pie dough cool all the way through the process of making it.
If your kitchen is blazing hot, it may not be the right time to make pie dough. If you are sweating, so will the pie dough. I’d say the ideal air temperature should be about 68-72 degrees F.
If the fat (butter/shortening) gets too warm, it will spell disaster – both in making the pie dough but also in how it bakes (the crust might shrink or be dense and heavy if the ingredients weren’t kept cool).
To prepare for today’s tutorial, you’ll want to throw ten tablespoons of butter in the freezer to hang out for 20-30 minutes.
Also, chill two tablespoons shortening in the refrigerator for several hours (or my cheater method: scoop the shortening onto a plate with a cookie scoop that’s been lightly greased with cooking spray and pop it in the freezer for 15-20 minutes).
For this pie crust, add 1 1/2 cups all-purpose flour to a medium-size bowl, followed by 2 tablespoons sugar and 1/4 teaspoon salt.
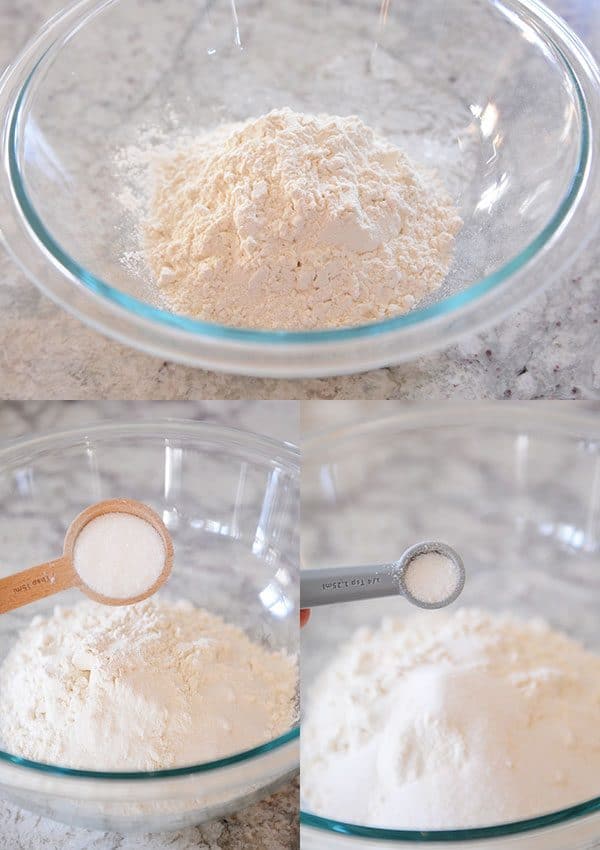
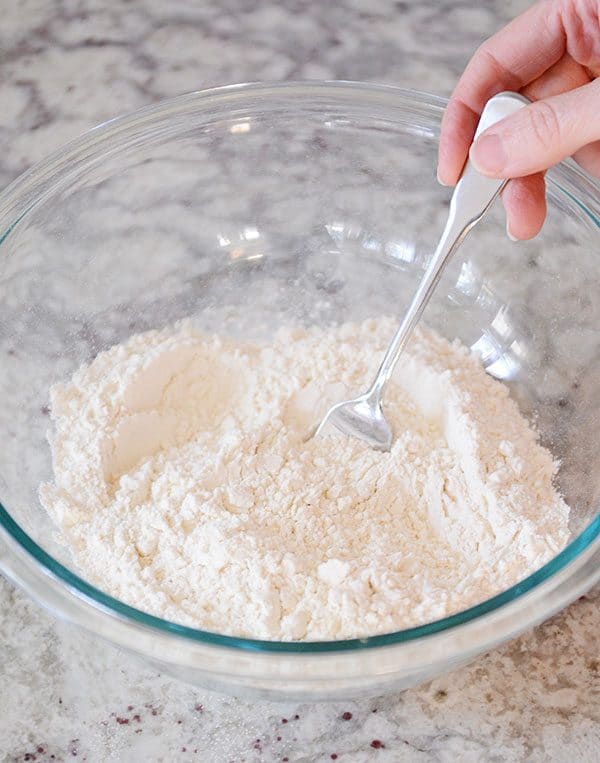
Give that mixture a quick stir with a fork.
Now, add the chilled shortening (two tablespoons).
If you are wondering who I am and how did I get here because I’m recommending you use shortening, stick with me for a second.
I know this might be the only recipe on my site to ever call for shortening, but for those that are new to pie crust, shortening may quickly become your friend.
It isn’t as finicky to work with as butter is, and even a mere two tablespoons (in addition to the butter we’ll be using in a sec) lends a light flakiness to the crust that can be hard to achieve with 100% butter.
I am not a fan of pie crusts made with all shortening (butter-flavored shortening or not) because of the greasy aftertaste and lack of flavor, but this pie crust recipe hits the sweet spot of ultimate butter flavor and flakiness that is helped along by the shortening.
It is great for those wanting to conquer pie dough once and for all.
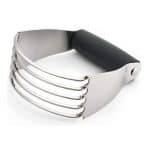
Now grab that pastry blender and start working the shortening into the dry ingredients.
TROUBLESHOOTING TIP: No pastry blender? No worries. You can work the shortening in with a fork or two butter knives.
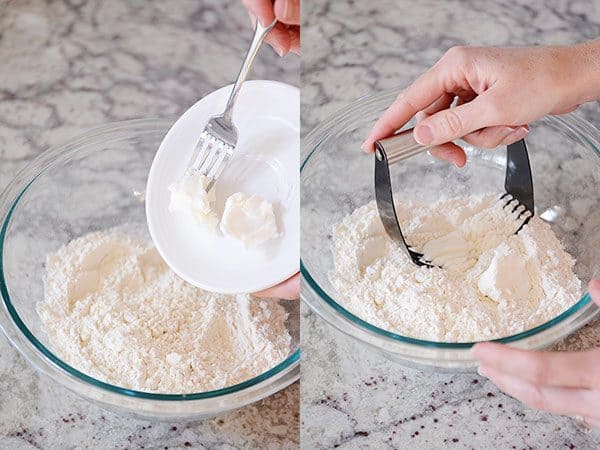
This step should only take a minute or two.
The pieces of shortening should be about pea-size.
Don’t work them in too much – those pieces of fat (same will go for the butter) melt during baking and release steam which creates little pockets of air in the pie crust…and all of that equals the crazy flakiness you are after.
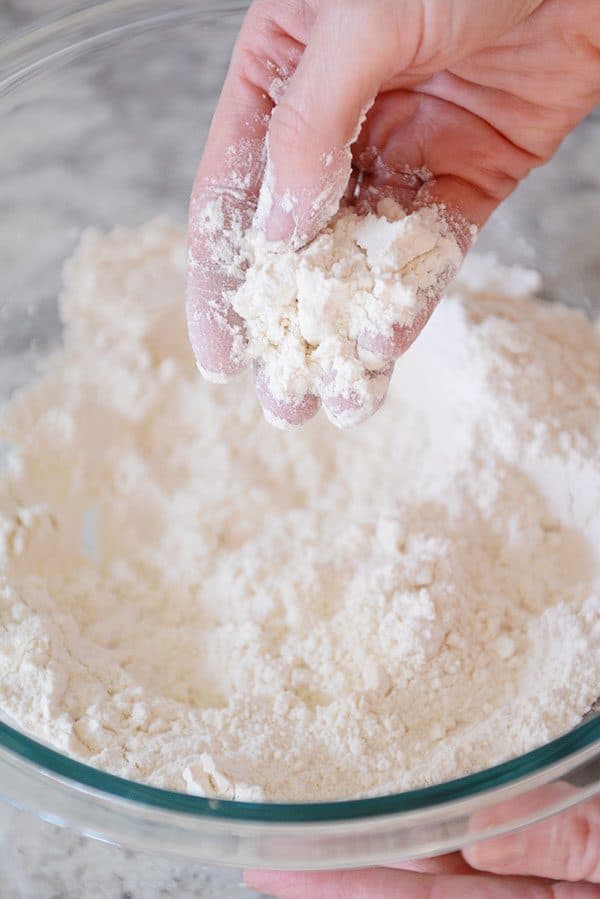
Now, using a box grater, shred the frozen butter right into the bowl.
This is much easier than cutting the butter into the flour mixture like we did above with the shortening (FYI: shortening doesn’t grate well on a mixer like the frozen butter does).
TROUBLESHOOTING TIP: If you don’t have a box grater, instead of freezing the butter, make sure it is well-chilled, then cut it into 1/4-inch pieces and add it to the dry ingredients and cut it in with a pastry blender or two forks or butter knives until the mixture is coarse and the butter is in pea-sized pieces.
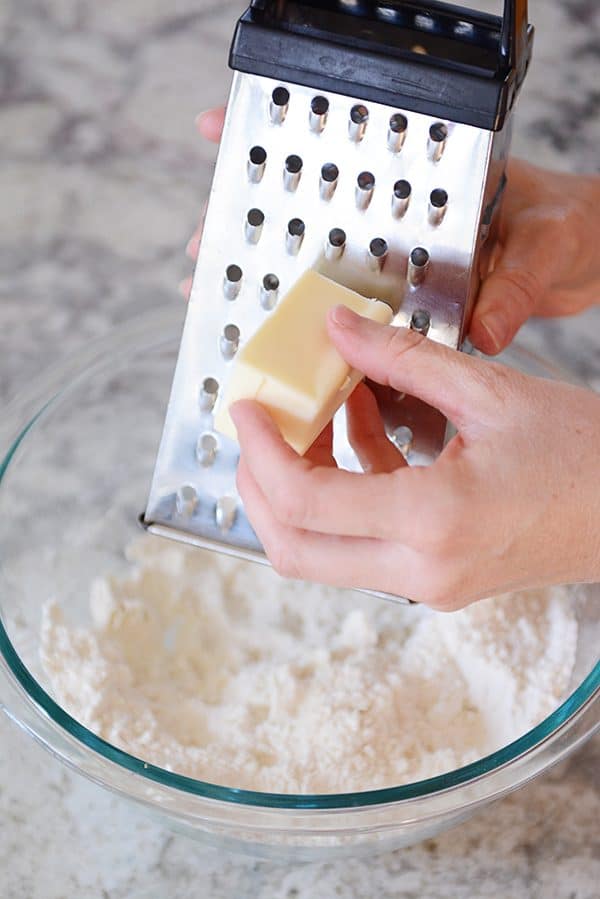
I usually grate half the butter in, give the mixture a toss, and then grate the other half.
But you can do it all at once. It’s hard to mess up.
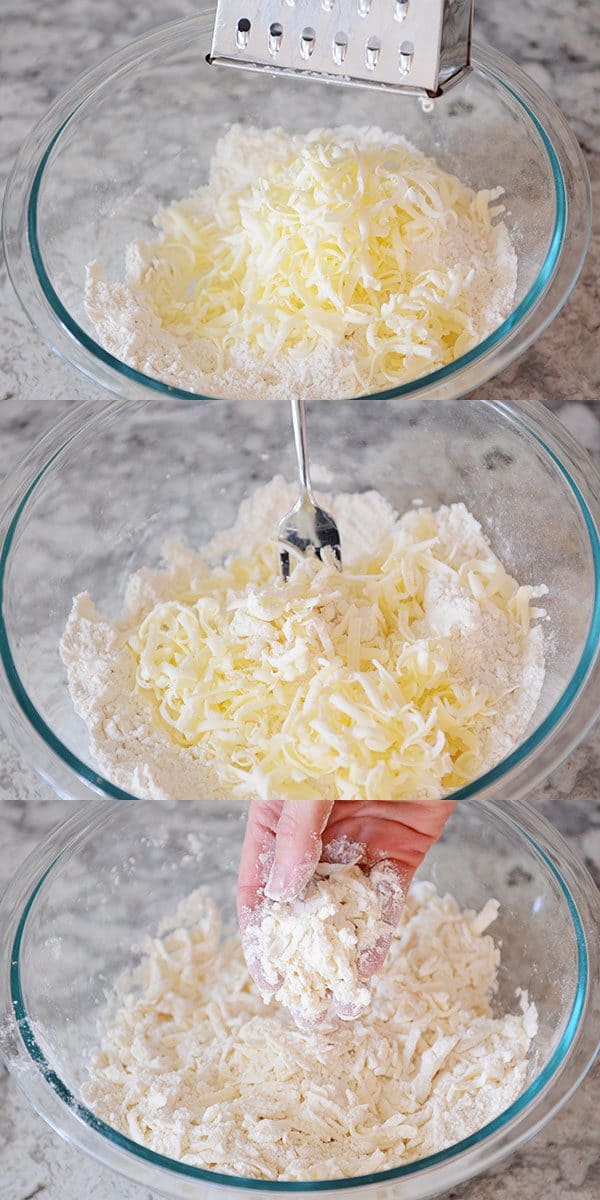
Once all the butter has been added, toss lightly with your hands or a fork until the butter strands are evenly coated with the dry ingredients.
Don’t overwork or overhandle the mixture to the point that the butter pieces start getting soft or melting from the heat of your hands!
Drizzle in the ice water, starting with the lesser amount (1/4 cup) and adding more (up to 1/3 cup TOTAL) only if the mixture is incredibly dry.
Use a fork to start moistening the ingredients.
Eventually, I always end up abandoning the fork and gathering the mixture together with my hands.
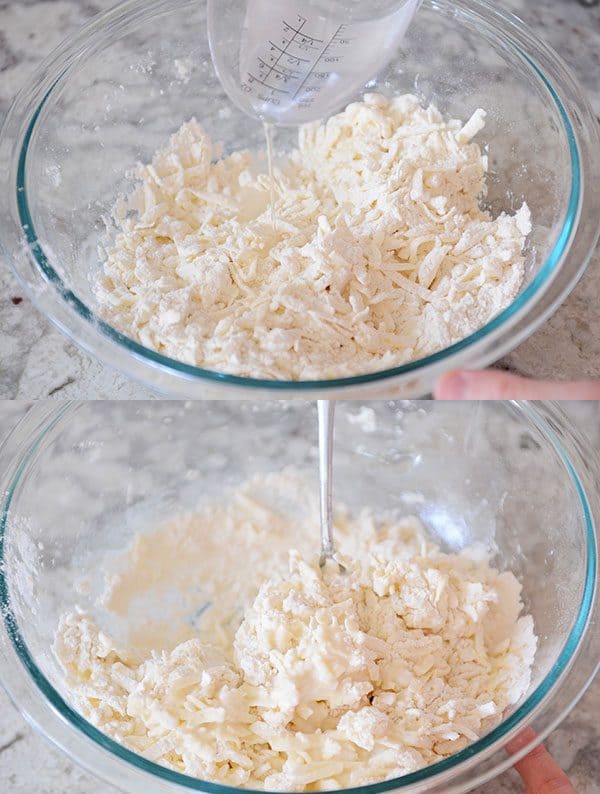
When you can press a handful of the pie dough together and have it mostly stay together in a clump (even if there are dry patchy spots), you are golden.
Stop mixing, and for the love, do not add any more liquid!
You can see below that the dough looks pretty shaggy. But it’s also coming together in a general mass.
When it begins to clump together like this, I gather up all the excess mixture at the bottom of the bowl and press it into a lumpy ball.
If you are new to pie making, it might feel uncomfortable to not continue adding water until the dough resembles, say, sugar cookie dough.
But I promise it’s ok if your pie dough looks like this! It’s better to have dry pie dough rather than overly wet pie dough.
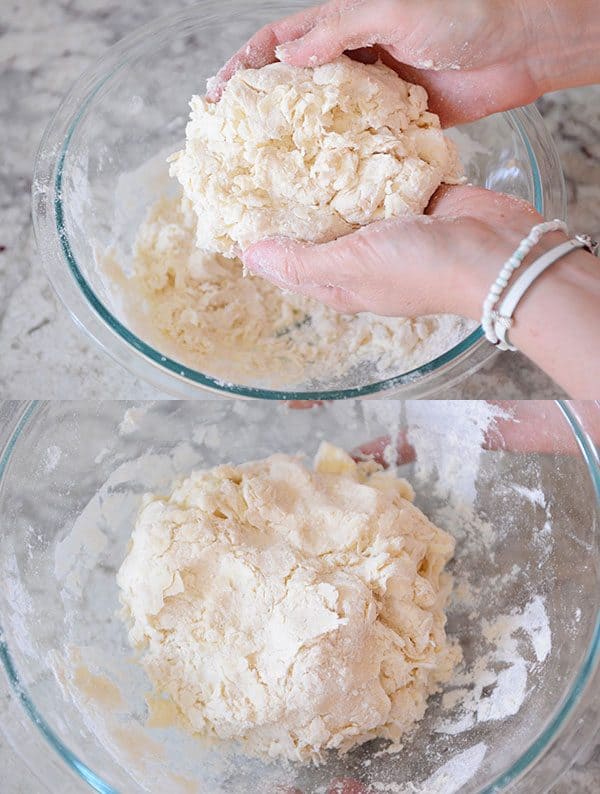
I think one of the biggest surprises and also one of the biggest pitfalls with homemade pie dough is how dry it may look after mixing – and resisting the urge to overmix or add more water.
Gather the dough together and place on a long piece of plastic wrap.
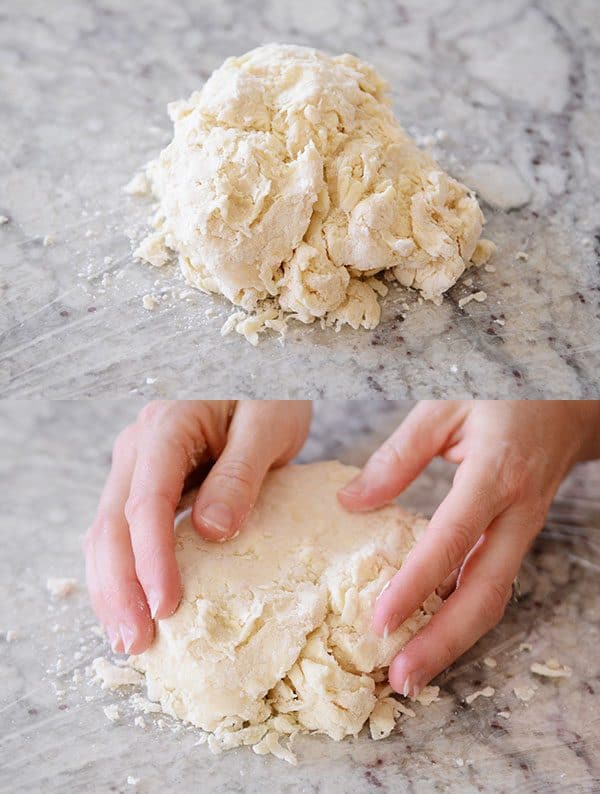
Mold it lightly into a thick disc.
Then, lift up the edges of the plastic wrap so the pie dough is covered completely. Refrigerate for at least an hour or up to several days (or freeze for a couple months).
TROUBLESHOOTING TIP: What happens if the dough falls completely apart when it is placed on the plastic wrap? If, at this point, you realize that you really did need to add more water, grab a spray bottle and lightly mist (very lightly!) the outside of the pie dough, patting excess dry ingredients back into a rough disc shape. While it rests in the fridge, the pie dough will absorb that extra liquid so it’s easier to roll out.
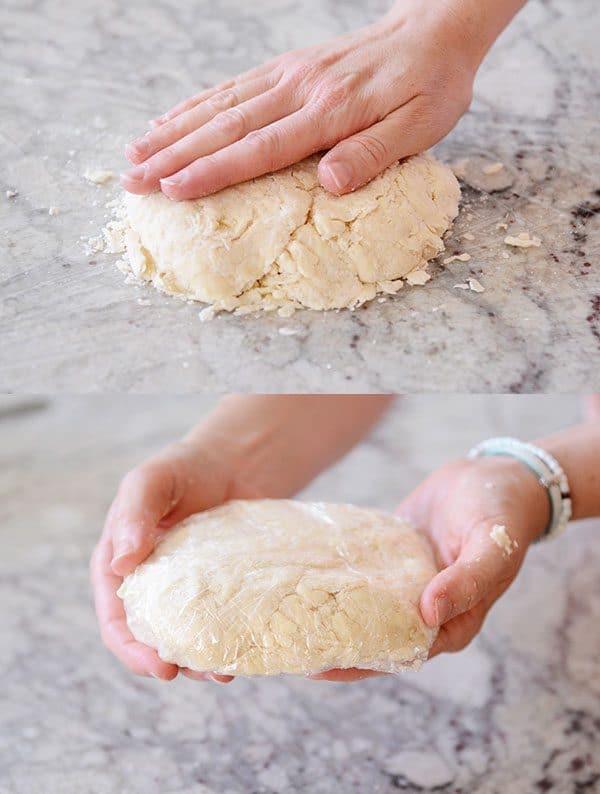
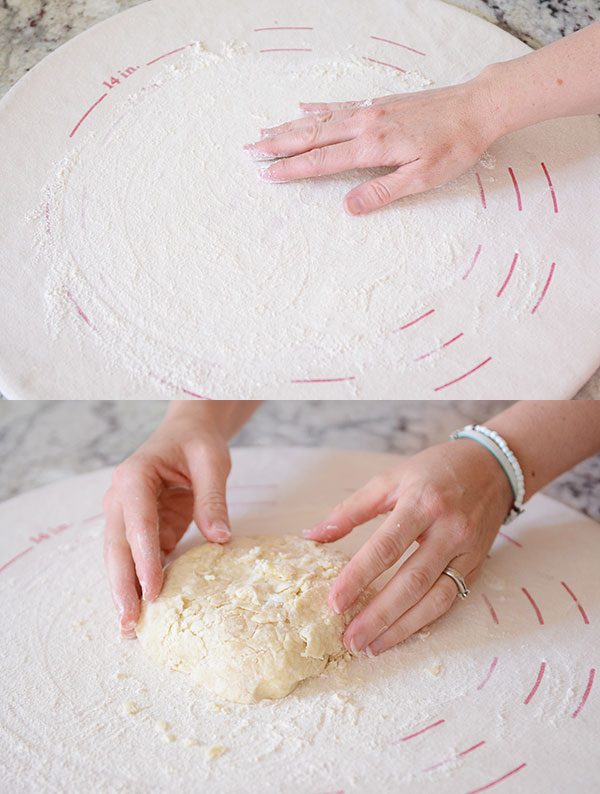
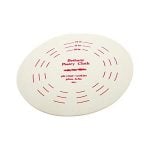
When the pie dough is ready to be rolled out, I always reach for my canvas board.
Purchasing this $25 piece of pie making equipment several years ago completely changed the way I felt about making homemade pies AND how my pie crusts turned out. Even though I’m not one to recommend buying unnecessary equipment, I highly recommend a canvas-covered board like this.
TROUBLESHOOTING TIP: If you don’t have a board like this, never fear! In the video tutorial below, I’m not using the board to roll out the pie dough. Just a good old-fashioned lightly floured counter. The biggest tip when using a floured countertop is to make sure to lift and turn the dough often (and swipe flour underneath, as needed) so it doesn’t stick.
Using a rolling pin, press the center of the pie dough and give a quick roll.
Turn the dough a quarter turn, and again, starting in the middle, roll out a few times.
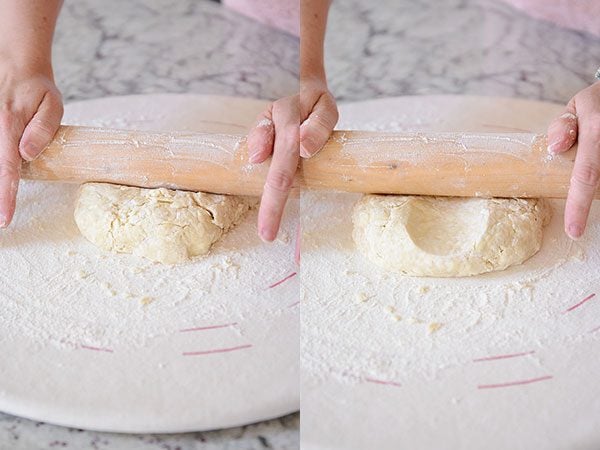
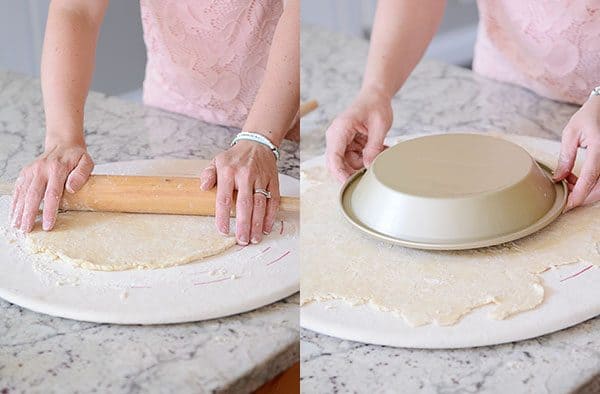
Continue this process of rolling from the middle and turning the pie dough until the pie dough is in a thin, even layer to the size you need it.
I like to hold the pie plate I’m using upside down in the middle of the dough to make sure it’s rolled wide enough.
My general rule of thumb is to roll the pie dough 2-inches wider than the outside rim of the pie plate.
Try to get the pie dough rolled out in as few rolls as possible (basically, don’t roll it to death). This will help the ingredients stay cold so it bakes up nice and flaky.
Lightly flour the rolling pin and starting at one edge, roll the dough up around the rolling pin.
If the dough feels too sticky to do this, before rolling it up, make sure there is a light sprinkle of flour on top of the dough and that you can easily lift all sides of the dough up from the canvas board (or counter).
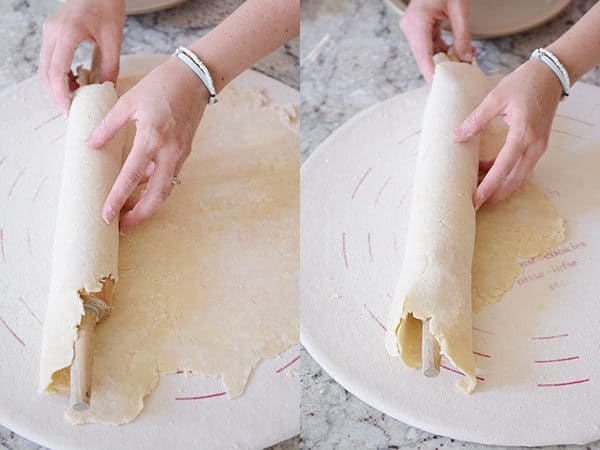
Now, unroll the pie dough over the pie plate, centering it as good as you can so you don’t have to stretch or move it too much once it is completely unrolled.
TROUBLESHOOTING TIP: What if the pie dough cracks or breaks while rolling or unrolling? If this happens, don’t stretch the pie dough to cover up the hole or tear. Instead, very, very lightly spray the area with cold water (just a drop, or less than) and take a small piece of dough from excess overhang and press it lightly to that area to cover the hole.
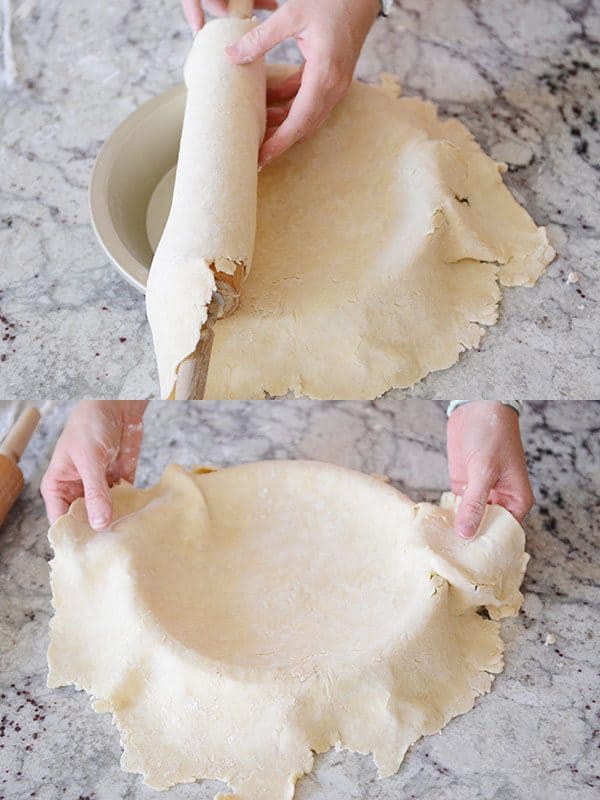
To get the pie dough perfectly nestled into the shape of the pie plate instead of pushing the dough down into the corners and molding it to the pie plates’ shape, lift up on the edge of the pie dough which will free up the slack of the pie dough, and using your other hand, move the dough down into the corner.
The key? No stretching or pulling. Just lifting and fitting.
Does that make sense?
This is really important so that your pie crust DOES NOT SHRINK while baking.
Stretched out dough is going to want to shrink right back up while backing, and that will make you sad (and me, too).
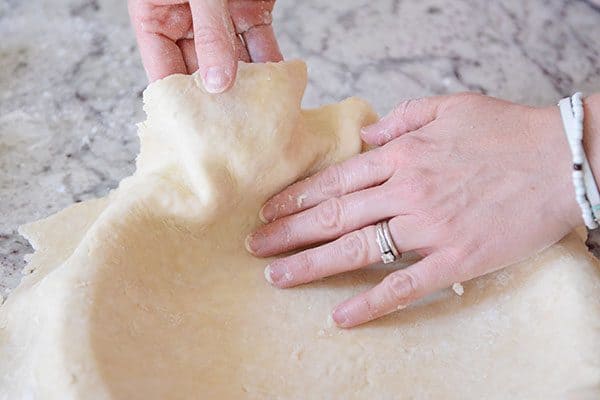
There we go. Perfectly lifted and fitted pie dough.
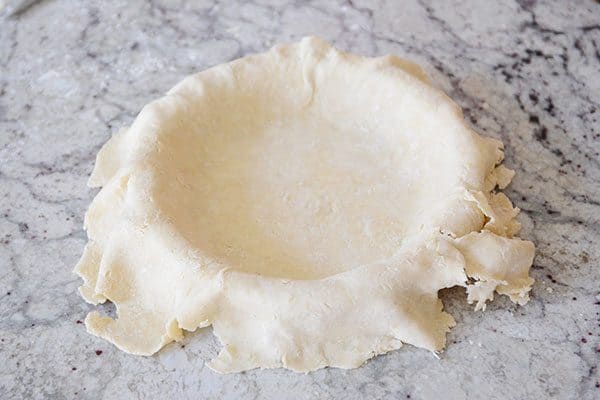
My favorite tool for trimming down the pie dough is kitchen scissors.
Snip the dough, leaving about 1/4-inch overhang (so, don’t trim it right up to the edge of the pie plate – you’ll see why in a second).
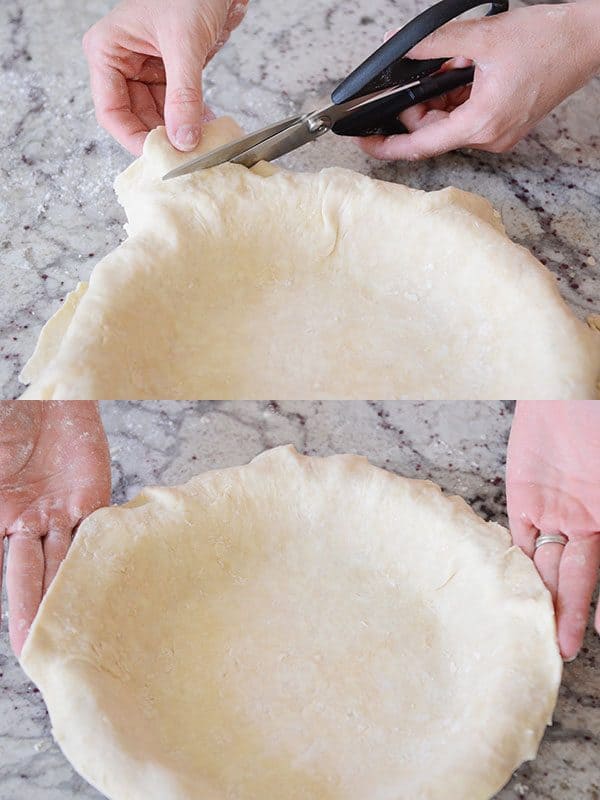
Take that 1/4-inch overhang and fold it underneath so it is flush with the edge of the pie plate.
Important note: you only want to do this if you are making a single crust pie and will be crimping the edges to blind bake (we’ll talk about this next week) OR to fill and bake. If you are making a double crust pie and will be filling the pie, adding a top crust, and then baking, leave the 1/4-inch overhang. In one of the next few weeks, I’ll be showing you how to add a top crust and where to go from there.
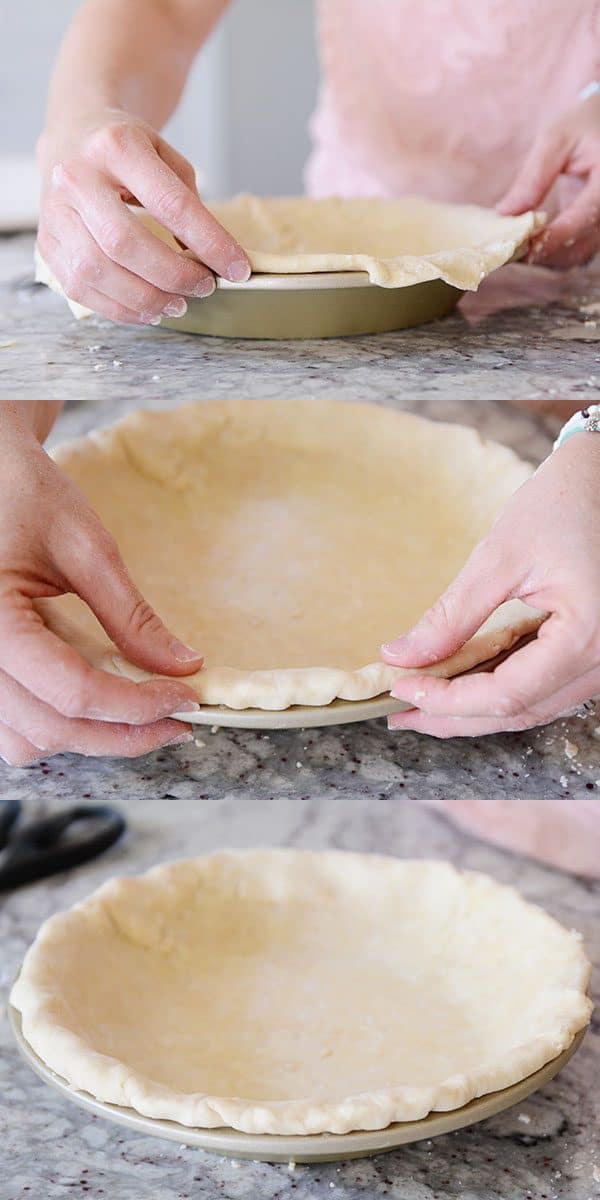
Those edges are ready for crimping! Folding the pie edges under like that gives a thicker edge so the crimping is prettier AND it helps with the pie crust shrinking during baking.
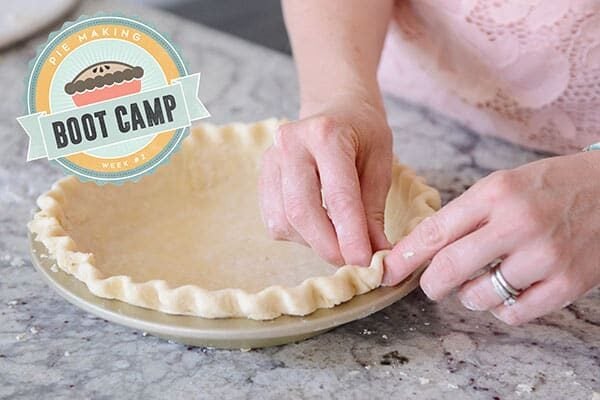
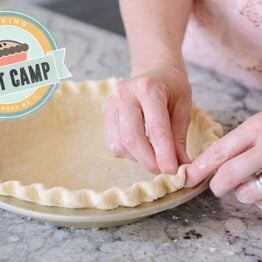
Using the thumb and forefinger of one hand on the inside of the pie plate and the forefinger of the other hand on the outside edge, press together and crimp the edges for a classic pie crust look.
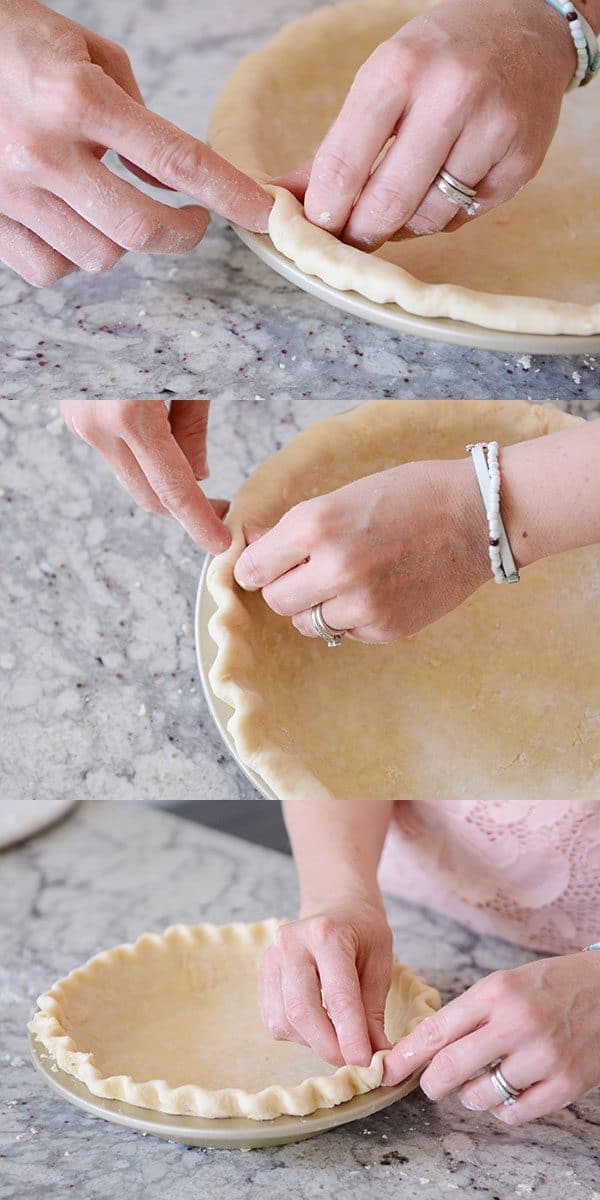
We’ll talk more next week about what to do with this gorgeous pie crust from here (so many options, so little time).
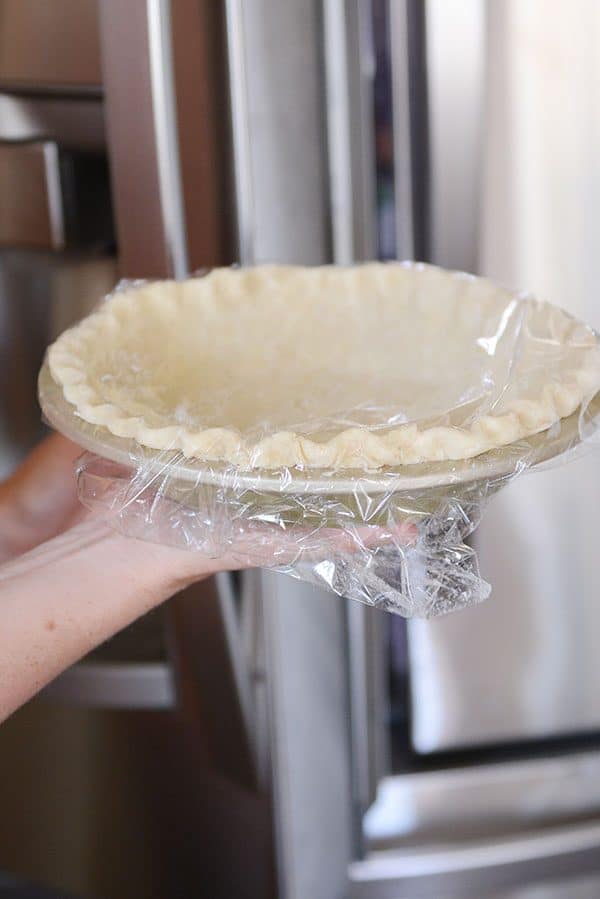
But the safest thing to do is to lightly cover it with plastic wrap and pop it in the fridge for about an hour.
It’s a rare pie crust that doesn’t benefit from chilling time on the front or back end (it helps with that dreaded shrinking problem!).
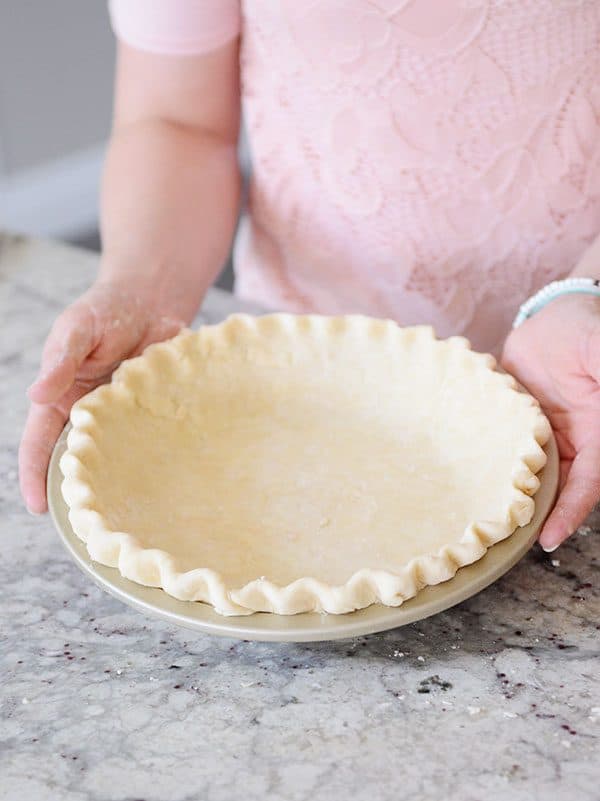
I honestly believe that learning how to make perfect homemade pie crust is one of the most rewarding things in life!
A few ending notes:
Please leave any and all questions, comments, near panic attacks, success stories, etc., in the comments below! I will respond to each and every one. Promise.
Get the recipe for today’s pie crust demo below.
The video tutorial is also right down there if you scroll another few inches.
Next week we’ll be attacking all things blind baking (why, what, how, who am I??) + I’ll be sharing an amazing, new, easy chocolate ganache cream pie recipe (that goes along with this beautiful pie crust you learned to make today) + we’ll be addressing many of the common pitfalls that happen when baking pie crust.
Video Tutorial
Perfect Flaky Pie Crust
Ingredients
- 1 ½ cups (213 g) all-purpose flour
- 2 tablespoons granulated sugar
- ¼ teaspoon salt
- 2 tablespoons shortening, frozen for 15-20 minutes or well-chilled
- 10 tablespoons (142 g) salted butter, frozen (see note)
- ¼ to ⅓ cup ice water
Instructions
- In a medium bowl, add the flour, sugar and salt. Whisk together with a fork to combine.
- Add the shortening to the bowl, and cut it into the dry ingredients using a pastry blender or fork or two butter knives until the shortening is in pea-sized pieces and the mixture is crumbly.
- Using a box grater (or other cheese grater with large holes), grate the frozen butter into the bowl. Lightly toss with a fork or your hands until the butter is evenly coated with the dry ingredients (don’t overmix with your hands, especially if the warmth from your fingers softens or melts the butter).
- Drizzle in 1/4 cup of the ice water. Use a fork to begin combining the dough. Abandon the fork, if needed, and use your hands to gather the pie dough into a mass. It will be dry and patchy – that’s ok. Grab a handful of dough and press. If it clumps together, don’t add more water. If it’s still dry and falling apart, drizzle in another 1-2 tablespoons and mix lightly and quickly until the dough gathers into a shaggy ball.
- Press the pie dough (gathering in any dry pieces that may scatter or fall out) into a thick disc-shape onto a piece of plastic wrap. Cover and refrigerate for at least an hour or up to several days (the pie dough can be frozen for several months).
- Roll out and use as needed or directed (in the recipe you are using).
Notes
Recommended Products
Recipe Source: adapted a little from Dorie Greenspan’s Good for Almost Everything recipe (reduced the shortening just a bit, use salted butter and less salt overall, adapted water amount slightly)


Hi Mel reguarding your pie crust…. what pie plate is the best to use… so it cooks on the bottom….
I almost always use a glass pie plate.
At age 55 i have never made my own pie crust. I come from a family of great bakers, I don’t consider myself one. Yesterday i decided to go head first into your apple pie and crust. It was amazing, My husband is a food guy and never lies about food said to me, I don’t know how you did it , this is the best pie i have ever had in my life. Thanks so much for sharing.
This was the best. Thanks, Kristy! And way to go!
I’m making a pumpkin pie for the first time this year for Thanksgiving…I have my grandma’s recipe for the filling but I am SO glad I’ve found your recipe for the crust! A quick question – I’m planning on making it in the food processor – would you still shred the butter or just cut it into chunks before processing it? THANKS!!
If you are doing it in the food processor, just go ahead and cut the butter into chunks. Good luck!
Just wanted to follow up…the pie was a huge hit & the crust was delicious! I have a feeling I’m going to be bringing pumpkin pie for Thanksgiving every year! Thank you for the amazing tutorial!
So happy to hear that, Mara – thank you!
Hi Mel! I found your recipe and made this crust last night and am going to roll it out today for a peach pie. It is a pie recipe that calls for a pre-baked crust, cause you don’t cook the peaches. Can you tell me how long to bake the crust for and at what temp? I didn’t see that in the instructions. Thanks so much!
Here’s a post that should help, Jani! https://www.melskitchencafe.com/pie-making-boot-camp-week-3-all-about-blind-baking-chocolate-cream-pie/
I made the above recipe yesterday and put it in the refrigerator overnight. I followed the instructions that were printed and also the above pictures. I took it out of the fridge rolled it out, and put it in the pie plate (glass), then put it in the freezer for about 5min. It looked so beautiful when it went in the oven………………..After about 3 min. I noticed the beautiful edges had slipped down the inside of the pie plate. What did I do wrong??? Still in the oven and hoping it will cook all the way thru, so I can use it for something.
Would substituting lard for shortening work as well?
Yes, I think so, but I haven’t tried it.
I grew up eating and occasionally making homemade pie crust so I know that it can be done, but honestly my hubby has magic pie crust making hands that are much more capable than mine. I usually leave the task of making pie crust to him when Thanksgiving comes around. This year his plate is full, so I’m tackling pie by myself! I’m crossing my fingers that with this tutorial and all the stellar tips you’ve shared, that my pie crust comes out just as good as his. Oh, and I wanted to mention to other readers, if you don’t have a canvas to roll your pie dough onto try using a woven kitchen towel, such as a flour sack cloth towel, instead. That is what we use and it works great!
Thanks for the tip, Amber – and good luck! You’ll do great!
Thank you! Thank you! I just made your crust this morning and I’ve NEVER had a crust that flaky and delicious before!! Hopefully it wasn’t just beginners luck and I can do it again for thanksgiving next week.
Yay!!!
I apologize if I missed this somewhere, but how long can I leave an unbaked (in the pie plate) crust in the fridge before baking? Can I make a few unbaked crusts a day or two in advance and then bake them on Thanksgiving morning? I have been referring to your pie boot camp frequently the past few weeks as I am preparing to bake my Thanksgiving pies. You are the absolute BEST. Thanks for all the fantastic recipes and step-by-step instructions. I’ve never had a bad recipe from your site and I have made a lot of them!
That’s a great question, Michelle – you can keep the unbaked pie crust in the fridge for several days – probably 2-3. So yes, you could definitely make them in advance! And let me know if you have any other questions. Good luck with your pie making!
Does this recipe make one pie crust? I usually make five pies at a time and freeze them but thought I would try this recipe.
Yes, it makes a single 9-inch pie crust, but you could double or triple the recipe as needed.
I am fairly new to the pie making thing. It was only a couple years ago that I decided to give it a try. I had a friend come over and help me with her recipe. I kept thinking, there has to be an easier way. I came across you sour cream pie crust recipe and decided to give it a go. It was SOOOOOO easy and came out AMAZING! Yesterday I had a hankering for peach pie. I didn’t have sour cream so I decided to try your new recipe with shortening. The pie looked absolutely gorgeous. My husband declared it was the best pie crust he has ever had! It was so delicious, I could not stop eating the little “pie cookies” (all the leftover scraps dusted with sugar and baked). One question I have, why DOES the pie crust crack and split when rolling it out?
Way to go, Carlin! You are awesome! About the pie crust cracking and splitting – if it’s doing that, it probably needs just a touch more water OR a few more minutes at room temp before rolling out. I saw a tip once on King Arthur Flour that they use a spray bottle and give just the tiniest hint of spraying the pie crust if it’s having issues like that. Obviously you don’t want to completely wet the dough – just a spritz should help!
I admit I am fairly new to the pie crust making scene. I doubled this and made your blue ribbon apple pie yesterday. Wow. The crust was amazing!!! It turned out so good! I didn’t want my husband to cut it to serve–I just wanted everyone to look and admire it for a while 🙂 It was an all day process making the crust and then the apple pie, but it was sooooo good! I am excited to make it again with your chocolate pie. Thanks for the very helpful pictures and info! It made a big difference!! Divine pie!
Jen! Way to go! I’m so happy that it all worked out and I’m so proud of you!
Mel – I’ve been making pie crust very similar to yours for years now. The only difference is I use 6 T butter & 6 T vegetable shortening. I also use 1 T sugar. My procedure is the same but I use these quantities for a 2 crust apple pie. You are using these quantities for a one crust pie. I have plenty of dough for the 2 crusts. If you are making a fruit pie with 2 crusts, do you double this recipe? It seems like a lot of waste. I’m planning on making an apple pie today and I will try your recipe with 10 T butter and 2 T shortening to see the difference. I also will try your sour cream recipe later on. I’ll post later with results of my pie today.
You make it looks so fun and easy to make pie crust 🙂
This is a great idea! Good pie crusts can be so elusive and from watching my grandmother, I think it’s more about technique than anything. It was helpful for me to realize that the main process you don’t want to overmix/handle is not the fat part but when you add the ice water and press everything together. I was totally stressed about the whole thing before that. And I’m not sure if you’ve tried it, but my grandmother would always shape the rough dough into a ball. That way you can roll it less (roll vertically until pie-plate height, flip and turn 90 degrees, roll vertically again and you’ve practically got a perfect circle without going back and forth everywhere).
Thanks for always sharing such delicious, doable recipes and for your tips! Our family has loved your blog ever since we met Nate and Kylie in our CT ward years ago.
Great tip, Sarah!
If I’m using the crust for a savory pie (quiche or pot pie), would you leave the sugar out? Is this crust recipe a good one for making a lattice pie?
Yes, it works great for a lattice crust (which I’ll be talking more about in two weeks)…and I don’t usually leave the sugar out, but you definitely could. Or cut it down to 1-2 teaspoons.
Longtime reader here. I am SO excited that you’ve been offering pie boot camp, I can’t even begin to tell you! I consider myself a pretty accomplished home cook and baker (even taught cake decorating classes for years). But there are two things that completely mystify me in the kitchen. The first is pie making. Both my Mormon maternal grandmother and my southern Baptist paternal grandmother made extraordinary pies. Unfortunately neither passed their skills, tips, or recipes down. I’ve often wanted to give pie making a go, but it’s just so intimidating. You can imagine how thrilled I was when I read you’d be doing a tutorial series!!!
The second thing that has always mystified me is canning! My maternal grandmother was a huge canner. She had an outdoor pantry lined with shelves of canned food. Unfortunately, my mom never took an interest. Maybe canning could be a tutorial series someday? Just a thought. THANK YOU for all you do, Mel!!!
I agree about canning, Shaynee! It’s becoming a lost art! I’ve done a couple posts on canning here and there, but I think next summer I’m going to hit the tutorials more in-depth!
If your butter starts to melt (warm hands) do you stop and chill everything in the middle of the process or do you finish grating the butter and chill before adding the water? This has happened to me several times and I always just power through. Curious of your experience. I can’t be the only person that starts with frozen butter and ends with soft butter (frozen in the middle).
Great question, Jessica. Yes, if ingredients start to warm up, I literally stick everything in the fridge until it chills a bit (or pop the butter back in the freezer).
Make sure you try the scallion pancakes and Peruvian style chimichurri rice next time you hit up Tj’s. Both in the freezer section.
And I’m loving this boot camp! I’ve always been afraid of pie crust and stock my freezer with Marie Callender’s pie crusts but I think I’m ready to try my own!
Thanks for the recommendations, Erin! And you can DEFINITELY rock a homemade pie. I know it.
Hi Mel! I’m so excited about this boot camp – you have so many great tips and info on correcting the EXACT problems I have been having with my pie crust. Usually I just try not to have anyone see it until it’s covered in lemon cream and garnish LOL! I have great hopes not to make a pretty pie 🙂
Thanks!
<3
Diana
Oh dear, I meant I have great hopes NOW to make a pretty pie – haha :0
Haha. I knew what you meant! And I think you can do it!
Thanks for all your wonderful recipes, you are one of my favorite blogs! Now for a question on this pie crust. I made it today and put pumpkin pie filling in it. As it was baking the butter comes out of the crust and onto the bottom of my oven(don’t know how else to discribe it.) Is there something I am doing wrong. I’ve had this happen to me before on a cheesecake crust that had lots of butter in it. Brand of butter?….
Hi Marilyn – what brand of butter did you use? I’ve heard that some brands of butter have more water content? I wonder if that would make a difference? Having said that, I’ve noticed that almost every time I make a pie (no matter the crust recipe), I get a bit of that butter bubbling up out of the crust, so I usually place the crust on a foil-lined baking sheet. Sorry I neglected to mention that in the post. Overall, though, did the crust turn out (flaky, tender?)?
Thanks for all you do — not just the piecrust — all of it! you are awesome!
Thanks, Deb – that made my day. 🙂
I recently made my first pie but didn’t have a crust recipe, my mom’s was a great one but sadly I can’t find it, so I used a premade dough knowing I wouldn’t like it but needing to use some great home grown apples. Now thanks to your tutorial I will be making my own from scratch pie crust. I’ll report back on my attempt but I wanted to thank you for this perfectly timed post,
I’m excited to hear how it goes, Julie!
My pretty pie plates are all 10″. Just wondering how to adjust the mixture to make my crust roll out bigger without stretching it.Thanks for your help.
One more thing. I have an old ceramic rolling pin of my mother’s. It has a cork in one end and she said that was to put ice water in it to keep the dough cold while rolling it out. I think that is so smart. Wonder why they don’t make them anymore?
Hmmm, maybe the do make them?? Sounds like an interesting concept and a great one to keep the crust cold while rolling. As for 10-inch pie plates, I’d probably 1 1/2 the recipe (or 1 1/4 the recipe) so you have enough crust for that size pie plate.
Have you tried to make crust with only butter? My husband (a physician) is absolutely, completely against using (or even purchasing) shortening 🙂 What would happen if I used your recipe and substituted more butter for the 2 Tbsp shortening? Would olive oil work better?
If I’m making an all-butter pie crust, I use the sour cream pie crust I linked to in the recipe – it’s amazing and delicious. I’ve never tried using olive oil.
My mom makes this recipe with all butter. I am now able to find lard – fresh leaf lard NOT hydrogenated – and prefer that to butter. Fresh leaf lard will be in the refrigerated section like butter. Anything on the shelf is hydrogenated and no better (health wise) than shortening.
Hi Ashley! I wanted to put in my two cents about all butter crust. My mom makes an all butter crust called Pate Brisee using a food processor. I think the reason she uses a food processor is so that the heat from your hands doesn’t warm the butter too much. In addition to using a food processor she chills the dough for at least an hour, both before rolling it out and after it is in the pie plate. I think Mel’s pie crust tutorial is spot on and you could use the same techniques and apply them to Pate Brisee (or just use Mel’s recipe with all butter) and it would work very well.
Do you follow Serious Eats?? It’s run by a guy who used to work for America’s Test Kitchen. If I’m looking for a specific recipe, that’s always where I go first!
Anyway, the pastry lady on their website uses sugar in lieu of beans or pie weights. She has a post about baking your sugar anyway as a flavor enhancement (and calorie reducer!), which I love doing now. So I’ll definitely be going the sugar-as-pie-weight route from now, and I’ll just dump it into my container of baked sugar afterwards. Check out the post here–http://www.seriouseats.com/2016/05/how-to-make-caramel-without-melting-sugar.html.
The same pastry lady also has a really great pie crust recipe. It’s so so easy to work with and has great texture. (The only comment on it I would make is that it didn’t seem like enough dough. I would do 1.5x the amounts next time.) But try it sometime! http://www.seriouseats.com/recipes/2016/06/old-fashioned-flaky-pie-dough-recipe.html
I love Serious Eats! Such a great website and resource. I’ve tried that pie crust recipe, but I didn’t have great luck with it. Glad it’s worked well for you! Thanks for the sugar tip! 🙂
Thank you so much for the great tutorial! I am looking forward to trying this. My hubby loves pie, but I am afraid of making my own crust! I love all the step by step pictures and troubleshooting. With your help, I will hopefully conquer my fear of pastry 🙂
You can do it, Kristi! Please ask me if you have any questions along the way!!
I made your peach pie recipe for Labor Day weekend (yum!) and used the sour cream pie crust recipe. My husband said it was the prettiest pie he’d ever seen! I think I do need to invest in a pastry board though because my crust was pretty thick (not a problem for me, I love crust). Also, grating frozen butter is surprisingly hard on achy hands (boo arthritis), I will try a salad shooter as per another commenter’s tip, I think that will be amazingly helpful. Thank you, Mel for all the great recipes.
Oh darn about your poor hands! I don’t have a salad shooter, but sounds like a great idea!
Love the boot camp!! Definitely not your typical boot camp!! A couple of questions. What is the benefit of the pie canvas? For a two crust pie, do you just double the recipe and then eyeball half to roll out at a time?
I think the benefit of the canvas board is much easier rolling (hardly any sticking and I think it’s much easier to get the pie crust even and thin). And yes, for a double crust pie, I double all the crust ingredients and then divide the dough so there’s a little more than half for the bottom (that goes in the pie plate) and the slightly smaller portion for the top crust.
Thank you for the great tip about the pastry board. I knew there were cloths but didn’t know there was a board. I don’t usually have issues with taste or flakiness (I use butter and a little lard and it’s amazing), but I need help making the pie look better. I’ll try the board and making sure I have enough overhang around the entire pie instead of too much in one place and not enough in another. Thanks again!
Keep me posted on how it goes!
Mel, I have been attempting to make pie crust for 35 years without consistent results. I am learning so much from your “bootcamp”. I can’t wait to test my newly learned skills at Thanksgiving. Thank you for sharing!
Thanks, Julia! You’ll do great! Let me know if you have any questions!
One thing I also do when making my pie crust is give a shout out to the Pie Gods… 🙂 LOVING your pie boot camp and can’t wait to make some pies!
Hahaha, that made me laugh.
Tender? I see descriptions of pie crusts and sugar cookies but never really know exactly what that means. Chewier? Softer? Thanks! I’ve asked you so many inane questions over the years…hopefully this one doesn’t push you over the edge!
Thank you for these tutorials. Your recipes make me so confident in the kitchen.
Ha! It’s not inane at all (neither have ANY of your questions been). So tender, yeah, when I say that I mean the crust has a bite to it when eating it but it isn’t crunchy. It’s melt-in-your-mouth with still some texture to it. Does that help at all?
That absolutely helps. Thank you so much for all you do!
I really like making pies! It’s always nice to see different techniques/recipes! My favourite thing to do with the leftover crust scraps is to make a little hand pie to bake at the same time as the pie and then eat while the main pie is cooling off. I usually fill it with jam or something fun, like a pie filling I have on hand 🙂 I make sure my kids don’t see me make it or else I’d have to share.
That’s such a cute (and great!) idea, Jen!
Your directions look easy to follow, I’m excited about trying this! And also looking forward to that chocolate pie you mentioned. 🙂 thanks Mel!
Oh, that chocolate pie is a doozy (in a GOOD way!). I’m excited to share it next week!
I have a serious sweet tooth and the barely sweet pie crusts always end up being uneaten on my plate. I’m wondering if there is a way to add a little more sweetness to the crust without it messing up the texture? I’ve tried just adding a couple Tbls more sugar but it changed the texture.
I know what you mean – I’ve tried more sugar, too, and the pie crust almost crystallizes while baking and has a different texture. You can sprinkle sugar over the unbaked pie crust before baking and that can help.
I’ve been looking forward to this post all week! Thank you!! Quick question, Mel: You mention that a lightly floured countertop will sub for the pie crust canvas. It looks like you also lightly floured the canvas, yes? Just wondering so that if I purchase a canvas I will know how to do it correctly. Thanks! This is so fun!!
Yes! Lightly flour either a canvas board or a counter – both will need a little flour. 🙂
Just wanted to mention that the Sally Hansen Shetopia ads on this post make it difficult to read the post (takes longer to load and appears every time you scroll) and kept crashing my browser (IE, not as bad with Chrome).
Thanks for the feedback! I’ll definitely look into it because I don’t want that to be happening. Please feel free to ALWAYS report an ad if it is causing a problem (there’s a “report this ad” link at the bottom of each ad). I’ll try to get it corrected ASAP!
In Canada, Tenderflake lard has a recipe on their package for THE pie dough recipe many a Canadian grew up on. It calls for lard, and vinegar which gives a unique tang to a flaky crust. To this day, for me, homemade pie crust doesn’t taste right unless it has that slight tang to it. It is definitely something to try.
5 1⁄2 cups all-purpose flour
2 teaspoons salt
1 lb tenderflake lard
1 egg, stirred slightly
1 tablespoon vinegar
7⁄8 cup cold water
Combine all the wet together and only add as much as the flour, lard, salt mixture will take.
Totally agree! That’s the recipe my mom used growing up. I tried many other recipes hoping to find something better, but eventually I went back to good old Tenderflake.
Yes! This is the pastry I make but instead of water I use milk. So flaky and good!
I’ve had good luck using oil in my pie crust instead of the butter, although I don’t usually see many recipes using oil. Is that more “old school” or are there advantages to one over the other? Just curious!
That’s a great question, Diane! I’ve tried a few recipes over the years with oil and didn’t love the flavor, but my big thing is that if you have a recipe that you love and works great, I’d stick with it!
What about a whole wheat pie crust? Do you have a good recipe? Or recommendations. Or WHY you don’t use a whole wheat pie crust…
Thanks.
That’s a great question, Gay! I haven’t had great luck with a whole wheat pie crust. The ones I’ve tried (or subbing in whole wheat flour) have been too heavy, dense, and dry.
How can I bake this and not have it shrink?
We’ll be talking all about that next Friday! I have tons of tips to share with you.
My mom always made the best flaky pie crusts. One of the tricks she taught me was to take out about 1/4 cup of the flour mixture prior to cutting in the shortening and make a paste with the water. After cutting in the shortening she would add the paste back in and it made it so much easier for the ingredients to come together!
Interesting, Nancy!