Pie Making Boot Camp {Week #3: All About Blind Baking + Amazing Chocolate Ganache Cream Pie Recipe}
All the details on how to blind bake a pie crust (and why you even need to do so in the first place)! Plus, a bonus recipe for the most deliciously amazing chocolate ganache cream pie!
Hey there, pie making friends!
It’s time for week #3 in our Pie Making Boot Camp!
If you’ve missed the previous “episodes” – here they are:
Week #1: All About Pie Making Essential Supplies
Week #2: How to Make Perfect Homemade Pie Crust + Video Tutorial + No-Fail NEW Pie Crust Recipe
Continuing the natural evolution of pie making tips, today is all about blind baking!
If that term has you blinking in confusion, never fear! I’m here to answer all of your questions and show you just how easy it is!
Blind baking a pie crust simply means baking a pie crust (in a pie tin) without any filling.
It’s usually needed when you are going to fill the pie with a no-bake filling.
Like banana cream pie. Or coconut cream pie.
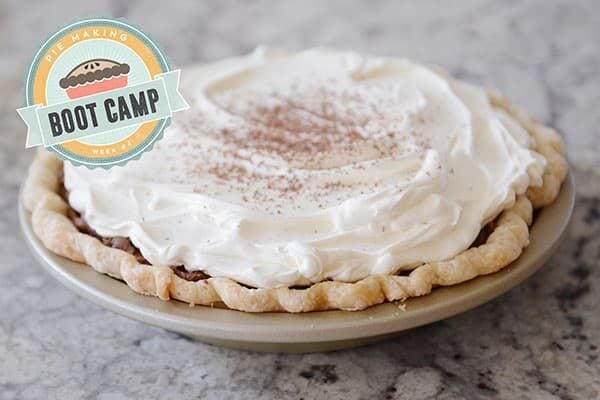
Or chocolate ganache cream pie (brand new recipe below!).
One of the most common questions I get about pie making is “why the heck do my pie crusts shrink when baking??”
If the images below fill you with familiar fright, you aren’t alone.
There are many reasons pie crusts can shrink while baking. I touch on a few examples in this post.
Overmixing the pie dough or stretching/pulling it while rolling or placing in the pie plate are common culprits.
But another reason the pie crust can shrink often happens during blind baking – and it is because the crust isn’t properly weighed down while it bakes in the oven (and can be compounded by the aforementioned issues).
Let’s talk about how to blind bake a pie crust so it turns out golden and lovely and perfect every time!
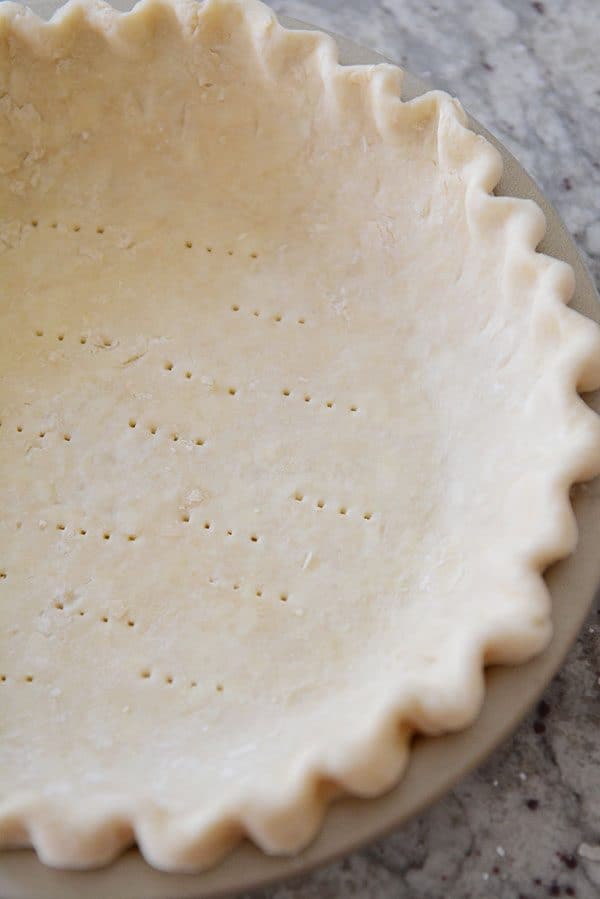
First, make the pie dough, chill it, roll it out, and place it in the pie tin (crimp those edges!). All the details of how to do those steps can be found here.
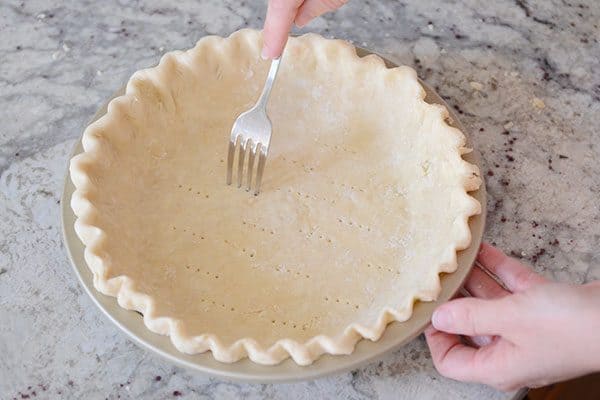
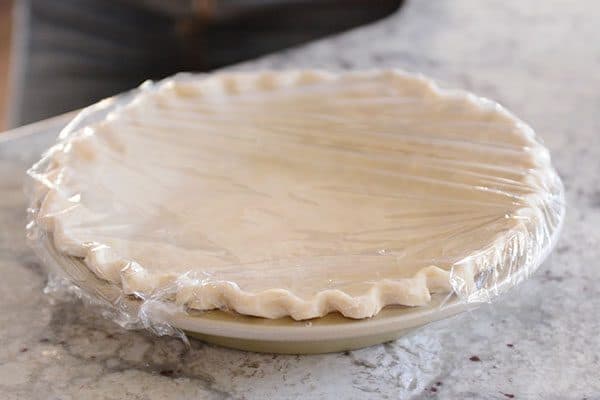
Then, take a fork and prick the bottom of the crust. This helps the crust not puff on the bottom while baking.
Cover the pie crust/plate with plastic wrap and refrigerate until the pie crust is well chilled.
This is important! A warm or room temperature pie crust will not bake as well as a chilled crust (it won’t be as flaky and it will have a tendency to slide and shrink).
Plus, it is easy to mash the crust into a misshapen mess with the foil if the pie crust isn’t well chilled.
And we really, really want to avoid mashed misshapen messes. Now and forever.
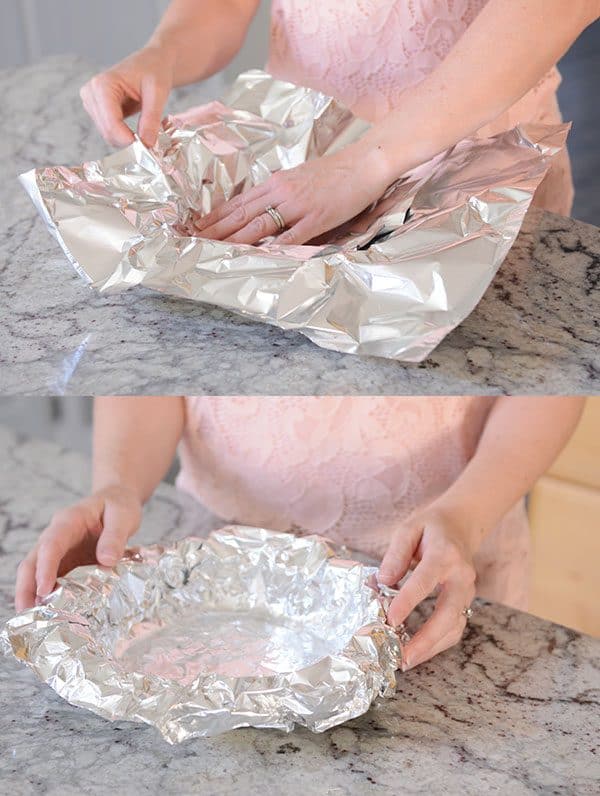
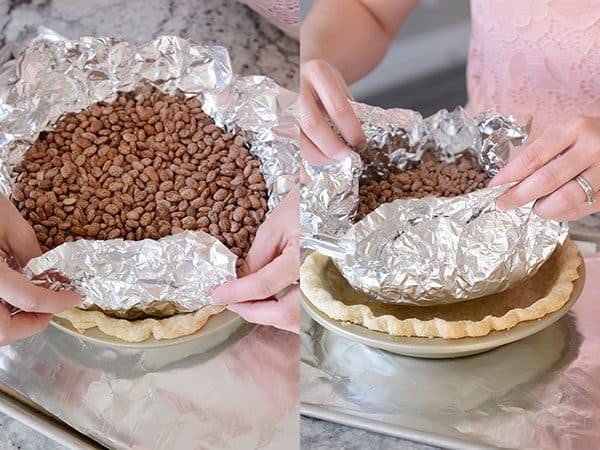
Once chilled, remove the plastic wrap and gently press regular (not heavy duty) aluminum foil into the unbaked pie shell so it is well formed to the shape of the pie crust.
Make sure the foil completely covers the edges of the pie crust.
There are many philosophies about what is best to use for filling the pie crust, but the only thing I’ve ever used is dry beans.
They are inexpensive, do the job well, and can be reused time and time again.
Fill the pie crust all the way to the brim with dry beans.
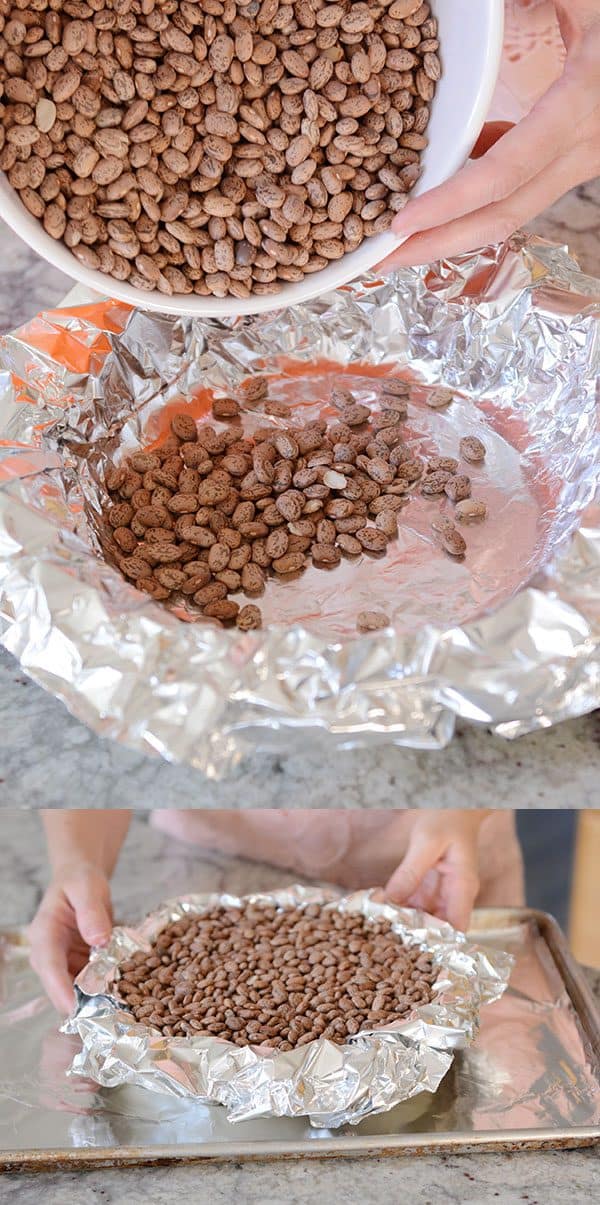
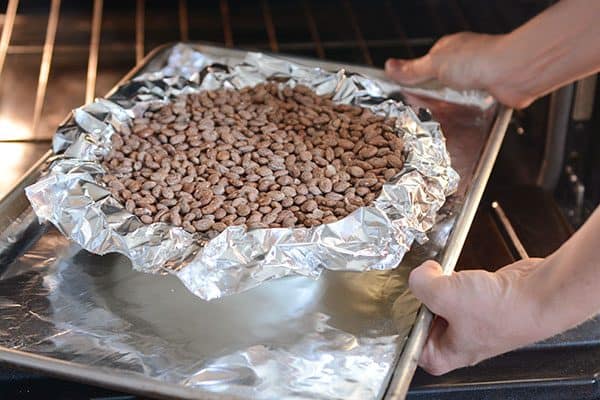
Then pop the filled pie crust onto a foil-lined baking sheet (this catches any butter splatters AND helps insulate the cold glass pie plate against cracking as it goes into the hot oven vs. going directly onto a piping hot oven rack). Bake in a preheated 350 degree oven for 45-50 minutes.
Rotate the pan about halfway through baking, especially if your oven has hot areas (and the pie crust is overly browning in certain spots).
Let it bake until the bottom of the pie crust is golden but not overly browned and the edges of the pie crust are set (not raw).
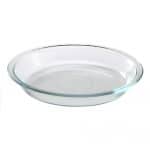
Using a glass pie plate is best here so you can see the color of the crust while it bakes (my pie making equipment recommendations are here).
Once baked, let the pie crust cool for 3-4 minutes.
Carefully peel back the foil and use the overhanging edges of foil to lift the packet of (very hot so be careful) beans out of the pie.
Place the foil and beans on a paper towel to let cool completely (the paper towel will absorb the grease from the bottom of the foil).
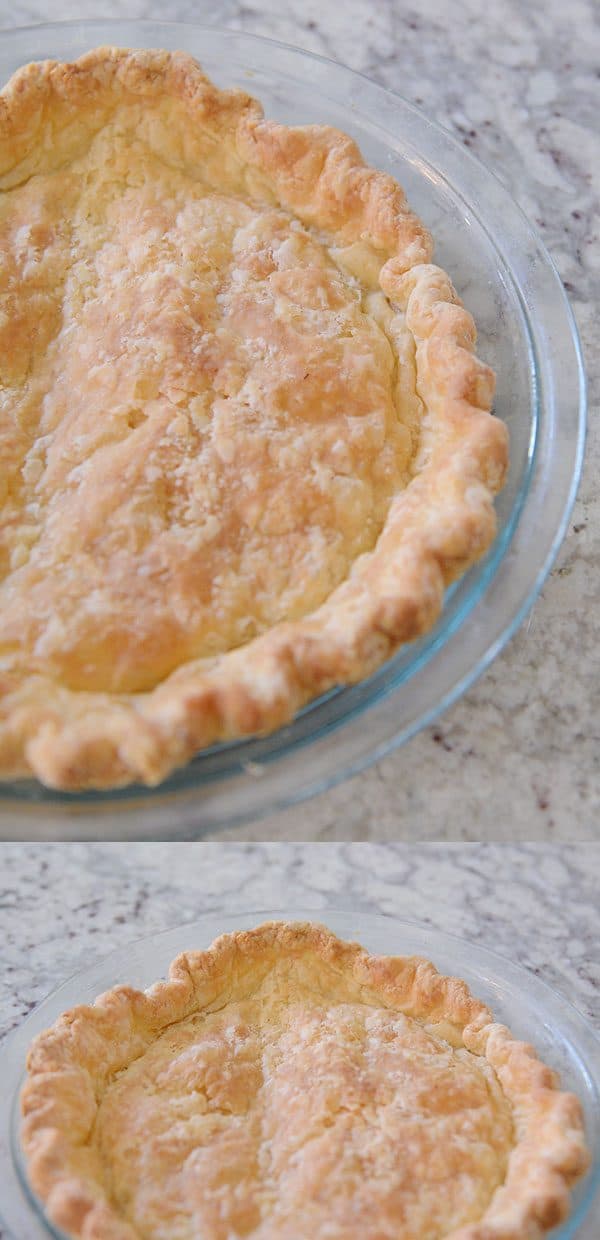
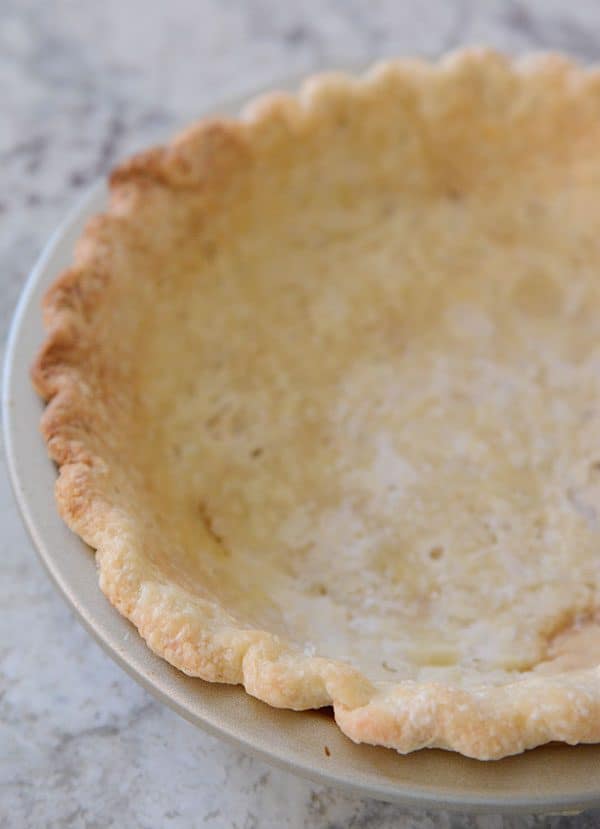
Behold! The blind baked pie crust.
You’ll see that my pie crust has a bit of a darker crust on that upper left edge. I’m blaming that on my oven.
I didn’t rotate the crust halfway (I know, I know, I disobeyed my own orders), and that part of the crust browned too quickly, thanks to an oven that bakes slightly hot in the back.
But honestly, it’s fine if that happens. Put away your perfectionist tendencies (totally speaking to myself right now).
Don’t stress small imperfections and make life miserable.
Once the beans are cooled, I pop them into a ziploc bag and store them in my pantry.
They can be reused again and again (but probably aren’t the best choice for your next batch of chili; save them for the pies!).

Learning how to blind bake a pie crust can totally up your pie making game.
I have tried MANY methods of blind baking over the years.
Lots of recipes have you bake the pie crust at a higher temperature (400 or so) and remove the foil and beans/weights halfway through baking so the pie crust can finish baking by itself.
This obviously works for some people, but I have found that when I try to remove the foil from a partially baked crust halfway through baking, I inevitably peel up the bottom of the crust, burn my poor fingertips, and say bad words.
So I’ve taken to blind baking the pie at a lower temperature for a longer amount of time and leaving the foil and beans in the crust the whole time.
Perfect pie crust!
Again, blind baking a pie crust is perfect for those pies that are going to get loaded with (usually) a creamy, delicious filling.
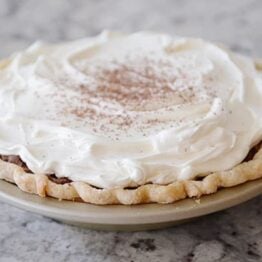
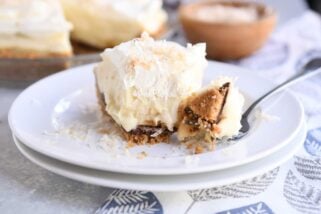
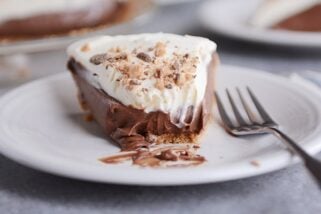
Today, in honor of all the extras I’m sharing during the pie boot camp, I’m giving you a favorite chocolate ganache cream pie recipe.
I started making this pie years ago, long before I was married or had kids.
My mom asked me to make a chocolate cream pie for Thanksgiving, and an early variation of this pie was born (although quite honestly, I have to admit there was not a homemade pie crust in sight – my pie making skills have definitely evolved over the years).
It’s easy, it’s simple, it’s ridiculously decadent and delicious.
The filling is a whipped chocolate ganache, which is a rather fancy term that basically just means chocolate and cream that has been heated and cooled and then whipped.
Yes, I know there is cream cheese in the filling. And I also know this is not a traditional, classic chocolate cream pie ingredient.
But it’s ok, because I never said this was a traditional, classic chocolate cream pie.
The cream cheese adds a subtle creaminess but does not make this a cheesecake in any way.
The filling is thick and luscious and rich and decadent and very, very chocolatey.
And while I shouldn’t admit this out loud – it being pie making boot camp and all – while a blind baked pie crust is ideal here, I will not unfriend you if you somehow find yourself using a graham cracker crust for this pie.
It’s also delicious (says the girl who has made it that way many a time).

If you are out to conquer pie making in all its forms, learning how to blind bake a pie crust is essential!
And pretty darn easy, huh?
Chocolate Ganache Cream Pie
Ingredients
- 9- inch pie crust, baked and cooled (see note)
Ganache Filling:
- 2 cups (340 g) semisweet or bittersweet chocolate, chopped (see note)
- 3 cups heavy cream, divided (meaning you’ll use 2 1/2 cups first and then 1/2 cup later)
- 2 teaspoons vanilla extract
- 4 ounces (113 g) cream cheese, softened to room temperature
Whipped Cream Topping:
- ¾ cup heavy whipping cream
- ⅓ cup (38 g) powdered sugar
- ½ teaspoon vanilla extract
Instructions
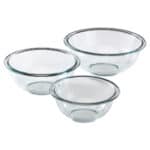
- For the ganache filling, add the chocolate to a heatproof bowl. Bring 2 1/2 cups cream to a simmer in a medium saucepan. Pour the cream over the chocolate and let the mixture sit for 1-2 minutes. Add the vanilla and whisk to combine until the mixture is glossy and smooth. Cover with plastic wrap and refrigerate until completely chilled, 2-3 hours.
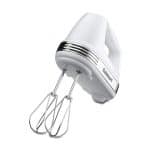
- When thoroughly chilled, scrape the mixture into an electric stand mixer fitted with the paddle or whisk attachment (or use a handheld electric mixer) and whip until the ganache is fluffy and lighter in color, about 1-2 minutes, scraping down the sides of the bowl as needed.
- In a small bowl or in a blender, combine the softened cream cheese and remaining 1/2 cup cream and whip or process until smooth and thick.
- Add the cream cheese mixture to the ganache filling and whip on low speed until combined and no white streaks remain.
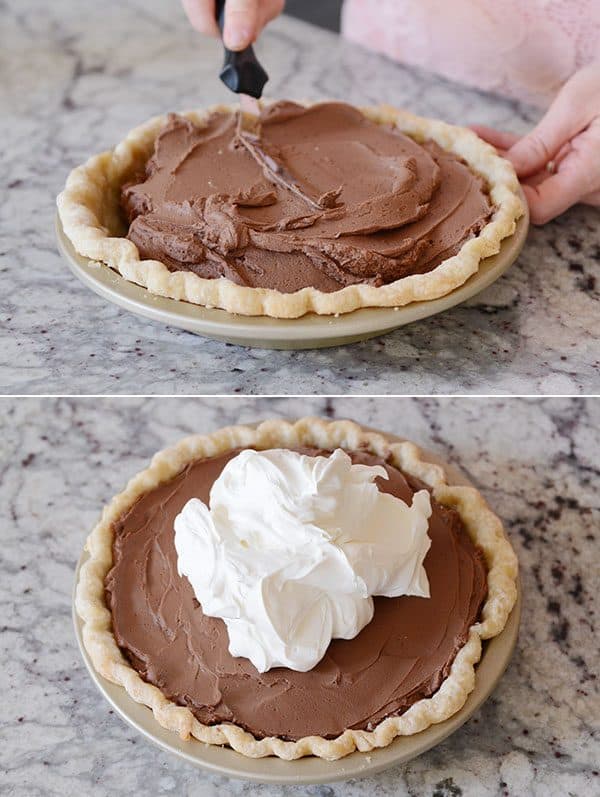
- Spread the chocolate filling in the baked and cooled pie crust.
- For the whipped cream topping, combine the whipping cream, powdered sugar and vanilla in a blender (or in a bowl using a handheld electric mixer or an electric stand mixer) and mix until thick and fluffy.
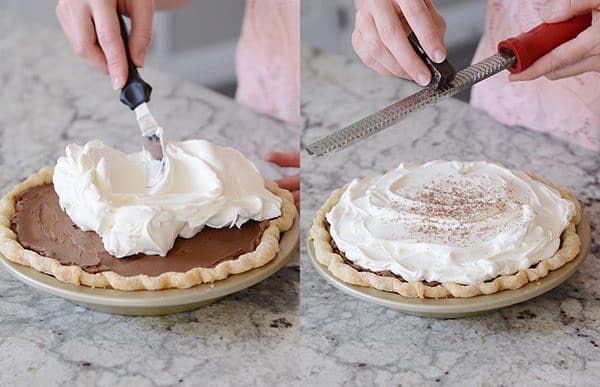
- Spread the whipped cream topping over the pie.
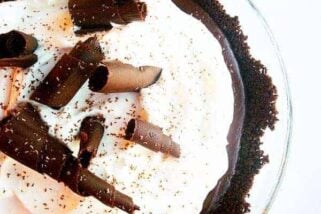
- If desired, grate chocolate over the top of the pie using a rasp grater or the small/poky holes of a box grater (or garnish with chocolate curls). Serve immediately or refrigerate for 2-3 hours before serving.
Notes
Recommended Products
Recipe Source: from Mel’s Kitchen Cafe
Can I make this without cream cheese
This is a great recipe except for the fact that after 50 mins of cooking, the crust was still raw on the bottom. I took out the weights and cooked it for another 15-20 mins and it was finally done. The sides shrunk a little during that time.
I have a question about blind baking. When I have a frozen pie crust that is already rolled out and in the pie plate, could I blind bake that crust straight from the freezer or would you suggest thawing it out in the fridge first?
I would suggest thawing (I tried one time with a frozen crust and it was really dry after baking).
My crust is baking. If I am planning on filling it tomorrow, should I refrigerate it once it’s cooled, or leave it on the counter?
I know this response is late, but I usually just let it cool, drape with plastic wrap and leave it at room temp.
Hi Mel! I’m a sucker for yummy pie crust, crispy and flaky. Graham cracker crust is not my favorite. If I make this ahead and stick it fridge will the crust get soppy? Is it better to do the chocolate filling the day before, then pie crust the day of? My bad for not trialing this last week!
If you want that crust to stay extra crisp, yes, I’d say make the pie crust and filling and store separately. The filling sets up quite a bit on chilling – so I don’t know how spreadable it will be the next day, but you could take a warm spoon and stir it up or whip it up again in the mixer, perhaps? Otherwise, I’d fill the pie the day before, too. The crust will soften slightly but it shouldn’t be soggy at all.
This looks delicious! On the pie, can it be made and refrigerated a day before serving?
Yes, that should be ok – although I’d probably wait to top the pie with whipped cream until the day of.
Hi Mel- you are amazing, thank you for always making the best tutorials! Your recipes and tips always make me look (and feel) like a rockstar in the kitchen!
Quick question, (I feel like you kind of answered it above about it cleanly cutting… but just to clarify) I am thinking of making this chocolate ganache pie with a graham cracker crust in a springform pan (all my pie dishes are all tentatively reserved for other shell pies), any thoughts? Is this pie/filling sturdy enough to hold up in a springform or should I buy another pie dish or re-evaluate my other pie “needs”?
This pie looks and sounds right up my alley!
Yes! I think it’s definitely sturdy enough for a springform pan. Yum!
I am very upset. my pie stuck to the foil!!! I even buttered the foil.
I baked the crust for 55 minutes, after checking it at 45. I tried lifting the foil when it came out, and the crust stuck to the foil. So I put aside the crust.
Now I did forget to set a timer, and I was busy making something else. So it may have been longer than 4 minutes. But the crust really stuck to the foil.
All that work, and no usable crust for the pie recipe!! Boo hoo!
What happened?
Hmmm, I’m surprised, Judy especially if you buttered the foil. What did you use to weigh down the foil? Dry beans? Did you use heavy duty foil or regular?
I thought you need to butter the foil so it doesn’t stick to the pie crust in blind baking.
I am using the King Arthur Flour classic double crust recipe, made in the stsnd mixer. Shoukd I butter the foil?
Thank you, you ROCK!!!
Hi Judy – I never butter the foil, but a lot probably depends on the pie crust recipe. You can definitely grease the foil if you are worried about it sticking!
Hi Mel, I figured out where the problem was!!!
I made a second pie crust today. The big change was that I warmed the baking pan when I warmed the oven. So it was hot when I put the pie into the oven! Before, I put the cold pie crust on the room temperature baking pan! The baking pan wasn’t hot enough to give a blast of heat to the crust! No wonder the pie crust stuck to the foil. It wasn’t ready to come out of the oven. With a hot baking sheet, the crust got the necessary blast of heat. It was easy to get a crust that was cooked just enough before removing the foil!!! This answer came to me when I woke up this morning, not even thinking of pie! Thanks for your replies, Mel. You helped me to keep trying.
Now, on to your pie recipe!
Great job troubleshooting this, Judy! Thanks for the report back!
Hi Mel! I have a rather random question regarding this recipe but I really hope you can help. I am making a chocolate pie for my family this Thanksgiving but we have several members who are dairy free. I know coconut cream whips up very similarly to regular cream so I would like to try this recipe with that substitute. However, I would need to decide what to do about the cream cheese. Any opinions on what would happen if I left that part out? Have you tried that before? I would prefer not to add something weird in its place, you know? 🙂
Hey Lisa, I think you could probably just try leaving it out. The pie will probably be slightly less creamy – and the texture might be thinner (not sure how the coconut cream will affect that as well), but I agree, I don’t think it’s worth substituting for something kind of strange.
Thanks, Melanie! I hope the information has been helpful!
You are the best! This was a very helpful tutorial! I use blind baked pie crusts all the time, and this post addressed some of the very issues that I’ve always dealt with. Now I feel ready to tackle blind baking again. Hooray for pie season!
Thanks, Cielle!
I love this series. Blind baking has never worked out super well for me but now I am excited to jump in to the holidays and try out all the great tips! Thanks Mel!!!
This is such a great series! Your instructions are so clear. AND it is so obvious that you have spent hours and hours putting this together for us. Thank you, Mel! It must truly be a “labor of love”. I do have a question……or two. When making a cream pie, do you ever bake your crust the day before you plan to fill it with the pudding mixture? If so, does it affect the quality of the pastry much? (I ask this because I know it is always best to make cream pies the day they are to be served in order to prevent a soggy crust……and I am thinking about what can be accomplished ahead of time for upcoming holidays, etc..). Also, do you have any words of wisdom regarding blind baking a crust that is going back into the oven for a quiche? Thank you again for sharing your knowledge with all of us!
Oh, wow. Blind baking- I had no idea!! I’m seriously starting to think that I i just might brave making a pie this year… and I’ll try not to use a graham cracker crust. 😉 thanks a million, Mel!!
I’m telling you, Amy – you can do it! And you can call me if you have issues mid-pie baking. 🙂
Thank you, Thank you!! I’ll email you! 🙂
I just want to say that I am loving this pie making boot camp! I haven’t tried making a pie yet as I want to see all of the steps completed first, but I can’t wait to give it a go this Thanksgiving season! I might cave early and make a Halloween pie 🙂
Thanks, Melanie! I hope the information has been helpful! This next week is going to be the last and then you can tackle homemade pie! I bet you’ll do great.
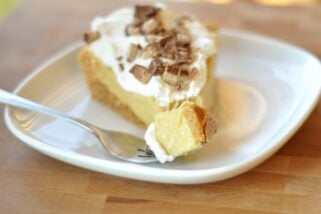
Does the pie cut cleanly or is it more pudding texture?
This chocolate ganache cream pie cuts very cleanly – the filling is more sturdy and thicker than a pudding pie.
I really enjoy reading your blog and making the recipes. They have all been successful! In your instructions, you encourage chilling the pie shell and then placing it into a preheated oven. Will glass pie plates stand up to this temperature change without breaking?
That’s a great question, Elizabeth. I always place the pie plate on a foil-lined baking sheet (I’ll add this note to the post in case it isn’t there already) so the cold glass pie plate isn’t going directly onto the hot oven rack.
Thanks for the great info. It will sure help me next time I blind bake a pie shell. My qustion is do you prick the shell all the way through?
Great question – yes, I push the fork in all the way to the pie plate.
Does this pie freeze well? I’m starting my Thanksgiving prep as far in advance as possible this year. 😉
I haven’t tried freezing it, Natalie, but my guess is that it would freeze just fine (but I’d probably leave off the whipped topping and add it after the pie has been thawed and is ready to serve).
I’ve been using parchment it sticks. Can’t wait to try your foil method.
Where did you get your ceramic blue pie plate? I’m in love.
I’ve had that blue pie plate for so long, I honestly don’t remember where I picked it up! I think it was at a kitchen store in Green Bay, Wisconsin when we lived there. Sorry for the fuzzy details!