Red Velvet Cheesecake Brownies
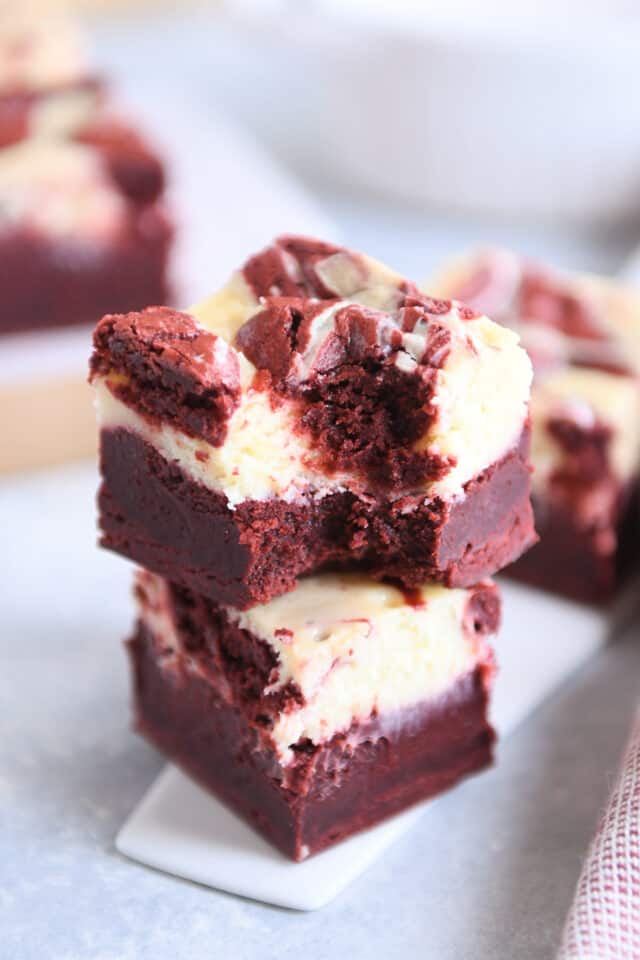
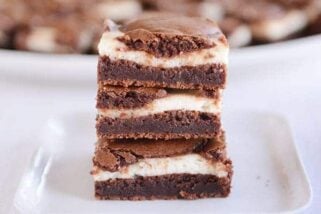
These red velvet cheesecake brownies are a showstopper. The brownies are fudgy, the cheesecake is creamy, and the combination is incredibly delicious!
Red velvet is often hit or miss for me (or maybe I’m just usually kind of expecting more and end up being underwhelmed)?
But such is not the case with these amazing swirly red velvet brownies. They’re divine!
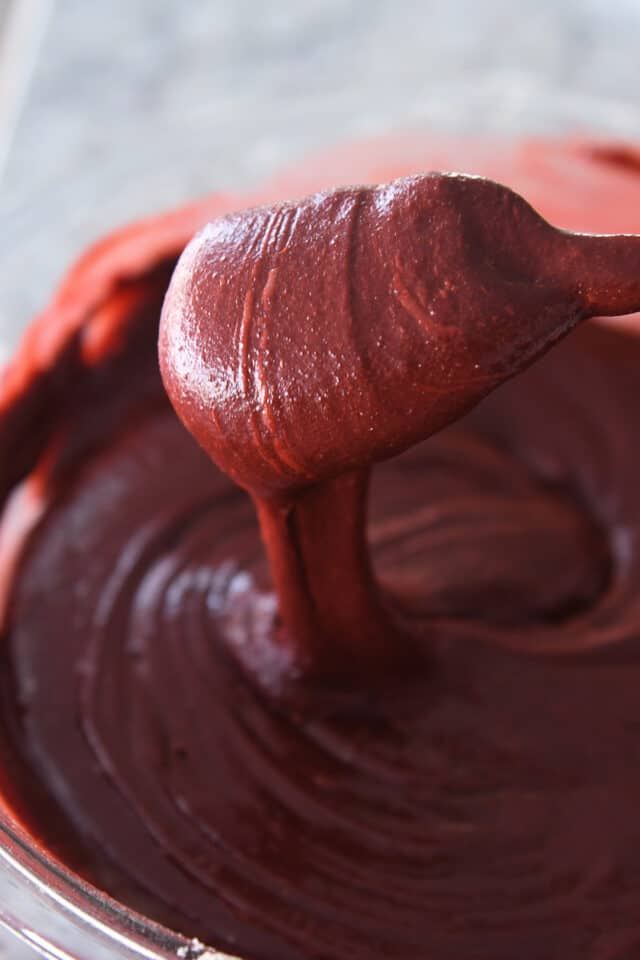
Red Velvet Brownie Batter
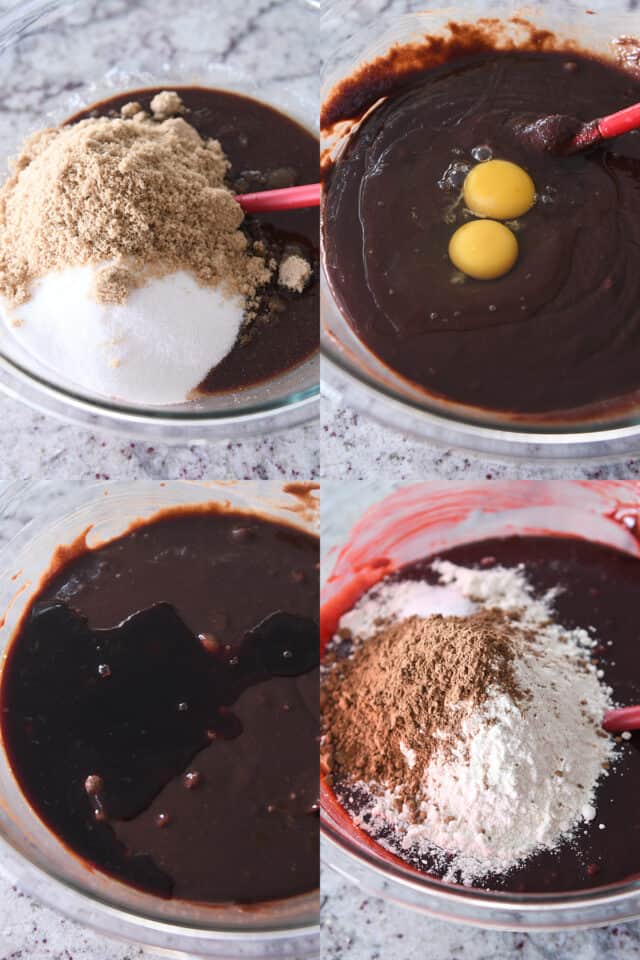
The brownie batter is fairly straightforward:
- butter and chocolate
- granulated and brown sugars
- eggs + vanilla + red food coloring
- a bit of cocoa, flour and salt
Once the red food coloring is added, the dark brownie batter instantly takes on a red hue. And the red color deepens even more once the brownies are baked.
Red Food Coloring
There is definitely no mistaking these for regular brownies. They are red velvet through and through.
A few notes about the red food coloring:
- I use liquid food coloring for this recipe; I have not tried substituting gel food coloring. If you do, I’m guessing you can use half as much gel food coloring since it’s more potent.
- I do not have a natural alternative for the red food coloring (as in, didn’t test the recipe with beets and the world is better for it). You could skip the food coloring completely and just go for an amazing swirled cheesecake brownie.
The red food coloring doesn’t affect the taste of the brownies – it’s simply there for the gorgeous, show stopping looks!
The Perfect Swirl
For this recipe, *most* of the brownie batter is spread in the bottom of the pan. One cup is reserved for the dollop-and-swirl procedure.
This remaining batter is spooned on top of the cheesecake layer and swirled in with a wooden skewer or other thin implement.
I personally use a clean knitting needle for the swirling action. That might sound weird until you learn that I have tried and failed 6 1/2 times to learn how to knit so I repurposed the knitting needle for ebelskivers and brownie swirling, and I have not looked back.
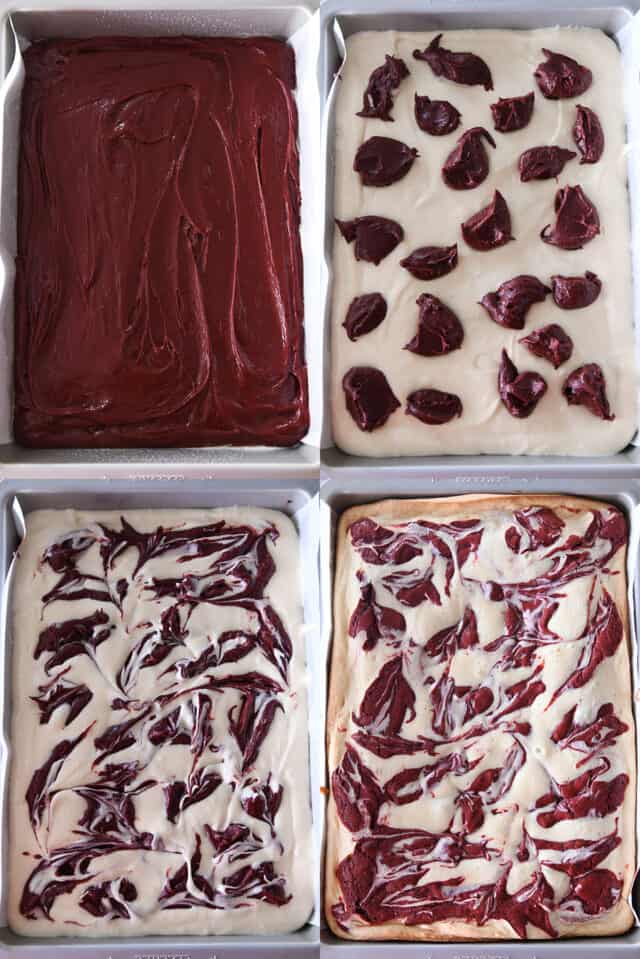
I mean, LOOK AT THAT SWIRL.
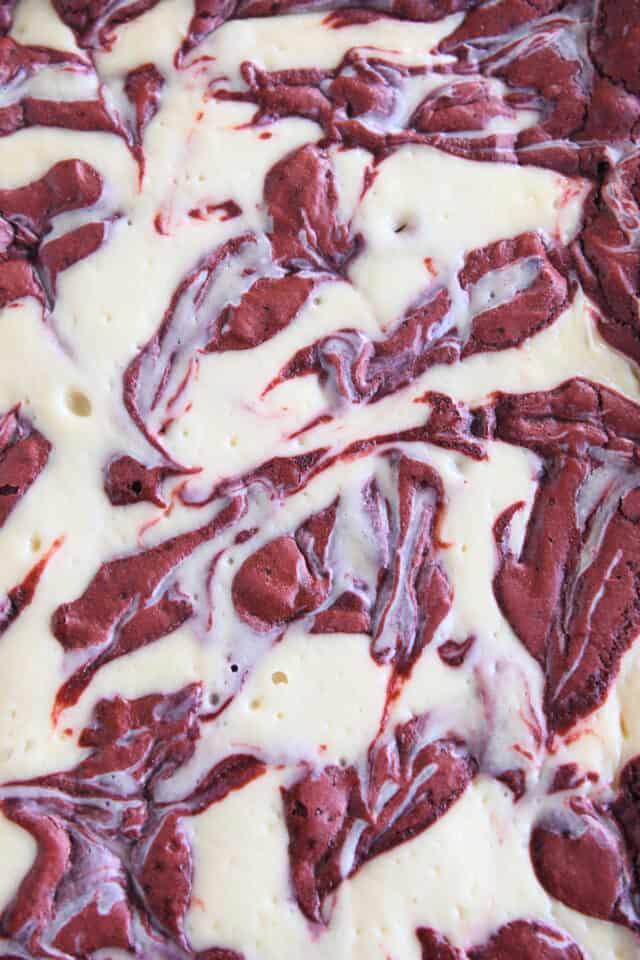
Red Velvet + Brownies + Cheesecake
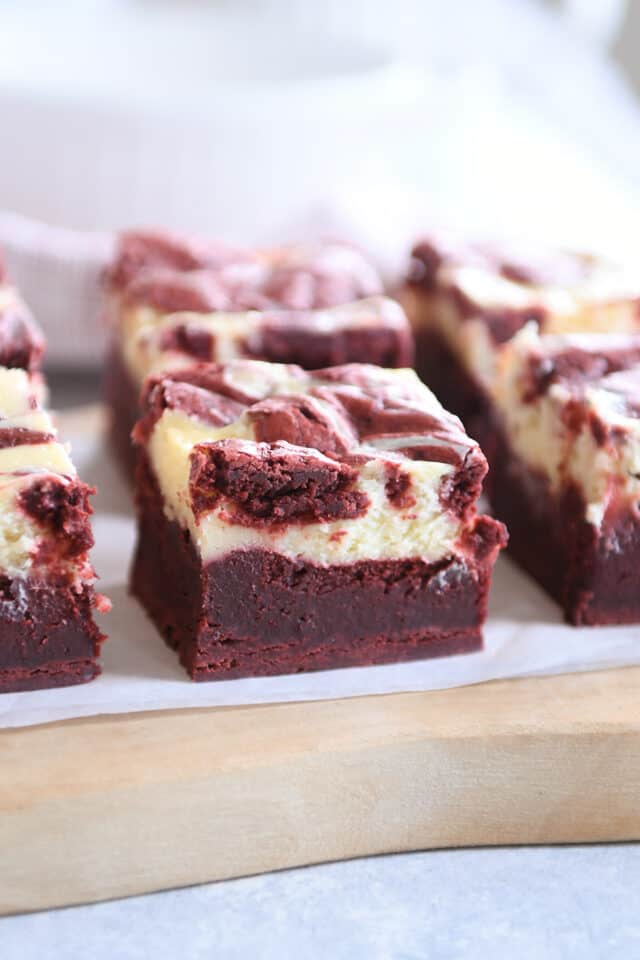
These red velvet cheesecake brownies are astonishingly delicious.
The brownie to cheesecake ratio is perfect. And the red velvet only enhances the appeal of these brownies.
I highly encourage you to try them chilled. You may never go back to room temperature brownies again. (But don’t even think about serving them warm…that’s all fine and good for a decadent batch of normal brownies, but it’s just plain shivery for cheesecake swirled brownies.)
While they may look like they should only be served for a festive occasion, let me assure you that these lovely brownies are perfect any time for any reason.
One Year Ago: Triple Chocolate Scones
Two Years Ago: Easy Sugar Cookie Bars
Three Years Ago: The Best Swig Sugar Cookies {Copycat Recipe}
Four Years Ago: Amazing Instant Pot Indian Butter Chicken and Potato Curry
Five Years Ago: The Best Vanilla Buttercream Frosting {For Cookies + Cakes}
Six Years Ago: Winter Minestrone Soup with Garlic Bruschetta
Seven Years Ago: Classic Strawberry Shortcake {With a Decadent Chocolate Version}
Eight Years Ago: No-Bake Berry Yogurt Cheesecakes
Nine Years Ago: Nutella and Strawberry Stuffed French Toast
Ten Years Ago: Healthy Banana Oat Snack Bars
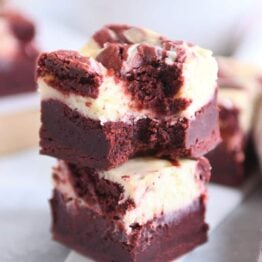
Red Velvet Cheesecake Brownies
Ingredients
Brownie Batter:
- 1 cup (227 g) butter (I use salted)
- 2 cups (340 g) semisweet chocolate, chopped (or good quality chocolate chips – see note)
- 1 ½ cups (318 g) granulated sugar
- 1 cup (212 g) lightly packed brown sugar
- 6 large (300 g) eggs
- 2 tablespoons red liquid food coloring
- 1 tablespoon vanilla extract
- 1 ¾ cups (249 g) all-purpose flour
- ¼ cup (21 g) natural, unsweetened cocoa powder
- ¾ teaspoon salt
Cheesecake Batter:
- 16 ounces (454 g) cream cheese, softened
- 1 cup (212 g) granulated sugar
- ¼ cup (36 g) all-purpose flour
- 2 large (100 g) eggs
- 1 teaspoon vanilla extract
Instructions
- Preheat the oven to 325 degrees F. Lin a 9X13-inch baking pan with parchment paper or foil (I suggest using a metal baking pan for even baking) and lightly grease with cooking spray.
- In a microwave-safe bowl, combine the butter and chocolate and cook for 1-minute intervals at 50-60% power, stirring in between, and continuing to cook until melted (don't over heat).
- Add the granulated sugar and brown sugar and whisk to combine. Add the eggs and whisk until fully combined.
- Add the vanilla and food coloring and whisk until well combined.
- Add the flour, cocoa (if the cocoa is really lumpy, sift it into the batter), and salt, and stir until just combined and no dry streaks remain.
- Scoop out 1 cup batter and reserve for later. Spread the remaining batter evenly in the prepared pan.
- For the cheesecake batter, in a medium bowl, cream together the cream cheese and granulated sugar until well combined. Add the flour and mix until well combined.
- Add the eggs and vanilla and mix well, scraping down the sides of the bowl as needed.
- Spread the cheesecake batter evenly over the brownie batter.
- Dollop the reserved brownie batter by tablespoonfuls over the cream cheese layer. Using a wooden skewer or other thin tool (I use a clean knitting needle!), swirl the layers back and forth. Swirl quickly or the brownie batter will stiffen and it will be harder to swirl.
- Bake the brownies until the edges are set and the top is shiny, about 45 minutes. Add additional time, if needed, as each oven and pan type may vary. The center of the brownies should be slightly jiggly; that's ok. An instant read thermometer inserted into the center should register 165 degrees F.
- Let the brownie cool completely in the pan. Refrigerate for 2-4 hours (or overnight) until well chilled. Serve chilled or at room temperature.
Notes
Recommended Products
Recipe Source: adapted a little from a recipe in the Bake magazine Nov/Dec 2021


Oh my gosh…..delicious!!! I added these to a wedding dessert table I was doing and they were quickly gone. I was nervous about making a recipe for the first time for a event, but reading the list of ingredients – I just knew they would be good. They are just what you want in a brownie….chewy, fudgy with a tang from the cream cheese. They are thick, which I also love. No whimpy thin brownie here. I have already had numerous requests to make these for Christmas. Thanks so much for sharing! This recipe is a keeper.
I need to leave more reviews…Mel, your recipes are amazing and I love that you list weights on ingredients. It makes it so easy to whip together.
The Red Velvet Cheesecake Brownies were a massive hit! Absolutely on our make again list. I noticed people asking about gel food coloring instead of regular liquid- I used 1 tsp plus 3 or 4 drops of squeeze gel (probably from Michaels or Hobby Lobby?) and the color was perfect.
I’m an inexperienced baker and made these for my dad for father’s day and they were pretty easy to make. My dad really enjoyed them. It’s funny, multiple comments talked about how rich they were and I was still surprised with how rich they turned out haha. They are sooo good but I’ll definitely be cutting smaller pieces because of how rich they are. I do wish the red velvet wasn’t as chocolatey because it is quite rich (I know I keep saying that word, sorry!). I love red velvet because it essentially chocolate but less chocolatey. But overall these were a hit for my family!
Amazing! Wonderful brownies, velvety smooth cheesecake and together they are divine!
We loved these! They are not hard to make either but they are rich. I will say my oven bakes fast and these required a lot more time for the center to get baked properly, probably somewhere between 55 and 60 minutes total.
I took these to a valentines dessert party and they were well received. Pretty, festive, and delicious. They were easy to make, I REALLY appreciated the instruction to cook to an internal temperature of 165. That was so helpful in knowing when the brownies were done. Warning – they are extremely rich and sweet, they were honestly a bit too much for me. But I guess that’s to be expected when you combine brownies and cheesecake.
Crazy, random question. Do you think that white chocolate chips could be used instead of, or with the chocolate chips? Thanks for answering with your opinion on how that would work! God bless.
Unfortunately, white chocolate chips don’t melt as well as “normal” chocolate chips. You could definitely experiment, but the base of the brownies might be a bit greasier/less smooth.
Amazing recipe! I’m 24 and like the idea of baking. Made this for thanksgiving and my family loved it! Making more now for Christmas! Added green food coloring to the cheesecake portion to give it that Christmas look. Thanks for sharing this recipe!
My husband and kids loved this. They asked for a repeat at Christmas. Thanks so much
Amazing! A must make and a repeat!
Got rave reviews! Absolutely amazing!
The taste was awesome – the texture totally flopped. I assumed from the recipe that when the outer one inch was set and the middle was still a little jiggly it was done but it definitely wasn’t. I baked mine for 5 or 10 extra minutes and wish I would’ve done 20. I’ll definitely try them again though because I thought the pieces that were done were delicious! Next time I’ll go for a much smaller jiggly part in the middle of the pan, and probably try an instant read thermometer like it mentioned.
Delicious! Made these for Valentine’s Day and they were beautiful. Thank you for another delicious dessert.
Thanks so much for letting me know you liked this recipe, Kimberly!
I cut the recipe in half as we have little self control in this house. Gram measurements make it so easy, thanks for including them! I used an 8×8 square baking dish. Came out great around 35-40 minutes, so delicious!
Thanks for the review on making a half batch, Jenna!
Just made these absolutely delicious wish I could post a picture 5⭐⭐⭐⭐⭐
I’m so happy you liked them! Thank you!
Made this yesterday for a Galentines night! Did an 11×17 Pyrex glass pan in a non-convection oven, came out delicious!! Baked for about 35 minutes, only had red food gel instead of the liquid – would go with the liquid as recommended next time as the fell was very hard to stir in. 5 out of 5 for us!! And the humongous size will help me cover three different small events over this weekend!
Do you mean 16 ounces of cream cheese, or 8 ounces?
I’m SOOOOOO EXCITED to make these! I’m bringing them to work for my co-workers on Valentines Day!
Hi Jessica, just made this last night and I used 16 oz and it came out great! Also used my 11×17 Pyrex pan, there was a ton of batter and cheesecake goodness!
Hi Jessica, the recipe calls for 16 ounces (two 8-ounce packages) of cream cheese. 🙂
They are perfect for Valentine’s, Teres They are perfect for friends birthday party
Okay, “the world is better for it” has been making me laugh out loud every time I think of it! You and your recipes are pretty amazing! Thank you for all you do to brighten my day and my menu!
🙂 Thanks, Nan!
Wow, those look fantastic. I love your black and white cheesecake brownies so much that I could eat the entire pan. But they take a bit of time to make – but worth it for sure. These look really easy and make a big thick brownie layer – 6 eggs! I can’t wait to try them. Perfect for v-day of course!
They are perfect for Valentine’s, Teresa – but definitely one of those treats perfect any time (and honestly, I have a feeling they’ll be just as delicious leaving the red food coloring out for a classic cheesecake swirl brownie). The six eggs make the brownies so fudgy and decadent.
Dear Mel,
Please do not give up on knitting! That would be so sad!
Have you tried the knitting using ‘continental’ style (1-minute videos below)?
https://www.youtube.com/watch?v=PkD2yhLY2Dw&list=RDCMUCKT45SJAAEu66uI6ngNiEbQ&start_radio=1&t=4s
https://www.youtube.com/watch?v=8EHTjQ708OQ
When I was a kid I thought I’d never learn to knit – I was originally taught by my paternal grandma, who used a strange and unflattering method she had invented herself (which involved painfully wedging one needle between the thighs, hunching over double and throwing the wool violently round the needle with the right hand!) I tried it for years, but it was so painful, that I had to give up – by the time I was a teen I was virtually in tears – I thought I would never learn to knit!
The final straw was when my kid sister was born – I was so desperate to knit a baby layette that I vowed to demolish all mental blocks – and sat down to what I thought would be tortuously long and difficult knitting research… I was so happy when I found the continental method on Youtube – it’s so easy and elegant – and I could learn all the main techniques in a few minutes! I’ve also heard it’s the best method for people who can already crochet, as the hand position is similar.
Please, please give it a try, Mel! Mental blocks about knitting are the worst!
(Apart from mental blocks about yeast-baking – they are terrible also).
On that note – thank you so much for all you do, Mel (and sorry it took your knitting mental block admission to push me into finally commenting – It’s not something I’m really used to!). I first found your blog when I was an undergraduate, desperately trying to learn to bake bread (and failing miserably) – and now two years on, cooking and bread-baking are my favourite hobbies.
I hope that February is a more peaceful month for you and your family.
I’ll just add in a link to a video which really encouraged me during these past two years. https://www.youtube.com/watch?v=Jyl3wOazMqo&t=1361s
I hope it encourages you too x
XOXO
I loved and appreciated this comment so much, Savanna! Thank you for taking the time to comment with your thoughts. I appreciate it so much and I will definitely look into those knitting videos. Your enthusiasm has me almost convinced to try again, so thank you! Appreciate you.
Another vote for continental! Or you could even try finger knitting!
https://www.youtube.com/watch?v=7KhLebID6pA
p.s. the brownies look great!
Prep time 4 hrs 30 min? Are you including chilling time, or is there is an error there?
Yes, the prep time includes the extra time needed for chilling.
These look amazing! Do you think they would freeze well?
Yes, they should freeze great!
Now I’m giddy about these!!! Anything I can make and eat…freeze…then eat more and more whenever I want is my favorite! Ps I never google or Pinterest recipes, I just search your site =)