My Mom’s Famous Caramels
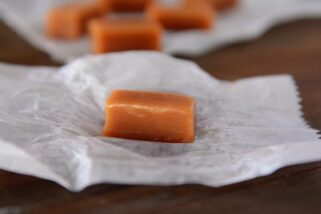
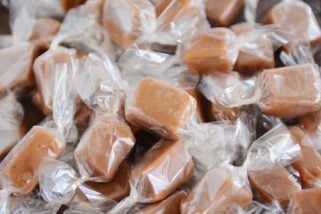
These Christmas caramels are the best. Homemade caramels are essential at the holidays and these creamy, sweet morsels will not disappoint.
Thirty years. More than 30 years, actually, these caramels have been part of my life.
Now that you know what decade my age resides in, let me tell you a little secret:
These caramels are the best. Ever.
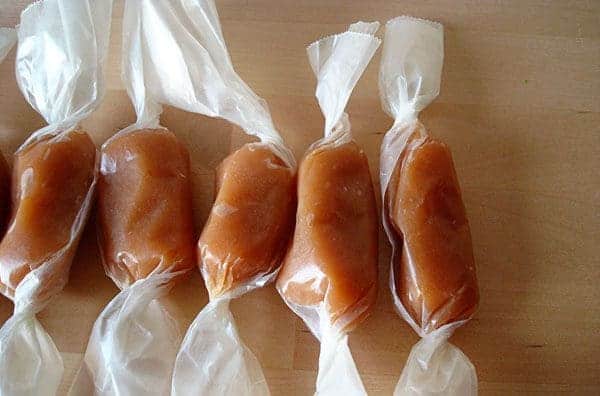
My mom has been making these caramels at Christmas ever since I can remember.
We kids would sit in an assembly line and help wrap them in waxed paper (and sneak a few in our mouths) to give to neighbors and friends.
I have since carried on the tradition of making these. Candy making can be a bit intimidating and scary, but with a handy-dandy candy thermometer (ultra cheap varieties are sold at most stores) and a bit of patience, it isn’t very difficult.
Homemade caramels are essential at the holidays and these creamy, sweet morsels are the only ones I ever make. Thanks, mom!
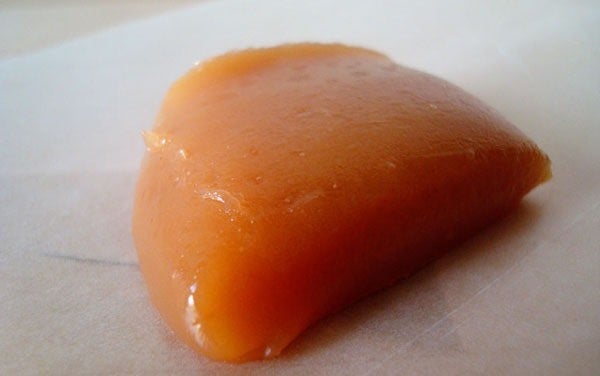
A Few Tips:
*I think one of the most common reasons candy-making can cause frustration is because of errors in the candy thermometer you may be using. It is a good idea to calibrate your cooking thermometer before each use – and it is quite easy. Bring a pot of water to a boil. After the water has reached a full rolling boil, insert your candy thermometer into the water, being sure not to let the tip touch the bottom of the pot and inserting the tip at least 2 inches into the water and the temperature on the candy thermometer should read 212 degrees F. If your candy thermometer reads a few degrees higher or lower – no fear! You don’t need to go out and buy a new candy thermometer (although long-term you may consider it), you simply need to adjust cooking temperature of your candy the few degrees your thermometer was off in the boiling water.
*This particular caramel recipe is unusual in that you don’t need to stir after adding the second half of the sweetened condensed milk. This is a bonus because you don’t need to slave away at the stove stirring for hours – but still be careful to check your candy thermometer often to make sure the correct temperature has been reached (and not exceeded!). Also, in order for the caramel not to scorch, remember to cook the caramel over medium-low heat. This requires time and patience because the caramel won’t cook as quickly as at high heat, but trust me, unscorched caramels are worth the wait!
*Finally, when pouring the caramel onto a buttered baking sheet, do not scrape the caramel from the bottom and sides of the pan. Simply turn the pan and let the cooked caramel roll out onto the baking sheet – when it has stopped flowing out, stop pouring and resist the temptation to scrape up the caramel stuck to the sides and bottom. Just walk away. Well, don’t just walk a way, but put the pan in the sink and work on spreading out your caramels. You don’t want the icky stuff left over on the pan. Trust me.
My Mom’s Famous Caramels
Ingredients
- 2 cups (424 g) sugar
- 1 ½ cups light corn syrup
- 1 can sweetened condensed milk, add only ½ to begin with
- ¼ teaspoon salt
- 1 cup (227 g) butter
- 2 teaspoons vanilla
- 1 ½ cups chopped toasted pecans, optional
Instructions
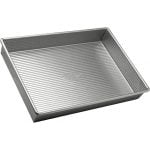
- Butter the sides and bottom of a 9X13-inch pan. Set aside.
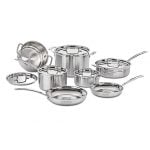
- In a medium heavy saucepan, add sugar, corn syrup, 1/2 can sweetened condensed milk, salt and butter.
- Over medium-low heat, stirring constantly to ensure the sugar is completely melted, bring the mixture to a boil and add the rest of the sweetened condensed milk when it begins to boil.
- Insert the candy thermometer and clip onto your pan at this point. Once the second half of the condensed milk has been added and the mixture is boiling again, stop stirring to prevent sugar crystallization (which means the caramels will have a grainy texture). Boil the mixture still at medium-low heat, without stirring until the mixture reaches the soft ball stage on a candy thermometer (234 degrees F). If you like your caramels a bit firmer, you can cook them up to 248 degrees F, which is firm ball stage but I prefer mine really soft (I will warn you that most people find this stage a bit too soft so use your best judgment and preference).
- When the caramel reaches the right temperature, immediately remove the pan from the heat and stir in the vanilla and toasted pecans (if using).
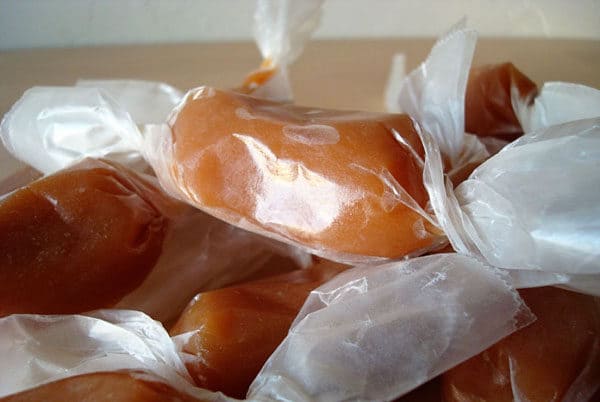
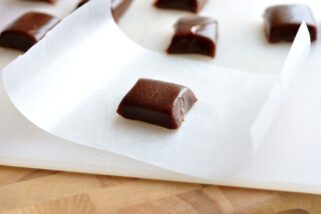
- Carefully pour the hot mixture into the prepared pan without scraping the bottom and sides of the pan. Let the caramel cool completely before cutting into squares and wrapping in waxed paper.
Recommended Products
Recipe Source: my mom, Michel W.

Followed directions to a T in a stainless steel saucepan and all the burnt bits boiled up into the caramel despite not stirring it and having it set on level 3 (5 is medium on my stovetop). Edible but not giftable unfortunately.
Very disappointed in this recipe. Followed directions completely and pan is burned so badly in the bottom , it will take a large amount of time to chisel it off. It is a heavy duty pan so tossing it isn’t an option. I normally don’t comment but I saw others with the same experience.
If you do make this, DO NOT stop stirring it like the recipe says. The flavor is pretty good, but I followed the recipe exactly and just the bottom layer got incredibly burnt and stuck to the bottom of the pan so all of the caramel has burnt black chunks in it
I have had so many epic fails when Googling recipes, it’s frustrating, but this one sounds really good and I wanna try it. When it comes to “heavy bottom” pan, would a Dutch oven work? It’s white on the inside & the heaviest pan I own. I honestly can’t wait to try your recipe! Thanks for sharing it!!
Hi Vickie, yes that should work just fine!
Okay, I made these caramels and they were absolutely phenomenal! I had to work on the bottom of the pan afterwards, but sooo worth it! Don’t scrape the bottom of the pan and you’ll have no black flecks. Thank you. Finally, someone I can trust for great recipes. Blessings
As so many others have posted, these are clear instructions, with the result of creamy caramels. I used these in my Millionaires candies. I have been making candies for a longtime, but I like trying new recipes. So glad I tried yours. Thanks for posting.
Wonderful caramel recipe! This was the first time I’ve attempted caramel candy and with the clear directions I was successful. I did cook to 240° over medium low heat and they were perfect for us! Thank you!
Yay, Susan! You’re awesome!
Oh my heavens. I made these and they were perfect. I cooked it to 243 degrees and stirred the mixture the entire time. Once I got to the temp I removed from the stove and slowly stirred in the vanilla and they are absolutely perfect. My pot was so easy to clean and these are soft and melt in your mouth.
I tried this recipe for my first time making caramels–I don’t need to try another recipe. These are the best caramels I have ever had! Everyone loves them. They are so creamy and soft. And they are easy to make!
This “no-stir” method really didn’t work out for me. I followed the directions precisely, but the stuff on the bottom of the pot scorched and then came off the bottom and into the cooling pan when I poured it. But also, the finished candy separated into firm and soft layers, maybe because of uneven heating, so I ended up with caramels with brown burnt bits inside and a thick skin on top. It’s still totally edible, but not suitable for gifts.
LOVE THIS RECIPE! My husband and I have been making these for the last few years for our family and friends and they are always a huge hit. Thinking about dunking some marshmallows in them this year and adding some sea salt on some too. Soooo yummy.
Is this white sugar or brown sugar?
White granulated sugar.
This is the worst recipe. Not stirring was the wrong thing. It took too long to reach soft ball and when it did the bottom of the pan was all dark. I used a heavy pan too. I’ll go back to my old recipe. These caramels will go in the trash!
When I poured the vanilla into the hot caramels, it cooked it. Now I have little brown spots throughout my caramels. Is this normal? I used Mexican vanilla
It could be the Mexican vanilla…different types of vanilla may have flecks.
I would just like to thank you I love all your recipes 8 out of 10 things I cook come from your recipes and everyone loves them. Cooking is definitely helping during this time of quarantine and my friends and family are loving the porch drop off surprise.
Thank you so much, Adam!
Is there a substitute for the corn syrup?
I haven’t tried subbing anything for it – not sure they would turn out the same.
Ez *
&
Yummy!
Would this be a good Carmale to use for turtles?
It might be a little soft, but you could experiment!
Would this be a good Carmale to use for turtles?
The caramel is sticking to the wax paper really badly. Any tips? Maybe it’s too soft?
If it’s sticking that badly, it does seem like the caramel might be too soft.
Is it ok to use an imitation vanilla?
I haven’t tried it, but it should be fine (especially if it is a brand you’ve used before with good success).
Corn syrup is really expensive where I live, is there a sub I can safely use? I’d like to give away these caramels this Christmas. They look delicious!
I’ve never tried these with a corn syrup sub since it’s pretty integral to the recipe. You might try googling a caramel recipe without corn syrup? Good luck!
You can make your own corn syrup. Google it you’ll find it
For all the people complaining about burnt bits on the bottom of the pan: you might want to cook it on a lower heat if it’s a really bad problem, but you can also switch out stirring utensils after the sugar is dissolved. Try to use only plastic or metal, though, no wood.
Or anyone planning on trying this who is worried about burnt bits.
Hi Mel; I have a recipe calling for heavy whipping cream instead of Sweetened condensed milk. It says it is from Mel’s Kitchen Café. I love the recipe. It tastes wonderful. It takes quite a while to cook though and it comes out hard like a Sugar Daddy. It is so difficult to cut. It takes my husband and I forever to get it cut into small pieces. My question…., is it supposed to come out so hard? Am I doing something wrong? I’m thinking now that my thermometer needs calibrating and I am cooking it too long. Help! I love the caramel and is it even your recipe?
Yes, it sounds like the caramel is cooking to a higher temperature than it should. Try decreasing by several degrees and see if that helps – and yes, calibrating your thermometer can make a huge difference. Good luck!
I am wanting to try making caramels for the first time but I’m wondering, do I need to use a stainless steel heavy bottomed pan or is it ok to use a nonstick heavy bottomed pan(that’s what I have right now)? I saw a comment where someone noted that they had used nonstick and when they poured the caramel out of the pan the burnt stuff on the bottom came out with it…maybe if I stir the whole time that would prevent it. Or I will just have to go out and get a stainless steel pan!
Hi Tiffany – I don’t recommend using a nonstick pan for making candy. Not only is it harder to determine the color of the sugar mixture but the other commenter is right, it can affect many other factors. I would definitely suggest using a stainless pot (perhaps you could borrow one to try the recipe initially so you don’t have to buy one??). Good luck!
These turned out great! It was my first time making any sort of candy, so I was a little nervous, but they were delicious! I was just wondering how long you can store them before they start to crystallize. Would it be a good idea to freeze them if I want them to keep?
Anna – I’ve never frozen caramels so I’m not sure. They should keep quite well at room temperature (wrapped in wax paper) for several days and in the refrigerator for a week or so.
I’ll have to try these. I get together every year with my Mom and sisters to make Christmas treats. Have you ever done the black licorice Carmels? I love those too!
Janette – I love black licorice caramels and am actually posting a recipe next week for those!
I made several batches of this recipe last year and they all worked out great. The first batch I made this Christmas was fine (I mean, delicious), and I made a batch of Mel’s chocolate ones that were great. The second two batches of the vanilla caramels keep burning, with small burnt pieces forming as I stir in the vanilla. And the second batch I was really careful with. As I poured it into the 9×13, I noticed that the entire bottom wasn’t scorched, just one small, blobbish area. I think when I pour the vanilla in and stir (and with the second batch, I was careful not to touch the bottom while stirring), the vanilla must be the thing that is scorching up, or the temp. change caused by the vanilla hitting the caramel or something. I use an All-Clad pan, and it retains its heat well, and I am cooking almost at the lowest setting on my stove. I think I am going to try another commenter’s idea about pouring it into a bowl, then adding the vanilla, then pouring it into the pan. Not frustrated, just perplexed. These taste so good they are worth the extra time and ingredients though, so I am determined to figure this out.
Tarryn – that is perplexing! Sounds like the vanilla might be the culprit, like you noticed. I’ll have to make these while I’m at my mom’s house this next week and troubleshoot, too. I didn’t make them this year like I normally do so I’m not sure why that would be happening since the experience isn’t fresh in my mind. I’ll update with results if/when I get to them. Let me know if you make them again with your test of stirring the vanilla in once you pour the caramel into a bowl.
First of all, I have to say that I just absolutely love your blog and I feel like we are best friends! These caramels are AMAZING! Thank you so much for all of the super yummy recipes
Andrea – I store them at room temperature.
I’ll have to try again to get them just right. Maybe altitude comes into play , after reading Paula’s comment (water boils at about 200* here @6200ft). The taste and texture are good, but mine did not turn a nice caramel color, they are still a light milky shade. I also ended up with lots of little flecks from the pan when adding the vanilla. I like the idea of pouring the caramel into a bowl and then adding the caramel… I’m hoping they are not too soft, we’ll see after I wrap em up.
P.S. Do you store all of your at room temp or keep cool?
Mel….I’m currently cooking my 4 th batch of these caramels! I can’t keep up with the demand of friends and family who have all tried the first batch and placed orders for more! They are delish! Thanks for helping me get over my fear of candy making 🙂
Deb – just good old-fashioned waxed paper.
where do you get the papers you wrap the caramels in? or do you just cut up regular waxed paper?
I also made these exact same caramels with my mother for many years, since I was a little girl…However she died very young and it took me years to find the recipe again…It’s not Christmas for me unless I make and give these caramels as gifts…She was a school principal and made enough for all her teachers. Imagine the quantities! LOL
Water boils at 212 Farenheit at sea level, so if you don’t live at sea level your thermometer is sure to read something other than 212. If the temperature in the recipe is for sea level, then it is easy to follow your method to determine the correct temperature. It isn’t a matter of a faulty thermometer, but rather altitude.
Deborah, its just the way my mom always made them and yes, sometimes if sugar comes off the sides it can crystallize but I’ve seen other caramels that require constant stirring.
Is there a good reason not to stir all the way through? Will it crystallize? I’d love to try it, but simply not willing to ruin one of my pots in the process. I’d definitely continue to stir all the way through for that reason. They sound yummy 🙂
I want some now. That is all.
Matt – I’m really, really sorry you ended up with a burned mess. It is really frustrating to waste ingredients and time. I completely get that. In the caramels’ defense, I’ve made this recipe dozens of times without stirring and they turn out wonderfully. The key is to moderate the heat and use a heavy-bottomed pan. Both of those factors will minimize the risk of burning. If you had both of those factors under control, I’m sorry they just didn’t work out for you!
I never post to these sort of things.
So pissed right now.
Do not stir is bad advice when making candy. I was highly suspicious going into it.
I ended up with 1/4″ layer of BURNT sugar at the bottom of my pan. When I went to stir the vanilla in it churned up the burnt nast and ruined the batch.
Michelle – the best pans to use for caramel and other candy making are stainless steel heavy bottomed pans. I’ve never used a nonstick but I can see how that might have caused the issue you described. Sorry about that! Hopefully the caramels were still salvageable.
Does it matter if you use a non-stick pan or not? I made it but when I poured it out all of the little brown bits came off and into my caramel as well.
This recipe is AMAZING! I cannot thank you enough. I recently found your website and this is the fourth recipe that I’ve tried…I haven’t been disappointed yet.
Looking forward to trying a couple more recipes next weekend.
I love this recipe, but I lost my candy thermometer…so now I make it in the microwave. I put in all the ingredients in a big glass bowl. Microwave for 2 min, then mix, micro. for 3 min, then mix, then microwave for 4 min. then mix and then microwave for three minutes.
I made these caramels last year, and got rave reviews from everyone who tried them, though I think I made them too soft. This year, I want to try making flavored caramels. Sea salt is a given, but I think I’ll also give raspberry and orange flavors a try. Or maybe cinnamon and spice…