Apple Cider Caramels
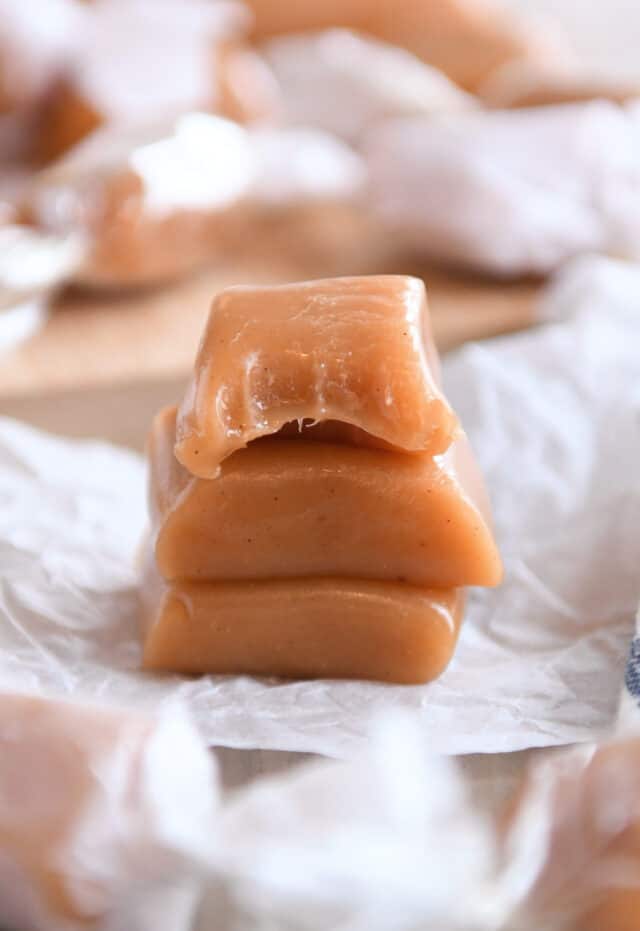
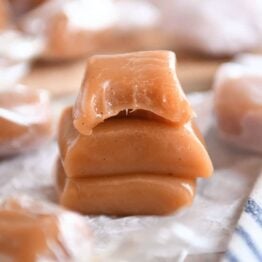
Soft and chewy, these tasty apple cider caramels have amazing caramel apple flavor thanks to the apple cider that boils down until syrupy.
Homemade caramels are easier than you think, which is great, because you don’t want to miss out on these apple cider caramels! I’m giving you tons of tips and tricks so ensure your caramels turn out perfectly every time.
How to Make Apple Cider Caramels with Almost Any Caramel Recipe
This base caramel recipe is my very favorite, even though I have several other caramel variations in the archives. I use this one almost exclusively these days for every flavor of caramel I want to make.
I highly recommend it for the best caramels of your life.
Having said that, I know that caramel recipes can be near and dear to people’s heart and inspire great loyalty.
So here’s a pro tip for you: in my testing of an apple cider caramel recipe, I found that most classic caramel recipes can be made into apple cider caramels simply by boiling down the cider until syrupy and adding it to the recipe of your choice.
- add the reduced apple cider with the cream and/or corn syrup (before the caramel mixture cooks for a long amount of time).
- generally speaking, add 1/2 cup boiled and reduced apple cider for every recipe that yields an 8X8- or 9X9-inch pan of caramels (for a 9X13-inch pan of caramels, use 3/4 to 1 cup reduced apple cider)
Of course, if you choose this adventure, you’ll need to experiment a bit, but this should be a good starting point!
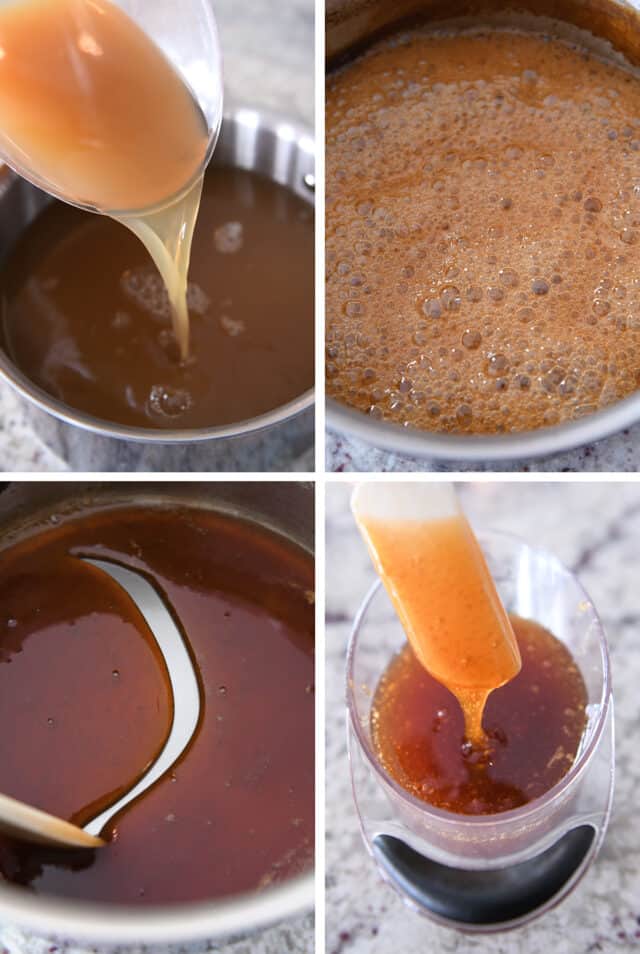
Boiling Down Apple Cider for Caramels
The first step in this recipe is easily the most important.
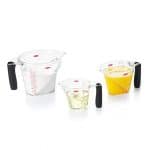
How to reduce apple cider: pour four cups unfiltered apple cider into a saucepan and simmer over moderate heat until it is reduced to about 1/2 cup. It will be thick and syrupy.
It’s important not to short this step. If the apple cider is too thin, it won’t work in the caramels.
The best kind of apple cider to use is the “fresh” apple cider common in the fall months. Look for apple cider that is unfiltered (it will be cloudy, not clear like apple juice) with no added sugar.
This step can be done several days in advance. Refrigerate the reduced apple cider until ready to use. Before making the caramels, heat the apple cider until slightly warm and pourable (pouring cold-from-the-refrigerator cider into the caramels could possibly crystallize the caramel mixture and lead to a lot of boiling splatters!).
How to Make Homemade Apple Cider Caramels
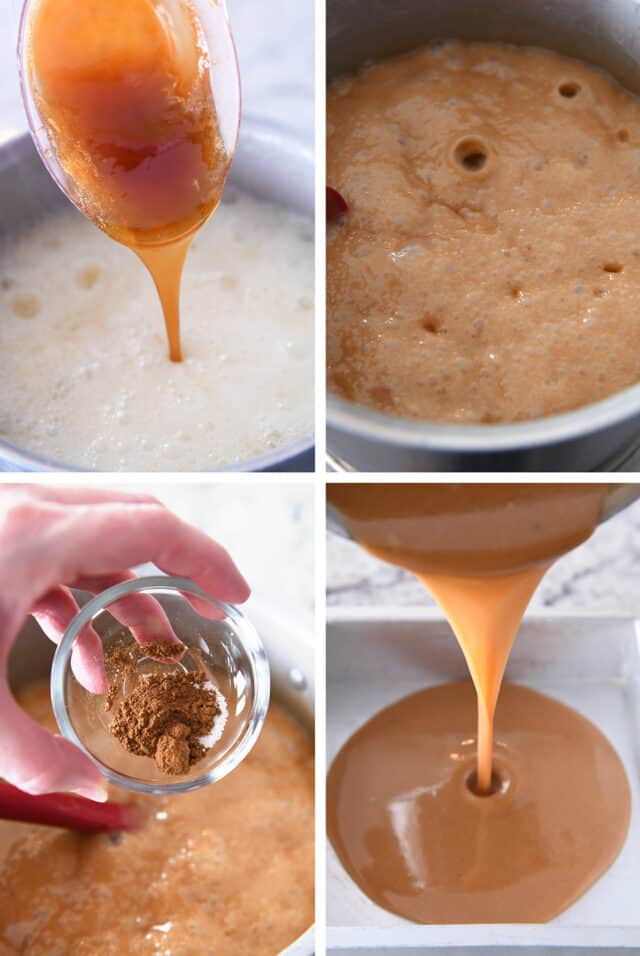
Heat the sugar, corn syrup, and water in a saucepan and bring to a simmer. Brush the sides of the pan down with water to get rid of any pesky sugar crystals, and cook until the mixture turns a golden amber color and registers 345 degrees F on a thermometer.
Speaking of thermometer, this post has TONS of helpful details about caramel-making including my favorite thermometer setup and the most important equipment needed to make caramels at home.
Slowly pour in the warm cream, butter and salt. It will bubble up quite a bit.
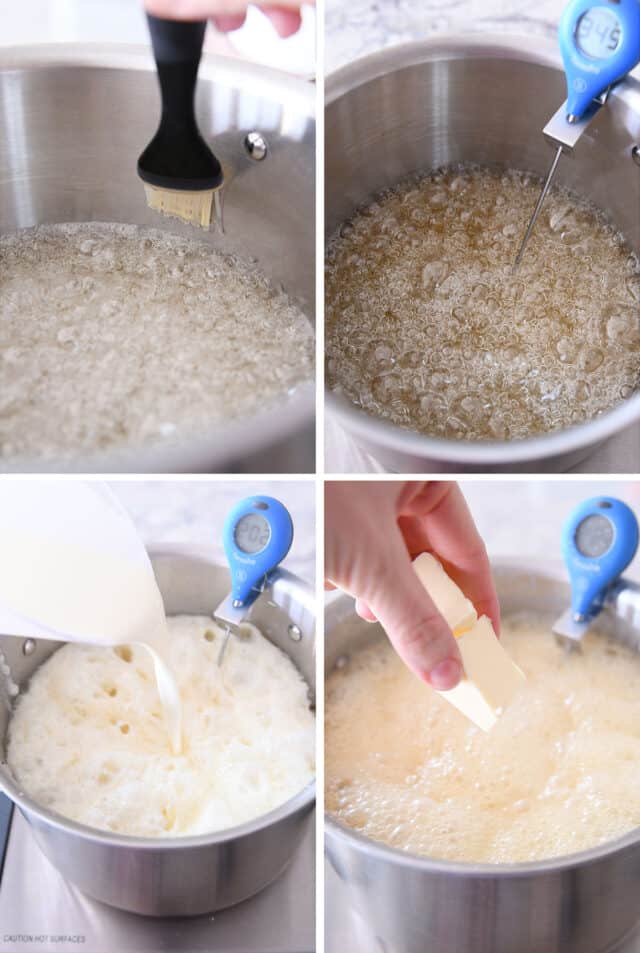
Add in that glorious, syrupy apple cider, and continue to cook the caramel, stirring constantly, until it registers 245 to 248 degrees F. on the thermometer.
How to Calibrate a Candy Thermometer
Bring a pan of water to a boil and insert the tip of the thermometer in the boiling water for a full minute. Write down the temperature your thermometer registers in the boiling water.
A few rules of thumb:
-We’re making the assumption that the candy recipe being used has been written and tested at sea level (I’ll tell you below how to make further adjustments if that is NOT the case.)
-Water boils at 212 degrees F at sea level
If your thermometer registers below 212 degrees F in the boiling water, you’ll need to subtract degrees from the cooking temperature in the recipe. If it registers above 212 degrees F you’ll ned to add degrees to the cooking temperature in the recipe. *Whatever temperature your thermometer registers is your “new” 212 degrees F mark.*
For instance, if your thermometer registers 205 degrees F in boiling water, subtract 7 degrees (212-205=7) from the cooking temperature in the recipe (for this recipe, the caramels cook to 245 degrees F so you would only cook them to 238 degrees F).
If your thermometer registers 215 degrees F in boiling water, add 3 degrees to the cooking temperature in the recipe.
Potential further adjustments:
If a recipe has been tested at an elevation other than sea level (the only way to know this is if the author notes it in the recipe or if you reach out and ask), further adjustments may be needed based on the difference between the elevation YOU live at and the elevation the RECIPE was tested at. An easy rule of thumb is to add 2 degrees F for every decrease of 1,000 feet elevation and subtract 2 degrees F for every increase of 1,000 feet elevation.
For instance, if a caramel recipe was tested at 3,000 feet elevation and indicates the caramel needs to be cooked to 238 degrees F, and you live at sea level (which is a 3,000 feet decrease in elevation from where the recipe was tested), you would add an additional 6 degrees F (2 degrees for every 1,000 feet elevation change) to the final cooking temperature bringing it to 246 degrees F. This adjustment would be in addition to the adjustments made for the boiling water test.
Another example, if a caramel recipe was tested at sea level and indicates the caramel needs to be cooked to 245 degrees F, and you live at 5,000 feet elevation (which is a 5,000 feet increase in elevation from where the recipe was tested), you would subtract 10 degrees F (2 degrees for every 1,000 feet elevation change) to the final cooking temperature bringing it to 235 degrees F. This adjustment would be in addition to the adjustments made for the boiling water test.
Remember that candy-making can take some trial and error! Even with the above adjustments, you may find that you need to add or subtract a few degrees for particular recipes to achieve the best results. Usually a 2 to 3 degree difference won’t make or break or a recipe, so do your best to make adjustments based on the information above and have fun with it!
Once the caramel comes to the correct temperature, immediately remove the pan from the heat.
Stir in the vanilla and cinnamon, and pour the caramel into a buttered pan. Let the pan of caramel cool completely to room temperature.
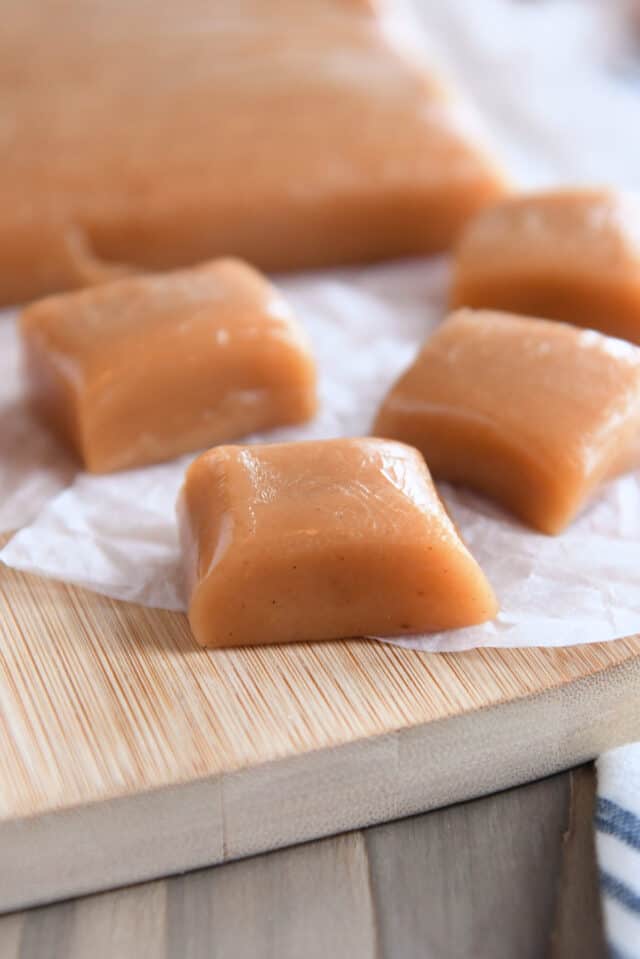
Cutting and Wrapping Caramels
- Lift out the caramel slab and transfer to a cutting board. I use a flat metal spatula to peel it up and out of the pan in a single layer.
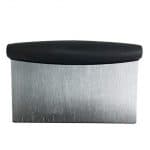
- Cut the caramels into squares with a bench knife.
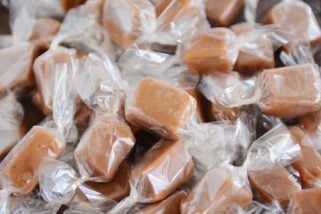
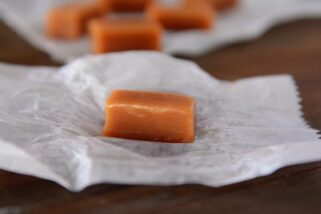
- Wrap the caramels in squares of wax paper, parchment paper, or cellophane. (I find the cellophane wrappers stay twisted shut the best.)
Once wrapped, the caramels will keep well for several weeks stored in a covered container at cool room temperature.
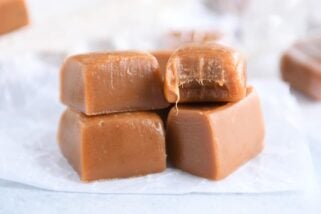
Although mad respect to you and yours if they last that long! The rich, creamy, classic caramel flavor is amplified by the sweet tartness of the apple cider and warmth of the cinnamon.
They are incredible and one of my favorite caramel variations to date!

If making homemade caramels feels intimidating, I’m here to help!
Remember that this post has a multitude of helpful tips to make foolproof caramels.
But if you still have questions, please comment below and I will help! I used to dread making caramels at home because they never, ever turned out. I hated the mess. I hated the process. I hated the disappointment. However, once I dialed in the right tools to use and figured out the most foolproof recipe (this one!), it went from stressful to fun.
In fact homemade caramels are one of my very favorite things (all year round!). There’s something about the process that just hollers Rock Star Status. Plus, you get a whole pan of delectable caramel at the end of it!
I hope you love this new variation on classic caramels!
One Year Ago: Creamy Tortellini Sausage Soup
Two Years Ago: The Best Classic Apple Pie
Three Years Ago: The Best BBQ Pulled Pork Sandwiches {Instant Pot or Slow Cooker}
Four Years Ago: The Best Red Sauce Chicken Enchiladas
Five Years Ago: Chicken BLT Burritos with Creamy Southwest Dipping Sauce {Quick and Easy!}
Six Years Ago: Homemade Chicken and Broccoli Alfredo Stuffed Shells
Seven Years Ago: Overnight Buckwheat Oat Gluten-Free Waffles or Pancakes
Eight Years Ago: Slow Cooker Lasagna {Perfected}
Nine Years Ago: Crusty Artisan No-Knead Bread {Made Even Easier + Step-by-Step Tutorial}
Ten Years Ago: Pumpkin Cream Sandwiches
Apple Cider Caramels
Ingredients
- 4 cups apple cider (see note)
- 2 cups heavy cream
- 2 ½ cups (530 g) granulated sugar
- ½ cup light corn syrup
- ½ cup water
- 6 tablespoons (85 g) salted butter
- ¼ teaspoon coarse, kosher salt
- 1 teaspoon vanilla extract
- ½ teaspoon ground cinnamon
Instructions
- Pour the apple cider in a medium saucepan and simmer over moderate heat, stirring occasionally, until reduced to 1/2 to 2/3 cup, about 1 hour.
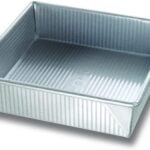
- Butter the bottoms and sides (get into the corners, too!) of a 9X9-inch square baking pan. (Alternately, you can line with parchment and butter the parchment – this may make it easier to pull the slab of caramels out of the pan after they have cooled in order to cut and wrap them.) Set aside.
- Heat the cream in a saucepan or in the microwave until steaming. Keep warm.
- For the caramels, in a large, heavy-bottomed pot (at least 5- or 6-quarts), stir together the sugar, corn syrup, and water, taking care to not splash the mixture up the sides of the pot. Clip a candy thermometer onto the side of the pan.
- Bring the mixture to a boil over medium heat WITHOUT STIRRING or moving the pan. As it begins to boil, fill a cup with water and use a pastry brush to wash down the sides of the pan so there are no granules of sugar sticking to the sides of the pan (you probably won’t need to repeat this after the sides have been well-cleaned). This prevents the caramel mixture from crystallizing in later steps.
- Cook until the boiling sugar turns a light-to-medium amber color and registers 325 to 345 degrees F on the thermometer, about 15-20 minutes .
- Slowly and carefully pour the warm cream into the caramel. Add the reduced apple cider, butter and salt. The mixture will bubble high during this step but will go down after a few minutes.
- Begin stirring the caramel with a heatproof silicone spatula with a flat top (a flat edge does better at preventing the caramel from burning than a rounded edge). Avoiding scraping the edges of the pan, and continue to cook, stirring constantly and slowly, until the mixture reaches 245 to 248 degrees F, about 10-15 minutes (these caramels tend to be softer than a *normal* caramel, likely due to the apple cider, so if you want a firmer caramel, consider adding 2 to 3 degrees to the cooking temperature).
- Off the heat, stir in the vanilla and cinnamon.
- Immediately pour the caramel mixture into the prepared pan.
- Let the caramels cool completely. Lift the caramels from the pan and transfer to a cutting board (I use a large, metal spatula to gently peel the whole slab of caramel out of the pan).
- Cut into squares using a sharp knife or bench scraper, wrap, and store in an airtight container at cool room temperature for up to two weeks.

So good and they turned out perfect!
Have you ever tried this with other types of juice?
I haven’t tried anything other than apple cider.
These caramels are to die for! They are a huge hit every time I make them and share them. The only critique I have is that when I added ground cinnamon at the end it burned! I had to try to scrape it all out, so it wouldn’t ruin the whole batch!
I’ve had more success adding 5-6 cinnamon sticks to the apple cider as it reduces.
Ok. Just Sayin’…Dont even start this without a candythermometer.!! Yes cuz I had to try it. Attempting to use a meat type. Mine never got firm. Stayed liquid. I just filled a small bowl and slurped it. Lol still tasted as good tho. Its the best recipe Ive used yet. Thank You Kindly. Hands Down. I will use the other flavor versions now. (I have a therm). They sound scrumptious. Im in roseburg oregon and spread these candies far and wide. Thank You. THANK YOU.!
These turned out so well despite all my *I don’t know if I can do this!* during the process. I used our own pressed cider and they have a delightful apple flavor. I ended up substituting blue agave for the corn syrup because I didn’t notice I was out until the recipe was already underway. I cooked it to 246 (I live in your area) and they are the perfect consistency. Soft enough to not get stuck in your teeth, solid enough to hold their shape when cut. We will make these again and again!
First time making caramels, and it was a huge success! I didn’t add the cinnamon, since the brand I purchased last time is really strong, and by the time I did all the work to get the end, I didn’t want to ruin it! They still tasted fabulous – like lovely caramel apples. Oooo, which makes me want to dip them in white chocolate and coat them with cinnamon sugar like apple pie caramel apples… I should get on that.
Thanks for the fabulous recipe!
Ok, might have to steal that idea!
I love your No-Stir Caramels because they are so easy! I wanted to make these but love the ease of the no stir method. I gave it a shot and used the no stir recipe with the added cider and they were so yummy, smooth, and had the perfect hint of apple and cinnamon! I just added in the reduced cider with the last cup of cream.
That’s amazing!! Thanks for letting us all know about your experience using the reduced apple cider in that other recipe!
These were divine and as always with Mel, easy to follow.
Can i use sweetened apple cider?
Artificially sweetened? Maybe? I haven’t tried that…it might affect the overall flavor/sweetness of the caramels.
We made the smitten kitchen recipie for many years, and it was a beloved family fall tradition. We usually made 2 double batches to give to our friends. Then we moved to Colorado and with the elevation change I could not make it work. Everyone I met who made caramels here used recipies with corn syrup. Then you posted this version! Cannot tell you how excited my kids were. We made it exactly as written (just doubled), knocking off 12 degrees for our elevation – 6000 ft. It turned out perfectly and the kids all helped wrap while discussing who we should share them with. So easy and so delicious.
Thank you!!
That is amazing, Lauren! Thanks for letting me know! So happy this caramel recipe worked out for you!
These are incredible. I couldn’t stop eating them. I was concerned because I made them while at our cottage (all the cookware is Rock there) and without my usual stainless steel pot at home but I am delighted to say they were perfect, albeit a tad darker than your traditional caramels I have made a few times. I can’t wait to make them again.
These tasted delicious and were a hit with my colleagues. I’m a seasoned caramel maker and cooked the caramels to 245 on my calibrated thermometer, but they were too soft to get out of the pan as a slab the next day. I managed to wrap them in cellophane wrappers (thanks for that tip previously—I will never go back to cutting waxed paper squares!) but they were way too soft. Will try again, cooking to a higher temperature.
Thanks for the review and feedback, Colleen! What elevation do you live at?
Sea level 🙂
I’ll add a note to the recipe, but since elevation can make a huge difference with caramel texture, at sea level, you might want to add another 4-6 degrees to the temperature mark.
Perfectly tart and sweet! Such a yummy flavor for fall. Your instructions are always so simple to follow and every caramel recipe I’ve made of yours has been a hit at parties. This will be no exception!
I forgot to leave the 5 stars!
Thank you so much, Sarah! I’m so happy you loved these caramels! I made them yesterday (in my half-finished kitchen) because we love them so much. 🙂
The flavor of these are delicious! I don’t think my thermometer is calibrated correctly because I got it to the 245* yet my caramels are way too soft. Have you ever tried putting it back into the pot (after it’s cooled) and tried to get it back up to temp? Is that a bad idea?
I haven’t tried that myself, but I’ve read on several sites/forums that you can do that. I think the trick is to heat it up slowly (too fast and it might turn grainy).
These caramels are amazing! Mel, you have never steered me wrong with your caramel recipes (pretty much any of them) and these are no exception! I made them this morning and I was very pleased with the result. Thank you!
So, so happy to hear that, Lynn! Thank you!
These were AMAZING! I make your vanilla bean caramels all the time so I knew these were going to be good but they were incredible, everyone who tried them fell in love. I doubled the recipe and it worked great. I can’t think of a better candy for fall.
April, I’m so happy to hear that! Thanks for making them so fast and mostly for leaving a comment to let me know!
For thorough research, you should try Smitten Kitchen’s apple cider caramels. 😉 I’ve been making them for years and they are perfection. I’d be curious about your thoughts if you try them, because in comparing the ingredients for the two recipes, the actual ingredients are very similar, but where Deb uses 4 cups of apple cider (before boiling down) like you do, the rest of her ingredients are a fraction of your amounts, which makes me assume that the apple flavor in your caramels would be much less pronounced, more diluted by the greater amounts of all the other ingredients. You should try her recipe and see what you think. They are a mega-hit wherever I’ve taken them!
I’ve made Deb’s recipe several times – very yummy! And they have a beautifully pronounced apple cider flavor. The recipe I posted for apple cider caramels is creamier, slightly less buttery (which makes the caramels a bit less greasy), and has a more balanced and mild flavor profile, which I prefer. But, I am a big fan of sticking with recipes you already love. Sounds like you’ve found a winner in the caramels from Smitten Kitchen!
I love the Smitten Kitchen apple cider caramels too! My favorite thing to make in the fall!
I collected several gallons directly from the cider press and cooked it down to apple syrup. I then canned it in 1/2 pint jelly jars. I now have my syrup all ready to go for whatever.
Licorice caramels are my favorite treat. I send batches to a lady, on a ranch, in Montana. She hides them from her grandchildren as she also loves them so much. She told me she will share a couple with the lady on the neighboring ranch since she loves licorice. This Christmas I will also send a batch of these apple caramels.
I would hide the licorice caramels from my grandkids too! 🙂
Hi. When you say to cook the caramel to 245 degrees is that sea level?? I live in Utah and make candy. That seems pretty high for a caramel. Thanks for your help. I’m excited to try the cinnamon caramels.
Hi Annette, the temperature for candy making can vary with elevation. A rule of thumb is to reduce the temperature by 2 degrees for every thousand feet (I also recommend calibrating your candy thermometer where you live to know what temperature it registers when water boils – there is more information about that on this post).
Thank you!!
I want to make your apple cider carmels. Your instructions say to boil sugar. Corn syrup. And water in a heavy pan
Your list of ingredients does not list sugar.
I am confused
Hmmm, try refreshing your browser? I see sugar in the ingredients list. If that doesn’t help, let me know!