Crusty Artisan No-Knead Bread {Made Even Easier + Step-by-Step Tutorial}
Get this recipe for the popular no-knead bread complete with extra tips and step-by-step pictures to make the process even easier!
I know it’s Halloween and all, and most of you are probably out roaming the streets dressed like witches and ghosts and chubby pumpkins, but I have bread on the brain.
And in my world, bread wins out over candy any day (except for the dark chocolate kitkats that may make it home in my kids’ loot, of course), so today I want to chat just for a minute about bread.

Like, the best, most delicious bread ever. That kind of bread.
Years and years ago in another place and lifetime (i.e. the first month I ever blogged), I posted about the famous no-knead bread that was taking the world by storm (from Jim Lahey published by the New York Times).
It’s a fabulous recipe and I hope every single one of you have experienced it. But if not, now’s the time, methinks.
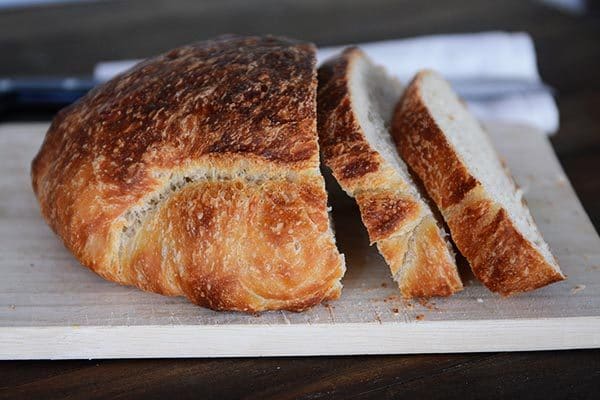
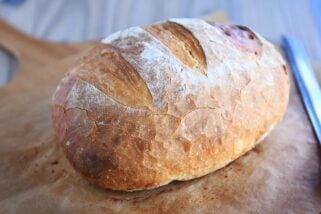
The crusty, artisan, extremely simple bread has been made countless times in our house since then. But I have to admit, I’ve started cutting corners over the years.
The original recipe is easy as can be, but I didn’t like the mess of splatting the bread onto a flour-dusted towel or counter (the last thing I need is extra laundry or more sweeping).
And the whole “flip the bread upside down in the pot” totally stressed me out.
Even though the bread turned out, I realized for my emotional health and well-being I needed to stop flinging the dough around like a madwoman.
Enter one of my favorite kitchen tools: parchment paper. (And in the interest of full disclosure, I never would have thought of this except that my really smart Aunt Marilyn tipped me off.)
Instead of transferring the dough and using flour or cornmeal or anything else prone to ending up on the floor, the entire shaping and rising and baking process happens on an unassuming sheet of parchment paper and it has revolutionized an already revolutionary recipe (along with measuring my flour a little differently so the dough is waaaay less sticky and maddening to work with).
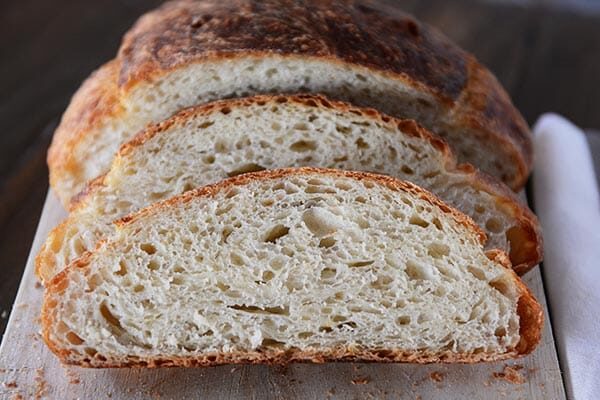
I am not exaggerating when I say I make this bread several times a month because it hardly requires any brain cells and yet manages to be so amazingly delicious.
And because I can’t leave you totally hanging, I included a step-by-step picture tutorial below the recipe. Just to ease any lingering fears (seriously, fears be gone…you need to make this).
This recipe is best baked in one of those enamel cast iron pots (I have a pretty old Mario Batali version which works great; Le Creuset is another obvious, popular brand) but there are lots of tips online for using other types of pots.
I’ve given a few tips in the notes of the recipe – but please, please, please, for all that is good and breakable, make sure that whatever you use is heatproof to 450 degrees. Ok? Thanks.
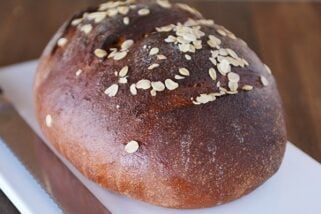
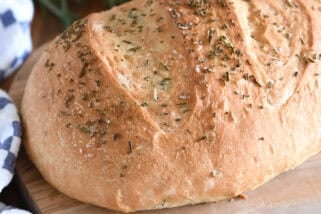
Oh, and one last note. This bread is fabulous with a variety of add-ins: asiago cheese, rosemary and cranberries, herbs and lemon zest, on and on. Options = endless.
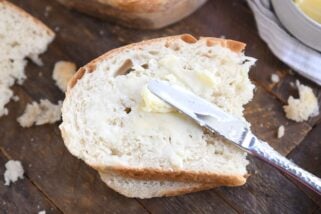
It’s straight out of the bread basket at a fancy-shmancy restaurant, except that it’s coming from your kitchen.
One Year Ago: Black Bean and Butternut Enchilada Skillet
Two Years Ago: Chocolate Chip Peanut Butter and Oatmeal Cookies
Three Years Ago: Pumpkin Cookies with Caramel Frosting
Crusty Artisan No-Knead Bread
Ingredients
- 3 ⅓ cups (473 g) unbleached all-purpose flour
- ¼ teaspoon instant yeast
- 1 ½ teaspoons salt
- 1 ½ cups room temperature water
Instructions
- In a medium bowl, combine all the ingredients and mix until the dough is combined and has a shaggy, sticky texture (it’s easiest to just get in there with your hands and do the job).
- Cover the bowl with lightly greased plastic wrap and let it sit at room temperature for 12-18 hours. It will get puffy and bubble.
- Scrape down the sides of the dough and let it gentle deflate. Turn it out onto a lightly greased piece of parchment paper and using your hands (lightly grease them if the dough is sticking too much) pat it into a thick oblong shape.
- Fold one of the long edges to the middle. Fold the other long edge over the top, forming a thick log. Take one short end and fold it in toward the middle and repeat with the other short end – basically like folding up a blanket or towel.
- Carefully and quickly flip the mound of dough over so the seams are on the bottom. Cover with lightly greased plastic wrap and let rise until puffy and doubled, about 2 hours.
- About 30-45 minutes before the dough is ready, heat the oven to 450 degrees. Place a 6- to 8-quart heavy cast iron pot (like the popular enamel covered ones) in the oven as it heats and let it stay there for 30-45 minutes.
- When the dough is ready, remove the pot from the oven and take off the lid. Lift up the corners of the parchment paper and set the bread and parchment paper right into the pot. Cover with the lid and return to the oven to bake for 30 minutes.
- Remove the lid from the pot and bake for another 10-15 minutes until the top of the loaf is browned and lovely.
- Carefully grab the corners of the parchment paper and remove the bread to a wire rack to cool completely.
Notes
Recommended Products


Recipe Source: adapted from one I posted in January 2008 from the famous Jim Lahey recipe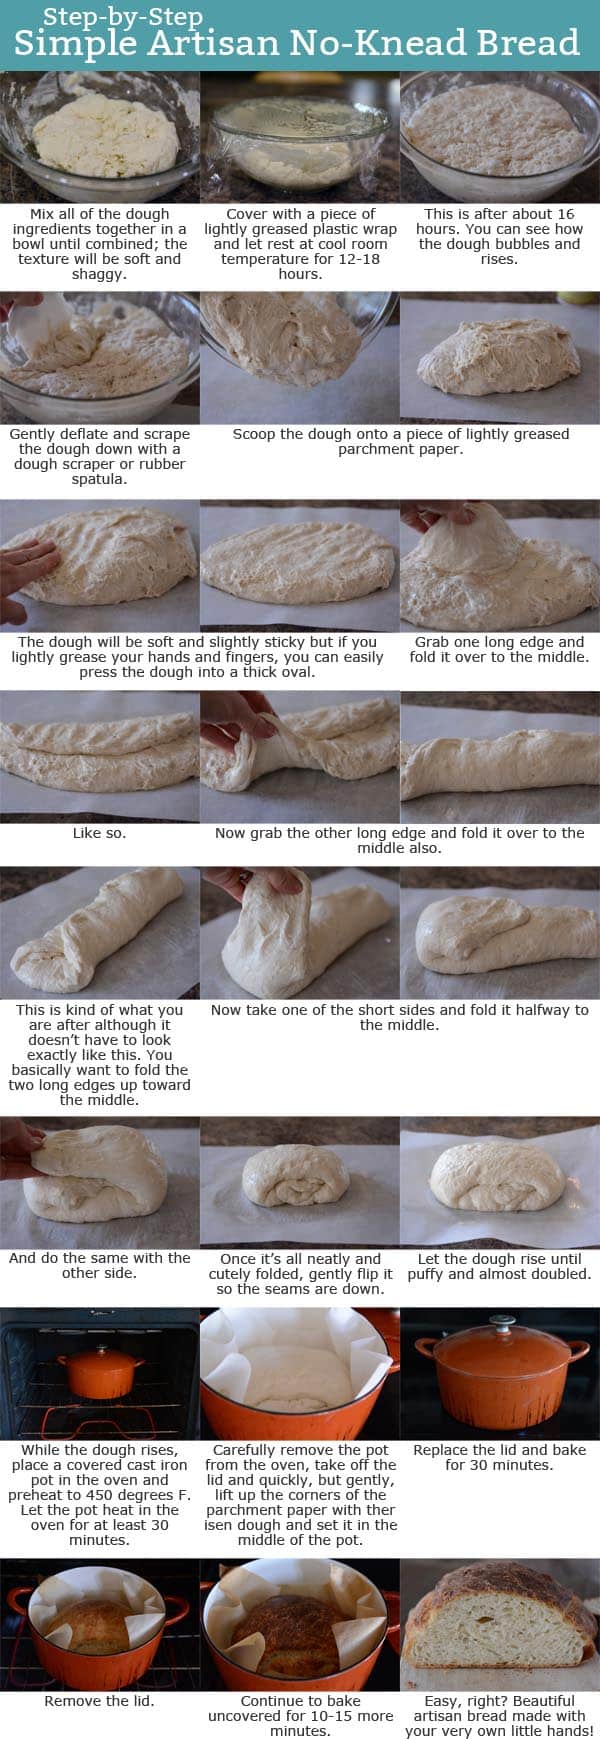
I made this yesterday and it is AMAZING! The flavor and crust are so amazing I love it. It’s so soft inside as well, the perfect bread chew. I can’t wait to make this again and again! Thank you!
Have you tried this recipe using Kamut flour ?
No, but it should work out just fine.
Made bread for the first time; it is awesome. My husband said it is the best bread he had in a long time. Thanks Mel, may God continue to bless you and your family!
Mel, your recipe earned me star baker status in my mom’s kitchen. Absolutely delicious and so, so easy. It came out of the oven smelling fantastic and looking like it came from a real bakery. Great flavor and held up wonderfully when buttered and served alongside a hearty soup. Thank you for another winning recipe!
Somehow I didn’t read all of the recipe before mixing up the dough only to realize that I don’t have a cast iron pot! Is there a reason why I can’t make it in a pie pan like you do in your easy peasant bread? Or is it a problem because it won’t have lid over it? Or how do I know if my crock pot insert can handle 450 degrees? Thanks!
Hey Kristin – I definitely wouldn’t try putting your slow cooker insert into the oven. I’m worried it will crack! Did you try baking in a pie plate? That might work!
Hey, Mel-
Hope you and yours are well! Just a quick note about a website quirk- I was browsing and noticed that the “Sourdough Bread Recipe” (shown in the “Other Recipes like this:” section below the recipe) takes you to Bless this Mess. I’ve never seen you link to other websites in this way, so I wanted to give you a heads up, in case it was an error. Have a great day!
Hi Rebecca, that’s actually a correct link! Until I get my own sourdough bread recipe posted, I wanted to link to another great resource 🙂
I haven’t made bread in years, and I’d evened only done it a few times. I made this yesterday and it is AMAZING. I’m trying to stop myself from eating the whole loaf for breakfast. I will definitely be using this recipe again, and I’ll definitely be trying some other bread recipes from this site. 🙂
The only issue I had was that my dough stuck to the parchment when I turned it out and tried to fold it. Is that normal? I ended up pulling off as much as I could and then had to put the dough on a 2nd, clean sheet of parchment. Would it be okay to oil the parchment first to prevent that? Or was my dough too sticky (too little flour)?
Even* (I hate seeing typos after I post.)
Yes, you can definitely grease the parchment if the dough is sticking too badly. This dough is pretty wet so it sounds like you made it just right!
This bread was so simple …and delicious! Really appreciates the step by step photos. How do you store the leftover bread (if there is any)!
I pop it in a bread bag and close it up (and store it at room temp – bread dries out if put in the fridge).
I love your site and your amazing recipes! I tell everyone about you! I love this bread! So delicious and so simple! Have you tried making this with Kamut flour? Every time I have tried it comes out really heavy and doesn’t rise as much as normal.
I haven’t – the most whole wheat I’ve done is half whole wheat flour and half white flour (for this recipe).
can i use instant dry yeast? will there be a change in the recipe?
The recipe calls for instant yeast, so you should be ok.
This has been my go to recipe for six years! I made it today swapping out the yeast for 75gm of sourdough starter, then leaving in the oven (with the light on) for 24 hours. It is bloody perfect! Chewy, soft, crunchy…all of the things good bread should be. I feel like I’ve levelled up 🙂
Amazing! Thanks for the sourdough report!
I made this and love it! Due to current circumstances, I would like to divide the dough into smaller Lowe’s to get up to my neighbors who are not able to go buy bread. Would I cook a half of the recipe the same amount of time?
If you are baking smaller loaves, you can probably adjust the baking time by maybe 10 minutes shorter and check and see how it looks.
Any advice for dough that’s isn’t rising? I mean, it bubbles and rose a bit… but after the 2 hour test still look like before.
Should I still continue to bake it?
P.s I’m in CT and it’s been cold here. Not quite spring yet
Thank you!
Hi Elisa, I would still bake it. What’s the indoor temp of your kitchen?
So easy and so beautiful! Almost too pretty to eat but my family and I gobbled it up. Thank you for this wonderful post – I will make again and again!
Any tips for someone who doesn’t own a cast iron dutch oven?
I would maybe suggest this recipe: https://www.melskitchencafe.com/rustic-crusty-bread-a-simple-how-to/
This is absolutely the most amazing bread ever! Just pulled it out of the oven a few minutes ago and it’s almost gone! No, it’s not just me eating it ha ha Ha thank you so much for this recipe!
I’m about to make this recipe and want to make sure I only use 1/4 teaspoon yeast?
Yes, that is correct. I have made this many times & this tiny amount works.
So good and easy!
I have made this bread 5 times and love it! I usually use about 17.2 ounces of flour and it comes out perfect. I did help my mom make this at her house and it was raining and noticed that it took a lot more flour before it was the right consistency and not too gooey. I think the reviewers who had trouble with being able to work with the bread may need to add more flour.
Is the dutch oven 6-8 imperial quarts or 6-8 us liquid quarts
absolutely the best bread recipe! I made my grandmother’s recipe which took hours … and it didn’t begin to compare with this recipe. It’s a “keeper”!!!
Do you have the measurements in weight or at least the method for scooping the flour (spoon in and shake, fluff and level, etc)?
It’s probably right around 3 1/2 cups.
you use all purpose flour, if I want to use Whole Wheat White do I need to add baking soda or baking powder to get this to work?
No, you don’t need to add baking soda or baking powder but the bread might be more dense with 100% whole wheat flour.
I substitute whey from my instant pot yogurt for the water, gives it a yummy flavor. Also, the dough is pretty sticky, so when it’s ready to shape I dump it out on my silicone pad, then use a bench scraper to handle the dough, fold it over several times, and shape it, sprinkling a bit of flour on the dough. A large spatula would work, or a big cleaver with a straight edge. I don’t get my hands in the dough at all. Once the dough is the shape I want, I flip the dough over onto parchment paper, again, no hands on the dough. I put an inverted bowl over the dough to raise. When the dough is ready to cook, lift the parchment paper and all into the hot pot, cover with the lid, and put in the oven. Wonderful crusty bread!