The Definitive Guide to Making the Best Homemade Caramels of Your Life
The Definitive Guide to Making the Best Homemade Caramels of Your Life: step-by-step tutorial, high speed how-to video, candy thermometer + wrapping tips…and all the other details you need for foolproof success!
This post has been a long time in coming! I’ve wanted a one-stop, comprehensive look at making the best homemade caramels ever for years. And today’s the day.
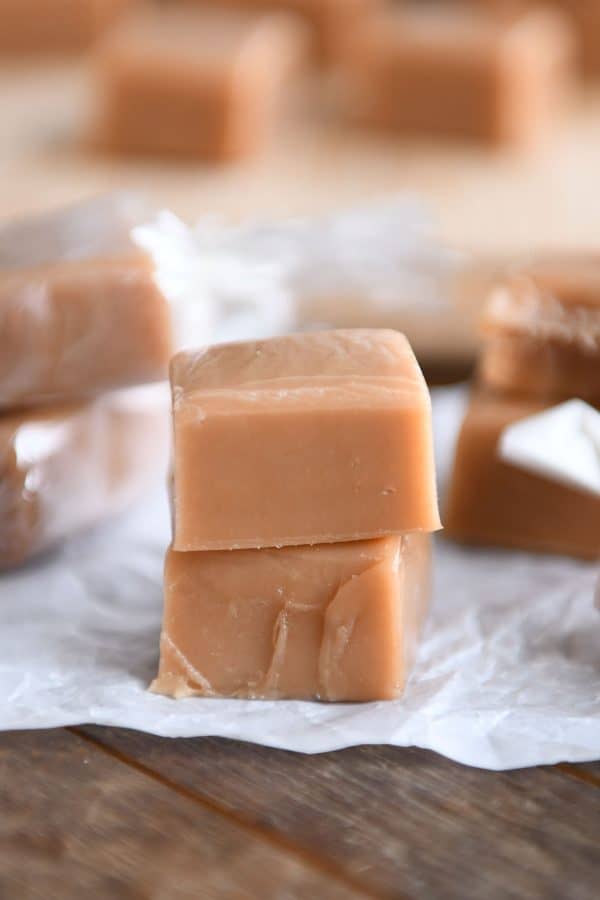
I have a lot of caramel recipes on my site. They’re all amazing in their own right.
- Cinnamon caramels (like a cinnamon bear only 1,000X better)
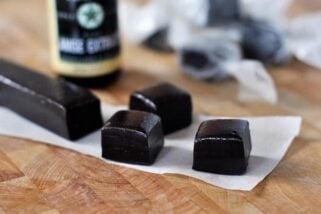
- Licorice caramels (where my black licorice lovers at??)
- Foolproof No-Stir Caramels (classic and yummy)
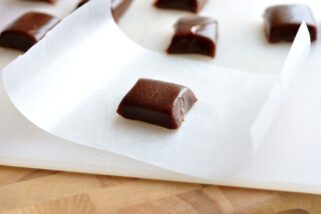
- Soft Chocolate Caramels (need I say more?)
- My Mom’s Famous Caramels (sweetened condensed milk recipe)
But my all-time favorite caramel recipe is this one. I posted about it three years ago and it’s really the only caramel recipe I’ve made since then. I love the rich flavor. I love the soft and chewy texture. I love how easy it is to make (I have the recipe memorized).
It has become my go-to homemade caramel recipe. I’ve changed it every so slightly over the years to use vanilla extract instead of vanilla beans among a few other minor changes.
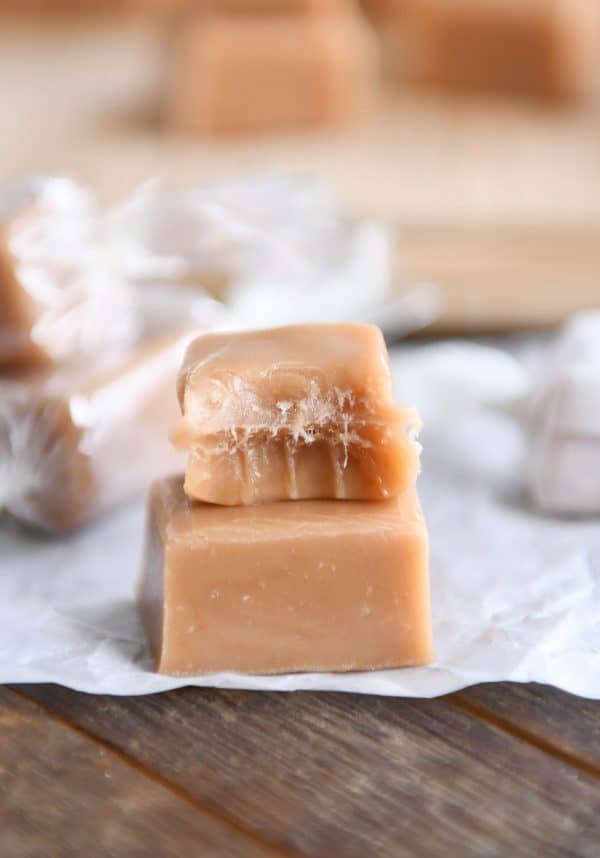
Today we are going to go through a step-by-step definitive guide to making the best homemade caramels of your life. Everything from how to make them (obviously) to the best candy thermometer to what to wrap them in.
I even made you a 1 minute 15 second video of the whole entire caramel cooking process. It’ll take you a little longer than that in real life, but it’s time well spent.
Basic but important tools for making caramels
- heavy-bottomed 4- or 5-quart pot
- flat-edge spatula for stirring
- pastry brush for washing sides of pan {aff. link}
- candy thermometer (lots of details below)
- bench scraper for cutting the cooled caramels
- wax paper or cellophane squares for wrapping (details below)
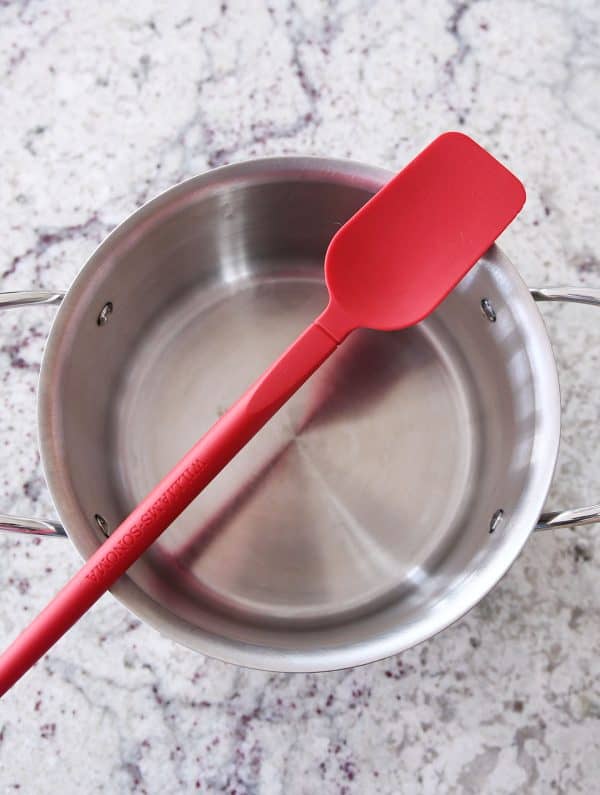
One of the most critical pieces of equipment in all homemade candy making is the pan. For these homemade caramels you want a heavy-bottomed stainless steel pan. I recommend using a pan that does NOT have a nonstick coating. Heavy-bottomed simply means the pot or pan has a thicker base. It shouldn’t be thin and tinny. This will help ensure the caramels don’t burn.
(In the pictures of this post, I’m using an All-Clad pot.) However, you don’t need a high-end pan. For years, I used a fabulous set of heavy-bottomed Farberware pans, and they worked great for caramel making.
Using a flat-edge rubber spatula for stirring is also key. It works better than a rounded spoon or spatula at scraping up the bottom of the pan thoroughly and preventing scorching and sticking.
Which candy thermometer is best?
Ah, this is a loaded question. If I had a dollar for every candy thermometer I’ve gone through over the years, I’d be a rich woman (actually not really because I’d still be in debt for all those thermometers I purchased that held all my candy hopes and dreams).
I am convinced there is no such thing as a perfect candy thermometer. The ones that sit perfectly on the side of the pan (like these flat Taylor thermometers) have hardly ever been accurate temperature-wise when I’ve used them, and the numbers have worn off of all the ones I’ve owned.
The classic glass bulb candy thermometers need to be retired (do they even make them anymore?). They aren’t known to be very accurate and they are prone to breaking.
I used to love and use this digital candy thermometer (and recommended it for years) until it, too, disappointed me enough times in later uses that I had to break up with it.
I’ve finally found a solution that works for me. It’s not perfect, but it’s come the closest to being so.
My candy thermometer solution
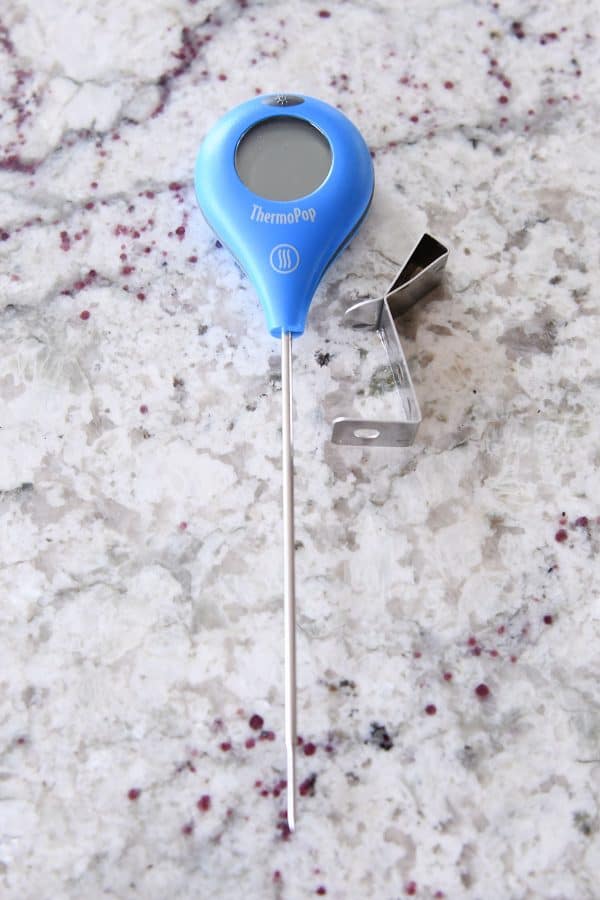
I now use a straight instant-read thermometer and use a pan clip to attach it to the side of the pot. Bonus: this thermometer can also be used for so many other things (like meat temperatures, etc).
I have this Thermopop thermometer from Thermoworks but there are a lot of inexpensive similar versions around {aff. link}. You can attach the thermometer to the pan with a pot clip, such as this silicone version or a metal pot clip.
You want to make sure that when the thermometer is clipped to the pan, there is space between the end of the probe and the bottom of the pan, otherwise the temperature reading will be inaccurate. The thermometer shouldn’t be touching the bottom of the pan.
The instant accuracy of these thermometers can’t be beat, and this feature outweighs the only two downfalls I see with this situation:
- the thermometer will turn off once or twice during cooking – all it takes is a quick press of the button (for this particular model) to turn it back on; no biggie
- I haven’t found a pan clip that nestles the thermometer right up against the edge of the pan like other candy thermometers, so it does tend to get in the way of stirring just a bit – not a huge deal breaker, but make sure if you use this setup to stir underneath and around the thermometer probe or else the caramel will scorch in those spots
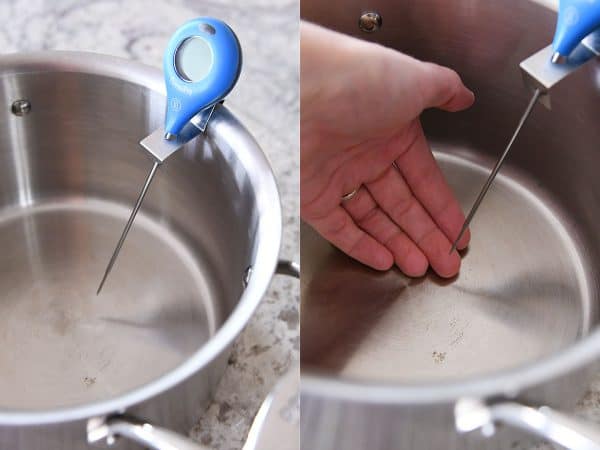
How to Calibrate a Candy Thermometer
Bring a pan of water to a boil and insert the tip of the thermometer in the boiling water for a full minute. Write down the temperature your thermometer registers in the boiling water.
A few rules of thumb:
-We’re making the assumption that the candy recipe being used has been written and tested at sea level (I’ll tell you below how to make further adjustments if that is NOT the case.)
-Water boils at 212 degrees F at sea level
If your thermometer registers below 212 degrees F in the boiling water, you’ll need to subtract degrees from the cooking temperature in the recipe. If it registers above 212 degrees F you’ll ned to add degrees to the cooking temperature in the recipe. *Whatever temperature your thermometer registers is your “new” 212 degrees F mark.*
For instance, if your thermometer registers 205 degrees F in boiling water, subtract 7 degrees (212-205=7) from the cooking temperature in the recipe (for this recipe, the caramels cook to 245 degrees F so you would only cook them to 238 degrees F).
If your thermometer registers 215 degrees F in boiling water, add 3 degrees to the cooking temperature in the recipe.
Potential further adjustments:
If a recipe has been tested at an elevation other than sea level (the only way to know this is if the author notes it in the recipe or if you reach out and ask), further adjustments may be needed based on the difference between the elevation YOU live at and the elevation the RECIPE was tested at. An easy rule of thumb is to add 2 degrees F for every decrease of 1,000 feet elevation and subtract 2 degrees F for every increase of 1,000 feet elevation.
For instance, if a caramel recipe was tested at 3,000 feet elevation and indicates the caramel needs to be cooked to 238 degrees F, and you live at sea level (which is a 3,000 feet decrease in elevation from where the recipe was tested), you would add an additional 6 degrees F (2 degrees for every 1,000 feet elevation change) to the final cooking temperature bringing it to 246 degrees F. This adjustment would be in addition to the adjustments made for the boiling water test.
Another example, if a caramel recipe was tested at sea level and indicates the caramel needs to be cooked to 245 degrees F, and you live at 5,000 feet elevation (which is a 5,000 feet increase in elevation from where the recipe was tested), you would subtract 10 degrees F (2 degrees for every 1,000 feet elevation change) to the final cooking temperature bringing it to 235 degrees F. This adjustment would be in addition to the adjustments made for the boiling water test.
Remember that candy-making can take some trial and error! Even with the above adjustments, you may find that you need to add or subtract a few degrees for particular recipes to achieve the best results. Usually a 2 to 3 degree difference won’t make or break or a recipe, so do your best to make adjustments based on the information above and have fun with it!
Ok. I’m glad we had this talk. Now let’s move on past candy thermometers.
The biggest key for homemade caramel success is getting all of the cooking supplies and ingredients laid out in a very cooking show-style manner. No, but really, it’s pretty important.
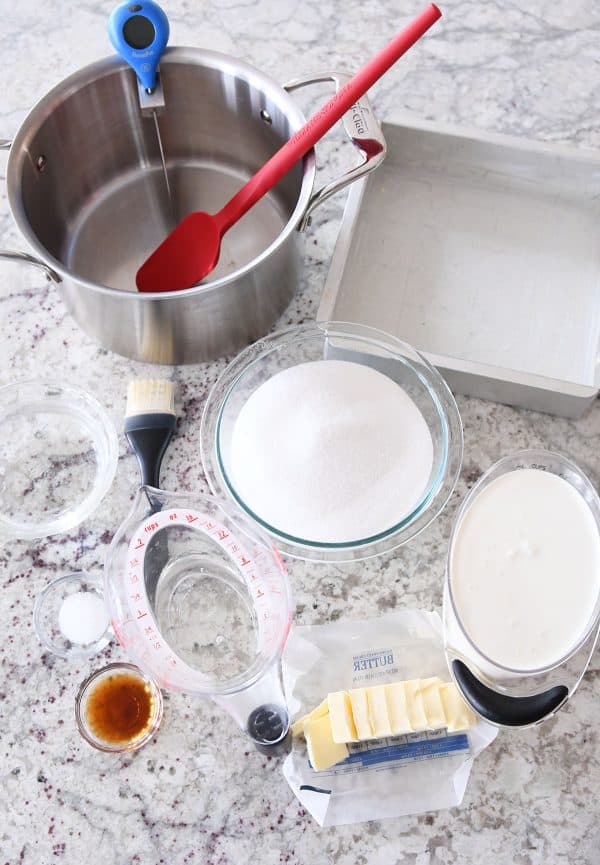
Measure out all the ingredients and have them ready to go.
Also, get the pan ready for when the caramels are finished cooking. You don’t want to have a bubbling hot batch of caramels at the perfect temperature only to realize you don’t have your pan buttered (they’ll continue to cook, even off the heat, while you butter that pan and you’ll be sad when your beloved caramels break off someone’s prized tooth).
I usually just butter all the creases and corners and crevices of a straight-sided 8X8-inch pan (this recipe doubles great for a 9X13-inch pan). But you can line with parchment for easy lifting of the caramels after they’ve cooled.
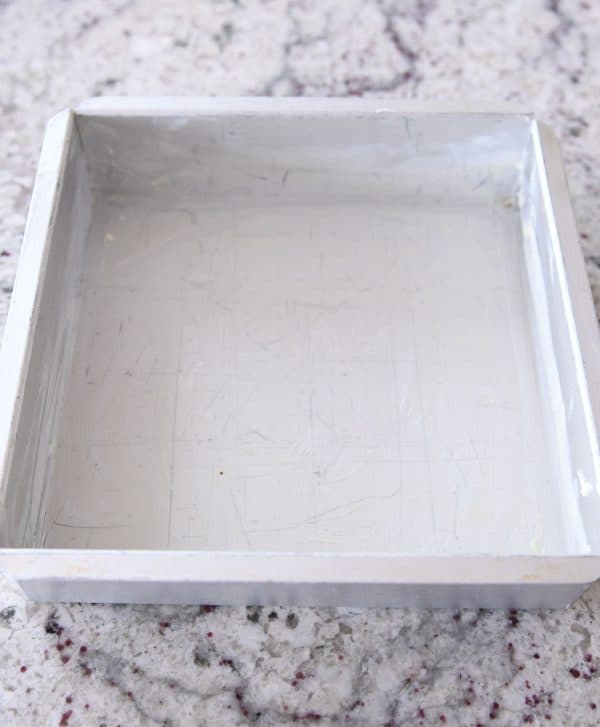
How to make homemade caramels
Finally! The fun part.
In that wonderful, heavy-bottomed pan (I wish I could be complimented for being heavy-bottomed at some point in my life), combine the sugar, water and corn syrup.
Don’t go crazy here. You don’t want to splash it everywhere up the sides of the pan. Be gentle. Be careful. Those splashed sugar marks can become sugar crystals, and they can ruin a whole batch of caramel if they get stirred back into the caramel.
That sounds kind of doom and gloom, but don’t worry. I’m going to show you how to easily rid your life of sugar crystals forever and ensure you know how to make the best homemade caramels of your life.
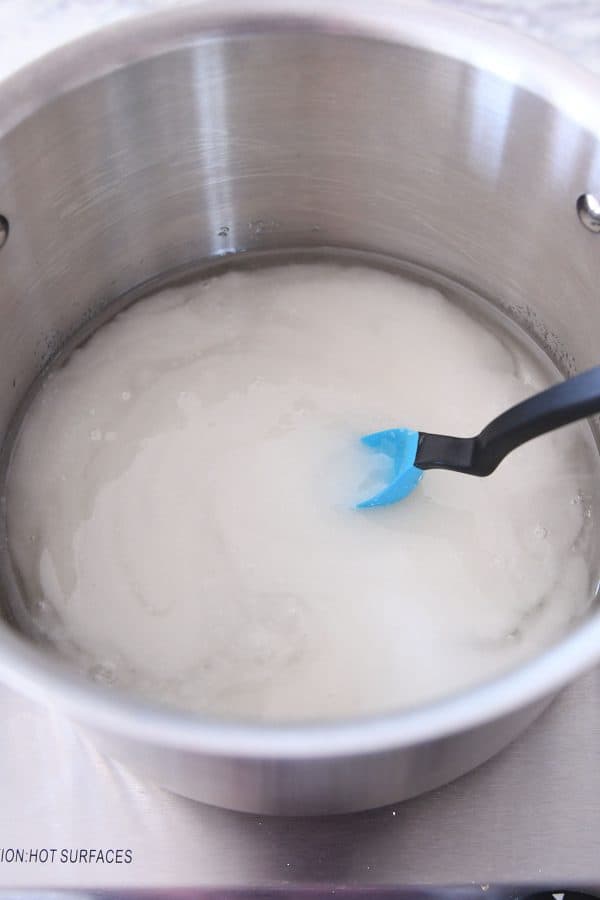
Heat this mixture over medium or slightly medium-high heat until it comes to a boil. It will foam and rise up a bit at the beginning but will quickly settle down into pretty, glassy bubbles.
Why this step? A lot of caramel recipes have you combine cream (or sweetened condensed milk), butter, sugar and corn syrup from the very beginning. But cooking the sugar and corn syrup like this first means you get a whole lot of flavor and cooking done quickly without having to stir and without any milky/creamy ingredients scorching on the bottom of the pan.
It’s brilliant.
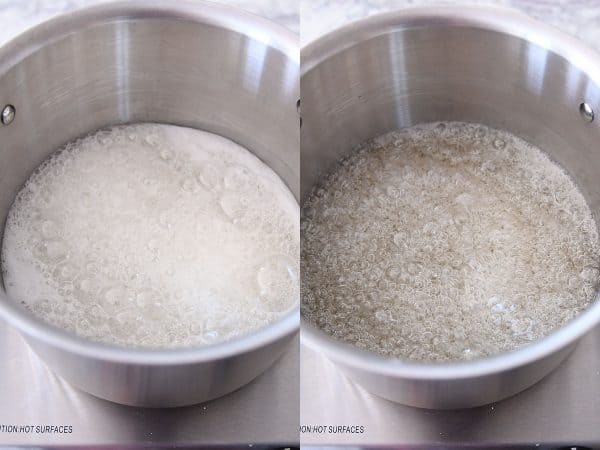
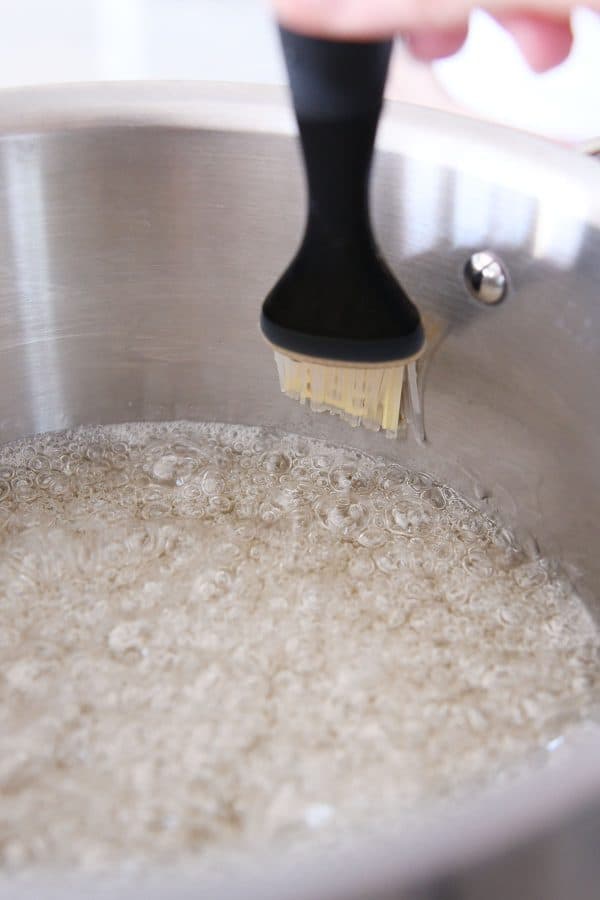
This is when you want to fill a cup with water and use the pastry brush {aff. link} to wipe down the sides of the pan above the boiling sugar/water line. Just dip the brush in the water and rub it along the sugar crystals; they’ll dissolve and run back down into the boiling mixture. This is what you want.
Once the sides of the pan are cleaned, you probably won’t need to repeat this process again.
Clip your handy dandy thermometer – instant read or candy thermometer – to the side of the pan. Without stirring, cook the mixture to between 325 and 345 degrees F. The range in temperature is fine and won’t affect the soft chewiness of the caramels. The higher the temp in this step, the darker the color of the caramels will be.
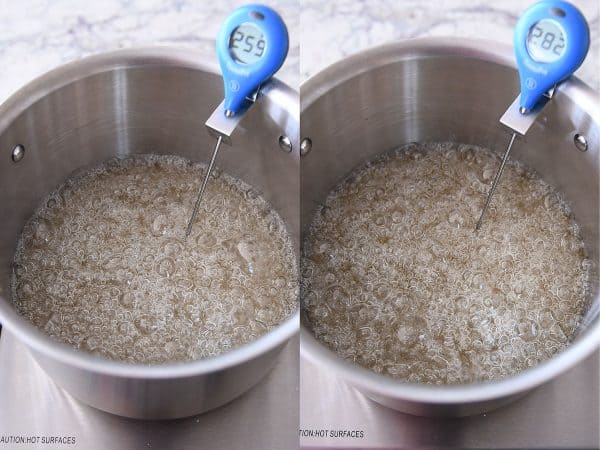
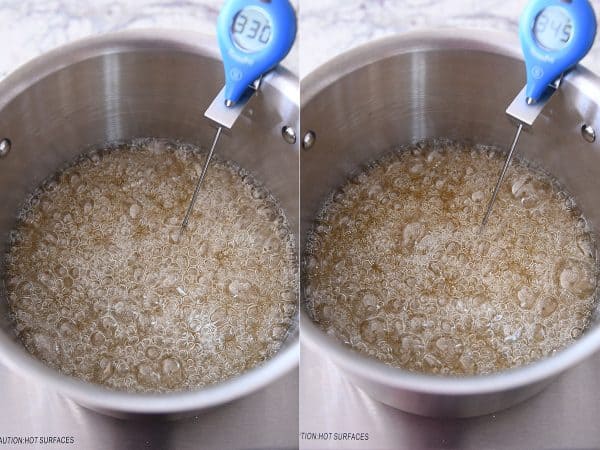
I usually cook the sugar mixture to right around 345 degrees. Over medium heat, this usually takes around 20 minutes on my stove.
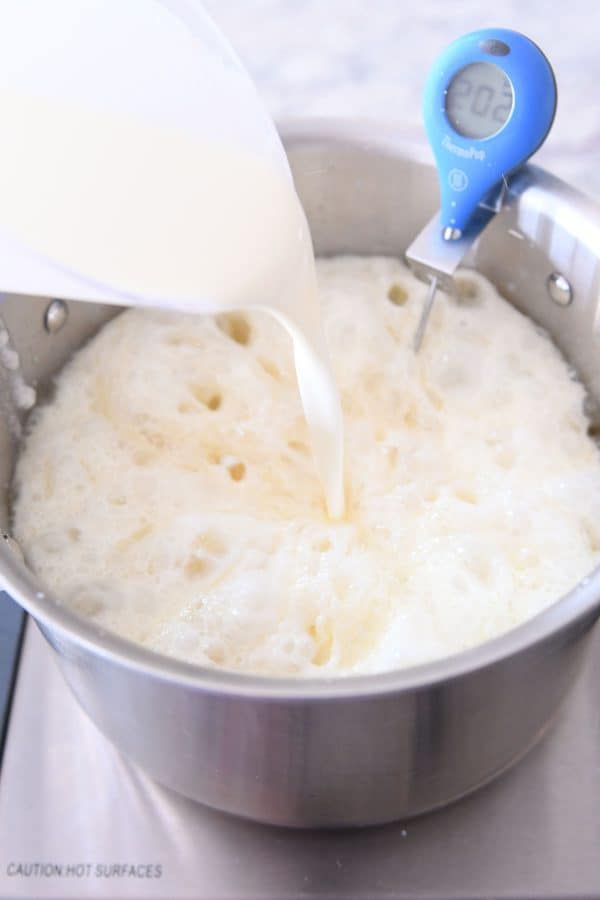
Immediately but slowly pour in the warm cream. The mixture is going to bubble and steam and completely freak out. It’s ok. Just keep your hands and fingers safe. This is also why it’s important to have a bigger-than-you-think pot. The mixture will rise quite a bit during this step.
Add the butter and salt.
The temperature of the caramel mixture drops significantly with the additions.
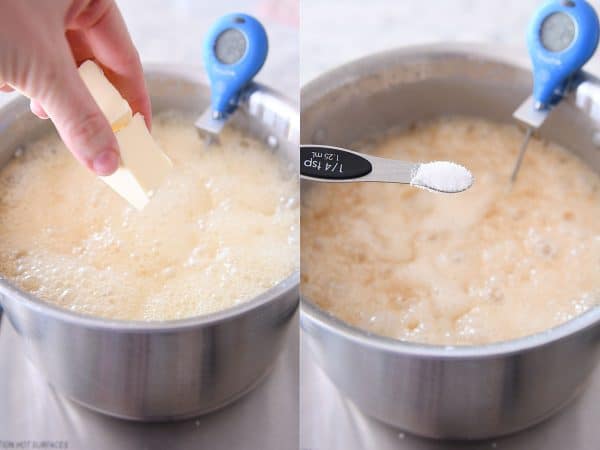
Once the cream, butter and salt have been added, it’s time to start stirring. You are going to stir constantly until the end of the caramel making process. This prevents scorching and burning. Just commit and stick with it.
You only need to focus on scraping the bottom of the pot – don’t scrape down the sides as you stir. It gets all sorts of sugary crystals and hard bits into the mix, and that’s not good. You will cook the caramel mixture back up to about 245 degrees F (depending on how soft/hard you want them).
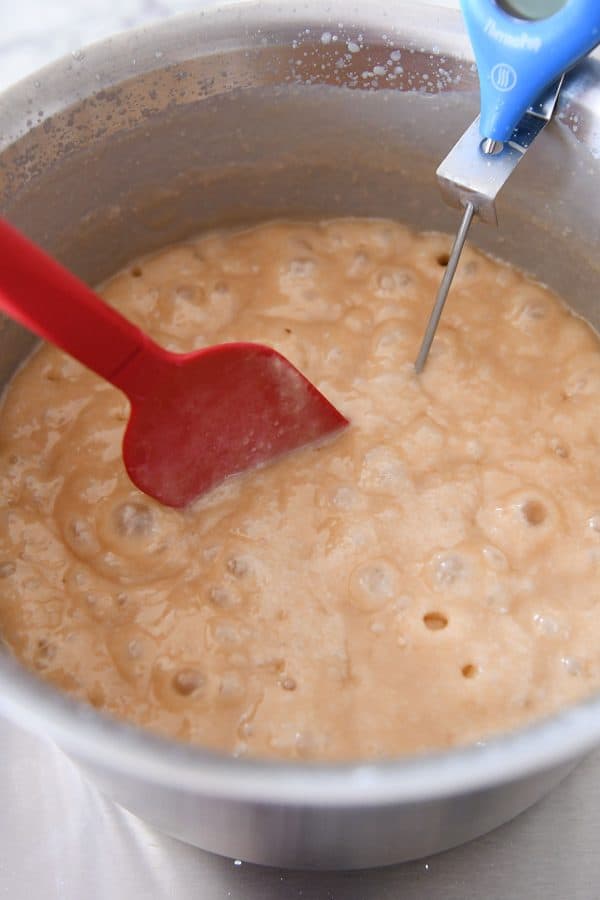
The look of the caramels changes as the temperature increases. At the beginning, the caramel mixture is light in color and the bubbles are small and closely spaced.
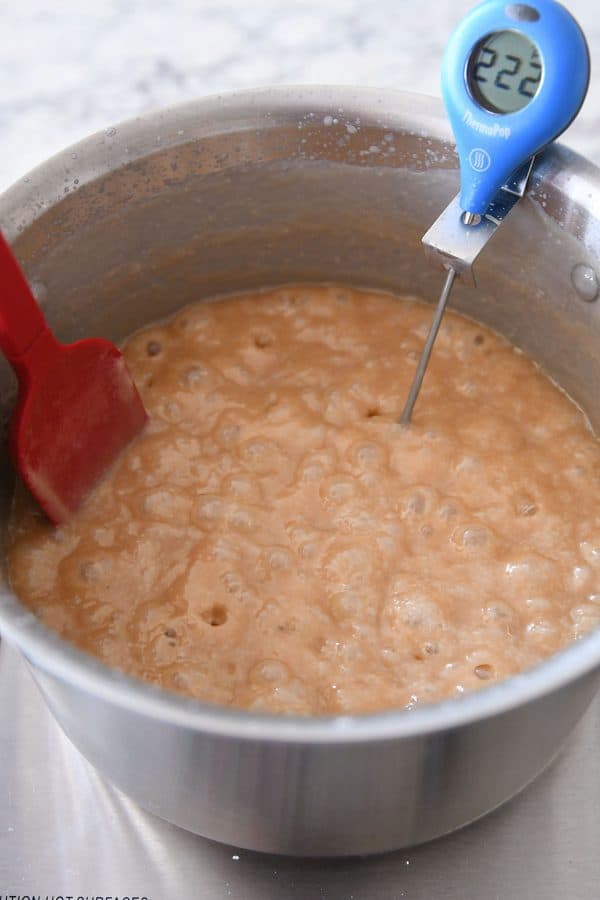
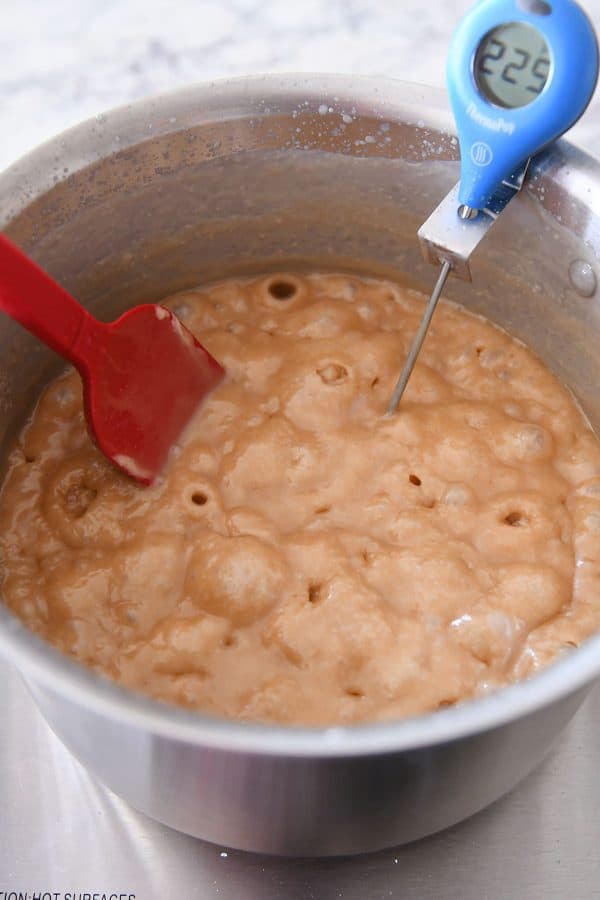
As the temperature increases, the color darkens and the bubbles get larger.
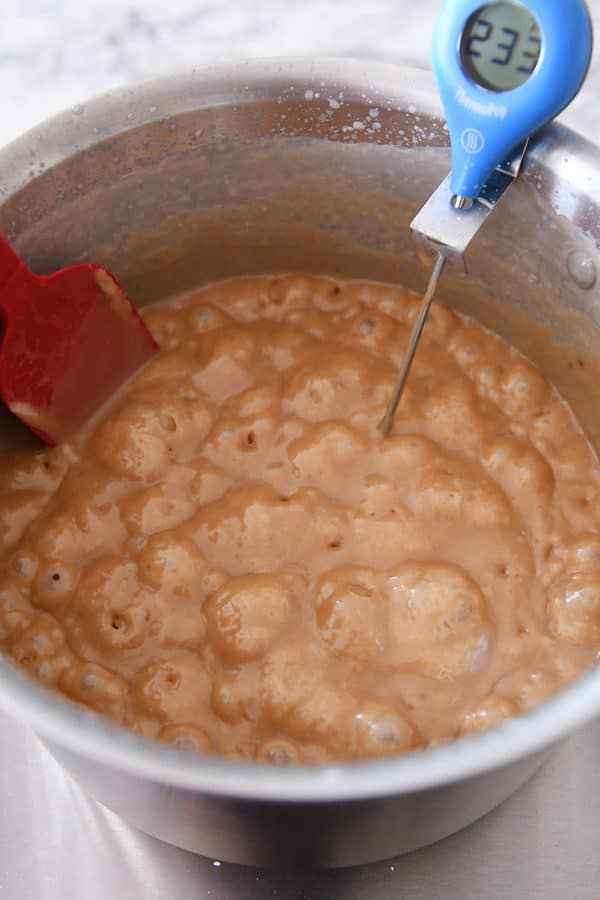
With my perfectly calibrated thermometer, I cook these perfect vanilla caramels to exactly 245 degrees. This will take about 30-45 minutes, depending on your stove and how you moderate the heat.
At this temperature, they are soft but not stick-to-the-paper soft. I’d consider them slightly softer than, say, a store bought Kraft or Brach’s wrapped caramel but firmer than the caramel inside a Twix bar.
Am I making any sense? Also, why don’t they make Twix bars in dark chocolate? And if they do, why does my grocery store not carry them? These are the things that keep me up at night.
You can cook these caramels to a lower or slightly higher temperature, too, depending on how soft or firm you like your caramels to be.
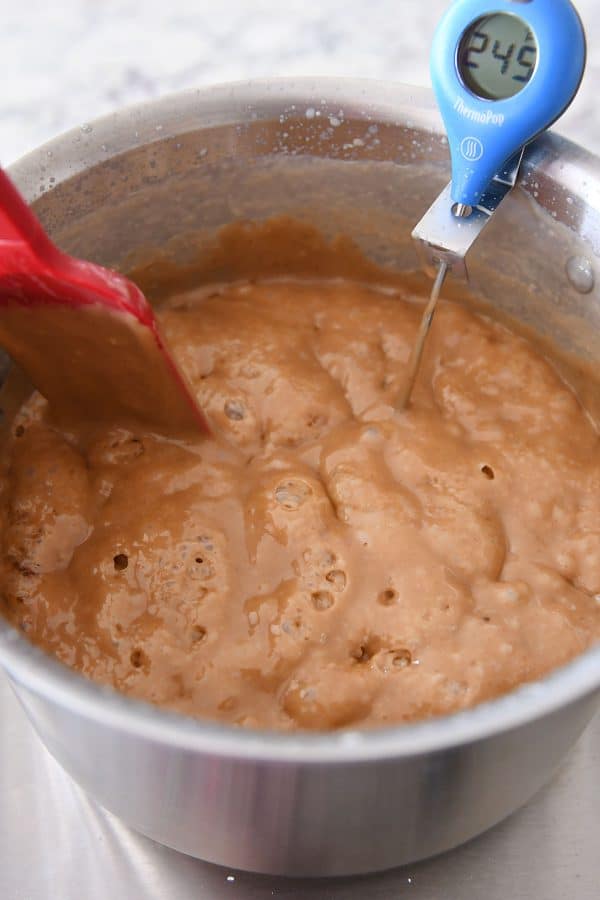
Immediately take the pan off the heat and stir in the vanilla. It will bubble a bit; that’s normal. As you stir it in, don’t scrape down the sides of the pan.
Other caramel flavors
If you want to change up the caramel flavor, now is the time! Omit the vanilla and stir in a variety of different extracts: cinnamon, anise, huckleberry or razzleberry.
The exact amount depends on the brand and flavor of the extract (and keep in mind flavored oils are much more potent than extracts so you’ll want to use less). Generally speaking I use about 1/2 to 1 teaspoon of a flavored oil and 2-3 teaspoons of a flavored extract.
You can also add food coloring at this step, too, if you want. I prefer using gel food coloring because a little goes a long way.
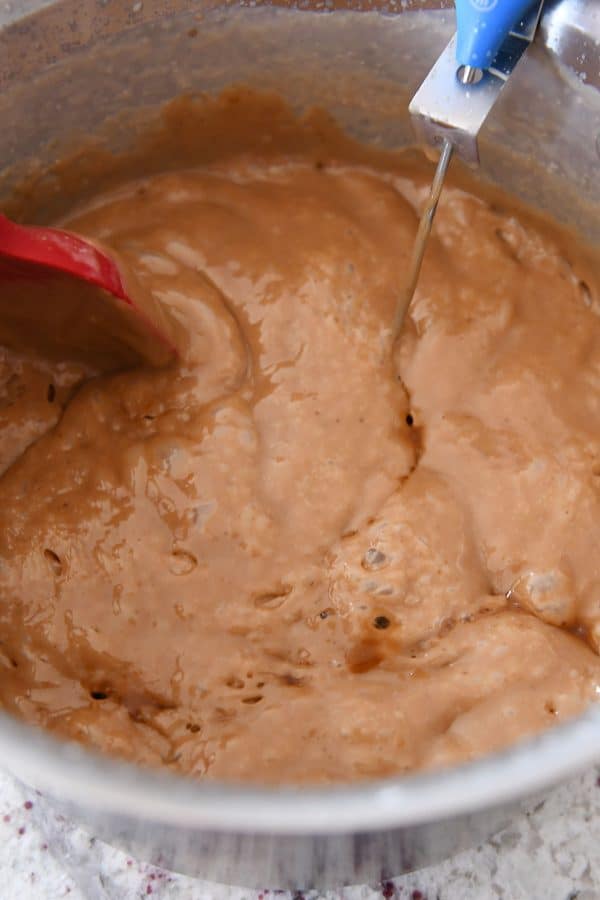
1-Minute How-To Caramel Video
Want to see that whole cooking process condensed into about a minute? Here you go.
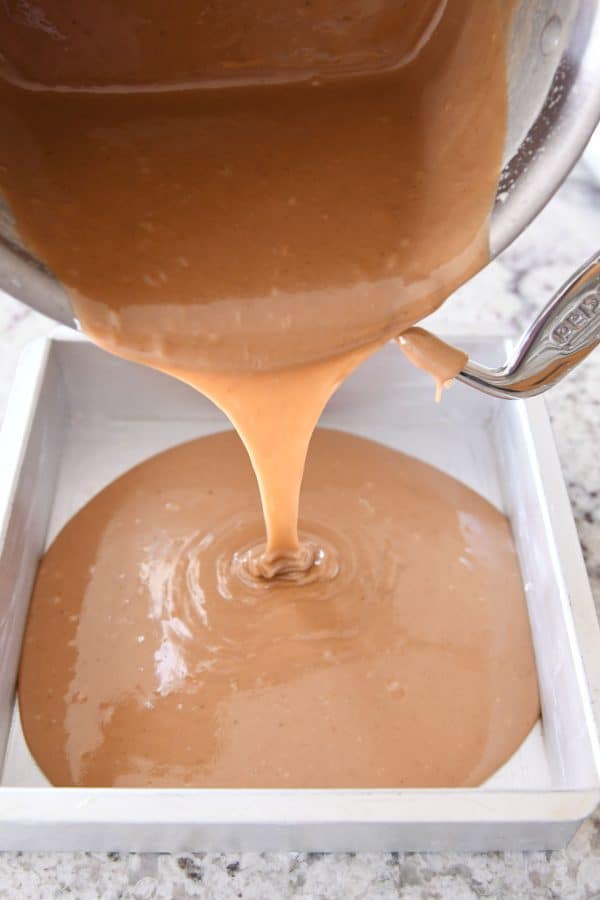
Once the vanilla has been stirred in, immediately pour the hot caramel into the prepared pan. You prepared the pan, didn’t you? I hope you prepared the pan.
Don’t scrape the sides and bottom of the pot too aggressively – a little scraping is fine, but cleaning out the pot is a bad idea; it can ruin the texture of your caramels with the super hot caramel on the bottom of the pan and sugary bits on the sides.
How to cut and wrap homemade caramels
Once the caramels have completely cooled (a couple of hours), it’s time to wrap them.
First of all, it helps to use a flat spatula to dig them out of the pan (they should come right up if the pan has been well buttered) and place the whole slab on a cutting board.
I use this can’t-live-without bench knife {aff. link} to cut the caramels. One 8X8-inch pan of caramels will yield about 50-60 caramels.
Wax paper vs cellophane
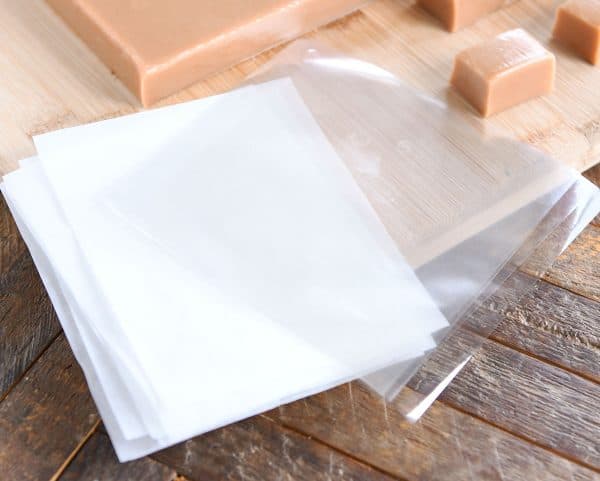
I grew up on a homemade caramel assembly line where I usually got relegated to the wax paper cutting station. With a good old-fashioned pair of scissors, I cut hundreds and hundreds of wax paper shapes (they ended up being all over the square-rectangle spectrum) for the homemade caramels my mom made every year.
Wax paper works great. But it’s a pain in the heavy-bottom to cut into pieces. As of yet, I haven’t seen precut wax paper for caramel wrapping. CORRECTION: but YOU awesome readers have. Here’s some precut wax paper squares on Amazon several of you told me about since this post went live {aff. link}.
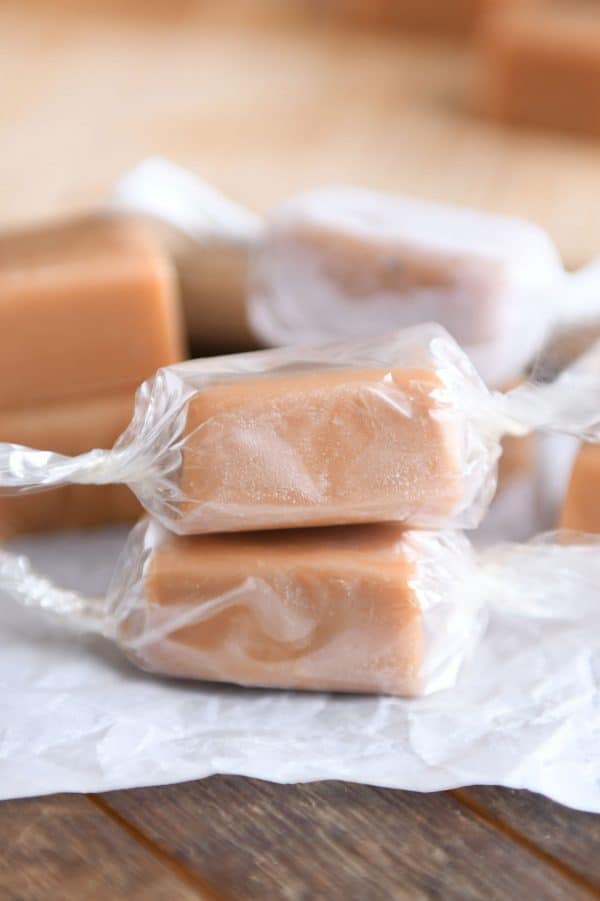
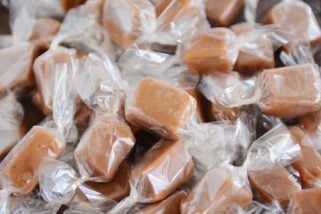
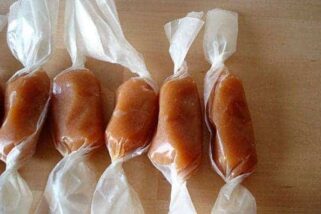
Now that I’m old and grown up with a caramel making household of my own, I go straight for the cellophane wrappers. They come in packs of 500 or 1,000 (read: they’ll last a lifetime unless you make caramels like it’s your job), and they are so super handy. Plus, I think the caramels look pretty in those clear crunchy little wrappers.
I use these cellophane wrappers {aff. link}. There are lots of brands available – they end up being between two and three cents a piece on Amazon. You can get them cheaper online elsewhere (like Orson Gygi or this site dedicated to Caramel Wrappers – shipping costs may vary).
When using the cellophane wrappers, you have to be a little aggressive as you twist the ends or else they tend to unroll a bit, but I love them and can’t imagine making and wrapping caramels without them.
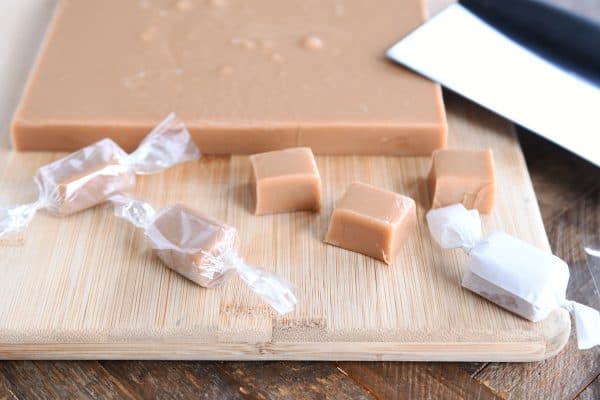
Also, don’t panic and worry about the bubbles in that there slab of caramel. It happens. Especially when your sweet tween is helping you make the caramels and accidentally scrapes too much out of the pan (that can cause the pesky bubbles). They aren’t noticeable once the caramels are cut and wrapped.
I hope this definitive guide to making the best homemade caramels of your life is helpful.
Because I honestly think everyone needs to feel like a rock star in the kitchen and make homemade caramels at least once.
There is seriously nothing like them. I’ve actually had to delegate the cutting and wrapping to my children because my self-control is nonexistent in the face of 50 little caramels staring up at me. One for the wrapper, one for me. One for the wrapper, one for me. I usually have a mild to severe stomach ache by the end. I know, I know personal problem.
What other questions do you have?
Please ask any other caramel making questions below and I’ll be happy to answer them or refer you to someone (ahem, google) who can!
Homemade caramels are my absolute favorite thing to make during the holidays. I also use this caramel recipe for homemade caramel apples and it’s become my go-to for other flavors (like cinnamon or licorice).
Seriously, I’m going to end it here because I CAN TALK ABOUT HOMEMADE CARAMELS FOREVER, and I don’t want to lose your loyalty forever by droning on and on. Brian’s giving all of you the side eye, like, “seriously, who got her started??”
Love ya. Now go make yourself or your neighbors a batch of homemade caramels, ok?
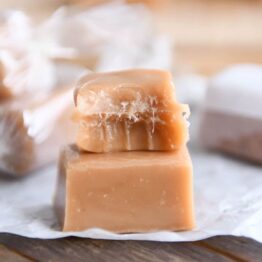
The Best Homemade Caramels
Ingredients
- 2 cups heavy cream
- 2 ½ cups (530 g) granulated sugar
- ½ cup light corn syrup
- ½ cup water
- 6 tablespoons (85 g) butter, cut into tablespoon-size pieces
- ¼ teaspoon coarse, kosher salt
- 1 tablespoon vanilla extract (see note)
Instructions
- Butter the bottoms and sides (get into the corners, too!) of a 9X9-inch square baking pan. (Alternately, you can line with parchment and butter the parchment – this may make it easier to pull the slab of caramels out of the pan after they have cooled in order to cut and wrap them.) Set aside.
- Heat the cream in a saucepan or in the microwave until steaming. Keep warm.
- For the caramels, in a large, heavy-bottomed pot (at least 5- or 6-quarts), stir together the sugar, corn syrup, and water, taking care to not splash the mixture up the sides of the pot.
Clip a candy thermometer onto the side of the pan. - Bring the mixture to a boil over medium-high heat WITHOUT STIRRING or moving the pan. As it begins to boil, fill a cup with water and use a pastry brush to wash down the sides of the pan so there are no granules of sugar sticking to the sides of the pan (you probably won’t need to repeat this after the sides have been well-cleaned). This prevents the caramel mixture from crystallizing in later steps.
- Cook until the boiling sugar mixture registers 325 degrees F on the thermometer, about 15-20 minutes (for darker but still chewy caramels, continue cooking the sugar mixture – I’ve gone as high as 345 for super intense, dark caramels; beware the next step will cause much more steaming and bubbling the higher you cook this initial sugar mixture).
- Slowly and carefully pour the warm cream into the caramel. It will bubble and produce a lot of steam! Add the butter and salt. The mixture will bubble high during this step but will go down after a few minutes.
- Begin stirring the caramel with heatproof rubber spatula with a flat top (a flat edge does better at preventing the caramel from burning than a rounded edge). Avoiding scraping the edges of the pan, and continue to cook, stirring constantly and slowly, until the mixture reaches 245 degrees F, about 10-15 minutes (you can go as high as 248 degrees F for a firmer, but still chewy, caramel, or take the caramel off the heat earlier for a softer caramel; 245 is perfect in my book).
- Off the heat, stir in the vanilla without scraping down the sides of the pan – scraping the bottom of the pan is fine (this would be the time to add other flavorings/color).
- Immediately pour the caramel mixture into the prepared pan.
Let the caramels cool completely. I use a large, metal spatula to peel the whole slab of caramel out of the pan and onto a cutting board. - Cut into squares using a sharp knife or bench scraper, wrap, and store in an airtight container at cool room temperature for up to two weeks.
Notes
Recommended Products
Recipe Source: adapted from this recipe which was originally adapted from Cuisine at Home 2016

I like your stainless pot what brand is it and where can I get one?
Hi Jim, it’s an all-clad pot and I bought it from Williams-Sonoma several years ago.
Hi, your website is filled with great information – thanks. This tutorial is really helpful – except I was hoping for a section to focus on the potential ingredients. I’m scouring the web and looking at tons of caramel recipes and see a lot with one of more of the following: brown sugar, evaporated milk, sweetened condensed milk.
I’ve even seen some that included both heavy cream and a canned milk product – so it can’t just be a matter of making it easier to call for a canned product. I’d love to hear of you have any thoughts on those potential ingredients.
Thanks!
Hi Dave – those are great questions, but unfortunately, I don’t know all the ins and outs of why canned milk is sometimes used vs heavy cream, etc. I think it has a lot to do with the chemical reactions of all those ingredients. Sorry I’m not more help!
Hi Mel, does the pan have to be stainless steel? I have heavy bottomed Circulon dark pots (they’re not non-stick)…not sure if the stainless part is mandatory.
Thank you!
That’s a good question, Tammy – I’ve only ever used stainless but I believe my cousin makes dozens of batches of caramel every year in similar sounding pots to the ones you describe.
Perfect! Two times in a row! I followed your recipe to a T, (using cream and butter from my very own cow) and everyone who tried them was so impressed. Delicious! Thanks so much Mel.
Ok just tried this and it didnt work! The problem was my thermometer I think. I mean I just had a good cook clip on candy thermometer and it didn’t quite reach the liquid when clipped on.. there isn’t much liquid height in there at all.. so then I had to sit and hold it so it barely got in the liquid but didn’t touch bottom of 6 quart pot. Is this normal?? I think because I had to hold and re adjust it, it took way longer getting to temp by the time it got to 325 it was really dark and burnt I’m pretty sure.. it was on there longer than 20 minutes to reach temperature. whst should I do.. is this normal that the thermometer won’t reach the liquid. I used the right size pot too
Hi Rachelle, different brands of pots are configured differently so even if it’s the same size as in the recipe, it could be more shallow if the base is wider. You could try a slightly smaller pot with higher sides and a smaller base – but yes, it does sound as though it was an issue with the thermometer being submerged in the caramel without touching the bottom.
I have an electric stove. I’ve made caramels for about 40 years using the Better Homes and Gardens (OLD) cookbook……it’s quite a bit like your recipe, but it uses dark corn syrup and directions are different. I’ve made five times the recipe several times, but it takes a long time……several hours. They usually turn out, but sometimes not…..resulting in a lot of ingredients wasted, as well as time. I blame my stove……or trying to make too many at a time. The stove chooses to (recycle or decide to put or not put energy into the coil. Should I just suck it up and get a gas range or switch to your recipe? My friends and family really love my caramels, and I give many away for Christmas presents every year. Thanks for listening to my story!
That’s a tough call! I don’t have a gas range – I have a flat top electric stove, and I know what you mean about the heat cycling on and off. This recipe works great with my electric stove!
Mary Ann, you commented several years ago, so may never see my reply. Hopefully, others will and it will help someone. The coils turning off and on shouldn’t e a concern if you’re using a heavy bottomed kettle, as Meg suggests. The heavy bottom stores more heat longer and distributes it more evenly, so the coils going off and on are not ‘noticed’ by your mixture.
I would suggest reducing your recipe to 1-2 times the size of Meg’s. This allows you to make adjustments to your process from one batch to the next and results in less waste should an adjustment turn out to be incorrect.
WOW! I made these today and they were delicious. I had no heavy cream so I used 1/2 cup of melted butter and 1 1/2 cup of milk, which made 2 cups of a heavy cream substitute. Everything worked well and the caramel tasted amazing!
Hi, so this looks really good, but I dont have a candy thermometer. Can i make this successfully without one?? Thanks.
You could try googling the ice water test for making homemade caramels (dropping bits of cooked caramel into ice water to judge the texture).
My daughter and I would like to make these and mail them to a friend in Washington. Our elevation is 3619’ and water boils in my kitchen at 205’ according to your chart as well as our boiling water thermometer test. Do I need to adjust the temp when we make these? After reading the comments, I’m a bit confused….Thank you for your help and your amazing recipes!! I have been cooking and baking from your website since day 1
Jenna
Hi Jenna, yeah, it’s a little confusing! I’ve made this recipe at right around 2,500 feet – so I think the fact that you live at an elevation not significantly different means you could adjust the temperature so that the finished caramels should cook to 238 degrees (since your thermometer calculates water boiling at 205 degrees). It’s always better to undercook caramels than overcook them, so I’d suggest cooking your batch to between 235-238 degrees (with your thermometer). Does that help?
Thank you so much! I was thinking that 238 or so might be the magic number. I really appreciate you answering my question! I boast to my friends and family that I was one of your very first subscribers, lol, but I have made over 50 of your recipes over the years. They are easy, well-written, a joy to read, and always delicious!! You have helped make creating yummy foods for my family a fun adventure. Thank you so much for sharing your recipes with all of us!
Hugs from me to you!
Thank you, Jenna! That was so sweet!
I’ve made these for neighbors at Christmas time every year since you posted this recipe and everyone loves and raves about them. I make 8 double batches with one batch being used for turtles. My kids are expert caramel wrappers! 🙂
I plan to make 300 caramels as gifts. Can I make all of them before wrapping them? I would wrap and store the batch in an air tight container prior to wrapping. I plan to wrap within 2 days of preparation.
They stay fresher if you wrap them right away (after they cool), but if you are keeping them well-covered, you could probably wrap them all at the same time.
Mel, these Carmel’s are amazing! Thank you SO much for sharing this recipe. I live in Colorado at over 5,000 feet so it took me three tries to get them just perfect (taste and texture) but I took notes every time and made adjustments. I wanted to give up but caramels are my dad‘s favorite and I wanted him to have the best caramels out there and you claimed they were so I stuck with it and you were right!!! Everyone I have shared them with loves them! They have become my go to gift for teachers and friends and every time I go home to visit my dad I take him a tin full. I have 4 sisters that live close by him and I have banned them from making them for him because it’s my thing! I made the promise before I would tell them were I got the recipe. Plus I want him to look forward to my visits so thank you again for taking the time to share them and the first few times were stressful and scary but really once you get the temperatures right they are so easy!!
This is the best, Janeil! Thanks for taking the time to let me know – and I’m proud of you for persevering to get the temperature just right (high altitude can be tricky!!). Sounds like you are getting quite the reputation with the caramels!!
Really delicious! My husband asked if this was hard to make and when I told him no he said good because it was one of his favorites and then he asked me where I got the recipe and I gave him a look that said “are you really asking me that”…he said “right Mel.” My kids loved it too.
I thought I was in the breakfast casserole recipe..but I’m sure the caramels are really delicious too!
Will a 5qt pot work for a double batch?
No (speaking from experience!) – I use an 8-quart pot for a double batch.
My first attempt was a miserable fail, only because my confection-loving heart couldn’t wait. I put the temp up too high right as I noticed my little one was in serious need of a diaper change. Smoke detectors went off as smoke went billowing out the door. I am happy to report that round 2 was a complete success and my sweet tooth is happy once again. Lesson learned: timing is everything and don’t step away from the boiling sugar! Thank you for the excellent tutorial, Mel!
Oh wow, sounds like an adventure, Susanna – I’m glad they eventually turned out ok!
My hubby and I were laughing for the rest of that adventurous day! Thanks for all your wonderful recipes – you really have made me a better cook (despite this obvious fail, haha)! Merry Christmas!
I have made a lot of caramels and these are by far the best tasting and creamiest I’ve ever made or eaten. I used your exact recipe and temperatures. I dipped a lot of them in tempered semi sweet chocolate and they deserved a starring role in the 2000 movie, Chocolat. They were that magical.
My search for the perfect caramel is over.
Thank you, Melanie for another perfect recipe.
I love this!! So glad you had success and that you loved these caramels!
Made 7 double batches- 7 flavors including vanilla, vanilla with almonds, chocolate, cinnamon, orange, licorice and root beer! All were fantastic ! Then I made my family sit in front of a Christmas movie and wrap them all! We ran out of the 1000 count cellophane wrappers. I have heard rave reviews as
We are heading them out to friends and family
as gifts! Thanks for a fantastic recipe!
Oh my heavens, Terri! You win the award for most homemade caramels made at one time – that’s amazing!! Love, love all those flavors. My carpal tunnel hurts just thinking of wrapping all those. Glad you got the family involved.
Do you have a version that doesn’t call for corn syrup? My partner is allergic to corn and we’re looking for a caramel recipe that’s safe.
I don’t, sorry! You might try googling “homemade honey caramels” – I’ve heard they can be really good!
Not sure what I did wrong but the syrup got really dark at about 315 degrees so I quick grabbed it off the heat immediately. I added the cream and it got all clumpy. I thought maybe it would smooth out if I continued but at about 230 degrees it totally separated into clumps and liquid. I quit at that point because I tasted it and it tasted burnt. I followed the recipe as exactly as I could. I am baffled, especially now that I read the comments. Any ideas of my mistake?
I used both my thermometers to make sure I had the correct temp so I don’t think that was the problem
I had the exact same thing happen. Tried a second batch and when the temperature got to about 280 I could tell it was going to do the same thing so I went ahead and added the cream and butter and cooked to about 240 degrees. They taste good but are a hard candy rather than a nice chewy caramel. So disappointed. I checked my candy thermometer with the boiling water method and it was right on fire my altitude. Pretty bummed. I don’t care try again but sure wish I knew what I did wrong.
What type of pan are you using, Wendy? Is it heavy bottomed? I’ve made these caramels dozens of times without any issue and would love to help troubleshoot anyone having issues because they really are amazing caramels (but I don’t blame you if you don’t want to try again).
Hey Jenny, honestly, I’m not sure. I’ve never had the sugar mixture turn dark at 315 degrees.
Were you looking at Celsius instead of Fahrenheit?
I have made these twice in the past week – one regular batch and one cinnamon batch. Oh.my.heavens. I am a caramel snob, and these are some of the best I’ve ever had! Mine were quite a bit darker than your pictures above, but the texture and softness was perfect, so I’m not sure why that would be! But they were divine!
I’m so happy you are loving this recipe, Morgan! What temp are you cooking the sugar mixture too? What is the color of it when you add the cream and butter?
I have been a fan of yours for many years and have many of your recipes in my collection marked as “Fav.” I appreciate all the effort you put into making your recipes consistently successful and delicious. Having said that, I do agree with Rebekah’s comment that, some people maybe confused. Even though I read the recipe all the way through, and followed your instructions step by step, once it reached temp reached 325 degrees, I pour in the cream and didn’t realize the desired temp then changed to 245-248 degrees not 345-348 degrees. I only realize my mistake when I read Rebekah’s comment and your explanation. I think I understand why. Between Step 5 and Step 8, you explanation the different stages. I simply missed the change temp. I am undeterred and tomorrow I am sure I will have a beautiful pan of delicious caramels.
Hi Annie – sorry for the confusion! I bolded the temperature in step #7 so it’s more clear the caramels should only cook to 245 degrees F. Hope that helps!
Thank you Mel, it will help remind me in the future and maybe others. As it turns out, I am getting ready to make your caramel recipe. I can’t wait to taste one of those golden sweet treats. Sorry about all the typos…it was much to late in the evening to be posting comments!
They are perfect and oh so delicious!
Looks good! Question: in your Carmel making video you are using a countertop cooker of sorts. What is it?
It’s a stand alone electric hot plate that I use when shooting pictures or videos of certain recipes.
These are fantastic, and so easy thanks to your careful instructions! I have made caramel sauce for years, but never thought to make my own caramel candy until boredom and some leftover heavy cream necessitated trying something new. I have now made two batches in two days. I dipped one batch in chocolate, which was divine, but honestly the flavor of these caramels uncovered is so fantastic that I (someone who loves chocolate and feels so-so about caramel) will probably forgo the chocolate on all future batches. Out of curiosity, when others are making different flavors, are these done using different extracts/oils, or adding different ingredients? I especially love the idea of using cinnamon or chocolate. Thank you so much for sharing all the great recipes!
The butter in the recipe – is there any difference in using salted Vs. unsalted?
I use salted butter. You’ll want to add more salt if using unsalted.
Have you ever used a candy mold like this one? https://www.amazon.com/gp/product/B07FZ7LMZV/ref=ox_sc_act_title_2?smid=A356IDMNT46LJY&psc=1
I’m wondering how good it would work?
I haven’t – sorry! I think it would be hard to get the caramel in each square without a lot of overflow/mess?
Just a thought…if you go to the Thermoworks website, they have a number of probe clips that are very affordable. I just tried the one I have and the probe was directed toward the side of the pan, not to the middle. Can’t try to try your recipe! It looks delicious!!!
Thanks, Dianna! I should have thought to look there!
I LOVE caramels! Can’t wait to try this recipe! There are some inconsistencies in your instructions though – some places say 245 degrees and others say 345 degrees! I’m guessing it’s the 245, but it might confuse some people!
It’s not an inconsistency – the sugar mixture at the beginning cooks to 345 and then the temperature lowers once the cream, butter, and salt are added. After that, the caramel needs to cook to 245 degrees. Hope that makes sense!
This recipe is so close to my mother’s recipe that I’ve been making for years! Thank you for some great tips, like brushing the side of the pan with water. After I pour my caramels in the prepared pan I put them in the freezer to set up. Once it is set up I can turn the batch on to the counter and let it come back to room temperature for cutting.
Thanks for all the great tips! Love your blog!
Thank you, Marilyn!
Boy am I glad I live at sea level!!! I don’t get any of that and I am a fairly educated person.
Be still my heart! ❤️ Homemade caramels are one of my favorite things to make, eat, study, and talk about. Food science nerd checking in. I have tried all your recipes & this one is my favorite. Adding the hot cream or milk in intervals is called slacking back the batch and if you want darker but not tougher caramels you can add it in increments. It’s also helpful if you happen to use a too small pot, slacking the batch makes it so you don’t lose your liquid gold all over the stove when it boils over.
I cringe anytime someone says they ruined a batch and threw it away. They can be saved! Crystallized and over or under cooked can all be recooked to the right temperature by adding boiling water to soften it and recook it.
I too was the caramel wrapper cutter. Wax paper cutting was my speciality.
I always learn so many great things from you, TaLaisa! Thanks for the info! Now I’m going to slack every batch (especially the ones I irrationally quadruple and they boil over!).
Just a quick note: the easiest way to adjust for altitude/calibrate a thermometer is to go off of 212 and adjust from there: most recipes, particularly well tested ones, will be based on sea level, and so the only change you need to make is to calibrate to 212. So, my water boils at 204 (tested with my thermometer, if I get a new one I would retest) so I subtract 8 from recipes. Make sense? That accounts for altitude AND thermometer differences. And it’s way easier math.
I think that’s a safe bet if you know the recipe has been tested at sea level for sure (usually it isn’t stated and I’m not sure, so I like to be extra safe, haha)
I LOVE caramel and I LOVE your recipes! I can’t wait to try these but I only nonstick pans… Is that a deal-breaker?
No, not a deal breaker, but make sure they are safe for candy making (some nonstick pans can have the coating flake off during candy/caramel making)
These really are the best! I made these last year and gave them out as neighbors gifts and everyone raved about them so I’m doing it again this year! I went through two candy thermometers doing it, but it was worth it! I’m going the Thermopop route this year. I made them with vanilla beans and then sprinkled sea salt on top before cutting them. I thought they looked so pretty with the vanilla beans–I’m curious why you started to use extract instead.
Hey Emily, I mostly started using vanilla extract because I have tons of homemade extract that I made back when vanilla beans weren’t so expensive and I use that (right now the cost of vanilla beans is so pricey!)
I make homemade caramels every year, and I always test them the old fashioned way in cold water because I never trust my thermometer. Now that you told me how to calibrate it, I might use it (and still test in water — high altitude here makes me nervous). But it would be great to be able to trust it. Thank you! Also, I ordered cellophane squares this year after you mentioned it and after years of cutting wax paper, so thanks for that tip as well!
I think that’s a good skill to use (the water test!) – it makes your caramel making pretty much foolproof!
What’s the water method? Inquiring minds want to know
Dropping a bit of the boiling caramel into ice water and judging the texture of the quickly cooled caramel.
I like my recipe much better.
Great! Stick with what you love. 🙂
Mel, I’m adding you to my list of people I don’t know who are teaching me how to be civil and Christlike and that there are some things just not worth getting worked up about. Thanks for the many ways you help my home to be better! ❤️
I’ve made caramels in the past with varied success. Thanks so much for this detailed post! I’m always in the middle and thinking “should it look like this???” “How long should this part take???” I can’t wait to try it again!
You aren’t alone! I ask myself questions like that all the time! I hope this post will be helpful for caramel making!
These look so good! We tried making caramels last year and it did not turn out well, totally want to give it another shot with your recipe!
Good luck if you try it again!
Any tips or warnings for coating these caramels in dark chocolate and sprinkling with sea salt?
The only warning I have is to maybe figure out how to get them out of your house ASAP. I’ve dipped them before in chocolate and they are insanely good.
Can I use this recipe to make caramel sauce?
I think so – but I haven’t tried it. I usually use this recipe:
https://www.melskitchencafe.com/divine-caramel-sauce/
I love making these!! And I finally bought the cellophane wrappers any I’m super excited to wrap a batch up today
It looks like step 8 in the recipe maybe needs to include stirring in the vanilla extract or other flavoring before pouring into the prepared pan.
I’m at 6000 ft above sea level and I cook these to 8 degrees below your recipe temps and they are perfect.
And I have found that if I turn off my gas stove before adding the cream, then I have less crazy bubbling. I get it mostly all stirred in and then turn the heat back on.
Thanks for the tips, Allison! And yes, I left out the vanilla extract – thanks for the heads up. I just edited the recipe. The high elevation tips are super helpful. You are awesome!
These Holly Caramel Wrappers are my favorite. They come in a bunch of different colors as well.
Those are adorable, Courtney! I’m going to order some!
“Pain in the heavy bottom…” I love your humor.
It took away my laugh-crying emojis! I was cracking up!
Haha, I’m glad you get me. 🙂
I love making these caramels! (Instruction #8 needs to include adding the vanilla before putting it into the buttered pan, I think)
And I live at 6000 ft above sea level, so I take 8 degrees off of your temps and they turn out delicious
Ah yes, thank you, Allison! Just edited it. And thanks for the high elevation tip!
Caramels are a Christmas tradition at our house also. I like to add mixed nuts that I purchase raw and toast in the oven. If you add nuts, they need to be warm or the entire batch gets filled with sugar crystals and is ruined. Ah, the things one learns.
My question is about adding the food coloring. Just curious about that. Do you have any photos of colored caramels?
Thanks for the tip on adding nuts, Nancy! Both of these caramel recipes have coloring added (one is cinnamon so they’re red, the other is black licorice)
https://www.melskitchencafe.com/cinnamon-caramels-chocolate-dipped-if-you-dare/
https://www.melskitchencafe.com/licorice-caramels/
Whoa! Those red ones are so cool. Thanks for the photo. I didn’t think you could get such a vivid color and SO festive!
What size”heavy bottom” pan did you use?
I use a 4-quart for a regular batch (pictured in this post). If I’m doubling, I use an 8-quart pot.
I do make caramels like it’s my job, so I have to purchase wrappers about every three years. 🙂 But I so appreciate you linking those wrappers from Amazon a few years ago, changed my candy-making life!
Haha, you are a rock star, Sharee! It’s my goal in life to also make caramels like it’s my job. 🙂
Hey! I love this recipe! I made it last year for neighbors and I am making it again this year. I was thinking of trying it with some added cinnamon spice or pumpkin spice…??Any suggestions on the amount to try? I was toying with a tablespoon for the double batch? Also…I know you love the clear wrappers but if you are ever in a caramel emergency and are shockingly cellophane wrapperless.. I found 6×6 waxed tissue papers at cash and carry in Nampa. They work great and have a fun old school caramels look to them.
Love that tip on the wax paper from Cash and Carry! I had no idea! I just made a batch of these as cinnamon caramels last night and used 1 tablespoon of cinnamon oil for a pretty strong flavor. If you are adding dry seasoning (like pumpkin spice), I think I’d do less. I’ve only ever added liquid flavoring.
I’m in. I’ve never made caramels but you’ve convinced me I can do it. My 3 boys and I thank you! Merry Christmas. You are a blessing to this clueless cook.
Thank you so much, Heidi! Good luck with the caramels – you CAN do it! If you have any questions, let me know!
Would it work to use dark Karo syrup instead of light corn syrup?
I haven’t tried, but I think you could.
I have used dark Karo syrup, it works just fine. It makes the sugar mixture look dark already, before it has cooked, so you have to go purely off temp on step 5. I prefer the taste of light a little better
Thanks for chiming in, Allison!
I get my caramel wrappers at Orson Gygi in Salt Lake City. You can also order them online. $13.99 for 1000 cellophane wrappers.
https://www.gygi.com/Cellophane-Caramel-Candy-Wrappers
Thanks, Tiffany! I’ve bought them there once or twice but the shipping always ended up being super expensive. I’ll take a look again!
Amazon has pre cut wax paper for candy………and Ive seen it on Hobby Lobby site….
Oh cool! I’ll have to look for it.
I make two batches of caramels every Christmas! They are a favorite by everyone. My recipe is slightly different but your post was very informative and helpful. Amazon does carry wax paper squares, I’ve been using them for about five years …..I love that I don’t have to cut them any longer! My other trick is that instead of buttering the pan really well and crossing my fingers that I buttered it enough I use non stick foil and lightly butter that and it works like a charm every time. You just lift the foil out and peel it off and get to cutting. I am definitely going to purchase a new thermometer- great idea. Happy caramel making everyone!! I hope my comment didn’t post twice and if it did pleas delete one of them!!
Great tips! Thank you so much, Kim!
https://smile.amazon.com/ToppKitchen-Silicone-Cooking-Thermometer-Chocolate/dp/B01GE2WZJ6/ref=sr_1_1?keywords=silicone+spoon+with+thermometer&qid=1576219136&sr=8-1
I can’t wait to try these, you make it sound doable! Have you ever tried one of the above? It’s a silicone spatula with a built in thermometer. I discovered it during a cheese making class. Merry Christmas!
I haven’t tried that spatula/thermometer combo – thanks for the recommendation, Stacey!
These look wonderful. I may have missed it but wondering what altitude are your temperatures based on?
The temperatures aren’t based on my altitude – they are just basic to the recipe but you can adjust the temperatures based on high altitude if needed.
If this recipe works perfectly at your altitude, then it has been adjusted to your altitude. In your section about checking the thermometer for accuracy, you are not adjusting for altitude at all, even though you provide a chart to give the boiling point of water at different altitudes. You can adjust for altitude and for thermometer accuracy, as well as variations caused by weather, by checking the boiling point of water as you described. However, your description of how to adjust the recipe is not accurate. In your example where water boils at 203 on the thermometer and the chart says it should boil at 206, you should NOT subtract just 3 degrees from the recipe temperature. The chart temperature is irrelevant—you only care what water boils at in your kitchen using your thermometer. If your thermometer shows 203 degrees for boiling water, then you should subtract 9 degrees from the recipe’s temperature, because that is the difference between the boiling point of water at sea level (212) and the boiling point of water in your kitchen with your thermometer (203).
BUT, and this is very important, this only works if the recipe is written for sea level. If the recipe is written for another elevation then adjusting becomes complicated. It actually would be useful information if you told us the boiling point of water at your altitude. If it is anything other than 212 degrees, then the recipe needs to be adjusted differently. I would probably adjust the recipe back to sea level by adding the number of degrees between 212 and your (Mel’s) altitude, and then adjust for my altitude by following the above process.
Candy can be tricky and it is very dependent on cooking temperature. The boiling point of water where I live is generally around 8 degrees less, or 204. If I were to bring candy to the temperature that works at sea level, it would be ruined. Checking your thermometer is the best way to ensure accuracy–much better than looking at a chart or taking a guess at the adjustment. Plus, inaccuracies in thermometers don’t matter as long as the thermometer is consistently inaccurate.
Water boils at 207 degrees where I live. 🙂