Perfect Homemade Caramel Apples {Tons of Tricks + Best Caramel to Use}
In this tutorial for perfect homemade caramel apples, I’m sharing ALL my secrets and tips with you. Everything from how to avoid bubbles to the best caramel to use. All your frequently asked questions answered!
Caramel apples are hands down, without a doubt one of my favorite treats to make. They are stunning to look at and crazy delicious to eat. Also? They aren’t that hard to make, believe it or not.
The key to a perfect caramel apple – decked out in gourmet flavor combinations and decorations – is following a couple non-negotiable tips that will ensure tried-and-true success.
I’m sharing all of those tips with you today! After almost a decade of making gourmet, homemade caramel apples, I have the process pretty much down to a science. #nerdalert
We’re going to talk about: what type of apples to use, how to avoid pesky bubbles in the caramel, the best caramel to use (homemade or store bought), how to perfectly prep the apples for optimal dipping, the best way to add toppings/decorations, and lots more.
I make dozens of these caramel apples every year for holiday gift giving and several times throughout the year for teacher gifts, take-in meals, special occasions, and sometimes just because life demands a homemade caramel apple.
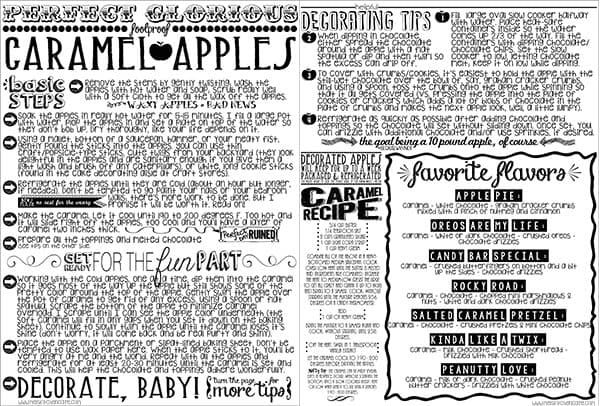
Five years ago, almost to the day, I posted a super quick post about gourmet caramel apples. But I didn’t include any tutorials, process shots, or in-depth tips. Today I’m making up for that. What I did include in that post was a cute little printable you can use as a hard copy how-to guide as well as some fun flavor combinations. I still use this same printout (and hand it out when I do occasional classes on how to make caramel apples). You can view a pdf version here.
Let’s get started! First up…
What type of apples to use for caramel apples.
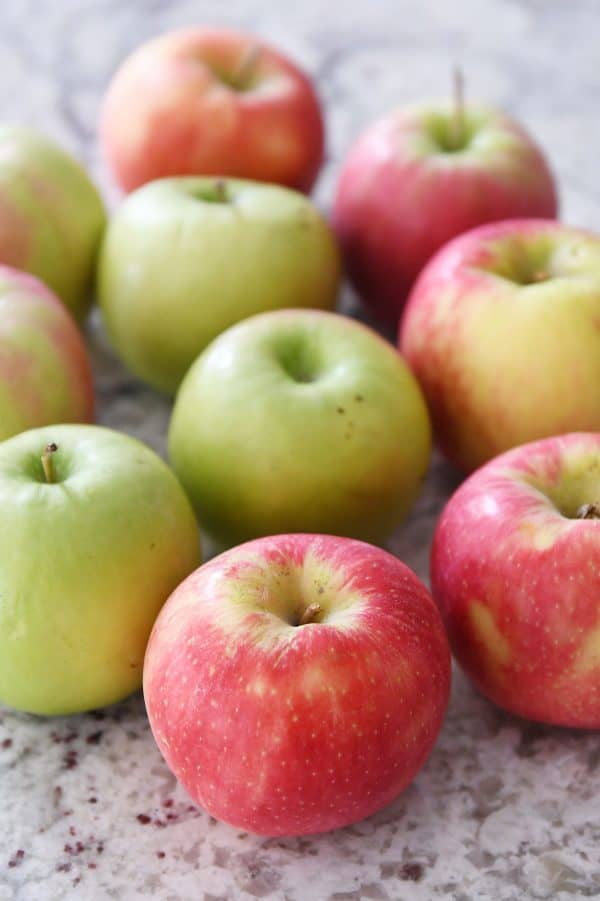
The only two types of apples I use are Granny Smith and Honey Crisp. But really it boils down to personal preference.
I prefer an apple that has a sweet/tart flavor to contrast with the sweet caramel and other toppings. Granny Smith are my top favorites. Their zingy, tart flavor are perfect for caramel apples.
You can use any size of apples, but try to pick apples that sit flat so the stem divot is facing straight up. It’s not a deal breaker if they are a little wonky – I’ll tell you how to deal with that down below, but if you are hand picking apples, keep an eye on that.
How to clean the apples for homemade caramel apples.
Of anything I painstakingly type out in this post, this area right here is probably the most important. I can’t understate how critical it is to wash and clean the apples thoroughly. Like, as thoroughly as you have ever cleaned anything in your life. (If you haven’t cleaned anything in your life, now’s the time to dig deep for some cleaning superpowers.)
The idea is to remove every single bit of wax on the apples. If not, the caramel won’t stick to the apples and it increases the chance of those annoying bubbles that pop up in the caramel after dipping.
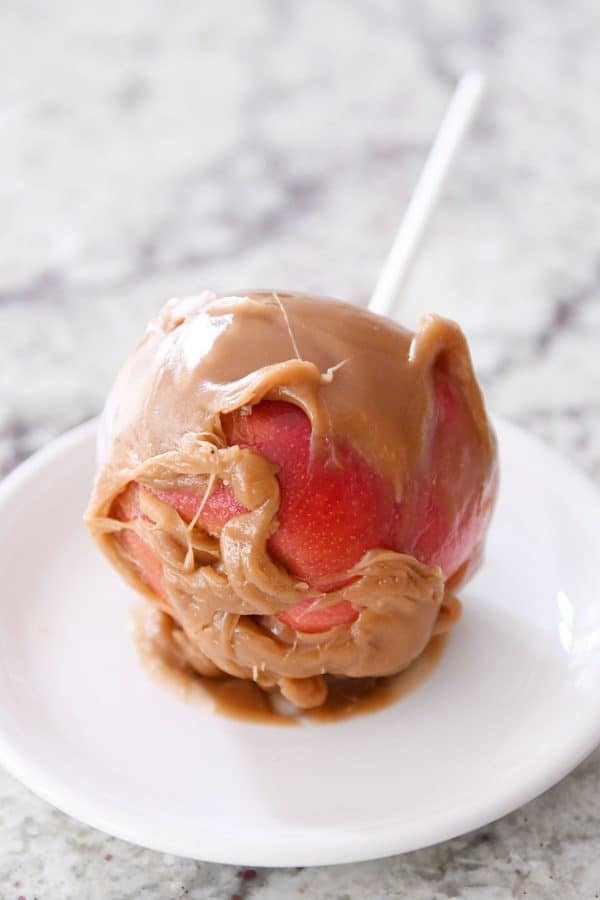
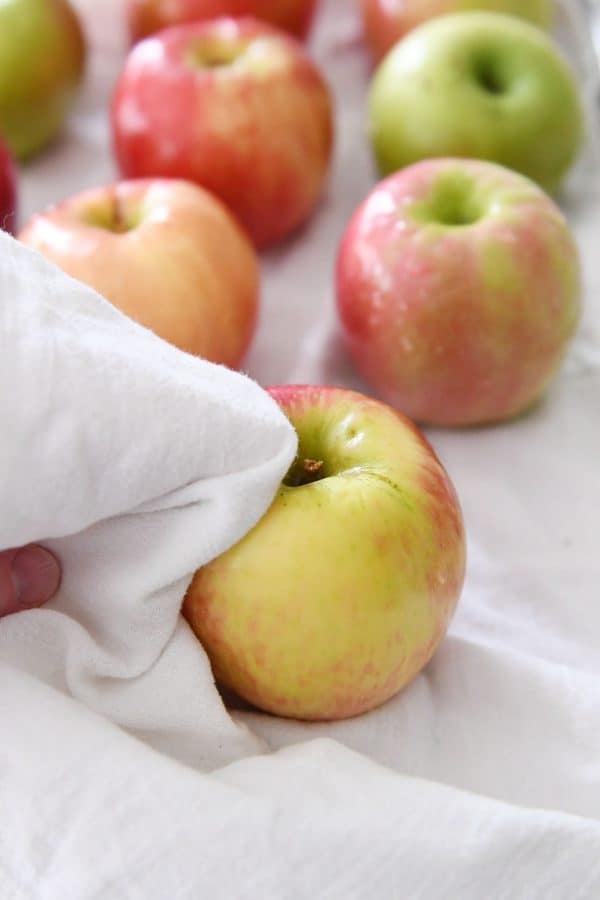
You really don’t want your apples looking like this, do you? Cleaning the apples is the first step to avoiding Total Caramel Apple Disappointment And Dare I Say Failure.
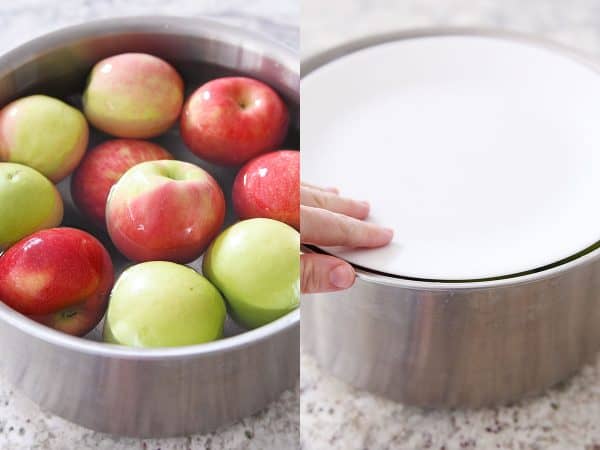
First step: remove the stems and soak the apples in hot, hot water + a little vinegar or lemon juice. I don’t like to use boiling water because it discolors the apples and makes the texture on the surface slightly softer. The reason for soaking is to remove the wax and help release some of the gassiness from the apples. (Spoiler alert: if my kids read this during 3rd period when their nice language arts teacher lets them look at my blog, they will giggle out loud.)
Fill up a large pot with hot tap water, add a couple tablespoons vinegar or lemon juice and add the apples. Swish them around in the water and let them hang out like that for a few minutes. If the water is too hot, it can cook/soften the apples, so just give the apples a good/quick soak and then scrub them (in step #2 below).
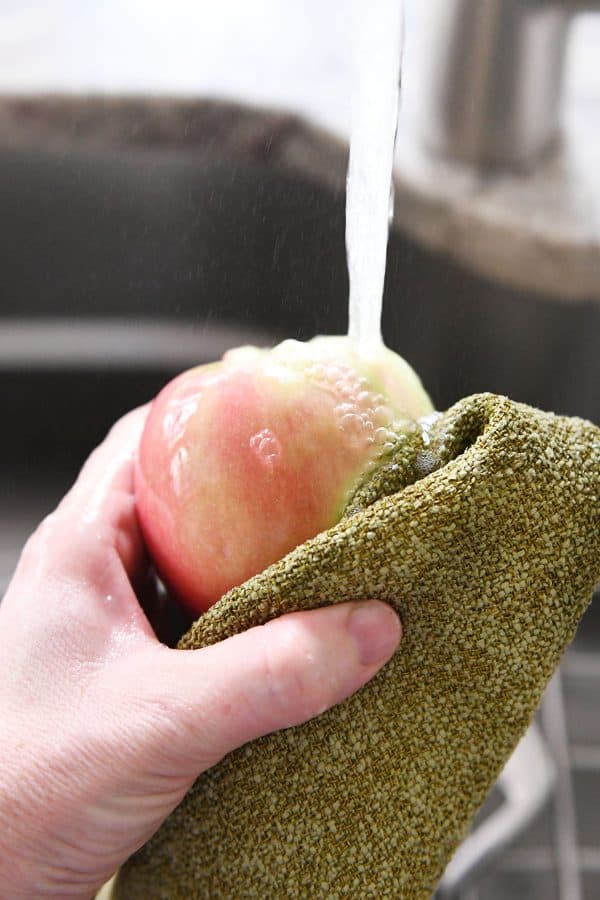
Second step: after the apples have soaked in the hot water, drain the water and prepare to scrub the living daylights out of the apples. This scrub will help eliminate the softened wax (from soaking in the hot water).
I use either an organic-type fruit wash or just some every day dish soap. I have a cloth (pretty sure it’s a Norwex one) that is scrubby-wubby on one side and I like to use that. A sponge or rag will work – it just helps if it has a slight amount of abrasiveness to the texture without being so aggressively spiky that it takes off the peel while scrubbing. As in, maybe leave the steel wool in the cupboard for this project.
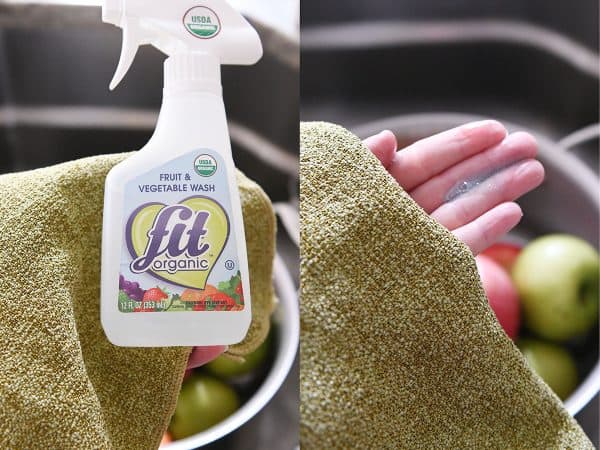
Spray the fruit wash or rub a small amount of soap around the apple and scrub/wash under hot water. Go around and around the apple until it is really well cleaned.
Third step: dry those apples like your life depends on it.
Any moisture, even the tiniest bit, will mean death to your homemade caramel apple. The caramel will slide off and it will cause a lot of angst and sadness. Dry, dry, dry.
What kind of sticks to use for caramel apples.
I have used many different types of skewers and sticks for caramel apples. Everything from a real, live stick from our yard (you can see it in action on this post – cute, but a little hard to work with) to lollipop sticks.
The ones I use most are 6-inch white lollipop sticks. I usually pick them up at Hobby Lobby or Amazon {aff. link}.
You can also use craft/popsicle-type sticks (these are my least favorite sticks to use) or wooden skewers {aff. links}.
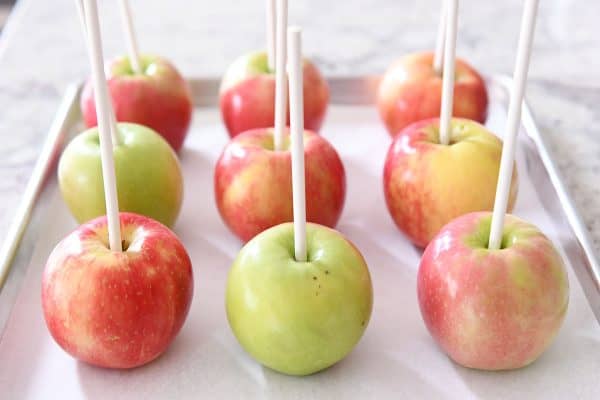
How to pound in sticks for the caramel apples.
This really isn’t rocket science. Just nestle the stick into the little divot where the stem is (make sure to remove the stem – if it doesn’t come out all the way, don’t stress, just press it to the side while you pound in the stick) and pound lightly with a hammer or meat mallet.
You’re just guesstimating here, but you don’t want to pound on the stick so much that it pops out the bottom of the apple. Pound lightly until you think it’s about halfway into the apple. Refrigerate the apples until ready to dip in caramel.
If your apple(s) isn’t completely flat and the stem area kind of points off to the side, still pound the stick in as straight as possible. So, the stick will be pointing straight up and down even if the apple is a little wonky like it’s looking off to the side.

What kind of caramel to use for caramel apples.
When making homemade caramel apples, I use either:
-a slightly modified version of this amazing homemade caramel (recipe below) OR
-Peter’s caramel (a store bought brand that comes in a brick so you don’t get carpal tunnel unwrapping a million caramels – also, it doesn’t have an artificial after taste like a lot of other store bought soft caramel brands). Available on Amazon {aff. link} or at stores like Orson Gygi.
Peter’s caramel (and most store bought options) are fairly pricey for the amount you’ll need to make caramel apples. Homemade caramel, although it adds extra steps and time, will be a little cheaper.
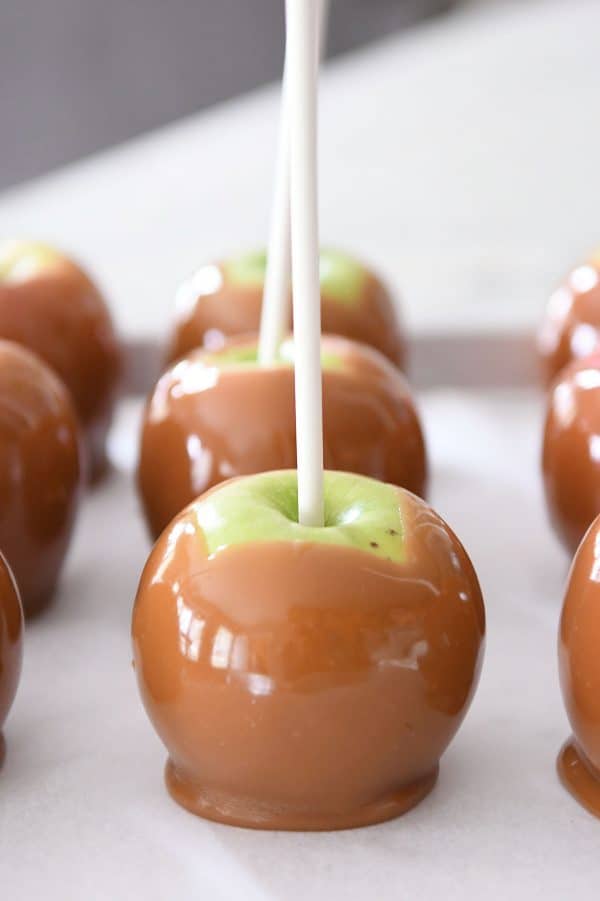
Both of these caramel options produce a glossy, chewy caramel that is as beautiful to look at as it is to eat. The caramel in these step-by-step pictures is the easier-than-you-think homemade vanilla caramel recipe.
How much caramel do I need for homemade caramel apples?
One batch of homemade caramel like the one I linked above (that yields a 9X9-inch pan of caramels) will make about 12-14 medium-sized caramel apples.
A 5-pound loaf of Peter’s caramel will make about 20-24 medium-sized caramel apples.
The exact number will depend on the size of the apples and how thickly they are coated with caramel.
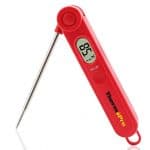
What temperature should the caramel be at for caramel apples?
The temperature of the caramel is really important. Whether you’re using homemade or store bought caramel, the temperature of the caramel should be about 180 to 190 degrees F for dipping the apples. Much warmer and the caramel might slide off or form a thin layer instead of a nice, substantial caramel layer. If the caramel is too cool, it will be really difficult to dip the apples at all, the sticks might break, and you will probably end up with big blobby super thick splotches of caramel all over the apple instead of a beautiful even layer.
I’ve scraped the warmed caramel into a slow cooker before to keep warm while dipping, but usually the extra step (and extra dish to wash) means I just keep the caramel in the pan I cooked it in, and when it starts to cool off too much, I warm it on the stove for a minute or two and keep dipping.
How to dip the apples in caramel.
This may seem pretty straightforward, but it is another area of making homemade caramel apples where how you dip can make a difference in the outcome. Mostly, again, for those bubbles that sometimes appear on the surface of the caramel after the apples are dipped.
Can you tell those bubbles drive me completely nuts-o? I’ve mentioned them at least 50 times in this post already, because they seriously make me crazy. I’ve almost thrown caramel apples across my kitchen all because of the blasted bubbles. (Don’t worry, I refrained – mostly so my kids didn’t think throwing apples was acceptable behavior.)
A couple tips to avoid bubbles while dipping:
1) don’t stir the caramel vigorously as it cools (or if you’re warming up store bought caramel). Stirring and/or whisking quickly will introduce air into the caramel and that air forms bubbles as you dip.
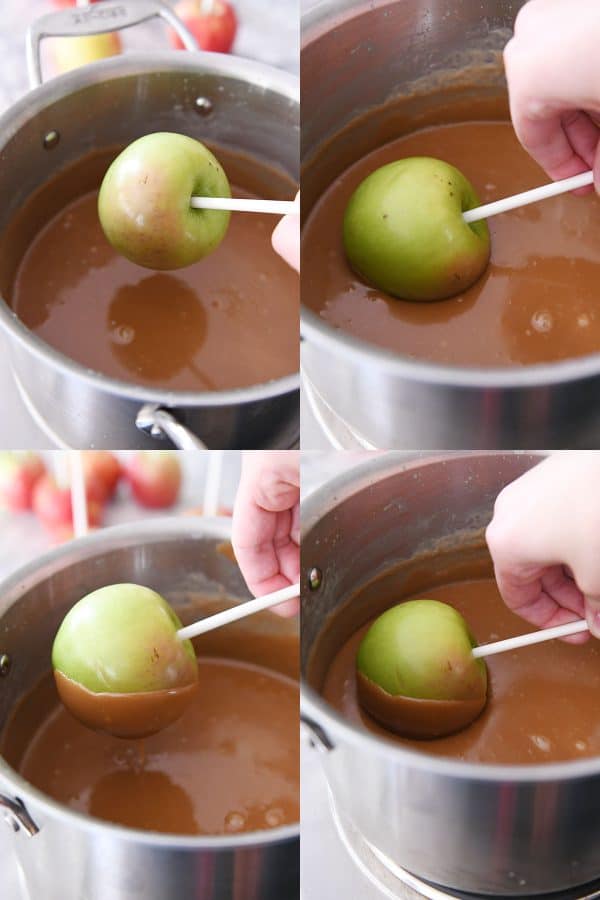
You can see in the picture below there are some bubbles on the surface of my caramel – you want to avoid those if possible. But don’t panic if they are there, I’ll tell you how to avoid them. If the caramel rests for a while (you’ll want to keep it warm), those bubbles will go away. Also, store bought caramel, in my experience doesn’t produce as many bubbles as homemade caramel since homemade caramel is usually getting a pretty good stirring workout while cooking.
2) instead of swirling the apple in the caramel to coat it, I prefer dipping one side of the apple in the caramel and very slowly lifting it completely out of the caramel before doing a quarter turn and dipping it back in. And then continuing this process around the whole apple. You’ll notice when you do this, if there are bubbles in the caramel, that slow process of lifting the apple out of the caramel will gently pop those air bubbles.
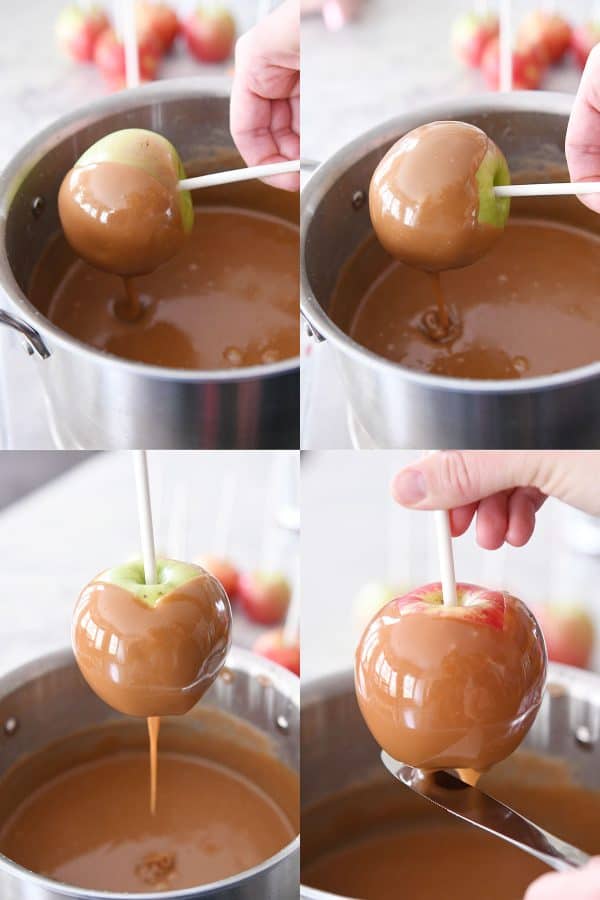
Let any excess caramel drip off the apple and then use a knife or other flat-edge kitchen implement and scrape off any long tails of extra caramel back into the pot.
You don’t want a lot of excess caramel on the bottom of the apple or else it will pool and create a lip around the bottom of the apple as it cools and sets. It’s hard to avoid a lip completely, we just want to minimize it.
Parchment paper vs wax paper
While dipping the apples in caramel, I keep a sheet pan in the refrigerator. I immediately place each caramel-dipped apple on the refrigerated sheet pan after dipping. I line the sheet pan with parchment paper. This is really, really important. Do NOT use wax paper or cooking spray or paper towels or anything else. You’ll end up with caramel apples that stick like crazy to whatever you put down that wasn’t parchment paper and you’ll curse the day you ever decided to make them.
Parchment paper only. Got it? (No need to grease it.)
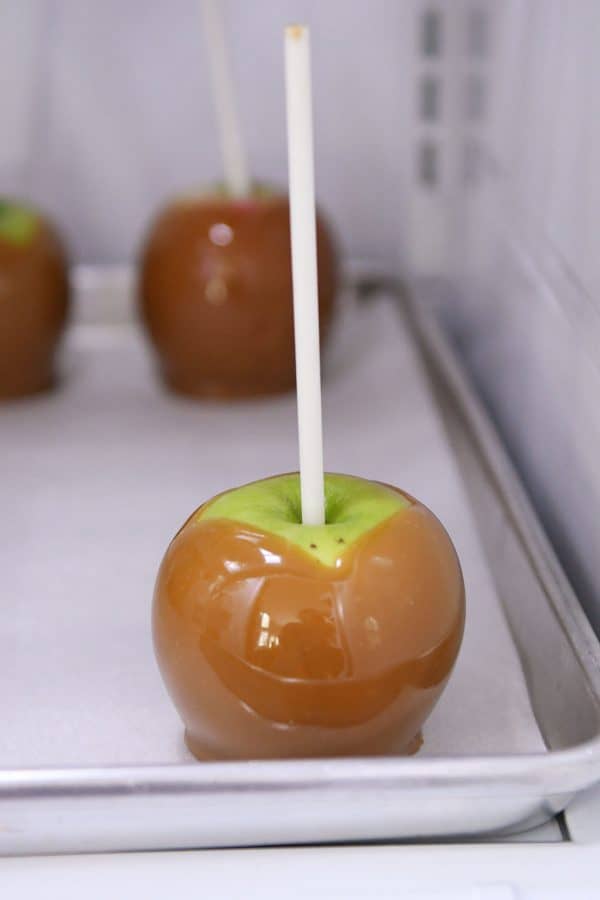
When all the caramel apples are dipped, make sure they have time to cool completely in the refrigerator before decorating (if the caramel apples are refrigerated longer than 20-30 minutes they may get little beads of perspiration that develop on the surface of the caramel).
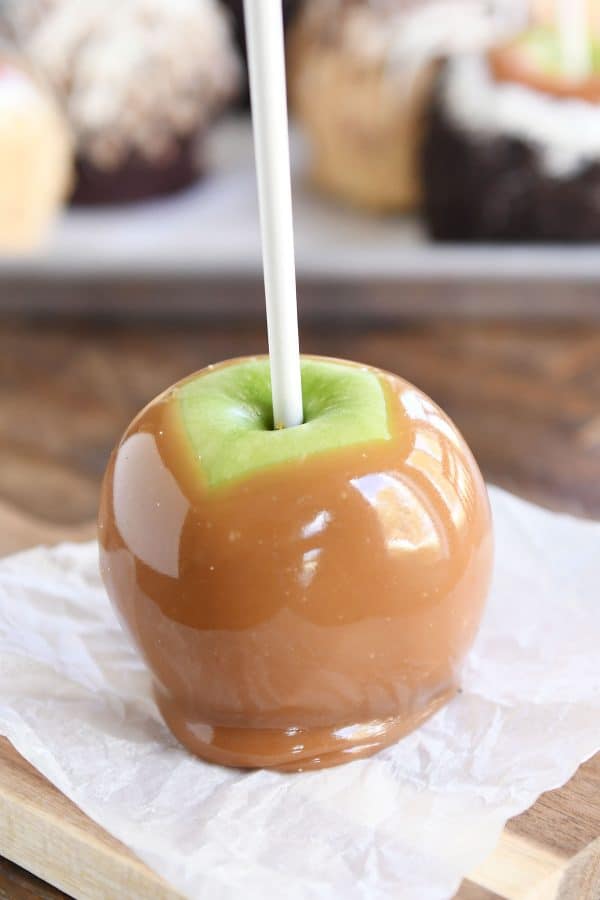
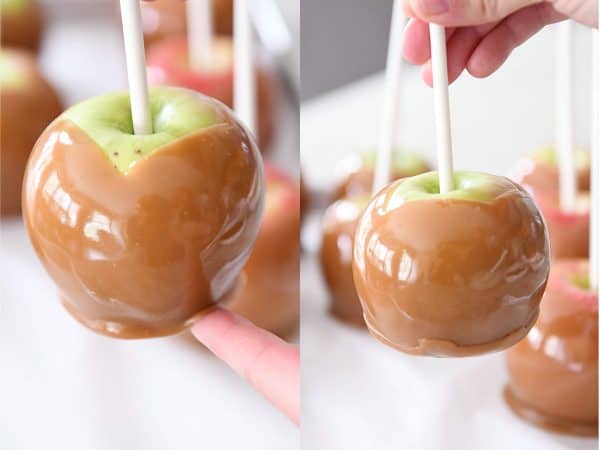
I mean, technically at this point you could just eat them/give them away as is. A caramel apple in its purest form. But if you want to go all out for an over-the-top, gourmet caramel apple finished product, keep reading.
If the little caramel apple lip on the bottom of the apple bothers you (it bothers me), you can gently press it up all the way around the apple like so.
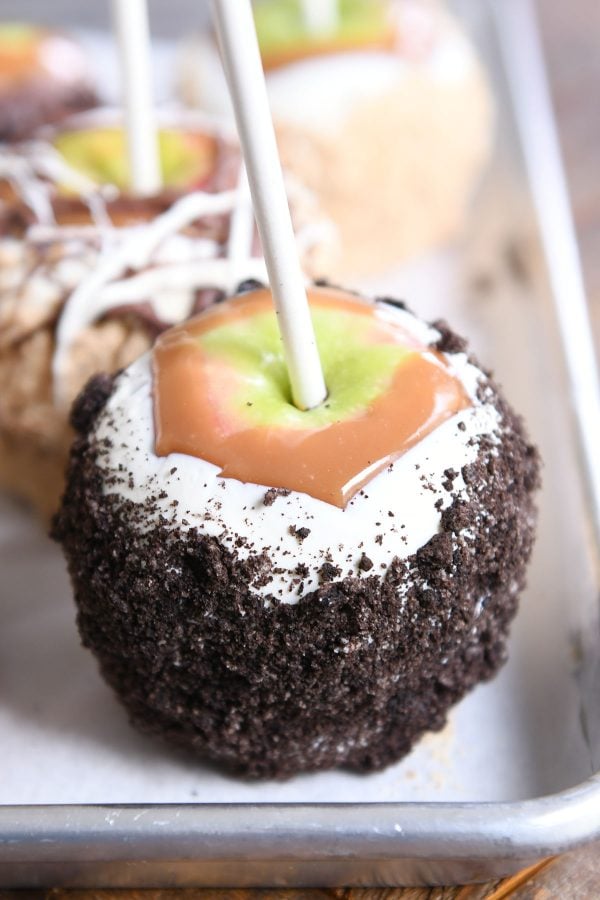
The best flavor combinations for caramel apples.
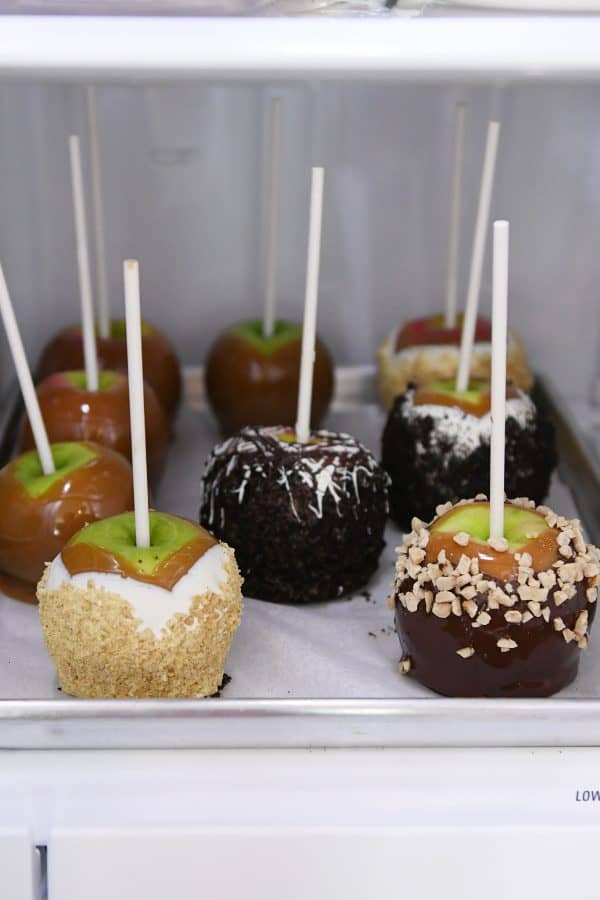
Now comes the fun part. The world is your oyster when it comes to potential sweet flavor combinations for the caramel apples. Here are a few of my favorites:
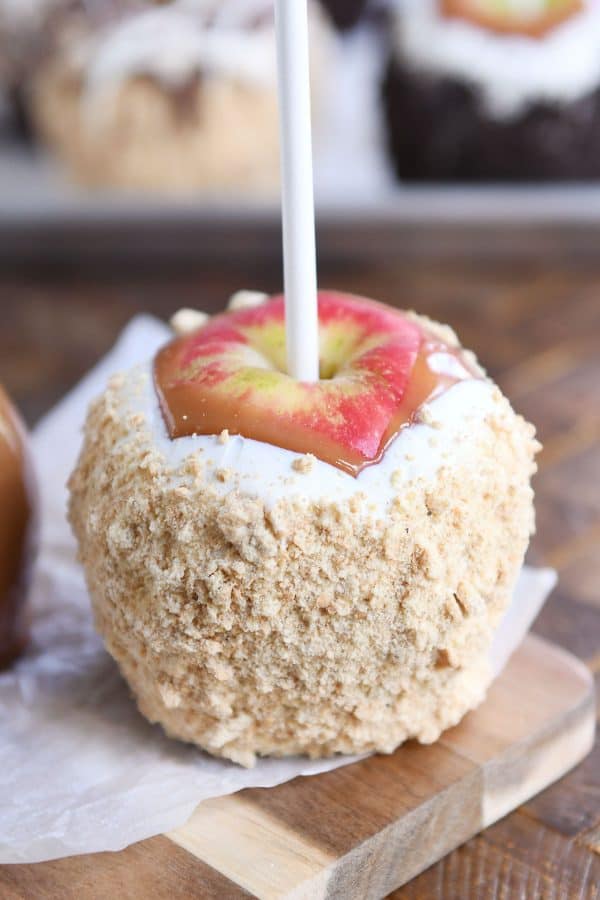
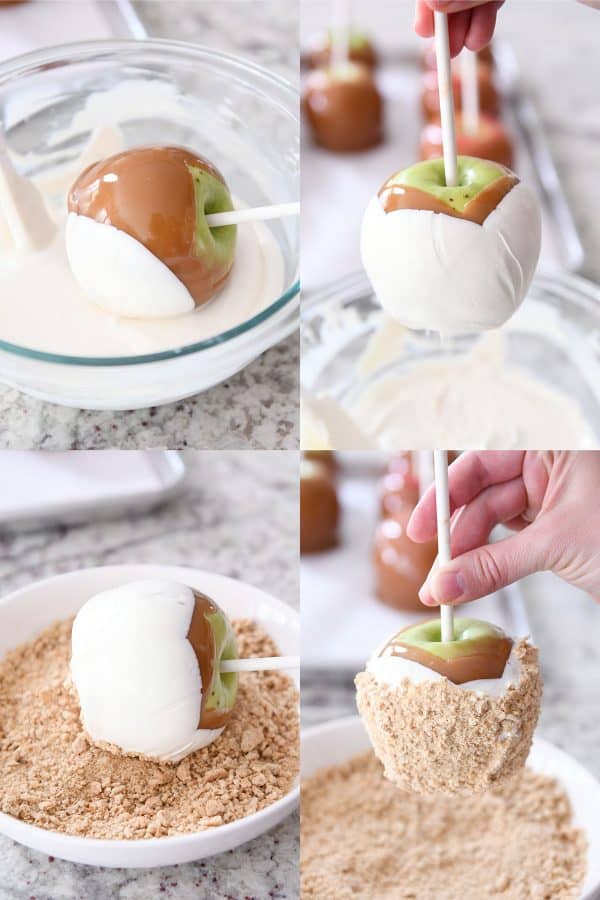
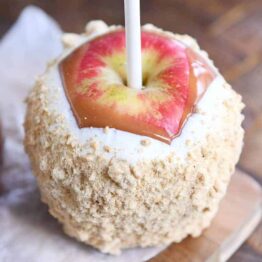
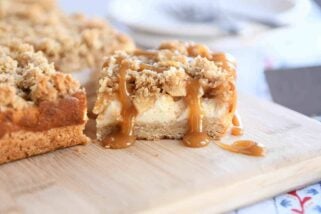
- Apple Pie: caramel + white chocolate + graham crackers crumbs (mixed with a hint of nutmeg and cinnamon) – this is actually my all-time favorite caramel apple flavor profile which is shocking since I’m not a white chocolate fan in general; people go CRAZY for this one all the time
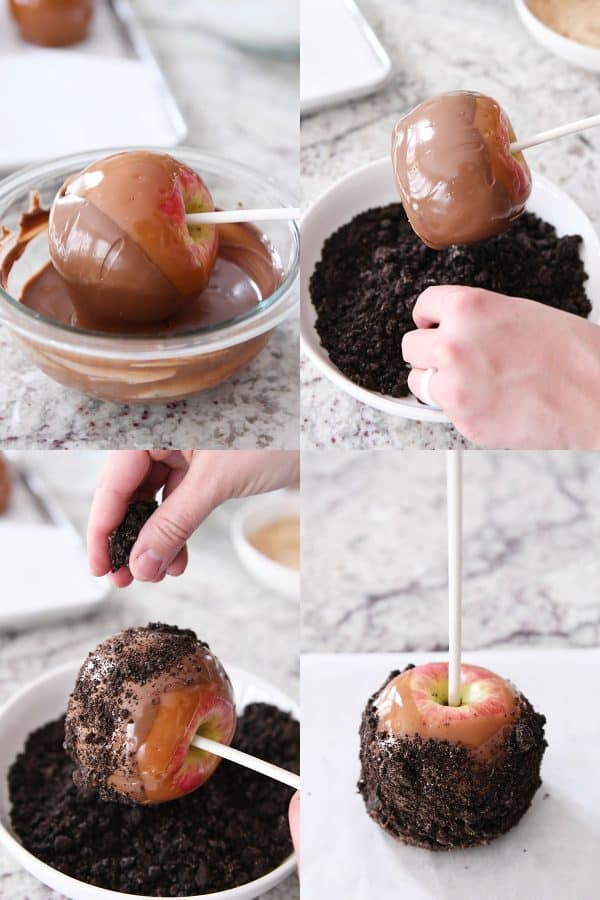
- Oreo Explosion: caramel + white or semisweet or milk chocolate + crushed Oreos (so many Oreo flavor options!) + chocolate drizzles (optional)
- Butterfinger Special: caramel + white or semisweet or milk chocolate + crushed Butterfingers + chocolate drizzles (optional)
- Salted Caramel Pretzel: caramel + white or semisweet or milk chocolate + crushed pretzels + mini chocolate chips or toffee bits + chocolate drizzles (optional)
- Kinda Like a Twix: caramel + semisweet or milk chocolate + crushed shortbread cookies + chocolate drizzles (optional)
A few ingredients that just don’t work well (because they are too heavy and fall off): M&Ms, regular or jumbo chocolate chips, large pieces of nuts.
How to decorate caramel apples.
First of all, make sure the chocolate or candy coating you are using is warm but not hot – and also not so cooled off that it is glumpy and clumpy.
I use the same method that I do when dipping the apples in caramel. I dip one side of the apple in chocolate, lift it out a bit, and rotate a quarter turn and dip again. I do this all the way around the apple. I feel like this gives my precious caramel apples just the right amount of chocolate coating without overpowering the caramel. Swiping the apple around and around through the chocolate produces a too-thick layer, in my opinion.
There are two ways to add toppings to the apples.
1) once the caramel apples are dipped in the wet chocolate and before it sets (candy coating will set much faster than real chocolate), gently press the sides of the coated caramel apple in the toppings of choice. Crumbly toppings will adhere better using this method than chunky toppings (like mini chocolate chips, toffee bits, etc)…and you’ll get less chocolate clinging to the remaining toppings in the bowl.
2) the second method is to dip the caramel apple in chocolate and then holding the dipped apple over the bowl of toppings, grab some of the cookies or whatever and sprinkle them over the apple. I like to sprinkle a thin layer all around the apple and then go back over with a second layer of toppings and this time gently press them into the chocolate.
No matter which method I use, I always gently press the bottom of the dipped caramel + chocolate apple in the toppings so the apple “rests” on a crunchy, crumbly toppings rather than just chocolate. This helps it not stick to the bag when packaging it up later.
If you find that the toppings are sliding off the chocolate, you can:
-make sure the chocolate layer isn’t too thick
-let the chocolate set just slightly before adding the toppings
-hold the apple upside down (by the stick) until the toppings start sliding too far that direction and then turn the apple right side up again for a few seconds – and continue this process (gently) until the chocolate and toppings set (this sounds strange, but the back and forth it just keeps the toppings from sliding all the way down to the bottom of the apple)
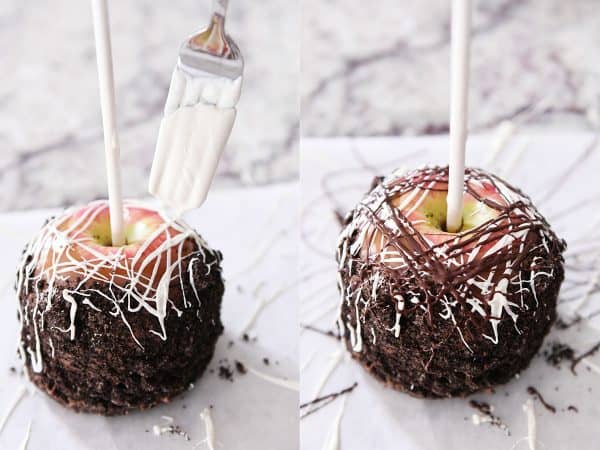
To drizzle or not to drizzle.
My sister just lately informed me she far prefers a homemade caramel apple undrizzled. After doing a little bit of soul searching about “who are you anyway, and can we still be friends, er, sisters?” I conceded that the drizzles on top may be a distraction to some.
I like them. I think they are fun and eclectic and haphazard and lovely. And they are also really good at covering up any imperfections in the decorated caramel apples. BUT, they are totally optional. I think whether or not someone chooses the drizzle says a lot about them, but what it says exactly, I don’t know. 🙂
I go the easy route and dip a fork in the melted chocolate and swish over the top of the apple. It’s a little messy but far more my style than getting out a bag and snipping a corner.
Just as before, I keep that handy sheet pan WITH PARCHMENT PAPER ONLY in the refrigerator and pop the decorated, dipped, and drizzled apples straight back into the refrigerator to set up. I keep the apples refrigerated until I package them up.
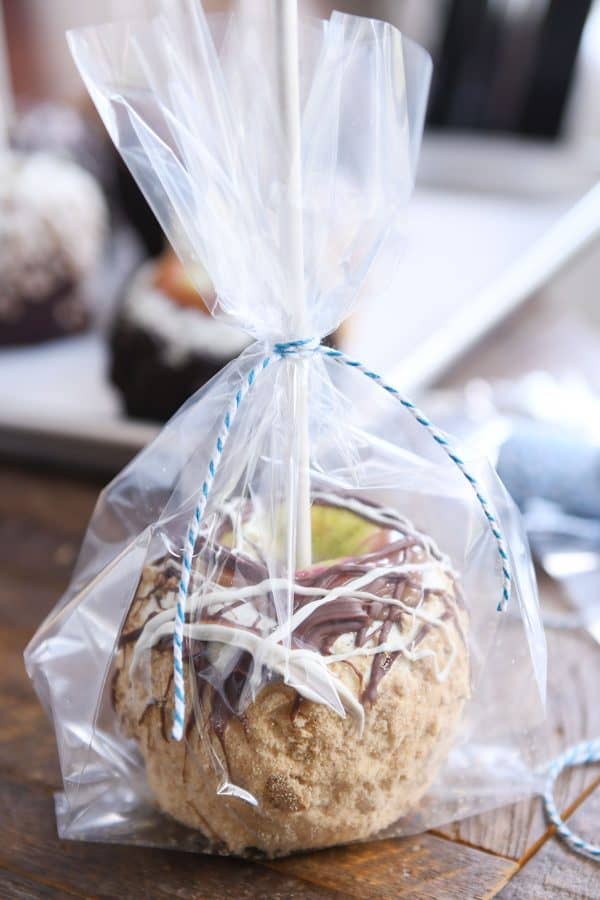
How to package a caramel apple.
Once the perfect homemade caramel apples are set up, I pop each of them in a cellophane bag – about 10X4-inches or slightly bigger and tie a bit of colored twine around the bag and stick.
So easy! And pretty darn cute. I think there are such things as caramel apple boxes. I’m sure they make a stunning presentation, but these bags are super cheap and do the job quite well.
How far in advance can I make homemade caramel apples?
The caramel apples can be made, decorated, and packaged 3-4 days in advance. I think they are best eaten within 1-2 days of making, but I’ve given them away up to a week later. After a couple of days the caramel will soften and get a bit “wetter” as it sits next to the skin of the apple – you only notice this when you cut into the apple. It’s not a huge deal, but there might be a very thin liquidy layer between the caramel and apple after several days.
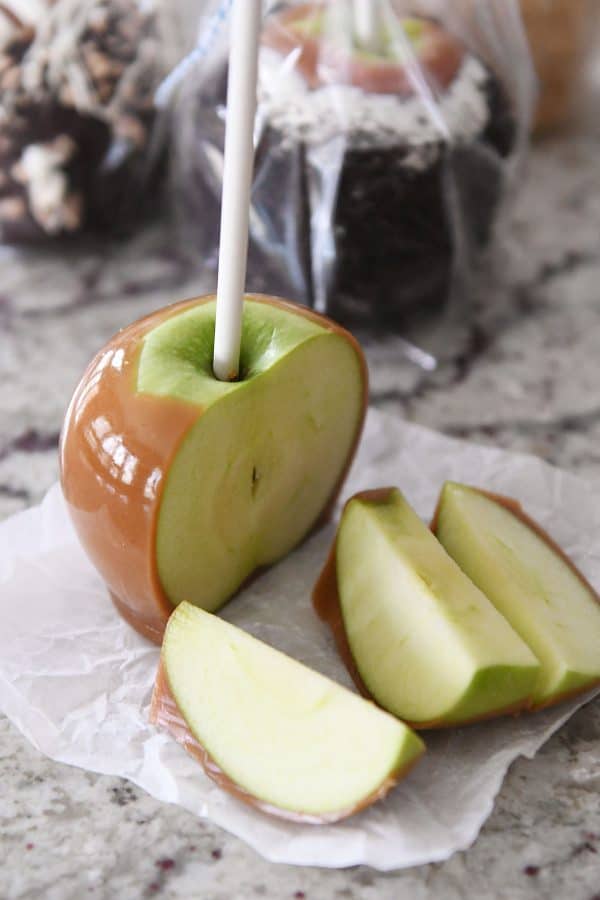
How to cut and serve a caramel apple.
It’s actually quite simple. But one thing to remember is that if the caramel apple has been refrigerated, it’s best to let it sit at room temperature for 10-15 minutes before cutting. Not only will you be able to practice better knife safety (as in, not having to pull out the chainsaw to get through the cold caramel) but your teeth will thank you later, too.
I just cut slabs off the apple around the core – four in total. And then I cut each of those slabs into smaller slices. That’s it!
Wow. This may officially be the longest post I’ve ever written, but I have no regrets. I love making (and eating) homemade caramel apples so, so much, and I want everyone to fall in love with making them, too!
I mean, talk about rock star status! These perfect homemade caramel apples are incredible…and even though the tutorial was long and in-depth, they aren’t difficult at all, I promise!
Make sure to throw away the idea of perfection and just have fun with it! If you have any additional questions, please leave them in the comments and I’ll get answer as best as I can (and send you to google if I can’t). 🙂
One Year Ago: Perfect Small Batch Cinnamon Rolls
Two Years Ago: Easy Homemade French Bread
Three Years Ago: Harvest Pasta Sauce {Trader Joe’s Copycat}
Four Years Ago: Peanut Butter Cup Cheesecake with Chocolate Cookie Crust
Five Years Ago: Easy Homemade Egg Noodles {Step-by-Step Pictures Include Food Processor Method or By Hand}
Six Years Ago: Black Bean and Butternut Enchilada Skillet
Seven Years Ago: Peanut Butter Oatmeal Chocolate Chip Cookies
Eight Years Ago: Pumpkin Cookies with Caramel Frosting
Homemade Caramel Apples
Ingredients
- 1 recipe homemade caramel OR 2 to 3 pounds store bought caramel (see note)
- 12-14 medium apples, I prefer Granny Smith or Honey Crisp
- 12-14 (6-inch) lollipop sticks or wooden sticks
- White, milk, or semisweet chocolate or candy coating for dipping
- Crushed Oreos, graham cracker crumbs, toffee bits, chopped candy bars, etc for decorating
Instructions
- Remove stems from the apples. Soak the apples in hot tap water (can add 1 tablespoon lemon juice or vinegar) for 1-2 minutes (if the water is too hot, the apples can cook/soften, so just give them a good, quick soak).
- Scrub the apples very thoroughly with soap (or a fruit wash) and hot water to completely remove the wax from the apples. This step is extremely important! Dry the apples completely. Again, this is an important step so the caramel will stick to the apples.
- Press a stick into the top of the apple and using a meat mallet or hammer, lightly pound in the stick until it’s about halfway into the apple.
- Make homemade caramel (per the recipe linked in the notes or using your favorite homemade caramel recipe) and let cool to 180-190 degrees F (or warm up store bought caramel to the same temperature). Make sure not to stir the caramel vigorously – it will create air bubbles and those bubbles can pop on the surface of the caramel apples.
- Dip one side of the apple in the caramel and slowly lift all the way out of the caramel (this helps any air bubbles pop as the apple is gently lifted out). Give the apple a quarter turn and dip back into the caramel. Repeat this process until the apple is coated all the way around (I like to leave a small open spot at the top so you can see the color of the apple).
- Use the flat edge of a knife to scrape off any excess caramel on the bottom of the apple. Place the apple on a parchment-lined baking sheet and refrigerate until the caramel is set and completely cooled. Repeat with the rest of the apples and caramel.
- To decorate, dip the sides of the caramel apples in melted chocolate and sprinkle with toppings of choice (lots of options in the post). Refrigerate until set. Package in cellophane bags tied with twine.
Notes
Recommended Products

Recipe Source: Mel’s Kitchen Cafe

These caramel apples look absolutely delicious! I can’t wait to try making them at home, especially with the tips you shared. Thanks for the detailed instructions! 🍏🍬
I put some 12 beautiful sweet and tart Washington apples in the (very hot water) for eight min took them out and cleaned them as told, and then put them into a cold fridge and now they are mush< cant use them and now Im making apple pie!! The water cannot be that hot< maybe tepid water would be perfect, needless to say you might want to re-post on how hot that water should be because if it's happened to me it's happened to others.
I’m so sorry that happened, John. A lot really depends on the variety of apple and the water temp. Some apples can withstand the heat better. But I agree that it needs to be revised and restated. I’ve edited that part of the instructions to hopefully help.
I’m planning on making these with my kids later this week. Have you ever made the caramel ahead of time, refrigerated it, and then warmed it up on the day you make the caramel apples? Last time I made caramel it took forever, my kids were impatient, etc. Maybe I could make the caramel all by my blessed lonesome and then heat it up later? Any tips would be great!
Yes, you can definitely do that! The main thing is to make sure not to overcook or overheat the caramel when making it and also when warming it back up!
Just made this for the first time and your directions made it so easy! Thank you for all of the explanations. I appreciate it!
Just curious why the apples need to be refrigerated prior to dipping in the caramel and why they are stored in the fridge after dipping.
Dipping a chilled apple in the caramel helps the caramel to set faster and not slide off. And then chilling them after helps the caramel and chocolate set up.
This recipe is amazing and so easy to follow. THANK YOU!!!! Now everyone thinks I’m a professional caramel apple maker and I am not good at things like this. I’ve made three batches over three weeks. Here are things I found. Practice is important and ultimately there isn’t a right way – just try what you like! I bought apples from an orchard and they weren’t waxy so I didn’t soak them. Maybe I should have, but the caramel seemed to work great. I mixed chocolate and the candy coating rather than each straight. I played with the temps of making caramel of what to go up to prior to adding the cream. It made the caramel taste different but they all worked. Finally, buying official bags is worth it. I couldn’t believe how many people said, “Oh you bought real bags.” It was as though that made them taste better!
I tried looking through others comments so please excuse me if I happened to miss this being asked, but couldn’t you just get organic apples to avoid the wax problem? Sure they cost more but seem worth it to avoid the boiling and hardcore scrubbing… Just curious if you’ve tried. Thanks!
You could definitely try! Organic apples still have the natural wax that apples produce on their own – not sure how much that impacts the caramel.
Hi Mel, I just made these and thought I followed all the directions but the chocolate fell from the caramel. It kind of looks like a wrinkly arm… any idea why that would happen?? Thanks for this amazing post!
Hey Mindy – what brand of chocolate did you use?
Hi! I’m so confused as to how your apples don’t get so soft after sitting in the hot water like that for 8 to 10 minutes??? My water was UNDER boiling and the apple sat in there for only 8 minutes and they are super soft. Why are yours not soft??
Hi Krista, what variety of apples did you use?
I had this same problem letting my apples sit as instructed. I had to buy new apples since I was making for gifts.
You didn’t give any tips for melting the chocolate. I would love to know how much chocolate you generally use for certain number of apples and what you found the best method of melting the chocolate is. I seem to run into issues when I try and do it in the microwave of not getting it to be runny enough.
I don’t have exact measurements, sorry. I always do a variety of flavors and so I haven’t measured exactly how much chocolate to use for a certain number of apples. I always melt on low heat in the microwave – so 1 minute intervals at 50% power, stirring in between until melted.
I was not clear on your modifications for your homemade caramel recipe when making it for caramel apples. You said that you only could get to 240° is that the first time instead of going up to 325 or the second time you keep the caramels up to 245? Yes
For the caramel, I still take the sugar mixture up to 325 but after adding the cream and butter I only cook until 238 or 240 degrees.
Hi, Mel!
I made twelve basic caramel apples about two months ago, and the friends I gave them to said they were great. I’m considering making them again this Saturday, but would like to spice it up with additional toppings.
Do you have the measurements for the apple pie ingredients (white chocolate, Graham crackers, nutmeg, cinnamon)? It sounds delicious, but I’m not one to wing it. Thanks!
Hi Nick, I don’t have exact measurements, unfortunately. A lot depends on how many apples you are making.
This is Emily again adding to the comment I just posted. I just noticed when I took a pan of apples out of the freezer where I’d set them for a couple minutes to get the caramel to harden faster that some of the hardened “caramel” actually appeared to be straight butter — yellow rather than caramel in color, and just buttery, not caramel-y. Could something I did have caused the grease to separate out? I wish I could attach a picture, but in the pan, it looks picture perfect — beautiful caramel color, well incorporated, uniform texture. So odd!
Hi Emily, based on the details, it sounds as though it’s probably an issue with the caramel, not the scrubbed apples (although in answer to your question, yes, I have noticed some apples just will.not.come.clean). If your caramel is separating into buttery droplets, it could be due to a couple different factors: stirring the caramel too quickly while it cooks, a sudden drop or rise in temperature, or just the brand of butter (some brands have more water and I’ve heard that can cause issues with caramel). It’s really hard to know exactly but it could be something related to those things. It is strange that it looks fine in the pan….
Hi Mel! I’ve used your both your caramel recipe AND apple-dipping instructions a number of times over the years with great success, including even some apple-dipping parties, so I’m trying to figure out what I did wrong this time. Basically the caramel will NOT stick, though I cleaned, scrubbed, and dried the apples the same way I always have. I just re-cleaning them all, and still — caramel slides right off. Arg! Have you ever seen that some apples are waxed differently or more heavily? Or, my caramel seems a tiny bit greasier than normal — if I had a smidge too much butter, could that cause it not to stick, even with wax removed? I’m trying to decide if I make a third attempt to clean the apples or just enjoy a huge batch of caramel! Thanks!
We went apple picking today and I made a half batch (#mompoints). They were easy and look amazing. I used a bag of those unwrapped caramel bits, plus the dregs of some wrapped caramels we had lying around (about a lb total), melted in saucepan on low with a splash of cream. Dipped 6 apples. Added about 2 T of crunchy peanut butter to the remaining caramel and reheated gently to combine, dipped 2 more (huge) apples, rolled in crushed peanuts. My kids weren’t sold on the idea of peanut butter caramel ahead of time (thus the regular apples first), but oh man. It’s so, so good. Obvs. not as versatile as plain caramel for additional flavor combinations/ toppings etc., but I highly recommend what I did- make some plain, then peanutify the rest. Now on to apple everything else…
GRACIAS POR TODAS LAS EXPLICACIONES, SERIA POSIBLE, MANDAR LA RECETA DEL CARAMELO
We scrubbed them with a clean magic eraser, it was magic and worked so well and so fast. We did soak them first in the hot water.
Cool!
Don’t make your water too hot or you will cook the outside of the apple – just did that with 20 Granny Smith apples. Sigh. Back to the store tomorrow for more apples.
Sorry to hear that, Jen! I’ll update the post – it sounds like Granny Smith apples might be more sensitive to the heat.
My 16 year old son really wanted to do caramel apples as a group date. It was a labor of love of him helping me prep. We had the apples washed, caramel made, and chocolate made before the three other teens arrived. My chocolate did not like warming my crockpot. I made the mistake of putting the lid on, and water got into the chocolate causing it to gum up and crystallize. I only had one apple not cooperate, and luckily it was the first apple. I realized my son took the apples out too soon from the fridge and the caramel was a touch too hot- caramel didn’t stick and apple discolored. All the other apples turned out perfectly. Four teens were very happy and had a fun time dipping and decorating apples.
Crazy I know, but they didn’t devour them. I had leftovers and took them to a party the next night, where I was oohed and aahed over. I happily said “Thank you, but do you know Marilyn Smith, well let me tell you she has a niece who is just as spectacular. I cannot take credit for these beauties, her niece Mel gets the credit. I am merely good at following a recipe.”
You are a good mom for helping your son do this for a group date!! I love the idea..but man, that’s a bummer that the teens didn’t super love these. Although I’m glad you got rave reviews at your party (and you made me laugh out loud at your comment about my aunt…haha).
Oh they loved them. Just too full to eat all 24 apples. My son may have been a little over ambitious in getting supplies.
Thank you so much for your detailed post and inductions. Last time I made caramel apple the caramel slid off and it was so discouraging. With your tips my apples turned out beautifully! The caramel was delicious too.
I’m so happy to hear this, Heather!
I’ve made lots of caramel apples and I’ve always pressed the toppings into the caramel directly, then topped with drizzles of chocolate. That’s a great way to do it if you don’t want to use up so much chocolate. However, this year I’m going to mix it up and try the Apple pie variety, looks delicious!!
Great idea, Cindy!
Hey Mel! You mentioned in these photos you used your homemade caramel recipe, but slightly modified? I was wondering about how you modified the recipe? Also, can it be doubled or tripled, or would I need to make 1 batch at a time? Thank you!!
Hey Lauren – I included the slight modifications in the notes of the recipe…hope that helps! Yes, you can double the caramel (I’ve never tripled so I’m not sure about that).
I did this yesterday with my boys using leftover Halloween candy chopped up to put on the apples. This is a serious labor of love! I probably won’t do this again, but these tips are fantastic for someone who wants to take the time to do it! I did have one issue – I cooked the outside of my apples when I put them in the hot water!! So upsetting. It only ruined 6 apples, and thankfully I had more. But what a bummer. I will do cooler water next time.
Thanks for the feedback, Rikki! I’m surprised the hot water cooked the outside of the apples – do you mind sharing what type of apples you used (were they thin skinned)? And was the water boiling or just really hot?
I used honeycrisp and they were very typical apples. The water was not boiling – just very hot. I was surprised too! I’m
We had a similar experience with Granny Smith apples—the apples discolored and you could tell they were a little soft under the skin after washing in the hot water. Even with the hot water, we had a really hard time getting the wax off the apples.
I have a question about the caramel recipe. We made the “Perfect Vanilla Bean Caramels” with the adaptation for caramel apples, but I noticed on the handout that the recipe you have there appears to be slightly different. Which one do you use? The syrup mixture for our first batch of caramel got burnt, so we started over and it worked better the second time. I’m usually pretty handy in the kitchen and your recipes are usually spot on, so it surprised me that we had so much trouble with this one.
Hi Penny, I use both recipes interchangeably but more often, I use the perfect vanilla bean caramels (or the adapted version from this post: https://www.melskitchencafe.com/how-to-make-the-best-homemade-caramels-of-your-life/). Sorry you had issues with this.
I have been wanting to try this recipe for a long time! I finally got all of the ingredients but unfortunately the hot water cooked the outside of all of my apples :(. I was super sad to have to throw all of them away. I used Granny Smith apples, the water was hot but not boiling. I left them in the pot for 8 minutes. Ughhh!! So sad, I’ll have to try it again another time.
I LOVE this post!! Thank you for taking the time and effort! Are there brands of white, milk, and/or dark chocolate that you prefer? Thanks!!
Hi Emily, I almost always use Ghirardelli or Guittard brand of chocolate. They are my favorites!
This is BY FAR my most favorite post by you! Hahaha I LOVE all the details and how specific you are! I also love how real and normal you are! I’m thinking of making these as gifts For Christmas this year for families. They are so fun and unique. I am so excited to try it!!
I’m glad you liked the post! It was a labor of love but a SUPER FUN labor of love! Haha.
I recently made your caramel cheesecake stuffed chocolate chip bars. I brought them to work. The entire pan was gone in 90 minutes!!! Everyone loved them. Several asked for the recipe and I forwarded your website. You now have several new people following you. Thanks for all of the delicious recipes.
Thank you so much, Wendy!
Mel, have you ever made caramel apple slices instead of doing the whole apple? Would that even work?
No, but I think you definitely could!
Hi Mel, these look great and remind me of my childhood! There was a lady in our neighborhood that made caramel apples where I grew up, and she always cored them and filled the inside of the apple with caramel too. I’m interested in trying it that way – have you ever considered it?
Oh wow, I’ve never even heard or thought of doing that, but it sounds super fun and interesting!
Okay… You talked me into it. I’ll be making these this week! I’ve been letting my kids make caramel apples with those store bought caramel wraps and well, that just won’t cut it.
Let me know how it goes, Ellen! 🙂
This is amazing. I got brave and tried it tonight and your tips were perfect. I made your caramel recipe and it turned out beautiful and stuck to my apples. You’re so good at being a food blogger. Thanks for sharing your talent.
Stacey! I’m so, so happy to read this tonight! I can’t believe you made them today. And I could cry, I’m SO happy the whole process worked out so well for you!
Hi, Mel. Can’t wait to make these for a fundraiser. How far ahead can I do them?
I’ve made them 3-4 days in advance and they’re great!
This post was a labor of love Mel. Thank you for the great tips and tricks. I love making homemade caramel apples, but the problem is we just end up eating them before I can give them away as gifts (lol!). Like you, the apple pie if my favorite flavor, but instead of rolling it in crushed graham cracker crumbs, I roll mine in cinnamon & sugar. If you haven’t tried it, you need it! It’s amazing! Thanks again for this great post.❤️
Thank you, Jodi! And I’ll definitely try the cinnamon and sugar version! Thanks!
Ha ha! Mel, I think we are kindred spirits. I can just see myself saying to ladies at church (like you did above) “These perfect homemade caramel apples are incredible…and even though the tutorial was long and in-depth, they aren’t difficult at all, I promise!” And them giving me an outrageous look that effectively says – yeah right, you a crazy woman! And then they would start to list reasons why they don’t have enough time/talent/motivation…etc. to do something like that too. Their reactions used to make me feel embarrassed when I would do something “rockstar status” and I used to take those comments personally – like there was something wrong with me. I’ve grown a lot over the years and I’m learning to accept myself, talents and hobbies and to let that shine. I love how you share who you are without shame everyday. Thank you for the in-depth-but-not-difficult recipe…I will definitely be making it in the near future!
Haha…yeah, what is “easy” to one is out of this world crazy to someone else. But I’m with you! Let’s celebrate the fun projects even if they are ambitious. And I’ll stick to my guns: it really is easy! 🙂 haha. Thanks for your comment!
I read this post when it went live and got so inspired I am hosting a Caramel Apple making party on Tuesday! Looking forward to a fun night with friends and experimenting together! Your tips are gold and make this seem so do-able!
Curious about how much chocolate you think is needed for a batch of apples dipped in the homemade caramel..12-14 apples I think was your recipe note? Thanks so much for your time writing this post!
How fun, Sheree! Let’s see for about 12-14 apples, you’ll want probably 3-4 cups chocolate (both for dipping and drizzling). So much depends on how thick the layer of chocolate is and things like that but that’s a good starting point.
My kids have been asking to make caramel apples so your timing is perfect! I’m guessing the homemade caramel will be as popular as the apples themselves. 😉
Haha. That’s definitely the case around here.
Hello,
I went through the whole post 3 times and paid special attention to the “Notes” and I was unable to find the homemade caramel recipe. Did I miss it or is it missing? Thank you.
Here it is Lynn: https://www.melskitchencafe.com/perfect-and-easy-vanilla-bean-caramels-step-by-step/
I forgot to link to it in the notes section. Sorry about it!
Mel – question about the caramel. (Because these look amazing and I would love to make them.) Do you make the homemade caramel and, after adding the cream/butter, only cook it to 180-190 degrees? Or cook it to the 245 degrees, and let it cool to 180/190 before using it for the apples? Thanks.
Good question – sorry if I wasn’t clear. I add the cream/butter and then cook it to 238-240 degrees. After it has come to that temp and I’ve stirred in the vanilla, I take it off the heat and let it cool to 180-190 degrees. Does that make sense?
Yes and thank you!
This is a fantastic post, Mel! The tips about how to clean the apple are priceless. I’ve never thought about how all that wax affected a caramel apple outcome. (And, coincidentally, I just found out about what a Norwex cloth was yesterday.) Also, there’s a place near us that does that apple pie version and I always look at it and think it’s interesting, but never buy one because it always gets beat out by a chocolate/nut choice. Now that I’m hearing how much you love it, I think I’m going to have to break down and try it 🙂 Thanks for this “everything you need to know about caramel apples” post!
Thanks, Ramona! Norwex cloths are worth it in my opinion (love them)…and I hope you try an apple pie caramel apple sometime SOON! 🙂
I’ve been making your caramel apples for years and love them so much! I always use the recipe in your pdf printable. I noticed that the caramel recipe you linked to in this post has butter it but the recipe from the printable does not. I’m just curious if you use butter in your caramel for caramel apples?
Hi Aubrey – the recipe in the printable is a good one, too. I prefer the flavor of the caramel recipe I talked about in this post (which does include butter), but honestly, any much-loved caramel recipe should work pretty well!
I’ve never had the desire to make caramel apples until today! I’m thinking a caramel apple bar for Thanksgiving! Can you tell me about how much nutmeg and cinnamon you add to the graham cracker crumbs for the apple pie flavor? Thanks!
Hi Bethy – I just do a small pinch of nutmeg and a slightly larger pinch of cinnamon. I know that isn’t super helpful but I never really officially measure.
Great tips for those of us who love to make and eat caramel apples. Now I know why the caramel slides off the apples!
Could you use silicone mats instead of parchment paper? So excited to try out all your tips! I’ve never made them before but I want to start!
I use silicone mats for caramel apples and they work great!
Good to know! Thanks, Laura!
Thanks Teresa! And Giuliana…I haven’t tried the silicone mats so I don’t know how “nonstick” they would be compared to parchment.
My caramel always goops and slides off, now I know why!
Question…if I want to do these for fun with my kids as a test run before gifting…is there a store bought caramel that isn’t so expensive? I don’t mind unwrapping. I’ve seen those “bits” also but have never purchased
Following- my question also! Fingers crossed for an easy to find, yet acceptable, option. Kids can unwrap!
The bits are an ok option for your first time, they will still taste nice. I do stir in a Tb. or two of heavy whipping cream after I have warmed the caramel.
Hey Bryn (and Suzannah), if you want a test run, I think the Kraft caramels or the caramel bits (they taste the same as the soft Kraft caramels) would work just fine. For the Kraft brand, you might want to add just a splash of milk or cream when melting.
Thank you for this! Just bought a loaf of Pete’s caramel to try making these again. Sidenote: I LOVE the new “jump to recipe” feature. It may or may not be new, but I just noticed it. I enjoy reading your commentary the first time I make one of your recipes, but it is nice to just jump down to the recipe during subsequent visits.
Thanks, Melanie! I added that a few months ago but I’m glad it’s helpful.
For the butterfinger special, how does the candy bar stick if there is not a chocolate coating?
That was my error, Alyssa – I use chocolate underneath the butterfinger pieces. I edited that description.
Fun post! How long do they keep after being bagged, and do you keep at room temperature?
I refrigerate them until eating (and then I let them sit out of the fridge for 10-15 minutes before cutting). I’ve made them 3-4 days in advance and they are fine. Sometimes the chocolate coating will crack in small places after a few days of refrigeration, but it isn’t very noticeable.
Thanks for the tips. I make them very year, but the caramel slides off the apple. I get my apples straight from the farm, so there is no wax. Could it be that the caramel is too hot? Or perhaps I don’t need to add water as I melt it (the recipe I used previously added water when melting the caramels).
I’d try not adding the water…also, I’d still follow the steps to wash and prep the apples. Roughing up the skin a bit with a scrubby cloth helps the caramel stick, I think. Also, keep an eye on the temp of the caramel because that could be a culprit, too.
I hope you’re going to do your game guide soon! 🙂
Yes! In a few weeks it’ll be up. 🙂
Yeah I’m looking forward to this too! We bought 6 Nimmt last year, and now my brother and sister and half my aunts and cousins have bought it too. I always get at least one game off of your list.
We play 6 Nimmt at least weekly still – such a favorite!