Small Batch Soft and Fluffy Whole Wheat Bread {Perfect for KitchenAid Mixers}
Making fluffy, delicious whole wheat bread at home is easier than you think! This small batch whole wheat bread recipe is the ticket. It can be made in a KitchenAid or Bosch mixer or by hand!
If you are new to making whole wheat bread at home or you want a recipe that doesn’t yield 13 loaves, today’s your day.
I’m walking you through how to make a smaller batch of whole wheat bread. It’s so easy. And it yields fluffy, soft, and delicious bread (yep, even with 100% whole wheat flour!).
I’ll be honest, my phase of life (with five hungry kids) isn’t conducive to small batch anything. Large batches are where its at with me and mine, especially with bread because the extra loaves freeze beautifully to be pulled out at a moment’s notice.
BUT, I also recognize not everyone’s life mirrors the chaos of my own. Many of you want to bake fewer loaves of bread at a time…either because of household numbers OR because you are mixing the dough by hand or with a KitchenAid mixer.
I almost always use my Bosch Universal stand mixer {aff. link} to make bread. It’s huge. It’s powerful. And it’s perfect for large batches of bread.
But many of you over the years have written/commented to me that you want a recipe for a smaller batch of bread that works great in a KitchenAid mixer.
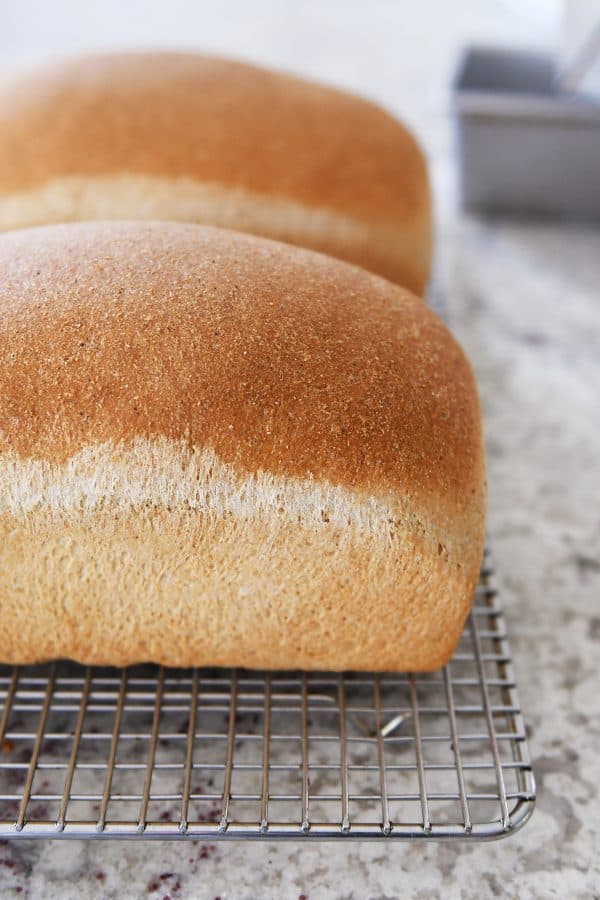
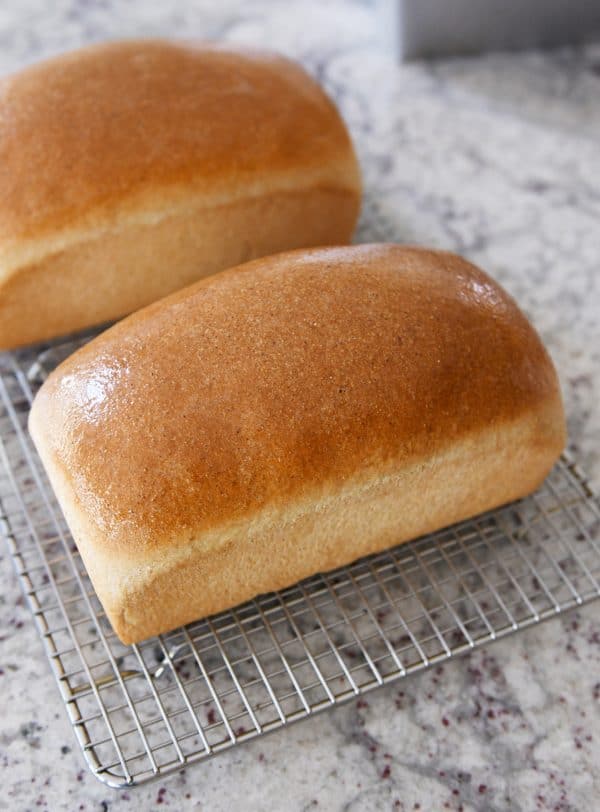
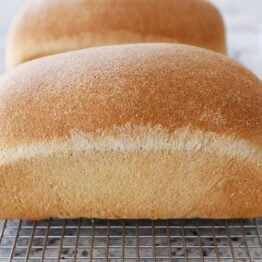
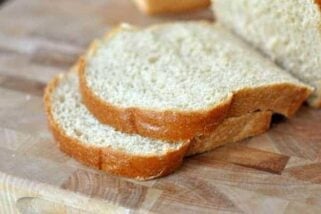
“Small batch” may mean different things to different people, but the recipe I’m sharing today is small batch in my book. It produces two perfect loaves of whole wheat bread.
I’m showing you the step-by-step of this small batch whole wheat bread recipe below.
But first, here’s a look at some past posts that might be helpful before we start:
The Best Whole Wheat Bread Recipe (this post has the original whole wheat bread recipe that I make most and what this small batch recipe is modified from; the full recipe yields 5-6 loaves and is best made in a heavy-duty mixer like a Bosch Universal – it’s too much dough for a standard KitchenAid)
Step-by-Step Tutorial for Whole Wheat Bread (a quick-glance picture tutorial for making the bread recipe linked above)
Bosch vs. KitchenAid (an in-depth look at these two stand mixers with some insight into why I use the Bosch for bread recipes; the comments on that post are helpful, too)
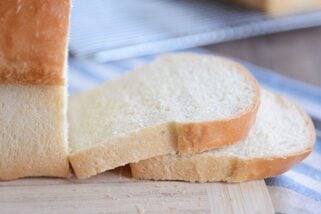
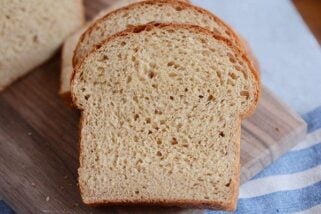
Wheat 101: Where to Buy, Different Types of Wheat, Etc. (quick overview – I almost always use hard white wheat berries and I grind them at home; if you are using storebought wheat flour, look for white wheat flour for a lighter color/textured loaf, otherwise hard red wheat flour can be used…the loaf will be darker in color and possibly a bit more dense)
Wheat Grinding 101: All About Wheat Grinders (I have a KoMo Wolfgang grain mill that I keep on my counter 24/7 and use for grinding wheat; these Harvest mills are a less expensive/great starter option)
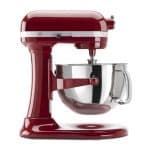
For the purposes of this tutorial, I am using my KitchenAid mixer, but this recipe can also be easily made in a Bosch stand mixer or by hand. {I have the Costco version of this KitchenAid mixer; I haven’t tested this recipe with other KitchenAid models.}
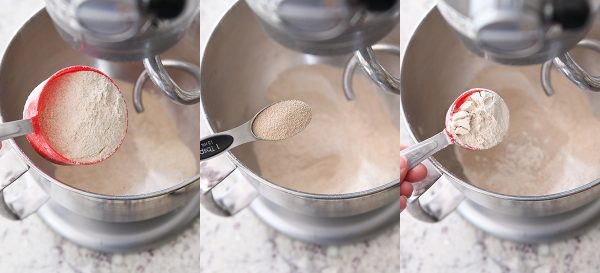
To start, add three cups whole wheat flour, 1 1/2 tablespoons yeast, and 1/4 cup vital wheat gluten* to the bowl of the mixer fitted with the dough hook.
*Quick note about the vital wheat gluten – this ingredient helps develop the gluten in bread and will also help yield a nice, fluffy loaf (fyi: gluten can also be subbed for a tablespoon or so of each cup of all-purpose flour in white bread as a sub to using bread flour). Vital wheat gluten is often found in the baking aisle at the grocery store (near the flour). Many brands of vital wheat gluten have Vitamin C added which is just fine to use in this recipe or other bread recipes. I usually buy my gluten from Amazon – the Bob’s Red Mill brand or the Honeyville brand {aff. links}.
Mix the dry ingredients together and add 2 3/4 cups warm water.
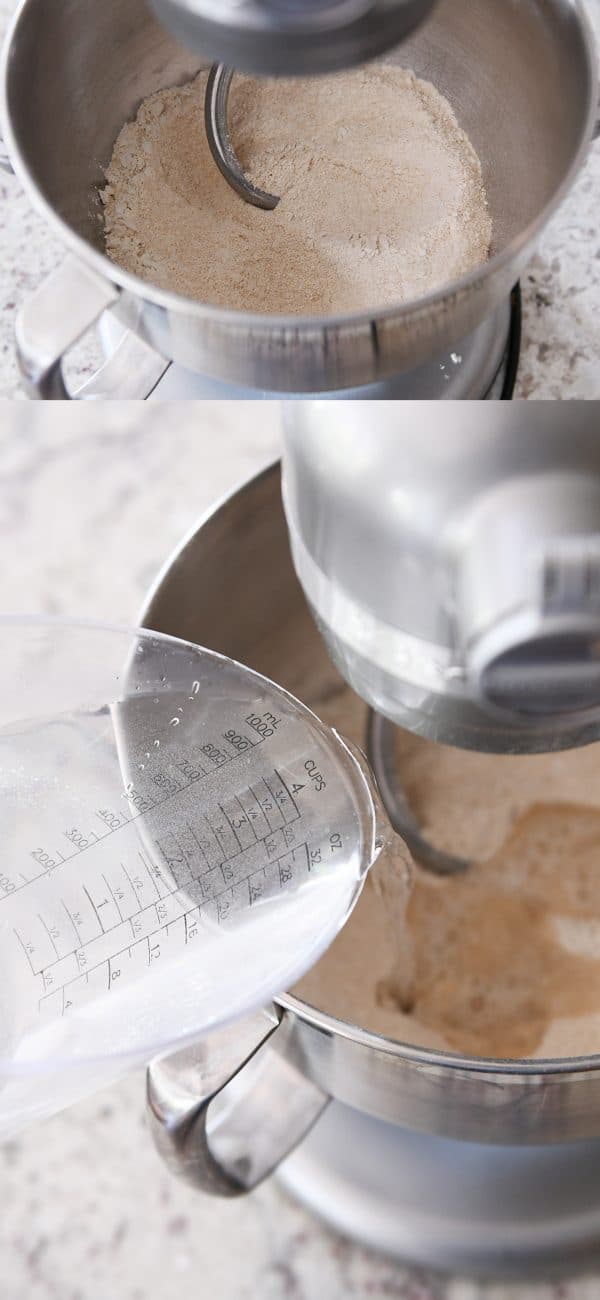
Start mixing on low speed. I find with the KitchenAid that I need to use a rubber spatula to scrape the sides and bottom at this point in the recipe when the mixture is very wet.
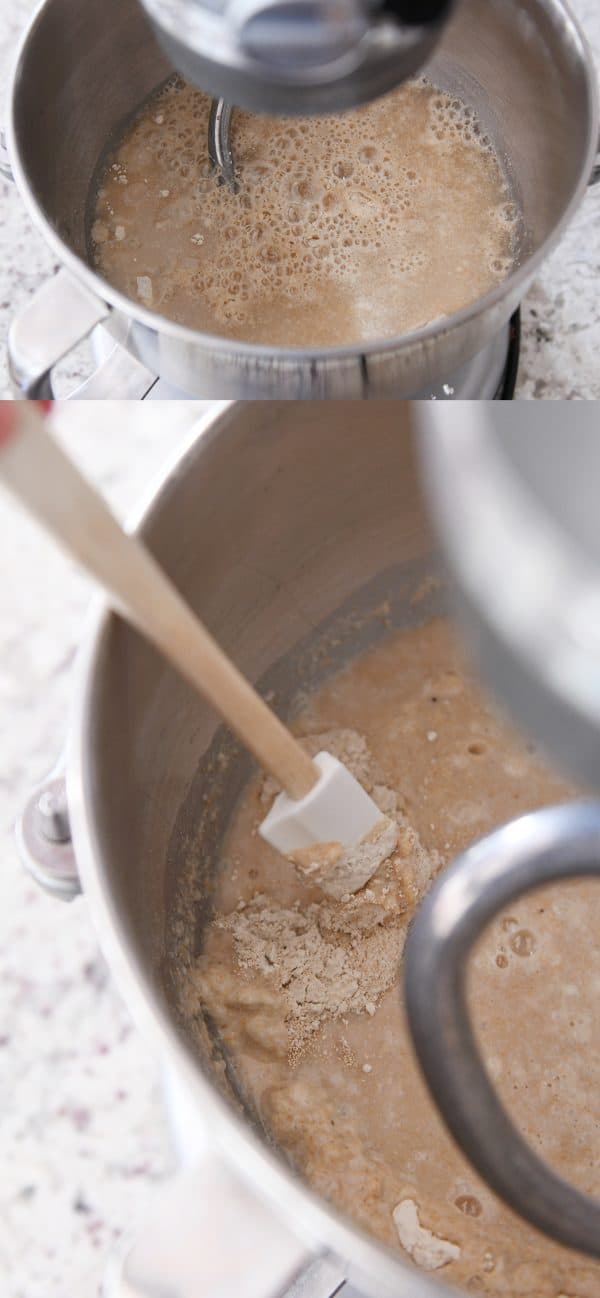
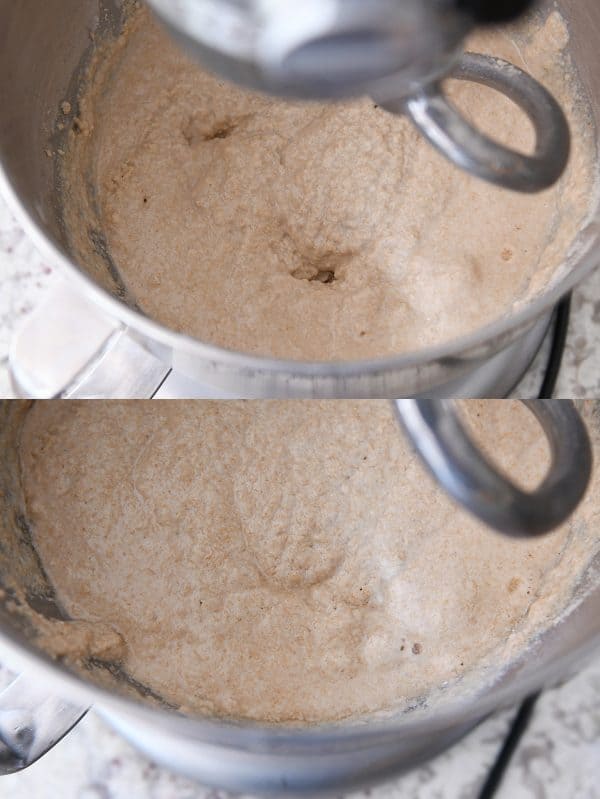
Let this “sponge” mixture rest for 10-12 minutes until it is slightly puffy – some little bubbles may form at the surface.
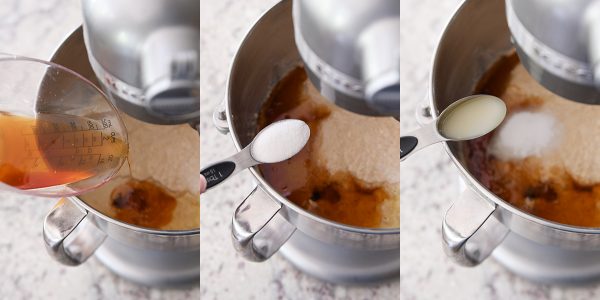
Add 1/3 cup oil, 1/3 cup honey, 1 tablespoon salt and 1 tablespoon lemon juice, bottled or fresh (you can sub in a finely crushed 1000mg tablet of vitamin c instead of the lemon juice; one or the other is needed to help activate the gluten).
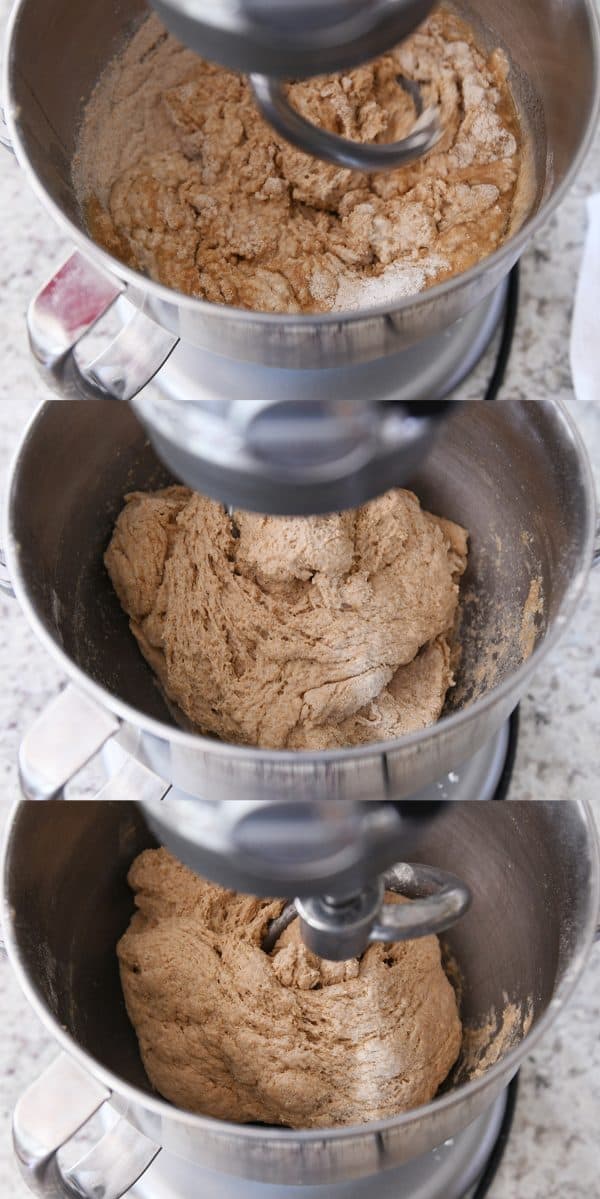
Mix on low speed with the dough hook and then with the mixer continuing to run, begin adding flour gradually to the mixer.
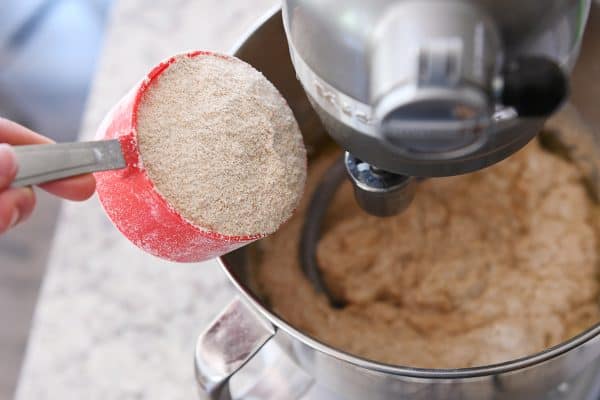
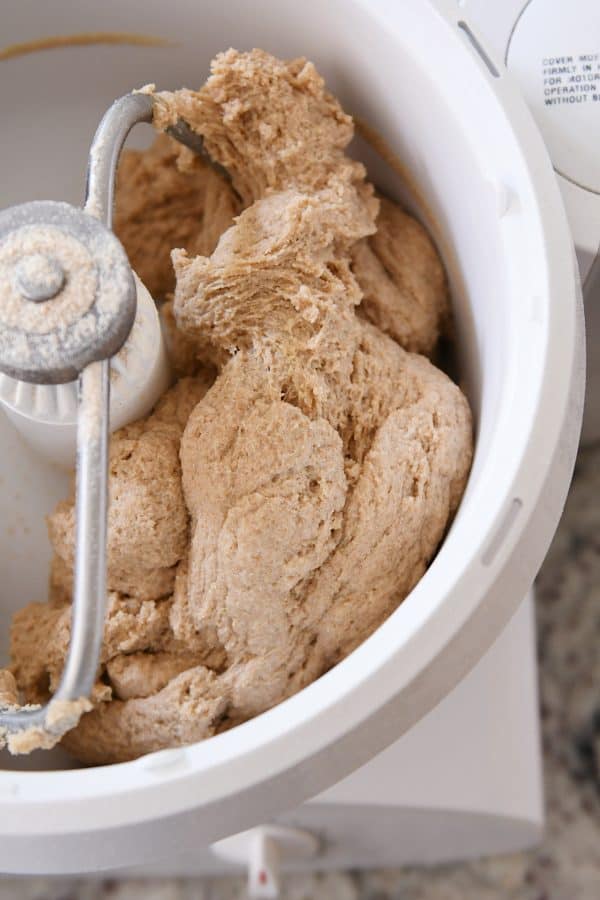
It’s going to be a shaggy mess for a while, but eventually it will start coming together. Continue adding flour until the dough pulls away from the sides of the bowl without leaving a lot of sticky residue. Be careful not to add too much flour at first; as the dough kneads the moisture in the dough will continue absorbing more flour.
If there continues to be a lot of stickiness, it’s ok to keep adding flour (even if you are several minutes into what you thought was the final kneading process).
I add about 2-3 cups. Don’t get hung up on the exact amount of flour needed; it will vary from person to person based on a lot of bread making factors like humidity, elevation, how we each measure flour, etc.
Let the dough knead on speed 1 or 2 for 6-7 minutes until it is soft and smooth.
Turn the dough onto a lightly greased counter and split into two even pieces. Form into an even, taught loaf shape and place in lightly greased 8 1/2-X 4 1/2-inch bread pans.Here’s a video I posted several years ago to demonstrate how I shape loaves of bread before baking. Skip to :52 if you don’t want to hear me blabbing at the beginning.
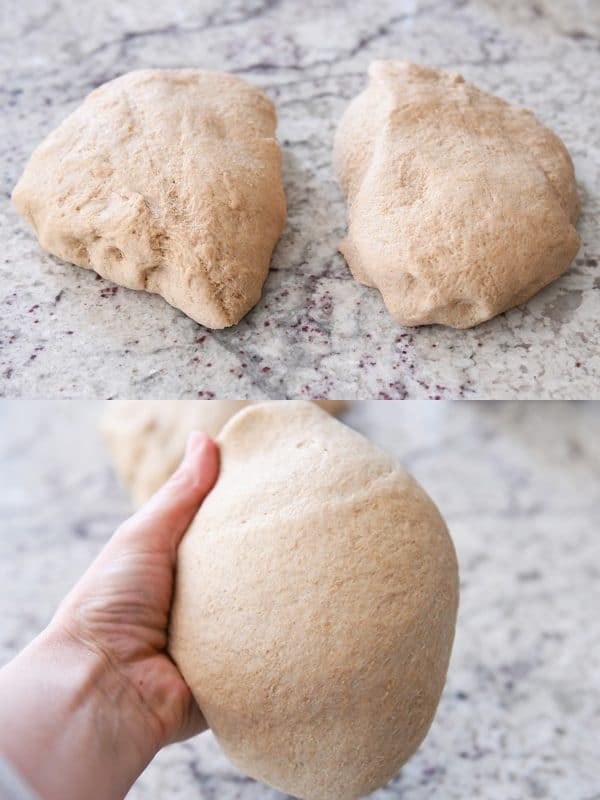
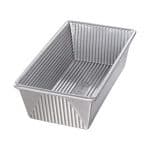
FYI: my favorite bread pans after all these years are still these Chicago Metallic pans and also these USA bread pans{aff. links} (love the USA ones maybe even more than the Chicago ones; although keep an eye on baking as the bread bakes a little faster…but more evenly…in them).
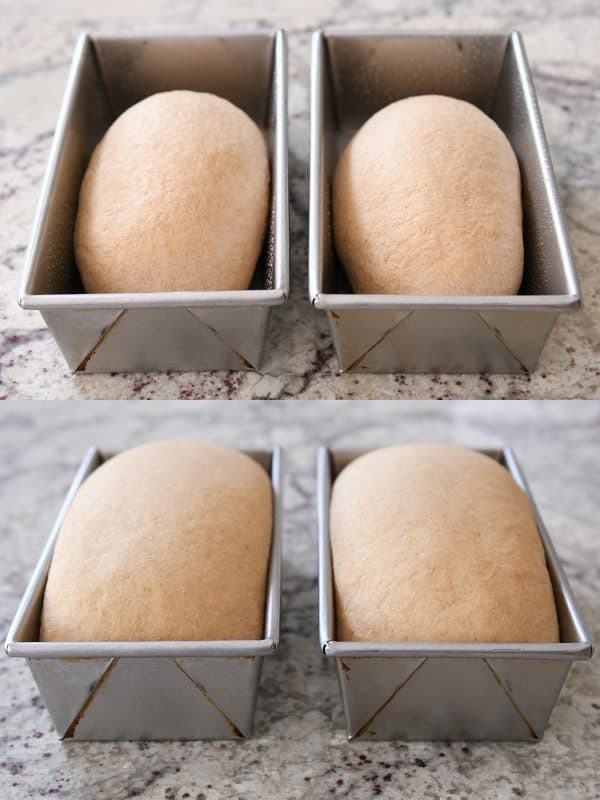
Let the dough rise, covered, in a warm, draft-free spot until it is 1-2 inches above the edge of the bread pan. I use these large, white, tea towels {aff. link} for covering the dough (I use them when making rolls and all other breads, too).
Bake in a 350 degree F preheated oven for 28-32 minutes until golden and baked through (an instant-read thermometer should register about 180-190 degrees if you are into taking the bread’s temp).
Turn the bread out onto a wire rack.
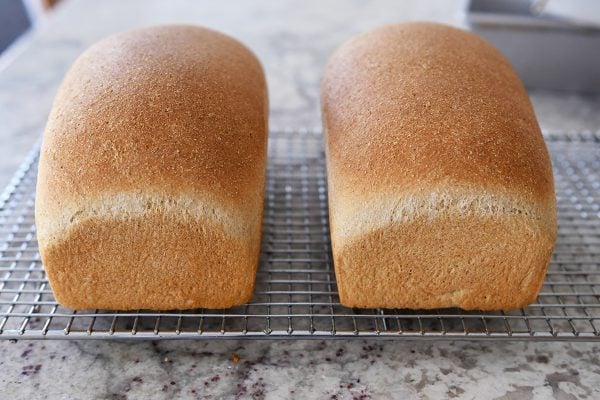
Don’t forget to slather the top with butter at this point while the bread is still warm, if so desired, and let the bread cool.
This bread freezes great! I pop the cooled loaves into one of these bread bags {aff. link} and freeze until we want to eat it all up.
There you go! Making two loaves of whole wheat bread is doable and dare I say, quite easy!I hope this recipe fits the bill for those of you that don’t need 5+ loaves of bread hanging around at a given time and/or you have a smaller capacity mixer (like a KitchenAid) and therefore need the perfect small batch whole wheat bread recipe for it.
Happy bread making!
One Year Ago: Pumpkin Cream Cheese Muffins
Two Years Ago: Double Chocolate Chunk Muffins
Three Years Ago: White Bean Chicken Chili
Four Years Ago: Classic Slow Cooker Chili
Five Years Ago: White Texas Sheet Cake
Perfect Whole Wheat Bread {Small Batch; Two Loaves}
Ingredients
- 5-6 cups (710 to 852 g) whole wheat flour, I prefer white whole wheat vs red whole wheat
- 1 ½ tablespoons instant yeast
- ¼ cup vital wheat gluten (see note)
- 2 ¾ cups warm water
- 1 tablespoon lemon juice, bottled or fresh
- ⅓ cup oil
- ⅓ cup (113 g) honey
- 1 tablespoon salt
Instructions
- In the bowl of a stand mixer fitted with the dough hook, mix together 3 cups of the whole wheat flour, yeast, and gluten. Add the warm water and mix well. Cover the bowl and let the mixture rest for 10-12 minutes.
- Add the lemon juice, oil, honey, and salt. Mix on low speed.
- With the mixer running on low speed, continue adding flour 1/2 cup at a time until the dough pulls away from the sides of the bowl (don’t overflour! A little stickiness is ok as long as the dough forms a ball and doesn’t leave a lot of residue on your fingers).
- Let the mixer knead the dough for 5-6 minutes until the dough is soft and smooth.
- Turn the dough onto a lightly greased counter and divide in half. Shape each half into a taut loaf and place in a lightly greased loaf pan (8 1/2- X 4 1/2-inches).
- Cover the loaf pans and let the loaves rise until they are 1-2 inches above the edge of the loaf pan.
- Preheat the oven to 350 degrees F. Make sure an oven rack is in the middle/center position. Bake the loaves for 28-32 minutes until golden and baked through (an instant-read thermometer should register 180-190 degrees in the center of the loaf).
- Turn the bread onto a wire rack. Brush the tops with butter, if desired. Let cool completely.
Notes
Recommended Products

Recipe Source: adapted from my favorite whole wheat bread recipe (thanks to Julie, a MKC reader, and her sister-in-law, Becky, who were the first to tell me they’d trimmed down this recipe)
Hi. I’ve made a lot of whole meal bread in the past but this is very good. Thanks a lot, I will always follow your recipe now.
Hi —
I’m new to bread making and found this recipe and will be trying it out. I will most likely do 1/2 it so I get only 1 loaf.
I had a question about the vital wheat gluten ingredient. If I don’t use that, will the bread still be ok? I don’t know what this ingredient is, I did some research online and still confused on why its needed. I noticed online, some bread recipes use it, some leave it as an option. Any input on this?
And second question, which brand of white whole wheat flour would be recommend? bob’s mill brand or king arthur flour?
Thank you for your advice.
Either of those brands of flour should work well in the recipe. The vital wheat gluten will help the rolls be a bit fluffier but you can leave it out – just make sure to knead a few minutes longer.
My first attempt at whole fresh-ground flour bread, I thought I would give your recipe a try since several of your recipes are my gold standard. (Strawberry gelato!!) Anyway, I had some learning curve involving my grain mill itself and so my timing got messed up. But . . .All in all, this was by far the best bread I’ve ever made(I’ve been making bread for 8 years). I liked that it wasn’t too sweet, didn’t require a lot of extra ingredients, rose beautifully, didn’t require a bunch of risings, and made just two loaves. It is among the best bread I’ve ever eaten as well. I , (we, my husband and I) love it!!
It turned out great but leaves a bitter after taste. I used bought white wheat flour, King Arthur’s White Wheat Flour. Can you possible tell me why it has a bitter after taste?
I’m honestly not sure – it must be something with that brand (I haven’t used it so I can’t say for sure).
Could it have been the baking pan used? Just s question.
Thank you so much for this recipe and all your hints, explanations, and pictures. I have made this twice now and both times turned out very successfully! I don’t have a lot of yeast bread making experience, either, so you have done a great job with your instructions! I am curious what you do to get such perfectly even slices of bread? Lots of slicinng practice? Haha! Or do you use a slicing guide? Special knife?
Hey Amber – so happy you have had success with this recipe! I don’t use a slicing guide, but I do use the Rada bread knife (you can find it on Amazon) and it is inexpensive and amazing.
I have been trying to make a copycat version of Dave’s Killer Seed bread but am disappointed with the heavy dense result. Could I add about a cup of various seeds to this recipe without any other changes?
Hi Loretta – I haven’t tried adding seeds to this bread so I don’t know how it would work out, but you could definitely experiment. I’d hold back a little on the flour – you might not need to add as much.
Making this again!! Wonderfully risen dough and heavenly taste. I added 5c flour this time, so we’ll see what happens after baking. (I give 5 stars but button would’nt click.
I have made this three times and it’s my family’s favorite! And I am no baker by any means! Thank you for helping us first timers. Thank you!!
I have regular yeast, not instant, on hand. Do you think it could still work in this recipe? What changes to the process should I make?
Yes, it will still work. Just proof it in a bit of warm water and pinch of sugar until it is bubbly and then use it in the recipe – you can use the same amount called for in the recipe.
I am also going to attempt this with regular yeast since I don’t have any instant on hand. Do I need to let it rise an extra time or anything? Or just the first proof is the only difference? Thanks! I’m excited to try this recipe, it was recommended highly!
I think when using active dry yeast, it helps to let the dough rise before punching down and shaping into loaves so you might try that but I think others have used active dry yeast with good results following the recipe (no extra rise).
I ended up needing to add about 4+ additional cups of flour to make the dough work for where I live. In the future, what do you have a recommendation on what you think would be best: 1) continue to just add extra flour or 2) decrease the amount of water? I wonder if one over the other would yield a fluffier bread or if it even matters.
That’s a good question – there is a lot of bread baking science involving the amount of hydration in a recipe, and I’m not sure which ingredient (flour or water) would be best to alter, but I’ve always gone the route of adding more flour and not messing with the water amount.
The bread turned out amazing so I probably shouldn’t mess with anything. Thanks for the recipe!
Mel I just made these and they turned out great! I have a question about freezing it- how do you defrost it? In the fridge, or on the counter? Also how long does it keep in the freezer?
I just defrost on the counter (I’ve found that storing bread in the fridge can dry it out). If it’s in a well sealed bag, it should keep for up to a month in the freezer.
Thx for the post and pics! Was hesitant on this recipe as I’ve done white only. I’m so glad I did this. Yummy 2 wheat loaves and super simple. Will be making this again
I just made this bread and it turned out really well. I have (well, had prior to today) zero experience with bread baking. I read and re-read all the instructions, notes and comments. I learned a lot (including that one can grind their own wheat- there’s a whole new world out there for me!). The advice about using the kitchen aid paddle then dough hook were really helpful. I used Bob’s Red Mill 100% stone ground whole wheat flour which is made from hard red wheat, so says the packaging. I went with weight rather than measuring cups for the flour measurement based on Mel’s advice in the comments section. I just sliced into my cooled bread and it is sooo yummy. Thank you, Mel, for teaching me how to bake bread!
Your comment made me so happy, Rebecca! I am SO proud of you!
Hi Mel – thanks for the recipe and thorough explanation? Wondering if we can do two rises for this recipe? so first rise until double in size after kneading, and second rise after being shaped in the loaf pans.
Why do you only require one rise instead of two?
Thanks!
Yes, you can do two rises if you have the time. Using instant yeast + the sponge at the start of the recipe means you technically don’t need another rise before rising in the bread pans.
Can you sub warm whey (from your ricotta recipe) for the warm water? It works beautifully in your white bread recipe, but I’m not sure if it’s okay in a wheat version.
Yes! I use leftover whey a lot in my whole wheat bread recipes. Works great!
I’ve made rolls and sweet breads aplenty, but this was the first time I’ve made a whole wheat bread. It. Was. Perfect. Thank you for the step-by-step instructions and hand-holding during the flour-adding-stage!!! I was fresh out of honey so I used pure maple syrup. Worked splendid if anyone else is wondering.
This is the best bread recipe ever! So easy and so delicious. I bought a Wondermill wheat grinder to grind fresh flour and use a Bosch mixer. Sometimes I make two loaves and sometimes double it for four or five loaves. Add some butter and homemade jam and it’s just as good as a big piece of cake (and I love cake)! And the house smells so good! Takes me back to my childhood when my mother baked bread. Thank you! Thank you! This will be a recipe I hand down to kids and grandkids!
I’ve been trying to bake an edible 100% freshly milled whole wheat bread loaf since getting my grain mill last month. I think this has come the closest. I didn’t have lemon juice but saw online that vinegar could be substituted as long as the amount was halved. So I used .5 Tbsp vinegar, and added a half hour rising time after the kneading and before the shaping. They rose beautifully in the pans and smelled heavenly while baking. Open the oven door to find that the poor things had deflated while baking. I think I let them rise too long before baking and didn’t put enough flour. I was really trying not to put too much flour and I guess I had too wet of a dough. The bread had a good flavor still and was very soft inside. Will definitely try again. Thanks!
I am not an expert, but not a newbie at baking bread. I also ended up with a thick batter after adding what I thought was the full amount of flour. I added some extra but was concerned about adding too much to avoid the whole wheat brick. I think the issue may be in the flour measure. In looking at the Q&A, I see you measure a cup that is 4 1/2 to 5 oz. I use King Arthur White Whole Wheat and their listed measure of 120 gms per cup. That is quite a bit lighter than your measure. I began with 6 cups or 720 gms. 4 1/2 ounces per cup x 6 is 765 gms, and at 5 ounces x 6 is 850 gms. I am going to mark my printed copy to read 6-7 cups, plus more if needed. With what flour I added, allowing a first rise in the bowl to absorb water, and just plopping sticky dough in the pans, I managed two pretty decent loaves of bread. I look forward to trying the recipe again now that I understand what went wrong.
Hi Mel! I love your blog and make your recipes all the time. But bread making is nothing but failure for me, has been for about a year, and I don’t know what I’m doing wrong. I was so happy when I saw this bread post with all the step by step pictures.. and today was the day! But the loaves came out of my oven like they always do..small & boring. NO oven spring. Your loaves come out so tall and beautifully rounded; mine come out of the oven exactly like they go in. Why is oven spring so elusive for me?
Also it seems like I can NEVER achieve a ball of dough that pulls away from the sides of the bowl. After 7 cups of flour it was still shaggy so I went with what I had. I did 2 rises. Second rise in the pans was weak. I’m scared to do only 1 rise as I know it will probably come out dense.
I’m so discouraged and I’m really about to quit. I’m tired of wasting ingredients.
Note: I use the King Arthur Flour white wheat flour, and I do everything exactly as you say. Please, any help I will be so grateful for.
Hey Jean – I’m certain we can get to the bottom of it! You are using a KitchenAid mixer, right (that’s what it seems like from your comment)? How long are you letting it knead?
Mel, darling…What would happen if I left the vital wheat gluten out? Is it possible to do that? (I don’t have any on hand). I’ve never made bread with vital wheat gluten before, but then again I have never ground my own wheat ever.
Any advice is appreciated. Thank you, Mel!!
If you leave out the gluten, just make sure to knead the dough for a few extra minutes to really develop that natural gluten!
Mel thanks so much for your incredible website and your “down to earth” style. I recently moved to a high elevation (7100 ft). I have attempted a whole wheat bread recipe I had and then this one. I ground my own wheat. For some reason, both recipes are flopping. I know it’s me, but I’m wondering if you can help me troubleshoot? When all the ingredients are mixing, it looks more like a super thick pancake batter and won’t come together in a smooth dough. I have tried to add the ingredients quicker so the yeast won’t “over bloom,” added more water, more flour, etc., but nothing seems to be doing the trick. I even threw a batch in my bread maker on the dough setting (which usually solves my inability to make bread dough) and the same thing happened. Any thoughts? Thanks a million!
Hey Kellie – how much extra flour have you tried adding? Can you try adding flour until the dough clears the sides of the bowl? Even if it’s a cup or more extra flour, that’s ok. Based on what you are describing that’s the main thing I can think of to correct the issues. If the dough is more like a batter, it seems like it needs more flour…I’ve also heard at high elevation that you might need to decrease the amount of yeast, however I don’t think that would be a factor in the bread dough texture – that’s more related to how it rises).
Made this today and it was SO good. It was also nice that there was only one rise, unlike other breads. I used vegetable oil in this because I wasn’t sure what kind of oil you used. Do you mind if I asked what kind you used? Thanks for yet another great recipe!
Hey Bri! I usually use avocado oil but any neutral flavored oil should work!
Mel, I am having a hard time finding the White Wheat berries.
I live in Illinois and I purchased a brand called Ziyad shelled wheat – link attached(https://www.amazon.com/Ziyad-Wheat-Shelled/dp/B006M6EBDS) but I do not think that this is the right wheat).
They also sell an unshelled wheat? An all natural whole wheat? Cracked wheat? So now I’m more confused than ever about which wheat to purchase? Please help me.
I also own a Vitamix with the dry grain container and blade that can grind wheat berries would that be okay to use since I do not own a grinder. I’m assuming I can just grind it and than sift it -to make sure I get only the soft flour out of it?
Thank you for your help.
I’ve never heard wheat berries called shelled wheat but looking at that picture, I think it’s the same as what I refer to as wheat berries. Cracked wheat is when the wheat berries have already been slightly cracked so you don’t want that for grinding wheat flour. I think the shelled wheat should do the trick!
Look up Augason farms you should find their white wheat berries there i got the 26 pound bucket was 26.99 through walmart.com free shipping to my local walmart.
I’ve been making your white sandwich bread, using 1/3 to 1/2 whole wheat flour, so as soon as you posted this, I made this. So good, so easy, and my kids are eating it, so that’s a win!! Love it, especially since I broke my KitchenAid earlier in the year…. I guess 13 years of using it basically daily takes a wear on it… But hubby replaced the stripped gears, so I’m back in business, but it can’t handle over-working. Long story short, this recipe worked great in my KitchenAid! Thanks!
So happy to hear that, Ashlee! Thanks for taking the time to leave a comment! Glad it worked out!
This recipe was perfect timing– my mom had just bought me a wheat grinder last week, and I have a KitchenAid and was needing a recipe just like this one. The two-loaf size is perfect too, since it is just me and my husband in our house for now! I made it tonight and it turned out great!
Way to go, Ainsley!
This bread is fantastic and so easy. Just had my first slice with butter and it is delicious. I just couldn’t wait for it to cool completely. Sorry! Thanks so much for the smaller batch recipe. We have just one teen at home so this is the perfect amount. Can’t wait to make sandwiches with it tomorrow!
Glad it worked out so well for you, Candice! Thanks for letting me know.
So glad you posted this, it inspired me to try adapting it to natural yeast. It worked great! I used 1 generous cup natural yeast, reduced the water to 2 cups, and left the gluten out. I replaced the lemon juice with 1 tsp ACV, but I believe either would work. It is a longer process, I let it raise overnight, but it turned out perfect. Thanks for the inspiration!
Thanks so much for the comment, Patty!
This bread is fabulous and really easy to make! So soft and yes fluffy…and its wheat! Thank you for once again suggesting we learn to how to shape a loaf…somehow…I missed this and was still trying with the rolling pin and never quite satisfied…made two beautiful loaves today…in my beloved Bosch! Thank you Mel…you’ve kept me happily in my kitchen all weekend long! And I made your spaghetti sauce…letting it simmer an extra hour and then froze it! So delish! You’ve the best!
Love this so much, Jill! Thank you!
Oh my goodness do I love the scent of freshly baked bread in the morning.
Fabulous Mel..this looks sooo good & delicious and today am trying to making this whole wheat bread….! Thanks for sharing…!
Also…have you ever tried to use buttermilk instead of water? Would you skip the lemon juice if so?
I haven’t tried that, sorry!
Lord have mercy! Thank-you for this. I am trying this today (if all goes well). I am struggling to get a nice soft loaf from my home milled flour. Praise the Lord! These loaves look wonderful. Thank-you profusely!!!!
Let me know how it works out, Brenda!
Mel I want to try this recipe but I have a few questions for you. First, can I just use store bought wheat flour for this recipe? If yes, what brand should I use in this recipe? If I use store brought wheat flour will I get the same results as this recipe? Lastly do I need to alter the recipe in any way if using store bought flour – meaning I would still need to use wheat gluten and all the other ingredients that you listed in the recipe?
Yes, you can definitely use store bought wheat flour for this recipe! It will be much more compact than if you were grinding your own to use, so make sure to measure the flour with a light hand (fluff it up, scoop in the cup, and level it off – you’re shooting for right around 4 1/2 to 5 ounces per cup of wheat flour). I honestly don’t know if I can recommend a good brand of store bought whole wheat flour because I never buy it (since I have a wheat grinder at home), but I’ve heard King Arthur Flour is a great brand if you can find it. I wouldn’t alter the recipe in any way if using store bought wheat flour other than what I mentioned above – just make sure not to overflour the dough since the flour in the storebought packages will be more compact. If you can find storebought flour that is labeled “white wheat” as opposed to “red wheat” I would buy that. Flour ground from white wheat berries will produce a slightly lighter (both in color and density) loaf than flour ground from red wheat berries.
I’m excited to try this!! Where does one find vital wheat gluten? Just at a regular old grocery store?
Usually its in the baking aisle above the flour (most of the time it comes in little boxes)…but I also snag it on Amazon. The Bob’s Red Mill brand.
Thanks!!
Quick question- are we talking fresh lemon juice or will the bottled work just as well with this?
Thanks for all your hard work! So grateful.
Yes, bottled works great!
I am a bread baking rookie. Can this be made into rolls? How many? Or sandwich buns?
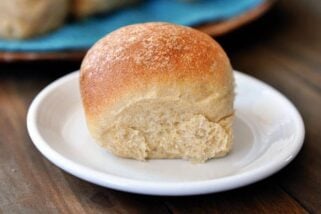
I’m sure it could be – I’ve actually never tried that because we always make it into loaves and I have another roll recipe that’s even easier and nearly fail-proof:
https://www.melskitchencafe.com/french-bread-rolls/
or
https://www.melskitchencafe.com/fluffy-whole-wheat-dinner-rolls/
Thank you so much for posting this!! I’ve looked at your other whole wheat bread recipes before but it just seemed like so much bread (not enough pans in my house!), so this looks perfect. Can’t wait to try it! How much yeast would you recommend using with Active Dry instead of instant? Thanks!
I would use the same amount if using active dry yeast. 🙂
Would powdered citric acid work instead of the lemon juice? An equivalent amount?
I’m pretty sure that would work…but I haven’t used it so I don’t know if it affects the flavor (lemon juice doesn’t). Maybe start with half as much just to see.
Tip for Kitchen Aid bread making: use the paddle attachment for mixing the ingredients until the dough comes together (starts clearing the sides and bottom of the bowl) THEN switch to the dough hook.
The KA dough hook is different than the Bosch– most Bosch dough hooks have L-shaped feet that mix the bottom of the bowl (which is flat, not curved like a KA). But the KA doesn’t have either, so the dough hook is best used just for the kneading portion.
You’ll do a lot less scraping with your spatula and it will take less time using the paddle for the first part 🙂
Thanks for the tip, Chelsea!
I am so excited for this! I have never been a bread maker but have intentions of becoming one and I’m so grateful I found your website. I just happened to come across it a few months ago and it has seriously changed my life and my family’s!! It seems like every night my husband asks me, “Is this another one of Mel’s?” 🙂 we love it. As a new wife and mother of two babies under 2, ain’t nobody got time for failed recipes. And I am not kidding when I say this-every recipe I have made from your website has been awesome. Thank you so much Mel! 🙂
Katie-
You can do it!! As a momma of two littles and one on the way, baking is my de-stresser and I love it. I grew up baking cookies but never bread but since being married (after some epic, epic fails, one in particular my husband fondly calls “the brick”) for four years I have moved up from terrible novice to “it usually turns out deliciously.” I have dabbled in sourdough starters (so.much.awesomeness) and just last week made a loaf…with no recipe because I felt like it. My extended family raved!! I feel like I’ve finally gotten a handle on things and I am here to tell you that you totally can too!! YAY! Go for it!!
Thank you so much, Katie! Your comment was a great pick-me-up and is EXACTLY why I continue to blog and try to share only the best of the best recipes. You are amazing for cooking up a storm during such a busy phase of life!!
So funny! I’ve had the huge batch version of his recipe on a tab in my phone for ages and finally made it today, only I halved it to fit in my kitchen aid. Just came back on your site for something else and saw you already halved it here! Haha oh well. Mine made two loaves plus two mini loaves and they came out great! Thanks for all you do (including reading my mind!)
Looks like you already did all the hard work – glad it turned out well!
Do you have a preferred brand of whole white wheat? There are so many out there! Thanks!!
I’ve used a lot of brands over the years and most have been about the same in terms of quality. Lately I’ve been picking up the Wheat Montana brand from Winco (a large grocery store here).
Thanks so much, this is going to be perfect for the two of us. My question does vital gluten go bad.? I have had some for awhile now.
I think it takes a while to go bad…if I know I’m not going to use it in about a month, I put it in the freezer. It keeps well there.
These look amazing! Perfect size for my little family! Does this recipe work well as sandwich bread?
Yes! That’s what we use it for.
Do I need to use the gluten and lemon juice?
I think they are important ingredients so the whole wheat bread is really soft and fluffy, but you can experiment leaving them out and see how it goes.
Is there anything that can sub for the vital wheat gluten? I’m living in Norway for a bit, and it doesn’t seem to be available here. And can I use normal yeast, I also can’t get instant. I do have dough enhancer. I made wheat bread, but it doesn’t seem to rise as high as it does in Idaho. Right now, everyone prefers your French bread!
Hi Lorrie, if you have dough enhancer, use a couple tablespoons of that instead of the gluten and then just make sure the dough kneads for 3-4 minutes longer than stated in the recipe (to really develop that gluten). When you say “normal” yeast, do you mean fresh yeast or active dry yeast? If it’s active dry yeast, yes, you can use it – just proof the yeast in a small bowl with a couple tablespoons water and maybe a pinch of sugar until it is foamy and bubbling before adding to the recipe.
I prefer a MixMaster mixer over the Kitchen Aid (crazy, right?), and it doesn’t do well with bread dough (dough climbs up the dough hooks & makes a mess). What about making in a Cuisinart food processor with the bread dough blade?
What size is your Cuisinart, Beverly? That might work…I have a Breville food processor that is supposed to be fairly good at mixing bread dough although I’ve never tried it. As long as your food processor is big enough, it should be a worthwhile experiment (otherwise, you could halve the recipe)
You need to reverse your dough hooks. As you face the front of the mixer, the dough hook which has a ring cut out of it’s shaft, near the top, needs to be installed on the right. I had the same problem until I figured that out.
I didn’t see the lemon juice (new ingredient for me to consider in bread, so I was curious) in the directions, only in the ingredient list.
Sorry about that, Jodi! You add it in with the oil and honey. I edited the recipe.
I’m totally going to make this to go with soup this week!