Sweet Cherry Pie and Pie Crust Tutorial
This post contains one of the yummiest sweet cherry pie recipes you will ever lay your lips on, and it has pie crust tutorial pictures.
What pie to serve at Thanksgiving is a hotly debated topic. Pie seems to be the quintessential Thanksgiving dessert, although, if you ask me, I always like to change it up a bit and intersperse other desserts (read: something dark and chocolate) alongside the delicious pies.
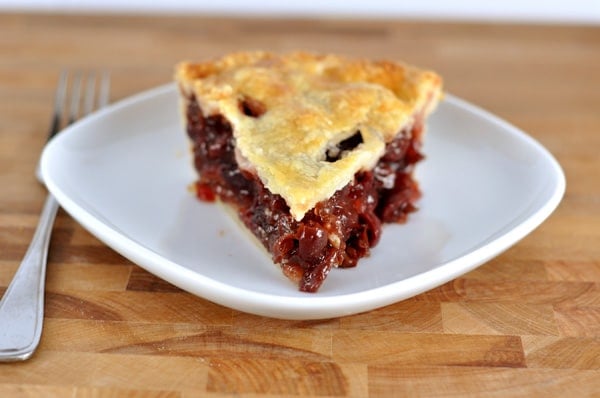
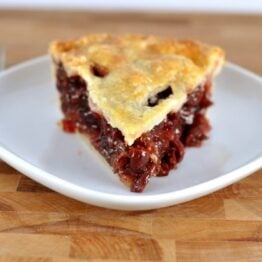
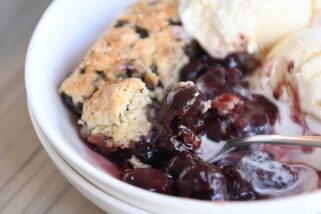
This year, I experimented with a cherry pie. I’ve never made one before and I have to say the result was completely lovely.
I was afraid the pie filling wouldn’t hold together and would be soupy and messy but the sweet, fruity filling thickened beautifully after cooling and since cherry pie has always been at the top of my favorite pie list, I was doing heel-kicks in the kitchen when we discovered how deliciously delicious this pie is.
Let’s talk about pie crust for a minute. I’ve mentioned before on this here blog that making pie crust scares the bejeebies out of me. I’ve created lots of practice for myself over the last year and I’m happy to report that it only scares half the bejeebies out of me now!
I’ve included my favorite all-butter pie crust below and a few how-to, step-by-step pictures (with a printable option) just in case it might help someone else not lose all their bejeebies.
Also, if you are wanting an extra boost in pie making confidence, check out my Pie Boot Camp Series HERE! The series includes:
All About Pie Making Equipment Essentials
How to Make Pie Crust (Foolproof Recipe, Rolling Out, Crimping + Video Tutorial)
All About Blind Baking + How to Do It and Why (Bonus: Chocolate Ganache Cream Pie Recipe)
Double Crust Pies and How to Make an Easy Lattice Crust (Bonus: Printable for Easy Reference to Sum Up Pie Boot Camp)
One Year Ago: Pumpkin Cream Cheese Muffins
Two Years Ago: Banana Bars with Whipped Cream Cheese Frosting
Sweet Cherry Pie and Pie Crust Tutorial
Ingredients
Pie Crust:
- Makes 2 pie crusts, for 2 single crust pies or 1 double crust pie
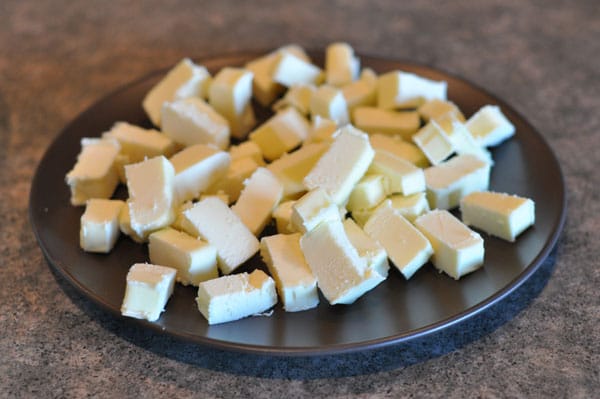
- 1 cup (227 g) 2 sticks very cold butter (I cut my butter into about 16 small pieces, put them on a plate and place the plate in the freezer for about 15 minutes before using in the recipe)
- 2 cups (284 g) all-purpose flour
- 1 tablespoon sugar
- ½ teaspoon salt
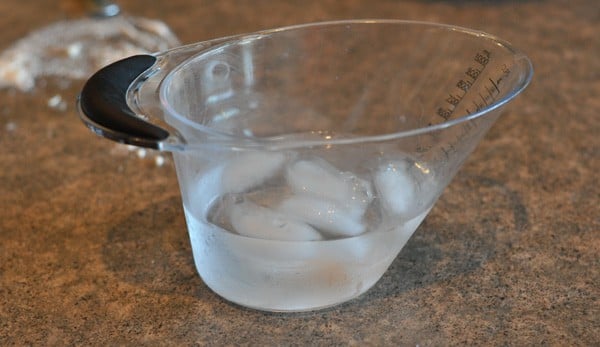
- ⅓ cup ice water, plus an additional tablespoon or two if needed
Cherry Filling:
- 2 red plums, halved and pitted
- 6 cups about 2 pounds pitted sweet cherries or 6 cups pitted frozen cherries, thawed, drained well and halved
- ½ cup (106 g) sugar
- ⅛ teaspoon salt
- 1 tablespoon juice from 1 lemon
- 2 tablespoons instant tapioca, ground
- ⅛ teaspoon ground cinnamon
- 2 tablespoons (28 g) butter, cut into 1/4-inch pieces
- 1 large egg, lightly beaten with 1 teaspoon water
Instructions
- For the pie crust: In a large bowl, combine the flour, sugar, and salt. Mix to blend. Scatter the butter pieces across the flour mixture and using a pastry cutter or two knives, work the butter into the flour until the pieces of butter are pea-sized and the mixture is coarse and crumbly. Throughout this process, the butter should stay very cold and firm. If you notice the butter is softening too much, refrigerate the mixture for about 10 minutes before continuing, although this shouldn’t be a problem if you work quickly. Drizzle the cold water over the flour/butter mixture, and with a fork, toss the flour and water lightly to combine. The dough should start to pull together in a floury mass of dough. Add a tablespoon of cold water additionally at a time if the dough is too dry. The dough should not resemble a sugar cookie dough – in fact, it may still be a bit crumbly when you start to roll it out, but it will come together as you roll (see pictures below).
- On a very lightly floured work surface, turn out the dough and using your hands, press it into a large, thick disk. As you press, it should start pulling together more. Cut the dough into two pieces. Loosely cover one of the pieces while you roll out the first.
- Using the same lightly floured work space, begin rolling the dough starting in the center of the disc and rolling outward in short, strong motions. After every roll, lift the dough and turn slightly to make sure it isn’t sticking to the counter (add additional flour as needed). When the dough has been rolled out to the desired size (roll it to about 11 inches for this cherry pie), roll the dough gently up on your rolling pin and unfold it into the pie dish. Lift the edges of the pie dough to ease it into the bottom of the dish (don’t stretch it otherwise it will shrink in the oven while baking!). Using kitchen scissors or a sharp knife, trip the dough around the edge of the pie plate. For this double-crust cherry pie, leave a one-inch overhang and don’t flute the edges yet! For a single crust pie, leave a slight 1/4- to 1/2-inch overhang. Fold this excess overhang underneath the edge of the pie plate to form a thick edge. Flute the edges with your fingers. Refrigerate the pie plate while you prepare the cherry pie filling.
- For the filling: Adjust an oven rack to the lowest position and heat the oven to 400 degrees. Process the plums and 1 cup halved cherries in a food processor or blender until smooth, about 1 minute, scraping down the sides of bowl . Strain the puree through a fine-mesh strainer into a large bowl, pressing on the solids with the back of a spoon to release all of the liquid. Discard the solids. Stir the remaining halved cherries, sugar, salt, lemon juice, tapioca, and cinnamon into the puree; let the mixture stand for 15 minutes.
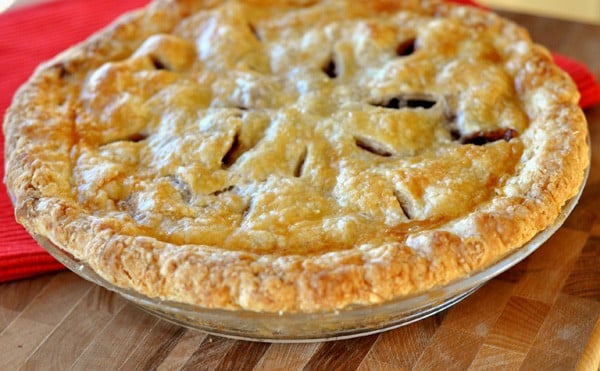
- Transfer the cherry mixture, including all juices, to the dough-lined plate. Scatter the butter pieces over the fruit. Roll the second disk of dough on a lightly floured work surface to an 11-inch circle about 1/8 inch thick. Roll the dough loosely around the rolling pin and unroll over the pie, leaving at least a ½-inch overhang. Fold the lower pie crust over the top pie crust and press to seal. Flute the edges using your thumb and forefinger or press with the tines of a fork to seal. Brush the top and edges with the egg mixture. With a sharp knife, make 8 evenly spaced 1-inch-long vents in the top crust. Freeze the pie for 20 minutes before baking.
- Place the pie on a foil-lined baking sheet and bake for 30 minutes. Reduce the oven temperature to 350 degrees and continue to bake until the juices bubble around the edges and the crust is a deep golden brown, 30 to 40 minutes longer. I covered my pie edges with a pie shield about 20 minutes into baking at the 350 temperature.
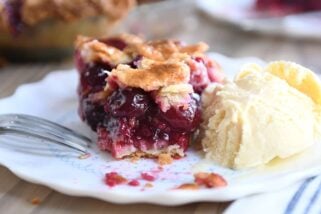
- Transfer the pie to a wire rack; let cool to room temperature so juices have time to thicken, 2 to 3 hours. Cut into wedges and serve.
Notes
Recommended Products

Recipe Source: pie filling adapted from Cook’s Illustrated, pie crust from My Kitchen Cafe
Pie Crust How-To:
Printable Version with Pictures or PDF Version
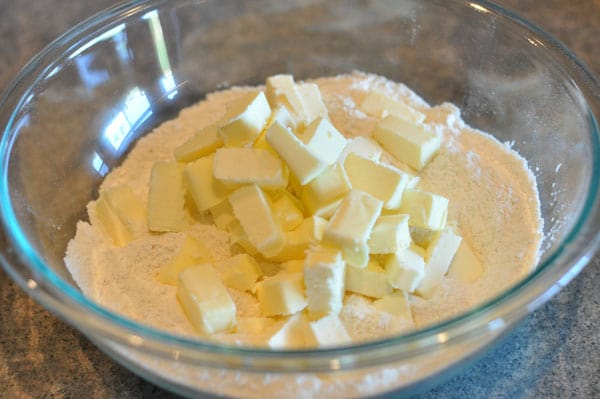
I start the process by cutting the butter into small pieces, putting it on a plate and setting it in the freezer for 10-15 minutes while I get the dry ingredients going.
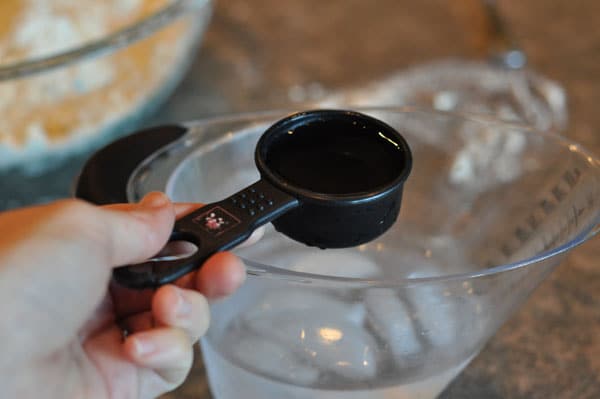
Also, I fill a liquid measure with water and put some ice cubes in to start getting my water nice and icy cold.
Combine all the dry ingredients in a large bowl.
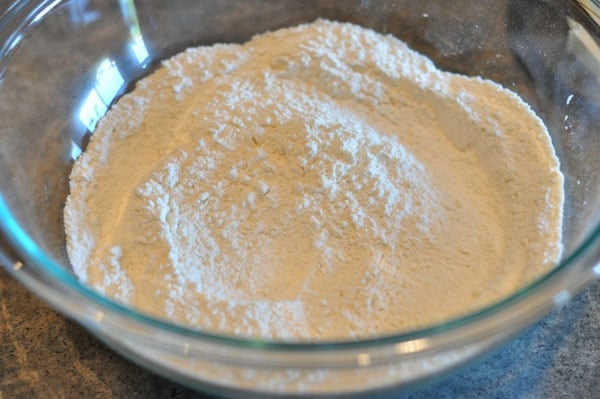
When the butter is very cold, toss it on top of the flour mixture.
Toss the butter with the flour.
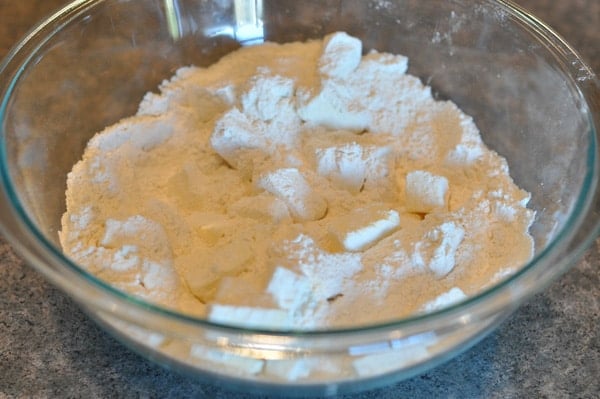
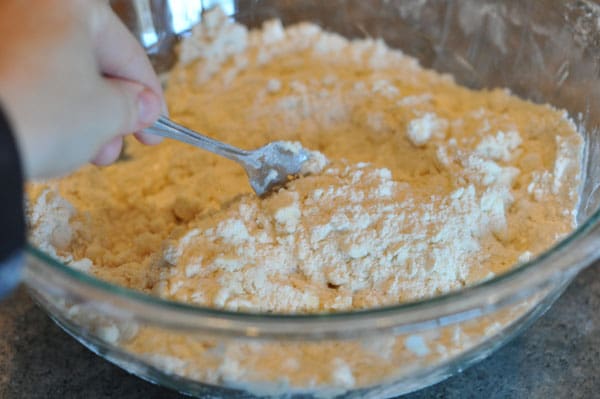
Using your handy-dandy pastry blender (or two knives) start working the butter into the flour…
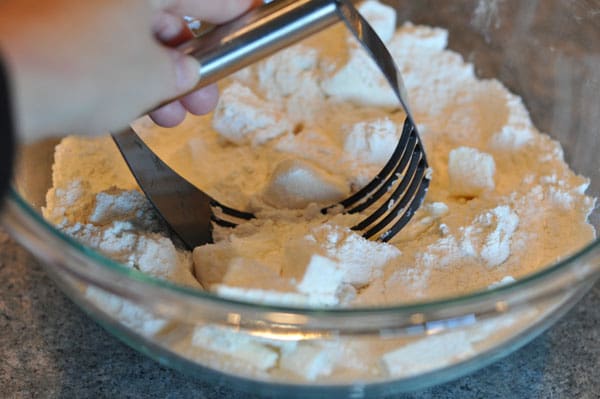
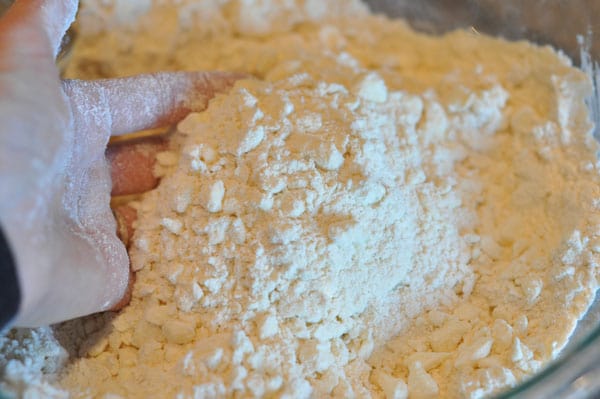
…until the mixture is crumbly and the butter is in about pea-sized pieces.
Measure out the ice water.
And drizzle it over the butter/flour mixture.
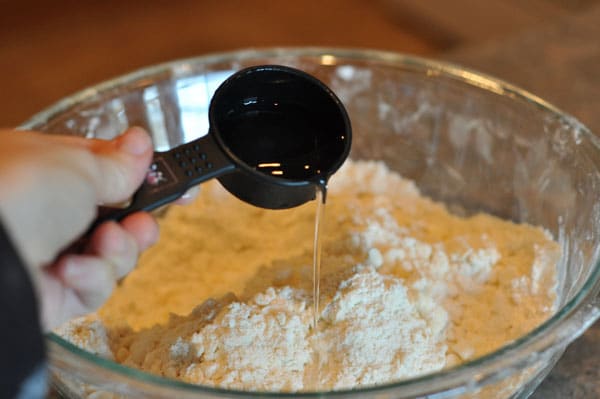
Using a fork, start tossing the water and flour mixture together.
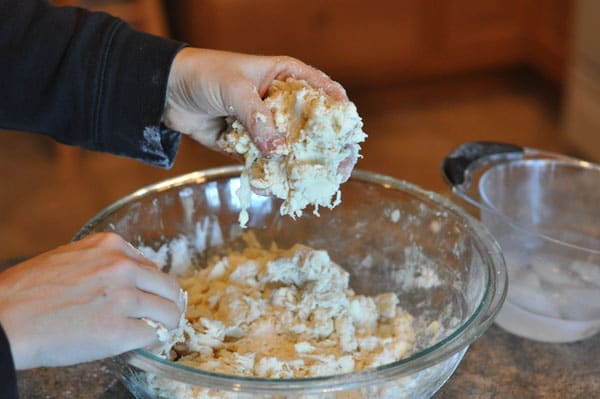
Eventually I abandon the fork all together and use my hands to do the mixing. Watch the butter to make sure it isn’t softening too much (especially with the body heat from your hands). If it seems to be getting soft, refrigerate the entire mixture for a few minutes.

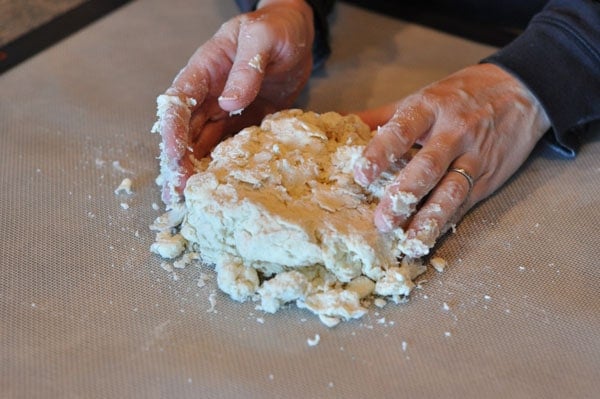
Mix until the dough forms a shaggy mess of a ball. It shouldn’t be smooth and supple, instead it should still be a bit crumbly but a pinch of dough should hold together when squeezed in your fingers. It will all come together as you roll it out.
Turn the dough out onto a lightly floured surface. See how it still looks a little crazy and shaggy? This goes against my personality that likes things all neat and orderly but I promise it will come together as you roll.
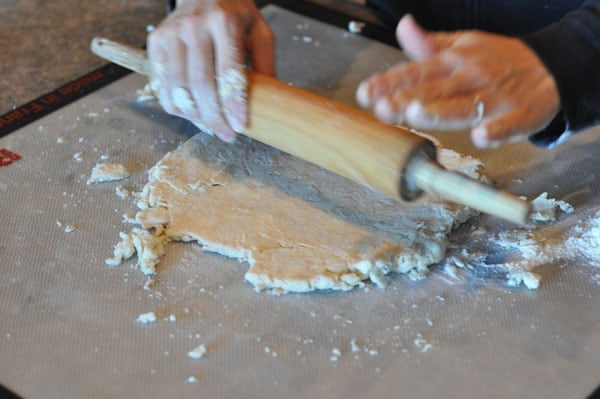
Begin rolling from the middle of the dough using firm, strong strokes and giving the dough a quarter turn and lift after each roll to make sure it isn’t sticking.
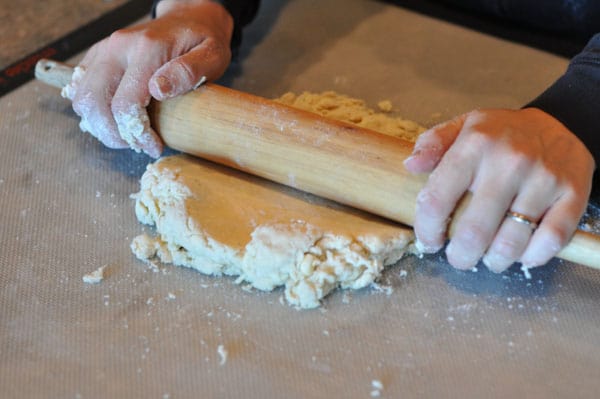
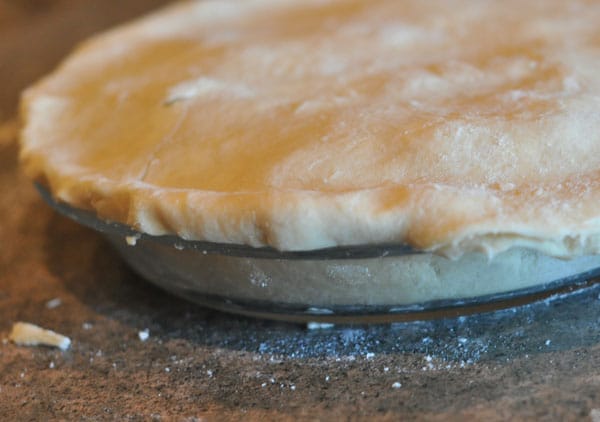
As you continue rolling the dough becomes more smooth. Take care not to manhandle the dough too much as you roll – this can make the butter melt into the dough too much and will result in a tough crust instead of a light and flaky crust.
When you have finished rolling you should still be able to see pockets of butter in the crust. It’s a little hard to tell in this picture but if you look close you’ll see smears and dots of butter rolled out in the crust. When that butter melts while baking it will create a steam puff of air which helps the crust be flaky and tender. Flaky and tender is good.
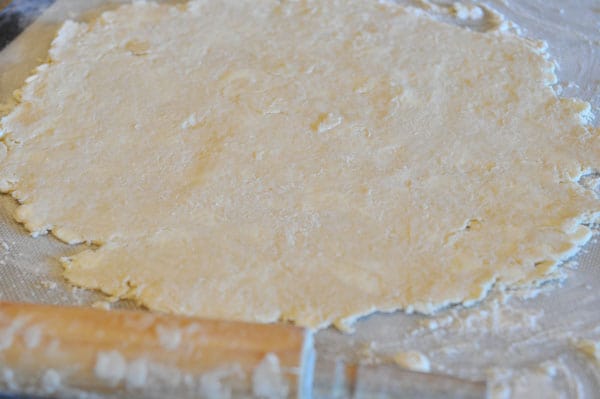
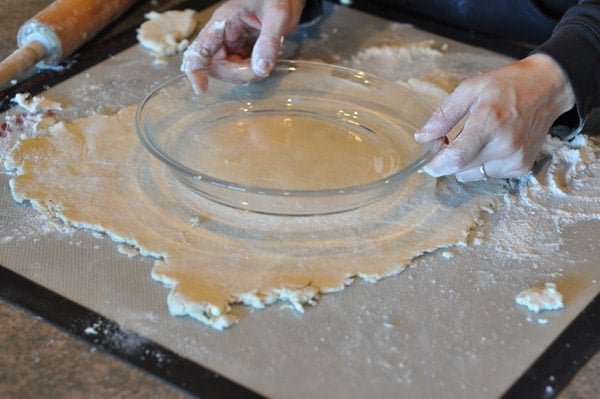
I like to take my pie plate and hold it over the dough to see exactly how big I need my dough circle. I always roll about 2 inches more than the diameter of my pie plate.
Carefully roll the crust around your rolling pin, trying not to curse if it rips or tears.
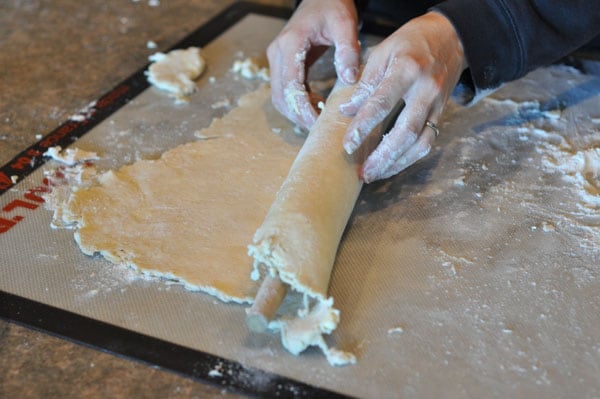
Gently transfer it to your pie plate and unroll it from the rolling pin.

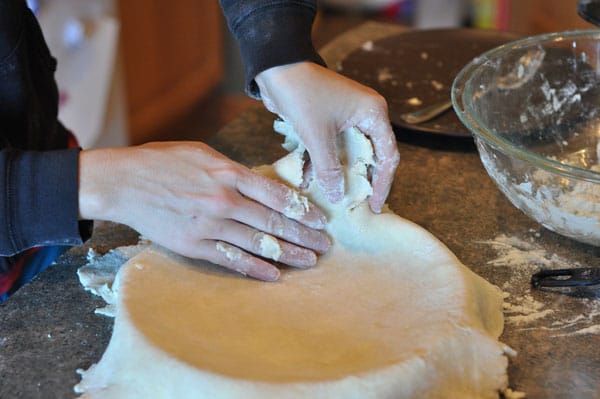
The pie crust will probably be sitting above the bottom of the plate. Instead of stretching and pulling the crust to line the plate, gently lift the crust from the side of the plate and ease it into place. If it stretches, it will shrink in the oven while baking. Shrinking is bad.
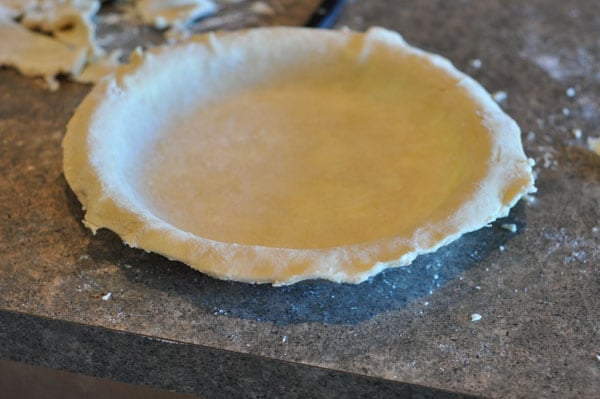
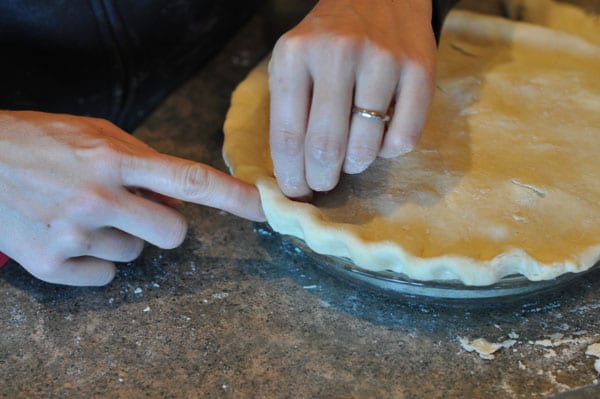
Trim the edges of the crust to about 1/2 to 1-inch beyond the edge of the pie plate. For a single crust pie, you could fill right now and flute the edges (or flute the edges and blind bake the pie crust). I like to fold the extra overhang underneath to create an extra thick pie crust edge and then flute it with my fingers.
For a double crust pie, repeat the above steps to roll out the dough. Then gently place the top crust over the filled pie. Trim the edges about 1/2-inch past the pie plate and fold the top crust underneath the bottom crust.
Then flute the edges and bake to perfection!
Thus endeth the longest post yet on My Kitchen Cafe. Peace out.

New to making my own crusts! I’m about to attempt your sour cream crust with the tutorial, with this filling. Would I still do the blind bake for the crusts before I add the filling, or just make all at once like the crust recipe says here? Thanks!
Hi Meg – for this recipe you don’t need to blind bake the crust first. Good luck!
Is tapioca flour same as ground tapioca? Do you buy it ground already or do you just grind the pearls yourself. If you grind them yourself what do you use to grind them. I can’t find “ground tapioca”.
Yes, you can buy tapioca flour – same thing as ground tapioca.
Just made this tonight. The crust! Omg…. so flakey and yummy. I made the crust the night before and put them in freezer. Freezing did not effect them at all. Still turned out prefect. Thank you!
Any time I need a recipe lately. I come here to find exactly what I need. I was hoping that I could find a pie crust recipe I could convert to butter and instead I find a butter crust. Thank you!
Thank you!
Hi, I’m looking to make mini cherry pies for Father’s Day this weekend and was wondering if you had a guess as to what changes would need to be made to pull it off?! My husband and I have loved everything we’ve made from you, so thank you so much!(and I’ll still mean that even if you crush my dreams and tell me to just make a regular sized pie for this one)
Haha! Well, I think this might work for mini pies (it’s been awhile since I made it) except I think the filling is pretty runny when it goes into the pie crust – which works fine for an actual pie but might be a nightmare for hand pies. Are you using mini pie tins? If so, I think it should work!
Yeah I have a handful of mini tins I was going to try using!
HI! I am so excited to try this crust tomorrow but I was wondering if you use unsalted butter???
I almost always use salted butter. 🙂
THANK YOU!
Oh man…I just tried this pie crust for a savory meat pie. I think I added too much water to my crust, because it was sticky and almost impossible to roll out. And I think I better invest in a pastry cutter, because cutting with two knives took so long and made my butter melt a little. You weren’t kidding about the part where you have to try not to swear as you roll up the pie crust! I am going to try again soon and hopefully do better! I love your blog and your recipes. I have yet to make something from your blog that I did not like! =) Thank-you for all your hard work and for sharing with all your readers!
The reason you don’t like pumpkin pie is because you’ve never had pumpkin chiffon pie!! I’ve converted many a pumpkin pie hater with my chiffon recipe. Let me know if you want to try it!!
Love the pie crust tutorial. Wish I had seen it yesterday, my pie crust is to crumbly I thing to much Crisco so next time I will try this one.. I was making pumpkin pie.. 🙂 just had to mention that since you posted about.. love your site I found it through Pinterest
Jeff – it says in the beginning of the filling directions to preheat to 400 degrees then you reduce to 350.
you say in his recipe to reduce the heat to 350 degrees.What temperature do I reduce the heat from? I don’t see the preheat temp in this recipe
Thank you so much for this tutorial! I’ve had many failures at pie crusts. I’m motivated to give them another try now.
Katie – whoa, there…don’t be so quick with your criticism. If you look right above the pie crust tutorial pictures, you’ll see that I DID cite Cook’s Illustrated. The credit to Cook’s Illustrated has been there since the day the recipe was posted.
this recipe is from cooks illustrated. shame on you for not citing your source!
Thank you so much for the recipe and detailed tutorial! I used the crust to make an apple pie to take to my parent’s house for Thanksgiving and it turned out great!
I had extra pie filling left over and my husband requested another pie a couple of days later so we could have one for ourselves. 🙂
Ruchita – I’m thrilled this pie crust worked out so well for your apple pie! Thanks for letting me know.
Red plums in November is proving to be difficult…
There probably isn’t any substitute for them, right?
Hi Anissa – I’m surprised finding plums is proving to be so difficult – bummer! I think the reason for the plums is to help the pie firm up…plums have a lot of pectin in them. If you can’t find them, I’d use about 1-2 cups more cherries and increase the instant tapioca to 3 tablespoons. I hope that helps. Good luck and Happy Thanksgiving!
great tutorial, and terrific pie! you’re a sneaky one, including those plums–i like it.
Super thanks for the pie crust tutorial! I have not perfected that yet 🙂
I have always struggled with pie crust too until I found this recipe. Give it a try and see if it is any easier. Pie Crust: Mix 2 c. flour and 1 tsp salt, then add 2/3 cup oil and 5 T. cold water (I combine the oil and water together then add). Mix gently until it hold together well. (Do not over mix) Roll between two sheets of waxed paper or on a pastery cloth into a round shape. Then create your pie. Hope you like this crust recipe as much as I have.
This is my Grandma’s exact recipe and the only one I use because it is so flaky and perfect! I highly recommend it.
Awesome tutorial!!! It has given me hope that perhaps with the help of your wisdom I just might be able to pull something like this off. All other attempts, including my Mother-in-Law’s recipe with vinegar, have failed miserably!!! Wish me luck!
Thank you. I have yet to try making pie crust and now I just might. Wonderful
WOW, what a wonderful step by step pictures. Your pie look perfect! It cuts so well with no runny filling!
Great tutorial. This recipe looks good as well. I’m putting it on my list. Now I know 2 people in the world who dont like pumpkin! You and my hubs. 🙂
I actually love making pies. I don’t do it often enough, but that is my favorite part of Thanksgiving. This cherry pie looks delish. I have a recipe for a pie crust that uses butter, shortening, and cream cheese that is divine, but kind of expensive. I think this is great and love that it just uses butter and no shortening.
I feel the need to defend pumpkin pie after reading the comments- I am really looking forward to it! You may want to try my aunt’s secret: Using the Libby’s can of pumpkin puree follow the recipe for pumpkin pie on the back, but substitute half and half for the evaporated milk- so yummy!
The cherry pie looks delicious!
I’m a fellow pumpkin pie hater. I’m an apple pie girl myself, but I may just try this cherry one out next week!
Looks divine and Deborah’s post was fun to read. We could be great friends, if only you lived closer. Although, you would find us on your door step many nights a week, at dinner time, ready to eat! Your food is so fabulous and I must say, you have stayed true to your purpose and my family loves you and your blog! We tell everyone about it!
What a great step by step . . . pie crust still slightly intimidates me as well. Yours looks both gorgeous and delicious!
I’m not a huge fan of pumpkin pie either but cherry pie – Yum. This looks fantastic. Making pie crust still scares me so thank you for the very clear tutorial. I’ve bookmarked this for a day when I’m feeling brave and ready to battle my fear of pie crusts! Happy Thanksgiving.
LOL, peace out….I thought I was the only one that said that. 🙂
I should surprise my mom and make her a cherry pie. She loves them.
~ingrid
I think it is funny that people feel they need to hide that they don’t love pumpkin pie! Most of us don’t! It is only those select few that love it that feel so strongly about it!
Now you’ve gone and done it! Now I have to admit that I don’t like pumpkin pie much either…I mean I’ll eat it…but if I have to choose, I’ll always choose Pecan Pie. Your Cherry Pie look delish, though…I might be tempted to waiver! 🙂
I’ve asked this before, Melanie, but I’ll ask again…were we seperated at birth? 🙂 I despise pumpkin pie, too! I love pumpkin cake, muffins, cheesecake, soup, etc., but pumpkin pie- no way! Your cherry pie looks scrumptious, though. I love the pie crust tutorial!