Easy Homemade Egg Noodles {Step-by-Step Pictures Include Food Processor Method or By Hand}
A super simple homemade egg noodle recipe complete with step-by-step pictures and details on using a food processor or making by hand!
Homemade egg noodles are not part of my every day routine but I kind of wish I had a magical way to make enough time in the day so they were. I love them.
They are homey and comforting and insanely yummy.
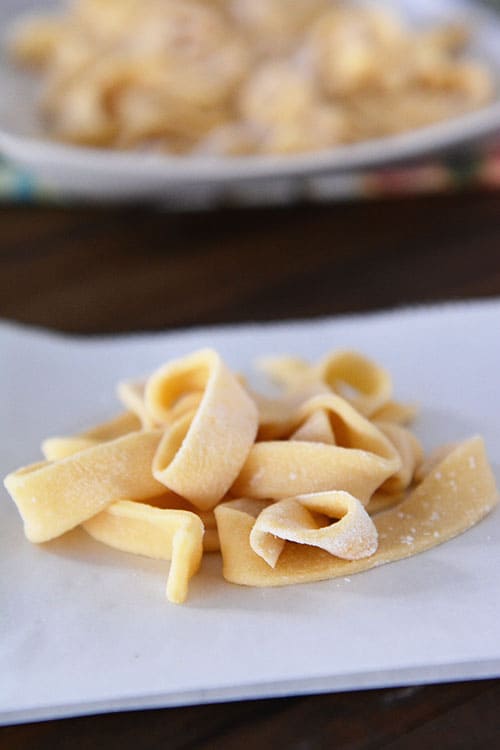
Plus, I know we’ve been talking a lot about rock star status lately and how to achieve it in the kitchen but homemade noodles can skyrocket you right to the top of the rock star awesomeness list.
And they are super easy. Super, dee-duper easy.
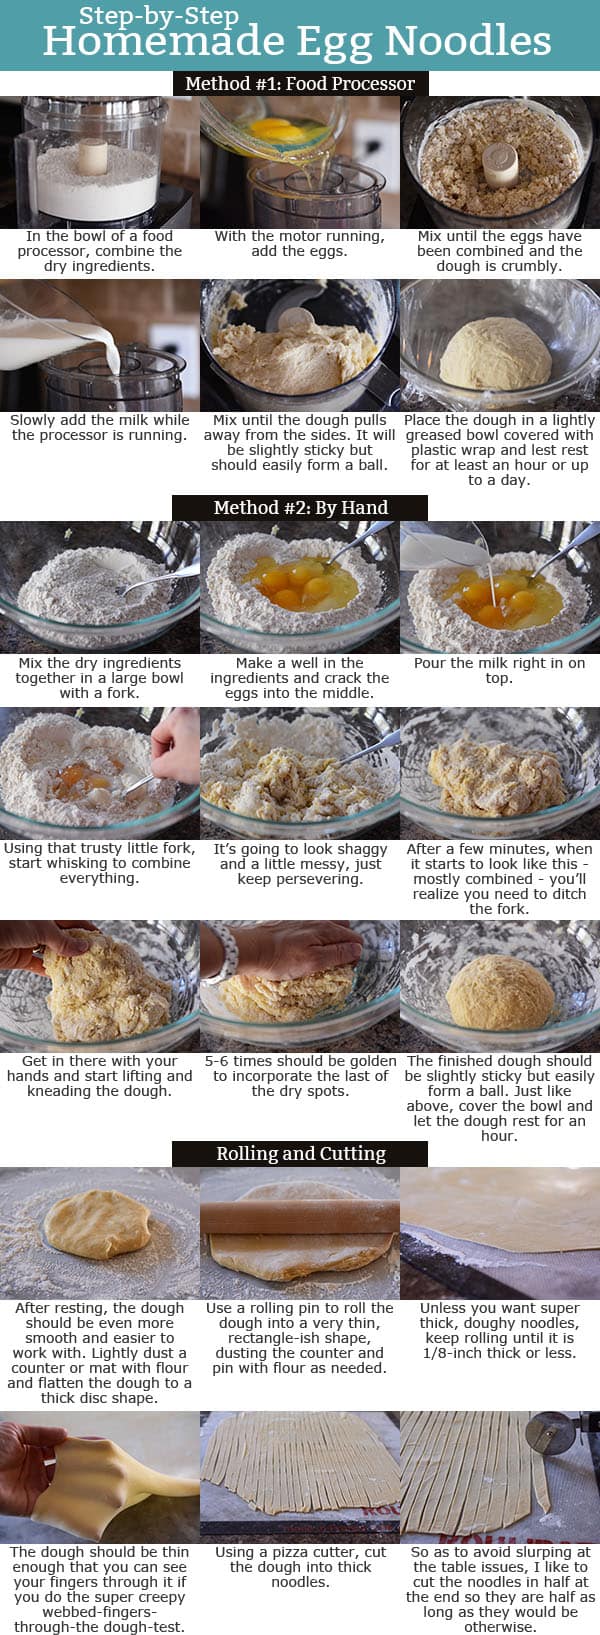
Because I love you, I included a step-by-step tutorial below the recipe and added pictures for both the by-hand method (go, you!) or the food processor method (while easier, you’ll still get rock star points).
Other than mixing a simple dough, letting it rest, rolling and cutting into strips, there’s nothing tricky here.
And if you have a real, life pasta roller machine, you can use that for rolling and cutting the dough (sometimes I pull mine out but most often, if we aren’t doing a fun homemade pasta night with lots of sauces and toppings and just want homemade noodles for, say, chicken noodle soup, I do it the old-fashioned way – rolling pin and pizza wheel because I don’t like cleaning my pasta maker; I’m lazy like that).
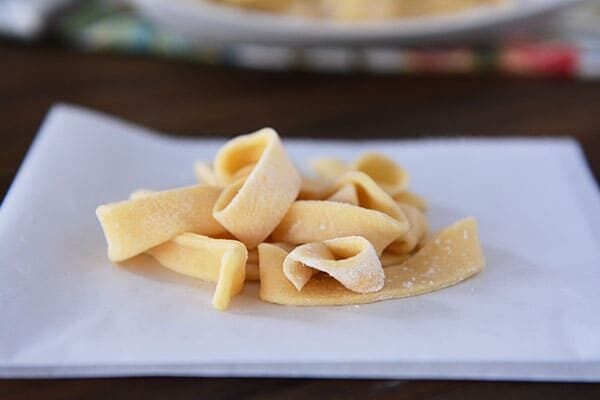
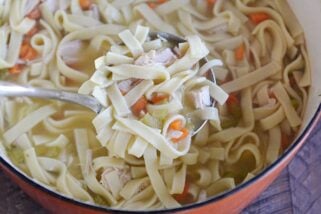
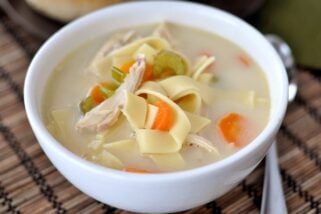
And if you want a real cheater method for chicken noodle soup, here’s our go-to variation on nights I haven’t prepped a whole, delicious chicken in the crockpot: I fill a 6-quart or so pot 2/3 of the way with good-quality low-sodium chicken broth (right now the Kirkland brand at Costco is my go-to), add chopped carrots, celery, salt and pepper and a bit of dried thyme, cover and simmer for 15 minutes or so until the veggies are mostly tender. Toss in leftover cooked chicken or rotisserie chicken (off the bone, obvs) and egg noodles (these homemade noodles can totally be made in advance and frozen or use store bought) and simmer until the noodles are cooked but not mushy.
My kids can down chicken noodle soup like no other.
It’s some kind of super human achievement that I’m hoping gets them into a good college some day. And when I happen to make chicken noodle soup with homemade noodles? Totally time to triple the recipe.
One Year Ago: Black Bean and Butternut Enchilada Skillet
Two Years Ago: Chocolate Chip Peanut Butter and Oatmeal Cookies
Three Years Ago: Pumpkin Cookies with Caramel Frosting
Easy Homemade Egg Noodles
Ingredients
- 2 ¾ cups (391 g) all-purpose flour
- ¾ teaspoon salt
- ½ teaspoon baking powder
- 4 large eggs
- 2-4 tablespoons milk
Instructions
- By Hand: Combine all the dry ingredients together in a large bowl. Make a well in the center and crack in the eggs. Pour in the milk (start with 2 tablespoons and add more if the mixture is too dry). Using a fork, whisk the mixture until it is mostly combined. It will look shaggy and have some dry spots. At this point, ditch the fork and get in there with your hands. Lift and knead the dough 5-6 times until there are no dry spots remaining and the dough forms a soft, slightly sticky ball. Cover the bowl and let the dough rest for an hour (or up to a couple of days in the refrigerator).
- Food Processor: Combine all the dry ingredients and pulse a few times in the bowl of a food processor. With the motor running, add the eggs and mix until the dough is crumbly. Add the milk a tablespoon at a time until the dough forms a ball around the edges of the food processor bowl. It will be slightly sticky but if you pinch a little bit in your fingers and roll it, it should stay together in a little ball without leaving a lot of residue on your fingers. Transfer the dough to a clean bowl, patting into a round ball. Cover the bowl with plastic wrap and let rest for an hour (or up to a couple of days in the refrigerator).
- On a lightly floured counter or mat, press the dough into a thick disc-shape. Using a rolling pin, roll the dough as thin as you like into a large rectangle-ish shape – keeping in mind the noodles will puff up quite a bit while boiling – I suggest rolling to at least 1/8-inch thick. See the pictures below for an example. A good rule of thumb is to roll them thinner than you think.
- Using a pizza cutter or knife, slice the dough into strips for noodles, depending on how thick you want them. I like to cut the entire rectangle in half when finished so the noodles aren’t insanely long.
- Use the noodles immediately or let them dry in an even layer on a lightly floured parchment-lined baking sheet (it will probably take several sheets).
- If I make these in advance, I let them dry a bit and then toss them in a ziploc bag (they should be dry enough not to stick together) and refrigerate them for a couple of days or freeze them indefinitely.
Notes
Recommended Products
Recipe Source: from Mel’s Kitchen Cafe (based on an old recipe my mom made growing up)



FABULOUS!
My first comment didn’t show up, so if it mysteriously shows up, please delete one of them.
Thanks for bringing up memories of my childhood. We had homemade noodles every Sunday and then again on Monday with the leftovers from Sunday. My mom’s recipe would drive you crazy. A handful of flour, one egg.(we were very poor) a half an eggshell of water, a little bit of oil and a pinch of salt. After kneading, and resting she would roll out the dough so thin you could read the newsprint through the paper. She would let the dough dry over the back of a kitchen chair until the edges would crack. Then she would cut the dough into strips as wide as your pinky was long and then stack up the strips a bit and cut the noodles as wide as your pinky was. It was my job to cut the noodles because my mom didn’t have the time to cut them the way my dad liked them.
She would then boil them until they were all uniform in color (about three minutes ). After draining them, she would melt a couple of Tablespoons of lard and pour it over the noodles. We never ate “store bought” noodles because they would slide down your throat (which was the same reason we didn’t eat mushrooms). I am not saying that ours were better than yours, it was just the way she learned how to make them. I rarely make them except for a dish called Chopped meat noodles which is a post for another day. Thanks again
I just read through the comments. For those who are having problems drying the dough I have a few tips. My mother dried her noodles over the kitchen chair on a sheet of newspaper. Well newspaper is rare these days. For those of you who order things through the mail, save that brown paper that they use to wrap your items in and roll it up. I used to let the grandkids color on it, but they are too old for such things. So I use that brown paper and put the rolled out dough on it.
We no longer have kitchen chairs with backs on them so I put mine on the paper and onto the cooling racks that I use for cookies. Divide the dough in half or more, till you figure out how much you need to fit on your cooling racks.
Mom always said to dry the dough until it cracked on the edges, but the dough is quite forgiving. I also found that it’s best to freeze the dough you are not using. Mom never did, but like I said, we had noodles almost every day and hers dried out a lot. I have more time than she did, so my dough doesn’t always get as dry as hers did, If I just stick it in a Tupperware bowl, it has the tendency to mold if it sits too long. Have fun
Tiggerr
If you’re using rotisserie chicken anyway, why not use the carcass and make your own broth?
What is your favorite sauce to use with this recipe if not doing chicken noodle soup? My dough is in the fridge. Can’t wait to see how it turns out.
Probably this one:
https://www.melskitchencafe.com/creamy-garlic-alfredo-sauce-my-go-to-dinner-saver/
These noodles were fantastic! Have you done with hard white wheat?
I have done it with half white wheat and half all-purpose flour but haven’t tried it with 100% whole wheat.
Wanted to report back – I tried with 100% hard white wheat and would not recommend. I then tried with 100% Kamut and it was fantastic! My son even said he was glad I hadn’t used “my weird whole grain junk” and used store-bought flour – it was that good that it tasted like white flour! Haha! I didn’t tell him that it was my weird fresh ground whole grain – he doesn’t need to know everything! Thanks for another great recipe!
Absolutely delicious! Thank you so much for sharing this recipe. These are fabulous.
I have a question about drying the noodles. As a child I watched my grandmother roll her noodle dough out in small rounds and place them on an upside down cake pan. She would place them in the oven with it heated. I don’t know what temperature the oven was on or how long she left them in. Would you have any suggestions on this?
Hmmm, I’m honestly not sure. I’m guessing it was probably on very low heat just to dry them, maybe 200 degrees?
Great recipe! The whole family loved it.
I made these noodles this week to use in a double batch of chicken noodle stew. Everyone loved it! (I wish I had made an extra half batch of noodles for it because I NEEDED more noodles…)
This is such an amazing recipe! Makes something that seems intimidating easy and fun! Thanks Mel!
Hi Mel-
Thanks for this recipe! I’ve been looking for a noodle recipe that tastes good when made with gluten-free flour and this one was delish. I used your measurements and cup-for-cup gf flour. It seemed more dry than your pics showed, and it was pretty stiff when I rolled it out. I’ll use a little less flour next time and see how it goes.
Just wanted to let you know that the noodles were plump and al dente, very similar to the ones my mom used to make, even with the gf flour. Thanks for sharing!
Thank you so much for this recipe. My grandma passed away 10 years ago. She always made homemade noodles for Thanksgiving. My family has missed them every year since so I decided to try making some this year and used this recipe. Everybody loved the noodles and I was even told that my grandma would have been proud of me for the way they turned out. I will definitely make these again.
Can someone explain to me what the baking powder does for it? Does baking powder to bad after awhile?
Hello Mel!
I just had to comment and tell you how much my family and I enjoy these noodles! It has become our go-to ingredient to jazz up our favorite chicken noodle soup. In fact, I have recommended many family and friends give the recipe a try as well!
Today on my blog, I posted about my adventure making these noodles with my kids (pictures and all!)…that’s how much we love it!
As an avid reader of your blog, I thank you for sharing your ideas and recipes with the rest of the world!
Best,
Erica
Podriais poner la receta en español, porfavor ya que me gustaría hacer está receta. Muchas gracias
So this may sound silly, but how long do you boil the noodles till they are done? I’m currently boiling them in my chicken stock , so I guess I’ll just taste test them periodically over the next twenty min or so???
A lot depends on how thick the noodles are and also how much they’ve dried, but it usually will only take a few minutes for fresh noodles.
Made the dough completely in my Cuisinart. Covered it and let it rest for an hour on my silicone pastry mat, thus saving the step of dirtying a bowl. Boiled noodles in chicken broth. Excellent final product.
Awesome!
Thank you for such detailed instructions! I am excited to make these for my chicken soup this weekend!
Hi Mel — I really want to make this work. I’ve tried twice. Both times, I ended up with dry flour at the bottom of the bowl. The first time I used 6+T of milk; this time I’m using 5T and I’ll just throw out the dry flour before rolling. Neither time have I been able to produce that nice round moist ball. Any suggestions?
Try adding a bit less flour and see if that helps.
Best, best, BEST noodle recipe I’ve found!!!! Simple, quick, yet most versatile, delicious noodles! I have the food processor but opted to do by hand. I will be making and freezing these to have on hand. They do puff nicely, so make sure to roll and cut them thinner than you’d expect, just like the recipe mentions!