Easy Homemade French Bread
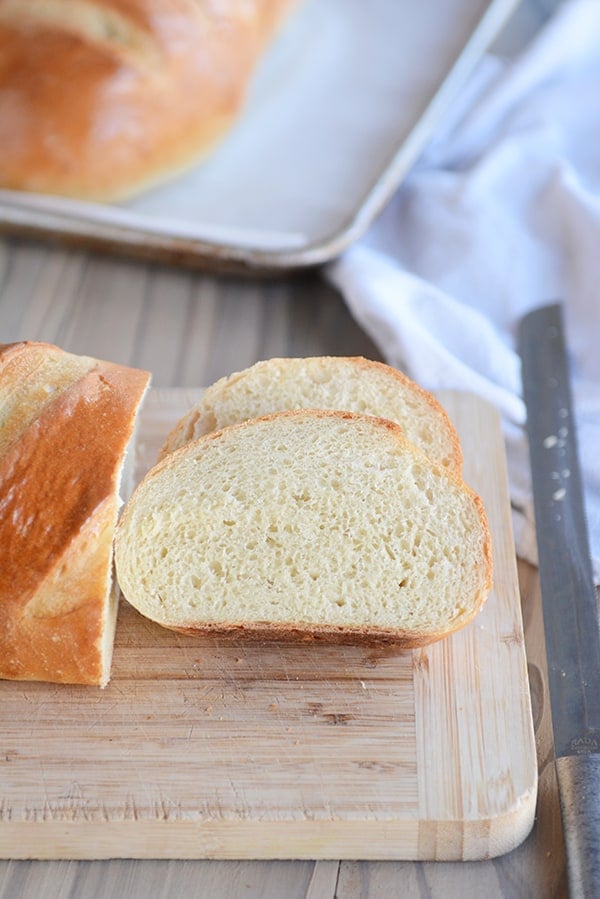
Homemade French bread has never been easier! This simple recipe produces a light and fluffy loaf of French bread that will rival any bakery!
This easy homemade French bread is so simple and perfect for a bread making beginner.
But as you can see from all the comments below, it’s just as valued by expert bread makers, too!

Making French Bread Dough
This straightforward bread dough can be made in a stand mixer or by hand.
- Warm water
- Yeast (instant or active dry yeast)
- Bit of sugar and oil
- Salt
- Flour (all-purpose or bread flour)
At the start, the dough will look shaggy and rough.

But as it kneads, it will become soft and smooth.
The most important part of this dough (and other yeast doughs) is to judge the amount of flour by the look and feel of the dough rather than the exact amount of flour called for in the recipe.
Factors such as humidity, elevation, room temperature, how we each measure flour, and more can affect the amount of flour added. So don’t stress about precise flour measurements and continuously feel the dough to achieve a soft dough that is slightly tacky but doesn’t leave a lot of residue on your fingers.
Too little flour and the dough will be a mess to handle. Additionally, the bread won’t hold its shape as it rises and bakes.
Too much flour and the dough won’t rise well and the bread will be tough and dense.

Two Methods for Dough Rising
In the recipe, there are two methods to letting the dough rise:
- Leave the dough in the mixer, cover with a lid or towel, and let the dough rest for 10 minutes. Stir it down by turning on the mixer for 10 seconds or so. Repeat the “rest and stir down” cycle five more times.
- Transfer the dough to a lightly greased bowl and cover with a towel or greased plastic wrap. Let the dough rise until doubled, about an hour or so, depending on the warmth of your kitchen.
I alternate between the two methods depending on my mood. The 10-minute increment rising method is unique to this original French bread recipe. The idea is that allowing the dough to rise this way produces a lighter crumb.
But the more traditional rising method also results in a delicious, fluffy loaf.
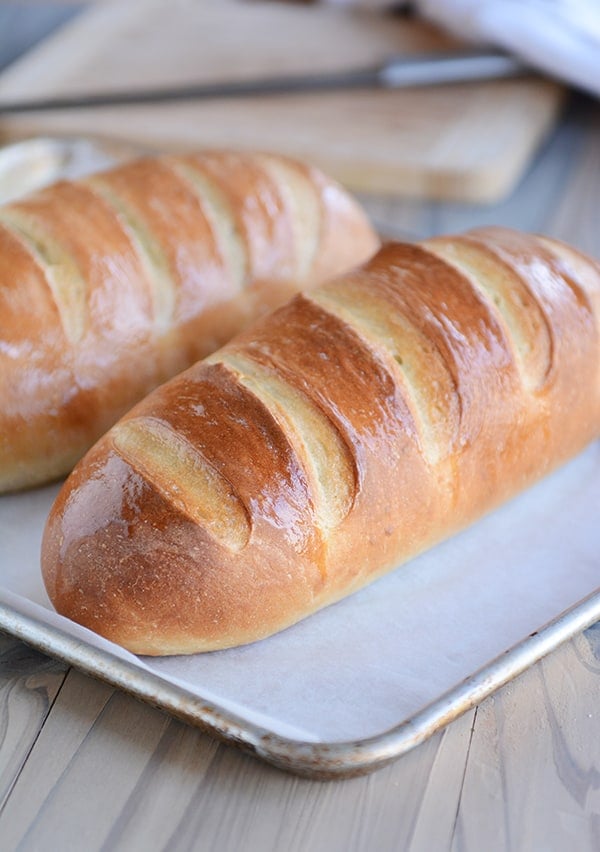
How to Shape French Bread Loaves
The question I get asked the most about this easy homemade French bread is how to shape the loaves.
The loaves can really be made any size or shape; I usually end up making 12-inch loaves, but if they end up being a bit thinner or chubbier, it’s no big deal!
Press each portion of dough into a flat rectangle and fold the bottom edge up and over the dough, pressing the seam flat with your hand.

Then, roll the dough up again to meet the top edge.
Fold the top edge over and press or pinch lightly.

Take the end of the bread dough and fold it up and over an inch or two to give an even thickness all the way down the loaf.
Pinch to seal the end. Repeat on the other end of the dough.
Then, deliberately and thoroughly pinch and seal the entire length of the loaf.

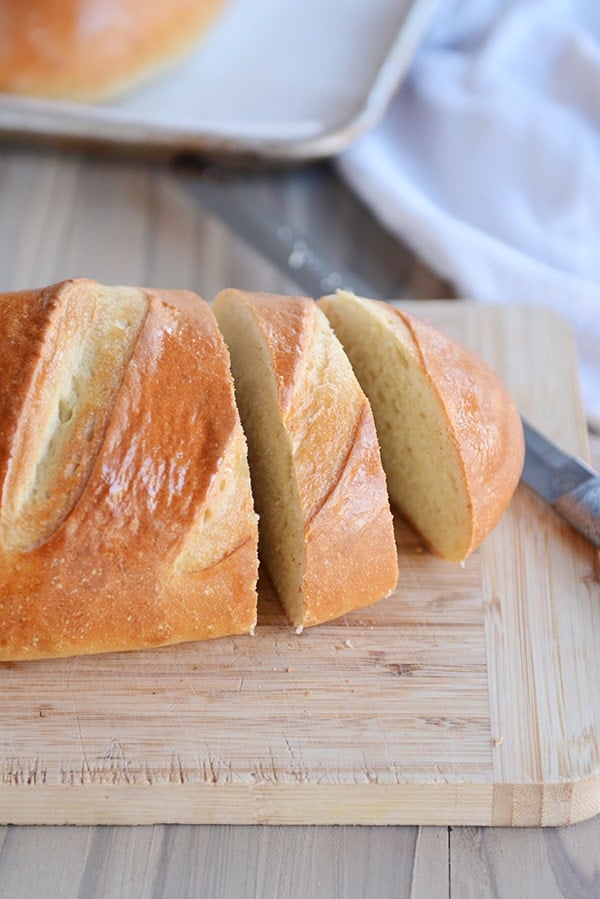
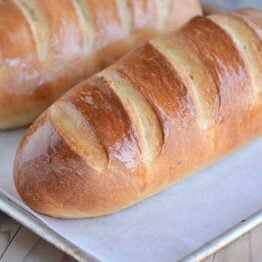
How to Score the French Bread Dough
Scoring the bread dough (in my house, also called: slashing or gashing) helps the dough rise better AND prevents it from cracking in unexpected places while baking.
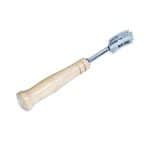
Using a bread lame for this task is extremely helpful. A bread lame is a long stick or utensil with a razor blade on the end. The razor is used to make thin cuts in the dough.
If you don’t have a bread lame, using a clean, sharp razor blade or an extremely sharp kitchen knife can work. Be aware that if the knife isn’t sharp enough, it’ll likely deflate the dough.
The bread loaves can be scored before or after the final rise. I prefer to do the slashing and gashing before they rise as I’ve had one too many loaves of risen bread deflate at the first touch of the razor, and there is nothing so soul crushing as when that happens.

Let the bread loaves rise until noticeably puffy before baking.

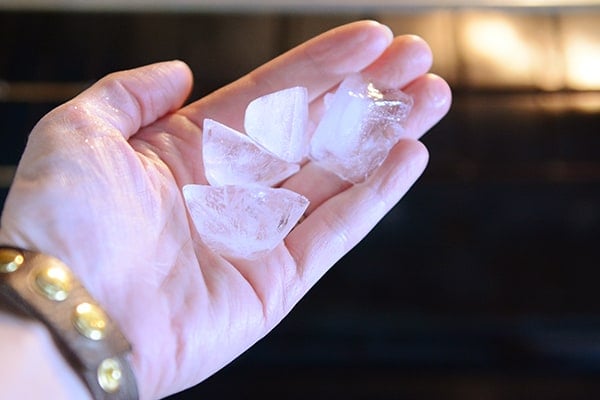
Easy Hack for Crusty French Bread
For a delicious golden crust, immediately before putting the bread in the oven, toss 3-4 ice cubes onto the bottom of the oven. Add the bread and quickly (but gently!) close the oven door.
The steam as the ice cubes hit the toasty bottom of the oven will lightly crisp up the outer crust as the bread bakes.
Important Note! Please consult your oven’s manual for details or caution on putting ice/water on the bottom of the oven floor – I’ve never had a problem, but everyone should do their own research and use their own best judgment (also take care not to toss the ice cubes on the glass oven door as it could crack).
If you are struggling to get a deeper golden crust on the French bread, try:
- Increasing the oven temperature by 25 degrees and/or
- Moving the oven rack up one position (I find my bread browns the best in the middle or upper middle area of my oven)
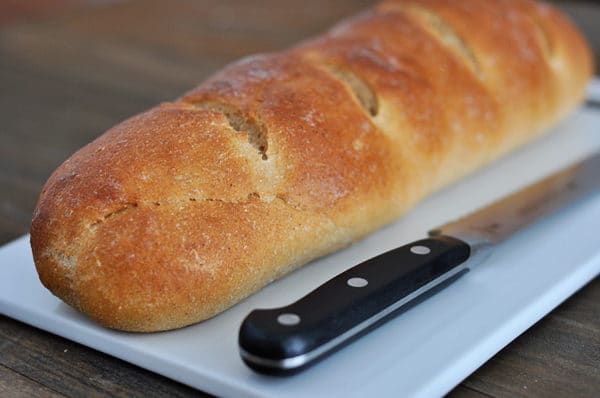
Whole Wheat French Bread
As noted in the recipe, French bread works quite well using whole wheat flour. I’ve found the best results are when using white whole wheat flour (red whole wheat flour makes a denser, heavier loaf).
I recommend subbing in half whole wheat flour to start and then adding more whole wheat flour as you continue to make subsequent batches of bread.
If using whole wheat flour, add a 2-3 minutes to the kneading time to help develop the gluten (also, adding a couple tablespoons of vital wheat gluten/gluten flour can also help the whole wheat bread bake up light and fluffy).

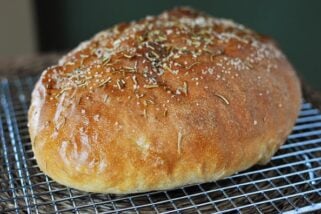
Helpful Tip: If you’ve struggled with your bread flattening out while baking instead of holding the perfect shape, you might try these French bread pans {aff. link}. I have them and LOVE them. I don’t use them every time I make this bread, but I do pull them out quite often (I also use them for this rosemary bread).
Perfect Homemade French Bread
With over 2,500 5-star reviews, this homemade French bread has become a favorite for so many of you.
Hundreds of you have let me know that you have been intimidated by homemade bread until you found this recipe! It is easy, foolproof, and will make you feel like a bread making rock star.
Helena says: Finally, after 5 failed bread attempts using other places recipes, this is THE recipe to use! Happy dance! Thank you for sharing this awesome recipe! Delicious bread!
Valerie writes: Such a fantastic, easy recipe. The “hands on” time is minimal and it comes out perfect every time. Thanks for sharing a recipe that’s become my “to do” dinner bread!
Nichole says: Followed instructions exactly! First time making any sort of bread ever. The bread turned out perfect!!!!
Pia commented: Hands down my go-to bread recipe. Today’s edition is 1/3 dark rye flour, with Italian herbs and caraway seeds mixed in and sprinkled with everything bagel topping. Yum! Best bread recipe ever, and so easily customizable!
FAQs for Homemade French Bread
Yes! Halve all the ingredients straight across – just keep an eye on the amount of flour and judge the final amount by the look and feel of the dough.
Yes, it freezes great (after baking and cooling).
Moving an oven rack up or down can help. In my oven, the bread browns best in the upper half of the oven. Also, you can try increasing the oven temp by 25 degrees.
Absolutely! You can mix the ingredients in a bowl with a spatula or spoon and knead by hand.
I always use the same amount interchangeably. Recently, I’ve heard that active dry yeast doesn’t need to be proofed in liquid first, but I always still do when using active dry yeast (no need to proof with instant yeast).
Yes, just keep an eye on baking time – smaller loaves may need less baking time.
One Year Ago: Harvest Pasta Sauce {Trader Joe’s Copycat}
Two Years Ago: Peanut Butter Cup Cheesecake with Chocolate Cookie Crust
Three Years Ago: Easy Homemade Egg Noodles {Step-by-Step Pictures Include Food Processor Method or By Hand}
Four Years Ago: Black Bean and Butternut Enchilada Skillet
Five Years Ago: Chocolate Chip Peanut Butter and Oatmeal Cookies
Easy Homemade French Bread
Ingredients
- 2 ¼ cups warm water, 110-115 degrees F
- 2 tablespoons granulated sugar
- 1 tablespoon instant or active dry yeast
- 2 ¼ teaspoons salt (see note)
- 2 tablespoons olive oil, canola oil, vegetable oil or avocado oil
- 5 ½ – 6 cups (781 – 852 g) all-purpose flour or bread flour (see note)
Instructions
- In the bowl of an electric stand mixer fitted with the dough hook, combine the water sugar and yeast. If using active dry yeast, let the mixture bubble and foam before proceeding (this can take 3-5 minutes). If using instant yeast, proceed with the recipe (no need to let the yeast activate).
- Add the salt, oil and 3 cups of flour and mix. Add in 2 1/2 to 3 more cups of flour gradually. The dough should clear the sides of the bowl and form a soft ball that doesn't leave a lot of dough residue on your fingers.
- Knead for 2-3 minutes until the dough is smooth. If the dough starts to cling to the sides of the bowl (or the center column if using a Bosch or other mixer with a center), add 1/4 cup of flour at a time until a sturdy but soft ball of dough forms.
- Rising Method 1: Leave the dough in the mixer, cover with a lid or towel, and let the dough rest for 10 minutes. Stir it down by turning on the mixer for 10 seconds or so. Repeat the "rest and stir down" cycle five more times.
- Rising Method 2: Instead of letting the dough rest for 10 minute spurts and then stirring it down, transfer the dough to a lightly greased bowl and cover with a towel or greased plastic wrap. Let the dough rise until doubled, about an hour or so, depending on the warmth of your kitchen.
- Turn the dough onto a lightly greased surface and divide in half. Pat each section into a thick rectangle, 9X13-inches or thereabouts (doesn't have to be exact). Roll the dough up starting from the long edge, pressing out any air bubbles or seams with the heel of your hand, and pinch the edge to seal. Arrange seam side down on a large baking sheet lined with parchment paper (I use separate baking sheets for each loaf).
- With a bread lame, razor blade or VERY sharp knife, cut several gashes at an angle on the top each loaf (you can wait to score the bread until after it rises, but it can easily deflate if the razor/knife isn't sharp enough).
- Cover the loaves with greased plastic wrap or a kitchen towel, and let rise until noticeably puffy and nearly doubled in size, about an hour.
- Preheat the oven to 375 degrees F and make sure an oven rack is in the center position. If you find your bread isn't browning as much as you like, preheat the oven to 400 or 425 degrees and/or move the oven rack up one position (watch carefully so the bread, especially the bottom, doesn't burn).
- Optional: for an extra golden, crisp crust, place the loaves in the preheated oven and immediately toss 3-4 ice cubes on the bottom of the oven. Close the oven door quickly but gently. (See note below!)
- Bake the loaves for 25-30 minutes until golden and baked through.
- If desired, brush melted butter over the hot loaves (this softens the crust a bit, so if you want a crispier crust, don't butter the top).
Notes


Recipe Source: adapted slightly from The Sister’s Cafe


Easy and delicious!
I am embarrassed to say I, too, have lost your Trader Joe list. I tried and tried to find it on your website, but to no avail. Could you please take pity on me and resend it?
Thank you, thank you, thank you.
Yes, I’ll resend!
Hi Mel! Love, love, love your site and recipes! Could you resend me your Trader’s Joe List too?
Just resent!
Thanks for saying you would resend the Trader Joe list. However, I did not receive it. Perhaps you needed my info, so am sending this and a big thank you!
I did resend when you first requested, but just to be safe, I just sent it again.
AMAZING and sooo easy to make! I think this will be my go to bread recipe!
I made this bread yesterday and it tastes great, but my loaves are really flat and wide. I’m wondering if I should have kneaded it longer. I’m not sure where I went wrong.
I don’t think it’s kneading – sounds more like a little extra flour will do the trick to help them hold their shape.
Me too!!!! Im so bummed. Tastes good, but not as pretty as I’d like.
Can anyone pass along Mel’s first list for Trader Joe’s favorites? I finally get to go today but can’t find the first list :(. (Got the second list.). Thanks!!
I just resent it to you (via email). Let me know if you don’t get it!
Wahoo! Got it! You are awesome! Thank you!
Hi Mel- You’re the best!
When you bake this in a convection oven do you lower the temperature 25 degrees?
No, I keep it the same – but that’s mostly because my oven seems to be on the cool side at that temperature. Each oven will be a bit different. If it’s looking overly browned, you could decrease the temperature halfway through
I made this bread today to eat with our dinner. It was great. My husband asked why I didn’t make this type of bread sooner. I would like to make just one loaf since there is just the 2 of us and we don’t need 2 loafs at once. I am freezing the 2nd loaf and sliced left overs from first loaf to make garlic bread next time we eat spaghetti. I may try to cut the recipe in half next time I make it and hope it will come out just as well. I followed Mel’s suggestion to go light on the flour – ended up using just under the 5 1/2 cups. Used one cup white whole wheat and 4 cups white all purpose.
Glad you liked it, Dianne! And you can definitely cut all the ingredients in half for one loaf.
I’ve made this, along with just about every other bread/roll recipe on your site with great results. I have always had a love for bread making but it wasn’t until I stumbled across your site about 5 years ago that I actually got to be any good at it. After purchasing many books over the years, it was the recipes on your site that finally made things click and I began to get great results. It was amazing! Now at any time you can find a stash of hamburger buns (made with your french bread rolls recipe), buttermilk rolls (those are the best I’ve ever made!) or pizza dough in our freezer. My whole family thanks you!
Thank you so much, Erin! That made my day!
Just made two loaves of French bread today with my kids. Super easy recipe and both loaves look great. We can hardly resist cutting into them right now but they’re still popping hot!
We lack the same self-control!
Just made two loaves of French bread today with my kids. Super easy recipe and both loaves look great. We can hardly resist cutting into them right now but they’re still popping hot!
Rating this bread on ease of making, have yet to taste it’s yummy goodness.
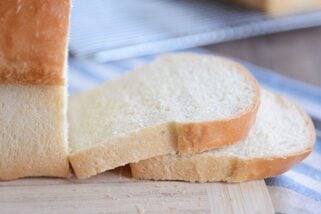
look at that color! Perfect bread! My grandmother used to bake a bread that we called French bread!
Do you think this would fair well in a bread machine on the dough cycle? Thanks, love your stuff!!!
I’ve never used a bread machine, but as long as the quantity of ingredients fits in there, I think it should work!
I made it in the bread machine and it was a hit with the whole family! Thanks!!
Do you have the weight measurements for the flour to share? And any other ingredients you may weigh?
I don’t include weight measures for the flour because the exact amount for yeast bread recipes will vary depending on elevation, humidity, etc. But for me where I live, I use about 27 1/2 to 30 ounces.
I’ve been making this lovely bread for a while now, and have always done rising method #1, as I believe that was the only method on your original post. Rising method #2 is less time consuming, in that you don’t have to go back every ten minutes to stir, but is there a benefit (that you know of) to doing one method over the other?
That’s a great question, Nancy, and I should have clarified in the post today. Thanks for asking. I prefer doing rising method #1…and maybe that’s because it’s how I learned to make this bread. I feel as though it gives a slightly fluffier texture to the bread. However, because I make this bread all the time, there have been many days when I need to make the dough and leave the house while it rises (and I don’t have time to watch the clock for 10-minute intervals). That’s where rising method #2 comes in. I’ve used it many times over the years, and the differences in texture/fluffiness are not significant enough to say method #1 is the only way to go. Make sense? Basically, if I’m home and available, I do rising method #1, if not, I plop the dough in a bowl and use method #2.
Thank you! It’s great to know there is another method that works almost as well 🙂 There have been times where I’ve wanted to make this but then realize I don’t have time to do the 10 minute intervals and end up either doing without the bread or just picking up a loaf at the store. Never again! I’ll stick to method #1 as much as possible and use method #2 in a pinch! Love this bread!
Thanks for clarifying!! I am a long time fan of this recipe and was wondering the same thing! I’m excited to try the ice cubes too!
This was so amazing!
Looks delicious! Just a comment on the slashing topic… I’ve been baking French bread for 20 years, and I’ve always cut my slashes on the top of the loaf as soon as I get it on the pan, before raising. No chance of deflation this way.
Thanks, Audrey! I’ve tried it that way before, too, but then my gashes and slashes tend to spread out and become wide ravines as the bread rises…know what I mean?
Actually making it now. How long would you say it should sit to double in size? I’m in OH. Today’s the first day of Summer and the AC. is on. The temp is 73 and I’ve blocked the vent in the itxhen so it’s not so freezing. Not sure if that’s something that helps lol. I only ask because I tried a bread recipe yesterday and it was as hard as a rock 🙁
With that temperature, I’d probably say about an hour, maybe an hour and a half.
Good recipe! I’ve been looking for a good, easy French bread recipe for a while and this is it! The only criticism I have is with the amount of salt. 1 Tbsp is too much imho. I made it a second time with 1tsp of salt and it was to die for! Thank you so much for all your effort you put into your blog!
Thanks for the feedback, Tim!
Hi! I love your site and recipes. I just made this bread is absolutely delicious but it didn’t brown very much. It is still quite light in color, any thoughts?
Sometimes it’s simply the placement of the oven rack. I’ve found with different ovens that my breads bake better in the top third – and my current oven, they brown better in the bottom third. Also, try turning the temperature up 25 degrees (it’s possible your oven bakes on the cool side).
Mel, we love French Bread anyway it is served! I do have a question. When purchasing bread I always look for Italian because we love the flavor of it even more!!! What is the difference – there definitely is one? I am wondering if you know what it is.
Hi Brenda, I don’t know what/if the difference is. I heard one time it’s basically the same, just packaged differently but honestly, I have no idea. Sorry I’m not more help!
Made this using garlic salt in place of the salt, and added a TBSP of Italitan Seasoning…OH MY GAWD! Hands down AWESOMESAUCE! And it’s just my first time making french bread at all!
What a fantastic idea! I’ve made this bread multiple times (it’s actually in the oven as I type this) but I love the idea of adding some seasoning.
I add the seasonings when I use this recipe for pizza crust.
Mel you saved the day! I needed a bread to go with dinner I was taking to a friend and although this recipe was new to me I knew I could trust you- the loaves were beautiful and tasted delicious!! Thank you for such delicious reliable recipes!!
Hi Mel – great website. Got back into bread making now that my kids are out of the house and my wife & I are empty nesters. I tried this recipe out and it worked perfectly (used 5/6 freshly milled wheat flour, 1/6 all purpose white). Went well with my wife’s homemade turkey soup for lunch :). Thanks for all the bread recipes here and I’m looking forward to trying more – especially the ciabatta!
How would you change this to make a traditional hard crust?
Hi Jim – impressed with your bread baking skills! Usually a hard crust can be had by adding a pan of boiling water to the bottom of the oven and/or spritzing the bread with water while baking. Good luck!
I just purchased the French bread pan you recommended on your kitchen gifts. I am a little confused after reading some of the reviews. Do I still make 2 loaves or 4. Help please :). Thanks so much!
Hi Rachel – are you wondering if this recipe makes two loaves or four? I split the dough into two parts, shape and bake two loaves (using a large baking sheet or a French bread pan like you just bought that bakes two loaves at a time). Does that make sense?
I’ve made this recipe several times, and every time I do the slits with a serrated bread knife (going quickly) the whole thing collapses. Its frustrating. Any thoughts???
It takes a really (like, super super) sharp knife or bread lame to get the cuts into the bread without it collapsing and often a really sharp razor works better than a serrated bread knife. You could leave out that step altogether (it makes the bread look prettier but doesn’t affect the taste).
I use a kitchen shears to make the slashes.
Can I freeze the dough? What would I change or would I thaw it out overnight? Would love to make a couple batches ahead of time to have on hand when we want a fresh loaf. Also there’s only 2 of us and I know this recipe makes 2 loaves. Thanks.
I usually freeze this after it’s been baked and cooled – I haven’t tried it with just the dough.
This was heavenly! The only problem is I didn’t want to stop eating it! Glad there were two loaves!
Do you think I could split the dough in half (or thirds) and make French baguettes? How would that alter the baking instructions? I made this recently and my family loved it! I got a baguette pan and want to try it out. Thanks for so many delicious recipes!
Sure! I have a similar type pan and it works great. I usually take a few minutes off the baking time since the pan I have is perforated and the bread bakes more quickly
Thanks Mel! I did it and it worked great. They were so delicious!
Love this recipe! It’s rising now and I’m making it into subs for your meatball sub recipe. As others have said, this also makes the BEST french toast ever, so I always make an extra loaf. I love to use vanilla sugar if I have it on hand too. I will say, I did have better luck when I kneaded this by hand. I tried the first time just using the bread attachment, but it didn’t rise as much. That being said, I love making bread and kneading is almost like therapy for me, so I felt a little sad taking that step out anyway! Have to take out tension somewhere!
this is such an awesome bread recipe. I’ve made it numerous times now and it always turns out great!
I make a few loaves of this bread at least every couple of weeks, and we devour it within about 48 hours. I usually mix it up with how much wheat flour I use, sometimes I make it into 4 baguettes instead of bigger loaves… but this week, I added about 3 tablespoons of wheat germ, and used about 3/4 spelt flour. With one of the loaves I also sprinkled some mixed seeds (sunflower, pumpkin, flax seeds, and some others) over the rolled out loaves, so they are all in the dough once it is rolled out, and then sprinkled some on top right before baking as well. Oh my gosh, so good! I ate three slices straight from the oven… I love this recipe because it is so versatile, so I feel safe experimenting and still knowing we’ll have great bread! Thanks Mel!
Can you remind me how to do the egg wash? I really like it but don’t remember. I also still do the cornmeal. It’s the best.
Just whisk together an egg with a tablespoon or two of water and brush that on top.
Thank you for this recipe! I made four loaves of the French bread today. My husband and I eat sugar free, so I adjusted the recipe a little bit. I substituted the 2 tbsp of sugar for 2 tsp onion powder and 2 tsp garlic powder. I also used olive oil instead of vegetable oil. I used Better for Bread flour as well. I made two of the loaves this way, and then I brushed olive oil, minced garlic, garlic powder, and onion powder on the tops of the loaves. So delicious! For the other two loaves, I made them the same way but added more toppings. I rolled sliced jalapeños and shredded cheese up in the third loaf and I rolled marinara sauce and cheese up in the fourth loaf. Big hit with the husband!
I love this recipe and have made it too many times to count. Recently, it’s been dense and the texture is a little off. What could I be doing wrong? Thanks!
Hi Sally, glad you love this recipe. It’s nearly impossible for me to know what might be going on with the bread these last few times you’ve made it, especially without more detail. Have you moved to a different house/location? Higher or lower elevation? More or less humidity? Those factors can make a difference. Have you floured the dough any differently than in the past?
I don’t see anywhere regarding the type of flour I should use: a-p or bread?
Thanks!
Never mind…ended up using bread flour and it is positively lovely. Rave reviews from my family. Thanks for the awesome recipe.
I usually use unbleached all-purpose.
True French Bread, by LAW in France, has nothing but yeast, salt, flour, and water. That is by law in their country.
Finally! I have tried bread recipe after bread recipe and they’re always tough and dry. This one turned out perfect. I’ll be adding this one to the rotation for sure. Soft and delicious. Thank you!
It’s me again, the same Stephanie from above. I just wanted to let you know that this bread also works in a loaf pan to make a fantastic sandwich bread. It’s the same time and everything. The only difference is that the bottom doesn’t get quite as crunchy but that could be because I baked it on stoneware the first time and in a glass loaf pan the second time. Both ways are fantastic! Thanks again!
Awesome, Stephanie! Thanks for checking back in to let me know about the loaf pan!
Hi Mel! Found your recipe through Pinterest and made it today. Read it thoroughly and read your working with yeast directions. Very helpful instructions and fantastic recipe. I found it a little difficult to roll out on a well greased surface because it was so elastic and keep pulling back into a small rectangle, but once I got it to the right size, it rolled beautifully. By the time I popped it in the oven, I was so excited. It looked amazing. It tasted even better. We demolished half of the first loaf before dinner and finished the other half with dinner. So, so good. I can’t wait to make it again. Thank you!!!
Thanks for this recipe. I’m making it for the second time right now. I’m just curious about why this bread has to be kneaded and rise five separate times. I’m fairly new to bread baking still, but I’ve never seen a recipe like this before. Does it change the flavor or texture compared to just doing the traditional 2 rises? Just curious about the baking science. 🙂 Thanks!
Jenn – From my experience (when I just let the bread rise normally like other bread recipes), the five separate 10-minute rise times adds a chewiness and airiness to the bread that isn’t there without those steps. I’m not sure of the exact science but I just know the bread tastes and looks better. 🙂
Hello Mel , thank you so much for all the work you do to make me a better baker! I never thought I would ever make my own bread, but it’s been a couple of months since I’ve started, and the whole family thanks you!:)
I’m getting a little daring here, and planning to make a couple of this french bread for sandwiches to take for a picnic lunch.. I would like to bake the bread ahead of time, freeze and then re-heat on the morning of the picnic to build the sandwiches.. I wanted to ask, how to and in what to wrap the loafs and how to reheat the bread.. I trust your advice more than all the tips on the internet.. Hope to hear from you..
Once again, Thank you so much!
Hi Anne – so happy you are a bread baking expert! I love hearing that! Ok, so on this french bread, I would make it, bake it and let it cool completely. Then double bag or put in a freezer bag and freeze. If it were me, I wouldn’t reheat at all. I’d just take it out of the freezer the night before you want to make sandwiches and let it sit at room temp until the morning. If you want warm bread, I’d do the same (let it thaw overnight) but then cover in foil and pop it in a 325 degree oven for 5 or so minutes. Good luck!
Thank you so much! That is exactly what I did and it was fantastic!! Appreciate all that you do!! 🙂
First, thank you for putting all the best recipes in one place. I’ve tried lots of them and am rarely disappointed. You are one of my 3 go-to recipe sites (the others are ATK and King Arthur so you are in excellent company!)
Have you ever doubled this bread recipe and if you have, do you double the yeast? I know that doubling the yeast is not necessary for lots of recipes and wondered what your experience has been. I’m going to be making this x10 (in probably 2 batches) for yw camp this summer and am trying to determine the yeast ratio for this one.
Michelle – Yes, I have doubled (and tripled the recipe). For a doubled batch, I use double the yeast. For a triple batch, I just use a doubled amount of yeast plus an extra 1/4 teaspoon.
thank you!!
My loaves were wider and flat on the bottom……are they suppose to be more like baguettes??? What should i do different? The dough was sticky….was it to sticky????
Shannon – It sounds like you need more flour – that will help the loaves hold their shape. I think THIS tutorial will help answer your question. The French bread is meant to be light and fluffy.
I found you on pinterest and decided to try your French bread recipe. I’ve attempted French bread a few times and haven’t been successful in making it as good as bakery bought bread. We are planning to use the bread to make roasted veggie and turkey panini’s for supper tonight. My husband live fresh French bread so I’m hoping this turns out as well for me as it seems to have for everyone else who as left a comment.
Thank you, I almost added a bit more water but was afraid I would mess it up. Had I checked back I would have added some. Just came out of the oven a few minutes ago and it smells wonderful. Not nearly as pretty shaped as yours. DD and I did a quick taste and it tastes great, much better than store bought. Hopefully there will still be some left when DH gets home from work tomorrow morning so he can try some LOL
Making this now. I started with the 5.5 cups of flour, figured I could add more to the 6 if needed but even at 5.5 I think it might be over floured. My dough is smooth and soft but not sticky at all after it’s first kneading in the machine. I assume it’s going to make it a heavier less puffy bread? I’ll proceed with the stirring and resting for the remainder of the recipe and see how it all turns out and post the results. Next time I guess I need to add even less than the 5.5 cups to obtain the slightly sticky texture it’s suppose to have?
Hi Pamela – if the dough is overfloured then yes, the bread might turn out a bit heavy. If that happens again, sometimes I drizzle in a tablespoon or so of water and let the dough mix a bit to soften it up slightly.
This bread was yummy, but it wasn’t fluffy and didn’t raise well. It definitely wasn’t the size of a typical french bread loaf, but smaller and dense. I am new to baking with wheat flour. I used half white whole wheat flour and half white flour. How do you get it to rise? I gave it about an hour and 15 minutes to rise, but didn’t have more time than that before dinner. Yours looks so pretty!
Hi Katie – with whole wheat flour, I always try to knead longer (this recipe is a bit unusual in how it is being kneaded but you could increase the number of times or mix it longer). Also, take care not to overflour. Wheat flour naturally makes a bread dough slightly more dense and overflouring only compounds that. The dough is usually slightly sticky (but easily forms a ball if a small piece is rolled in your hand). Hope that helps!
Mel-was the 1 TBSP of salt a typo? My bread turned out pretty salty. It was perfect other than that. Next time I’ll cut it in half.
Danielle – no, it isn’t a typo. Sorry it was too salty for your taste! You might want to cut it down to 2 teaspoons next time.
Listen, I have not yet tried your recipe. I thank you in advance as I am new to breads. I recently moved to Colombia, yes the country not Columbia in South Carolina, USA, and the bread here is horrendous. I am being forced to learn to bake bread so that I can survive here. You would not believe how bad the flour is here. I am desperate to import some real flour from the USA or Canada. What I to complain about is your complete lack of specification of what type of flour to use. All purpose, standard, bromated, durum, bread flour, artisan flours? The one thing that I do know is that flour is ‘everything’ to baking. Please provide some details in your recipe ingredients. Otherwise, keep on rockin as I enjoy the site.
Pal – I use unbleached all-purpose or white whole wheat flour or a combination of both. You could definitely experiment with other types of flours thought. Good luck!
I made this French bread this morning and it was so delicious! I loved the flavor and the soft plush texture. It also was very easy to make , this was my first time making a French bread loaf. My family loved it and we have already eaten 1 whole loaf! I plan on making another batch tonight so we can try your French bread pizza.