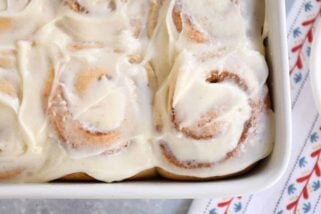
The Best Cinnamon Rolls {Cheryl’s Famous Recipe} – with step-by-step tutorial and tons of tips
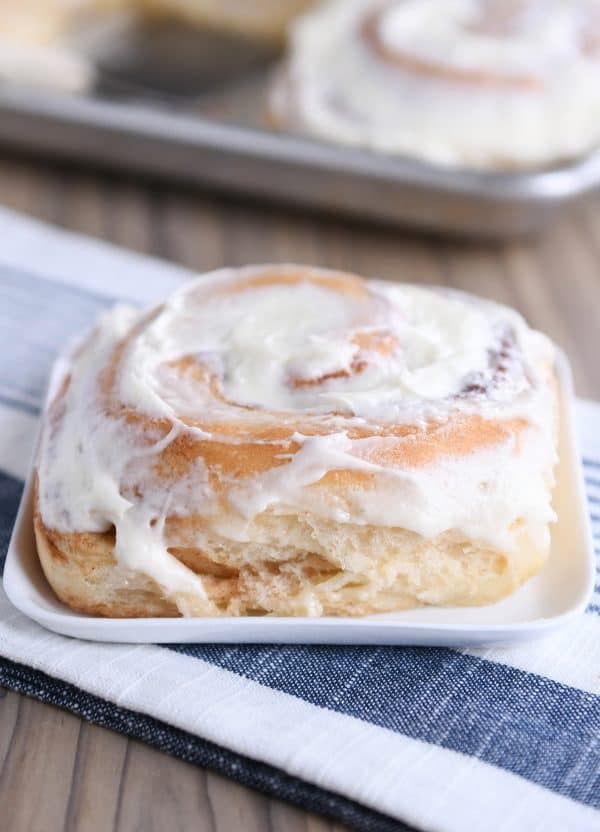
This recipe for the best cinnamon rolls EVER will make you rethink who you are and every cinnamon roll recipe you’ve ever made! They are so light, so fluffy, and so amazing!
Well, today is a big, BIG day.
Several weeks ago, I quickly mentioned (in this Friday Thoughts post) that I had found “the cinnamon roll recipe to end all cinnamon roll recipes” and I asked if you had room in your heart for one more cinnamon roll recipe? Haha. Hundreds of you responded saying: uh, hello, are you crazy, BRING IT ON! While the other two of you said: don’t need another cinnamon roll recipe, thankyouverymuch.
I’ve been buried under requests for this recipe ever since. You’ve emailed. You’ve commented. You’ve found my personal Instagram account and stalked me there to ask for it. You’ve begged. You’ve pleaded. You’ve called. You’ve emailed and commented and asked again. 🙂
Although I had already made the recipe several times when I mentioned it that Friday, I wanted to make it several more times and take lots and lots of pictures in order to make sure I could provide the most foolproof recipe and preempt any troubleshooting. In total, I’ve made this best-ever cinnamon roll recipe at least nine times since my friend, Cheryl, gave it to me mid-December.
Speaking of Cheryl, I gotta give this lady all the credit. She’s the source of the greatest cinnamon roll recipe of all time! And she’s adorable (and so nice).
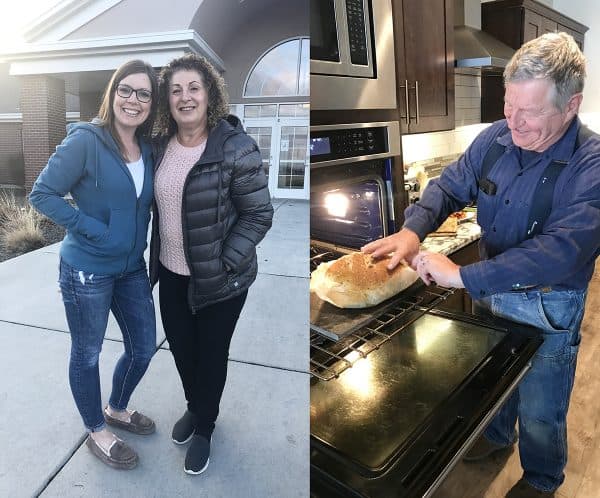
So is her husband. That’s him, Jean (pronounced John), making his other-worldly artisan bread. He’s a master bread baker. And Cheryl is one of the most accomplished, gourmet cooks and home bakers I’ve ever met. Like, she takes everything totally next level (they had us over for a Mediterranean-inspired dinner and I could barely eat, I was so in awe at the amazing spread). And these cinnamon rolls are no exception. Thank you, Cheryl! And thanks for letting me share the love with everybody about this recipe!
One of the most common phrases I’ve heard over the last couple weeks as you’ve requested this recipe is: I don’t know how they can be better than Gloria’s cinnamon rolls*, but I’m willing to try! (*Or these vanilla pudding cinnamon rolls or these Yukon gold cinnamon rolls.)
And trust me, I thought the same thing! The backstory is important here. So let me explain really quickly. At a church activity mid-December, I won an innocent-looking disposable square pan of cinnamon rolls as a Bunco prize. I’m wired to never turn down a pan of cinnamon rolls. When I found out Cheryl had made them, I was even more excited. I had no choice but to dig in right then and there even though the dice were still rolling.
I was stunned. How could a cinnamon roll be this light and fluffy? This amazing? I mean, I don’t want to brag, but I already make a ridiculously great cinnamon roll, but these were totally beyond deliciousness, and I began to doubt everything I thought I knew about cinnamon rolls.
I cornered Cheryl in the hallway to ask if she’d be willing to share the recipe after several of us women basically ate the whole pan and unanimously agreed: these cinnamon rolls = lifechanging. I had to whip my phone out faster than an old western gunslinger because Cheryl started rattling off the recipe by memory and I wanted to type in every detail. In my mind, I had already decided that if the ingredient lineup and method was basically the same as the other beloved cinnamon roll recipes on my site, I’d just chalk it up to the fact that Cheryl had a magic cinnamon roll touch. I’d be sad for a minute that I was missing this magical cinnamon roll making gene, but I probably wouldn’t need or use a recipe that was a similar variation to others I make all the time.
But. That wasn’t the case at all. As she gave me the recipe, I realized this was a cinnamon roll game changer and unlike any cinnamon roll recipe I’d made before. Because the amount of variation was so great, I knew I could (and needed to) post it to stand alongside the other great cinnamon roll recipes in my archives.
And because the ingredients and mixing method and dough texture are unlike other cinnamon roll doughs I’ve made, the resulting cinnamon rolls are lighter in texture and much fluffier. You don’t have to take just my word for it either. I’ve already said before that Brian is the resident cinnamon roll snob. He doesn’t like it when I mess with a good thing, and he already loved the cinnamon roll recipes I’ve posted before. But even he agrees 100% that these are the best cinnamon rolls I’ve ever made.
I even dared make them for my Aunt Marilyn (who introduced me to Gloria’s recipe years ago!), Uncle Dan and cousin Lydia, who take “cinnamon roll snob” to a whole new level. Dan almost didn’t try them because he’s so loyal to Gloria’s recipe. After eating, analyzing, eating, and analyzing (that’s what I make you do if you come to my house), Lydia said they were “way better than any other recipe,” Marilyn admitted they were “absolutely incredible,” and Dan conceded that although he’d never say they were better than Gloria’s recipe, they were “definitely on the same level.” I’ve given so many of these cinnamon rolls away as I’ve tested the recipe; every single person has honestly raved over them (and I don’t think they are just saying that, because I’ve instructed all my friends that we can’t be friends unless they give me honest feedback on food I shove in their face.)
Phew! So there’s the background. I know some of you may not care about all that. But for those of you that have been loyal MKC readers and have fallen in love with any other cinnamon roll recipe on my site, you know that it is important to me to give you an explanation for why I’m posting yet another recipe for something I’ve already declared the best!
Here’s my ultimate disclaimer though:
If you have a cinnamon roll recipe that you love and have already deemed BEST EVER, stick with it! No need to change things now! I already know that this recipe may not be for everyone; the world was meant to be a cinnamon roll diverse place. However, if you love to try new recipes, have been looking for the cinnamon roll to end all cinnamon rolls, or you just want to expand your baking horizons, I think you are going to love this one.
Let’s get into the nitty gritty!
For this recipe, you can use a stand mixer or mix it by hand because it doesn’t require much kneading and the dough is not super stiff and hard to work with. I have recently been using this Danish dough hook aff. link (that one of you recommended!) for hand-mixed yeast doughs and it is a game changer.
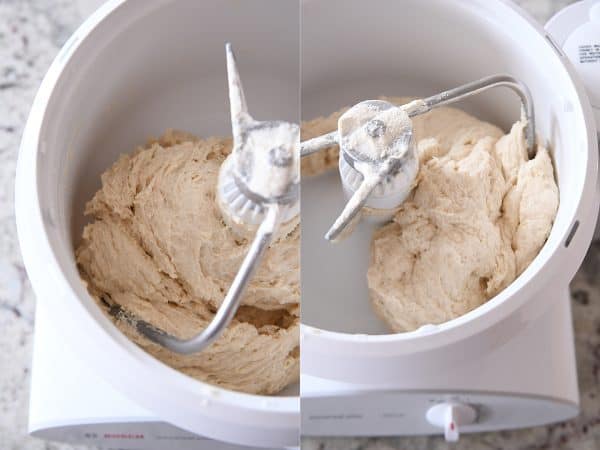
I’ve made this cinnamon roll recipe in my Bosch Universal mixer {aff. link} and my KitchenAid stand mixer {aff. link} for testing purposes; I’ll always choose my Bosch for bread making because it’s superior at that kind of task, but a Kitchen Aid will do the job, too. Here’s a quick look at the comparison between these two stand mixers, if you are interested. This recipe doubles GREAT in the Bosch (haven’t tried a double batch in the KitchenAid).
Add 1/2 cup granulated sugar and 1/2 cup neutral-flavored oil to the mixer and pour in the 2 cups scalded milk.
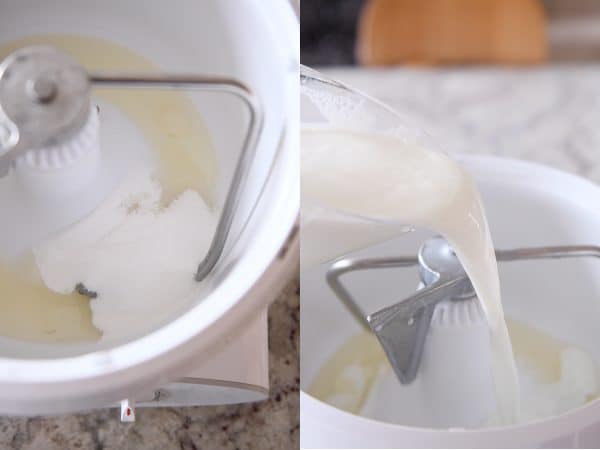
What is scalded milk? It’s basically milk that’s been heated to just below a boil – doing so changes the protein structure in the milk (none of which I really understand). But what I do know is that the reason many yeast dough recipes calls for scalded milk is because it makes the bread/rolls lighter and fluffier! So do it!
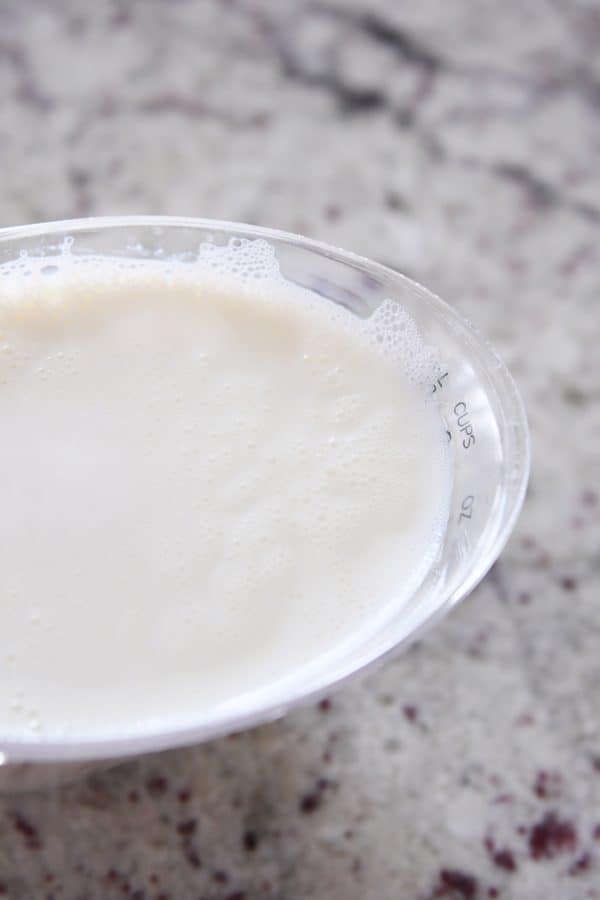
I take the easy way out and microwave the milk for this recipe in a microwave-safe liquid measuring cup. Every microwave will vary, but I heat it for 2-minute increments until little bubbles start to form around the edges and it is steaming. You can do this on the stovetop, too. And yes, I’ve let it go too long and it actually boils, and no, I don’t start over, and yes, the rolls still turn out great (just be aware that boiling milk will foam and rise and most likely spill over so if it does, you’ll want to make sure you have a full 2 cups of hot milk to work with).
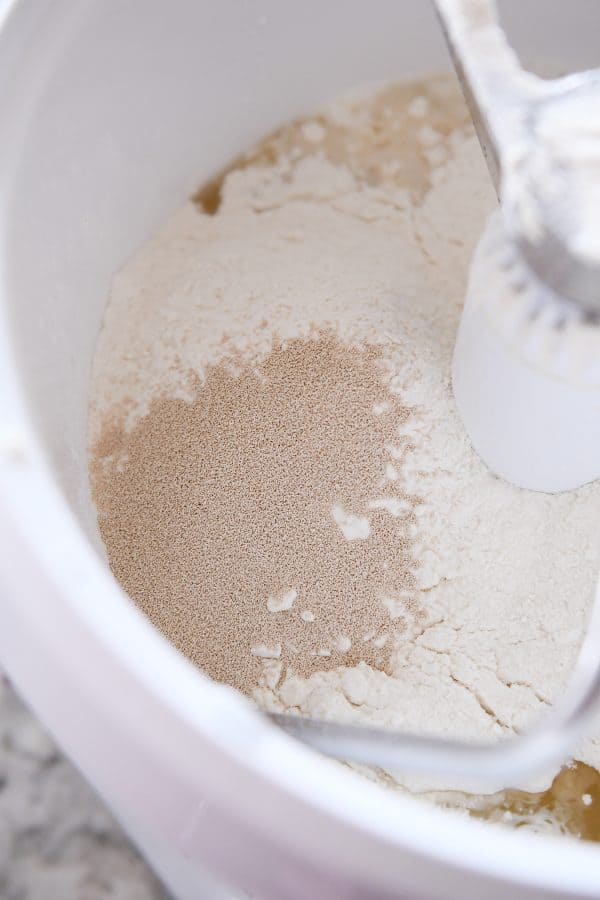
Let the milk/oil/sugar mixture rest for 15 minutes or so until the mixture is warm and not blistery hot. Add in the 4 cups all-purpose flour (I always use unbleached all-purpose) and then sprinkle the 1 tablespoon instant yeast on top of the flour. See the recipe below for how to substitute active dry yeast for the instant yeast.
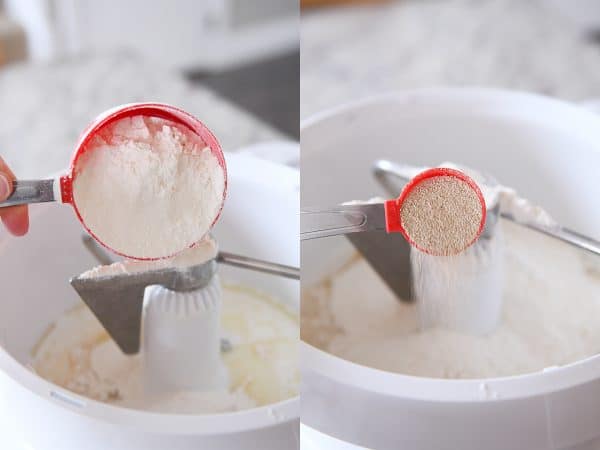
If you’ve been a tad bit impatient like me and maybe, possibly, perhaps didn’t let the milk mixture cool off for the full 15 minutes, make sure the yeast is added on top of the flour so it isn’t incorporated straight into the hot milk.
Start mixing! The dough will be much wetter than a normal cinnamon roll dough. Don’t panic. Things will come together, I promise.
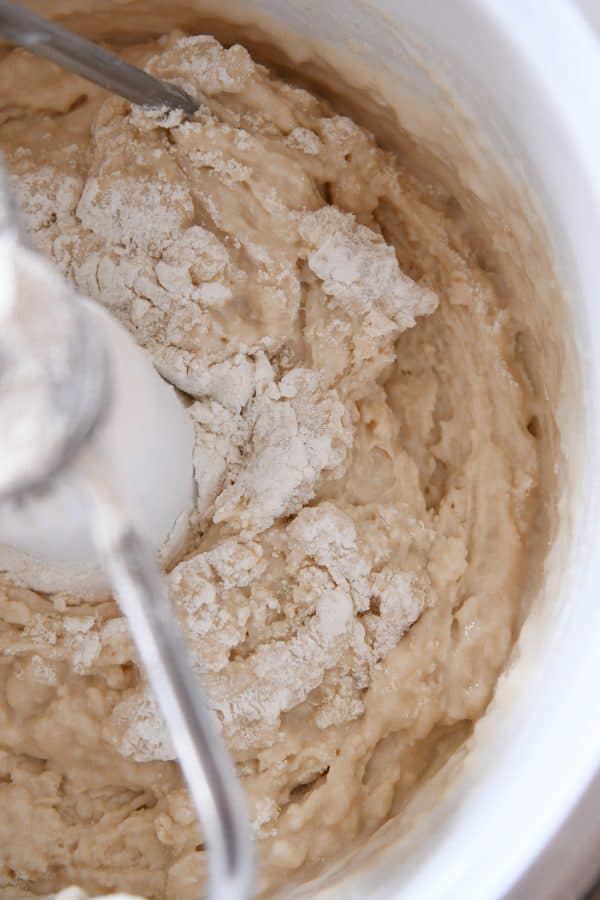
Mix until no dry streaks remain, scraping down the sides of the bowl if needed.
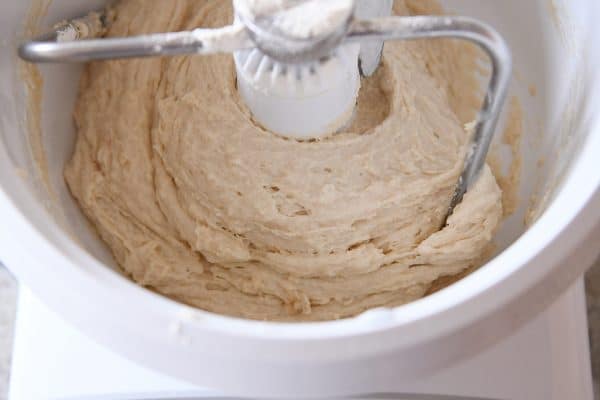
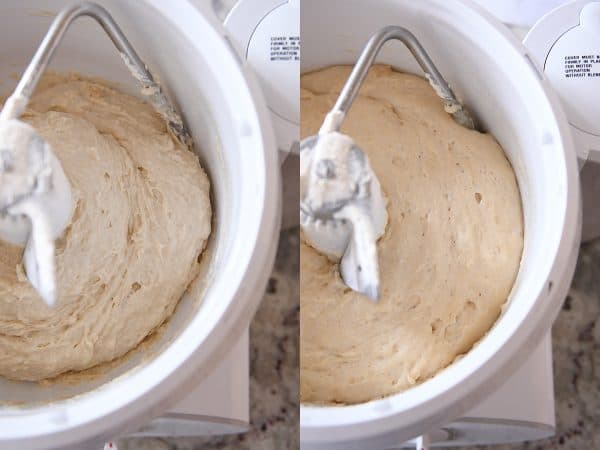
Now cover the bowl and let the wet dough (we’ll call it a sponge) rise until puffy and a little bubbly. This takes about 45 minutes to an hour in my kitchen. You can see a noticeable difference as the sponge has had time to rest and rise.
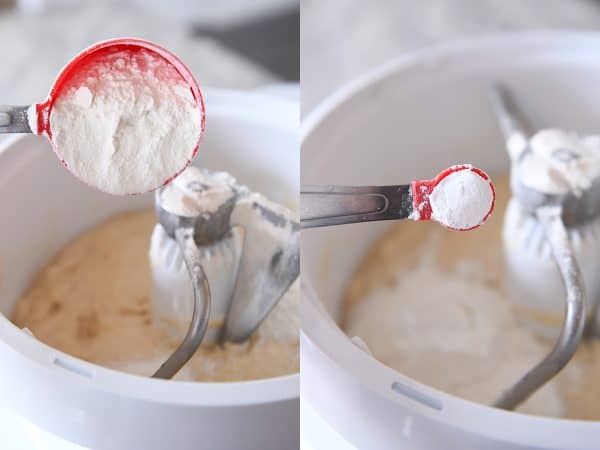
To the sponge, add 3/4 cup flour, 1/2 teaspoon baking powder, 1/2 teaspoon baking soda, and 1 1/2 teaspoons salt.
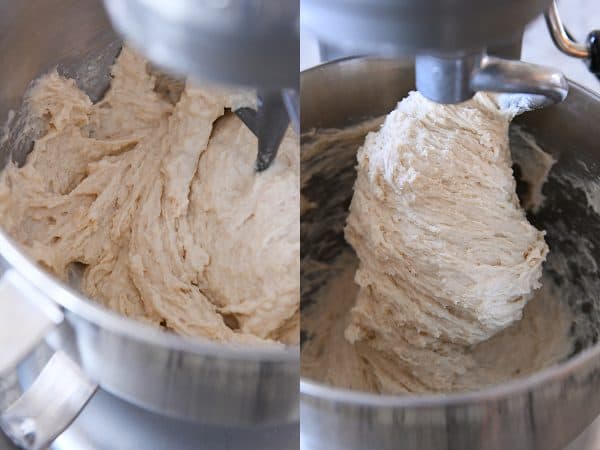
Start mixing again. The dough doesn’t need to be kneaded, necessarily, but you definitely want to let it mix to fully incorporate all the dry ingredients. It will start out rough and shaggy looking but it will come together.

After about a minute of mixing, it should form a mass of dough that has smoothed out a bit (doesn’t look as rough and spiky). This dough is very soft! Resist the urge to add more flour. As long as it isn’t leaving lots of wet dough residue on the sides of the bowl, it should be ok.
If you are making the dough in a KitchenAid mixer, I suggest starting with the paddle attachment and moving to the dough hook after adding the last addition of flour, baking powder and baking soda. I find it’s harder to get clean sides of the bowl with this recipe when using the KitchenAid based on the shape of the dough hook and bowl, just try to avoid adding more flour unless it is just so sticky it is impossible to work with. Grease your hands with cooking spray and gather it into a smooth ball before deciding whether to add more flour.
The dough may leave some doughy bits of residue on your fingers or hands, but if you grab a small piece, you should be able to roll it into a somewhat sticky ball. Over flouring this dough will be the death of a great cinnamon roll, so persevere through a bit of stickiness if you can!
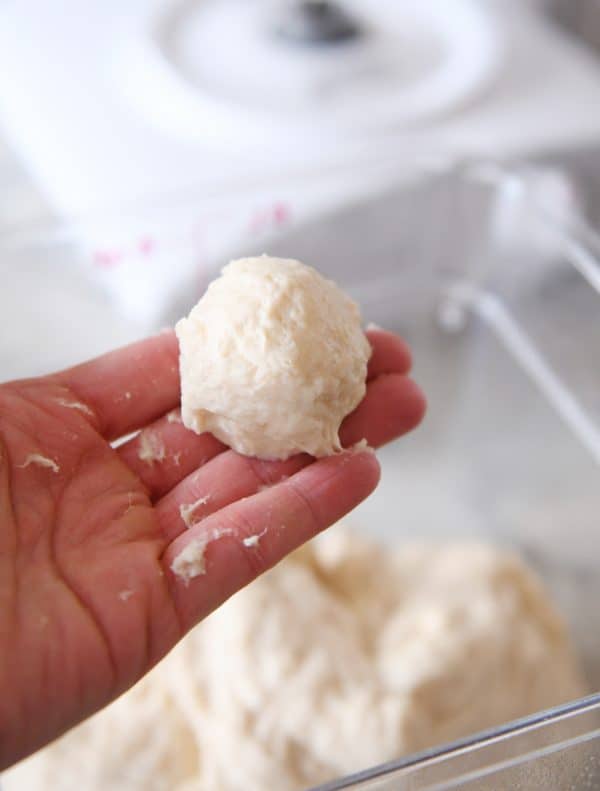
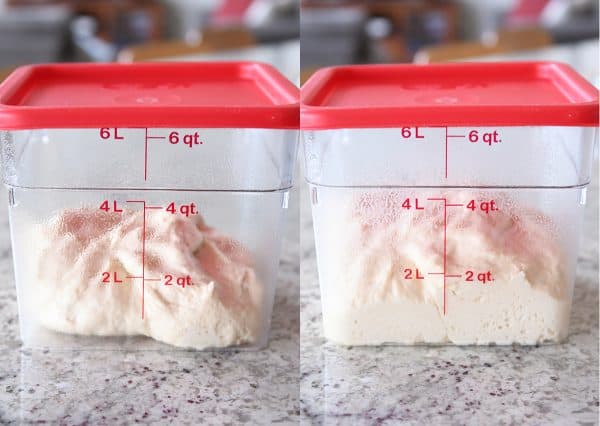
Pile the dough into a lightly greased bowl or container. You can see how soft and stretchy the dough is below.
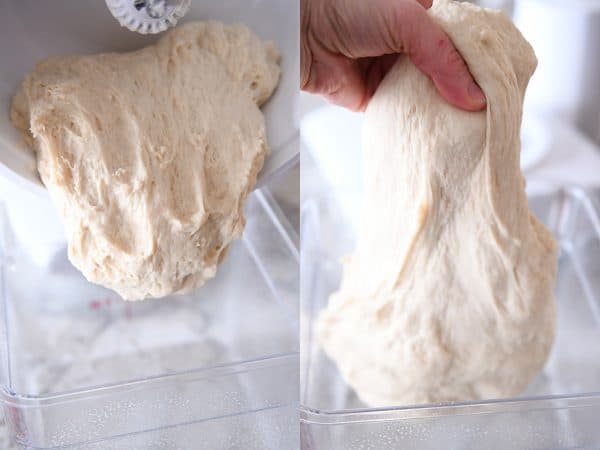
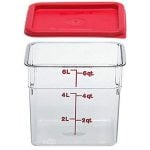
Let the dough rise until doubled. The exact time will depend on the warmth of your kitchen, but it takes right about an hour to an hour and a half in my kitchen. I use these handy measured food storage containers for dough rising and about a million other things {aff. link}. If you live near a Standard Restaurant Supply store (or other restaurant supply store), you can pick them up in various sizes for less than the price on Amazon, FYI.
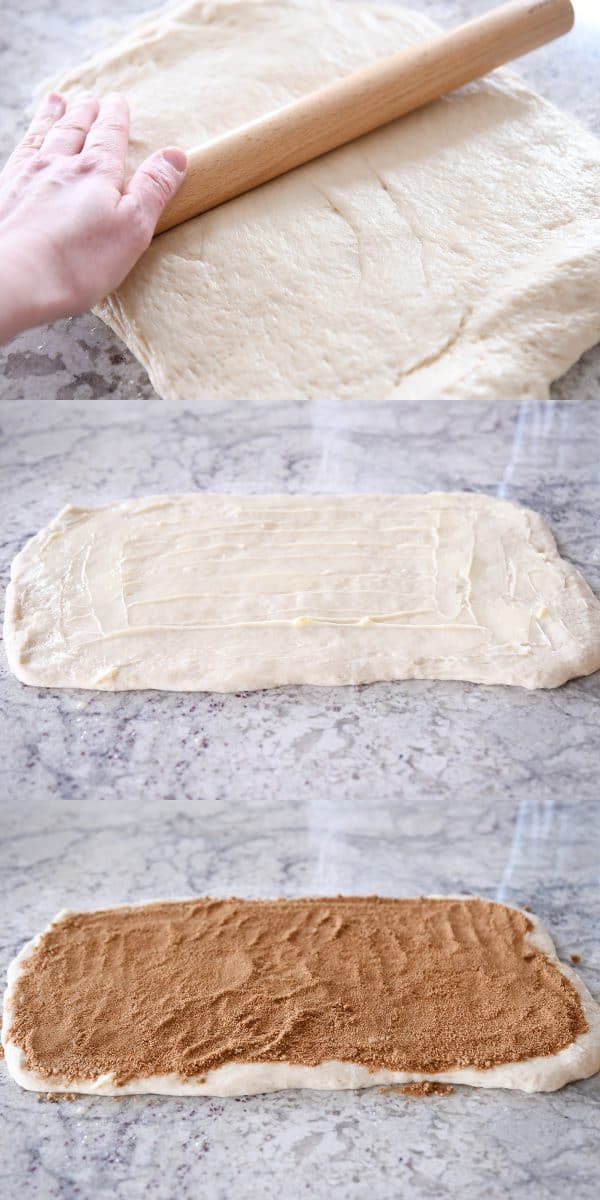
Turn the dough out onto a lightly floured counter (I use about 2-3 tablespoons flour) and roll out to about 12X18-inches. Pictured below is my favorite inexpensive and super awesome rolling pin – I have the 13 2/5-inch one {aff. link}. The size of the rectangle doesn’t have to be exact. I go for this size because it gives several spirals in the cinnamon roll, but if you like your cinnamon rolls puffier, roll the dough into a smaller rectangle so it is thicker. Spread the dough evenly with 8-12 tablespoons butter and sprinkle with cinnamon and brown sugar (I use about 3/4 cup brown sugar + 1 tablespoon cinnamon – Cheryl recommends adding cardamom to the sugar, too, which is delicious).
Favorite cinnamon = Penzey’s signature cinnamon blend (totally unsponsored but the only cinnamon I use)
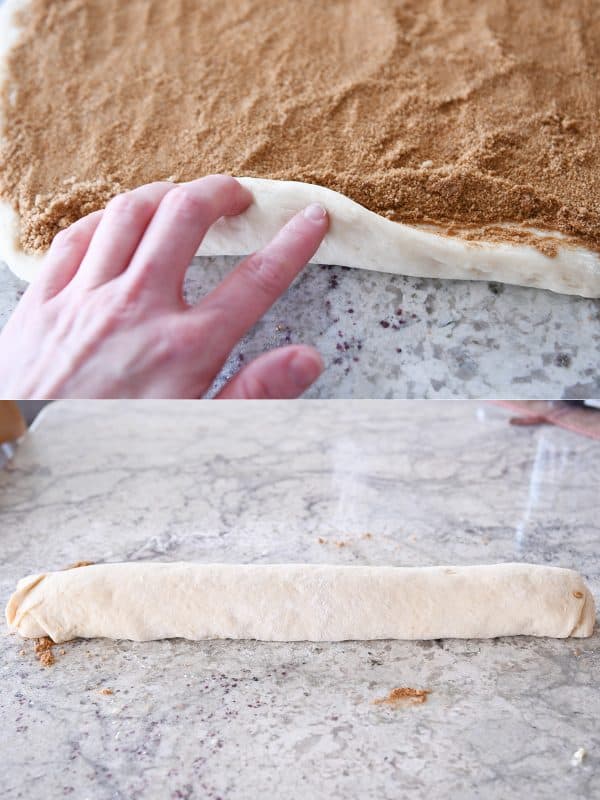
Start rolling these bad boys up! Roll tightly without lifting and stretching the dough up and over. If the dough is stretched while rolling, the rolls may have a tendency to shrink while baking. Once rolled, pinch the edge lightly to seal and pat the roll into an even thickness. My rolled up cinnamon roll log usually ends up being about 20 inches long.
As a quick sidenote, I get this question a lot:
Why do cinnamon rolls shrink and gap while baking?
That is a great question. And one that has kept me up many a night. In my intense cinnamon roll research, I’ve found it can be due to a variety of things. 1) Stretching and pulling on the dough while rolling into a log (like I mentioned above). When I’ve stretched too much during this part of the process, I’ve noticed that the cinnamon rolls can shrink and gap while baking. 2) Too much butter and/or cinnamon and sugar filling. While baking, the sugar and butter melt (into that glorious buttery/sugary gooeyness), and if the sugar filling is really thick, that leaves a lot more opportunity for gapping after the rolls bake and cool. 3) Rolling the dough too thin. While this may mean less cinnamony spirals, a thicker cinnamon roll rectangle is going to gap less while baking. 4) Letting the cinnamon rolls rise too long before baking. Doing this can cause the cinnamon rolls to deflate slightly in the oven and shrink as they cool. 5) Cramming too many cinnamon rolls into a pan that is too small. When I’ve done this, the rolls press together too much while rising and then fall back and shrink while baking/cooling.
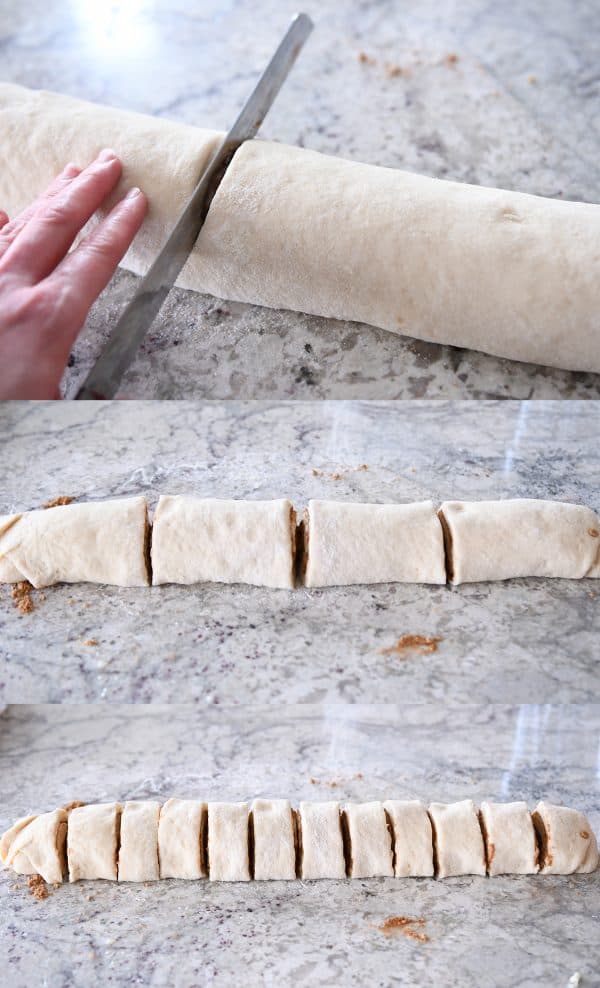
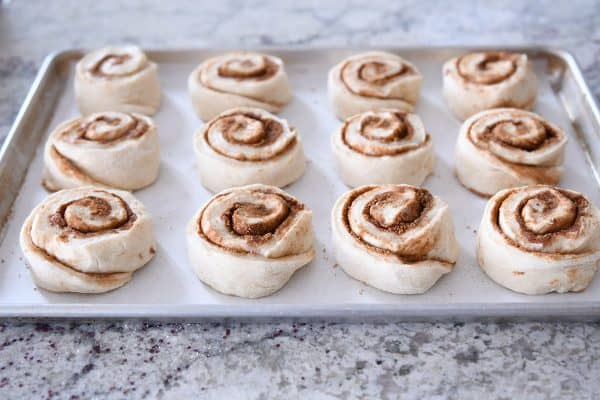
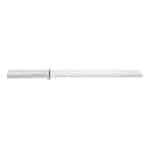
Ok, moving on. Now it’s time to cut the log into rolls! I cut the log in half first. And then I cut each half in half again. And lastly, I cut each of those fourths into thirds. Confused? Haha. It’s easier than it sounds. This inexpensive serrated knife {aff. link} is my go-to for cutting cinnamon rolls because it doesn’t crush the dough while cutting, but you can use unflavored dental floss or thread.
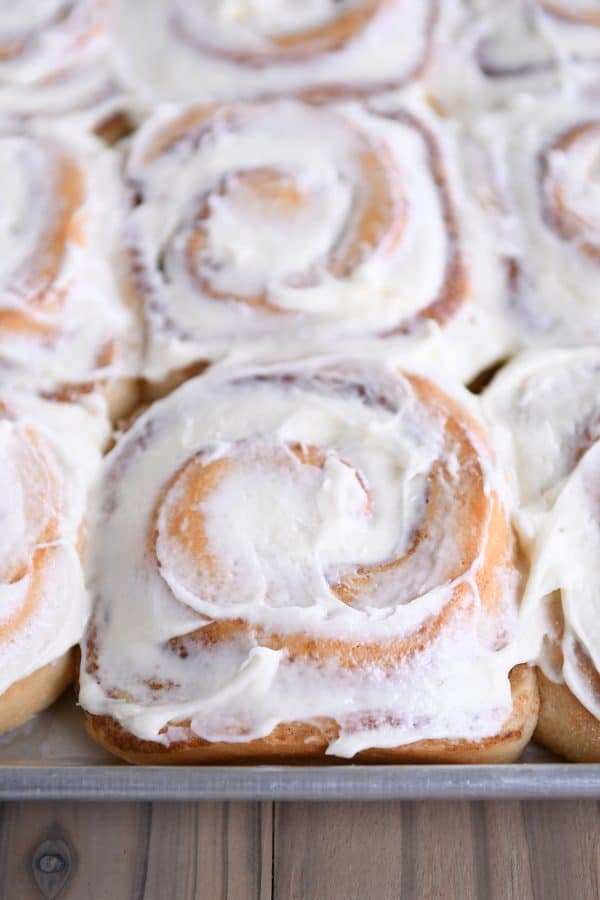
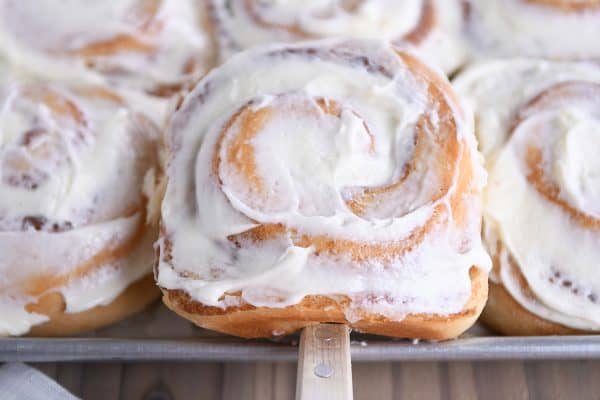
My preference is to use a half sheet pan for these rolls (the recipe makes 12 large cinnamon rolls).
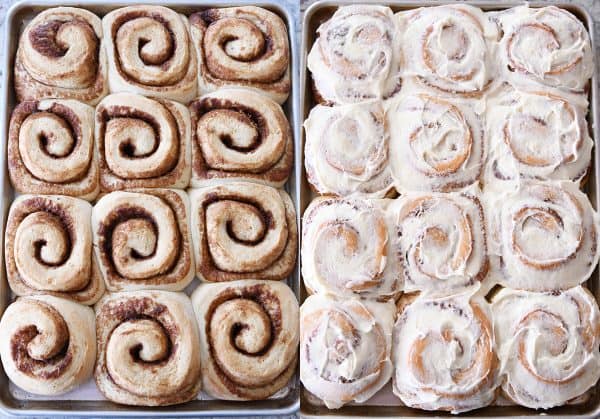
These rolls need room to rise and I’ve learned the hard way that putting them in too small of a pan means they won’t be nearly as fluffy and delicious. Below is a picture of this same recipe (all 12 rolls) baking in a 9X13-inch pan. You can see how close they are together before they’ve even risen. And on the right, after baking, they’ve gapped a lot in the middle and the sides are burned/middles are doughy.
So make sure you give the rolls at least an inch in between so they can breathe and have room to live. You can certainly roll the dough into a large rectangle and make 15-16 rolls out of the batch, instead of 12. If they are smaller, they’ll probably fit in a 9X13-inch pan + an 8X8-inch pan just fine.

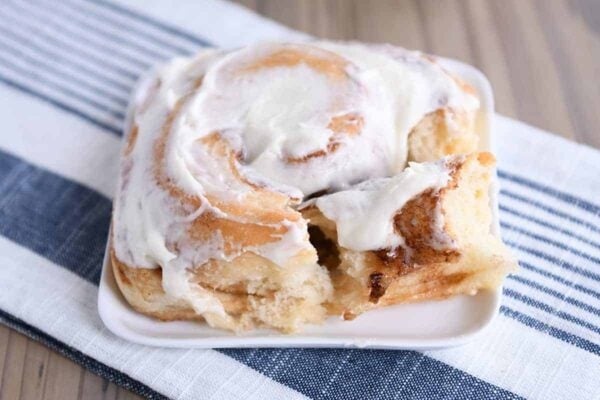
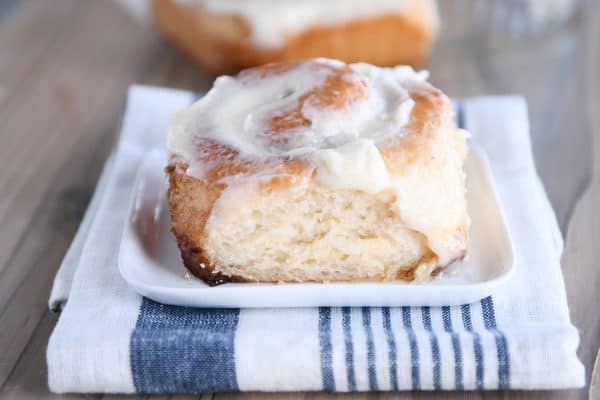
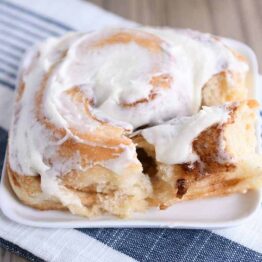
If you are making these to give away, I’ve found rolling them per the recipe (and getting 12 rolls out of the batch) and putting four rolls into an 8X8-inch pan is about perfect for baking smaller batches. Just the right amount of space to bake up fluffy and perfect. Here’s an example of a cinnamon roll baked in a square pan with three other rolls. Get a load of that fluffiness! It’s the perfect size of cinnamon roll if you ask me.
Once the rolls are placed on the baking pan, let them rise until very puffy and touching lightly on most sides (they may not be double in size, but close).
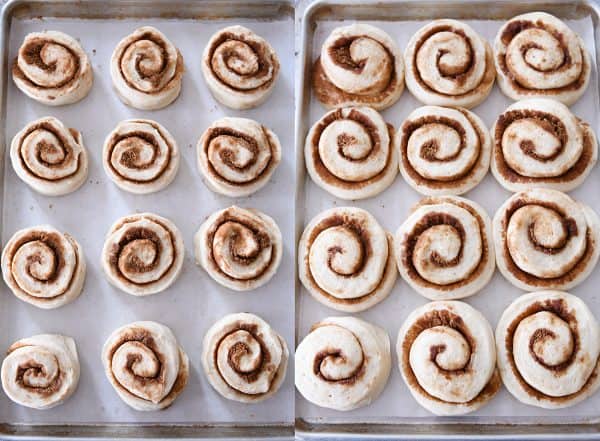
Bake the rolls at 350 degrees for 18-22 minutes (add time if needed). If you have convection bake, using that setting will help the rolls bake through to the center more quickly, but standard bake is fine, too.
While the rolls bake, make the frosting. You can frost them warm, or let the rolls cool a bit. I like to hit middle ground and frost while they are still just slightly warm so some of the frosting melts down into all the nooks and crannies but still stays a bit solidly soft on top.
Speaking of frosting, I’ve made a lot of cinnamon roll frostings over the years, and the icing I posted with these Yukon gold cinnamon rolls is hands down my favorite. It is the cinnamon roll icing I’ve been searching for my whole life. The delicate, creamy flavor (without an overpowering cream cheese presence) is the best, best, best. You can use various extracts to flavor it – maple, if that’s your thing (yum) or vanilla.
Lately, with the price of pure vanilla sky high, I’ve been experimenting more with emulsions (scary word that in this case just means flavoring). And wow, this butter vanilla emulsion {aff. link} adds the most insane yumminess to the cinnamon roll frosting. Kind of gives it a buttery sugar cookie vibe. In.the.frosting. It’s crazy good. And it’s only six bucks a bottle.
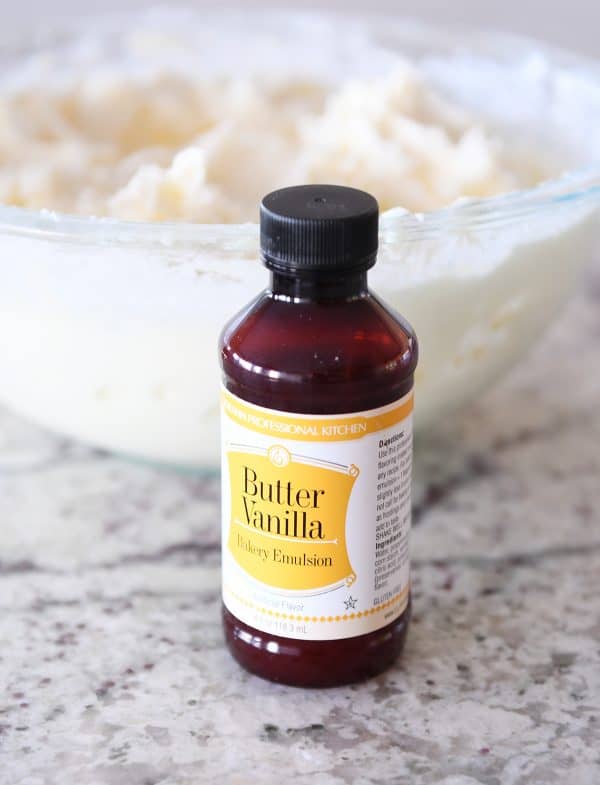
Incidentally as a sidenote, my 14-year old made these super soft chocolate chip cookies for a youth activity last week and used that butter vanilla emulsion in place of the vanilla extract and people were apparently saying they’d never had a cookie that tasted so amazing and wanted to know the secret. Emulsions! Haha.
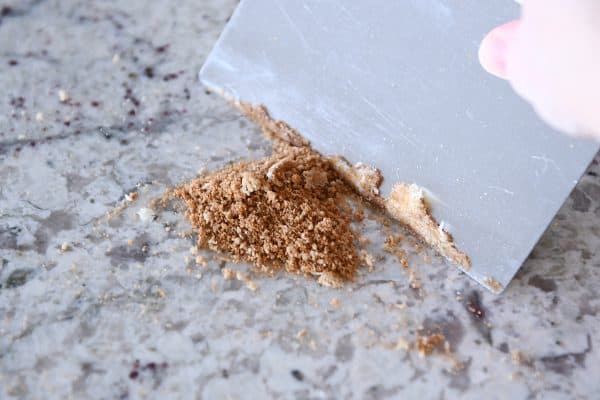
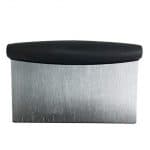
And since we’re talking random bits of knowledge here, rolling things out on a lightly floured counter is one of my least favorite things to do in the history of ever because of the gummy mess it can leave while wiping up. That is, until I figured out my handy dandy bench knife/scraper {aff. link} could eliminate the hassle. I use this scraper for so many things, but scraping up floury, cinnamon roll gunk off my counter is one of the reasons it has earned its way into favorite tool status.
So there you have it! Have we covered everything? I think so! If you’ve made it this far (without skimming), you deserve a major award.
If you have any additional questions, ask away in the comments and I’ll respond as quickly as I can. I am SO excited for you to get your hands on this recipe and let me know what you think! Enough talking, go make some cinnamon rolls!
How to make these cinnamon rolls ahead of time
This post on making cinnamon rolls ahead of time applies perfectly to any sweet roll!
One Year Ago: Healthy Yogurt Oat Blueberry {or Chocolate Chip!} Muffins
Two Years Ago: 7-Minute Spaghetti Squash {Instant Pot/Pressure Cooker}
Three Years Ago: Perfect Roasted Vegetables {5 Simple Tips}
Four Years Ago: White Chocolate Oatmeal Craisin Coconut Cookies
Five Years Ago: Light Lemon and Spinach Spaghetti
The Best Cinnamon Rolls {Cheryl’s Famous Recipe}
Ingredients
Sponge:
- ½ cup (106 g) granulated sugar
- ½ cup neutral-flavored oil
- 2 cups milk, scalded (heat to just below a boil), I use 2% milk
- 4 cups (568 g) all-purpose flour (I use unbleached)
- 1 tablespoon instant yeast, see note for active dry yeast
Dough:
- ¾ cup (107 g) all-purpose flour
- ½ teaspoon baking powder
- ½ teaspoon baking soda
- 1 ½ teaspoons salt
Filling:
- 8-12 tablespoons salted butter, softened
- ¾ cup (159 g) packed light brown sugar
- 1 tablespoon cinnamon
- ¼ teaspoon cardamom, optional but delicious
Icing:
- 2 ounces (57 g) cream cheese, softened
- ½ cup (113 g) salted butter, softened
- Pinch salt
- 2 tablespoons milk or heavy cream
- ½ teaspoon vanilla extract
- 1 ¾ cups (200 g) powdered sugar
Instructions
- In the bowl of a stand mixer (or in a bowl to mix by hand), add the sugar and oil. Pour in the scalded milk and mix. Let the mixture sit for 15 minutes or so until it is warm but not blazing hot.
- Add the 4 cups flour and sprinkle the yeast on top of the flour. Mix until no dry streaks remain and scrape down the sides of the bowl if needed. The dough will be loose and wet-looking. Cover the bowl and let the sponge rest until puffy and doubled, 45 minutes to 1 hour, depending on the warmth of your kitchen.
- Add the remaining 3/4 cup flour, baking powder, baking soda and salt. Mix until the flour is completely incorporated and the dough looks smooth instead of rough and shaggy. It may not necessarily clean the sides of the bowl but it should for a pretty cohesive mass. Add additional flour only if it is too sticky to handle or a small piece of dough won’t form a ball in your hands (it’s ok if it leaves some doughy residue on your fingers).
- Scrape the dough into a lightly greased bowl or container, cover, and let rise until doubled, about an hour.
- On a lightly floured counter (I use about 2-3 tablespoons flour), roll or pat the dough into about a 18X12-inch rectangle. Spread the softened butter evenly across the top. Combine the brown sugar and cinnamon (and cardamom, if using) in a bowl and sprinkle evenly across the top of the butter. Pat down very lightly.
- Starting with one long end, start rolling the rectangle into a log without pulling and stretching on the dough (but still rolling as tightly as possible). Roll the seam to the bottom and pat the log into an even thickness – it should be about 20 inches long or so at this point.
- Cut the log into 12 even pieces. Place the rolls on a parchment-lined half sheet pan, tucking the loose end of the roll underneath, if you want. The rolls should be about an inch apart so they have room to rise. Cover with lightly greased plastic wrap and let rise until noticeably puffy and almost doubled, about an hour.
- Bake at 350 degrees F for 18-25 minutes until lightly golden and baked through. Let cool until warm before frosting.
- For the frosting, add the cream cheese and butter to a medium bowl. Whip with a handheld (or stand) mixer until creamy. Add the salt, milk or cream, and vanilla. Mix again. Add the powdered sugar and whip until light and creamy.
- Spread the slightly warm rolls evenly with the icing. Serve immediately or let cool completely and serve at room temperature (or warm lightly before serving).
Notes


Recipe Source: adapted slightly from a recipe from my friend, Cheryl R (cut the recipe down to smaller size, changed up the mixing method just a little)


Except for the icing and cardamon, these are the exact same ingredients as the Pioneer Woman’s cinnamon rolls. She too makes the sponge, lets it rise, and then adds more four, baking soda and powder, and salt. I think they are the best, and make them as treats every Christmas. Her recipe yields a HUGE amount though, so I am excited to have a tried and true recipe that will make a more manageable amount just for us if we want! Oops, one more difference… she uses white granulated sugar. But I made the choice to switch it over to brown sugar years ago.
Thank you for sharing… can not wait to try them out in the new Bosch mixer I got for Christmas thanks to reading about Bosch on your blog for years. Yay!!!
Yay! So fun that you have a Bosch mixer!
I’ve been waiting very impatiently for you to share this recipe… I’m a major cinnamon roll snob! I loved reading your whole post and my mouth was watering as I read! I started making these first thing this morning, took about 4 hours. I just ate the first one and it was great! It has a familiar carmely taste that I can’t quite put my finger on and they we so very fluffy. I personally love a bit of gooeyness to my cinnamon rolls (these didn’t have), but my husband doesn’t so I think he’ll love these even more than I do. Thanks for another great recipe!
Thanks for the feedback, Jessica – and for making them so quickly! I love that so much!
Made these this morning. Holy Moly. Hands down the best cinnamon rolls I’ve EVER made. They practically melt in your mouth.
I love that you made them today and took the time to comment! Yes! So happy you loved the recipe!
Can you make the night before?
Yes! And then let the dough rise overnight in the refrigerator – then the next morning shape, rise and bake (or you can shape the rolls and refrigerate overnight and then rise an bake in the morning).
You posted this on Monday and I just barely got the email. Hopefully I have time to make them today and surprise my hubby. Tomorrow it’s his birthday
I actually posted it late last night (Wed) and sent the email this morning (Thurs) so sounds like it’s right on track! 🙂
I am curious as to why oil and not melted butter. Does the oil change the texture or baking in someway?
I haven’t tried them with melted butter but I bet you could – I don’t know if the texture would be different.
Oh man!! You did it again!! CANNOT wait to make these! You’re the best Mel! Thanks lady!!
Quick question…totally buying the butte vanilla emulsion but curious what you would suggest for adding the maple flavoring? Affiliate links welcome! ❤️
Hey Avah! I haven’t looked but maybe there’s a maple emulsion? I’ve heard there are tons of flavors.
Just in time for my husband’s birthday next week!! After tasting cinnamon rolls in Sweden, my husband even commented that he wouldn’t mind some cardamom in his birthday cinnamon rolls. We live in eastern Europe right now and cardamom is way more popular in pastries than cinnamon here! (And, yes. It’s delicious!!)
That’s awesome, Amanda! I had never tried it before, but wow, I love the flavor!
Very similar to the cinnamon roll recipe we have used to sell at yard sales. In our family we spend more money on building tools than kitchen gadgets, and for years I’ve told my girls not to tell that we use drywall scrapers for cleaning up counters. Good to know theirs a classier way to do that!
Haha…hey, if a drywall scraper works, keep using it! That’s awesome!
You’re the best Mel! Love your blog and everything I’ve made! Everytime someone says my food tastes good, I say “of coarse it does, it’s Mel!” Thanks for sharing!
Thank you so much, Aubrie!
I recently tried a cinnamon swirl bread recipe from Cook’s Illustrated, they addressed the issue of filling “runnage” and gaps between the layers/rolls. They fixed these problems this way: using powdered sugar because it has corn starch to thicken the filling, and they spray the dough with a light spritz of water before spreading the filling and again after- and they use 3 tablespoons of cinnamon which also thickens up the filling. They didn’t spread any butter on the dough. This recipe is for bread, not gooey rolls, so we might miss that butter. Could spray the top of the filling however? BTW, I am blown away by that cinnamon bread recipe, you should take a look at it if you can…
Thanks for the input, Wendy! I’ll have to look at that recipe!
I’m on day 2 on being home bound with a croupy child, I think these may be on the menu today. My big kids will think this is the most amazing after school snack ever! Also, a group of us made our own vanilla a few months ago since the price is so high. You know, just a group of Mormon ladies with their Bacardi rum and vanilla beans.
Haha! I just made my own vanilla extract too! It tastes AMAZING and is way better than anything I’ve bought at a store. I joined a Facebook group that’s a vanilla bean co-op run by some ladies in Northern Utah (“Vanilla Bean Co-Op”, admins Stephanie Austin and Whitney Olsen). A couple weeks ago they actually had Ugandan vanilla beans for sale, though usually Indonesian beans are the standard. Whitney shared her recipe for “everlasting vanilla”, basically a jar of extract that’s been going on strong for 10 years. That’s what I made and it’s fantastic. I chuckle whenever I see the liqueur bottles in the cabinet.
Haha, Sara. That’s awesome. Did it save you money? I haven’t found a good source for vanilla beans that doesn’t break the bank. Share if you have a great place to buy them!
What about adding walnuts on the middle? How much would be just right? We prefer our Cinnamon rolls with nuts.
You could definitely do that! I don’t put nuts in my cinnamon rolls so I’m not sure what to suggest – sorry!
Is it possible to make a double the recipe? Or should I make one recipe at a time?
Yep! I know the post is long and wordy but there’s a note in there that this recipe doubles amazingly well!
I’ve been telling myself that I’m going to learn to make cinnamon rolls forever, especially for Christmas morning. This looks amazing and I would love to try it. The problem is, I’ve tried to get dough to rise in my house over the 30 years we’ve lived here and it just doesn’t. I don’t know what the secret is. Do you have any suggestions? Does the house have to be a certain temperature? Could I put rising dough in a barely warm oven? Have I done other things wrong in the mixing process? I would be forever grateful for your suggestions. Btw: LOVE your blog and enthusiasm for cooking. Great recipes and you make it fun.
We keep our house pretty cool too, and the rising step is hard. My solution: (this will sound crazy!) is to run my clothes dryer for a few minutes and then set the pan in the warm dryer. Not only is it the perfect temperature for fool proof rising, but I think having the pan or bowl cozily trapped in the dryer with the door close tends to give it a bit of a buffer from all the door slamming and foot stomping that always seems to happen in my house when I am trying to get something to rise!
Hey Shantal! Don’t give up! We can work through this together, I promise! What do you think the temperature of your kitchen is usually? In the 60’s? 70’s? A warm oven can work but I’ve also learned the hard way that if it’s even just slightly too warm, it can kind of parbake the rolls/bread which is a disaster. One tip that I usually do if I want to really make sure that rise happens well is to turn the oven light on and pop the dough in. The light offers a little bit of heat without cooking the dough. Let me know if you try it! I’d love to keep helping you troubleshoot.
Me scrolling: please include flour weight measurements, please include flour weight measurements. Huzzah! I’m an over-flourer by nature so weight measurements have helped me stop second guessing myself.
I usually only make cinnamon rolls twice a year (general conference and because I have no cinnamon roll self control) but I may need to *test* these soon. You know, for science.
I found this online and plan to give it a try. It is a method to make your oven into a proofing box. It is basically putting a pan of boiling water on the bottom shelf your dough on the shelf above it. Then close the door and let it rise. The boiling water adds just the right amount of head and gives the moisture too. https://www.cooksillustrated.com/how_tos/6398-turning-your-oven-into-a-proof-box
I make a warming station in my house for rising dough. I put a heating pad on medium and put a towel down on top of the pad, then the bowl of dough (covered) and then wrap it up with another towel. We usually tuck something under the sides of the heating pad to keep the heat close to the bowl.
It’s like a warm nap for the dough while it doubles!
Good Luck, realistically, the dough should rise, even if very slowly and taking at least 2 or 3 times as long even if it is colder than the ideal temp. Do be careful with the temperature of the liquids when adding the yeast. Too much heat will kill the yeast and then it will never rise. I’m not good at judging temps and always use a quick read thermometer to check temp before adding the yeast. This turned out to be a real game changer for me, so I’m passing it on in case it helps. It also helps to be sure you don’t add too much flour since really stiff doughs don’t rise as well.
What @ALICE E said!!! And unless your house is 32F or colder, you should get a rise, although it might take longer (considerable longer depending on temp) than a recipe states. I typically do a 24-48 hour rise in my refrigerator (40F). The frig /low temp, slows things down but does not stop things. No rise, over 10-12 hours, means either “bad” yeast or something in the ingredients that kills the yeast (or leaven if using a natural leaven) and all of the dough proofing equipment and/or methods will not help that. Candidates for yeast killers: chemicals in water/liquid, too hot liquid as @ALICE E says, mold/chemical on dried fruit … etc. This recipe with milk and no water should easily produce a rise in no more than twice the recipe time estimate if your house is at least 60F.
To clarify a little: “should easily produce a rise” … IF your yeast is good … you can google/search “testing your yeast”. Mainly, I was thinking that if your water had chem, the fact that this recipe’s liquid is milk would negate anything in the water killing the yeast.
I follow Orson Gygi on Instagram and they did a whole study on different kinds of vanillas, pure, imitation, and emulsion. I was already thinking I should get some, but since you recommended it, I bought it straight away! I’m excited to try these, but since we just got back from our first cruise, and all we did was eat, I need a bit of a detox first!
Haha, I hear you on that! I felt that way after we got home from Alaska last year. I hope you had a blast!
I loveeeeee that butter vanilla emulsion! And it is so true. Everyone always comments on the recipe when I use it.
Can’t wait to try these cinnamon rolls.
There’s just something about it!!
What are your feelings to using a food processor with the bread blade? I don’t have a kitchen aid or Bosch mixer, but I have a Cuisinart food processor.
Hey Beverly! Nanci below just asked the same question and I just barely, barely responded. I think if you have had good luck in the past using your food processor to mix do with the dough blade, it is probably worth a try. I haven’t tried it myself so I can’t say for sure. Mostly I would make sure that the quantity of ingredients will fit in your food processor. Good luck if you try it!
I don’t have a stand mixer and won’t likely buy one. I do however have and often use my Cuisinart food processor for dough. What do you think…processor or hand mix?
Bread and sugar…= my downfall.
I have heard a lot of people have good success making dough in their food processors, too. That’s awesome! I would say if that has worked for you in the past it is probably worth a try. I haven’t tried it myself so I can’t say for sure. I will say this dough is very soft and forgiving, so it makes a great dough to mix by hand.
Hi Mel
I live up the street from your mom & dad. Could I come down sometime an have a tour of the kitchen? My daughter works for a company (Whirlwind) at Gillespie field. I am going to try the cinnamon rolls.
Cheers
Kay
Hi Kay, I actually don’t live in the same town as my parents. Sorry!
Hi Mel,
This recipe looks so good – I want to make it right away. Question though – have you ever tried making it dairy-free?
I have not tried this recipe with dairy free substitutions. Sorry!
Does your master bread baker friend have tips for high altitude baking for this recipe? It looks fantastic?
I’ll ask!
When I woke up this morning, I had zero plans to make cinnamon rolls. All of a sudden, I can’t think of anything else as important as trying this recipe TODAY. I even have all of the ingredients on hand and a furloughed husband to help me judge. This is happening.
Yessss! Keep me posted!
Mel…two questions.
1. Is whole milk needed or can I use 2%?
2. I only have a hand held Kitchen Aide mixer but it does have a dough hook. Will this work?
Thanks for this fabulous sounding recipe and making the directions that even I think I can follow!!
hey Sandra, I have only ever used 2% milk for this recipe and it works great. I edited the recipe ingredients to note that. I would say if you have a handheld mixer with a dough hook I still think it might be best to mix the dough by hand. It is a very forgivable dough for mixing by hand and I’m not sure how a dough hook on those handheld mixers would do with this since I haven’t tried it.
Weekend fun! Been waiting waiting waiting for this recipe! Thanks Mel!
Let me know what you think if you try them Jill!
I’m SO excited to try another cinnamon roll recipe that sounds amazing! Especially one that doesn’t have egg (daughter is allergic). We use an amish one my family has loved, but I miss the structure in it that an egg can do. So looking forward to this. Thanks Mel and Cheryl for willing to share recipes! XO
Hi Katie, I was excited about this recipe for the same reasons! I have several friends who have kids that are allergic to eggs and so many cinnamon roll recipes don’t work for them.
I make a huge batch of these from another similar recipe every year for Christmas and take it in to my husband’s work. People talk about it all year long. These really are the best! Thanks for posting a smaller recipe. I may make these more than once a year now.
Thanks, Shayla!
Thanks! I’ve been waiting for this recipe. Can’t wait to make these today. I may even share them with my sister’s family.
I hope you like them, Teresa! And I won’t judge if the first batch doesn’t get shared.
Cheryl and Jean!!! We know them from Vancouver and we love them! Amazing people!!! We miss them!
Oh, p.s. Cheryl is an AMAZING cook/baker!❤️
Oh wow! What a small world!
Oh man, I honestly made the Perfect Cinnamon Rolls last night for dessert. Dare I make more for scientific purposes? hmmm
Love using the autolyse technique in bread baking – bet she picked that up from her baking husband. Works so well at preventing too much flour being added to a dough.
My “secret” trick for extra cinnamon-y cinnamon rolls? I add about 1 teaspoon of cinnamon to the dough itself. So yummy!
Awesome idea to add cinnamon to the dough!
This! What a good idea! I’ve always thought that cinnamon roll dough needed “something” but never would have thought to add cinnamon. This is why I love to read the comments. Thanks Mel and Marcella!
I make the PW recipe like this in quadruple batches multiple times each Christmas. The dough is soft and it is easy to mix by hand. I put the dough in the fridge/cold garage overnight for the first raise and add the rest of the flour and bake the next morning to break up the process. These are the best rolls!!
Great idea!
I’ve been making this recipe for years from The Pioneer Woman’s recipe (everyone always raves). They’re amazing. A helpful hint- I never have time to scald the milk and wait for it to cool, so I scald half the milk, then add the other half in cold and it brings the hot milk to room temperature within a couple of minutes. I also love my bench scraper for these, and I have a marble rolling-pin that is amazing. My daughter even gotten compliments on it from her friends when they made sugar cookies.
Bench scrapers are the best, aren’t they??
This is almost exactly the recipe also shared by the pioneer woman, which I’ve been making for ages and is so good! I’m always tempted to try a recipe that requires kneading but then I just make these again =D So glad this recipe is finding its way to more people!
I wonder if the PW got this recipe from my friend, Cheryl? Haha. Cheryl was famous for these rolls for decades when she lived in Vancouver (she’d stay up all night making them for Fathers Day for church)…it’s always fun to hear the evolution of a recipe and how others have tried variations! Love this kind of stuff!
I just glanced at the PW post, and her recipe seems to be from her mother… Love how what are tried and true classics through the generations appear in different locations (or continents!) and get shared again and again- be it through blogs or as a bunco prize!
Thanks to Cheryl for her generosity!
This is very similar to the pioneer woman’s recipe! I made it at Christmas for our traditional Christmas morning cinnamon rolls because my MIL was here and she is allergic to eggs so all my usual recipes were a no-go. I thought the baking powder/soda step was weird when I did it but the buns were amazing!
I have several friends who have kids allergic to eggs and I was excited about this recipe for the same reasons!
Will coconut oil work? What exactly does “neutral oil” mean?
An oil without a strong flavor…like, I wouldn’t use olive oil in this recipe but canola or vegetable or avocado oil works great.
@JESSICA
The only thing I bake with is refined coconut oil, it has no taste (versus UNrefined coconut oil). You can buy liquid or just melt the hardened stuff which comes in a jar 🙂
Coconut oil is so amazing!! 🙂
Wow. I can’t wait to try these. But before I do, I just want to say THANK YOU for all the photos and helpful detail. I am a pretty confident baker, but I think bakers at any level really benefit from this extra help and clarity. You really set us up for success. Thanks!
Thanks so much, Nancy!
Thanks for all the hard work and effort you put into this. I’m going to make these on Friday.
Looking forward to tasting these!
Friday’s going to be a good day!!
Can’t wait to try these!
If using the emulsion is it measured the same for the vanilla exract?
Yes!
I was all set to make these immediately until I realized I’d need to let it rise three times, looks like I know what I’m doing tomorrow
I need to edit the recipe to state that Cheryl, who gave me the recipe, usually lets them rise that last time (before shaping) overnight in the refrigerator. I haven’t tried it myself because I have always made them start to finish the same day, but that may be a good tip for anyone who wants to break up the process.
I was able to make them today and they were well loved, my mom said they are the best she’s ever had.
Yay! Thanks so much for leaving a comment to let me know, Britney!
I don’t have a marble counter top … should I roll it out on a floured bread board or parchment? Thanks!!
My counter isn’t marble either. It is granite. You should be able to use any type of countertop unless it is tiled or uneven. But a floured board would probably work too, especially if you’ve used it before to roll out cinnamon rolls.
Thank you Mel!! I appreciate all the details you put into a post like this because I consider myself a baking nerd . Can’t wait to try these!
Thanks, Michele! Baking nerds unite!
So excited to try! What kind of milk (whole, 2%?) do you usually use? Thanks for sharing and writing so many details to help us!
Good question, Lachelle, I use 2%. I’ll add that detail to the recipe.
Yay! Can’t wait to try these!
Thanks, Mel, for always finding a scrumptious way to ruin my diet and for giving me a perfect excuse when my husband asks what happened to my diet!
Thanks for the recipe! I’ll try these gluten free version! Can’t wait!
Nicold
Can you tell me how they turn out? I just recently had to stop wheat and I miss cinnamon rolls!!
Well I now have plans for tomorrow! If baking on convection should I still do 350 or drop to 325? I’m nervous but excited! I’ve got some Gloria’s in the freezer In case something goes south and I end up not happy with my results
Haha, at least you have a backup stash! Let me know how it goes and email me or comment if you have any panic moments (which you probably won’t; the recipe is pretty straightforward). When I bake on convection I bake at 325 (good question)
I finally made them! And a double batch:) I came to the decision that I love them as equally as Gloria’s. My friend, who I have recently given Gloria’s rolls to, was willing to taste test and she declared these much better than Gloria’s. My husband said he can’t give me an honest opinion unless he tastes them side by side, not happening:):):):) Thanks for another delicious recipe. Also, I think my oven cooks hot because they were done at 15 min!
I’ve made (and loved) all of your cinnamon roll recipes, and I can’t wait to try these! I kind of love that they’re so different 🙂 I’m definitely a bit if a food nerd and I love new techniques.
Haha, you and me both! My nerdiness keeps me blogging. 🙂
That is an interesting list of ingredients! Thank you so much for sharing. I’ll be baking these and returning to leave a rating later…although I already know it’ll be 5 stars
Can’t wait to hear what you think! I’m always a little nervous to post a recipe like this and declare it “best ever” – what if people hate it?? But I really think these are a winner.
What oil did you use?
I’ve used both canola and avocado oil in separate batches.
You are the BEST! Can’t wait to try this! Thanks for the amazing thorough tutorial. Inexperienced bakers like me are definitely grateful for all he info!
Thanks, Rachel! I know this post was long and wordy, but I wanted to pack in all the info.