The Best Homemade Toffee {3 Tips for Foolproof Toffee!}
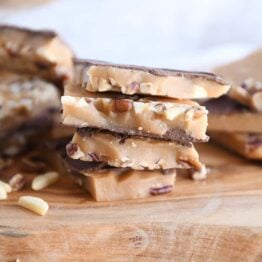
This easy foolproof homemade toffee is a holiday staple! The recipe also includes THREE essential tips for ensuring perfect toffee every time!
Making toffee at home can seem super intimidating. And trust me, I get it! I’ve had my share of homemade toffee fails over the years.
But thanks to me failing and trying again (over and over and maybe with a few bad words sprinkled here and there), I’ve learned the secrets to perfect foolproof homemade toffee.
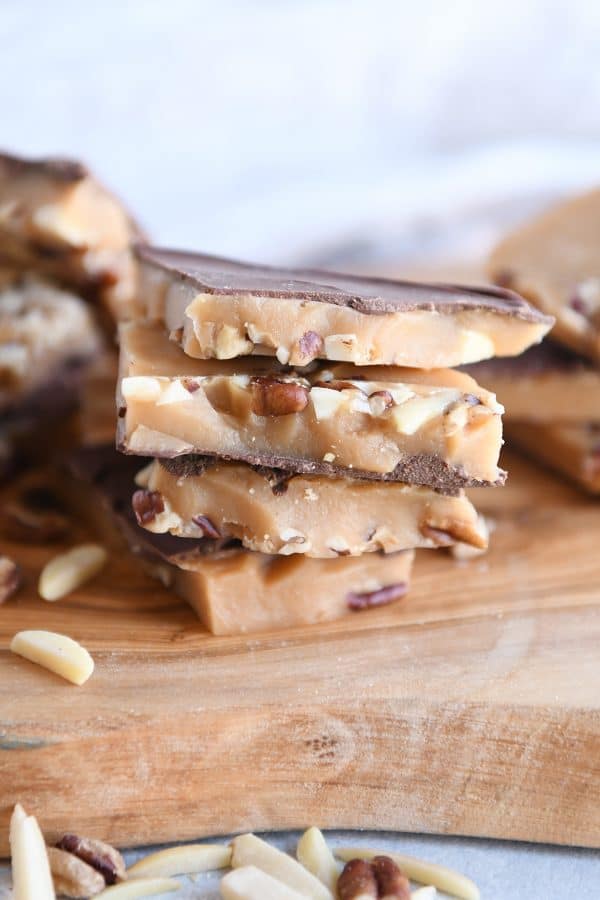
Most homemade toffee recipes look very similar. Making perfect toffee is all about the technique and tips. The do’s and don’ts.
Today, I’m sharing my favorite homemade toffee recipe plus three tips for foolproof toffee!
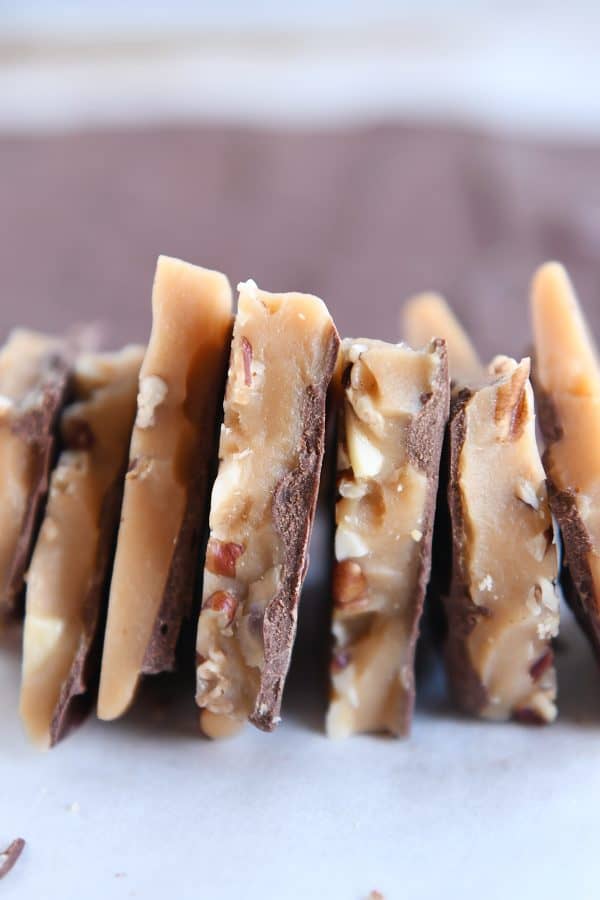
Simple Ingredients
Homemade toffee is one of my favorite holiday treats ever. The crunchy caramelly nutty goodness is irresistible!
The ingredients are super simple:
- butter
- sugar
- a little bit of salt
- chocolate
- chopped nuts (optional)
The other critical “ingredient” is a heavy-bottom pot.
What constitutes a heavy-bottom pot? You’ll know if your pot is good for toffee making if the base of the pot is thicker than the sides. It should feel noticeably heavy and more substantial at the bottom. This helps distribute the heat to cook more evenly.
How to Make Homemade Toffee
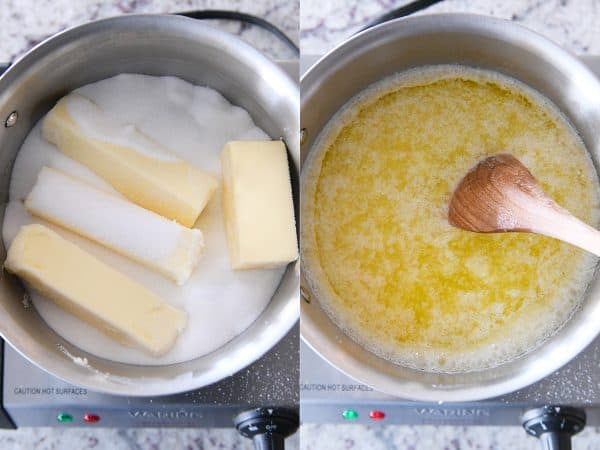
To begin, the butter, sugar and salt get melt together over low heat.
At first, you may be alarmed. Like, why is my sugar and butter mixture so greasy? So oily? So separated? So weird?
It all comes together, I promise! It has a lot to do with chemistry and molecules and heat reactions and science.
Mel’s Dumbed Down Version: patience, moderate heat and heavy-bottoms (see saucepan note above) make the best toffee.
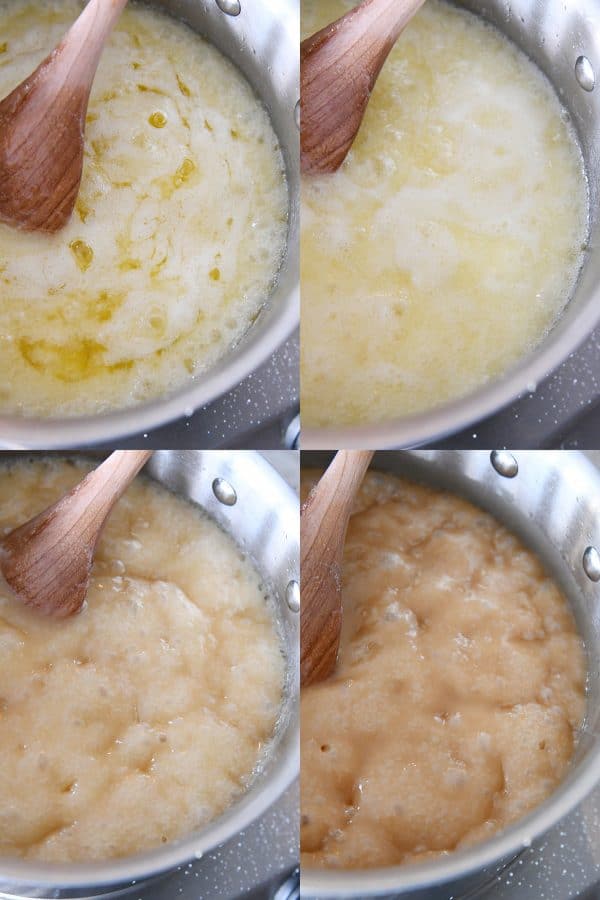
It’s important while the toffee cooks to only stir it occasionally. Constant stirring can cause the toffee to crystallize and separate.
For those of you that need to know exactly how often you should stir, I would suggest erring on the side of not stirring more than stirring. Moderate the heat so the toffee doesn’t scorch and burn, and you only need to stir 3-4 times.
When stirring, don’t scrape the sides of the pot. That can also cause the toffee to crystallize and/or separate into a butter layer.
Cook the toffee until it is a beautiful deep golden brown. That’s right around 285-290 degrees F on a thermometer.
What happens if my toffee separates?
If you notice the toffee separating with a greasy butter layer on top, try slowly stirring in 1 tablespoon water at a time until it comes together again.
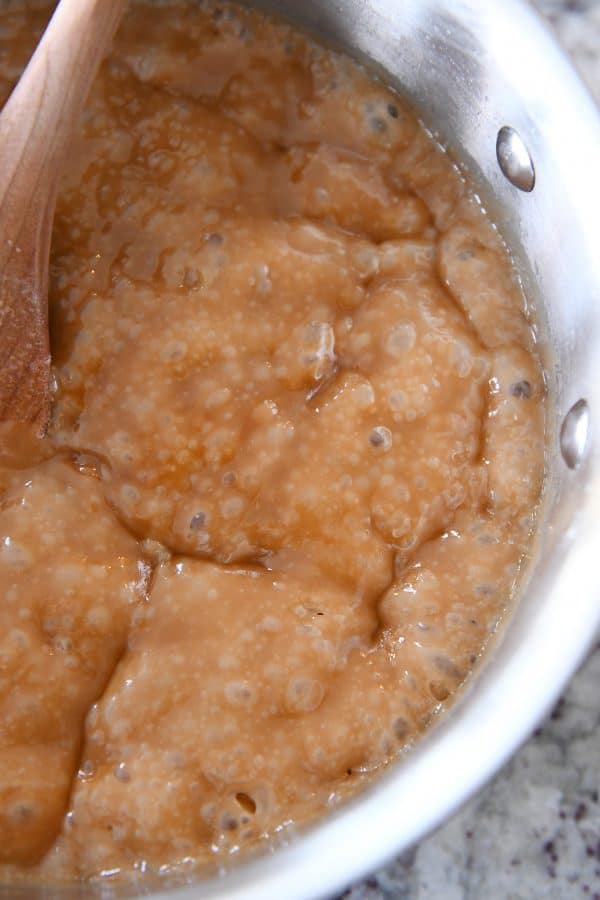
Immediately upon reaching the sweet spot of perfectly cooked toffee, pour it onto a parchment lined baking sheet. You can spread it out with an offset spatula, but I just pour it around in ribbons and let it flow together.
The Golden Question
Q: Do you like nuts on the bottom of your toffee or on the top?
A: I like them on the bottom. It’s the only way I make toffee. I scatter chopped nuts (my fave combo is slivered almonds and toasted pecans) on the parchment paper and pour the toffee over the chopped nuts.
But if you prefer the age old toffee + chocolate + nuts look, you can simply pour the toffee right onto the parchment paper and save the nuts for later.
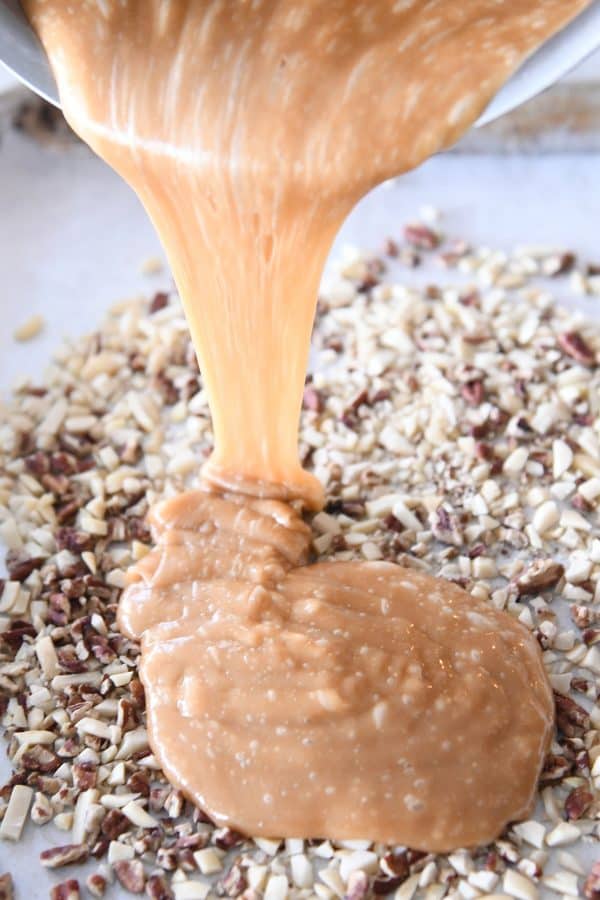
Scatter chocolate chips immediately on top of the hot toffee. They’ll melt within a few minutes.
Spread them into an even layer (add nuts to the soft chocolate at this point, if you want) and then let the toffee hang out until it’s set and no longer warm.
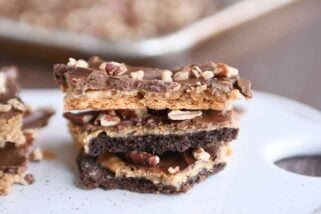
Break the cooled toffee into delicious shards and make a plan for the toffee’s immediate exit out of your home. Otherwise you’ll be like me and wonder how an entire batch of toffee innocently sitting on the counter managed to disappear in less than 24 hours.
Oops.
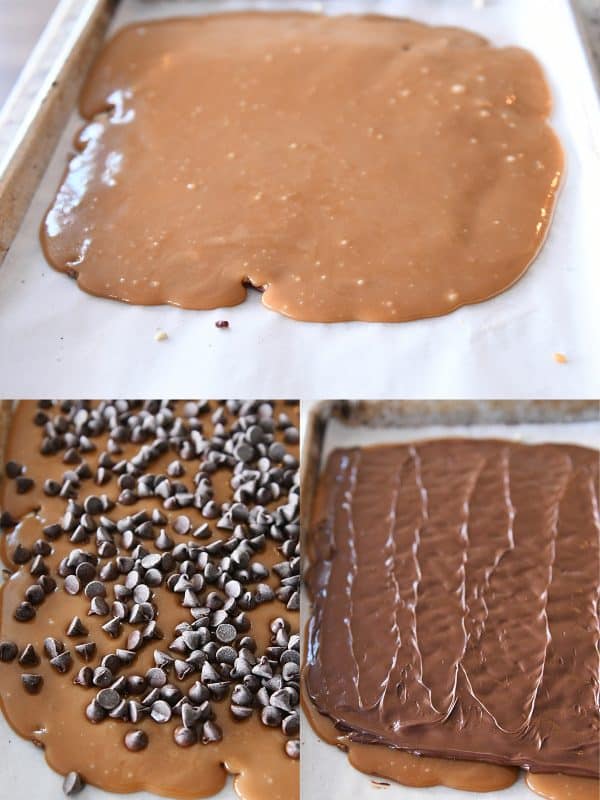
3 Tips for Foolproof Toffee:
1) Use a heavy-bottom saucepan.This is important as the thicker base means more even heat distribution which means less chance of burning. Thin-bottom, cheaply made pots should stay far away from toffee making. I always use a stainless pot – I wouldn’t recommend pots with nonstick coating. Basically, a heavy-bottom is a very admirable quality here.
2) Don’t stir constantly. Unlike other homemade candy and many caramel recipes that require constant stirring, toffee is different. It only needs to be stirred occasionally, otherwise it has a tendency to crystallize (turn sugary and grainy) or separate. I leave my stirring spoon in the pot the entire time. Taking it out and reintroducing it with every stir also increases the risk of the dreaded crystallization because the temperature drops when the spoon enters the hot, boiling toffee.
3) Moderate the heat carefully. When the butter and sugar are first added to the pan, cook on medium-low until the butter is melted. Don’t try to rush this step with higher heat. After that, cook on medium heat as the toffee comes to a gentle boil and throughout the cooking process.
Every stove is different – gas vs. electric, etc., so watch the heat closely and turn down or up as needed. Medium on my stove may not be the same as medium on your stove. Additionally sudden drops or spikes in the temperature of the toffee can cause issues, so try to keep it even and steady.
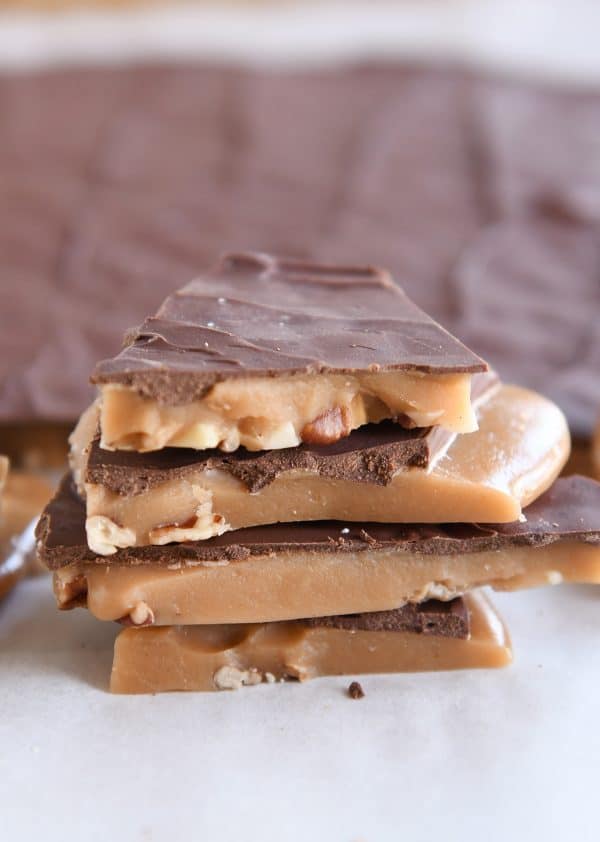
And there you have it! Perfect foolproof homemade toffee. This recipe has been in my family for years. It’s classic, simple and delicious.
Anyone can make homemade toffee with the right recipe and just a few crucial tips and tricks!
FAQs for this Homemade Toffee:
Yes! Use a larger pot and remember that doubling the recipe will mean it takes longer to cook and reach the correct temperature.
If you notice a greasy buttery layer forming on top while the toffee cooks, it means the toffee is separating. You can try adding in 1 tablespoon of water at a time and slowly stirring to recombine. Separating (and/or crystallizing where the toffee turns sugary and grainy) can happen with sudden drops or spikes in the temperature or with constant, vigorous stirring. It can also happen if the sides of the pot are scraped, reintroducing crystallized sugar pieces.
Granulated sugar is best for this toffee recipe (brown sugar has a different moisture content and a much higher chance of scorching).
One Year Ago: Easy Winter Fresh Fruit Salad
Two Years Ago: Easy Parmesan Breadstick Knots
Three Years Ago: Honey-Vanilla Yogurt Fruit Salad
Four Years Ago: Perfect Vanilla {Bean} Caramels {Step-by-Step}
Five Years Ago: Holiday Fruit Soup
Six Years Ago: Smothered Crispy Pork Cutlets with Cauliflower Mash
Seven Years Ago: Homemade Peppermint Patties
Eight Years Ago: White Chocolate Cherry Shortbread Cookies
The Best Homemade Toffee
Ingredients
- 1 cup (114 g) chopped nuts (see note)
- 2 cups (454 g) salted butter
- 2 cups (424 g) granulated sugar
- ¼ teaspoon salt
- 2 cups (340 g) chocolate chips
Instructions
- Line a half sheet pan or 9X13-inch pan (for thicker toffee) with parchment paper – no need to butter or grease the parchment. Sprinkle chopped nuts in an even layer over the parchment. Set aside. (I like nuts on the bottom of the toffee, but you can skip this step and sprinkle nuts on top of the toffee after the chocolate melts.)
- In a heavy-bottom 4-quart saucepan on medium-low heat, add the butter, sugar and salt. Cook, stirring, until the butter is melted. Clip a candy thermometer to the side of the pot, if using.
- Increase heat to medium, and bring the mixture to a steady boil. Stir only occasionally (not constantly) and avoid scraping down the sides of the pan. Stirring too quickly or too often can cause the toffee to separate. Moderate the heat as needed – turn it down if the toffee is boiling or cooking too fast so it doesn’t burn.
- Cook until the toffee registers 285-290 degrees on an instant-read or candy thermometer and is deep amber brown in color, about 20-25 minutes.
- Immediately remove the pan from the heat and pour the toffee evenly over the nuts on the prepared baking sheet – don’t scrape the sides of the pan. You can spread the toffee with an offset spatula; I pour it back and forth in ribbons over the nuts and let it flow together.
- Sprinkle chocolate chips on top. Let them soften and melt for 2-3 minutes and then spread the chocolate into an even layer over the toffee. If using nuts on top, sprinkle them over the melted chocolate before it hardens.
- Chill or let toffee sit at room temperature until set. Break into pieces. Store at room temperature in an airtight container (it will keep for several days at room temp).



This looks close to my tried and true recipe for homemade toffee, except instead of chocolate chips I use 3 Hershey bars. It is delicious!! I have one question…sometimes after the coffee cools down the chocolate separates, or lifts away from the toffee. Do you know what caused this or how you prevent it? Trust me, we still devour it! Thank you!
That happens to me, too, and I think it has more to do with the type of chocolate used than the toffee. Melted chocolate chips tend to do that more than melting bars of chocolate.
Some additional tips:
I have found that adding a tablespoon of corn syrup helps avoid separation or the toffee turning grainy. I don’t use a thermometer because I find it annoying in the pot. I remove it from the heat as soon as it becomes less foamy and almost slippery.
I score the toffee immediately with a sharp paring knife (greased with butter) to make even size, somewhat square pieces.
I love toffee! My favorite candy bar is a Skor bar.
This isn’t exactly the same as that, but it was the very first time I have ever made toffee and your recipe made it so easy!
I figured I’d make it as instructed the first time and then if it worked out then I’ll try it again with modifications.
I was just wondering, have you ever made it with homemade almond “flour”? If you you have, or would, would you mix the ingredient in once the butter, sugar & salt have melted, but before it starts to boil or would you sprinkle it on after you pour it on the parchment paper?
Thank you for your post Mel!
Kat
Hi Kat! Glad you liked this recipe. I haven’t tried it with homemade almond flour – but if you want to use it, I’d definitely add it after the toffee has cooked and has been spread on the parchment
SO GOOD! I don’t really like toffee but made this for a friend and it’s delicious!! 10/10!
Even though it is not candy making season, I saw this recipe and thought I would add the following observations.
I personally like brown sugar over granulated sugar.
I can never get all the chocolate to stick when you do it like you suggest. If I get a 50% hit rate I am lucky. So I have decided to just dip my toffee. I know that adds a lot work but I don’t get overly intense. Just grab a piece of toffee, swirl in melted chocolate, wipe off excess and put on wax paper.
Separating toffee. I attended a chocolate making class given by a person who wrote a book on making candy ( Ruth somebody). She swore she couldn’t make toffee. It always broke. So I decided to come up with as fool proof method as possible. Here goes. Put the butter in your pan, dump the sugar on top (keeps the butter from popping and to some degree the sugar from sticking to the bottom of the pan). Put a lid on and cook until all the sugar has fully melted (250 degrees ish). You now have a beautiful mess (come on – brown sugar and butter. It may be a mess but it is beautiful). At this point take a whisk (no wimpy little spoon) and start stirring. Keep going until it looks like a cheese sauce – your picture looks great. Be careful, a lot of times there is still butter on the edges. Keep stirring until all the butter disappears. Take your whisk out and stick it in a bowl of water (the sticky stuff will dissolve making the whisk easy to clean. I have rarely had a batch separate with this technique.
Final cook temperature. 300 degrees plus. Since this is nearing the turn-sugar-into- carbon temperature, I start stirring at 290 and keep stirring until I hit my final temperature. When I cook toffee below this temp it is hard and sticks to my teeth. The higher temp gives it an almost crumbly texture.
Thanks for a great website!
Varied results, patience is definitely a virtue …. Enjoy eating my mistakes, also my nearly ”spot on ” Toffee …. Thank you for easy-to-understand Recipes
My toffee keeps coming out chewy
Probably didn’t get it hot enough the other toffee recipe I use recommends 310-315 while I would stay away from 315 (Getting close to burning) chewy usually means not hot enough in my experience.
Wish I would have seen your recipe before trying recipe with real bourbon. Stated to add bourbon and vanilla after taking it off the stove. Splattered and separated big time! Think 1 teaspoon non-alcoholic bourbon flavoring slowing added after removing from stove would work?
Yes, I think it would work to add bourbon extract.
Thanks for this! For folks who need low-sodium, would using unsalted butter omitting (or lowering) the added salt affect the texture? I’ll have to play to figure out the flavor aspect, but will it be more likely to turn grainy or scorch?
I think using unsalted butter should work just fine.
I make toffee by the pounds every year and have come to learn that unsalted butter will cause the toffee to separate right at the end. If using unsalted you will need to add a little bit of salt. I don’t risk it because who wants to stir for so long then have it ruined?
Easy to follow and it came out amazing!!!! Highly recommend it.
Thanks Mel! This is the first time I’ve made toffee and it came out perfectly. Great recipe with very detailed, easy to follow directions. I made a half batch for my first try and added a 1/2 tsp. of Simply Organic Non-Alcoholic Vanilla Flavoring. It is glycerin based and has the most wonderful flavor. I discovered it on Amazon when I started making homemade vanilla bean gelato and I haven’t used anything else for baking or gelato making since. Just thought I’d share for those who wish to add vanilla to their toffee
I am so glad I found your recipe! I was using one that called for constant stirring for TWENTY MINUTES! It was exhausting, and there was always a point where it began to separate.
Your approach is much easier, and just as delicious!
Thank you!
Could I make this in a magnalite pot?
I’m not familiar with that kind of pot so I’m not sure – sorry!
I don’t know what I did wrong, but my talking is stuck to my pan. I cannot get it out. Is there something I can do to fix this?
Hi Becky – did you have a layer of parchment paper on the pan before spreading the toffee? You can try warming the bottom of the pan slightly with a rag dipped in warm water or a heating pad or something like that to see if it will loosen the toffee.
Most every other recipe I see says to heat to hard crack stage- above 300. Why is yours at a soft crack stage? How does the end result differ?
You could cook to a higher temperature if you’d like!
How do you guys keep the chocolate from breaking off the toffee? Is it because I’m putting it in the freezer before breaking? My chocolate always comes off when I break the toffee and it frustrating! Also what brand heavy bottom pans are you using and are you using a wooden spoon?
Hi Mary, try letting the toffee set up with the chocolate at room temperature or chilled for just a few minutes in the fridge (but too cold, like the freezer, might be the issue).
I’ve made homemade almond roca for years without any problems on a regular electric stovetop and induction stovetop. We have moved into a home with a gas stovetop this year. I’ve made three batches and they all seperated at the end. What recommendations do you have?
Hi Lori, sometimes separation can occur if there are high and low changes in the temperature. It could be that the gas stove may increase or decrease the temperature too quickly? I’d keep an eye on that.
I’ve made this twice now and I think it’s my family’s new favorite thing this Christmas! I am including it in my Chocolate Lover’s Gift Box as well.
Things I noticed:
1. A half batch is much easier to watch and control the temperature than a whole.
2. Use a bigger pot than you think you need. I would use a 6 quart over a 4 to make a full batch, and my 3 quart was perfect for a half. Better heat distribution.
3. On my electric glass top stove, I kept it on VERY low the entire time after the butter was fully melted, and it still only took 14 minutes to come to a beautiful amber color and 285 degrees. Err on the side of caution – my first batch scorched on the bottom, and while it did not affect the flavor, it was a mess to clean off the pot. The half batch on very low heat was JUST starting to over brown on the bottom, but rinsed off easily, and I like the color better.
4. Re: stirring after the butter has melted – you really don’t have to, just gently swirl the pan (bonus that you can usually check how the bottom looks when turning.) I learned this through many years of perfecting caramel sauce – don’t stir, just swirl!
5. This tastes even better after a day or two in the fridge! It’s not too hard but still has a great snap.
My mom makes this type of toffee every year and her biggest tip was not to make it on a cloudy day- she said if it’s cloudy it always turns her toffee grainy.
I’ve heard this about other candies too, most notably angel food!
would 1/2 batch work? would like to try to see if it is what we would eat.
thanks for all good recipes
Bona!
A 1/2 batch should work just fine!
Will be trying this recipe – do you recommend using semi-sweet chocolate chips OR milk chocolate chips?
I break apart a giant hershey bar and let the sections melt on the hot toffee. Tastes perfect to me. I’ve been making this toffee for years!
I prefer semisweet but you could use either.
This toffee was perfectly delicious. Thank you for all the tips will definitely make it again!!!
I have made many versions of toffee and this is the best. My only suggestion is to remove the toffee mixture from the burner and pour onto the cookie sheet at 285 degrees. Perfect!