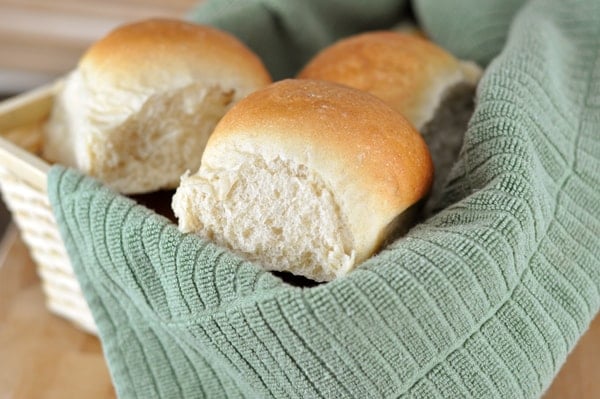
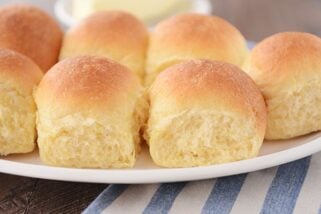
French Bread Rolls {Step-by-Step}
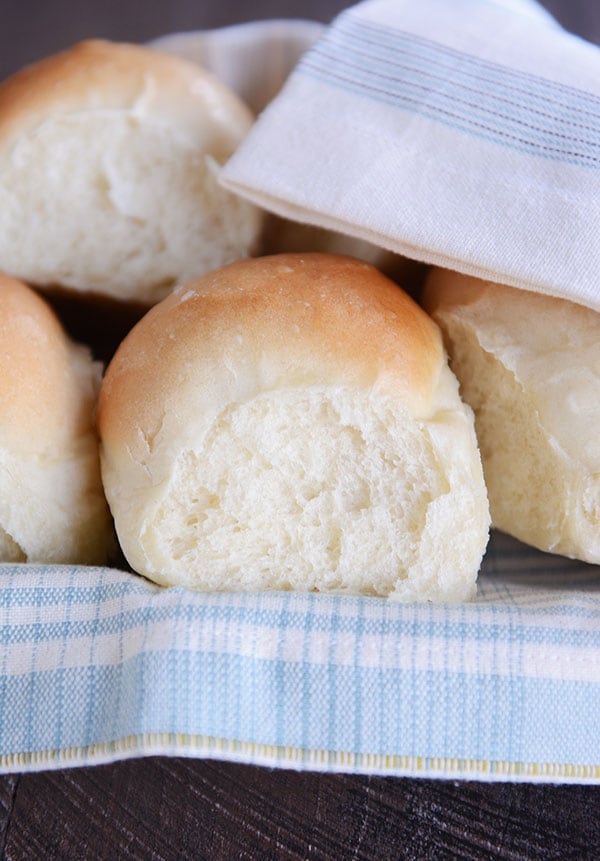
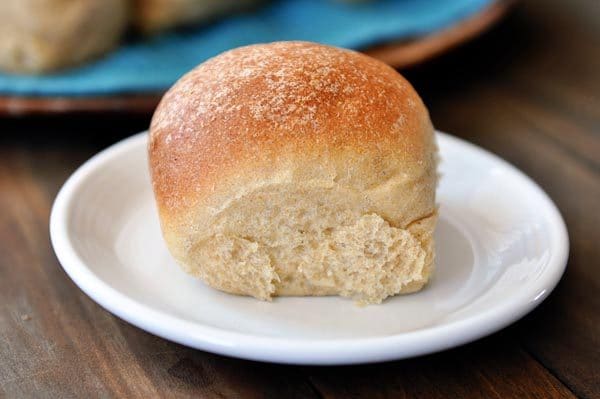
These popular, no-fail French bread rolls are light, fluffy and delicious! They are so easy to make; perfect for bread-making beginners and experts alike!
If you want one of the easiest, foolproof, most delicious roll recipes around, this is it.
This French bread roll recipe has been around a loooooong time, and after 10+ years, it is still the roll recipe I probably make the most (that’s saying a lot, because I have a lot of favorite roll recipes).
A Very Forgiving Dough
The dough for these French bread rolls is straightforward and very forgiving. I usually use my Bosch stand mixer, but many of you make this dough in a KitchenAid mixer and others make it by hand.
Dough ingredients:
- warm water
- yeast (instant or active dry yeast)
- sugar
- oil
- salt
- flour (all-purpose or bread flour)
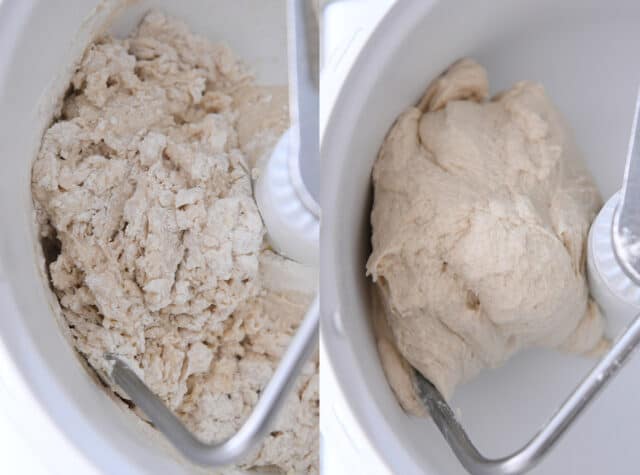
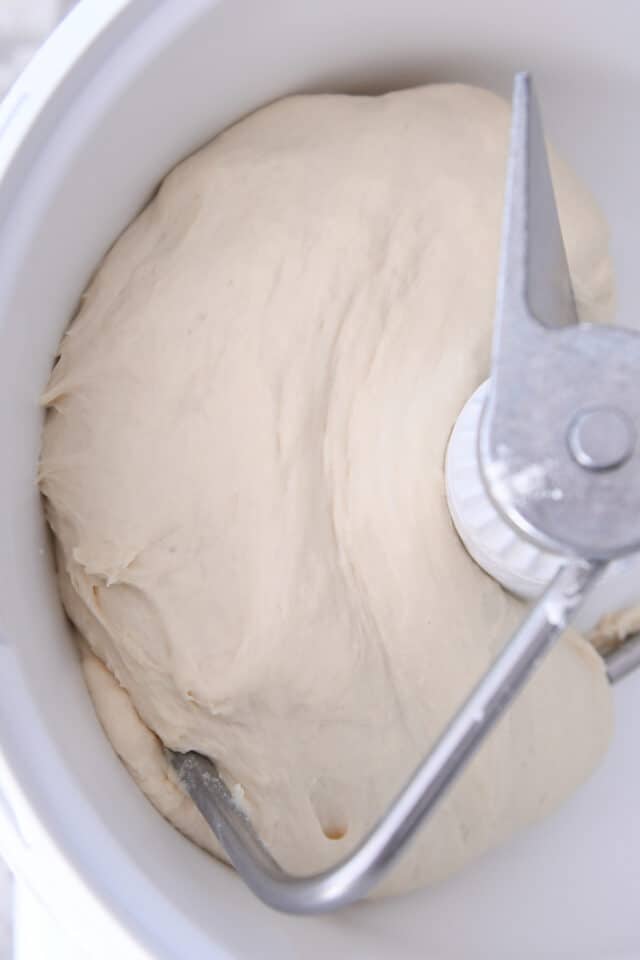
Mix all the ingredients together until the dough forms a soft, slightly sticky ball of dough that clears the sides of the bowl and doesn’t leave a lot of sticky residue on your fingers.
How to Make Yeast Dough at Home
Stop stressing about adding the exact amount of flour called for in a recipe! Many, many factors determine how much flour is needed (elevation, humidity, how we each measure flour, etc.)
Judge the dough based on how it feels and how it looks. If you need to add a bit more flour, that’s ok!
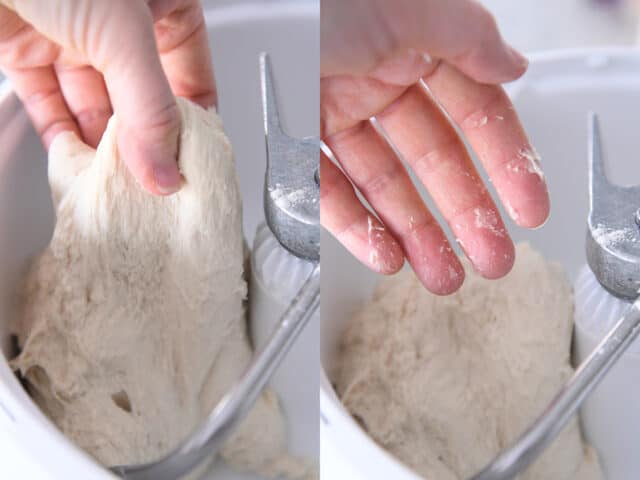
For this recipe, grab a piece of dough after the flour has been added. Initially, it might leave a little sticky residue on your fingers.
Try rolling it into a ball without any oil or cooking spray on your hands. If it can form a ball shape without sticking to your hands in a shaggy, horror-movie mess, you are good to go. If not, add a bit more flour (a couple tablespoons), mix and try again.
Adding too much flour can spell death to light and fluffy homemade bread or rolls.

Let it Rise
I’m lazy and let the dough rise right in the mixing bowl. It is a pretty quick-rising dough.
Once it has doubled in size, it’s ready to get shaped into rolls.
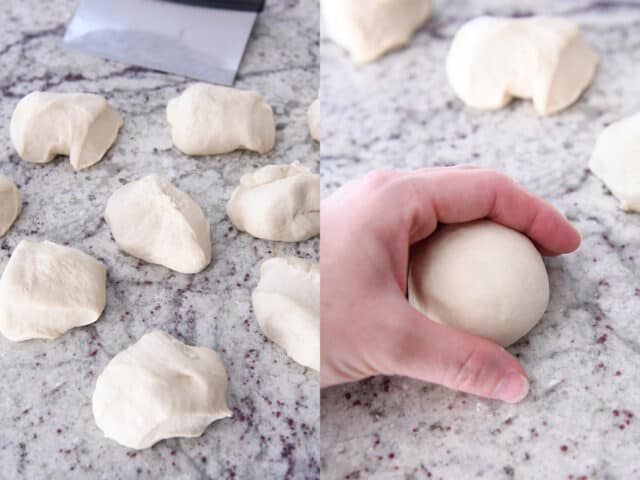
Shape the Rolls
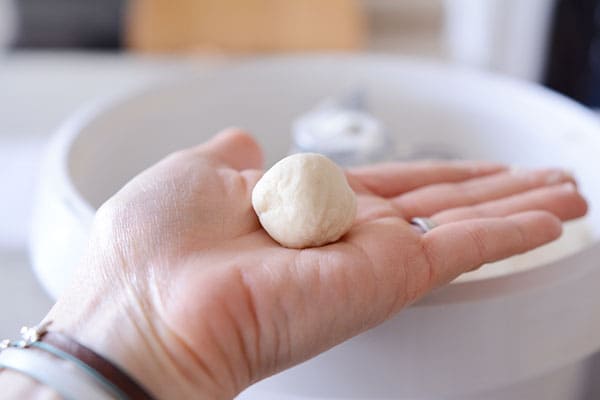
Cut the dough into 12 equal pieces. I usually weigh each piece to make sure they are uniform. Each dough piece usually weighs right around 2.6 to 2.7 ounces.
Cup your hand and roll the dough into a smooth ball (keep the pinky side of your hand against the counter while you roll). Pinch the bottom to seal, if needed.
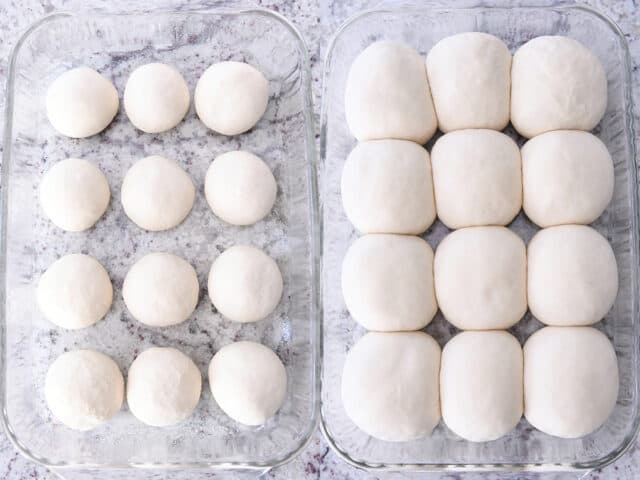
Place the rolls in a greased 9X13-inch pan.
For a double batch (I almost always double the batch), I like to place and bake the rolls on a half sheet pan (24 rolls fit perfectly).
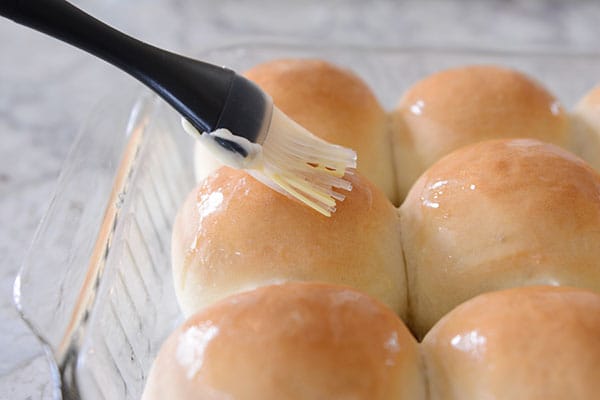
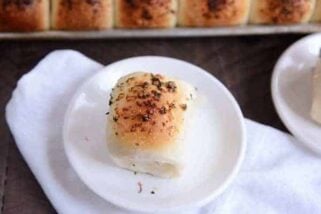
Bake the rolls until golden and then brush the tops with butter.
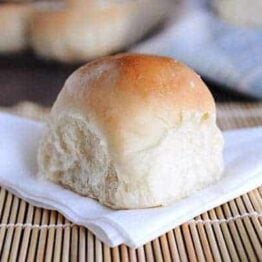
The Perfect Roll for Sandwiches or Subs
Over the years, these French bread rolls have become more than a dinner roll.
These French bread rolls have become my go-to for any recipe that needs a wonderful all-purpose roll or bun.
Here are a few examples:

Whole Wheat Version
I also posted a 100% whole wheat version of these French bread rolls with a few small but important notes/changes, so if whole wheat is more your jam, check that out (although you can definitely add whole wheat flour to the recipe below as I’ve done many a time throughout the years).
Freezer Friendly
There is not an easier, more perfect roll recipe out there!
These French bread rolls come together fast, and honestly, I haven’t met a single person who wouldn’t fight to the death for one of these fluffy, heavenly rolls.
I always, always at least double (most often triple) the French bread rolls batch, because the baked and cooled rolls freeze amazingly well!
Step by Step French Bread Rolls
Tools for Making French Bread Rolls at Home:
*Affiliate links included below for products I’ve purchased from Amazon; feel free to shop around for the best price!*
- -I like to weigh out the dough for this recipe and others; this is the beloved kitchen scale that I have
- -Here is the large 8-quart container I use for letting the dough rise (comes in many different sizes; also carried in stores like Standard Restaurant Supply, if you have one local); smaller 4-quart version here (keep in mind you have to purchase the lids separately)
- –Silicone pastry brush for slathering on the butter
- -My favorite OXO bench knife for portioning out the dough
A quick note about mixers: I have a Bosch Universal and use it for 99% of the bread recipes I make. Here is a side-by-side (unsponsored) review I did between a Bosch stand mixer and a KitchenAid stand mixer.
French Bread Rolls
Ingredients
- 1 ½ cups warm water
- 1 tablespoon instant or active dry yeast (see note)
- 2 tablespoons granulated sugar or honey
- 2 tablespoons canola oil, vegetable oil or other neutral-flavored oil (olive oil will work, too)
- 1 teaspoon salt
- 3 ½ to 4 cups (497 to 569 g) all-purpose or bread flour, more or less (see note)
Instructions
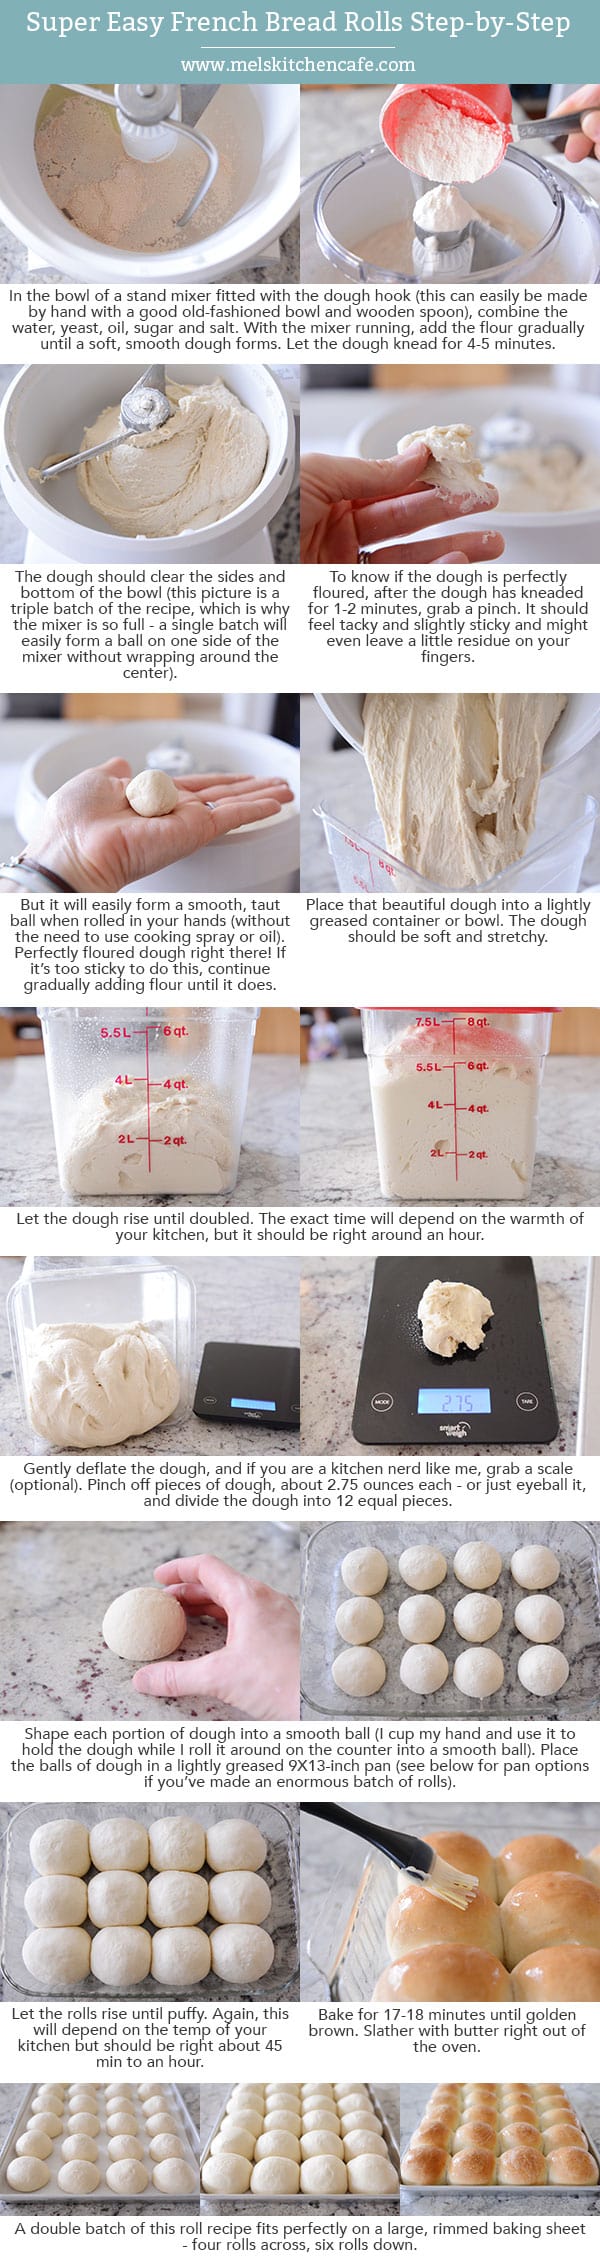
- In the bowl of a stand mixer fitted with the dough hook or in a large bowl by hand, combine the warm water, instant yeast, sugar, oil, salt and 2 cups of the flour.
- Begin mixing, and continue to add the rest of the flour gradually until the dough has pulled away from the sides of the bowl. Begin kneading the dough for 4-5 minutes in a stand mixer (7-9 minutes by hand).
- The dough should be soft and smooth but still slightly tacky to the touch. After a few minutes of kneading, stop the mixer and grab a small piece of dough to test if it needs more flour or not. It might leave a little bit of sticky residue on your fingers, but if you can roll it into a small ball without it sticking all over to your hands, it is good to go. If not, gradually add a bit more flour as needed.
- Place the dough in a lightly greased bowl and cover. Let the dough rise until doubled, 1-2 hours.
- Lightly punch down the dough and turn it out onto a lightly greased countertop.
- Divide the dough into 12 equal pieces (about 2.75 ounces each, more or less), and form the dough into round balls (video tutorial here right at minute marker 2:20).
- Place the rolls in a lightly greased 9X13-inch pan or on a large, rimmed baking sheet lined with parchment or lightly greased. Space the rolls about 1/2- to 1-inch apart.
- Cover the rolls with lightly greased plastic wrap taking care not to pin the plastic wrap under the baking sheet or else the rolls will flatten while rising. Let the plastic wrap gently hang over the sides of the pan to fully cover the rolls but not press them down.
- Let the rolls rise until very puffy and doubled, about 45 minutes to 1 hour.
- Preheat the oven to 400 degrees. Bake for 15-17 minutes until lightly browned and cooked through.
- Immediately out of the oven, brush with butter.
Notes
Recommended Products

Recipe Source: Mel’s Kitchen Cafe
Recipe originally published 12/2007; updated with new pictures, step-by-step tutorial, and recipe notes.
I did it!! I braved the bread! It turned out that my mom came over today & both my parents were here for supper. My mama couldn’t wait to tell my daddy that I made homemade bread. She said she wouldn’t have believed it if she hadn’t seen it for herself! Ha!!! Everyone loved the rolls AND your pulled pork bbq that we put in them!! You made me a star! LOL! Thanks!
FINALLY made these today (I have so many of your recipes bookmarked, it’s hard to get to them all!) and… umm… they’ll do 😉 Couldn’t be more perfect – thanks!
I made these last night and they were a huge hit! The only thing I changed was that I used bread flour instead of AP. They were great!
Many thanks for your response. I’m going to make again soon with a tad more flour–very nice taste. And easy!
sweetpea – yes, I make about 12 rolls out of this recipe. If you want smaller rolls, you might get upwards of 14-16. I place mine slightly touching or about 1/4 to 1/2-inch apart on the baking sheets.
just made these for the first time. I didn’t add enough flour, I know, as they were too sticky to ever shape properly.
However, is the qty of 12 correct? I got 12 hamburger sized rolls. and your photo looks as if yours were placed touching
in pan. Thanks for your help.
I am new to your site and have never used yeast before. I was nervous, but these rolls turned out perfect!!!! Thanks for the great step by step directions. I made them with your sloppy joe recipe, and my husband LOVED it!!!!
These were so good I made them twice in the last week! I was so surprised how easy they were. We used them as buns for pulled pork sandwiches and the sweetness in them was the perfect balance to the smoky spicy pork. The only thing I changed was to swap out half of the AP flour for white whole wheat flour. Thank you for the thorough detailed instructions and the delicious recipe, it will be a regular around our house!
Ok I don’t know why I have been having so much trouble with these rolls! I have tried other roll recipes and they come out perfect. I am just determine to get these to work too.
I always half this recipe. If I halved everything would that work? Does 1/2 TBS active dry yeast with 3/4 cup water work?
n82 – I’m sorry you are having difficulties with this recipe. You might try making the full batch to see if that would make a difference. The halved recipe should work just fine with that yeast amount but if it really is giving you a lot of trouble, try making the full batch just to see.
I’ve made these twice in the past week. They make for the perfect burger! Thanks for another wonderful recipe!!!
Once again I’ve found a winner..or you’ve shared a winner 🙂 I made these rolls tonight and I even forgot to include salt and they are phenomenal!!! So soft and tender…I could go on and on. They’re super easy and they will definitely be a main staple in my house from now on. No more store bought rolls and buns for me 🙂
n82 – if they are that sticky, it sounds like they need a bit more flour. If properly floured the dough should be slightly tacky but should roll into a ball without leaving a lot of doughy residue on your hands. Try adding a bit more flour and see how that works for you.
Thank you for your advice. I really appreciate your time in writing back. I am sure you are right with why they flattened. I will definitely have to try them again.
Also, when I was rolling them into balls (following your video), the dough seemed to be too sticky and I kept having to spray my counter with Pam for each roll to prevent sticking. Otherwise it was just too sticky to form the balls. Why do you think that was?
Love these rolls! Made them a few weeks ago and they made my house smell sooo good! I even froze the rest of the batch, but now those are gone too. We used the rolls for burgers and sandwiches and they were great. The video you posted on how to roll & shape these rolls was a great help to me. I’d love to use this recipe to make a sub sandwich roll, but was wondering how you make them into sub sandwich rolls. Do you use more than 2 oz per roll? How do you shape them for a sub sandwich?
Thank you!
Hi Leslie – so glad you like this roll recipe! When I make them into hamburger buns or sandwich rolls, I use about 3 to 3 1/2 ounces per roll. For the sub sandwiches, I roll each piece of dough into a little log-shape, about 3 inches long by 1 to 1 1/2 inches wide. They rise quite well and expand to the perfect sub roll shape. I hope that helps!
hi Mel, ok so I have a question for you…
I made these tonight and they were good but something went wrong. Just so you know both times my dough rose beautifully and it had definitely doubled in size. However, after the second rise (once the rolls were shaped into circles) I put them in the fridge because there was still a couple of more hours to dinner.
I took them out of the fridge a couple of hours later and saw that all the previously risen balls had deflated. I put them straight in the oven and baked them. They came out flat just like when they went it…
Can you put the dough balls in the fridge once they have risen or no? What did I do wrong?
Please help!
Thanks!
n82 – I’m sorry the rolls flattened! That can be frustrating. When I want to refrigerate the rolls before baking, I don’t let them rise on the sheet pan before refrigerating. I shape them, place them on the pan, then cover with greased plastic wrap and immediately put them in the refrigerator. Then, depending on how long they were refrigerated, I take them out and let them come to room temperature and rise until doubled before baking (sometimes if I refrigerate them overnight, they double in size in the fridge and I just take them out for 30 minutes or so to let them come to room temp). My guess is that because you let them rise and THEN refrigerated, they continued to rise in the refrigerator and collapsed. I hope that helps a little!
I have used this recipe 4 times now when making buns for burgers and hot dogs. Not only are they AMAZING, but each time they are shared, my friends have asked for the recipe! Thanks Mel. I am LOVING your website!
Hi Melanie, I was looking for instant yeast and I noticed that the package said 50% faster rise time. Do I change the time for the dough to rise or anything? Silly question I know. And by the way I adore your blog! Your recipes are amazing!
Hi Sommer – instant yeast is sometimes called rapid rise yeast so while I’ve never noticed that it actually rises 50% faster, that could definitely be the case. I never change any of the rising times when using instant yeast. Except for the proofing part (active dry needs to be proofed in water whereas instant does not), I don’t change anything when using it. Hope that helps!
I made these for hamburger buns and oh man were they good! I replaced some of the flour with whole wheat like you said and they were fantastic. Perfect texture. I have made hamburger buns before but these were sturdy enough for the sandwich but still moist. I also watched your tutorial on getting them round which was extremely helpful. I froze some and pulled them out last night and they were just as good the second time. I made some into hot dog buns and I couldn’t quite get the shape right. Do you have any tricks to make them into cylinder shape? Thanks so much for posting!
Hi Renee – no tricks for the hot dog bun shape, except that I have learned to make them much smaller than I think. The first few times I made hot dog buns/sub buns they ended up HUGE. So usually I roll them into about 1 1/2-inches wide by 3 inches long and that does the trick.
Thanks for the additional information, Mel. My leftover rolls are thawing as we speak, and I can’t until dinner tonight! 🙂
Mel- I wanted to let you know that I (finally!) got up the courage to make your French Bread Roll recipe last night. I don’t know why I waited so long, because they were the best bread/rolls that I have ever made! And so simple! WOW…my family is blown away! I used to make home-made bread all the time when my children were young, and then I stopped for some reason (maybe the low carb thing). Of course, my children don’t remember the home-made bread. When they saw the dough rising they thought I was making pizza dough! Well, needless to say, I’m afraid that store bought rolls are a thing of the past in our house, and it is all your fault! 🙂
I love, love, love the tutorials! They really helped with the amount of flour (I didn’t use the full 4 cups) and shaping the rolls. I made 8 rolls (3 oz. each), planning to freeze them for burgers tonight. Well, let’s just say that there are only 5 left, and I had to threaten bodily harm to anyone that ate another roll! 😉 LOL!
I will definitely double the recipe next time. I will have to see how a double recipe fits in my Kitchen Aid 6 quart mixer. I am hoping I can even triple the recipe in the future. If not, maybe I will have to trade in my trusty KA a Bosch mixer! 😉
I am going to toast/grill the rolls tonight night for burgers…I am already thinking about how delicious dinner is going to be!
Oh- and even though my rolls turned out perfect (in my opinion!), I did have few questions- do you use table salt, kosher salt or sea salt? Since you didn’t specify what kind, I assumed that you use table salt. As a result, I used 1 1/2 tsp. of fine sea salt. The rolls were not overly salty at all, and I think I may increase the amount to 2 tsp. next time. Every type of salt is different (even kosher salts vary from brand to brand), so finding the right balance is key.
Also, I used canola oil as your recipe calls for, but I was wondering if you think a good quality extra virgin olive oil would be a nice substitute or would it be too overpowering?
Last, but not least-after reading the comments here about egg wash, I was curious if you ever brush these rolls with egg wash before baking? I didn’t, and I am curious to know if you do brush them and then sprinkle them with sesame seeds or poppy seeds? Don’t get me wrong- I personally don’t think they need anything else…they are absolutely heavenly! I was just wondering why egg wash was discussed in regards to this recipe. Thanks!
Hi Kim – I’m so happy these rolls worked out for you! We must have been on the same wavelength because I made them the same day you did. There’s nothing like homemade rolls! As for your questions, I mostly use table salt but occasionally will randomly reach for my bamboo holder of kosher salt and they still turn out great, albeit slightly more salty than when I use table salt. I always use canola oil but have used EVOO when I have been out of canola and if you like the taste and flavor of EVOO, it actually works great as a substitute. The flavor isn’t overpowering but I can definitely taste the olive oil vs. the mild canola, does that make sense? As for the egg wash, the original recipe called for an egg wash but I never use it, mostly because I like the softness of the rolls without it. However, they are a sturdy enough roll to stand up to a light egg wash before baking and for a hamburger bun, I think they would be delicious with an egg wash and a sprinkle of sesame seeds. I’m a plain Jane kind of roll girl, so I never adorn them but they would definitely be great that way.
I went ahead to try and make them, and I have to say that my first experience making rolls turned out amazing. I thought they would be crusty like french bread usually has been for me, but they are moist and fluffy. They turned out great because of your wonderful directions and helpful hints.
I’m just getting into the whole bread making thing and I have started out with a breadmaker, but I want to make rolls so my question is: Do you use a portion of the water from the recipe to proof active yeast in or would the water you use be cancelled out by the proofing process?
Hi Ariane – if I use instant yeast, I don’t proof the yeast in water, I just add it with the other ingredients. If you are using active dry yeast in a breadmaker then yes, you would want to proof the yeast in a bit of water and a pinch of sugar first before adding it to the breadmaker with the other ingredients.
Made these today! I felt super fancy making my own rolls/ buns. Thanks for the great recipe and for walking me through the yeast process 🙂
Hey 🙂 I already wrote how good these are, but now I’d like to know whether I can add raisins to the dough? Any suggestions how much I could add, when etc ? My friend wants to eat sweet rolls with raisins, but either I can’t search properly or there aren’t many recipes for such :/ Thanks for help!
kk – I’ve never tried adding raisins to these. My only suggestion would be to knead them in at the end but that’s just a guess. Good luck if you try it!
I have to say that I love this recipe. After using it to make several BBQ Chicken Braids and loving the flavor and texture I utilized it as a dough for hamburger buns and I am so glad that I did. FANTASTIC to be able to make my own burger buns! My ultra picky husband was impressed and even asked that I never buy regular buns again. I think these buns have the taste and texture of a bread much richer than one containing a mere 2 tablespoons of oil like this one. Thanks again!
So, so good. Made these with sloppy joes. This was the first time I made rolls completely successfully–not only did they look good, but they tasted fabulous. I’ll definitely be making these over and over again! Thanks for sharing!
Just wanted to say THANK YOU for the yummy bun recipe. I made them today with your sloppy joes! So yummy! My husband kept saying how amazing it was that I actually MADE the rolls… they were like gourmet to him! 🙂 Thanks a bunch!
I just made these today and they turned out great…and the house smelled soooooooo good while these were baking! I always used to avoid bread recipes that called for yeast, but I’ve been gaining more and more confidence every time I use one of your recipes. Thank you!
I just discovered your blog and am so excited! I am in a cooking slump, bored with my recipes. Now I am inspired bc your cooking tastes are so much like mine. I made your hamburgers and hamburger buns this weekend and oh. so. good. Like Kat, my husband kept raving over the buns. Seriously, will I ever be able to eat a store-bought bun again? Keep up the good work!
I used this recipe to make homemade hamburger buns as suggested in your classic grilled burgers recipe. They turned out FANTASTIC! My husband asked that we not buy store bought buns ever again 🙂 Thanks for another great recipe!
Kat – that may or may not have been my husband’s exact request. So glad you loved these!
I made these this afternoon. They were so easy and yummy! We have egg and milk allergies in our house so it was so great to find something I didn’t even have to tweak! I used the bread flour and it was great. Your blog is awesome!
Melanie – thank you for your comment! I’m glad these rolls turned out so well for you since you are working around allergies!
Have you ever tried whole wheat for part or all of the flour? Thanks!
Kaitlyn – yes, I use at least 50% whole wheat everytime I make these now. Sometimes I’ve used all whole wheat but I have the best results when I use at least one cup of white flour.
Ive never made any type of bread or rolls before so i really really new to this. Can you kneed this bread by hand? i cant find my kitchen aid bread hook attachment.
paramedichick06 – yes, you can definitely knead the bread by hand. You’ll probably need to add a few minutes on to the kneading time to sufficiently develop the gluten.
I am going to try these rolls – they look delicious! I was just wondering if you have ever made a huge batch in the Bosch and if so, does it fit in the Bosch x 4 or x 5? Thanks so much!
Kaitlyn – the most I’ve ever made in my Bosch with these rolls is a triple batch.
Do you have to knead by hand or can you use the dough hook of a mixer? I’m wondering if you need the extra flour you get from kneading?
Allyson – I always use my Bosch mixer and knead with the dough hook. I add flour until a soft, tacky dough is formed.
These rolls are fantastic! I always come to your site first when I need a new bread recipe, and you never disappoint! I made these into buns for burgers and they were a huge hit, and I kept eating the leftover buns plain. I’m already looking forward to making them again. Thanks so much!
Emily Marie – I’m glad you like these rolls as much as I do. I swear I make them at least weekly for some application or other!
I LOVE crusty rolls. What ratio do I use for egg white/water mixture? Do I brush the rolls all over, even the bottom? Or just brush it on the top? Do I actually spray the rolls with water or just into the air above the rolls?
Jess – I usually use one egg white to 1 tablespoon water. I brush the rolls gently on top and around the sides – basically covering the entire top but not worrying about the underside or bottom. I spray the water into the oven above the rolls. I hope that helps!
Mel I use this recipe to make hamburger rolls also, and pizza crust, and sub sandwich rolls. I love this recipe. Thanks
Thanks, Tiffany – I love the versatility of this recipe!
I’ve made these a few times now (always for sandwiches, rather than as a dinner roll) and I use the extras out of the freezer to make garlic bread. Yum!
Janssen – thanks! I freeze my extras, too, and they are great to pull out last-minute.
Easy, wonderful recipe…found ourselves without rolls for Mother’s Day and it was a cinch to whip these up. They were the perfect addition to our Mother’s Day meal. Many thanks!
Thanks, Christa – I’m so glad these rolls worked in a pinch for you!
Debbie,
I had that problem the first time I tried them and I think that the problem for me was that the water that I proofed the yeast in was too hot.
I’m not sure what I’m doing wrong, but mine were much flatter. I let it rise longer than it said, but it didn’t rise nearly as high as yours. Any clue what I did wrong?
Debbie – sometimes if the dough is too sticky (not enough flour) the rolls flatten instead of rise tall and puffy. It’s a tricky balance between adding enough flour but not too much so the rolls are dry. Also, klutzymama’s advice can also be true – yeast won’t proof well, or at all, in water too hot. Hope that helps a little bit.
So I tried these again today and they turned out fabulously. I’m thinking that my warm water was too hot the first time. Thanks so much for this recipe, these are perfect for my family!
klutzymama – so glad these worked out better the second time. Thanks for checking back in to let me know!
These look really good. Wonder if I can use instant yeast and cut down on rise times?
momstarr – I actually only ever use instant yeast, in these rolls particularly. I’ve heard that with instant yeast you can cut out the first rise. I don’t do that just because I like the flavor that comes from both rises but I’m sure it would work fine.
Hi! These rolls look so delicious. I made them today, only I used wheat flour because I didn’t have enough white. My rolls didn’t rise at all, would that possibly mean that my yeast is no good?
Thanks!!
klutzymama – I’m so sorry these didn’t work out very well for you! A couple of reasons why dough sometimes doesn’t rise well is a) the dough has too much flour in it (it should be a pretty soft, tacky consistency), b) it needs to be kneaded longer (especially with whole wheat flour since it takes longer to develop the gluten during kneading) or c) the yeast didn’t proof properly in the water (i.e. water was too hot??). Yeast doesn’t “go bad” very often, in my experience, but that could also be a factor. I hope you try them again! Let me know if you have any other questions.
Jenn – I checked out your blog and I love how you break down the costs. I also am thrilled that you liked the rolls…some of our favorites, too!
Absolutely, hands down, the best roll recipe ever! I doubled the batch yesterday and my family of five has eaten almost all of them. The fact that this recipe calls for no eggs or milk just adds to the appeal for me. Thanks so much for ALL the fabulous bread recipes you post. I know that they will be great. I hope you don’t mind but I posted this recipe and your Divine Breadsticks on my blog.
Anonymous – yes you can half the dough for this but if you are going to all the work of making them, I would suggest making the full batch and freezing some of the rolls once they are baked.
Hi, I love your blog!! I wanted to make these for a dinner, but I am wondering if you can half the recipe? I’m not super good with yeast, so I never know what matters! Thanks!
I made these buns, it perfectly rise twice. But when I put it in the oven nothing happened. It’s not soft and not brown colored. Tried to bake it a short while longer but it just became a hard white rock. I’m using a gas oven can it be that using gas is different settings and baking time? I hope you can help me I really want to make this a succes.
I haven’t had a lot of experience using a gas oven, so I’m not sure. That could be it. Also, if the rolls over rise before going in the oven, they can fall while baking.
These turned out absolutely delicious! This has now become my favorite recipe for rolls!